After you create a data entry form in a spreadsheet, configure a submission area to define the cell range for data entry, the submission type, and other settings.
Prerequisites
-
A data entry form is created in the spreadsheet. For more information, see Dataset Data Entry, Cell Data Entry, Table Data Entry, and Data Entry Controls.
Procedure
Configure the submission area settings in the spreadsheet editor.
-
Select the cells for the data entry area, and then in the upper-right corner of the toolbar, click Data Entry > Create Submission Area.

-
In the Create Submission Area dialog box, configure the Basic Information, Write Settings, Data Validation, and Function Settings for the submission area.
-
After you complete the configuration, click Done in the lower-right corner to create the submission area. You can also manage created data entry areas from the spreadsheet editor.
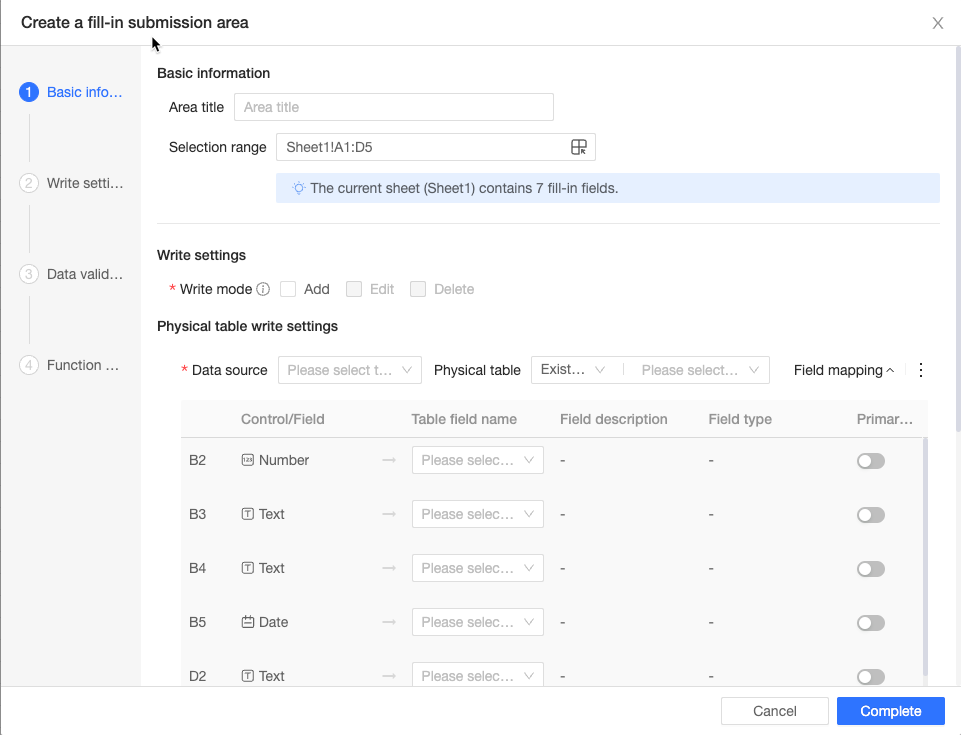
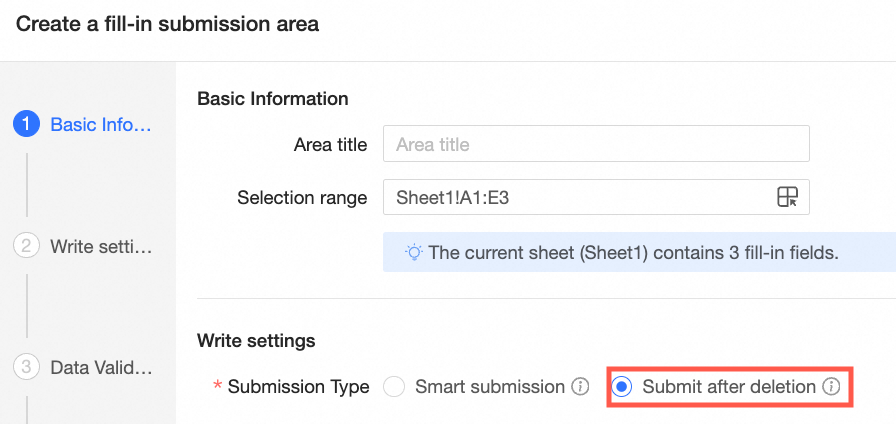
Basic information
In the Basic Information section, configure the Area Title and Selected Range.

-
Area Title: Enter a title that reflects the business purpose of the submission area.
-
Selected Range: The cell range in the spreadsheet designated for data entry. Click the
 icon to adjust the range.
Write settings
In the Write Settings section, configure the Submission Type, Write Mode, and Physical Table Write Settings.

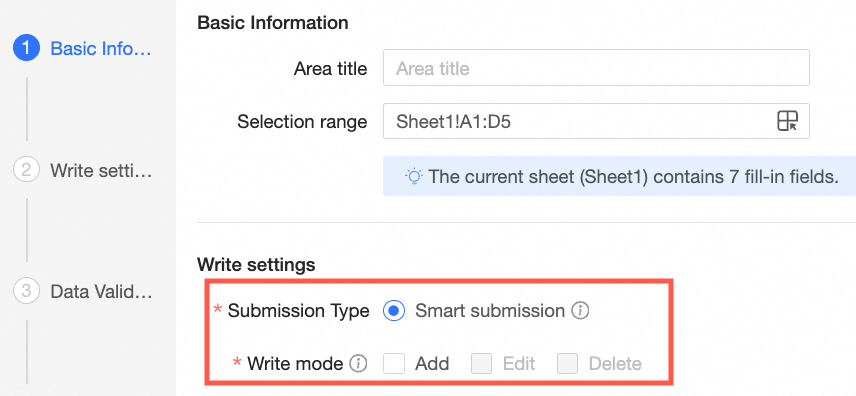
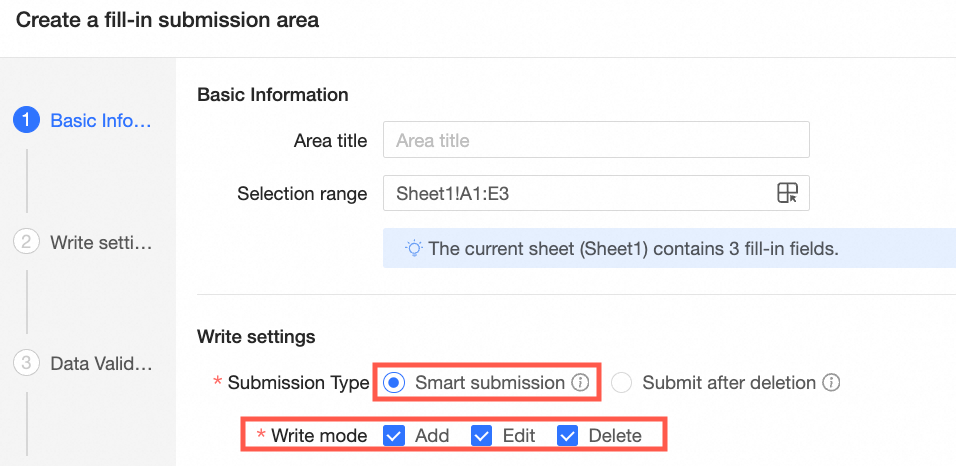
Submission type and write mode
Data entry cells are classified into three types: regular cells, data entry tables, and dataset tables. The available write modes depend on the selected cell type and fall into two categories:
-
Areas without dataset tables: If your selection contains only regular cells, data entry tables, or a combination of both, the write mode is permanently set to Add. You cannot modify or delete records, and no primary key is required.
-
Areas with dataset tables: If your selection contains a dataset table, you can select either Smart Submission or Submit after Deletion as the submission type.
-
Smart Submission combines add, edit, and delete operations into a single action. When data is submitted, the system automatically determines whether to add, edit, or delete records.
When you choose Smart Submission, you can set the write mode to Add, Edit, and Delete.
-
Submit after Deletion first deletes all data in the corresponding rows based on the primary key fields in the storage settings, and then resubmits the new data. If your storage configuration does not map to all fields in the physical table, the system also clears the values of the unmapped fields. Use this option with caution.
-
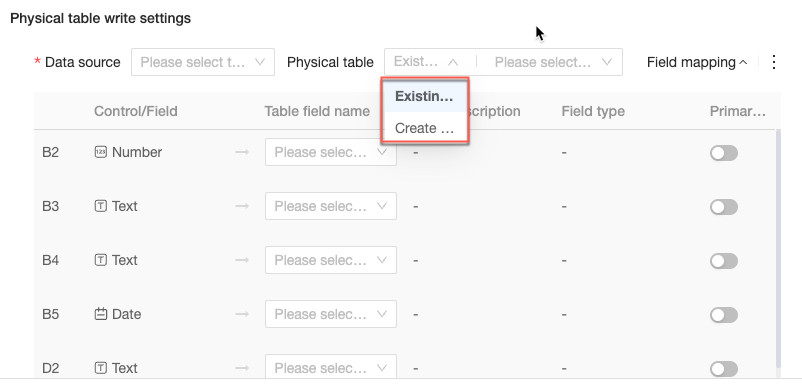
Physical table write settings
-
Select a data source and physical table.
-
You must have permission to use the data source, and the associated database account must have write permissions.
-
To write to a physical table, you can select an Existing Table or create a New Table.
NoteAfter a new table is created, you cannot modify its schema through the spreadsheet data entry interface. You must make any changes directly in the database. Ensure your table design is complete before you create the table.
-
You can use the Add, Delete, and Copy options to configure writing to multiple tables simultaneously.
-
-
Configure field mapping: After you select an existing table or create a new one, map the data entry fields to the fields in the underlying table.
-
If you selected Existing Table:
-
For each control, select the corresponding Table Field Name. The Field Description and Field Type are automatically populated. You can also specify whether a field is a primary key.
NoteThe data entry operation uses this primary key to uniquely identify a row for editing or deleting. It is separate from the database table's physical primary key, which you must set in the database. Ensure the field you select as the primary key can uniquely identify a single row.
-
You can add or delete field mapping rows as needed.
-
-
If you selected New Table:
-
Define a new physical table by specifying the Table Name, Table Field Name, Field Description, Field Type, and Primary Key.
-
You can add or delete field mapping rows as needed.
-
-
Data validation
In the Data Validation section, click Add to define a validation rule and a corresponding error message to ensure data quality during data entry.

-
Validation Rule: Enter a logical expression based on your business requirements. You can use spreadsheet functions and reference data entry fields in the format
[Field Name]. Example:[Order Amount] - [Cost] > 0. -
Error Message: Enter the text to display when validation fails. The message should explain the error and how to fix it.
-
Other operations: Click Add to create another validation rule. Click the
 icon to delete a validation rule.
Function settings
In the Function Settings section, customize the layout and style of the buttons in the submission area.

-
Customize Submit Button Text: The submit button is labeled "Submit" by default. Select this option to customize the label.
-
Show Reset Button: Select this option to display a Reset button on the data entry page. Users can click this button to clear all entered data and start over.
-
Button Color: Customize the button color on the data entry page to match your brand style.
Submission area management
In the upper-right corner of the spreadsheet, select Data Entry > Manage Submission Areas. A panel appears, listing all data entry controls for the current sheet, such as regular cells, data entry tables, and dataset tables. Click a control in the panel to navigate to its location in the sheet.
Next steps
-
After you configure the submission area, create and distribute data entry tasks to business personnel for data collection. You can also configure data entry permissions and enable storage approval to prevent invalid data submissions. For more information, see Data Entry Permissions, Distribute Data Entry Tasks, and Storage Approval.
-
If using a PC for data entry is inconvenient, Quick BI supports table data entry on the mobile client for flexible data collection. For more information, see Mobile client table data entry.