Assign data entry tasks to individuals, notify them automatically, and reduce the risk of missed submissions.
Prerequisites
You have logged on to the Quick BI console and created a spreadsheet. For more information, see Create a spreadsheet.
Limitations
This feature is available only in the Professional Edition.
Access the feature
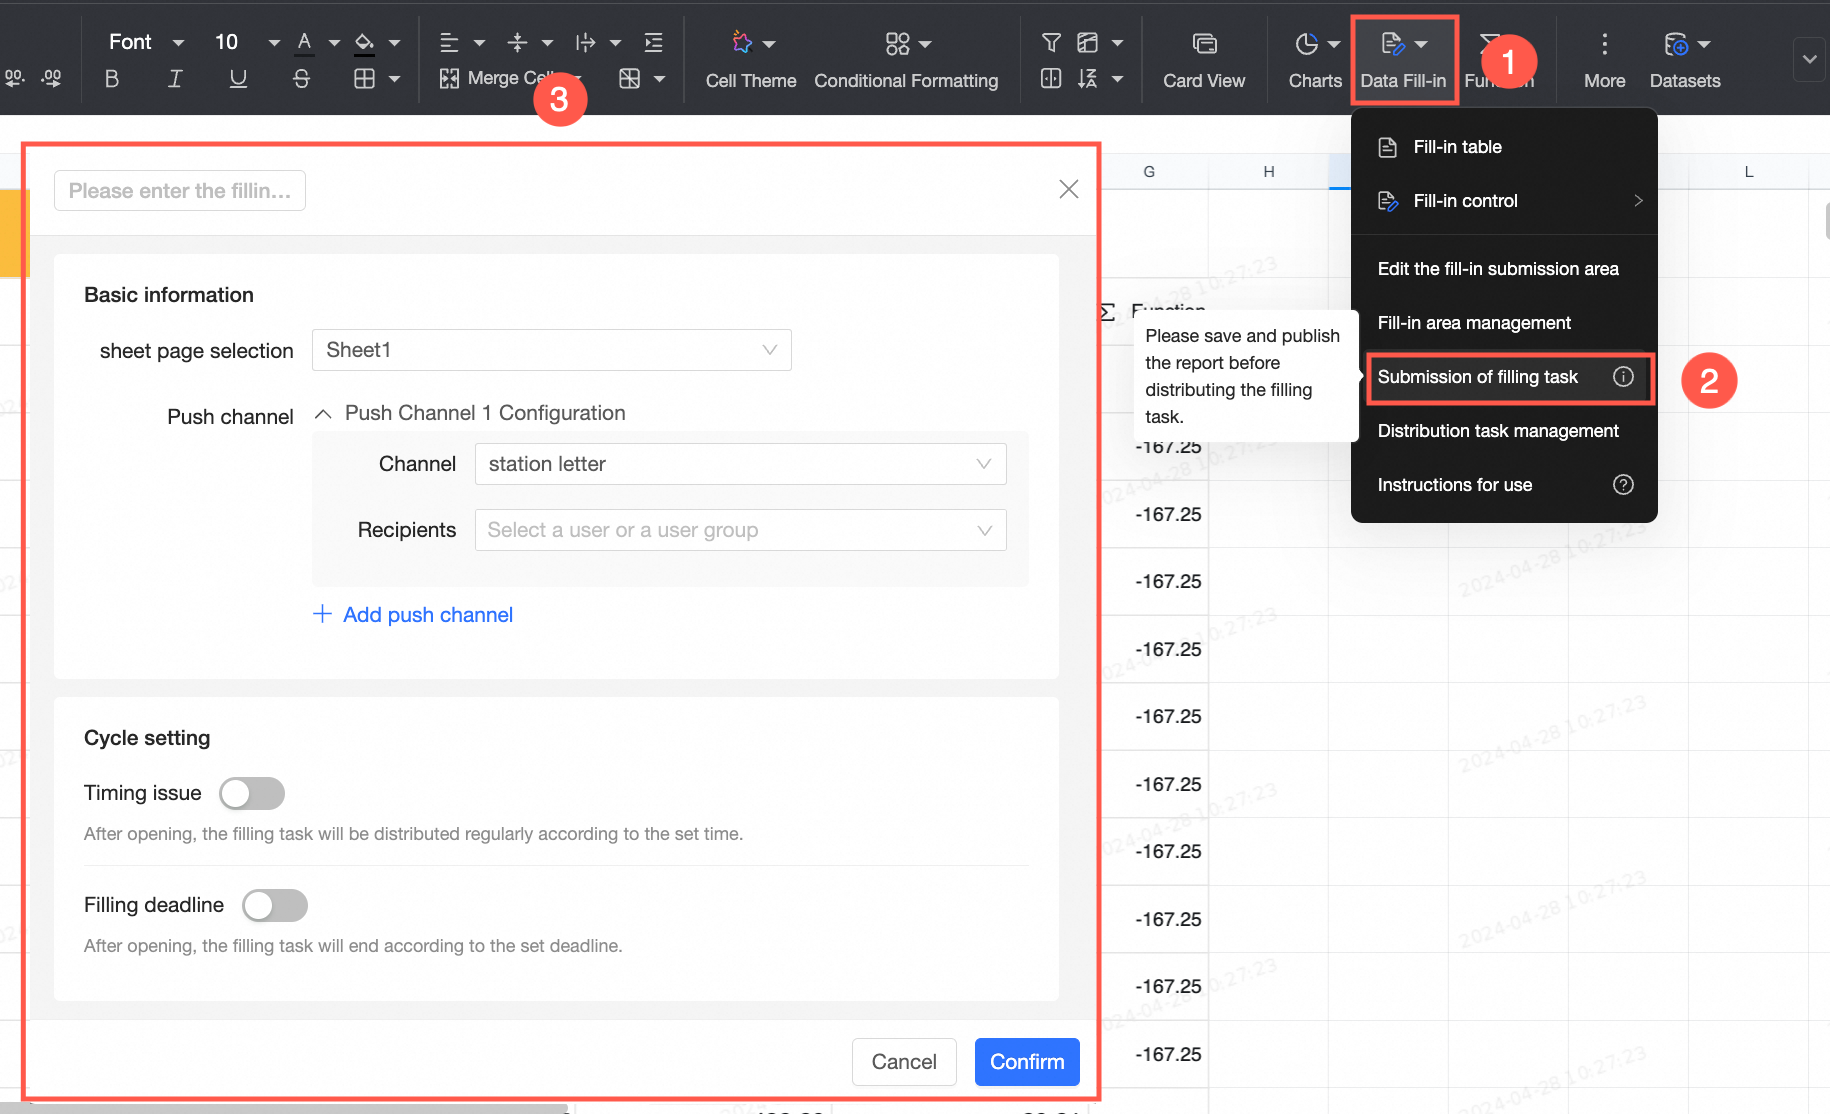
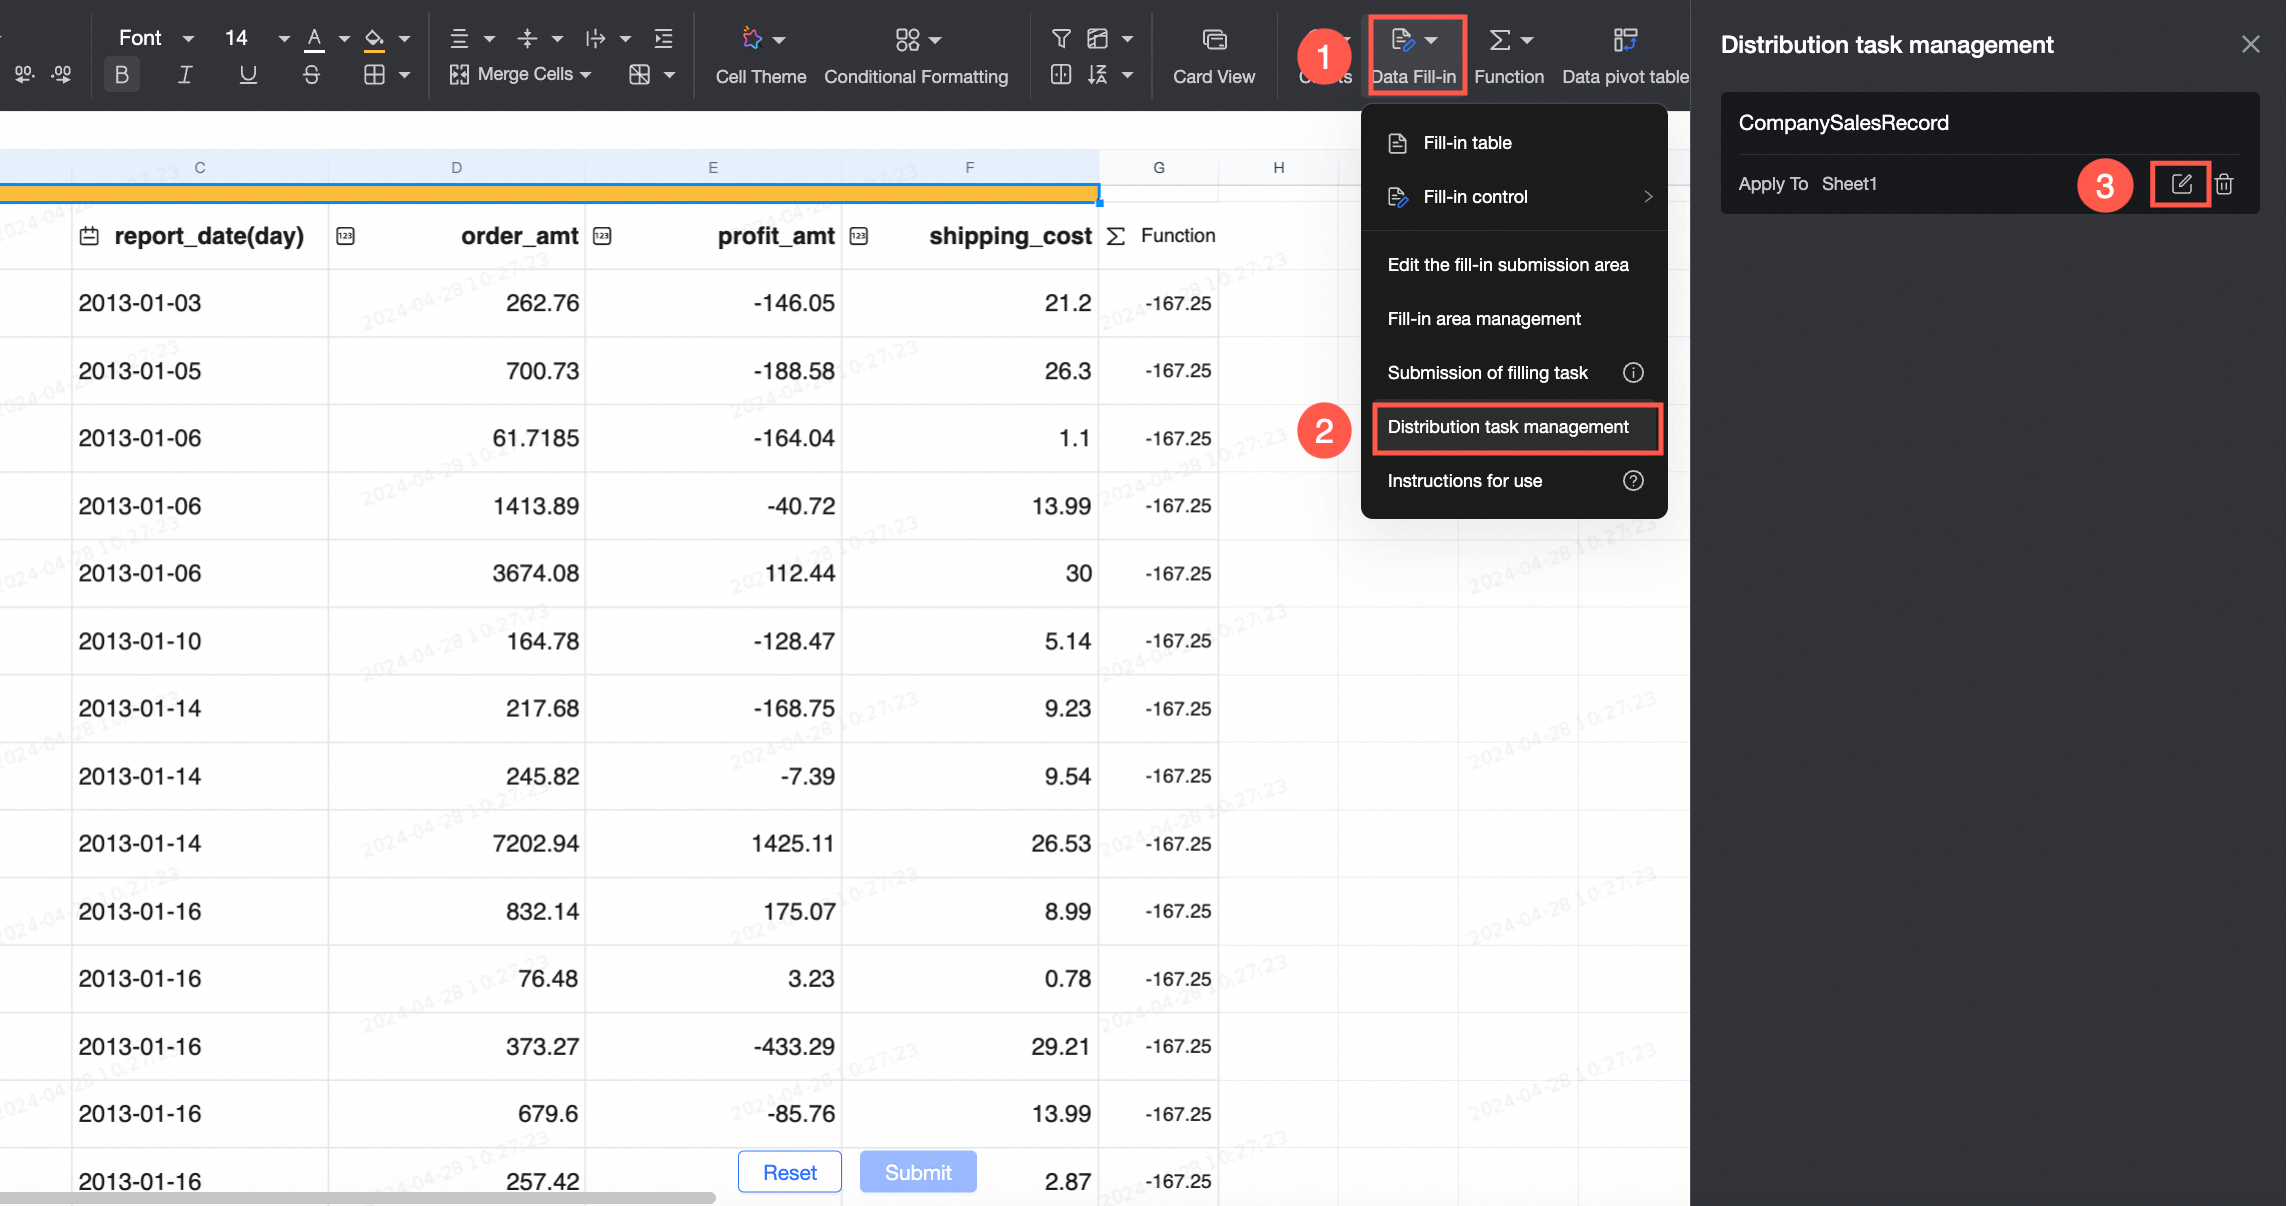
After you create, save, and publish a spreadsheet, click Assign Data Entry Task from the Data Entry drop-down menu to configure the task.
This entry point is visible only to the spreadsheet owner who has edit permissions or administrator permissions. For more information, see data entry permissions.
Configuration details
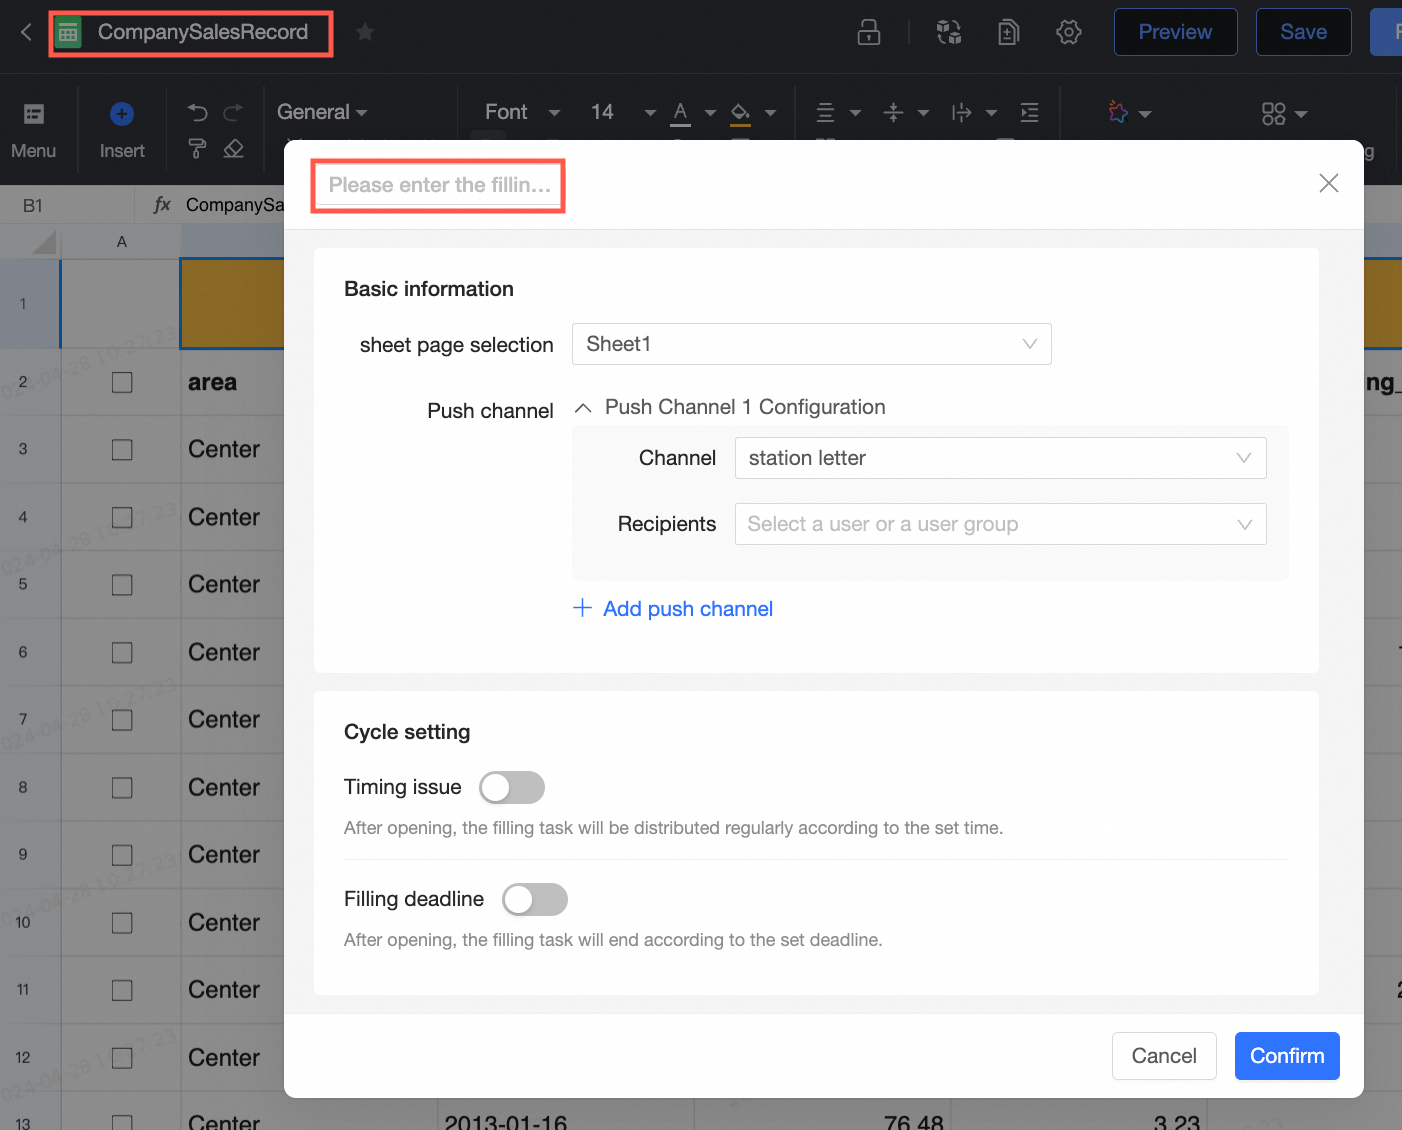
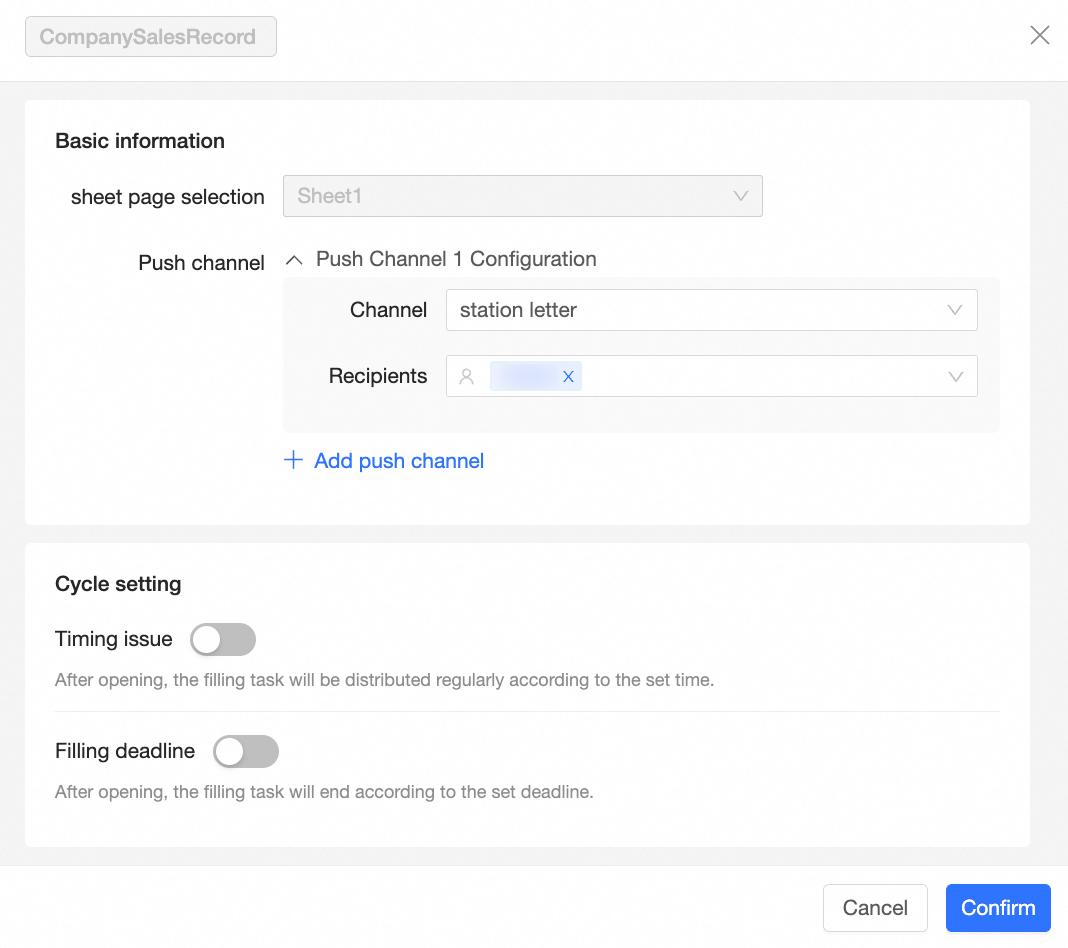
Basic information
-
The title defaults to the current spreadsheet name, but you can change the task name.
-
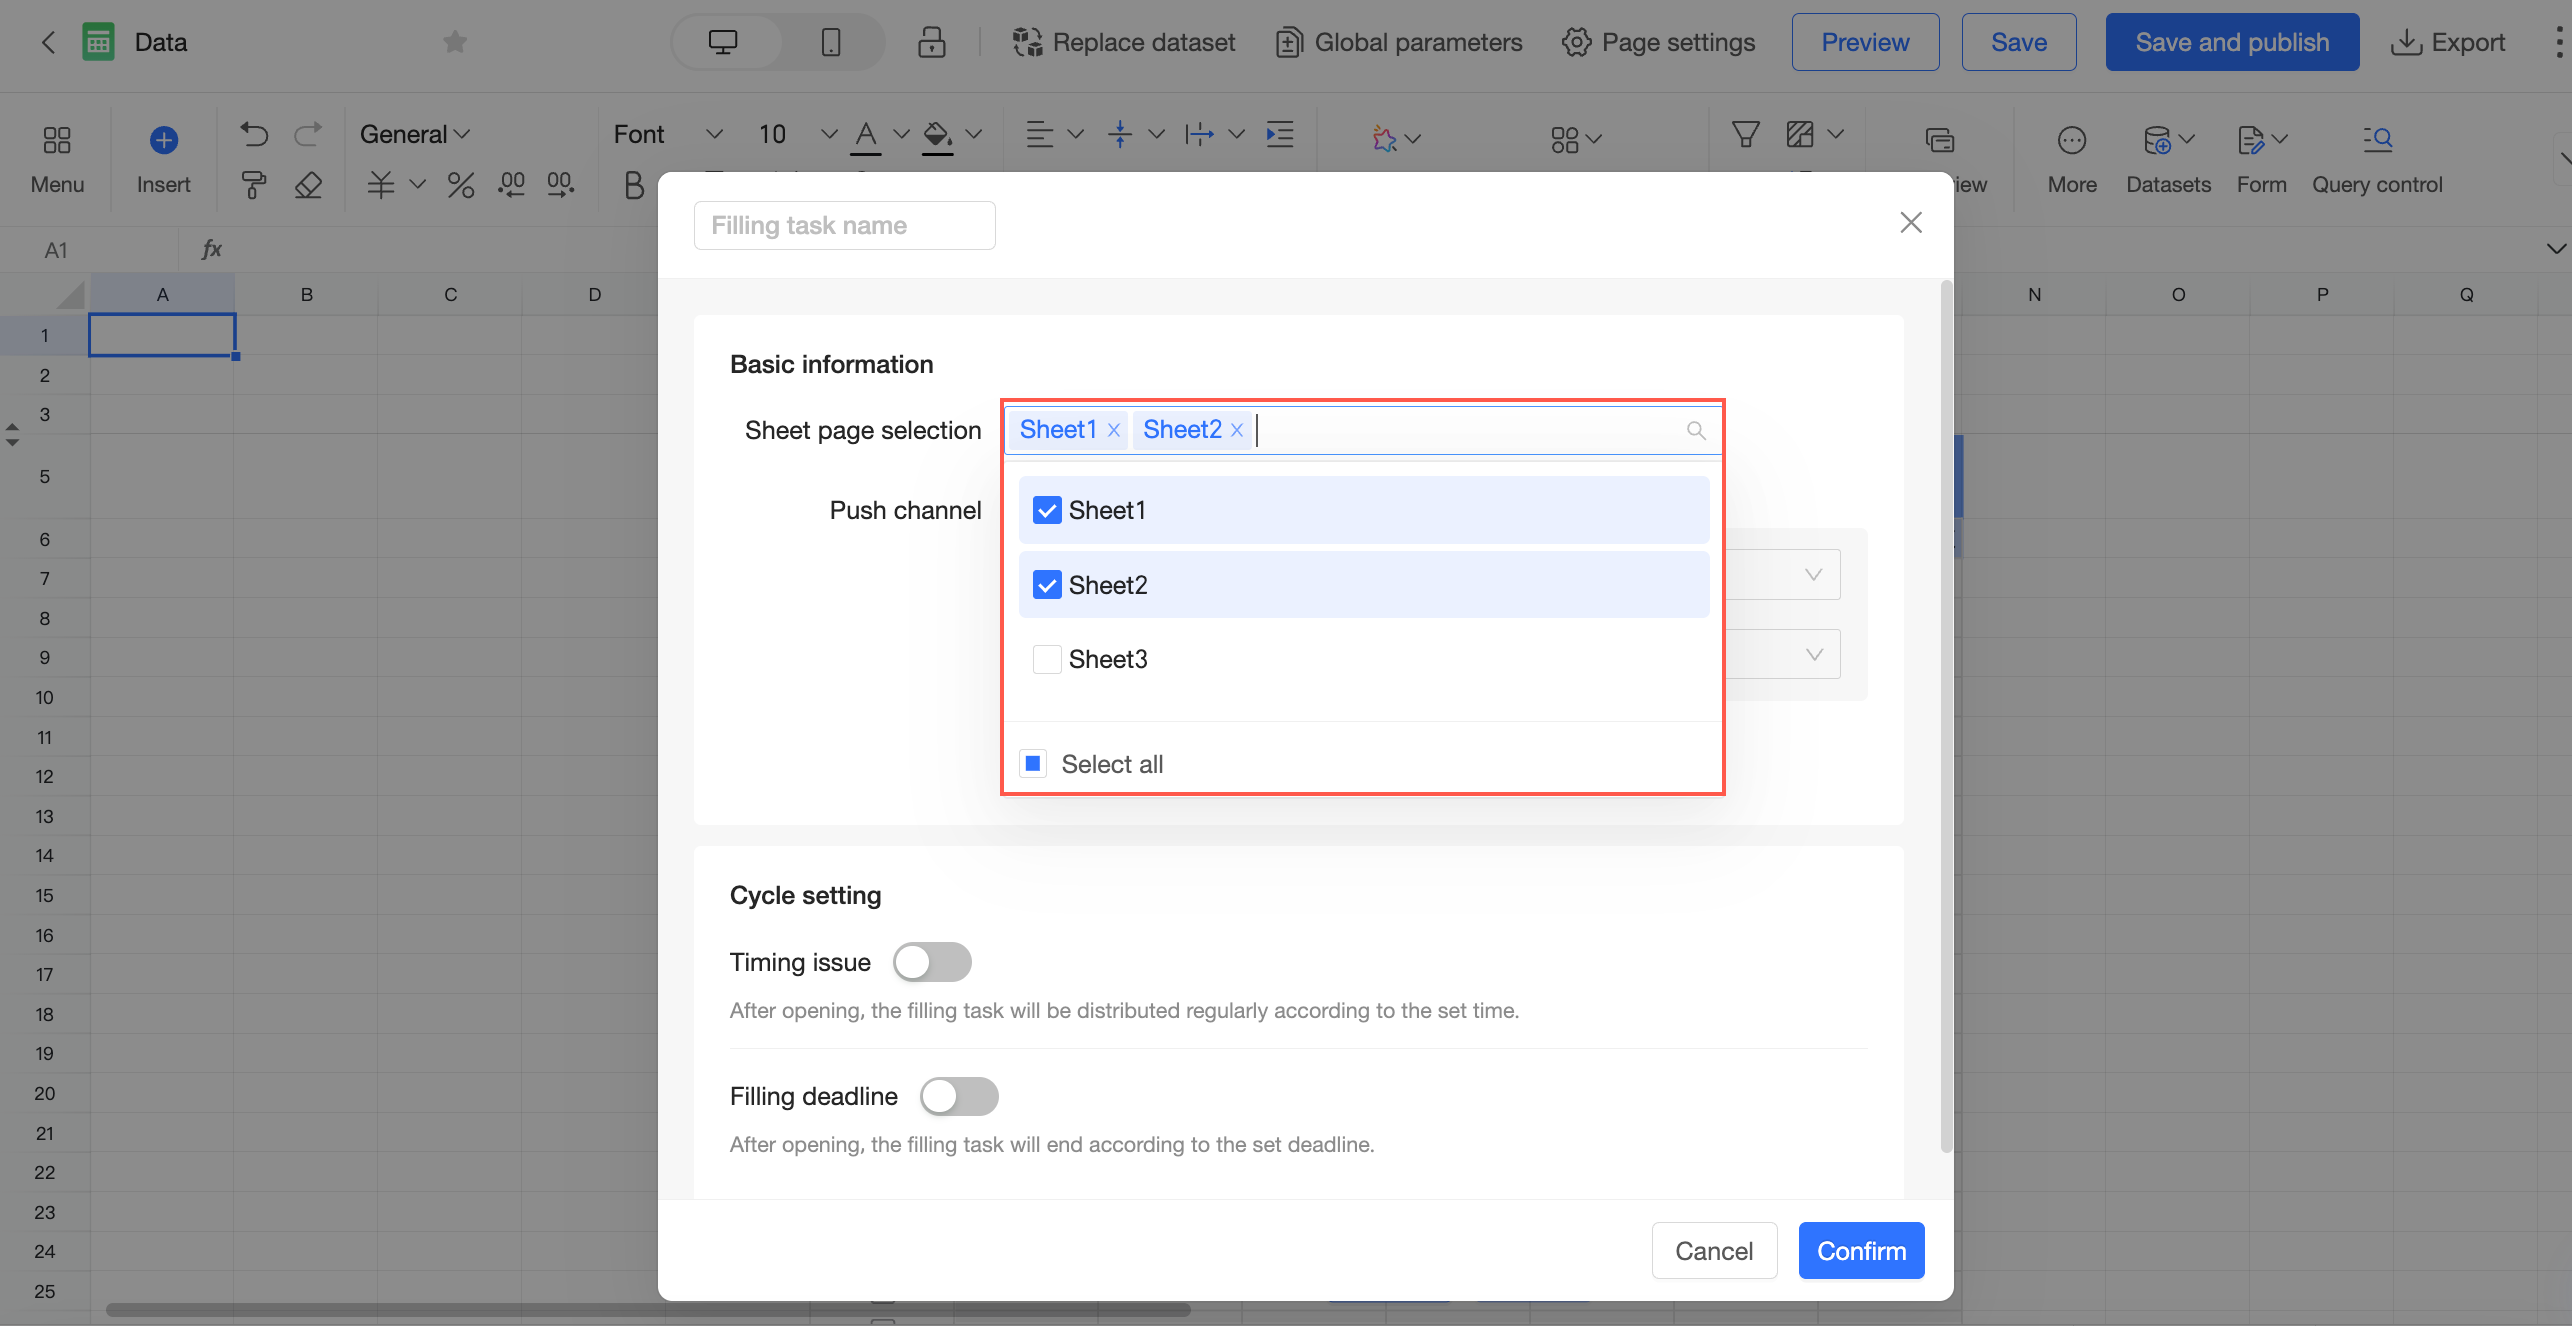
In the Select sheets section, select the sheets you want to assign. You can set different data entry tasks for different sheets in a spreadsheet and select multiple sheets. This option is required.
-
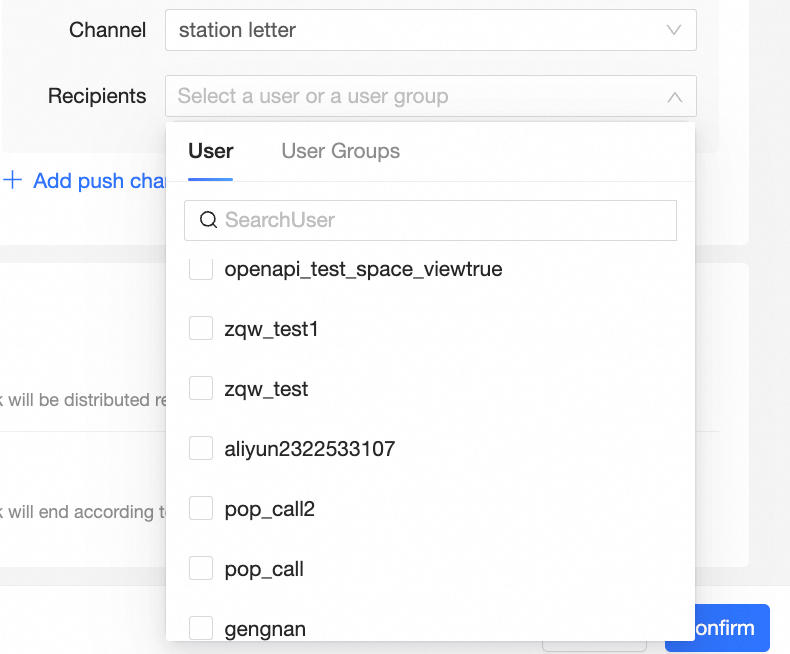
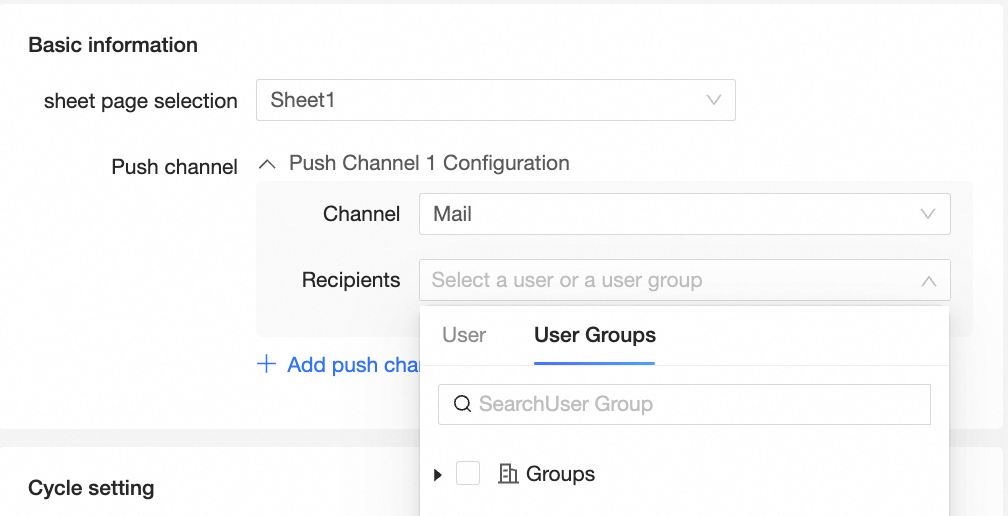
In the Push channel section, you can select a channel method, specify recipients, and add push channels.
Channel method
Description
Internal message
Send the task to users or user groups within the same organization, regardless of their workspace. You can select multiple recipients.
When you issue an internal message task, recipients receive a pending task on the Quick BI message notification page:

Email
Send the task by email to multiple users and user groups within the same organization.
Custom channel
Send the task through a custom channel. For more information about how to create one, see Custom channel.
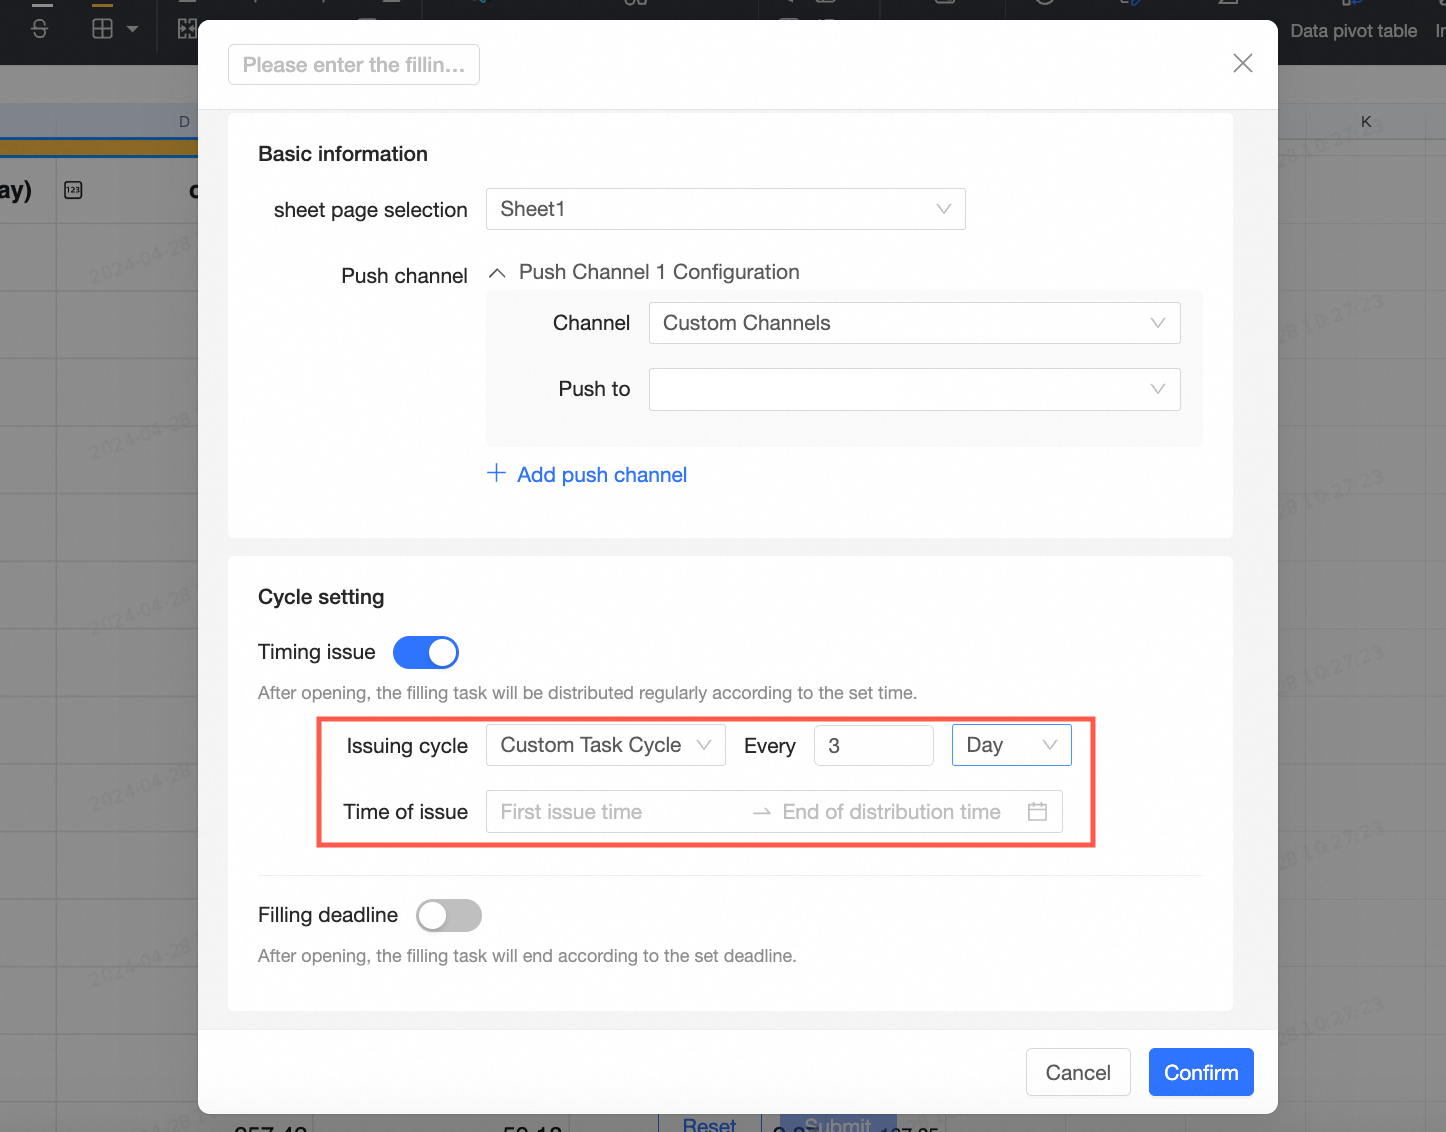
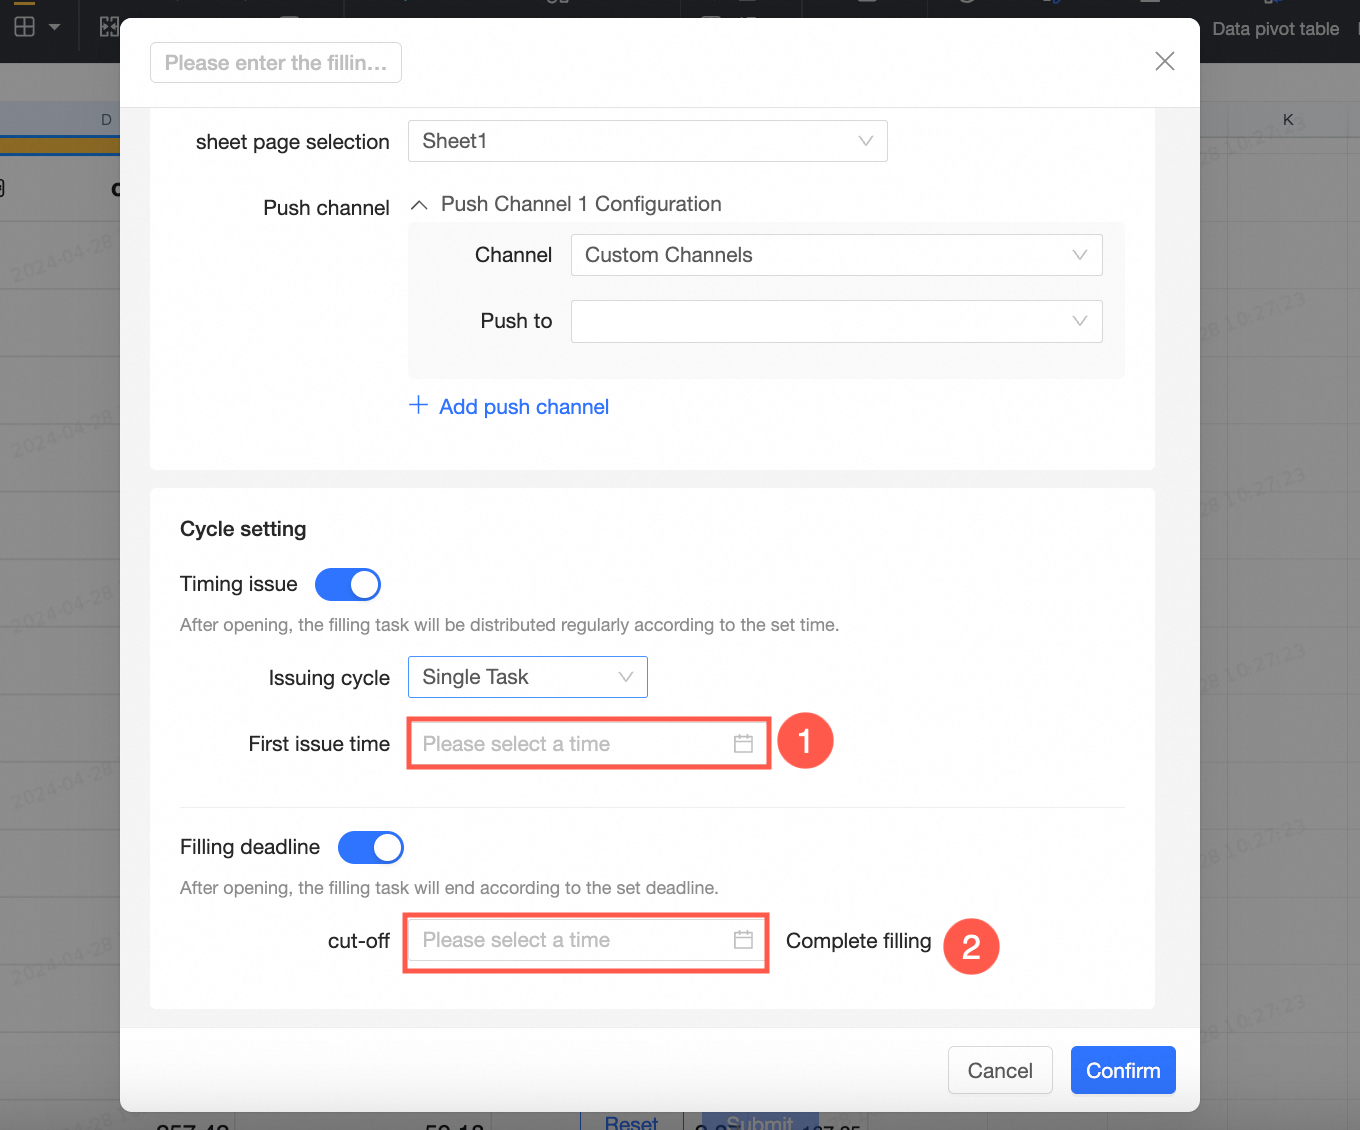
Schedule settings
-
Scheduled delivery
-
When you enable this option, the system issues the data entry task on your schedule. You can configure it as a one-time task or a recurring task that repeats on an hourly, daily, weekly, monthly, quarterly, or yearly basis.
-
A one-time task runs only once. Configure the first dispatch time and publish the task. For example, if you set the first dispatch time to 15:30:59 on July 20, 2023, the task is pushed only at that time.
-
A daily task runs every day at the specified time. For example, if the first dispatch time is 15:30:59 on July 20, 2023, the system pushes the first task at that time and the next one at 15:30:59 on July 21, 2023. This continues until the schedule ends. Each push creates a new to-do item.
-
A weekly task runs every week on the same day and time. For example, if the first dispatch time is 15:30:59 on July 20, 2023, the system pushes the first task at that time and the next one at 15:30:59 on July 27, 2023. This continues until the schedule ends. Each push creates a new to-do item.
-
The push logic for hourly, monthly, quarterly, and yearly tasks follows the same pattern.
-
A Custom Period lets you issue tasks at a specified interval. Set the first dispatch time and an end time, and the schedule repeats automatically within this period.
-
-
Submission deadline
-
Disabled by default. When enabled, the data entry task ends at the specified deadline.
-
If the dispatch schedule is a one-time task, enter the deadline.
-
For recurring tasks, set a relative deadline that requires submission within a certain period after each task is issued:

-
Task delivery
The following example uses internal messages:
-
After you select internal message as the channel method, configure the schedule settings, and confirm the task, recipients can click the
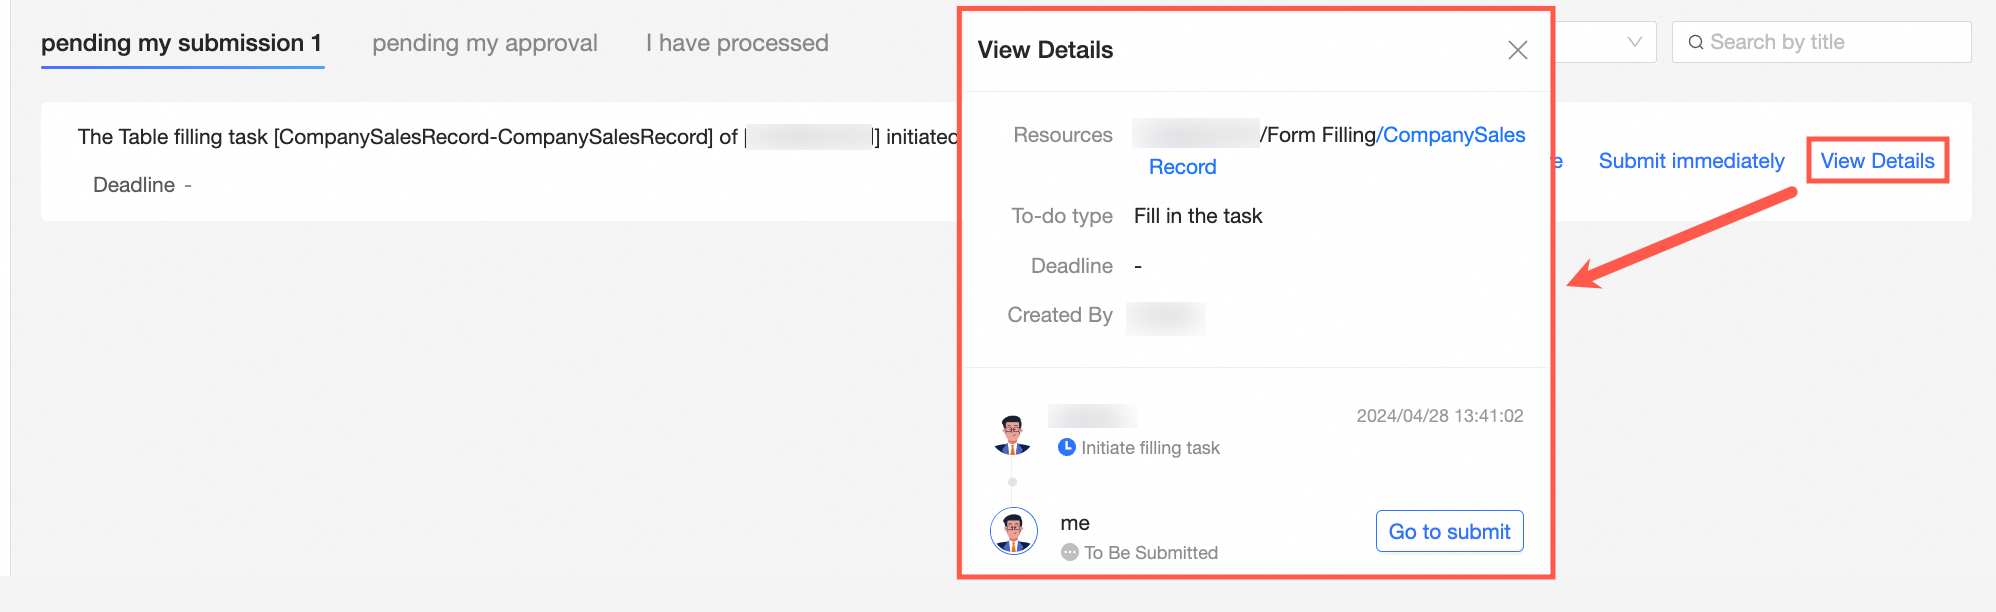
 icon in the upper-right corner and find a corresponding to-do item on the To be submitted page.
-
If you have already submitted the data through another entry point, such as Favorites or an email notification, click Ignore to dismiss the reminder.

-
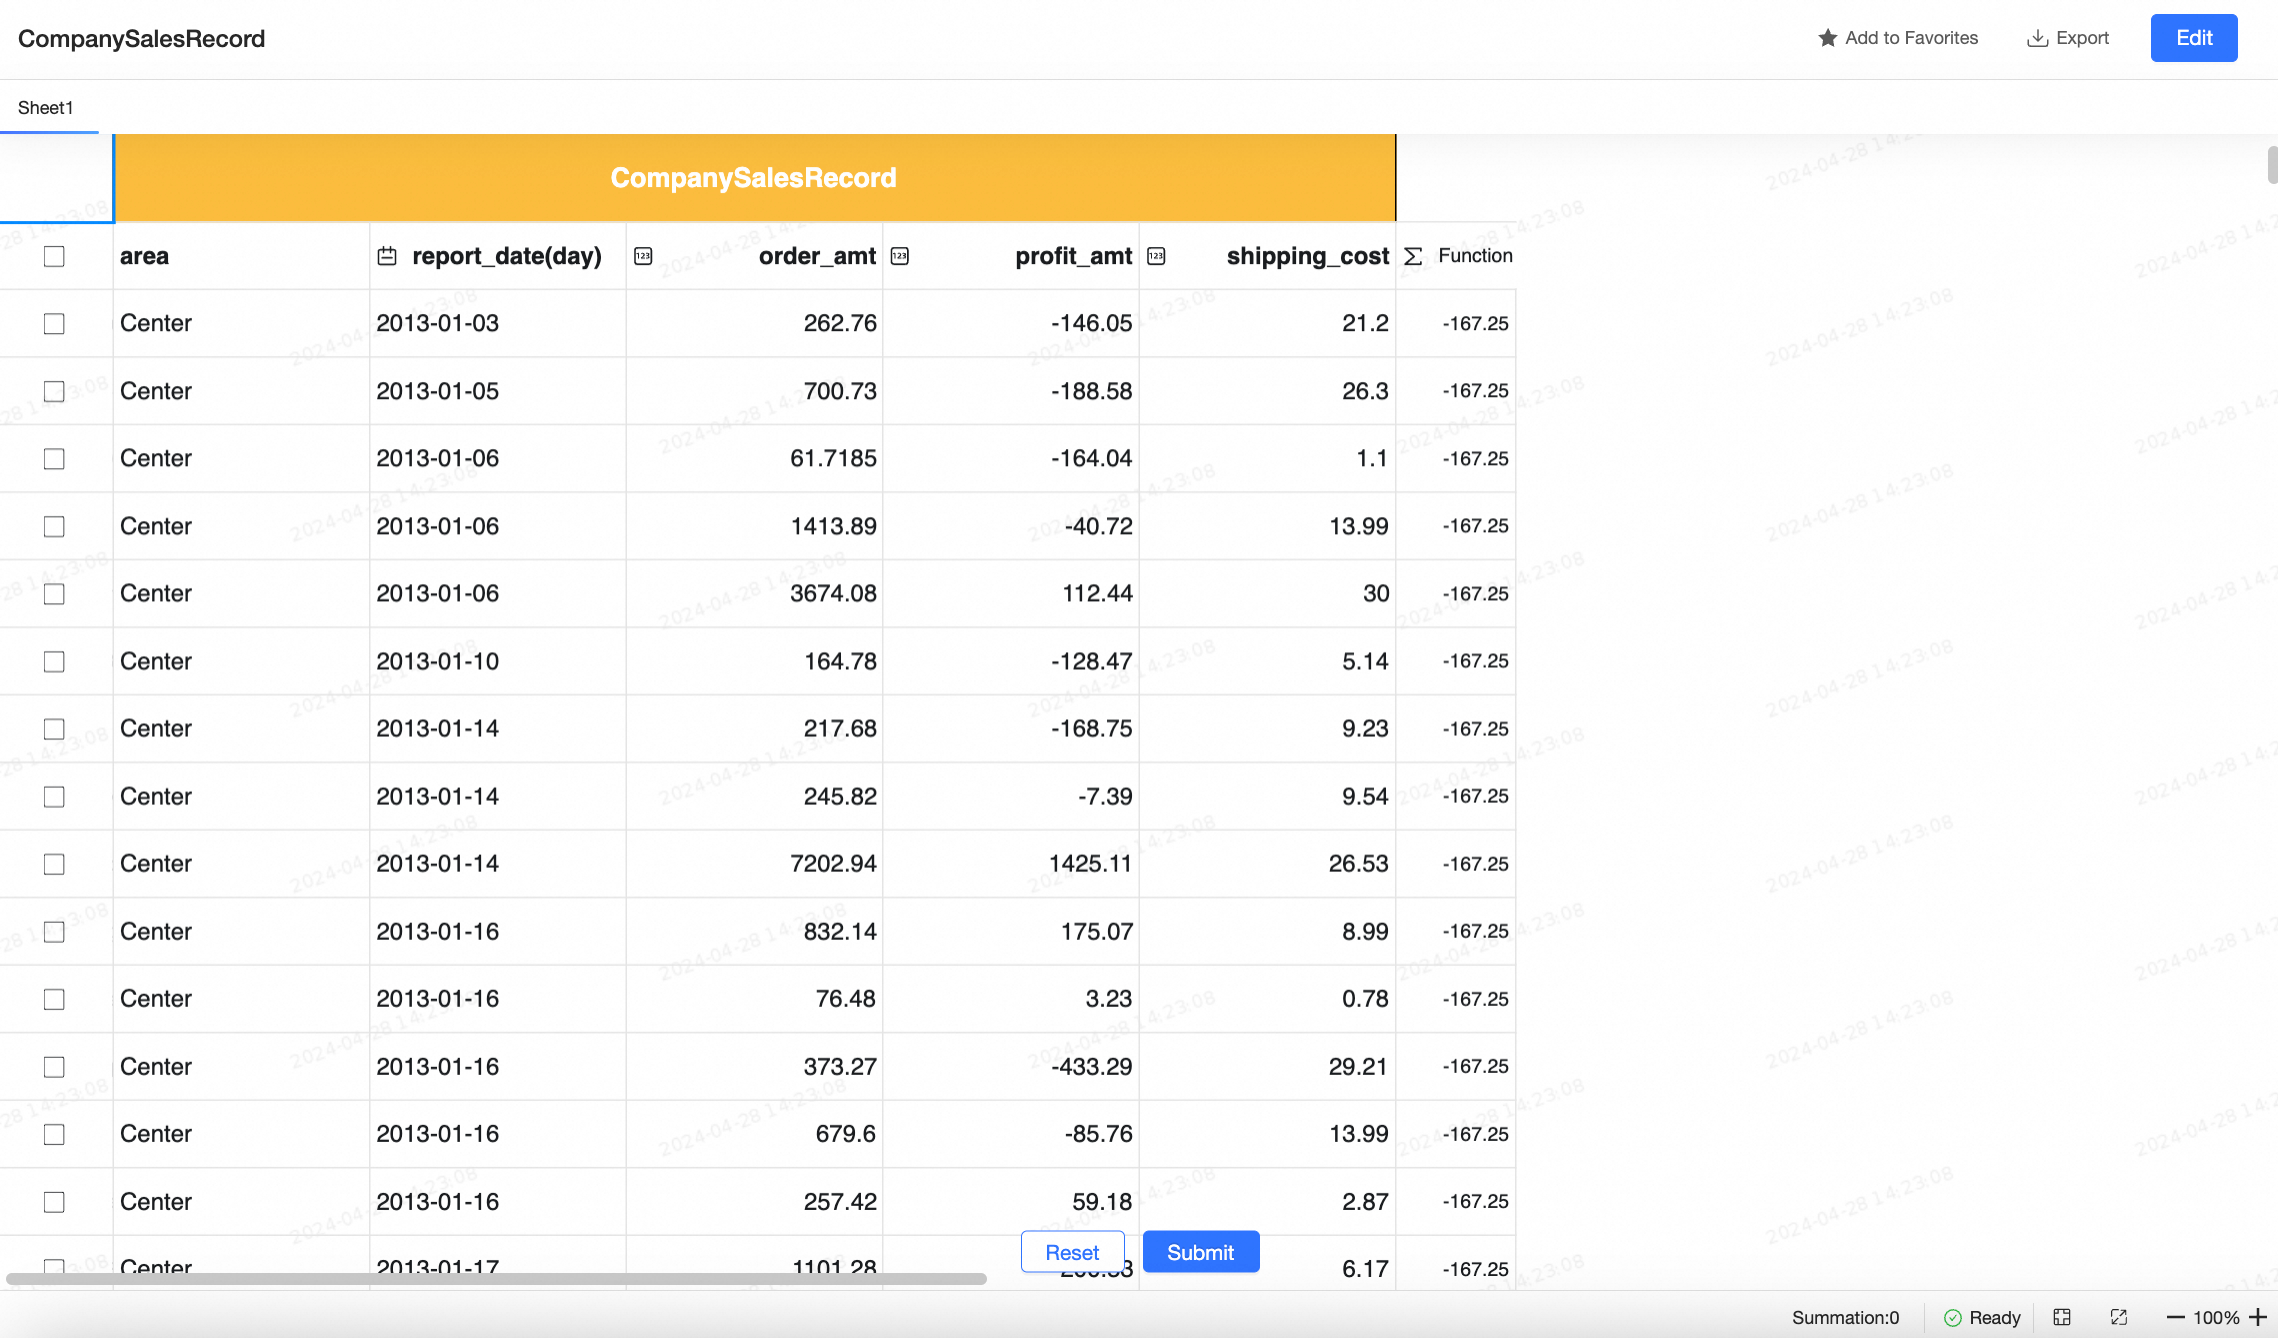
Click Submit Now to go to the data entry page, where you can add, edit, or delete data.
-
In the Details view, you can see the to-do type, deadline, initiator, and submission status. Click Go to submit to navigate to the spreadsheet submission page.
Manage issued tasks
If your requirements change, modify, suspend, or delete an issued task from the issued task management page.
Access the feature
-
Click Data Entry, and then select Issued task management.
Feature overview
-
After a data entry task is issued, you can modify its configuration in issued task management.
-
For recurring tasks, you can click the
 icon to suspend the task delivery or the
  icon to resume it.
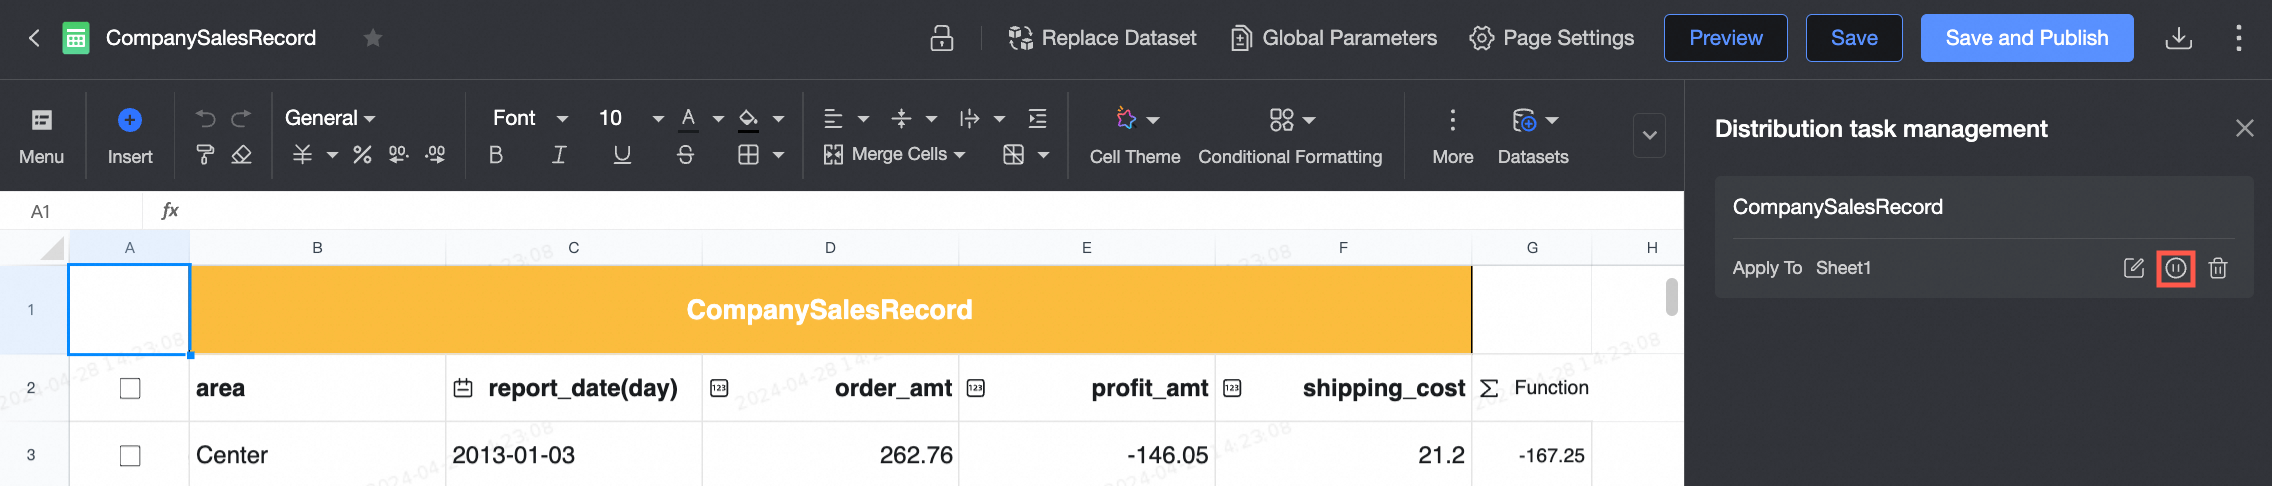
-
Suspend: Pauses the scheduled delivery of the task.
-
Resume: Resumes a previously suspended scheduled task.
NoteThis feature is not available for a one-time task.
-
-
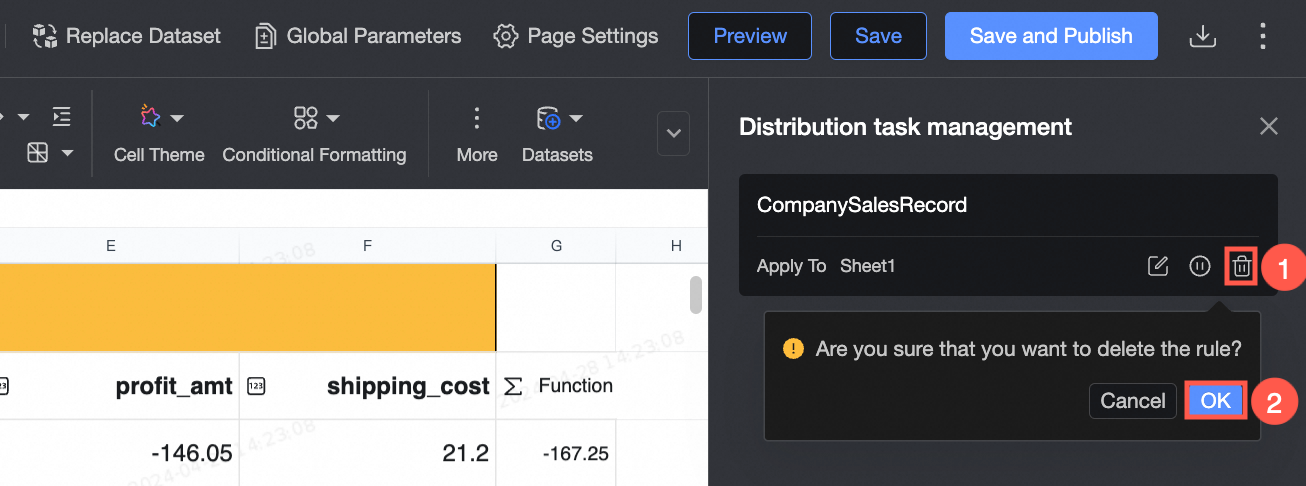
Click the
 icon to delete an issued task.