DataWorks organizes data development around workflows and nodes. Each node encapsulates a task for a specific compute engine — MaxCompute, Hologres, E-MapReduce, and others. This topic walks you through the full development cycle: from creating a workflow and writing node code to configuring scheduling and deploying to production.
By the end, you will know how to:
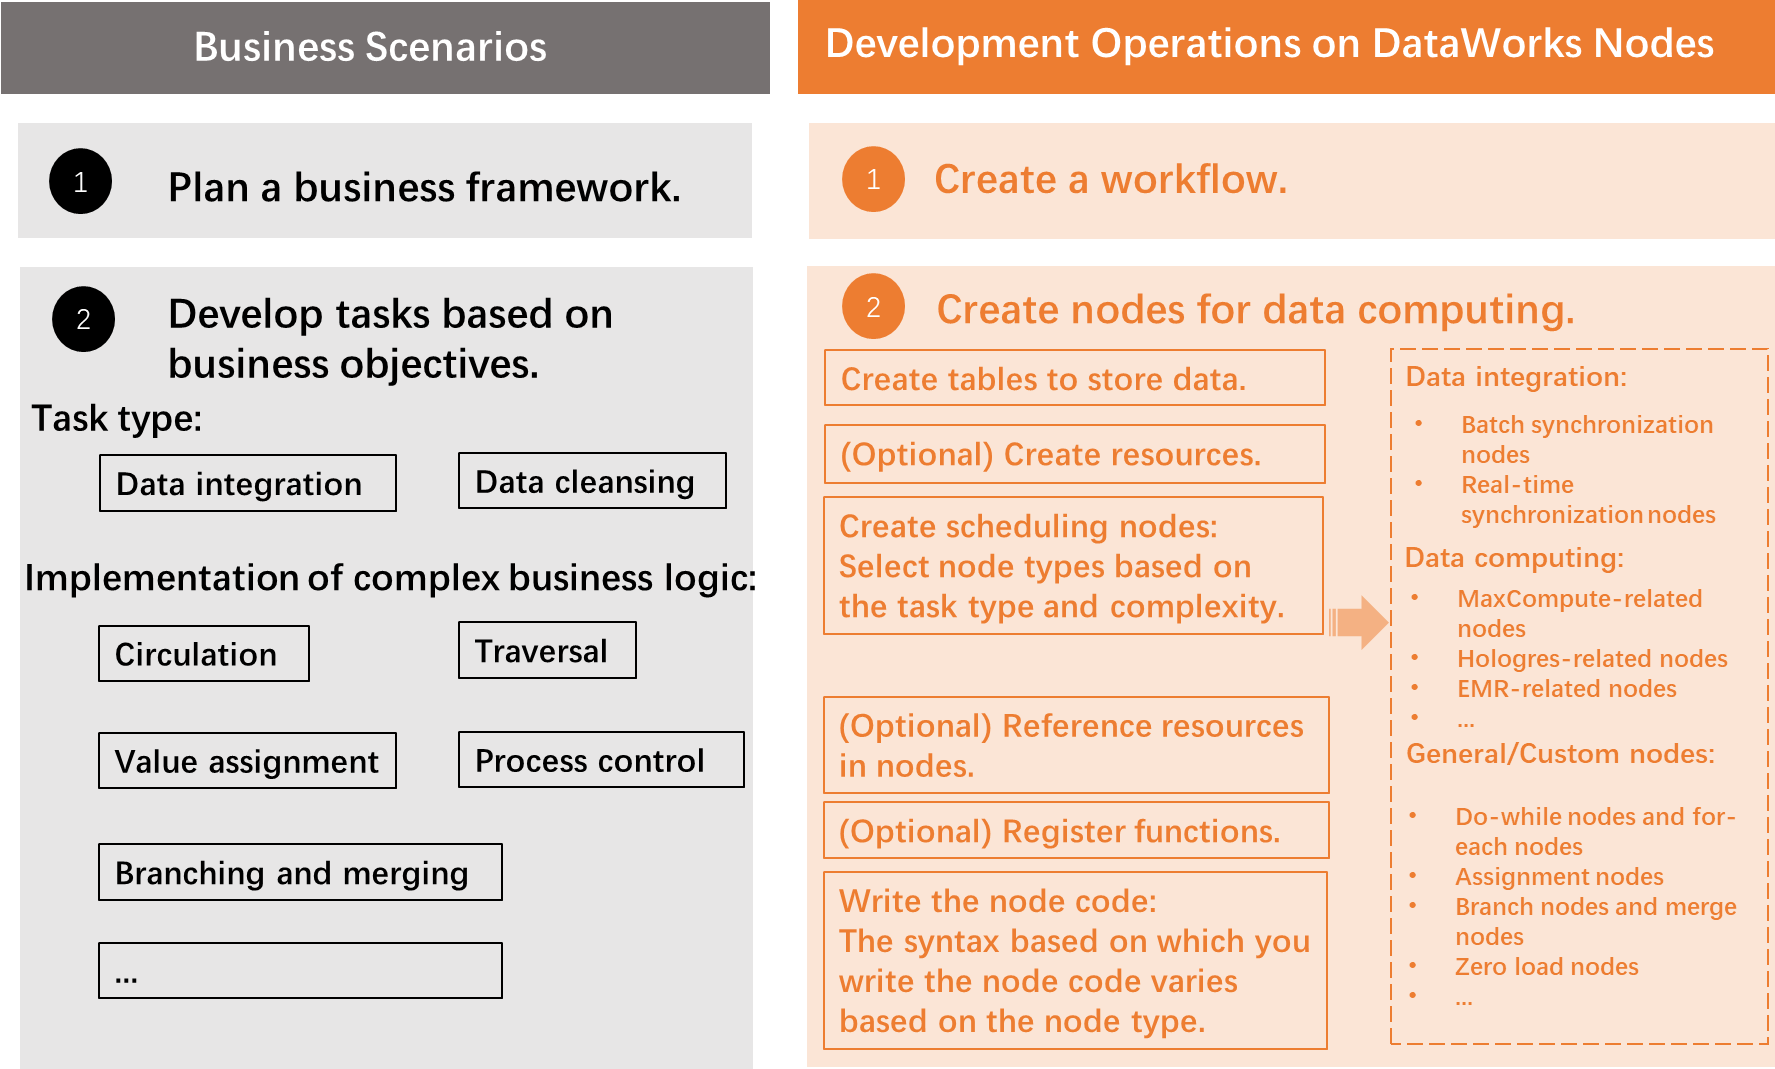
Create a workflow and the tables your pipeline needs.
Write and save node code for your compute engine.
Upload resources and register functions (when needed).
Debug a node or an entire workflow.
Configure scheduling and deploy nodes to the production environment.
Monitor running nodes in Operation Center.
Prerequisites
Before you begin, make sure you have:
Data sources associated with DataStudio. For details, see Associate a data source or a cluster with DataStudio.
The Development role in your workspace. For details, see Add a RAM user to a workspace as a member and assign roles to the member.
Go to DataStudio
Log on to the DataWorks console. In the top navigation bar, select a region. In the left-side navigation pane, choose Data Development and O&M > Data Development. Select your workspace from the drop-down list and click Go to Data Development.
Development process
The following diagram and table describe the steps.
| Step | What you do | References |
|---|---|---|
| Step 1: Create a workflow | All data development in DataWorks is organized into workflows. Create a workflow before adding any nodes. | Create a workflow |
| Step 2: Create tables | Create the tables your pipeline reads from and writes to. You typically need one table for raw input data and one for cleansed or transformed output. Supported engines: MaxCompute, Hologres (internal and external tables), E-MapReduce, and AnalyticDB for PostgreSQL. | Create and use tables: MaxCompute tables | Hologres internal table | Hologres external table | E-MapReduce table | AnalyticDB for PostgreSQL table — View and manage tables: View tenant tables | Manage external tables | Manage tables |
| Step 3: (Optional) Create and upload resources | If your node code depends on external files — such as text files or JAR packages — create and upload them to the target compute engine first. The DataWorks console lists which engines support resources and which resource types each engine accepts. | MaxCompute resources | E-MapReduce JAR resource |
| Step 4: Create a scheduling node | Create a node for each task in your pipeline. Select the node type that matches your compute engine. Node management features include node groups (clone multiple nodes at once) and a recycle bin for deleted nodes. | Supported compute engines: MaxCompute | Hologres | E-MapReduce — Node management: Deploy nodes | Undeploy nodes | O&M operations on auto triggered nodes — All node types: DataWorks nodes |
| Step 5: (Optional) Reference resources in nodes | Before node code can use an uploaded resource, load it into the node's development environment. | MaxCompute resources | E-MapReduce JAR resource |
| Step 6: (Optional) Register a function | To call a custom function from node code, register it in the DataWorks console. Upload the function's resource files before registering. The console lists which compute engines support function registration. | MaxCompute resources | MaxCompute UDF | E-MapReduce JAR resource | E-MapReduce function |
| Step 7: Write the node code | Write code on the node's configuration tab using the syntax of your compute engine and database. Syntax varies by node type. Save the code immediately after writing to avoid loss. | DataWorks nodes — Usage notes for common engines: MaxCompute | Hologres | E-MapReduce |
Subsequent steps: Debug code and configure scheduling
After the node code is developed, perform the following operations based on your requirements:
Debug code: Run a single node or the full workflow to validate logic before deployment. Check the output after debugging completes. For details, see Debugging procedure.
Configure scheduling parameters: Set scheduling parameters so the node runs automatically on a recurring schedule. For details, see Configure basic properties.
Commit and deploy the node: Commit the node to make it available for scheduling. In a workspace in standard mode, click Deploy in the upper-right corner of the node's configuration tab after committing. For details, see Deploy a node.
Perform O&M operations: After the node is deployed, it is displayed in Operation Center in the production environment by default. Go to Operation Center to monitor run status and perform O&M operations. For details, see Operation Center overview.