Create single-node or distributed training jobs using the console, Python SDK, or CLI. Choose from public resources, subscription resource quotas, or preemptible instances.
Prerequisites
-
Activate PAI and create a workspace. Log on to the PAI console, select a region, and follow the prompts to authorize and activate. For more information, see Activate PAI and create a workspace.
-
Grant permissions to your account. Skip this step if using your Alibaba Cloud account. For RAM users, assign one of the following roles:
Algorithm Developer,Algorithm O&M, orWorkspace Administrator. For more information, see Configure Member and Role in Manage workspaces.
Create a job in the console
If new to PAI-DLC, create jobs using the console. PAI-DLC also supports creating jobs using SDK or CLI.
-
Go to the Create Job page.
-
Log on to the PAI console, select the target region and workspace, and click Deep Learning Containers (DLC).
-
On the Deep Learning Containers (DLC) page, click Create Job.
-
-
Configure parameters in the following sections.
-
Basic information
Configure the Job Name and Tag.
-
Environment configuration
Parameter
Description
Image config
In addition to Alibaba Cloud Image, the following image types are supported:
-
Custom Image: Custom image added to PAI. Image repository must allow public pulls or be stored in Container Registry (ACR). For more information, see Custom images.
NoteWhen selecting Lingjun resources and using a custom image, install RDMA manually to use the high-performance RDMA network. For more information, see RDMA: Use a high-performance network for distributed training.
-
Image Address: URL of a custom or official image accessible over the Internet.
-
For private image URLs, click enter the username and password and provide credentials for the image repository.
-
To improve image pull speeds, see Accelerate image pulling.
-
Mount dataset
Datasets provide data files required for model training. Supported dataset types:
-
Custom Dataset: Create a custom dataset to store training data. Set as Read-only and select a specific dataset version from Version List.
-
Public Dataset: PAI provides pre-built public datasets that can only be mounted in read-only mode.
Mount Path: Path where dataset is mounted inside the container, such as
/mnt/data. Access dataset from code using this path. For more information, see Use cloud storage in DLC training jobs.ImportantWhen using CPFS datasets, configure a VPC matching the CPFS VPC. Otherwise, the job remains in "Preparing" state.
Mount storage
Mount data source path to read data or store results.
-
Supported data source types: OSS, General-purpose NAS, Extreme NAS, and BMCPFS (Lingjun AI Computing Service resources only).
-
Advanced Settings: Use advanced configurations to enable specific features for different data source types:
-
OSS: Set
{"mountType":"ossfs"}in the advanced configuration to mount OSS storage using ossfs. -
General-purpose NAS and CPFS: Set
nconnectparameter in advanced configuration to improve throughput when the container accesses NAS. For more information, see How do I resolve poor performance when accessing NAS on a Linux OS? Example:{"nconnect":"<example_value>"}. Replace <example_value> with a positive integer.
-
For more information, see Use cloud storage in DLC training jobs.
Startup Command
Startup command for the job. Supports shell commands. PAI-DLC automatically injects common environment variables for PyTorch and TensorFlow, such as
MASTER_ADDRandWORLD_SIZE. Access them using format$variable_name. Examples:-
Run Python:
python -c "print('Hello World')" -
PyTorch multi-node, multi-GPU distributed training:
python -m torch.distributed.launch \ --nproc_per_node=2 \ --master_addr=${MASTER_ADDR} \ --master_port=${MASTER_PORT} \ --nnodes=${WORLD_SIZE} \ --node_rank=${RANK} \ train.py --epochs=100 -
Set a shell file path as the startup command:
/ml/input/config/launch.sh
Environment Variable
In addition to automatically injected common environment variables for PyTorch and TensorFlow, provide custom environment variables in
Key:Valueformat. Maximum 20 environment variables per job.Third-party Libraries
If the container image is missing third-party libraries, add them here using one of two methods:
-
Select from List: Enter names of third-party libraries in the text box.
-
Directory of requirements.txt: Write third-party libraries into a
requirements.txtfile, upload to container, and specify the file path within container in the text box.
Code Builds
Upload code files required for training into the container using one of two methods:
-
Online configuration: If you have a Git code repository with access permissions, create a code source to allow PAI-DLC to access job code.
-
Local Upload: Click the
 button to upload local code files. After upload completes, set the Mount path to a specified path inside the container, such as
 /mnt/data.
-
-
Resource configuration
Parameter
Description
Resource Type
Default: General Computing. China (Ulanqab), Singapore, China (Shenzhen), China (Beijing), China (Shanghai), and China (Hangzhou) regions support selecting Lingjun Intelligence Resources.
Source
-
Public Resources:
-
Billing: Pay-as-you-go.
-
Use cases: Public resources may experience queuing. For small job volumes without strict time constraints.
-
Limitations: Maximum 2 GPU cards and 8 CPU cores. To exceed limits, contact your business manager.
-
-
Resource Quota: Includes General Computing or Lingjun AI Computing Service resources.
-
Billing: Subscription.
-
Use cases: For large job volumes that require highly reliable execution.
-
Special parameters:
-
Resource Quota: Set quantity of resources such as GPUs and CPUs. To prepare a resource quota, see Add a resource quota.
-
Priority: Specifies execution priority for concurrent jobs. Value ranges from 1 to 9, where 1 is lowest priority.
-
-
-
Preemptible Resources:
-
Billing: Pay-as-you-go.
-
Use cases: Reduce resource costs using preemptible resources, which usually offer a discount.
-
Limitations: Stable availability not guaranteed. Resources may not be immediately available or may be reclaimed. For more information, see Use preemptible jobs.
-
Framework
Supports the following deep learning training frameworks and tools: TensorFlow, PyTorch, ElasticBatch, XGBoost, OneFlow, MPIJob, and Ray.
NoteWhen selecting Lingjun AI Computing Service for Resource Quota, only TensorFlow, PyTorch, ElasticBatch, MPIJob and Ray jobs are supported.
Job Resource
Based on selected Framework, configure resources for Worker, PS, Chief, Evaluator, and GraphLearn nodes. When selecting Ray framework, click Add Role to customize Worker roles, enabling mixed execution of heterogeneous resources.
-
Use public resources: The following parameters can be configured:
-
Number of Nodes: Number of nodes to run the DLC job.
-
Resource Type: Resource specifications. The console displays the corresponding price. For more billing information, see DLC billing.
-
-
Use resource quota: Number of nodes, CPU (cores), GPU (cards), Memory (GiB), and Shared Memory (GiB) for each node type. Also configure the following special parameters:
NoteSystem overhead: The system reserves resources for container runtime and system processes. When configuring resource quotas, allocate 10-20% more resources than your training job requires to ensure successful execution. For example, if your job needs 2 CPU cores and 4 GiB memory, configure at least 2.5 cores and 5 GiB.
-
Node-Specific Scheduling: Execute job on specified compute nodes.
-
Idle Resources: When enabled, jobs can run on idle resources of other quotas, improving resource utilization. However, when these resources are needed by the original quota's jobs, the job running on idle resources will be preempted and terminated, and resources will be returned to the original quota. For more information, see Use idle resources.
-
CPU Affinity: Binds processes in a container or Pod to specific CPU cores. Reduces CPU cache misses and context switches, improving CPU utilization and application performance. Suitable for performance-sensitive and real-time scenarios.
-
-
Use preemptible resources: In addition to number of nodes and resource specifications, configure the Bid parameter to request preemptible instances by setting a maximum bid. Click
 to select a bidding method:
-
By discount: Maximum price is based on market price of resource specification, with discrete options from 10% to 90% discount, representing upper limit for bidding. When maximum bid for preemptible instance meets or exceeds market price and sufficient inventory exists, the instance can be requested.
-
By price: Maximum bid is within market price range.
-
-
-
VPC configuration
-
If not configuring a VPC, public network and public gateway are used. Limited public gateway bandwidth may cause slowdowns or interruptions during job execution.
-
Configuring a VPC and selecting the corresponding vSwitch and security group improves network bandwidth, stability, and security. The cluster can directly access services within the VPC.
Important-
When using a VPC, ensure the job's resource group, dataset storage (OSS), and code repository are in the same region, and that their respective VPCs can communicate.
-
When using a CPFS dataset, configure a VPC matching the one used by CPFS. Otherwise, the DLC training job fails to mount the dataset and remains in
Preparingstate until timeout. -
When submitting a DLC job with Lingjun AI Computing Service preemptible instances, configure a VPC.
Additionally, configure a Internet Access Gateway in one of two ways:
-
Public Gateway: Network bandwidth is limited and may not meet requirements during high-concurrency access or when downloading large files.
-
Private Gateway: To address public gateway bandwidth limitations, create an Internet NAT Gateway in the DLC's VPC, bind an Elastic IP (EIP), and configure SNAT entries. For more information, see Improve public network access speed through a private gateway.
-
-
-
Fault tolerance and diagnosis
Parameter
Description
Automatic Fault Tolerance
Turn on Automatic Fault Tolerance switch and configure parameters. The system provides job detection and control capabilities to promptly detect and avoid errors at the job's algorithm layer, improving GPU utilization. For more information, see AIMaster: An elastic and automatic fault tolerance engine.
NoteWhen enabling automatic fault tolerance, the system starts an AIMaster instance that runs alongside the job instance and consumes computing resources. AIMaster instance resource usage is as follows:
-
Resource quota: 1 CPU core and 1 GiB of memory.
-
Public resources: Uses the ecs.c6.large specification.
Sanity Check
When enabling Sanity Check, a check is performed on resources involved in training. Automatically isolates faulty nodes and triggers automated backend O&M processes, reducing issues in early stages of job training and improving training success rate. For more information, see SanityCheck: Health check.
NoteHealth check is only supported for PyTorch training jobs submitted with Lingjun AI Computing Service resource quotas and with a GPU count greater than 0.
-
-
Roles and permissions
How to configure the instance RAM role. For more information, see Configure a DLC RAM role.
Instance RAM role
Description
Default Role of PAI
Uses the
AliyunPAIDLCDefaultRoleservice-linked role, which has fine-grained permissions to access ODPS and OSS. Temporary access credentials issued based on the PAI default role have the following permissions:-
When accessing MaxCompute tables, has permissions equivalent to the DLC instance owner.
-
When accessing OSS, can only access the default OSS Bucket configured for the current workspace.
Custom Role
Custom RAM role. When accessing cloud products within the instance using STS temporary credentials, the permissions are consistent with those of this custom role.
Does Not Associate Role
Does not associate a RAM role with the DLC job. Default option.
-
-
After configuring parameters, click OK.
References
After submitting the job:
-
View basic information, resource views, and operation logs. See View training details.
-
Clone, stop, or delete jobs. See Manage training jobs.
-
View analysis reports through TensorBoard. For more information, see Visualization tool Tensorboard.
-
Configure monitoring and alerts. See Monitor training jobs and configure alerts.
-
View billing details. See Bill details.
-
Forward DLC job logs from the current workspace to a specified SLS Logstore for custom analysis. For more information, see Subscribe to task logs.
-
Create notification rules in the PAI workspace's event center to track and monitor the status of DLC jobs. For more information, see Training job notifications.
-
For troubleshooting, see DLC FAQ.
-
For DLC use cases, see DLC use cases.
SDK and CLI
Create a job with SDK or CLI
Python SDK
Step 1: Install Alibaba Cloud Credentials tool
To use Alibaba Cloud SDK, install the Credentials tool to configure credentials. Requirements:
-
Python 3.7 or later.
-
Alibaba Cloud SDK V2.0.
pip install alibabacloud_credentialsStep 2: Obtain an AccessKey
This example uses an AccessKey pair to configure credentials. To prevent AccessKey leakage, configure AccessKey ID and AccessKey secret as environment variables. Environment variable names should be ALIBABA_CLOUD_ACCESS_KEY_ID and ALIBABA_CLOUD_ACCESS_KEY_SECRET.
-
To obtain an AccessKey pair, see Create an AccessKey.
-
To learn how to set environment variables, see Configure environment variables.
-
For other ways to configure credentials, see Install the Credentials tool.
Step 3: Install Python SDK
-
Install the workspace SDK.
pip install alibabacloud_aiworkspace20210204==3.0.1 -
Install the DLC SDK.
pip install alibabacloud_pai_dlc20201203==1.4.17
Step 4: Submit the job
Submit a job using public resources
Example code to create and submit a job.
Submit a job using a subscription resource quota
-
Log on to PAI console.
-
As shown in the following figure, find your workspace ID on the workspace list page.

-
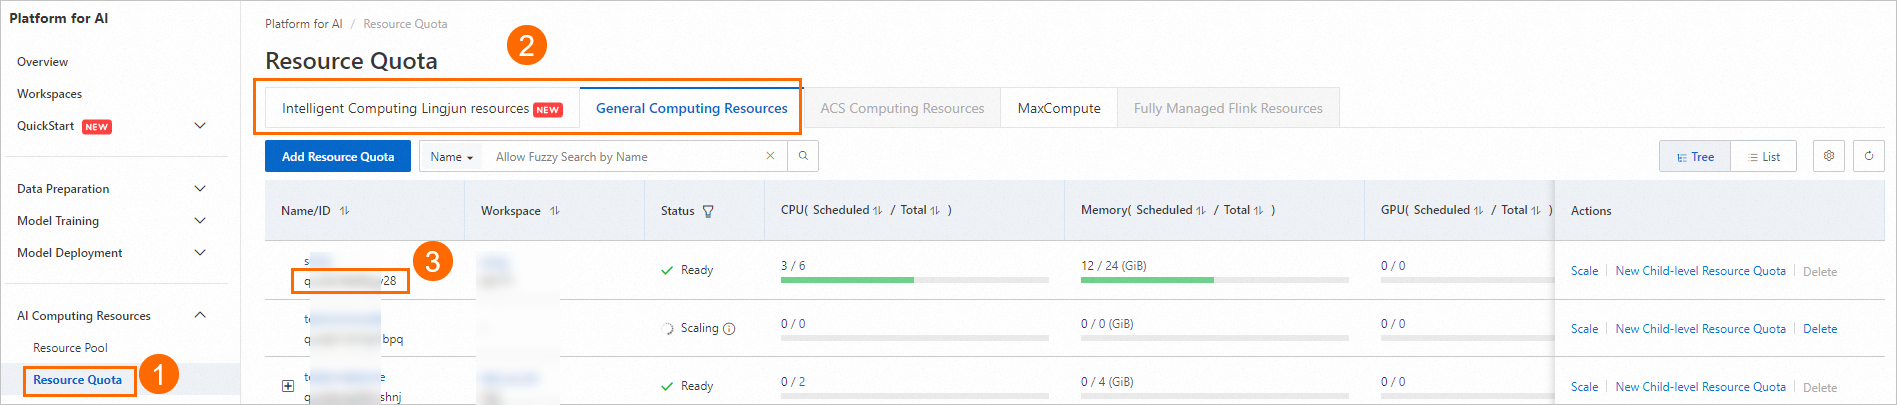
As shown in the following figure, find the resource quota ID of your dedicated resource group.

-
Use following code to create and submit a job. For a list of available public images, see Step 2: Prepare a container image.
from alibabacloud_pai_dlc20201203.client import Client
from alibabacloud_credentials.client import Client as CredClient
from alibabacloud_tea_openapi.models import Config
from alibabacloud_pai_dlc20201203.models import (
    CreateJobRequest,
    JobSpec,
    ResourceConfig, GetJobRequest
)

# Initialize a client to access the DLC API.
region = 'cn-hangzhou'
# The AccessKey of an Alibaba Cloud account has permissions to access all APIs. We recommend that you use a RAM user for API access or daily O&M.
# We strongly recommend that you do not save your AccessKey ID and AccessKey secret in your project code. This can lead to an AccessKey leak and threaten the security of all resources in your account.
# This example shows how to use the Credentials SDK to read the AccessKey from environment variables for identity verification.
cred = CredClient()
client = Client(
    config=Config(
        credential=cred,
        region_id=region,
        endpoint=f'pai-dlc.{region}.aliyuncs.com',
    )
)

# Declare the resource configuration for the job. For image selection, you can refer to the public image list in the documentation or provide your own image URL.
spec = JobSpec(
    type='Worker',
    image=f'registry-vpc.cn-hangzhou.aliyuncs.com/pai-dlc/tensorflow-training:1.15-cpu-py36-ubuntu18.04',
    pod_count=1,
    resource_config=ResourceConfig(cpu='1', memory='2Gi')
)

# Declare the execution content of the job.
req = CreateJobRequest(
        resource_id='<Replace with your resource quota ID>',
        workspace_id='<Replace with your WorkspaceID>',
        display_name='sample-dlc-job',
        job_type='TFJob',
        job_specs=[spec],
        user_command='echo "Hello World"',
)

# Submit the job.
response = client.create_job(req)
# Get the job ID.
job_id = response.body.job_id

# Query the job status.
job = client.get_job(job_id, GetJobRequest()).body
print('job status:', job.status)

# View the command executed by the job.
job.user_command
Submit a job using preemptible resources
-
SpotDiscountLimit (Spot discount)
#!/usr/bin/env python3 from alibabacloud_tea_openapi.models import Config from alibabacloud_credentials.client import Client as CredClient from alibabacloud_pai_dlc20201203.client import Client as DLCClient from alibabacloud_pai_dlc20201203.models import CreateJobRequest region_id = '<region-id>' # The ID of the region in which the DLC job resides, such as cn-hangzhou. cred = CredClient() workspace_id = '12****' # The ID of the workspace to which the DLC job belongs. dlc_client = DLCClient( Config(credential=cred, region_id=region_id, endpoint='pai-dlc.{}.aliyuncs.com'.format(region_id), protocol='http')) create_job_resp = dlc_client.create_job(CreateJobRequest().from_map({ 'WorkspaceId': workspace_id, 'DisplayName': 'sample-spot-job', 'JobType': 'PyTorchJob', 'JobSpecs': [ { "Type": "Worker", "Image": "dsw-registry-vpc.<region-id>.cr.aliyuncs.com/pai/pytorch-training:1.12-cpu-py39-ubuntu20.04", "PodCount": 1, "EcsSpec": 'ecs.g7.xlarge', "SpotSpec": { "SpotStrategy": "SpotWithPriceLimit", "SpotDiscountLimit": 0.4, } }, ], 'UserVpc': { "VpcId": "vpc-0jlq8l7qech3m2ta2****", "SwitchId": "vsw-0jlc46eg4k3pivwpz8****", "SecurityGroupId": "sg-0jl4bd9wwh5auei9****", }, "UserCommand": "echo 'Hello World' && ls -R /mnt/data/ && sleep 30 && echo 'DONE'", })) job_id = create_job_resp.body.job_id print(f'jobId is {job_id}') -
SpotPriceLimit (Spot price)
#!/usr/bin/env python3

from alibabacloud_tea_openapi.models import Config
from alibabacloud_credentials.client import Client as CredClient

from alibabacloud_pai_dlc20201203.client import Client as DLCClient
from alibabacloud_pai_dlc20201203.models import CreateJobRequest

region_id = '<region-id>'
cred = CredClient()
workspace_id = '12****'

dlc_client = DLCClient(
    Config(credential=cred,
           region_id=region_id,
           endpoint='pai-dlc.{}.aliyuncs.com'.format(region_id),
           protocol='http'))

create_job_resp = dlc_client.create_job(CreateJobRequest().from_map({
    'WorkspaceId': workspace_id,
    'DisplayName': 'sample-spot-job',
    'JobType': 'PyTorchJob',
    'JobSpecs': [
        {
            "Type": "Worker",
            "Image": "dsw-registry-vpc.<region-id>.cr.aliyuncs.com/pai/pytorch-training:1.12-cpu-py39-ubuntu20.04",
            "PodCount": 1,
            "EcsSpec": 'ecs.g7.xlarge',
            "SpotSpec": {
                "SpotStrategy": "SpotWithPriceLimit",
                "SpotPriceLimit": 0.011,
            }
        },
    ],
    'UserVpc': {
        "VpcId": "vpc-0jlq8l7qech3m2ta2****",
        "SwitchId": "vsw-0jlc46eg4k3pivwpz8****",
        "SecurityGroupId": "sg-0jl4bd9wwh5auei9****",
    },
    "UserCommand": "echo 'Hello World' && ls -R /mnt/data/ && sleep 30 && echo 'DONE'",
}))
job_id = create_job_resp.body.job_id
print(f'jobId is {job_id}')
Following table describes key parameters:
Parameter | Description |
SpotStrategy | The bidding policy. The bidding type parameters take effect only if you set this parameter to SpotWithPriceLimit. |
SpotDiscountLimit | The spot discount bidding type. Note
|
SpotPriceLimit | The spot price bidding type. |
UserVpc | This parameter is required when you use Lingjun resources to submit jobs. Configure the VPC, vSwitch, and security group ID for the region in which the job resides. |
Command line
Step 1: Download client and authenticate
Download the Linux 64-bit or macOS version of the client tool based on your operating system and complete user authentication. For more information, see Preparations.
Step 2: Submit the job
-
Log on to the PAI console.
-
On the workspace list page, view your workspace ID.

-
Follow the instructions in the image below to view your resource quota ID.
-
Prepare parameter file
tfjob.paramsby referring to following content. For more information about how to configure the parameter file, see Submit command.name=test_cli_tfjob_001 workers=1 worker_cpu=4 worker_gpu=0 worker_memory=4Gi worker_shared_memory=4Gi worker_image=registry-vpc.cn-beijing.aliyuncs.com/pai-dlc/tensorflow-training:1.12.2PAI-cpu-py27-ubuntu16.04 command=echo good && sleep 120 resource_id=<Replace with your resource quota ID> workspace_id=<Replace with your WorkspaceID> -
Use following code example to pass the params_file parameter to submit the job. Submit the DLC job to the specified workspace and resource quota.
./dlc submit tfjob --job_file ./tfjob.params -
Use following code to view the DLC job that was submitted.
./dlc get job <jobID>
Advanced parameter list
|
Parameter (key) |
Supported framework types |
Parameter description |
Parameter value (value) |
|
|
ALL |
Custom resource release rule. Optional. If not configured, all pod resources are released when the job ends. If configured, the only supported value is |
pod-exit |
|
|
ALL |
Enables IBGDA feature when loading the GPU driver. |
|
|
|
ALL |
Whether to install the GDRCopy kernel module. Version 2.4.4 is currently installed. |
|
|
|
ALL |
Enables NUMA. |
|
|
|
ALL |
When submitting a job, checks whether total resources (node specifications) in the quota can meet specifications of all roles in the job. |
|
|
|
PyTorch |
Whether to allow network communication between workers.
When enabled, domain name of each worker is its name, such as |
|
|
|
PyTorch |
Defines the network ports to be opened on each worker. This can be used with If not configured, only port 23456 on the master is opened by default. Avoid using port 23456 in this custom port list. Important
This parameter is mutually exclusive with |
A semicolon-separated string, where each string is a port number or a port range connected by a hyphen, such as |
|
|
PyTorch |
Requests a number of network ports to be opened for each worker. This can be used with If not configured, only port 23456 on the master is opened by default. DLC randomly assigns the requested number of ports to each worker. Assigned ports are passed to the worker through the Important
|
Integer (maximum 65536) |
|
|
Ray |
When framework is Ray, define the runtime environment by manually configuring RayRuntimeEnv. Important
The Environment variable and Third-party library configuration are overridden by this configuration. |
Configure environment variables and third-party libraries ( |
|
|
Ray |
External GCS Redis address. |
String |
|
|
Ray |
External GCS Redis username. |
String |
|
|
Ray |
External GCS Redis password. |
String |
|
|
Ray |
Number of retries for submitter. |
Positive integer (int) |
|
|
Ray |
Configures shared memory for a node. For example, to configure 1 GiB of shared memory for each node, use the following configuration: |
Positive integer (int) |