On the dataset edit page, you can use the toolbar to save your work, apply advanced configurations, switch data sources, and restore previous versions. You can also process data by creating calculated fields, grouping dimensions, creating hierarchies, and adding placeholders. Other data processing operations include calculating time differences, replacing missing values, adding dimension value aliases, and splitting or merging fields. The toolbar also lets you set field formats, filter and sort data, manage placeholders, and optimize SQL statements. This topic describes the functions of the toolbar.
Prerequisites
You have created a dataset. For more information, see Create a dataset.
Top toolbar
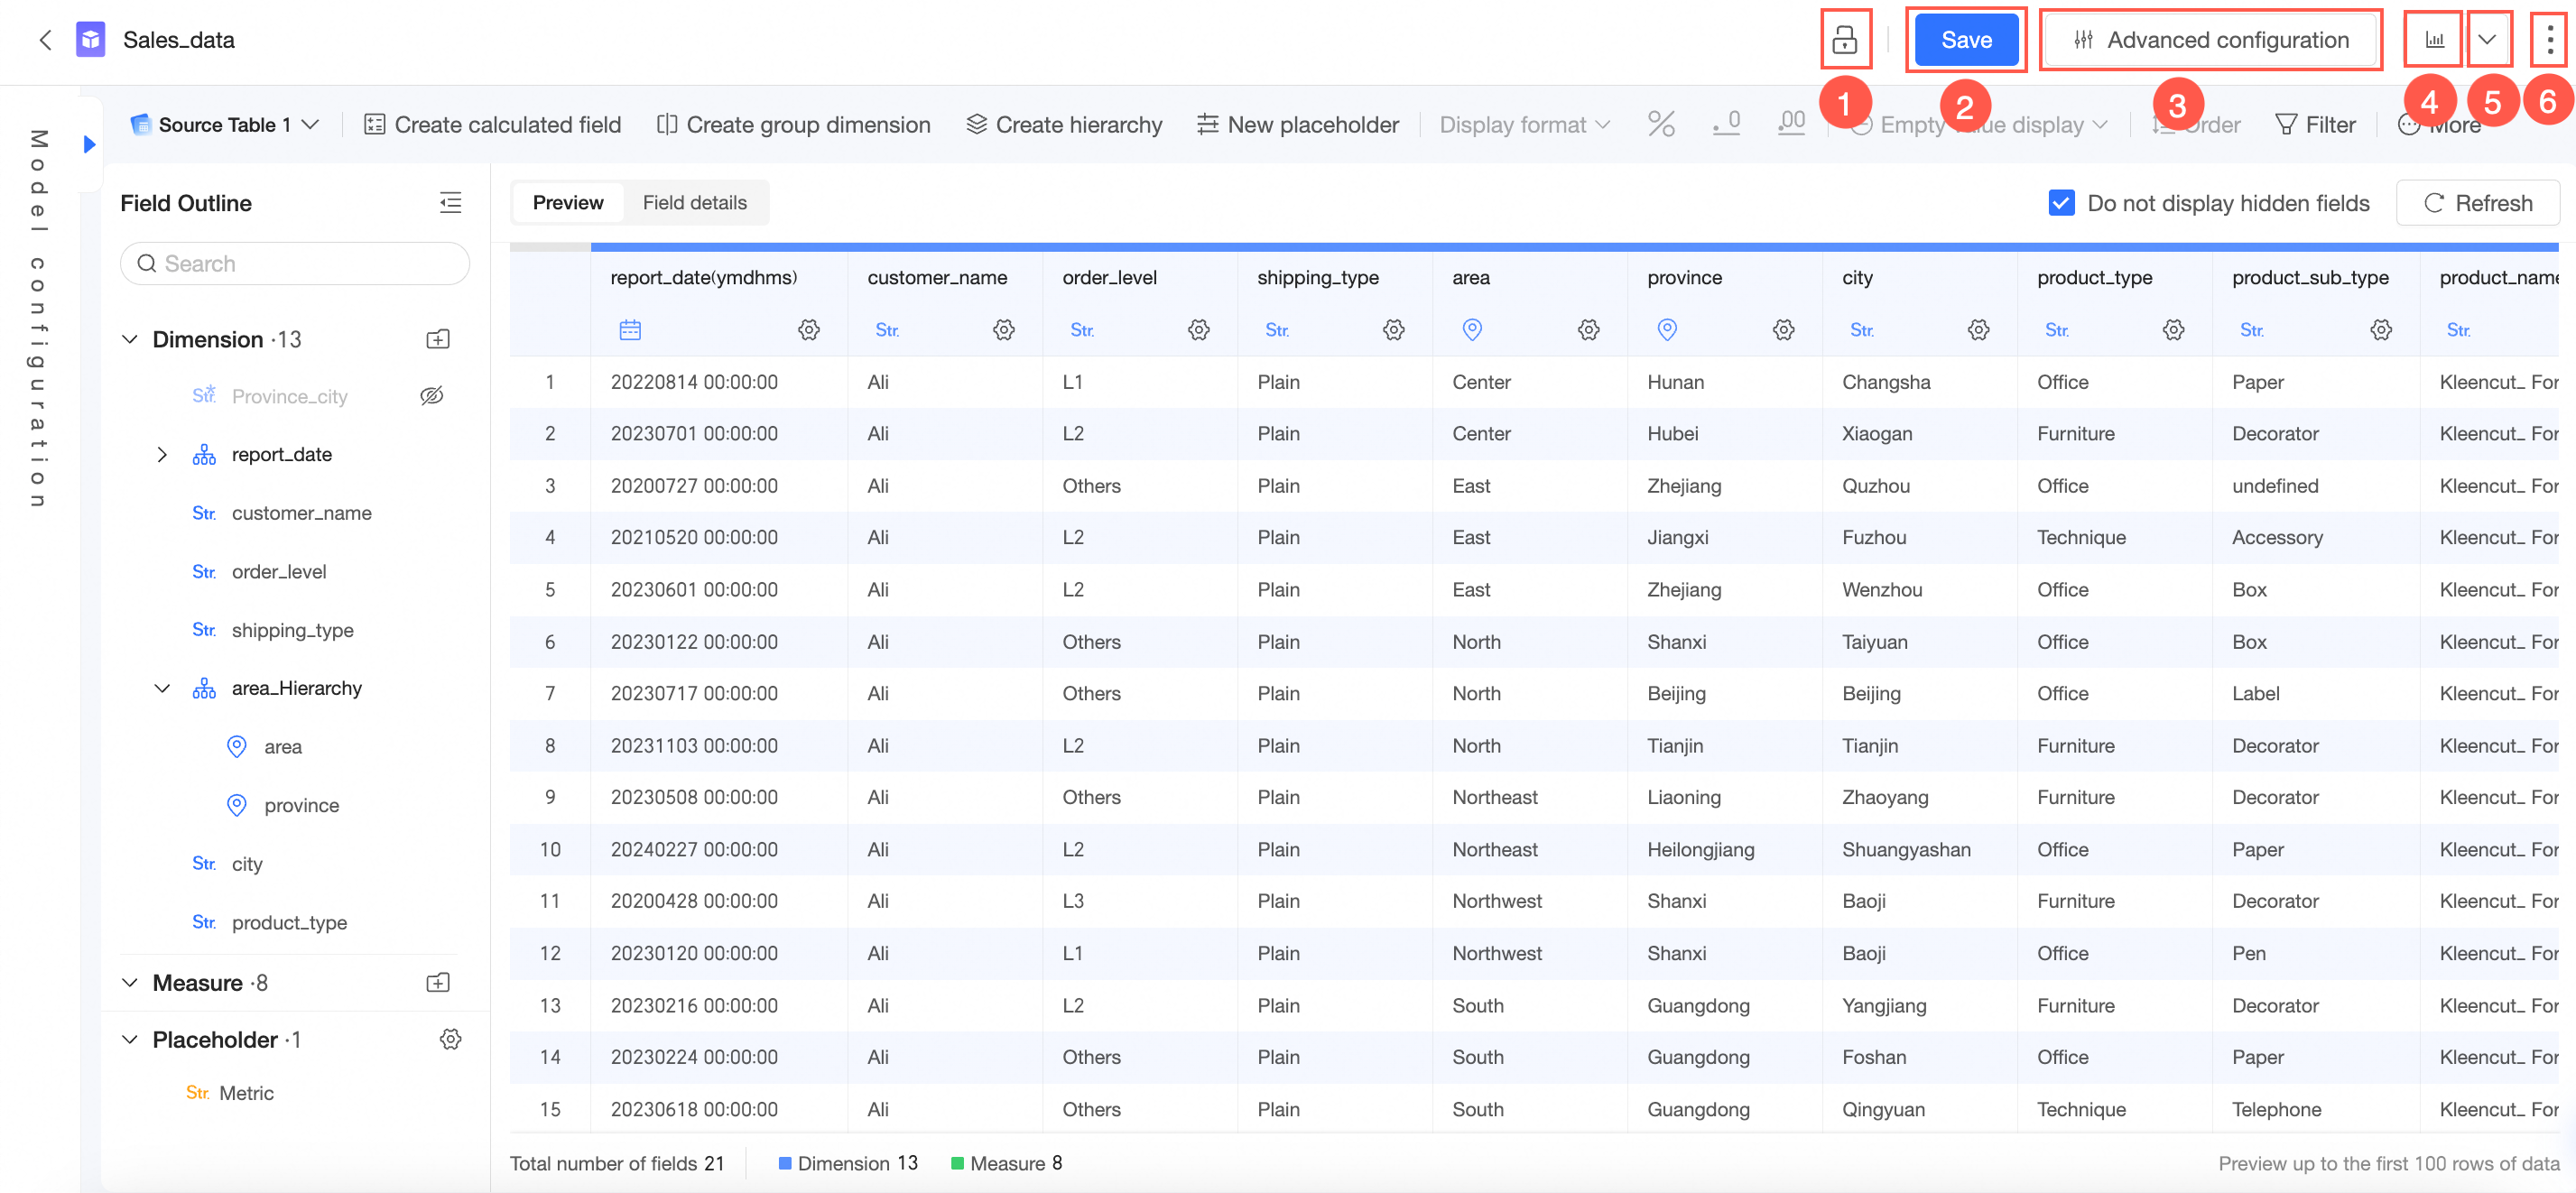
On the Quick BI home page, follow the steps shown in the following figure to navigate to the dataset edit page.

On the dataset edit page, the top toolbar contains the following buttons.
You can edit the dataset when the
 icon is displayed.
If the
 icon is displayed, click the icon to unlock the dataset before you can edit it.
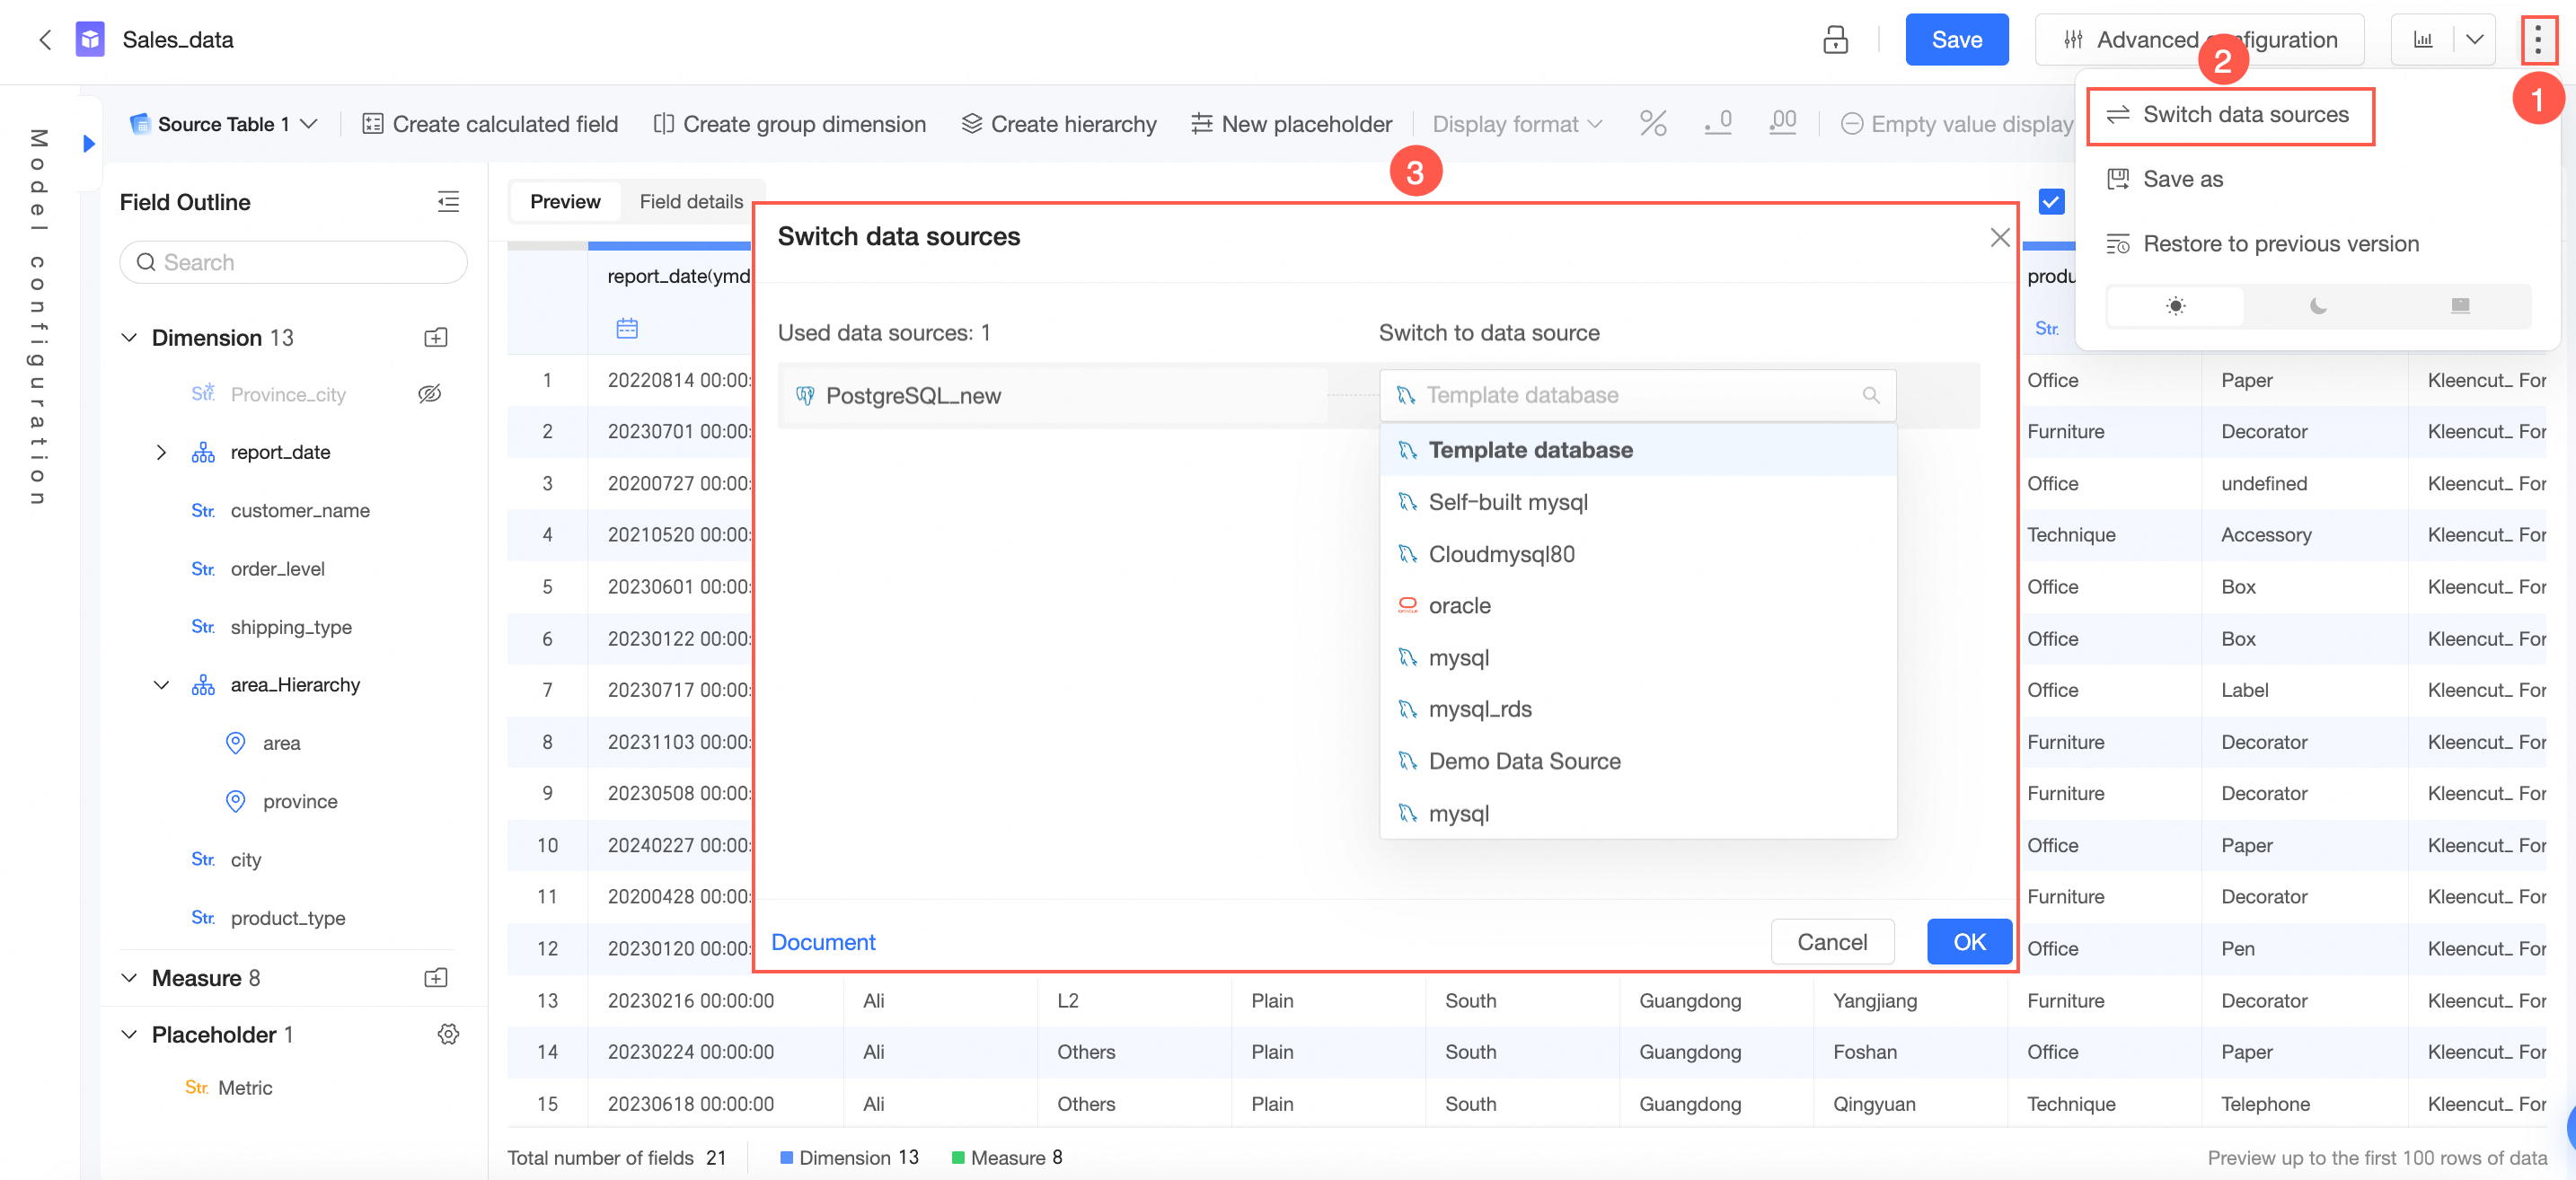
Switch Data Source
You can change the data source for the dataset.
ImportantChanging the data source will cause unsaved content to be lost. Save the dataset first. Also, because syntax support varies among data sources, check whether the calculated fields are correct after the change.
Save As
Saves the dataset with a new name and location.

Restore Historical Version
In the Restore Historical Version dialog box, the list on the left contains historical versions of the current dataset that comply with the retention policy, sorted in reverse chronological order. You can click to view the details of each version, find the specific version you want to restore, select it, and then restore it.
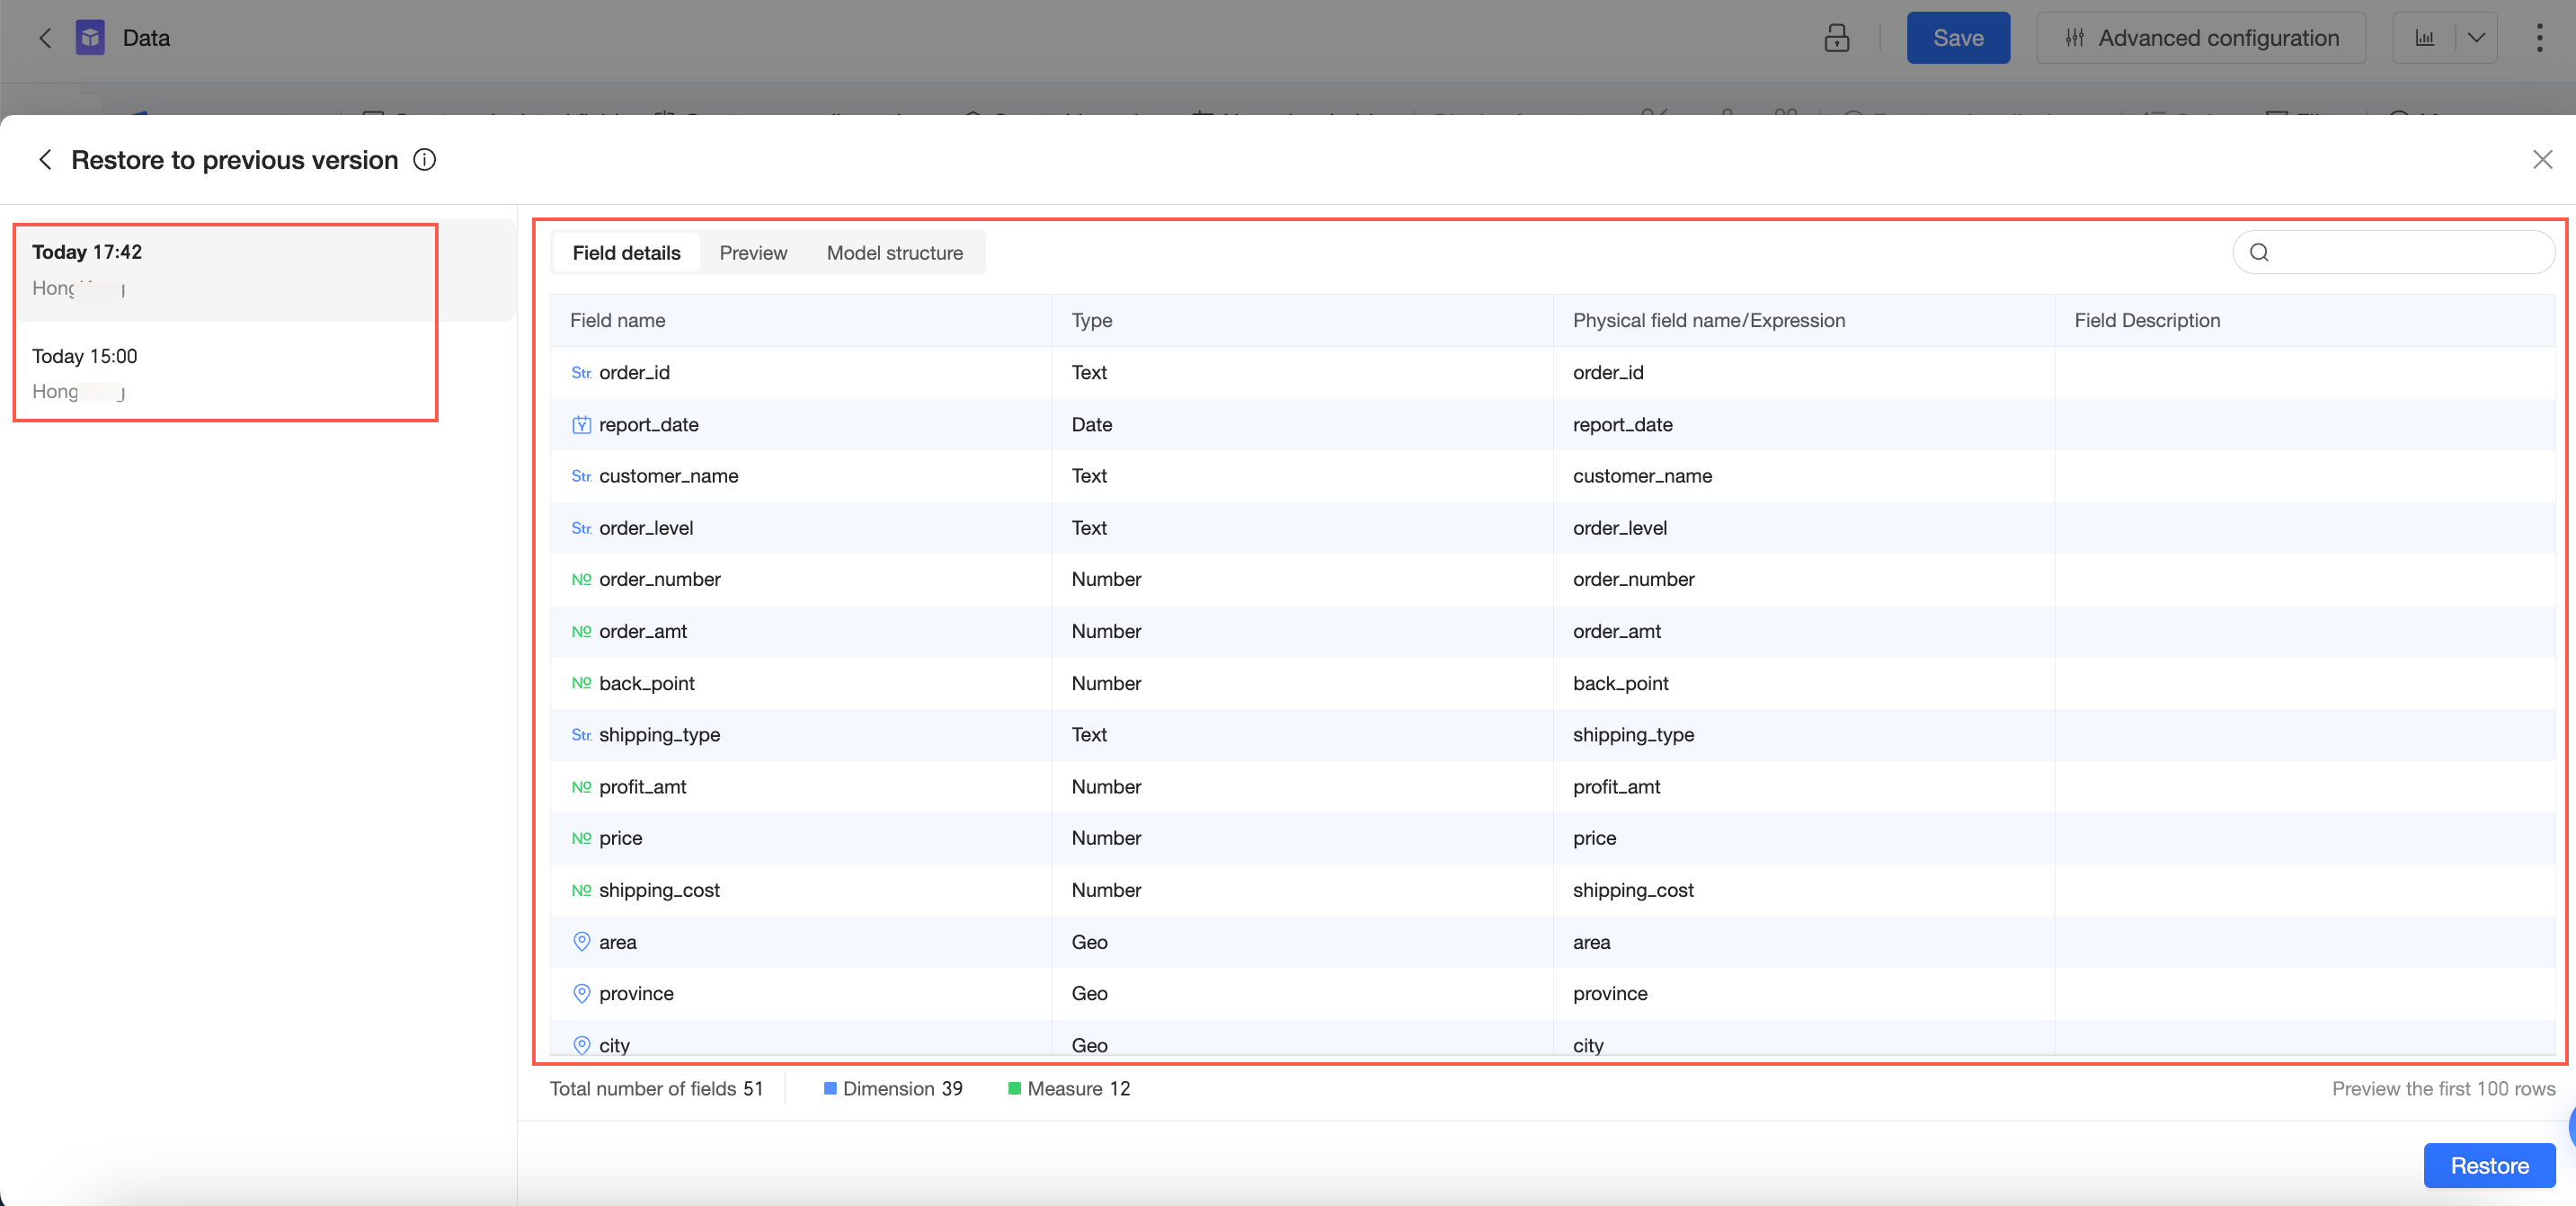 Note
NoteA maximum of 15 saved versions from the last 3 months are retained.
If some fields are deleted or modified after you restore a historical version, errors may occur in upstream charts. Proceed with caution.
Switch Theme
Light mode
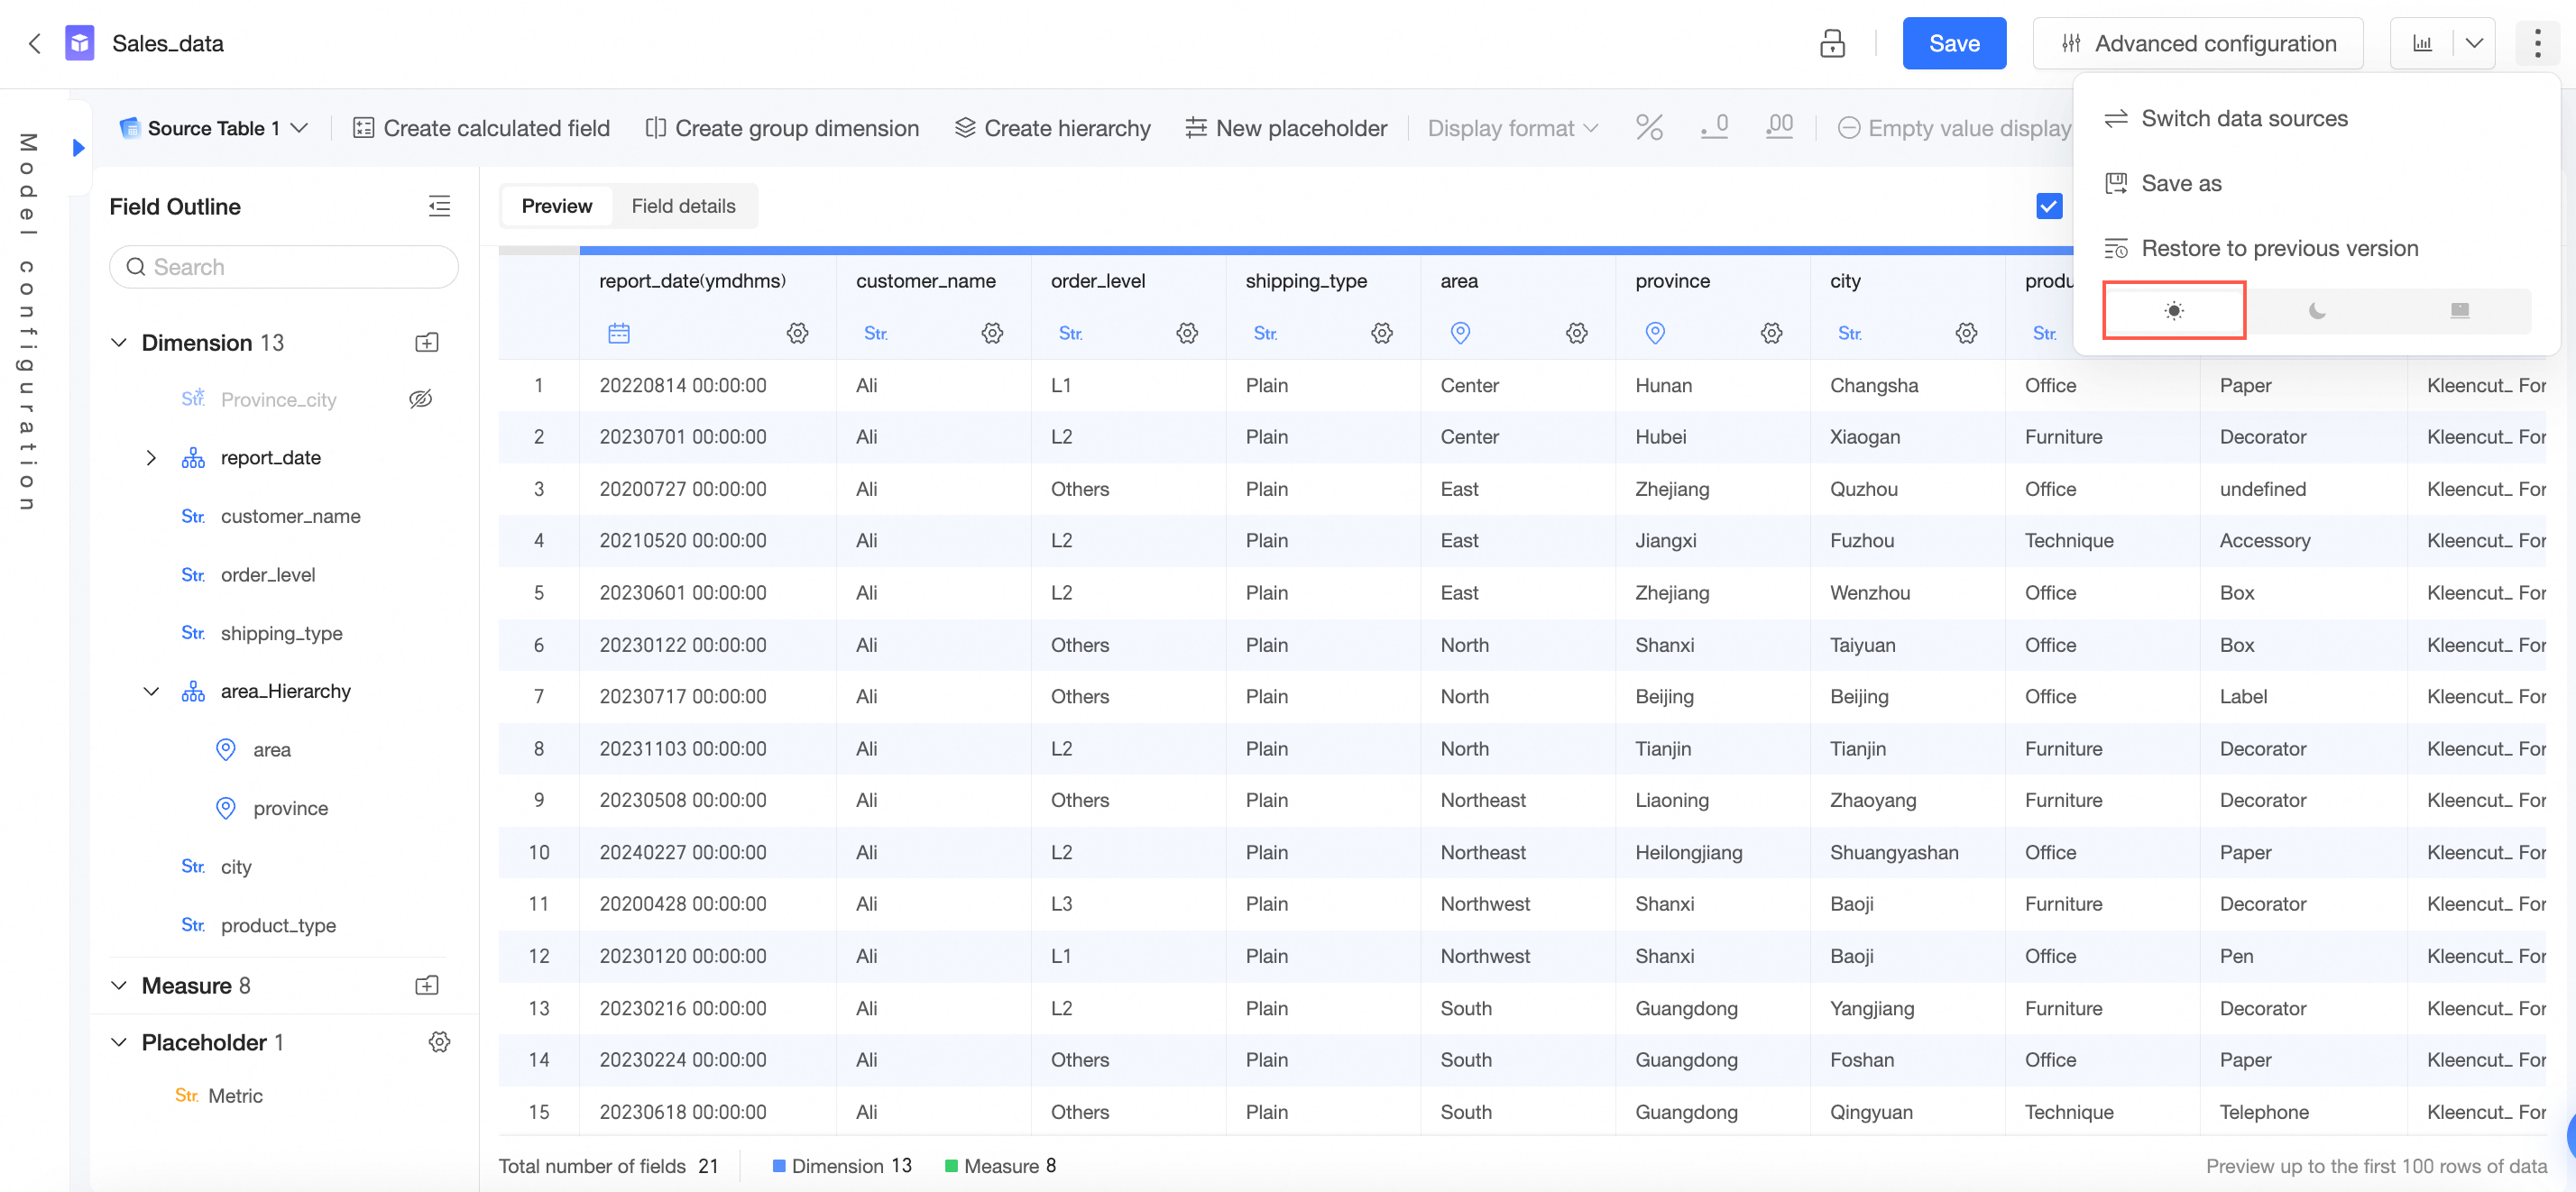
Dark mode
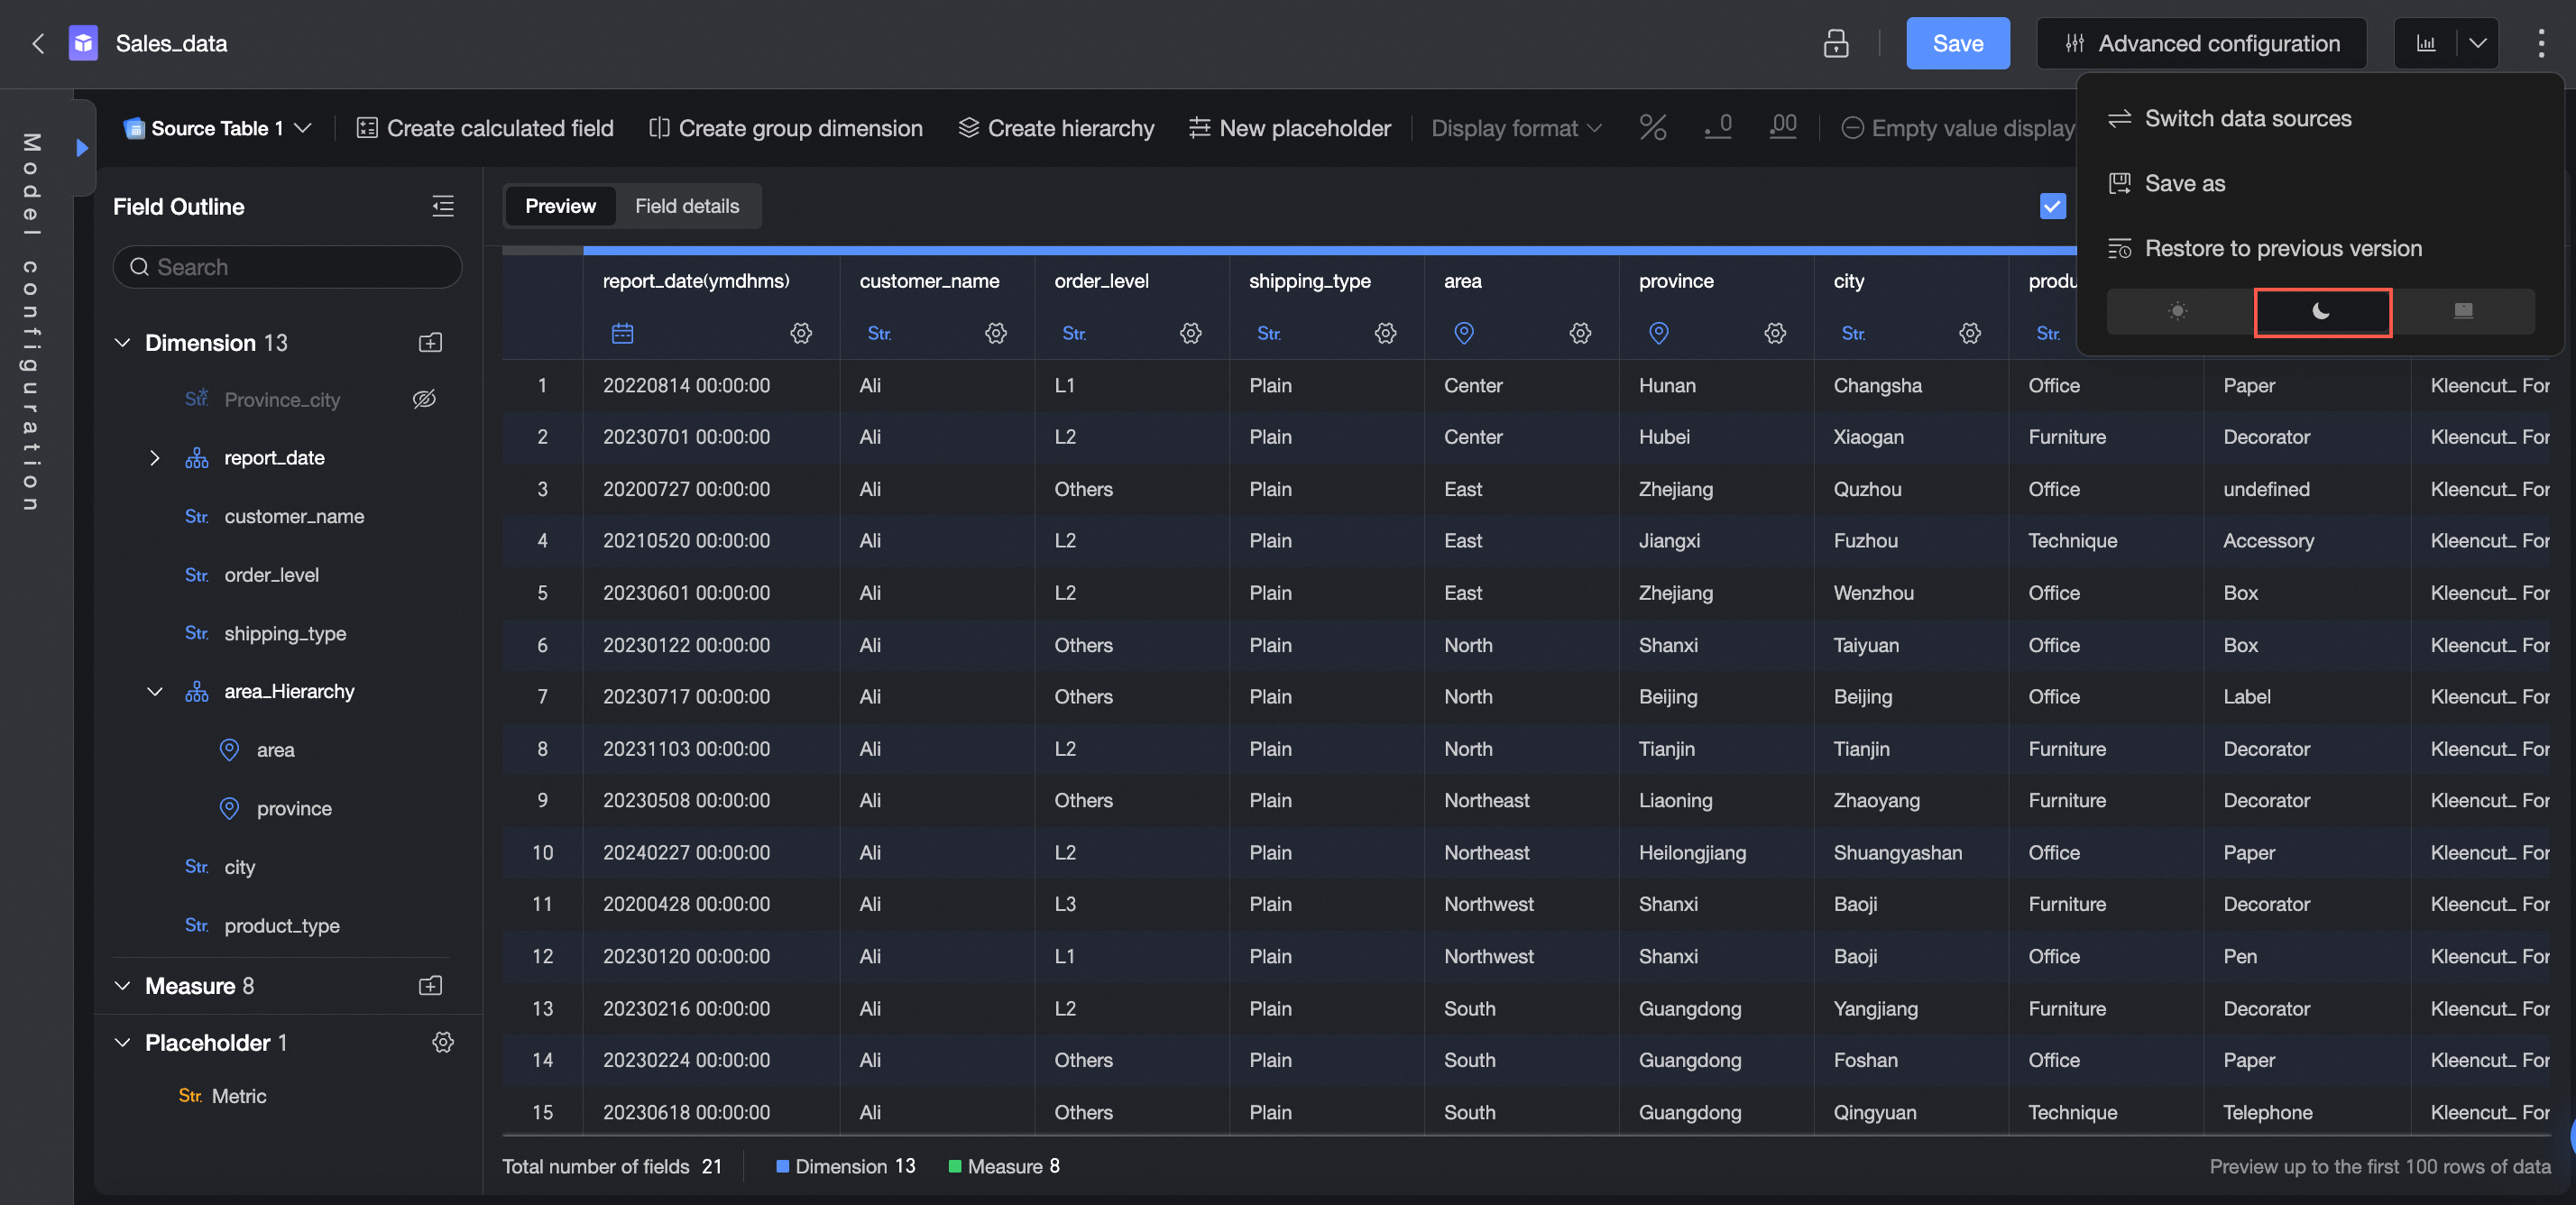
Follow organization configuration
Follows the system style in the custom configuration.

Button | Description |
①Lock | Enables data protection during collaborative operations. Note This button appears only in group workspaces. |
②Save | Saves the current dataset. Note A dataset name can be up to 100 characters in length. If the name exceeds the limit, it is truncated. |
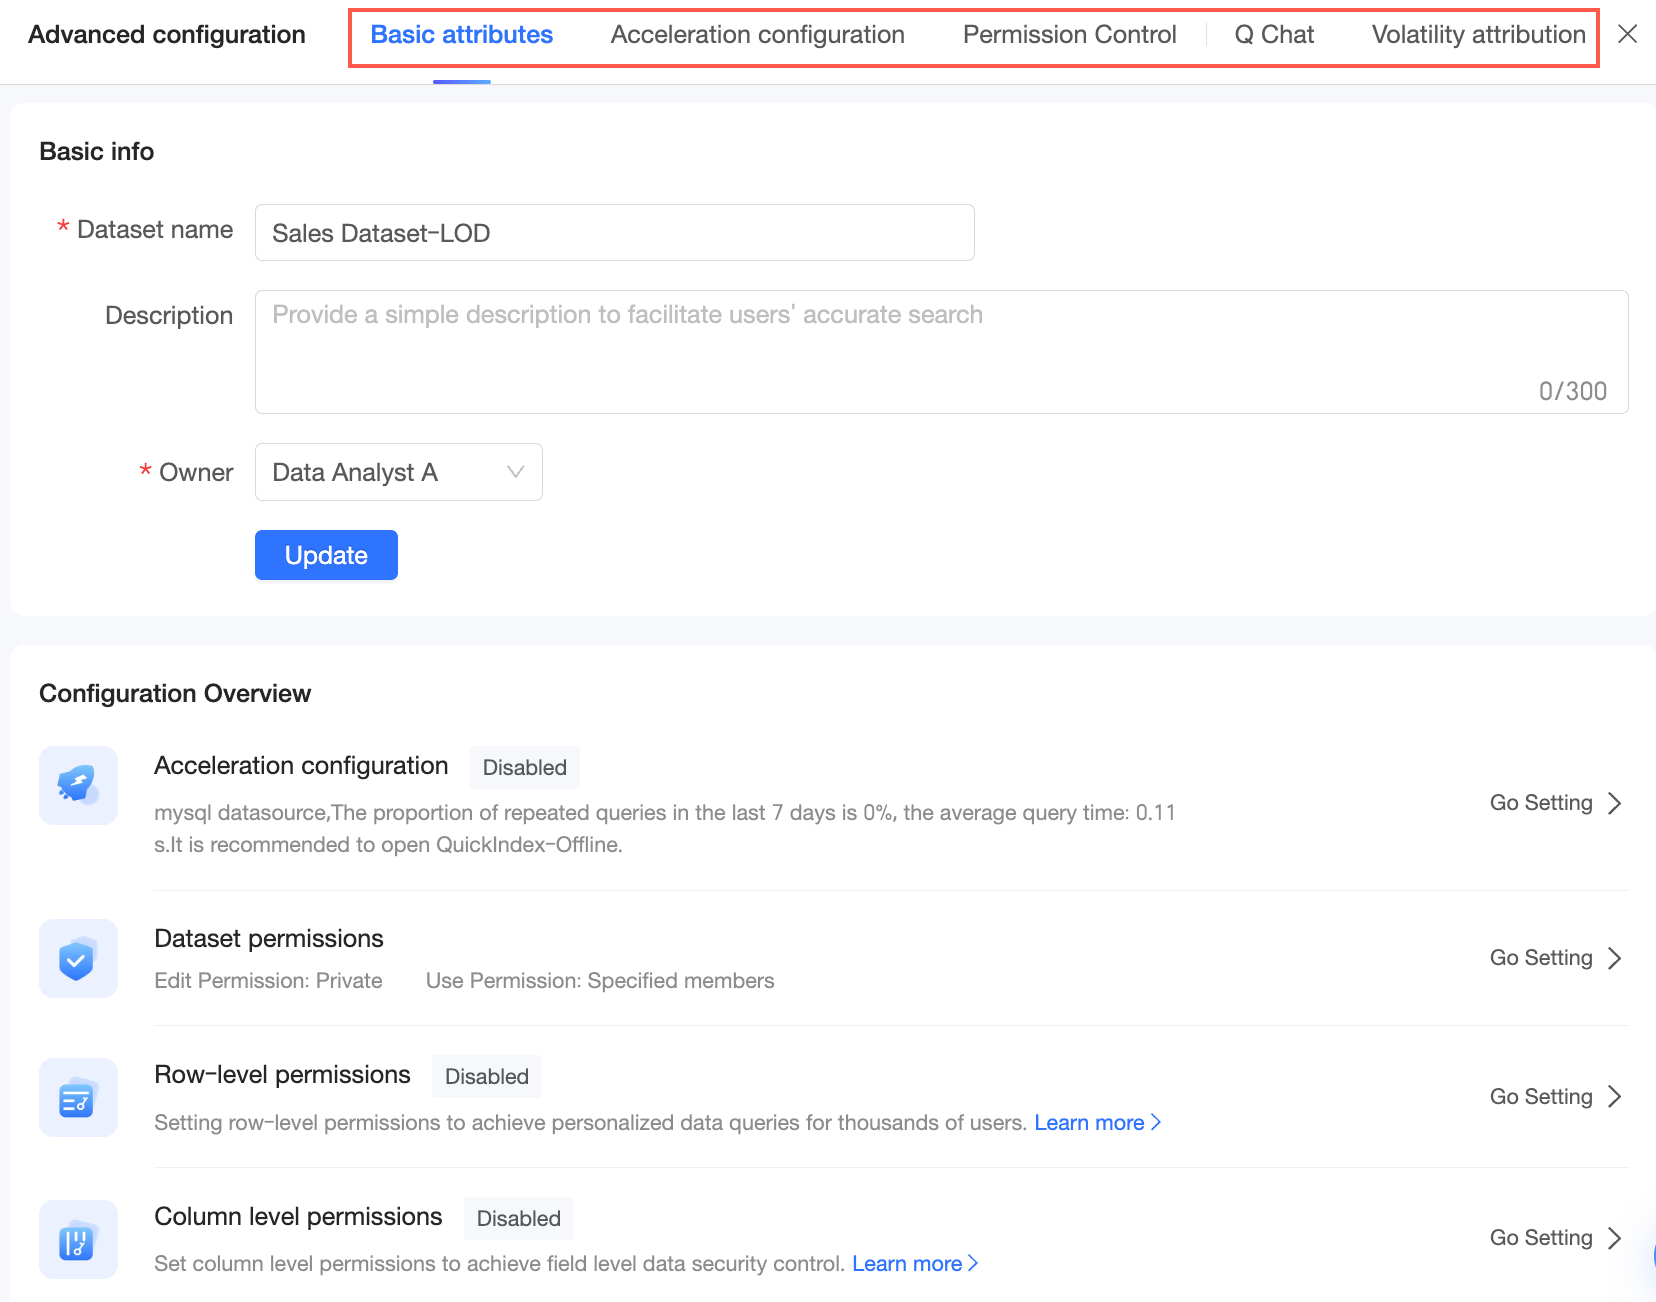
③Advanced configuration | Supports the following advanced configurations:
For more information, see Create a dataset. |
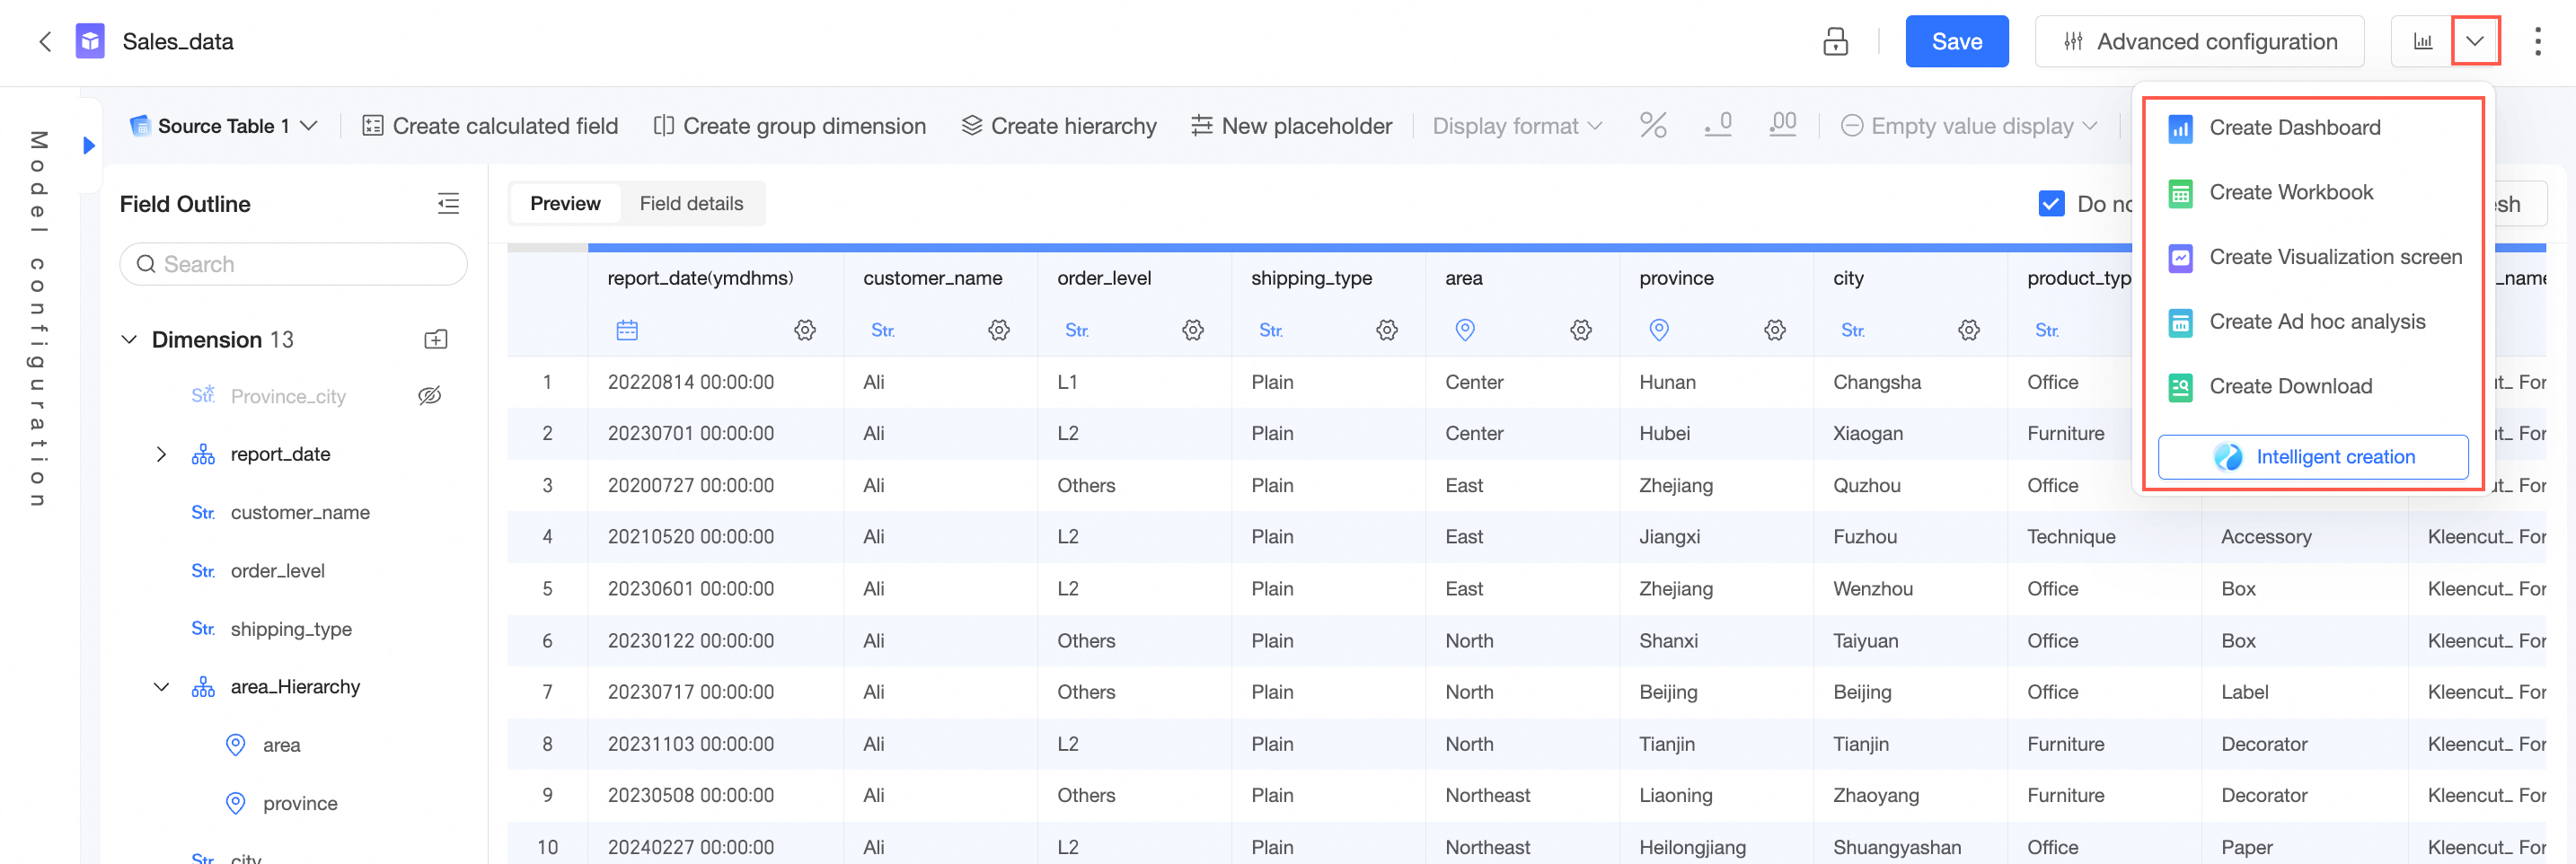
④Create Dashboard | Uses the current data source to create a dashboard. |
⑤Start Analysis | Uses the current data source to create a dashboard, create a workbook, create a data dashboard, create an ad hoc analysis, create a download, or intelligently create a dashboard.
|
⑥More | Supports Switch Data Source, Save As, and Switch Theme. |
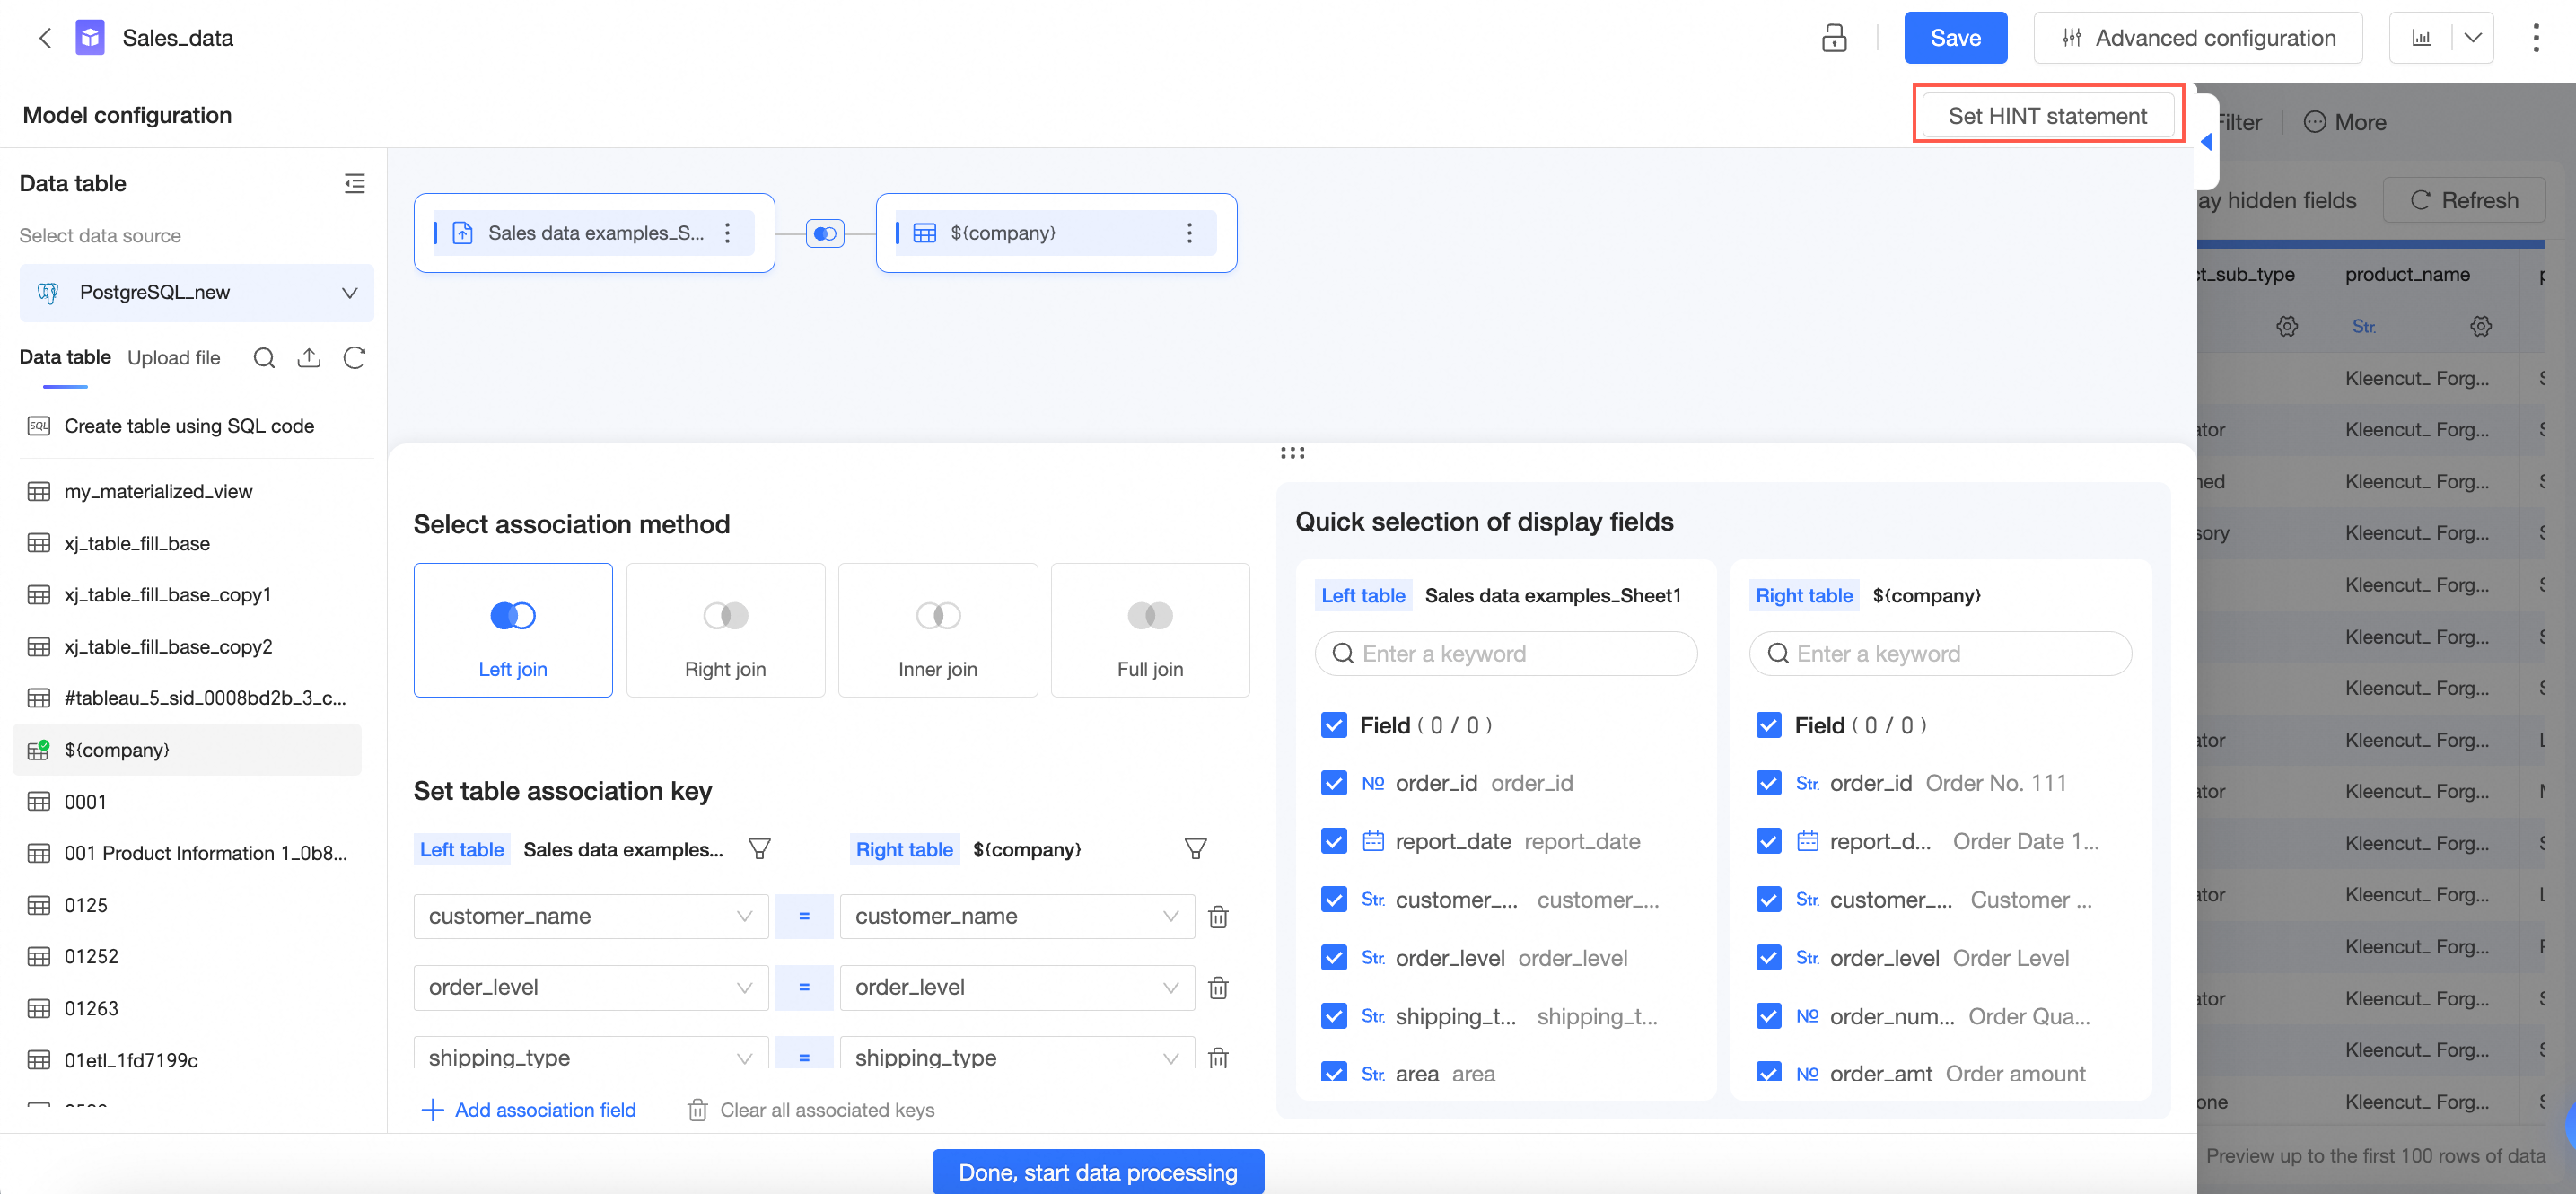
Model configuration interface toolbar
On the model configuration interface, you can set HINT statements. For more information, see HINT statement.
Data processing interface toolbar
On the data processing interface, the toolbar contains the following buttons:
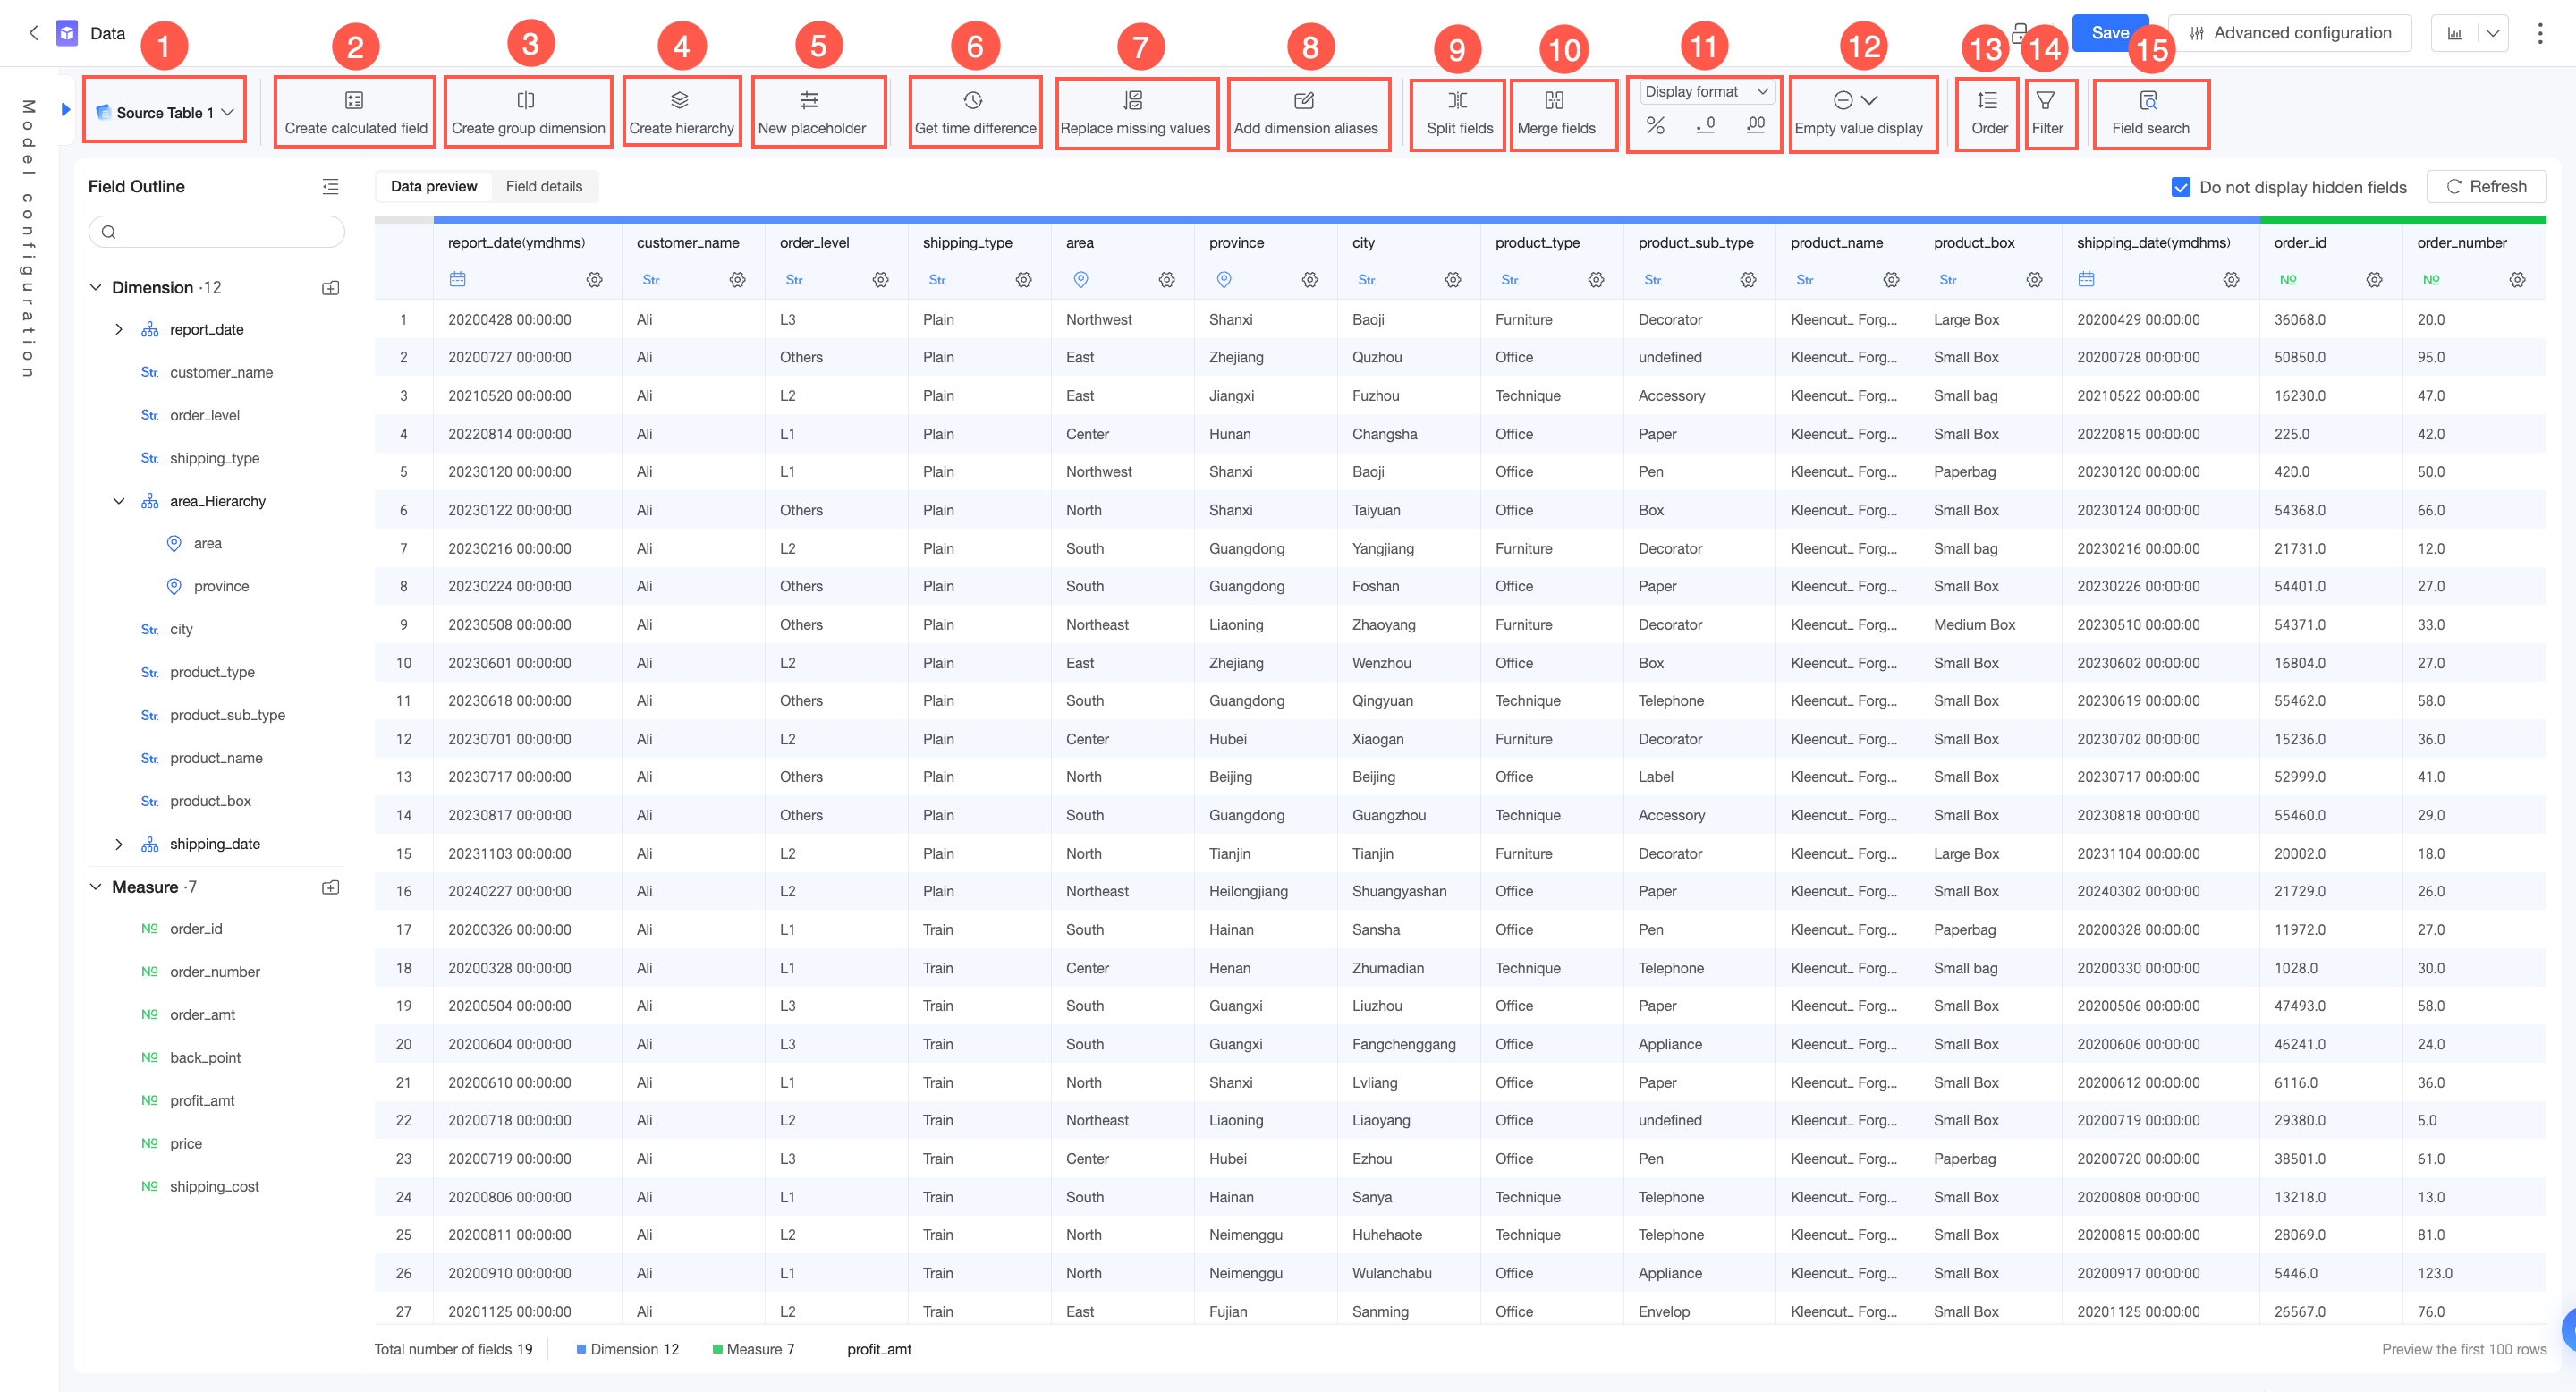
Button | Description |
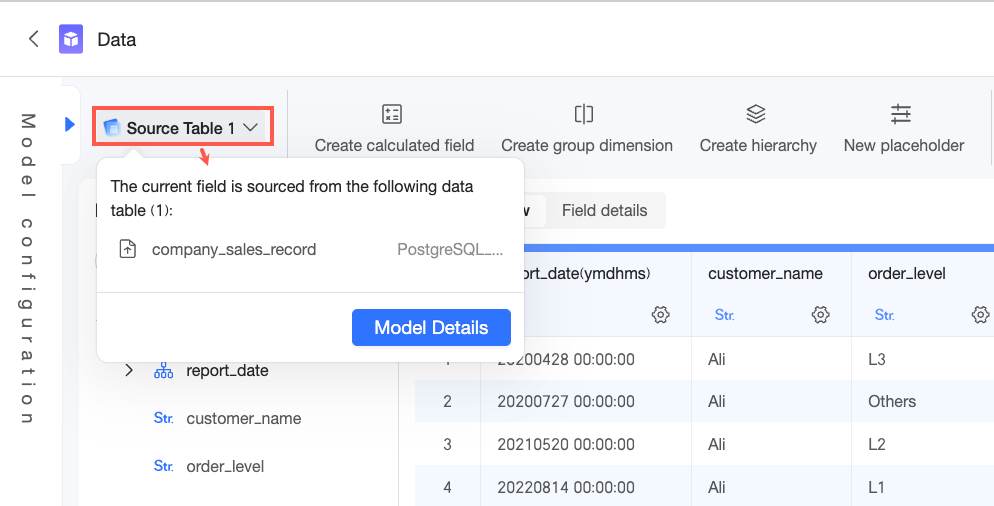
① Source Table | Displays the number of source tables. Click to expand the list and view the source table names. Click Model Details to go to the model configuration interface.
|
② Create Calculated Field | If the data you need to analyze cannot be directly obtained from a data table and must be processed from the raw data, create a calculated field. For more information, see Create Calculated Field. |
③ Create Group Dimension | Group dimensions are used to group dimension values. For example, you can group the age field into minor, youth, middle-aged, and elderly to view the vaccination status of people in each age group. For more information, see Group Dimension. |
④ Create Hierarchy | Used for drill-down analysis in charts. This allows for automatic drilling based on the hierarchical structure. For more information, see Drilling. |
⑤ Create Placeholder | Placeholders can be used to dynamically adjust the result values of calculated fields, flexibly switch between measures or analysis dimensions, and dynamically adjust auxiliary lines. For more information, see Placeholder. |
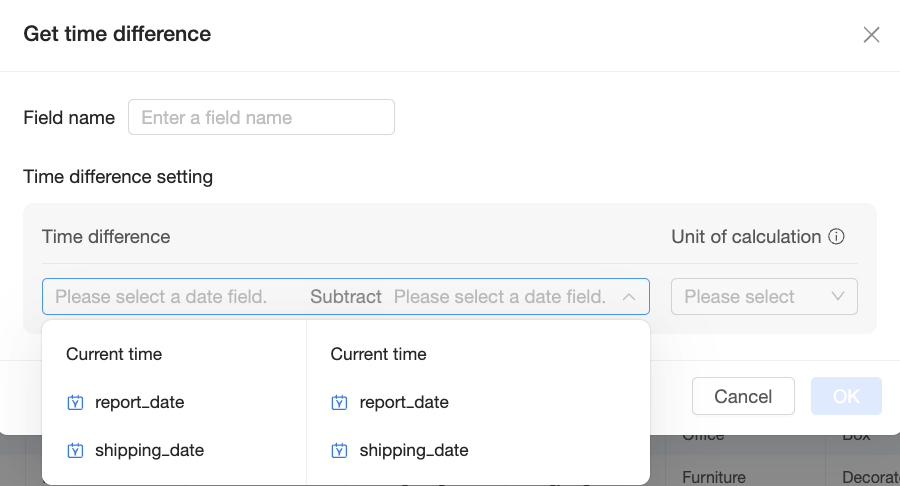
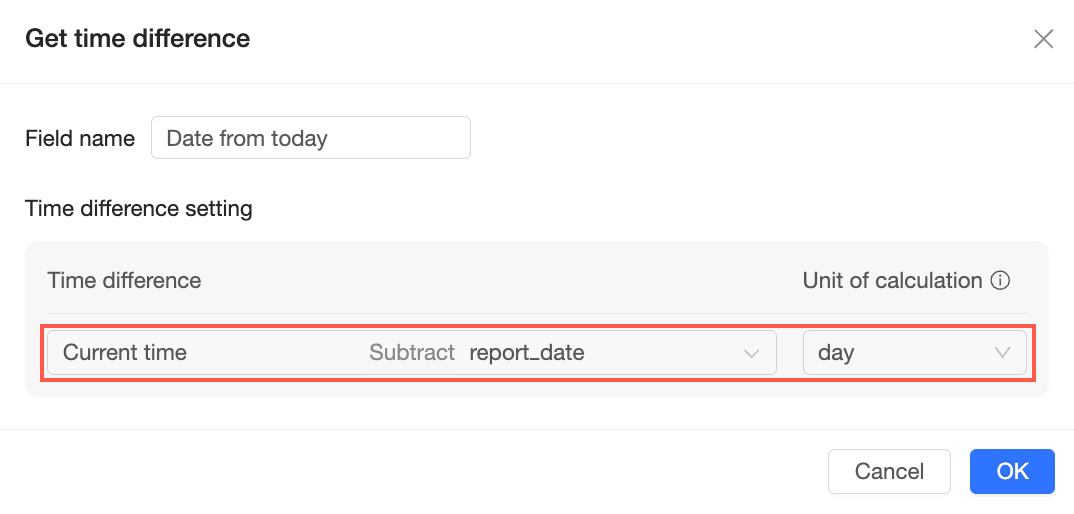
⑥ Get time difference | Calculates the time difference between two date fields. It returns a number and calculates only complete compute units. Note You cannot select calculated fields.
Enter a field name and configure the time difference settings.
For example, set the calculation to 'Current Time' minus 'Date' and set the compute unit to 'Day'. This calculates the number of days between the current date and the specified date.
For more information, see Get time difference. |
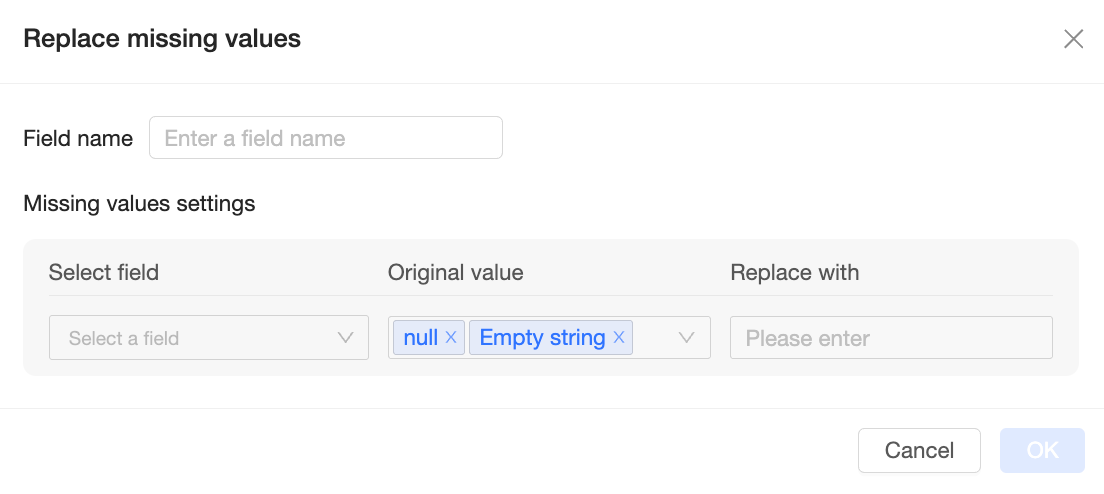
⑦ Replace missing values | Replaces null values and empty strings with other content.
Note You cannot select calculated fields. For more information, see Replace missing values. |
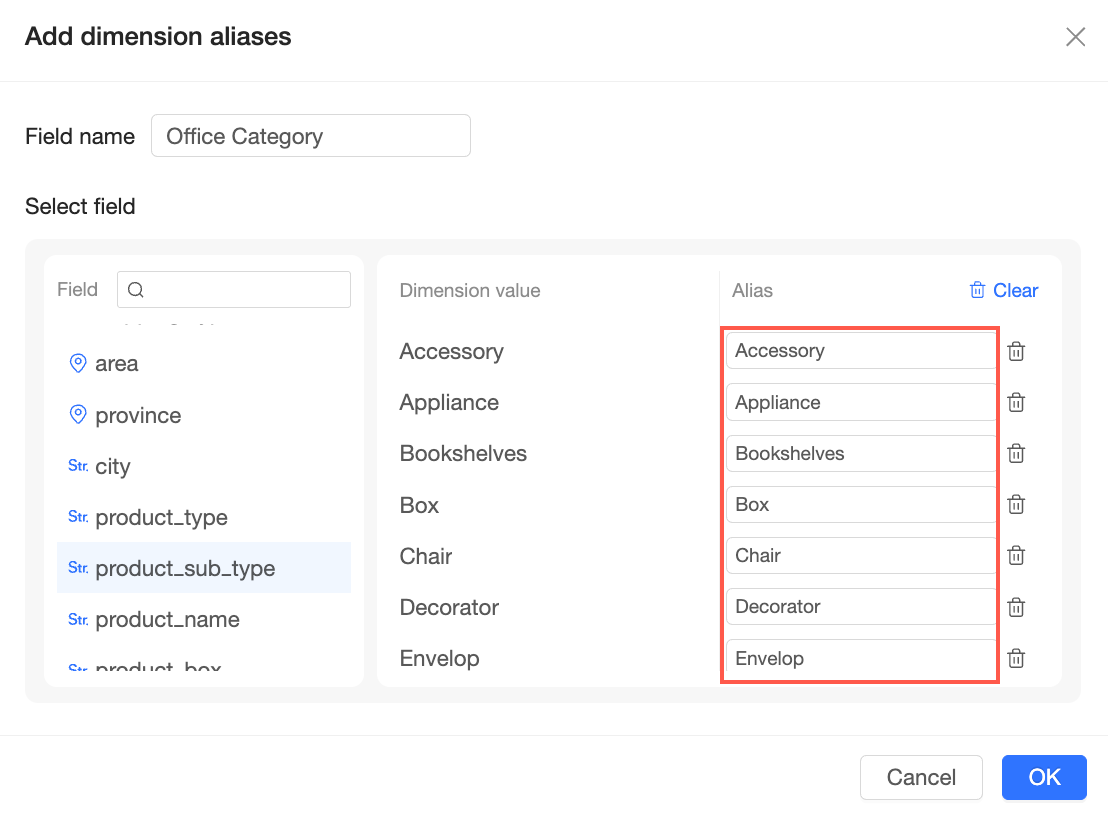
⑧ Add dimension value alias | Creates new aliases for the enumerated values of a text field.
Note
For more information, see Add Dimension Alias. |
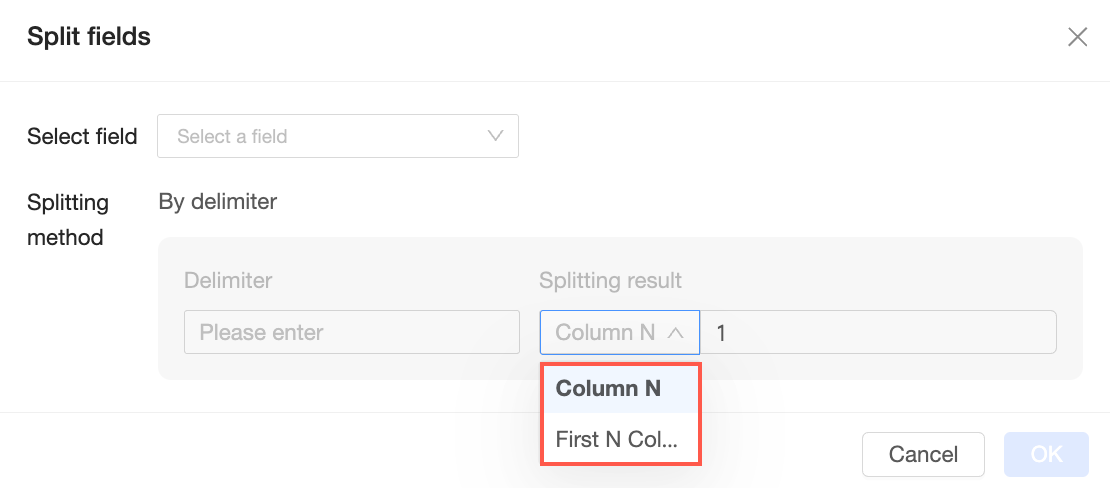
⑨ Split field | Splits a text field into multiple fields based on a separator. The split method is by separator. Enter a separator and set the split result to the Nth column or the first N columns as needed.
Note
For more information, see Split field. |
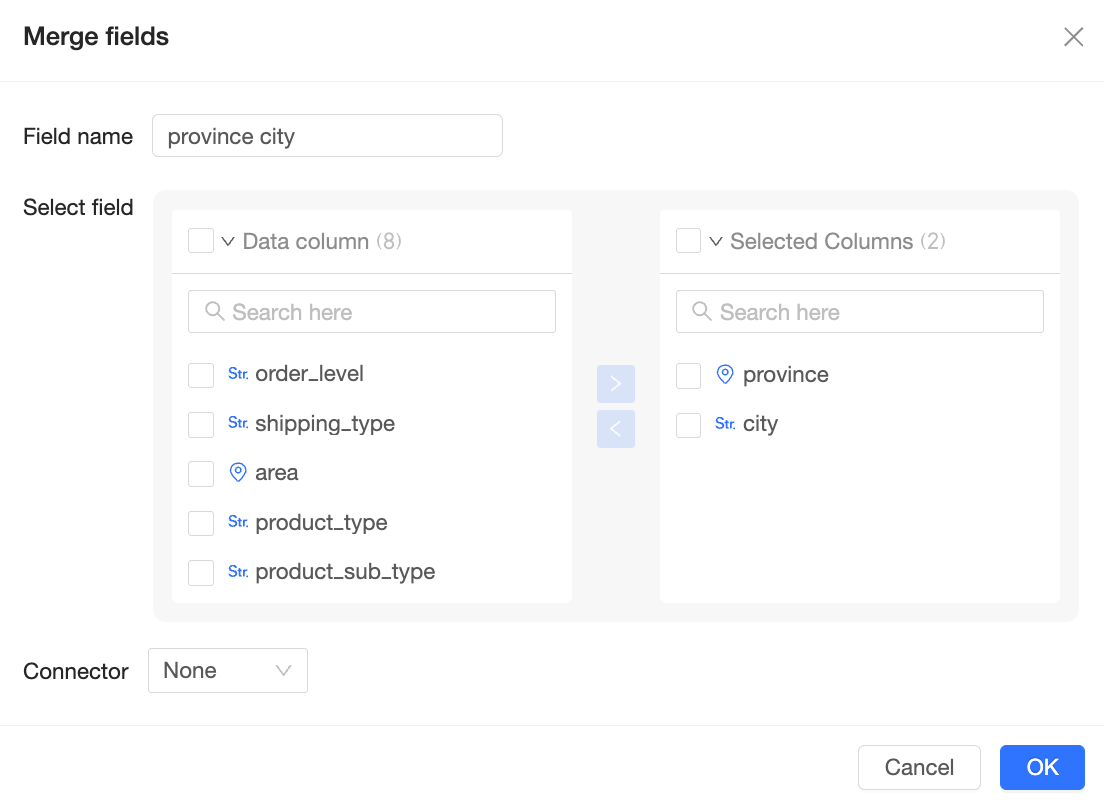
⑩ Merge fields | Merges multiple text fields into a new field using a separator.
Note
For more information, see Merge fields. |
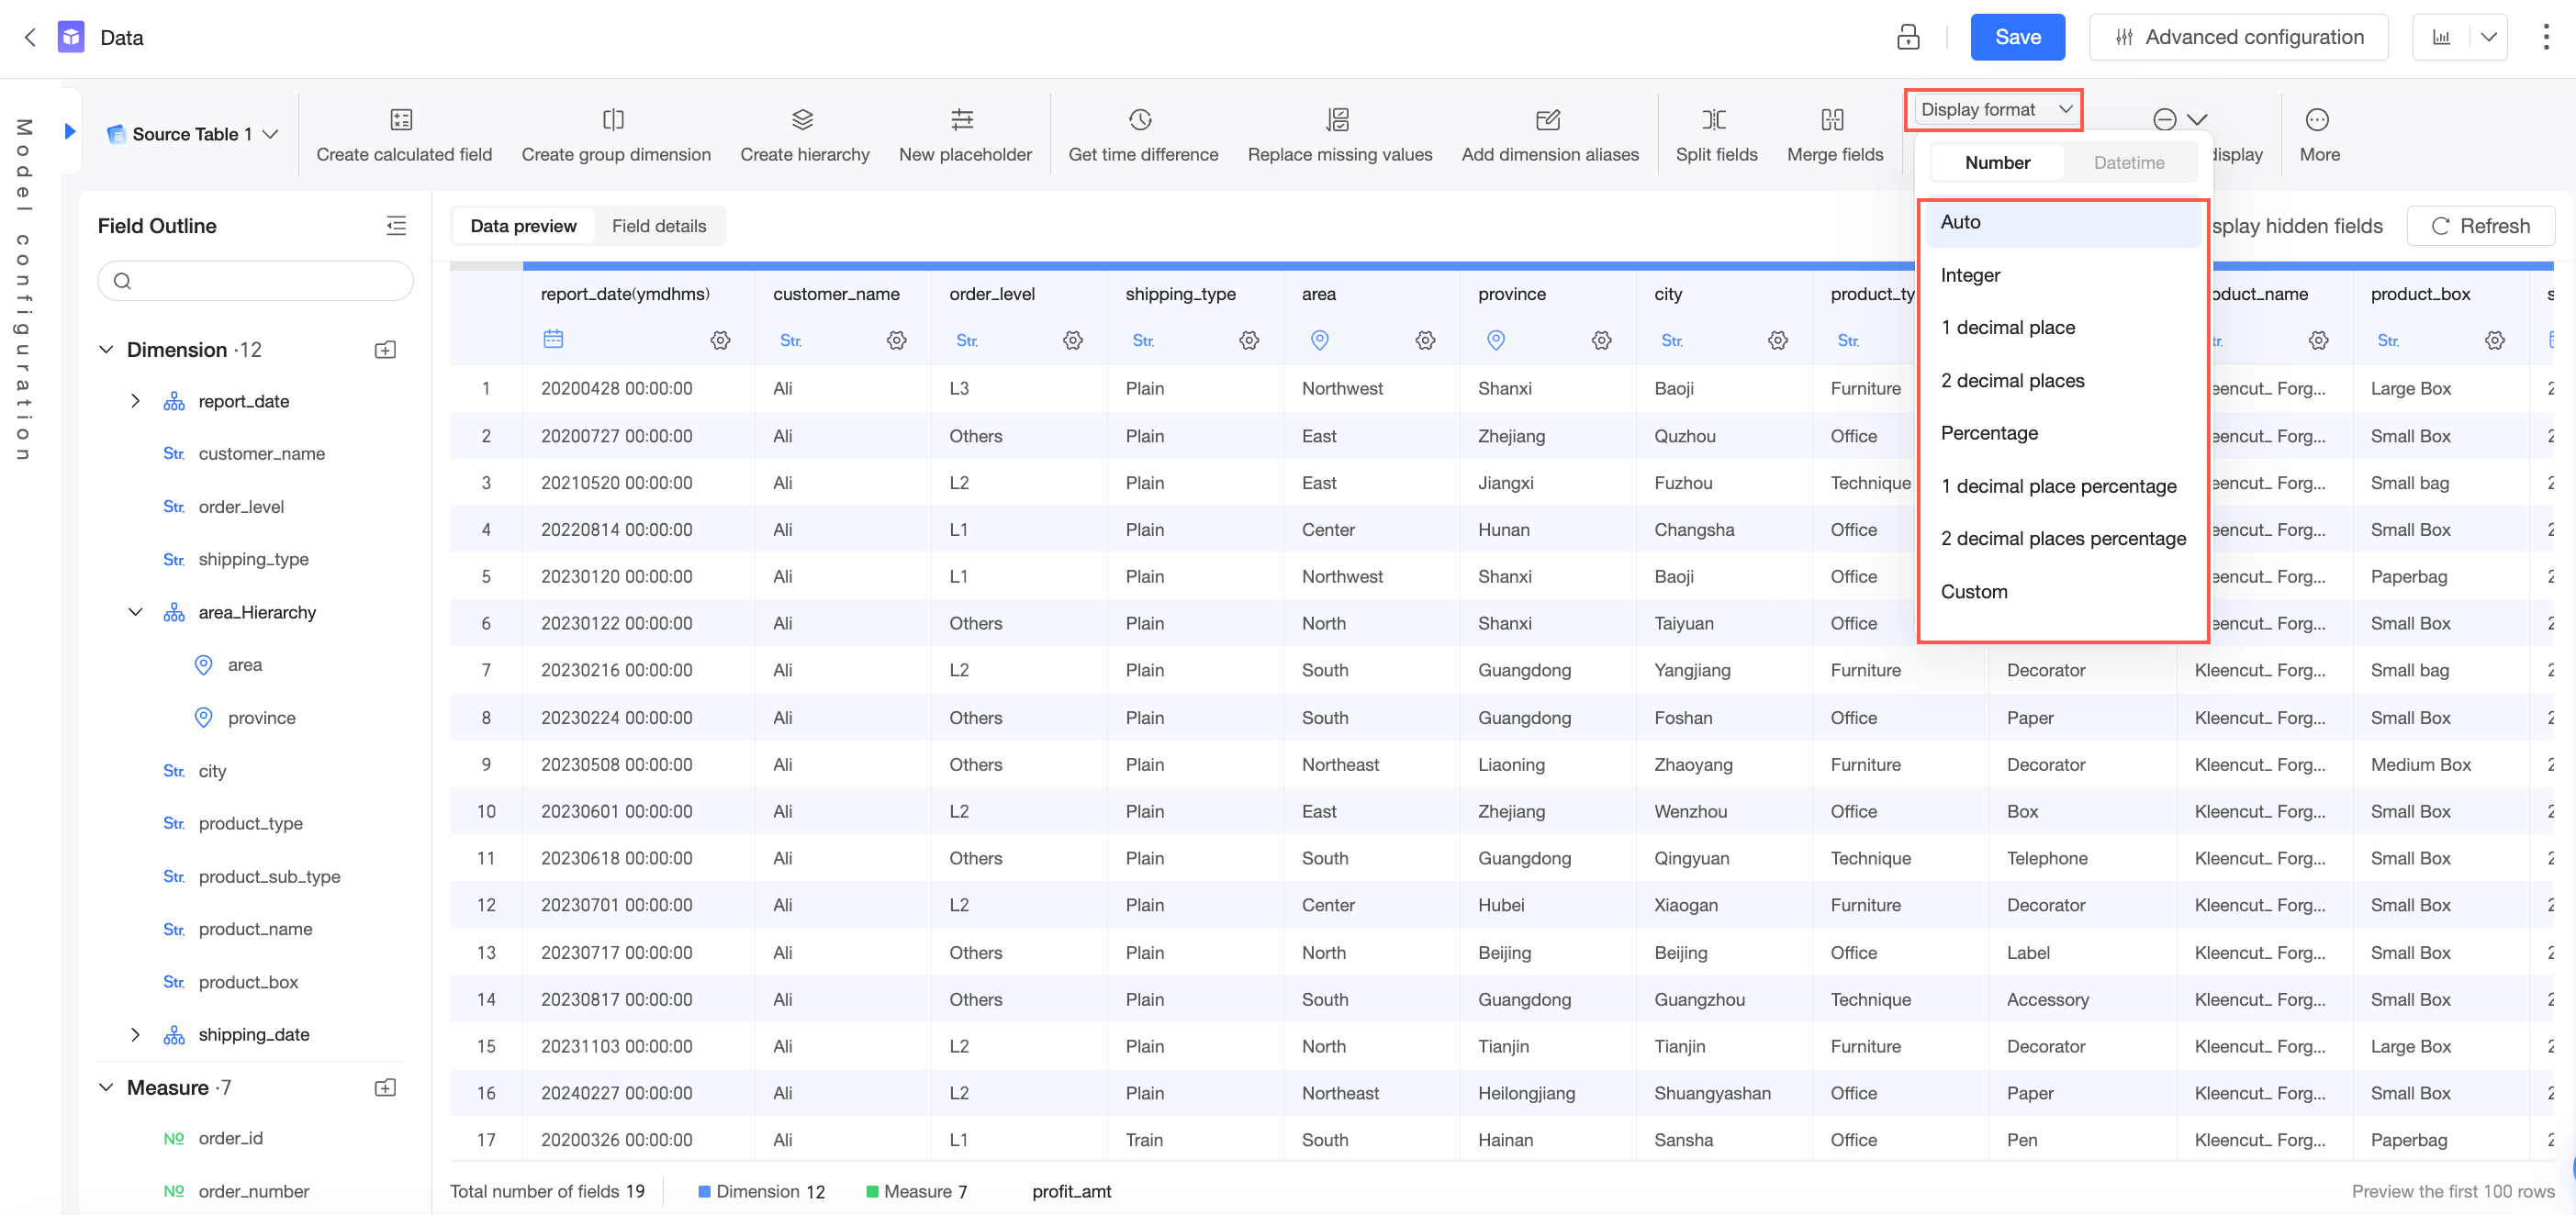
⑪ Display Format |
|
⑫ Null Value Display | When a field is selected, you can set how null values are displayed. For dimension fields, you can set the display style for null values or empty strings. For measure fields, you can set the numeric display format. For more information, see Field configuration and filtering. |
⑬ Sort | Sets the sorting method for a field. By default, no sorting is applied. You can set the sorting to ascending, descending, or custom. |
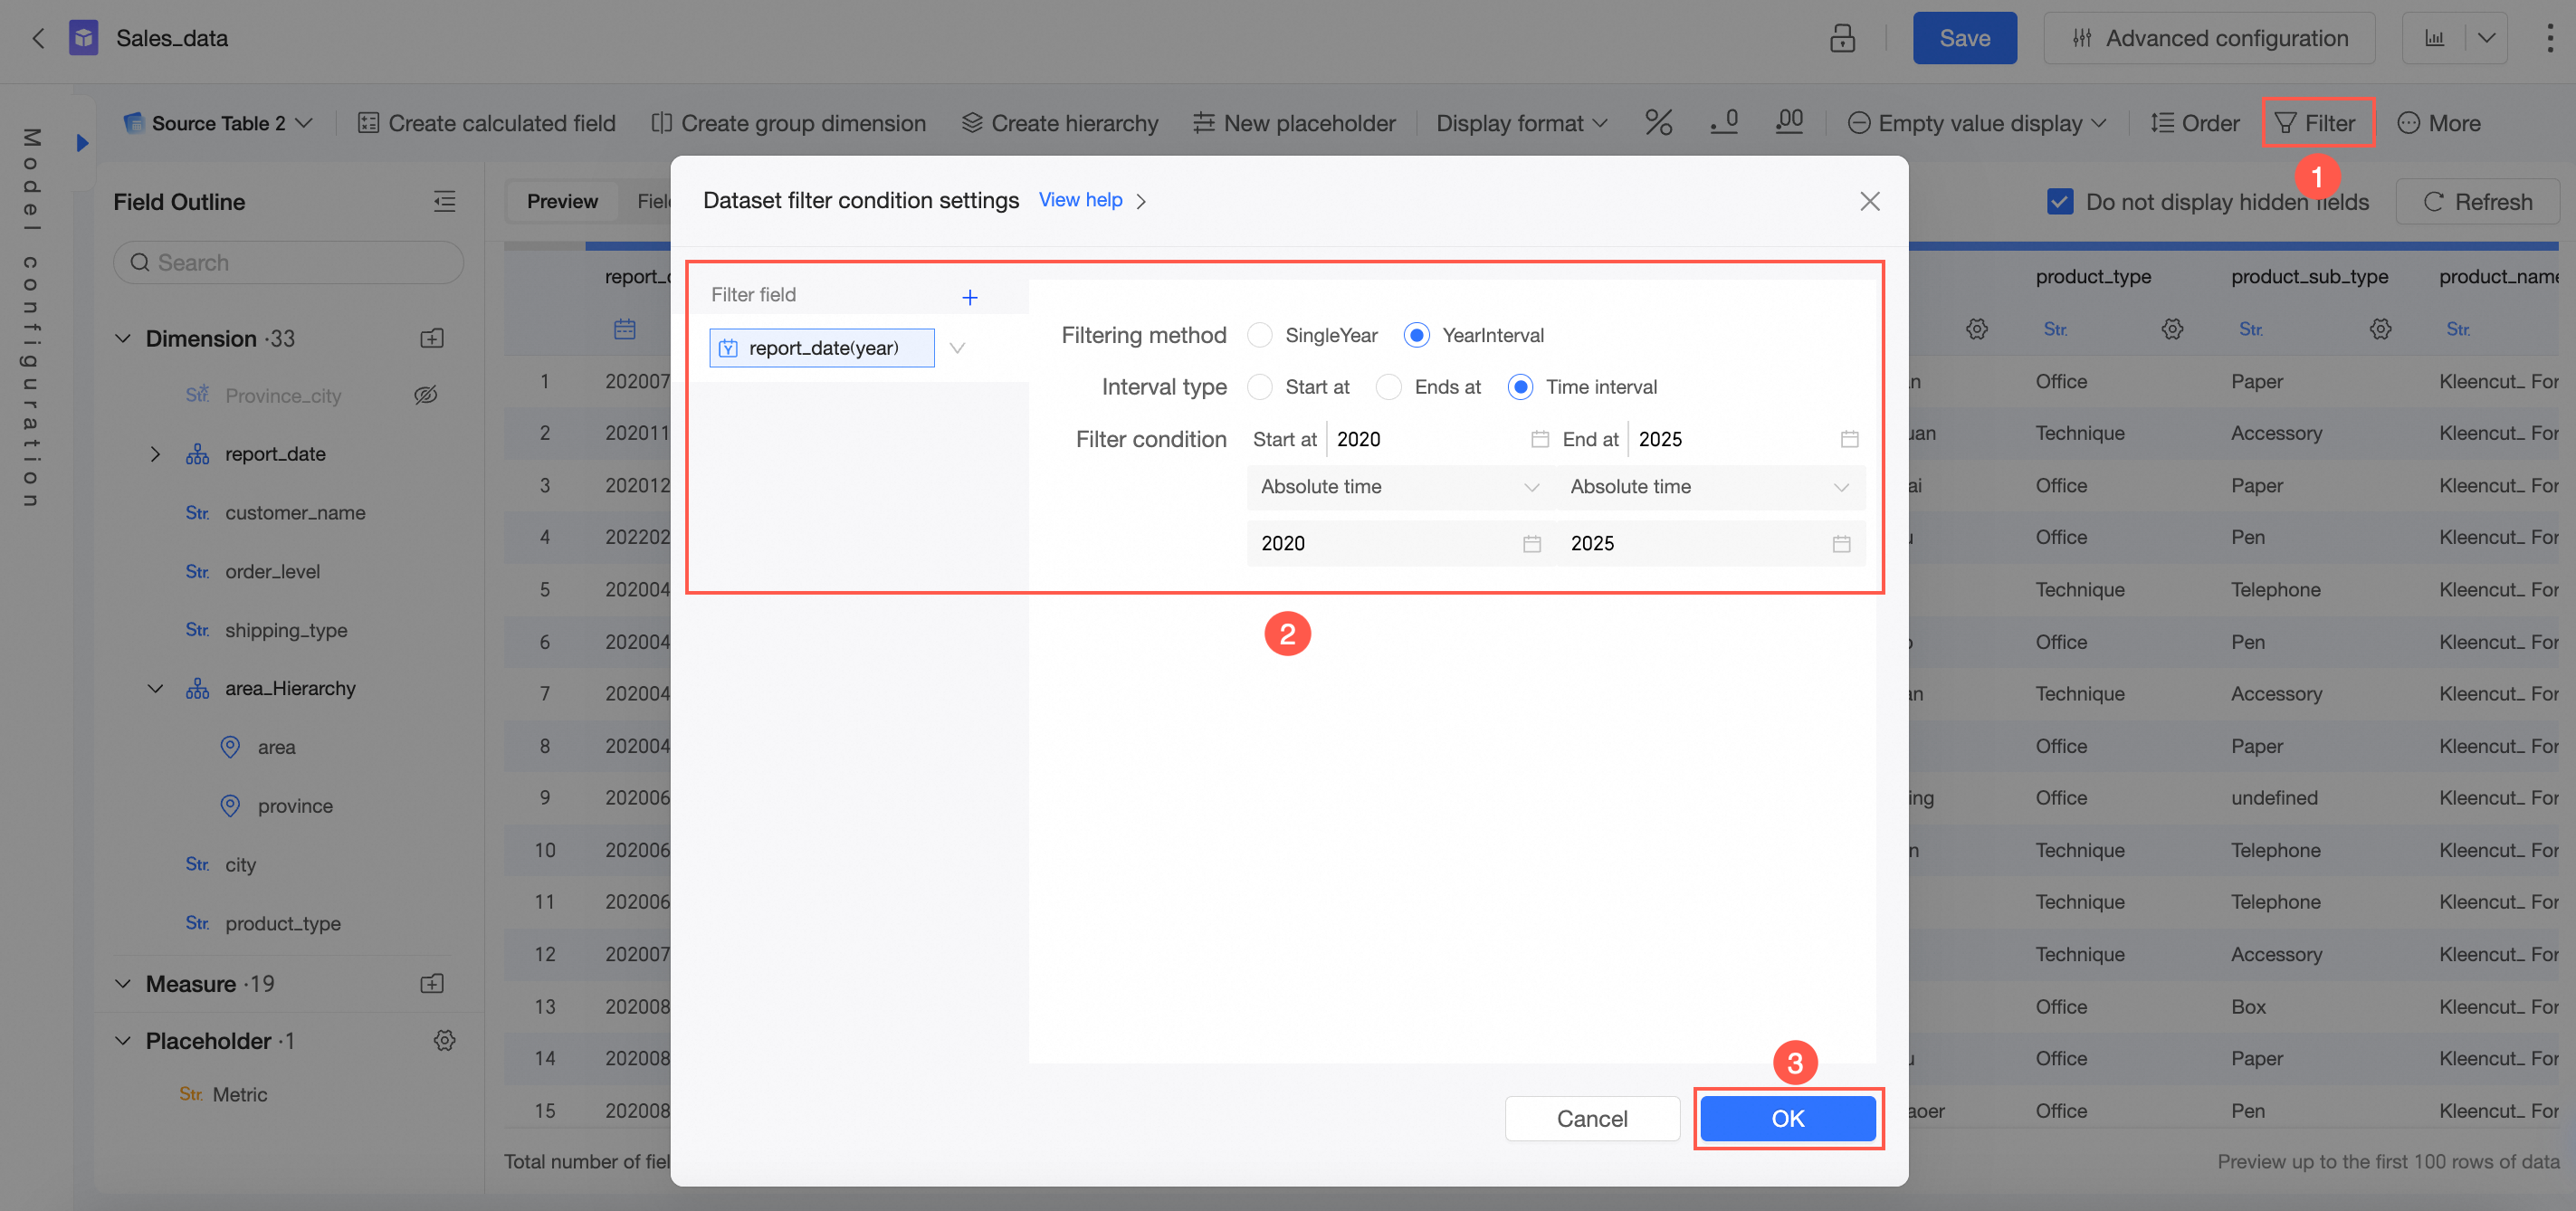
⑭ Filter | Sets filter conditions in the dataset to screen the data you want to display. |
⑮ Field Search | Click Field Search and enter keywords to quickly locate a target field.
|

If your dataset contains placeholders, you can manage them using the icon located to the right of Field Outline > Placeholder ![]() in the dataset editor. For more information, see Placeholder.
in the dataset editor. For more information, see Placeholder.

Custom SQL edit page toolbar
On the custom SQL edit page, the toolbar contains the following buttons:
Button | Description |
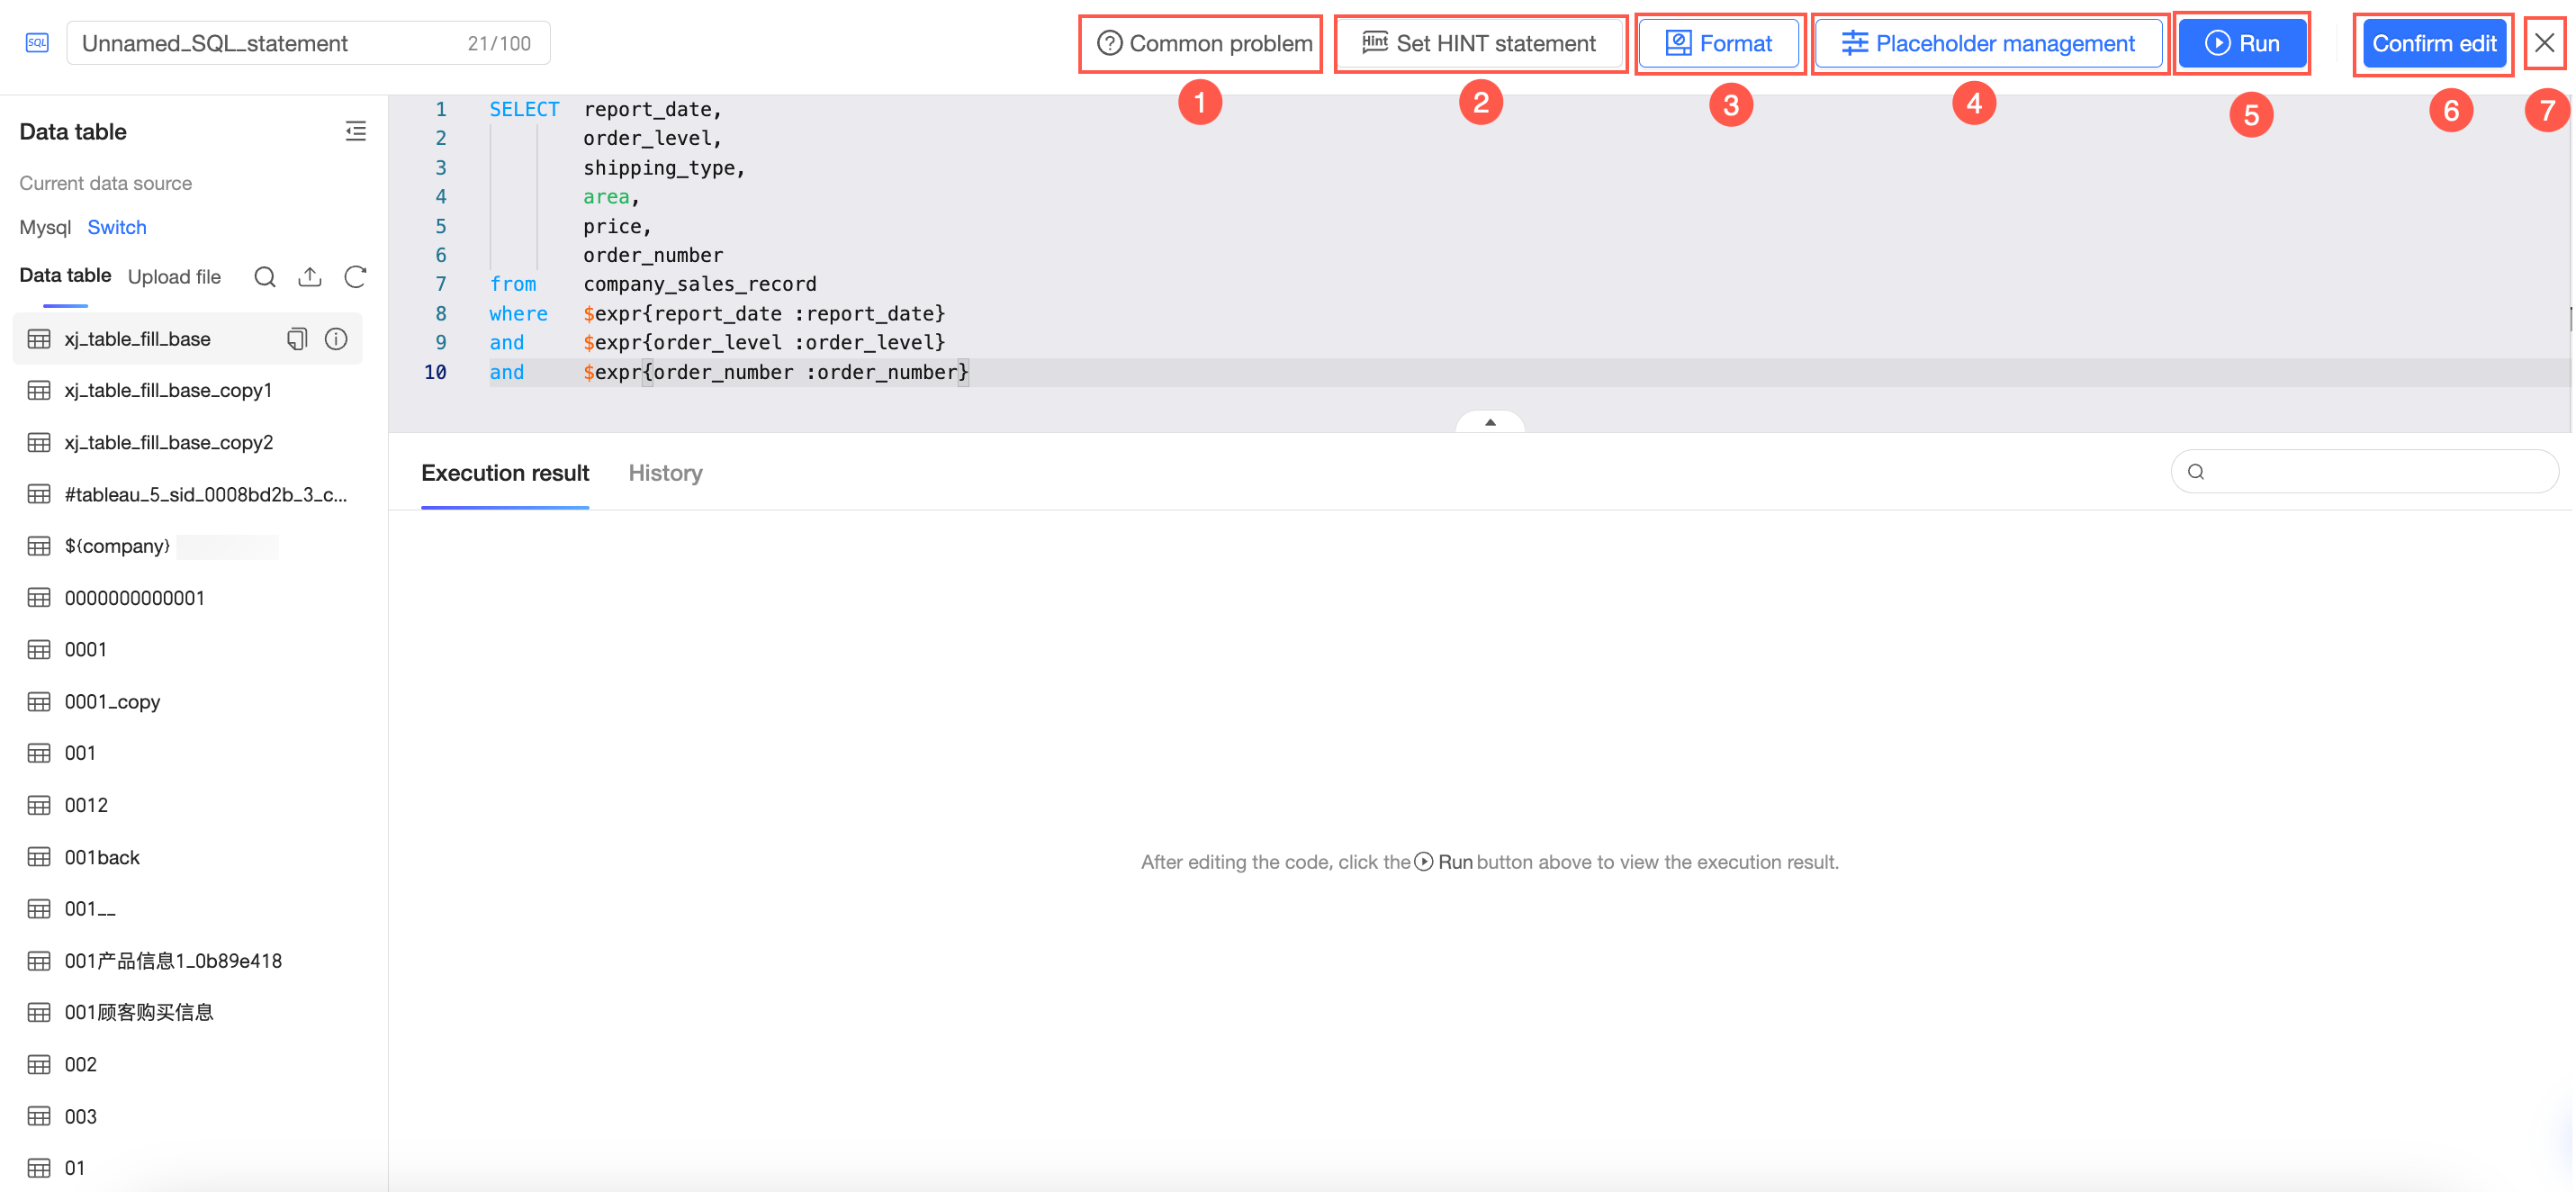
①FAQ | Lists some frequently asked questions about datasets. For more information, see Dataset FAQ. |
②Set HINT Statement | Supports custom HINT statement settings. For more information, see Create a dataset. Note Setting HINT statements is not supported when data tables are associated across sources. |
③Format | Optimizes the format of the current custom SQL to make it more visually appealing and standardized. |
④Placeholder Management | In placeholder management, you can perform operations such as setting variable names, setting variable types, querying default values, and deleting placeholders. For more information, see Placeholder. |
⑤Run | Runs the current custom SQL. |
⑥Confirm Edit | Confirms the edits to the custom SQL. |
⑦Exit | Exits the custom SQL edit page and returns to the model configuration interface. |