This topic describes how to use the data transmission service to synchronize data from OceanBase Database to a RocketMQ instance.
Background
Message Queue for Apache RocketMQ is a distributed message-oriented middleware built by Alibaba Cloud based on Apache RocketMQ. It features low latency, high concurrency, and high reliability. The data synchronization capability of the data transmission service enables you to synchronize data between an OceanBase Database physical table and a RocketMQ data source in real time, extending the message processing capability.
For more information about the data formats for the two types of tenants, see Data formats used when data is transmitted from OceanBase Database to a message queue system.
Prerequisites
The data transmission service has the privilege to access cloud resources. For more information, see Grant privileges to roles for data transmission.
You have created a dedicated database user for data synchronization in the source OceanBase database and granted corresponding privileges to the user. For more information, see Create a database user.
Limitations
The data transmission service supports RocketMQ instances of versions 4.x and 5.x, including commercial and community editions.
Only physical tables can be synchronized.
During data synchronization, the data transmission service allows you to drop a table before creating a new one. In other words, you can execute
DROP TABLEand then executeCREATE TABLE. The data transmission service does not allow you to create a new table by renaming a table. In other words, you cannot executeRENAME TABLE a TO a_tmp.The name of a table to be synchronized, as well as the names of columns in the table, must not contain Chinese characters.
The data transmission service supports the migration of an object only when the following conditions are met: the database name, table name, and column name of the object are ASCII-encoded without special characters. The special characters are line breaks, spaces, and the following characters: . | " ' ` ( ) = ; / & \.
The data transmission service does not support a standby OceanBase database as the source.
Considerations
If the source is OceanBase Database of a version ranging from V4.0.0 to V4.3.x (excluding V4.2.5 BP1) and you have selected incremental synchronization, you need to specify the STORED attribute for a generated column. If you do not specify this attribute, no information about the generated column is stored in the incremental logs, which may result in data errors in incremental synchronization.
Take note of the following considerations when an updated row contains a large object (LOB) column:
If the LOB column is updated, do not use the value stored in the LOB column before the
UPDATEorDELETEoperation.The following data types are stored in LOB columns: JSON, GIS, XML, user-defined type (UDT), and TEXT such as LONGTEXT and MEDIUMTEXT.
If the LOB column is not updated, the value stored in the LOB column before and after the
UPDATEorDELETEoperation is NULL.
When data transfer is resumed for a task, some data (within the last minute) may be duplicate in the RocketMQ instance. Therefore, deduplication is required in downstream systems.
If the clocks between nodes or between the client and the server are out of synchronization, the latency may be inaccurate during incremental synchronization.
For example, if the clock is earlier than the standard time, the latency can be negative. If the clock is later than the standard time, the latency can be positive.
If you select only Incremental Synchronization when you create the data synchronization task, the data transmission service requires that the local incremental logs in the source database be retained for at least 48 hours.
If you select Full Synchronization and Incremental Synchronization when you create the data synchronization task, the data transmission service requires that the local incremental logs in the source database be retained for at least seven days. Otherwise, the data synchronization task may fail or the data in the source and target databases may be inconsistent because the data transmission service cannot obtain incremental logs.
Supported source and target instance types
In the following table, OB_MySQL stands for a MySQL tenant of OceanBase Database, and OB_Oracle stands for an Oracle tenant of OceanBase Database.
Source | Target |
OB_MySQL (OceanBase cluster instance) | RocketMQ (RocketMQ instance on Alibaba Cloud) |
OB_MySQL (serverless instance) | RocketMQ (RocketMQ instance on Alibaba Cloud) |
OB_Oracle (OceanBase cluster instance) | RocketMQ (RocketMQ instance on Alibaba Cloud) |
Procedure
Log on to the
ApsaraDB for OceanBase console and purchase a data synchronization task.For more information, see Purchase a data synchronization task.
Choose Data Transmission > Data Synchronization. On the page that appears, click Configuration for the data synchronization task.

If you want to reference the configurations of an existing task, click Reference Configuration. For more information, see Reference and clear the configuration of a data synchronization task.
On the Select Source and Target page, configure the parameters.
Parameter
Description
Synchronization Task Name
We recommend that you set it to a combination of digits and letters. It must not contain any spaces and cannot exceed 64 characters in length.
Source
If you have created an OceanBase data source, select it from the drop-down list. Otherwise, click New Data Source in the drop-down list and create one in the dialog box that appears on the right. For more information about the parameters, see Create an OceanBase data source.
Target
If you have created a RocketMQ data source, select it from the drop-down list. Otherwise, click New Data Source in the drop-down list and create one in the dialog box that appears on the right. For more information, see Create a RocketMQ data source.
Tag (Optional)
Select a target tag from the drop-down list. You can also click Manage Tags to create, modify, and delete tags. For more information, see Use tags to manage data synchronization tasks.
Click Next. On the Select Synchronization Type page, specify the synchronization types for the current data synchronization task.
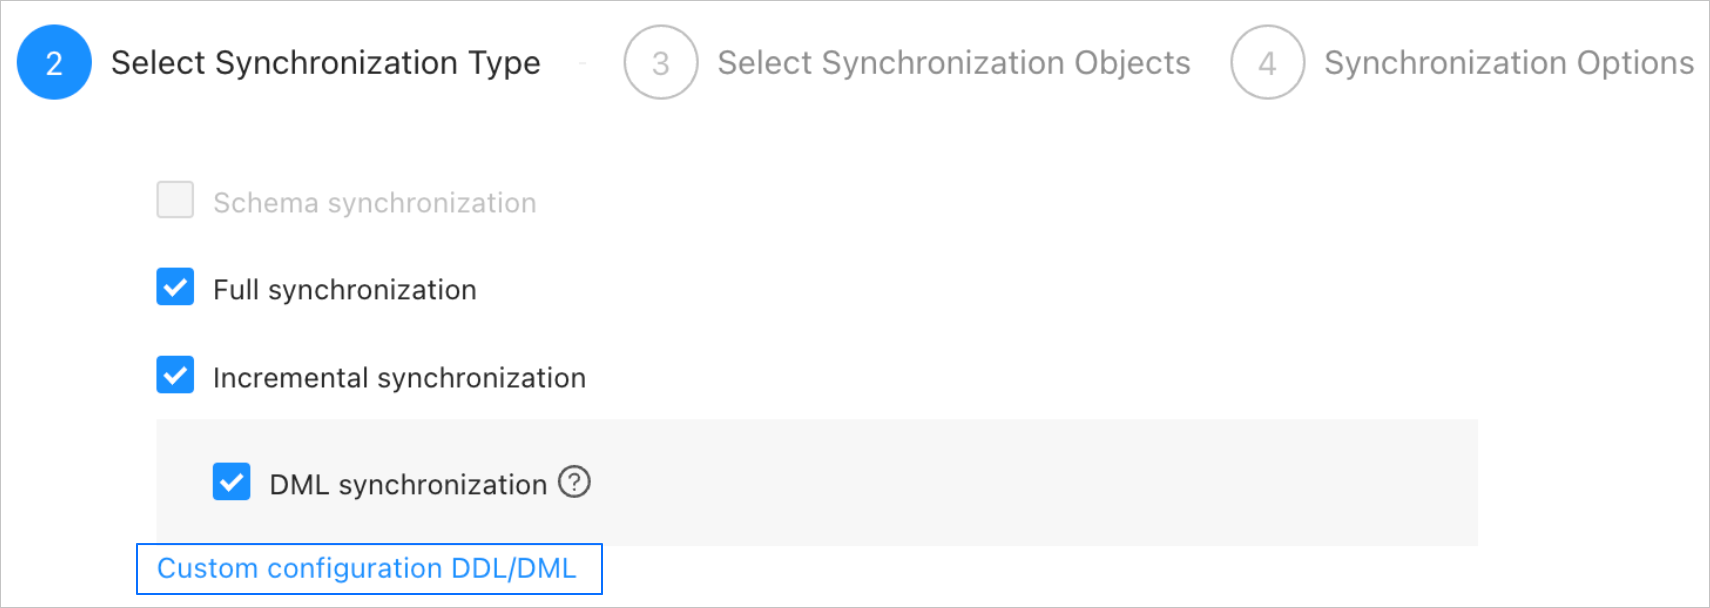
The supported synchronization types are Full Synchronization and Incremental Synchronization. Incremental Synchronization supports only DML Synchronization. Supported DML operations are
INSERT,DELETE, andUPDATE. You can select the options as needed. For more information, see Configure DDL/DML synchronization.Click Next. On the Select Synchronization Objects page, select the objects to be synchronized in the current data synchronization task.
You can use the Specify Objects or Match Rules option to specify synchronization objects. This topic describes how to use the Specify Objects option to specify synchronization objects. For information about how to configure matching rules, see the "Wildcard patterns for data migration/synchronization between a database and a message queue instance" section in the Configure and modify matching rules topic.
NoteIf you selected DDL Synchronization in the Select Synchronization Type step, we recommend that you select synchronization objects by using the Match Rules option. This ensures that all new objects meeting the matching rules are synchronized. If you selected synchronization objects by using the Specify Objects option, new or renamed objects will not be synchronized.
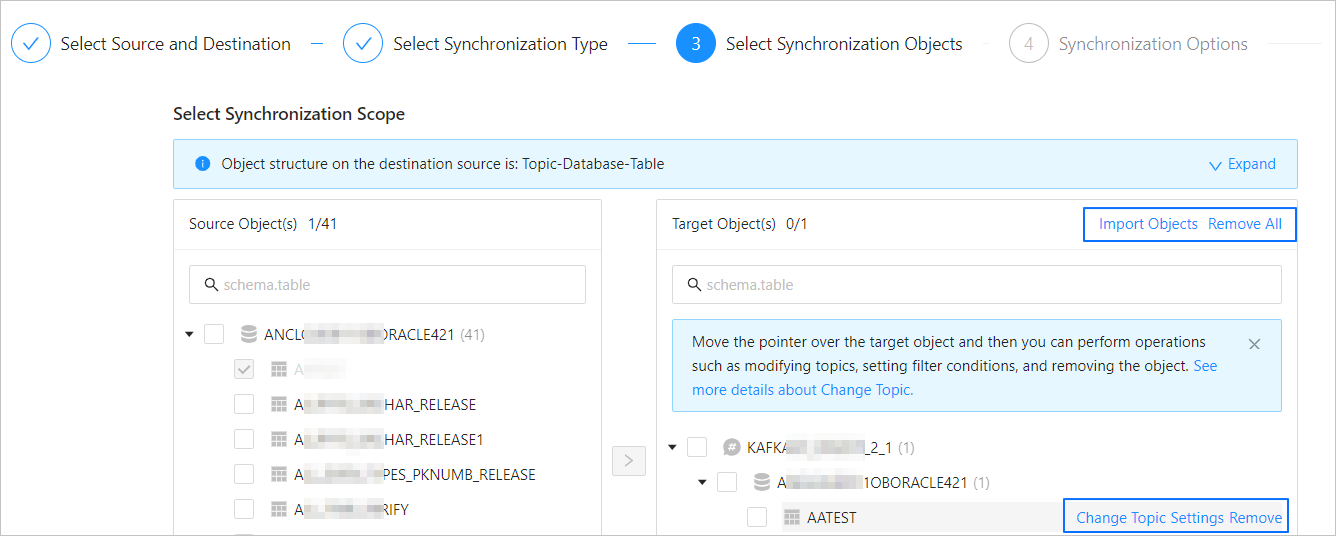
When you synchronize data from an OceanBase database to a RocketMQ instance, you can select multiple tables to map to multiple topics.
In the Select Synchronization Objects section, select Specify Objects.
In the left-side pane, select the objects to be synchronized.
Click >.
Click the Existing Topics drop-down list in the Map Object to Topic dialog box and select the target topic.
You can also enter the name of an existing topic and select it after it appears.
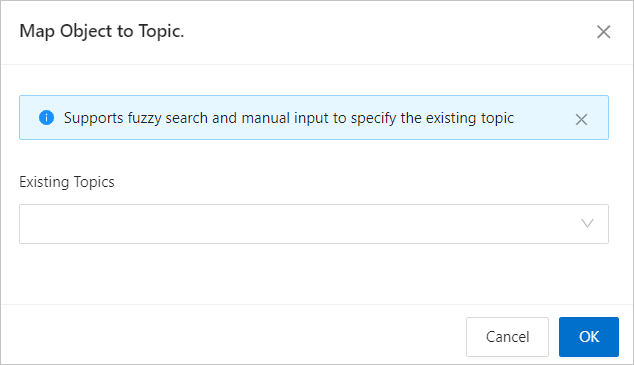
Click OK.
The data transmission service allows you to import objects by using text. It also allows you to change the topics of the objects, set row filters, and remove a single object or all objects. Objects in the target database are listed in the structure of Topic > Database > Table.
NoteWhen you select Match Rules to specify synchronization objects, object renaming is implemented based on the syntax of the specified matching rules. In the operation area, you can only set filtering conditions and select sharding columns and the columns to be synchronized. For more information, see Configure and modify matching rules.
Operation
Description
Import objects
In the list on the right, click Import Objects in the upper-right corner.
In the dialog box that appears, click OK.
ImportantThis operation will overwrite previous selections. Proceed with caution.
In the Import Synchronization Objects dialog box, import the objects to be synchronized. You can import CSV files to set row filter conditions, filter columns, and sharding columns. For more information, see Download and import the settings of synchronization objects.
Click Validate.
After the validation succeeds, click OK.
Change topics
The data transmission service allows you to change topics for objects at the target For more information, see Change topics.
Configure settings
You can use the
WHEREclause to filter data by row and select sharding columns and the columns to be synchronized.In the Settings dialog box, you can perform the following operations:
In the Row Filters section, specify a standard SQL
WHEREclause to filter data by row. For more information, see Use SQL conditions to filter data.Select the sharding columns that you want to use from the Sharding Columns drop-down list. You can select multiple fields as sharding columns. This parameter is optional.
Unless otherwise specified, select the primary keys as sharding columns. If the primary keys are not load-balanced, select load-balanced fields with unique identifiers as sharding columns to avoid potential performance issues. Sharding columns can be used for the following purposes:
Load balancing: Threads used for sending messages can be recognized based on the sharding columns if the target table supports concurrent writes.
Orderliness: The data transmission service ensures that messages are received in order if the values of the sharding columns are the same. The orderliness specifies the sequence of executing DML statements for a column.
In the Select Columns section, select the columns to be synchronized. For more information, see Column filtering.
Remove one or all objects
The data transmission service allows you to remove a single or all synchronization objects that are added to the right-side list during data mapping.
Remove a single synchronization object
In the list on the right, hover over the object that you want to remove, and click Remove to remove the synchronization object.
Remove all synchronization objects
In the list on the right, click Remove All in the upper-right corner. In the dialog box that appears, click OK to remove all synchronization objects.
Click Next. On the Synchronization Options page, configure the parameters.
Full synchronization
The following table describes the full synchronization parameters, which are displayed only if you have selected Full Synchronization on the Select Synchronization Type page.

Parameter
Description
Read Concurrency
The concurrency for reading data from the source during full synchronization. The maximum value is 512. A high concurrency may incur excessive stress on the source, thereby affecting the business.
Write Concurrency
The concurrency for writing data to the target during full synchronization. The maximum value is 512. A high write concurrency may incur excessive stress on the target, affecting the business.
Full Synchronization Rate Limit
You can choose whether to limit the full synchronization rate as needed. If you choose to limit the full synchronization rate, you must specify the records per second (RPS) and bytes per second (BPS). The RPS specifies the maximum number of data rows synchronized to the target per second during full synchronization, and the BPS specifies the maximum amount of data in bytes synchronized to the target per second during full synchronization.
NoteThe RPS and BPS values specified here are only for throttling. The actual full synchronization performance is subject to factors such as the settings of the source and target and the instance specifications.
Incremental synchronization
The following table describes the incremental synchronization parameters, which are displayed only when you have selected Incremental Synchronization on the Select Synchronization Type page.
Parameter
Description
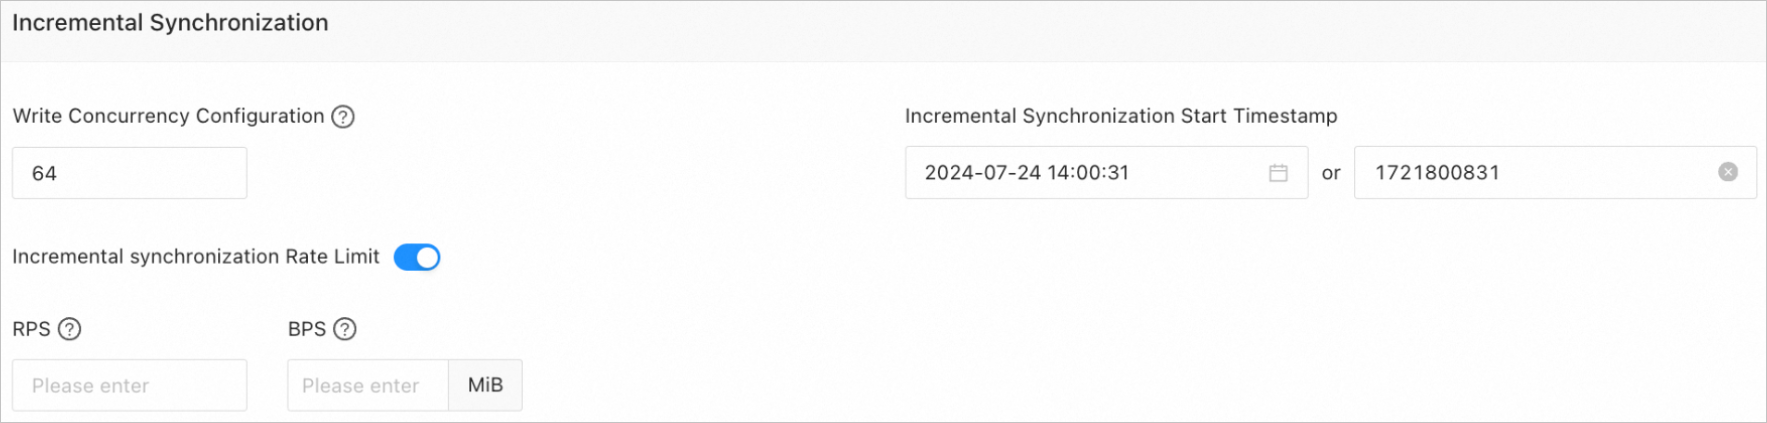
Write Concurrency
The concurrency for writing data to the target during incremental synchronization. The maximum value is 512. A high write concurrency may incur excessive stress on the target, affecting the business.
Incremental Synchronization Rate Limit
You can choose whether to limit the incremental synchronization rate as needed. If you choose to limit the incremental synchronization rate, you must specify the RPS and BPS. The RPS specifies the maximum number of data rows synchronized to the target per second during incremental synchronization, and the BPS specifies the maximum amount of data in bytes synchronized to the target per second during incremental synchronization.
NoteThe RPS and BPS values specified here are only for throttling. The actual incremental synchronization performance is subject to factors such as the settings of the source and target and the instance specifications.
Incremental Synchronization Start Timestamp
This parameter is unavailable if you have selected Full Synchronization.
If you have selected Incremental Synchronization but not Full Synchronization, specify a point in time after which data is to be synchronized. The default value is the current system time. For more information, see Set an incremental synchronization timestamp.
Advanced parameters
Parameter
Description
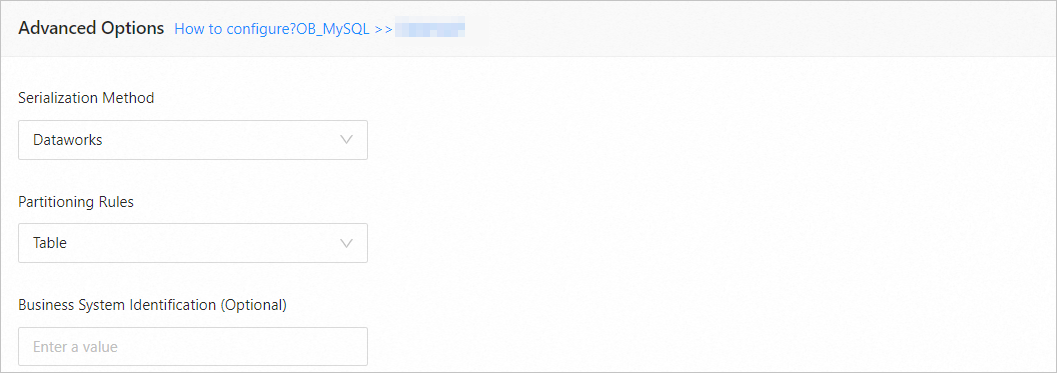
Serialization Method
The message format for synchronizing data to the target RocketMQ instance. Valid values: Default, Canal, DataWorks (version 2.0 supported), SharePlex, DefaultExtendColumnType, Debezium, DebeziumFlatten, and DebeziumSmt. For more information, see Data formats.
ImportantOnly MySQL tenants of OceanBase Database support Debezium, DebeziumFlatten, and DebeziumSmt.
Partitioning Rules
When you synchronize data to a RocketMQ instance, only Hash is supported. Hash indicates that the data transmission service uses a hash algorithm to select a message queue of RocketMQ based on the value of the primary key or sharding column.
Business System Identification (Optional)
Identifies the source business system of data. This parameter is displayed only when you select DataWorks for Serialization Method. The business system identifier consists of 1 to 20 characters.
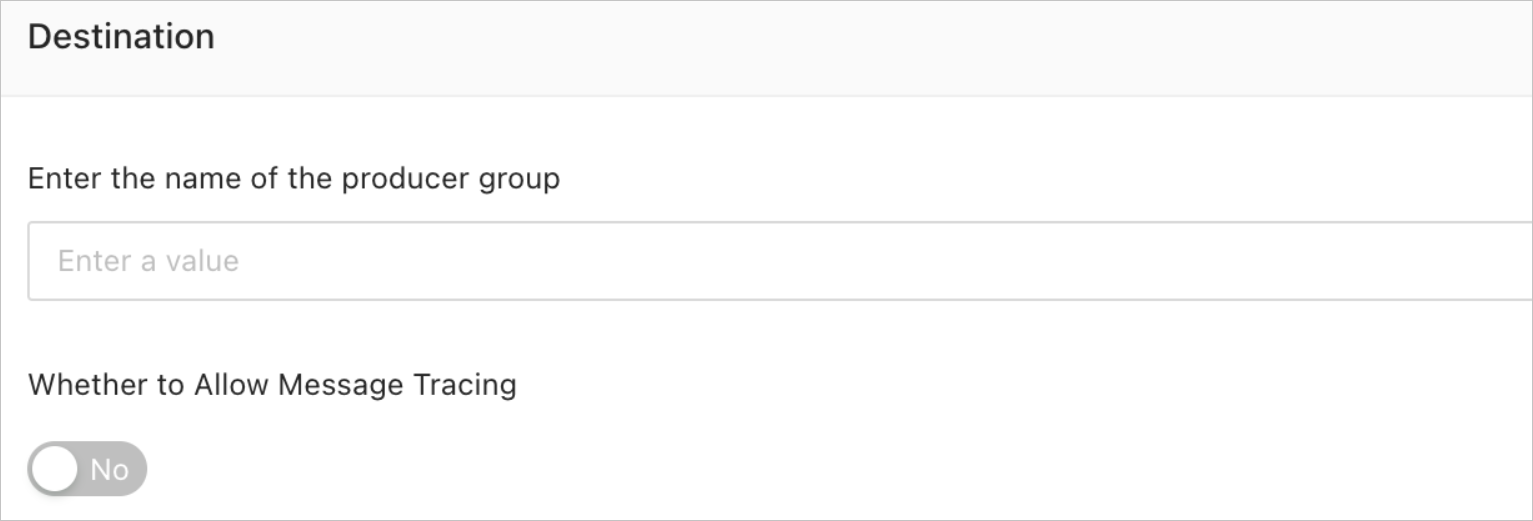
Target
Parameter
Description
Enter the name of the producer group
Specifies a producer group that can write data into multiple topics.
Whether to Allow Message Tracing
Specifies whether to allow message tracing. If message tracing is enabled, you can trace the complete task information, including the node time and status, of a message in its entire lifecycle from transmission to the RocketMQ server by the producer to consumption by consumers. The message tracing feature provides data support for troubleshooting in the production environment.
Click Precheck.
During the precheck, the data transmission service detects the connection between the source and target. If an error is returned during the precheck, you can perform the following operations:
Identify and troubleshoot the problem and then perform the precheck again.
Click Skip in the Actions column of the failed precheck item. In the dialog box that prompts the consequences of the operation, click OK.
After the precheck is passed, click Start Task.
If you do not need to start the task now, click Save. You can manually start the task on the Synchronization Tasks page or by performing batch operations later. For more information about batch operations, see Perform batch operations on data synchronization tasks.
The data transmission service allows you to modify the synchronization objects when a synchronization task is running. For more information, see View and modify synchronization objects and their filter conditions. After the data synchronization task is started, it will be executed based on the selected synchronization types. For more information, see View details of a data synchronization task.
If the data synchronization task encounters an execution exception due to a network failure or slow startup of processes, you can click Resume on the