PDS for Enterprise allows users to log in using Resource Access Management (RAM). To allow enterprise users to log in with their RAM user credentials, you must configure RAM login. This topic describes how to configure RAM login for PDS for Enterprise.
Notes
Only a super administrator or a drive administrator can enable this feature.
Procedure
Step 1: Create an OAuth application
-
Log in to the RAM console with your Alibaba Cloud account.
-
In the left navigation pane, choose Integrations > OAuth Preview.
-
On the Enterprise Applications tab, click Create Application.
-
In the Create Application panel, configure the application parameters.
-
Enter an Application Name and a Display Name.
-
Set Application Type to WebApp.
-
Set the Access Token Validity.
The validity period of an access token ranges from 900 seconds (15 minutes) to 10,800 seconds (3 hours). The default value is 3,600 seconds.
-
Set the Refresh Token Validity.
The validity period of a refresh token ranges from 7,200 seconds (2 hours) to 31,536,000 seconds (1 year). The default value is 2,592,000 seconds.
-
Set the Callback Address.
ImportantIn the example, change
domainIdto your actual enterprise code.The callback URL format is
https://domainId.api.aliyunpds.com/v2/oauth/callback.
-
-
Click Create Application.
Step 2: Add OAuth scopes
Add OAuth scopes to allow PDS for Enterprise to retrieve RAM user information.
-
Log in to the RAM console with your Alibaba Cloud account.
-
In the left navigation pane, choose Integrations > OAuth Preview.
-
On the Enterprise Applications tab, click the name of your application.
-
On the Application OAuth Scopes tab, click Add OAuth Scopes.
-
In the Add OAuth Scopes panel, select the aliuid and profile scopes.
-
Click OK.
Step 3: Create a secret
-
On the application's details page, click App Secrets > Create Secret.
-
In the Create App Secret dialog box, view the application secret, click Copy, and then click Close.
Important-
The application secret is visible only upon creation and cannot be retrieved later. Save it securely.
-
You can create a maximum of two application secrets for each application.
The dialog box contains the AppSecretId and AppSecretValue fields. Make sure to save the AppSecretValue. In addition to copying the value, you can also click Download CSV File to save the secret information.
-
-
Save the Application ID and AppSecretValue. You will need them in Step 4.
Step 4: Enable RAM configuration
-
Log on to CDE and go to the admin console.
-
In the left navigation pane, choose Dedicated Login Configuration > RAM configuration.
-
On the RAM configuration page, enable the RAM configuration switch.
-
In the Login Settings section, enter the RAM configuration parameters.
-
OAuth2.0 Client ID: Enter the Application ID from Step 3.
-
AppSecret: Enter the AppSecretValue from Step 3.
-
-
Click Save.
Step 5: Link a user to a RAM account
-
Log on to CDE and go to the admin console.
-
In the left navigation pane, choose Team Management, select a user, and click Edit.
-
In the Login Account Information section, set RAM user to the UID of the corresponding RAM user.
NoteYou can find the RAM user UID on the Users page of the RAM console. For more information, see View RAM user information.
-
Click Save.
Log in with a RAM user
Access the Enterprise File Management logon interface.
Click Enterprise Exclusive Logon.
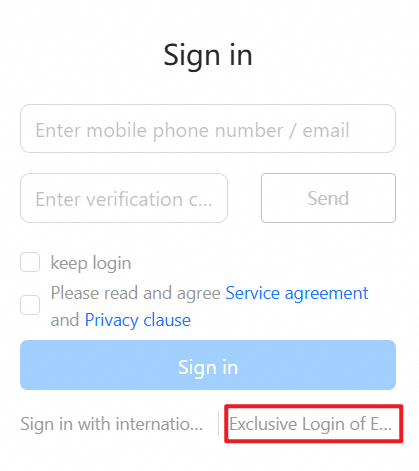
Enter the enterprise code and click Next.
-
On the dedicated login page, click RAM Login.
-
You can now log in to PDS for Enterprise using RAM.