This topic describes how to configure Security Assertion Markup Language (SAML). After you configure SAML, you can use a third-party account to log on to Cloud Drive for Enterprises by using the SAML protocol. In this example, Microsoft Entra ID is used to configure SAML. The procedures for other systems are similar.
1. Enable the SAML configuration switch in PDS and obtain the SP metadata file
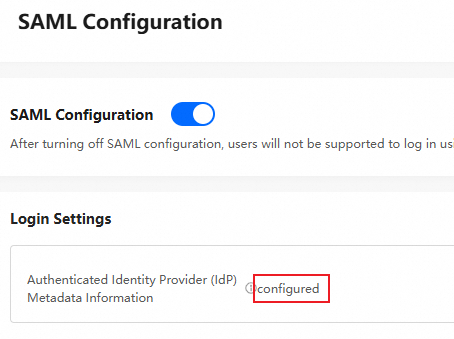
Go to the Administration Console of Cloud Drive for Enterprises and log on as an administrator. In the left-side navigation pane, choose Exclusive login configuration > SAML Configuration.
On the SAML Configuration page, turn on SAML Configuration.
Download the metadata information about the service provider and save the XML file to your computer.
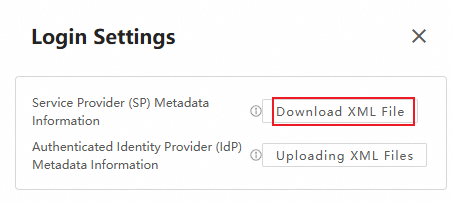
The metadata information about the service provider contains the access information about Photo and Drive Service (PDS) as an SAML service provider. You must save the XML file and use it to configure SAML in Microsoft Entra ID.
2. Enter the Microsoft Azure AD interface, configure SP metadata information, and obtain IDP metadata information.
Step 1: Create an application in Azure AD
Log on to the Microsoft Entra ID console as an administrator and click View.

In the left-side navigation pane, choose Enterprise applications > All applications.
On the page that appears, click New application.
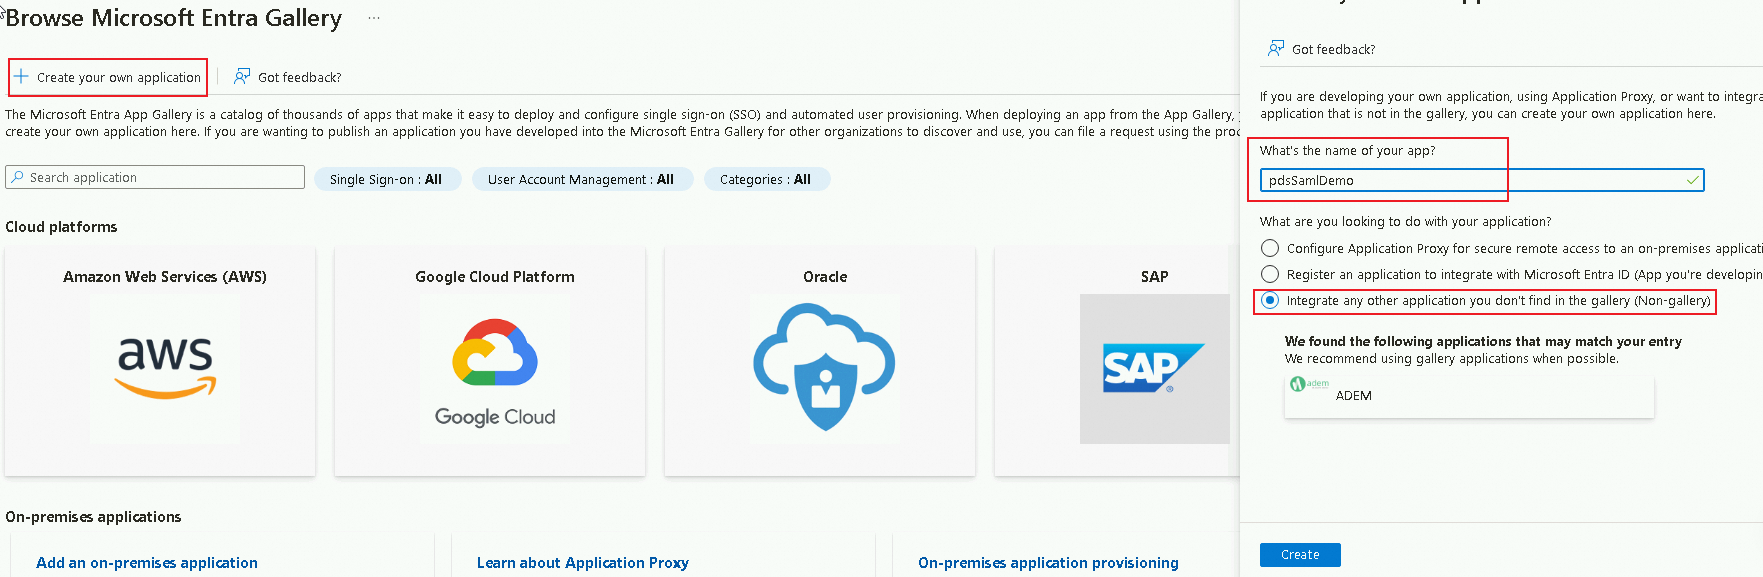
On the Browse Microsoft Entra Gallery page, click Create your own application.
In the Create your own application panel, enter an application name such as PdsSamlDemo, and select Integrate any other application you don't find in the gallery (Non-gallery). Then, click Create.
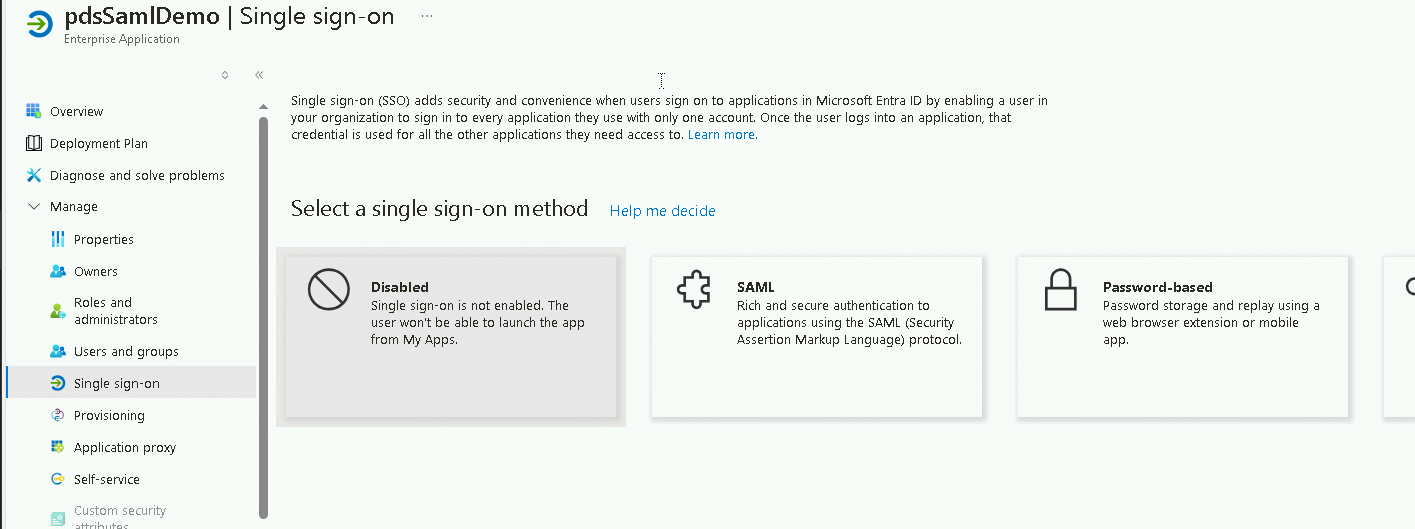
Step 2: Configure SAML in Azure AD
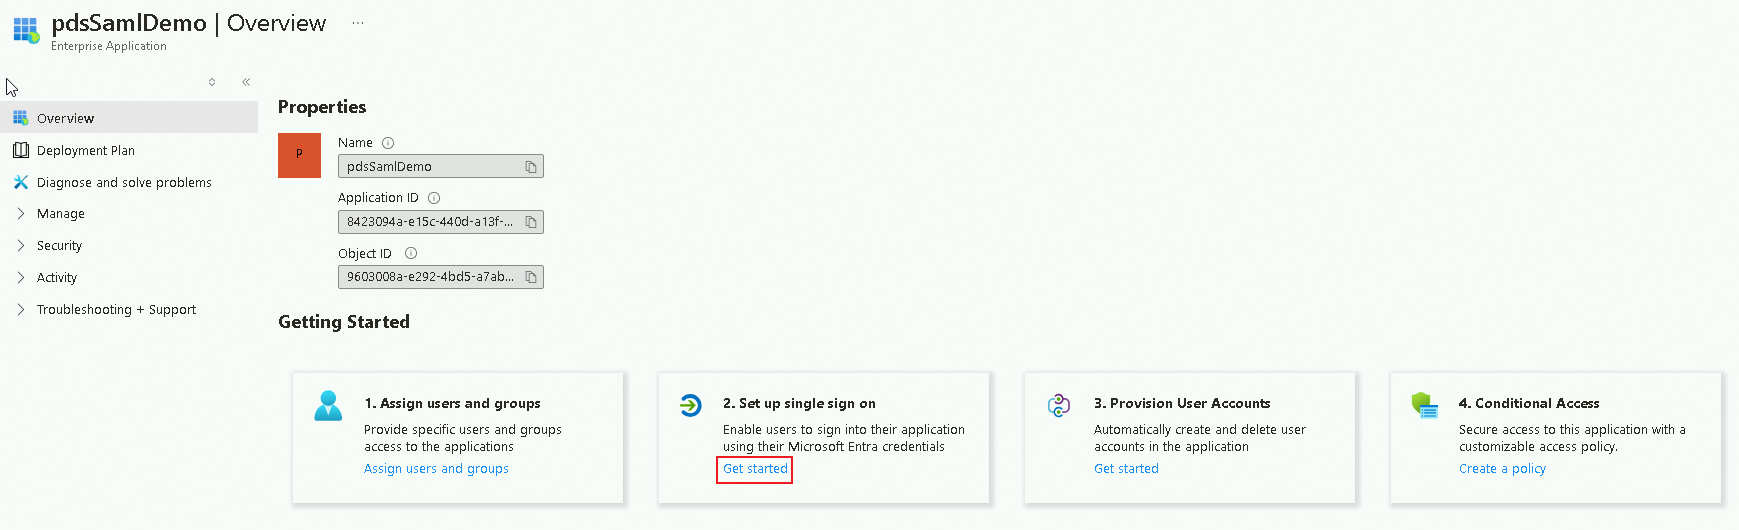
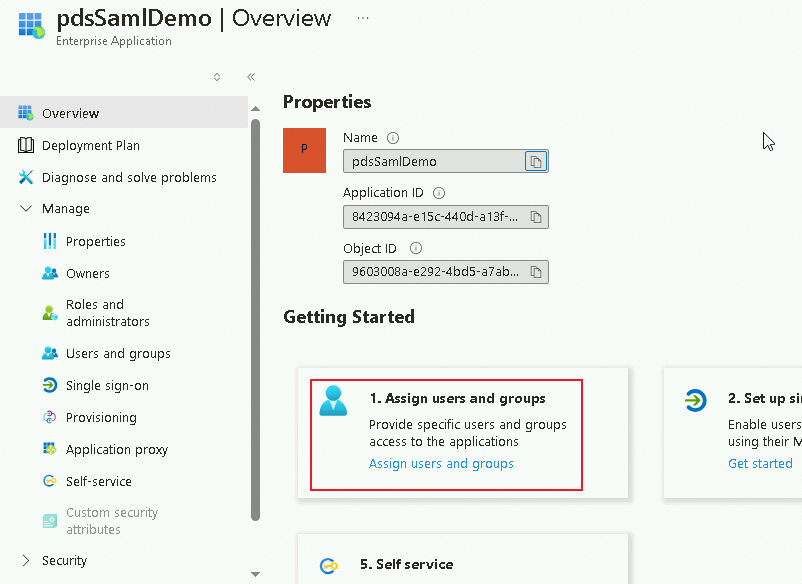
On the Overview page of the PdsSamlDemo application, click Get started in the Set up single sign on section.
In the Select a single sign-on method section, click SAML.
On the SAML-based Sign-on page, perform the following steps:
In the upper-left corner of the page, click Upload metadata file, select your metadata file, and then click Add.
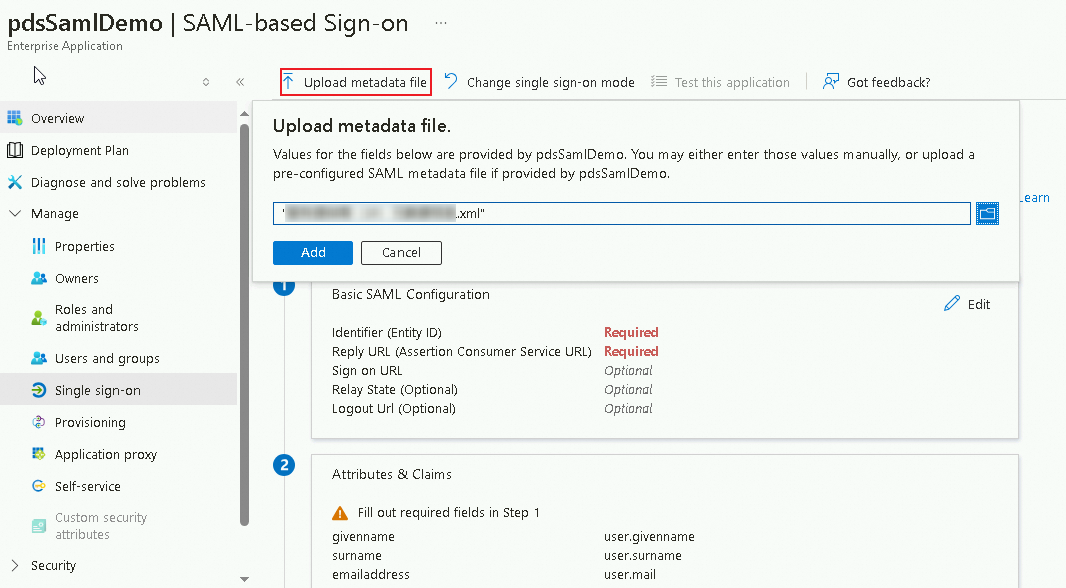
The metadata file to be uploaded is the metadata file of the service provider that you download from the SAML Configuration page of PDS.
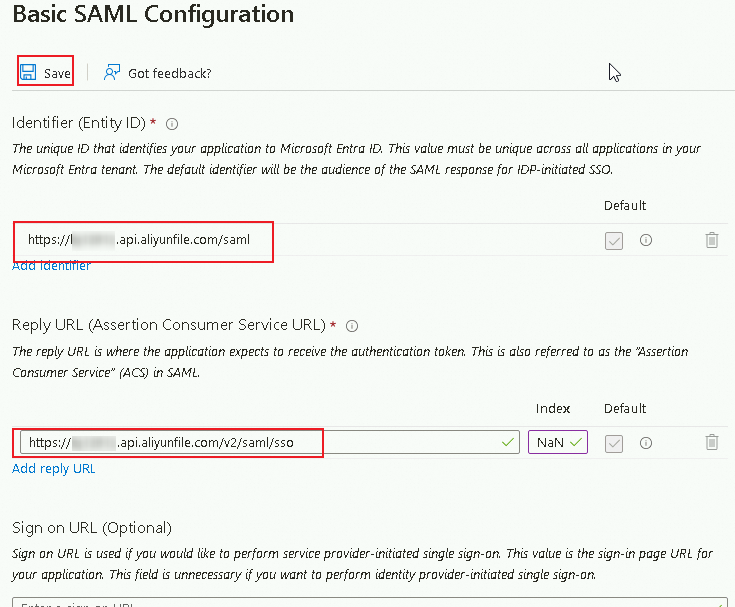
In the Basic SAML Configuration panel, configure the following parameters and click Save:
Identifier (Entity ID): The value of this parameter is read from the entityID parameter in the preceding metadata file.
Reply URL (Assertion Consumer Service URL): The value of this parameter is read from the Location parameter in the preceding metadata file.
In the SAML Certificates section, click Download next to the Federation Metadata XML parameter to download the related XML file.
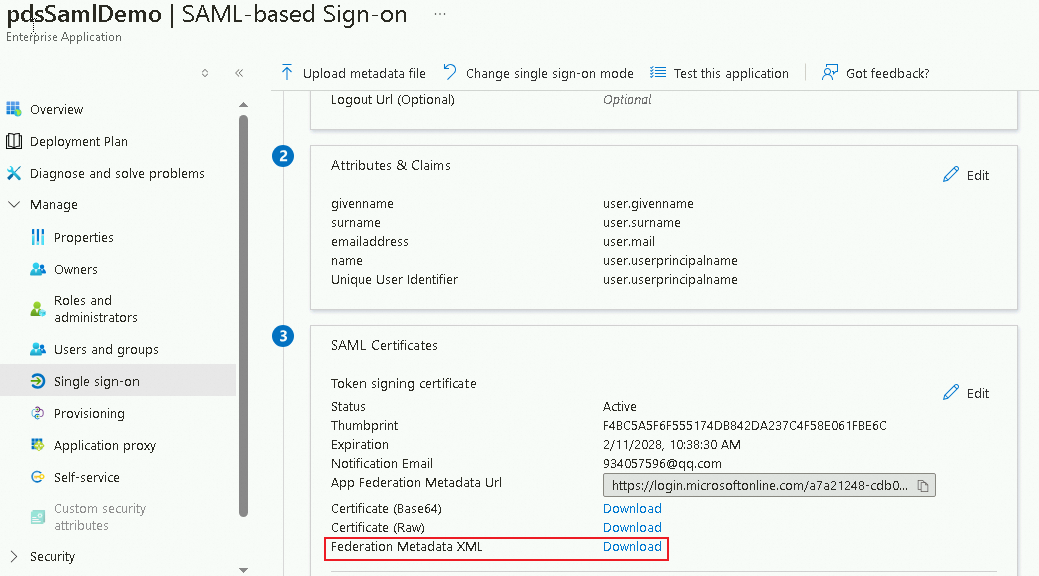
The federation metadata XML file contains the metadata information about the authenticated identity provider (IdP). You must save the XML file and use it to configure SAML in PDS.
Step 3: Assign users in Azure AD
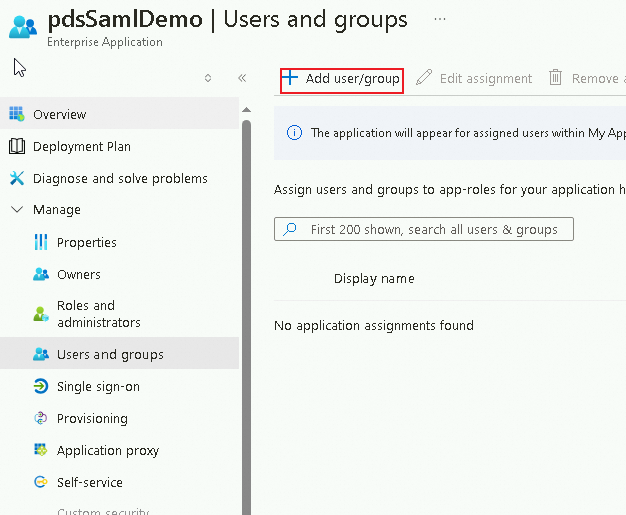
On the Overview page of the PdsSamlDemo application, click Assign users and groups in the Assign users and groups section.
On the page that appears, click Add user/group in the upper-left corner.
On the Add Assignment page, click Users. In the Users panel, select the users that you want to assign and click Select.
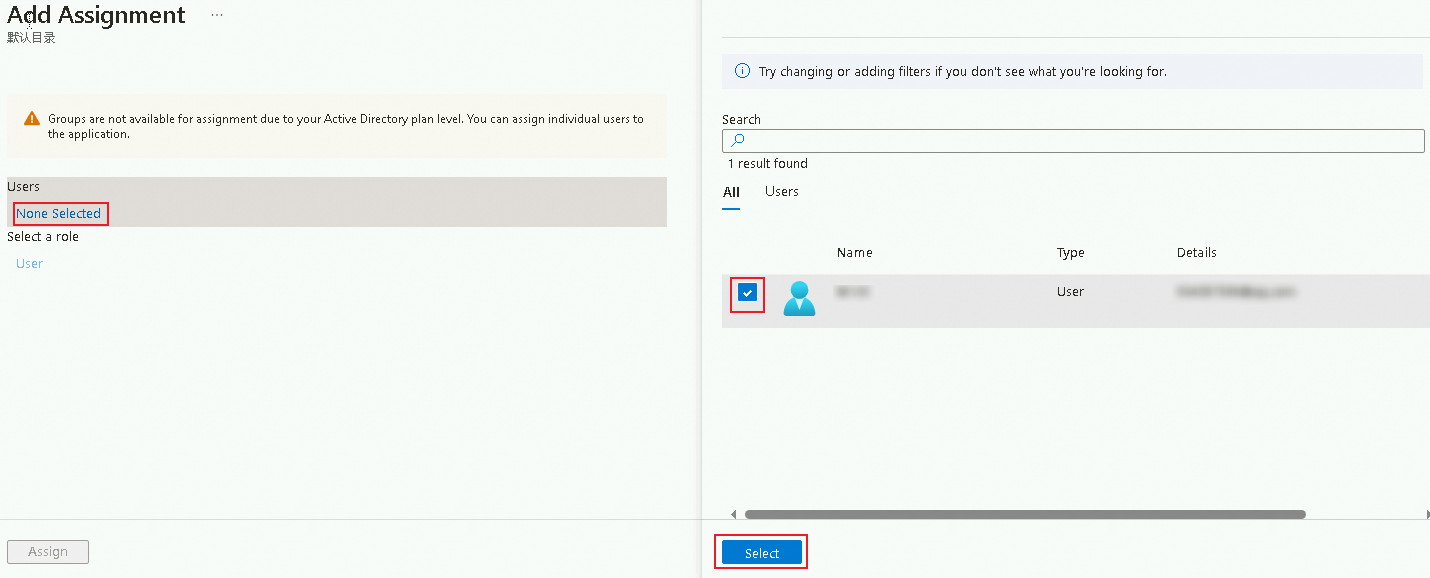
Click Assign in the lower-left corner.
4. Configure IdP metadata in the PDS console
Go to the Administration Console of Cloud Drive for Enterprises and log on as an administrator. In the left-side navigation pane, choose Exclusive login configuration > SAML Configuration.
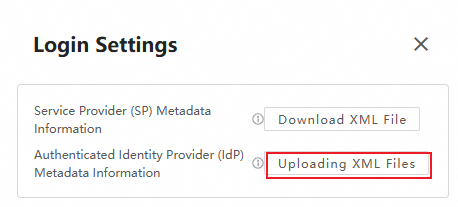
On the SAML Configuration page, click Configure in the Login Settings section. In the Login Settings dialog box, select the XML file that you want to upload to configure the metadata information about the authenticated IdP.
The metadata file to be uploaded is the federation metadata XML file that you download from Microsoft Entra ID.
After the upload is successful, the Logon Settings message Configured indicates that the IdP metadata is configured.