Attach an ESSD, ESSD AutoPL disk, or Regional ESSD to up to 16 NVMe-enabled instances in the same zone for concurrent read/write access, data sharing, and rapid failover.
Use cases
Multi-attach suits the following use cases:
-
When data is written to a multi-attach disk, other connected nodes can access it immediately. This saves costs and improves read/write performance. For example, in cloud-based container deployments, multiple instances can read and load the same image from a shared disk.

-
High availability is one of the most common use cases for shared disks. In traditional SAN-based database scenarios such as Oracle RAC and SAP HANA, or with cloud-native high-availability databases, single points of failure can occur. Cloud storage and networks offer excellent availability, but compute nodes are often affected by power outages, downtime, or hardware failures. Businesses typically build primary/secondary architectures to ensure high availability at the compute layer.
For example, in a database scenario, if the primary database fails, services are quickly switched to the secondary database. After failover, use an NVMe Persistent Reservation (PR) command to release the write permissions of the old instance, preventing stale writes and maintaining data consistency.
NotePersistent Reservation (PR) is part of the NVMe protocol. PR provides precise control over read and write permissions of a cloud disk to ensure compute nodes write data as expected. See NVMe PR protocol.
-
The primary database instance (Database Instance 1) fails.
-
An NVMe PR command revokes write access from Database Instance 1 and grants it to Database Instance 2.
-
Database Instance 2 replays logs to reach the same state as Database Instance 1.
-
Database Instance 2 becomes the primary instance and resumes services.

-
-
Multi-attach disks deliver high IOPS and throughput, and can accelerate slower storage systems. For example, data lakes often use Object Storage Service (OSS). While OSS supports multi-client access with high sequential read and append-write throughput, its random read/write performance and latency are poor. Attaching a high-speed cloud disk as a cache on compute nodes significantly improves access performance for data lake scenarios.

-
In distributed machine learning training, after sample labels are written, the dataset is split into smaller chunks and distributed to multiple compute nodes for parallel processing. Multi-attach allows each compute node to directly access shared storage resources without frequent data transfers over the network, reducing latency and accelerating model training. This is especially beneficial for large-scale model training tasks that require high-speed data access.

Billing
The multi-attach feature is free of charge. You pay only for cloud disks and ECS instances. See Billing overview.
Limitations
The following limitations apply to multi-attach disks:
|
Resource |
Limitations |
|
Cloud disk |
|
|
Region and zone |
Supported regions and zones match those where the corresponding instance families are available. |
|
ECS instance |
|
|
Image |
The image must include an NVMe driver. Note
|
Procedure
Step 1: Create a multi-attach disk
In the upper-left corner of the page, select a region and resource group.

-
Click Create {category}.
-
On the Create Disk page, configure the disk parameters.
 Note
NoteThis step describes only the parameters required for multi-attach. For other parameters, see Create a data disk.
Parameter
Description
{value, select, create {Create a disk} createPrepaid {Add Subscription Disk} snapshot {Create Snapshot} autoSnapshotPolicy {Configure Snapshot Policy} attach {Attach} batchAttach {Attach a disk} detach {Detach} release {Release} resize {Resize} category {Change Configuration} performanceLevel {Change Performance Level} changeToPostPaid {Switch to Pay-as-you-go} changeToPrePaid {Switch to Subscription} attribute {Edit Attributes} desc {Modify Description} reinit {Re-initialize Disk} partition {Partition Disk and Mount File Systems} consoleToCode {Generate IaC Deployment Template} other {{value}} }
Select Not Attach to create the disk without attaching it to an instance.
Region and Zone
Select a region and zone that support multi-attach.
Billing Method
Select Pay-as-you-go.
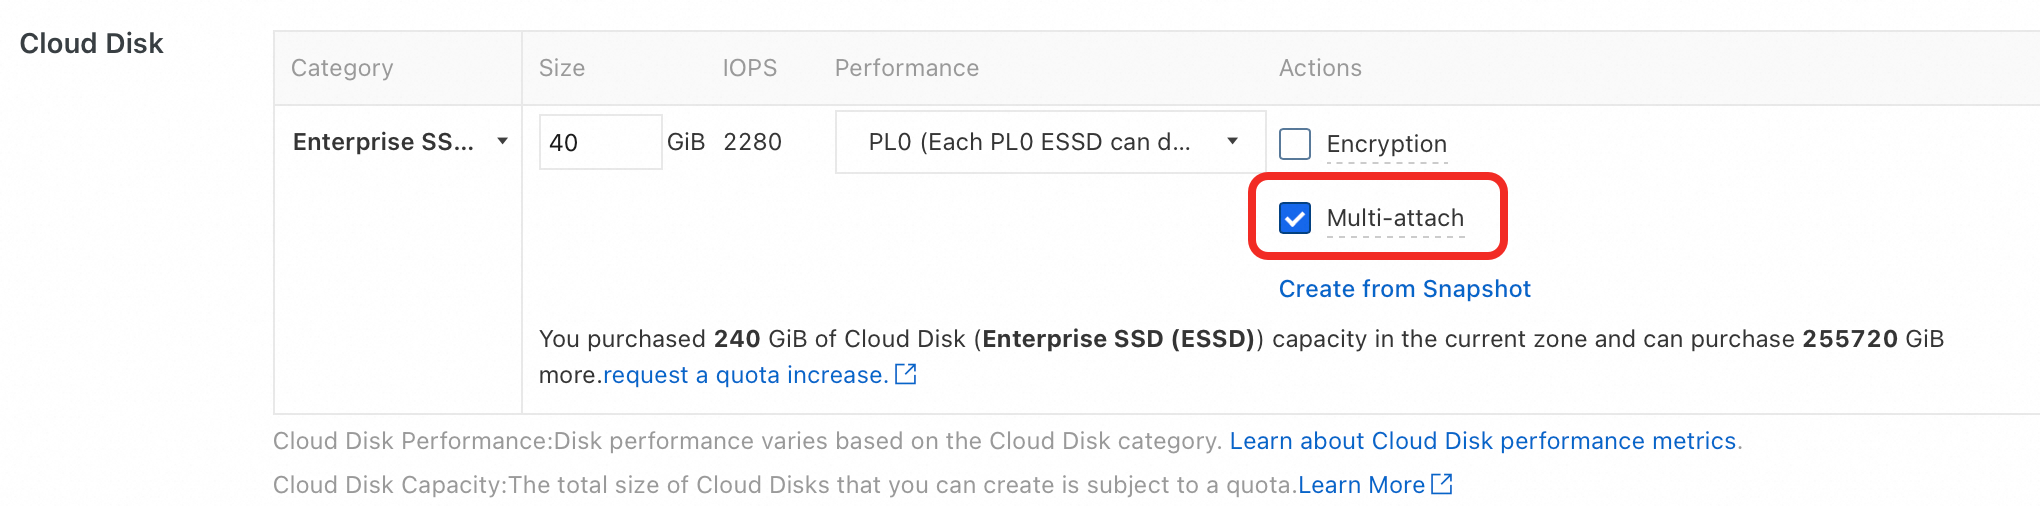
Cloud Disk
Configure the disk storage and enable multi-attach.
-
Select a disk category and set the capacity.
-
Select Multi-attach.
After the disk is created, go to the disk list page and verify that Yes appears in the Multi-attach column.
-
Step 2: Attach the disk to multiple instances
Go to ECS console - Instances.
-
In the instance list, note the IDs of ECS instances that support the NVMe protocol.
-
Find the target cloud disk and click Attach in the Actions column.
-
In the Attach Disk dialog box, configure the parameters for attaching the disk.
NoteThis step describes only how to attach a multi-attach disk to multiple instances. For other parameters, see Attach a data disk.
-
Target Instance: Enter the ECS instance ID obtained earlier.
-
{value,select, enable {Release Disk with {intro}} disable {Not Release Disk with {intro}} release {Release Disk with {intro}} keep {Not Release Disk with {intro}} releaseToAttach {Release Disk with {intro} After Attaching Disk to {intro}} releaseWithSourceInstance {Release Disk with Source {intro}} other {{value}} }: Do not select this option. This ensures the disk is retained when the instance is released.
-
-
Log on to the instance to partition, format, and mount the disk.
ImportantAfter a multi-attach disk is attached to multiple instances, using a single-node file system such as ext3, ext4, xfs, or ntfs will lead to data inconsistency because data is not synchronized between instances. We recommend that you create a cluster file system suitable for your application. A cluster file system ensures that written data, created files, and modified metadata are synchronized in real time across all attached nodes. Common cluster file systems include OCFS2, GFS2, Veritas CFS, Oracle ACFS, and DBFS.
-
(Optional) Repeat sub-steps 4 and 5 to attach the disk to other NVMe-enabled instances.
After the disk is attached, its status changes to In Use on the Disks page. To view the attached instances, hover over the instance ID or name in the Associated {intro} column.
References
-
To modify the NVMe driver attributes of a custom image, see Modify the attributes and tags of an image.
-
After you resize a multi-attach disk, the new capacity does not take effect automatically. See Step 1: Resize a disk.