The embedding vectorization feature in Alibaba Cloud DataWorks Data Integration lets you extract data from heterogeneous sources like OSS, MaxCompute, and HDFS, convert it into vectors, and write it to destinations such as Milvus, Elasticsearch, and OpenSearch vector databases, or Hologres vector tables. This capability streamlines ETL, simplifies knowledge vectorization, and enables AI scenarios like RAG.
Why use embeddings
As Large Language Model (LLM) technology continues to evolve, integrating private knowledge into these models is crucial for creating business value. Retrieval-Augmented Generation (RAG) is a key approach to achieve this. By encoding data into vector representations and using a vector database for efficient retrieval, RAG provides LLMs with precise, authoritative, and dynamically updated domain knowledge.
Your business data may be scattered across heterogeneous data sources like Object Storage Service (OSS), MaxCompute, HDFS, MySQL, Oracle, or message queues. You must embed this data and write the resulting vectors to a vector-capable target, such as a vector database like Milvus, OpenSearch, and Elasticsearch, or a Hologres vector table. This process requires writing complex ETL scripts and adapting to various types of data sources. The multiple stages of the data pipeline—extraction, transformation, embedding, and writing—create a long, tightly coupled process that significantly slows model iteration.
Features
The embedding feature in DataWorks data integration lets you extract data, generate embeddings, and write them to a vector database in a single data pipeline. This end-to-end automation reduces development complexity, shortens knowledge update latency, and enables efficient knowledge ingestion for scenarios like RAG, intelligent customer service, and search and recommendation.
The embedding feature for offline synchronization in data integration supports two configuration modes:
-
Configure in wizard mode: Use the visual interface to quickly configure
offline synchronization. -
Configure in script mode: This mode supports advanced configurations, allowing you to set up various synchronization pipelines to meet custom requirements.
Limitations
-
This feature is available only in workspaces where the new version of Data Development is enabled.
-
This feature supports only serverless resource groups.
-
This feature is currently available only for select offline synchronization channels.
Billing
In addition to the standard fees for Data Integration scenarios, AI-assisted Data Integration tasks incur costs for calling a large language model.
-
For Alibaba Cloud DataWorks model service billing, see Billing of Serverless resource groups — large language model services.
-
For Alibaba Cloud Model Studio billing, see Model inference (call) billing.
-
For Alibaba Cloud PAI model marketplace billing, see Elastic Algorithm Service (EAS) billing.
Prerequisites
-
You have created a workspace with the new version of Data Development enabled.
-
You have created a Serverless resource group and bound it to the workspace.
-
You have set up the large model service required for AI-assisted processing. Preparations vary by model service provider:
-
Alibaba Cloud DataWorks model service: You have deployed a model in Large Model Service Management and started the model service.
-
Alibaba Cloud Model Studio: You have activated Model Studio and obtained an API key.
-
Alibaba Cloud PAI model marketplace: You have activated PAI and obtained the model service token.
-
-
You have created the source and destination data sources required for the offline synchronization task.
This tutorial uses data synchronization from MaxCompute to Milvus as an example. Therefore, you must first create a MaxCompute data source and a Milvus data source.
Prepare test data
This tutorial uses table data from the public E-commerce Product Review Sentiment Prediction Dataset. User reviews are vectorized and then synced to Milvus for similarity search.
-
MaxCompute source: Create a test table and insert test data.
-
Milvus destination: Create a destination collection to receive the vectorized data. The schema is defined in the table below.
This collection has auto-ID enabled.
Field name
Type
Description
id
Int64
The primary key. Auto-incrementing.
sentence
VarChar(32)
Stores the raw text.
sentence_e
FloatVector(128)
The vector field for similarity search, using the COSINE measure.
Codeless UI configuration
This tutorial shows how to configure an offline sync task in data integration using the codeless UI. The example reads data from a MaxCompute (ODPS) source, generates vector embeddings, and syncs the data to a Milvus destination.
Step 1: Create an offline sync node
-
Go to the Workspaces page in the DataWorks console. In the top navigation bar, select a desired region. Find the desired workspace and choose in the Actions column.
-
In the project directory, click the
 icon and choose . Configure the Source and Destination (in this tutorial, the source is MaxCompute and the destination is Milvus), enter a Name for the node, and click OK.
Step 2: Configure offline sync task
-
Configure basic information.
-
Data Source: Select the data sources for the source and destination.
-
Running Resources: Select the resource group to run the offline sync task. The resource group must be bound to the current workspace and connected to the data source.
If no data sources or resource groups are available, ensure that you have completed the prerequisites.
-
-
Configure the Data Source.
The following parameters apply to the MaxCompute data source used in this tutorial. Configuration varies for other data sources, so adjust your settings accordingly.
In this tutorial, for Table, select
test_tb. For Filtering Method, select Partition Filter and set the partition condition tosplit=dev. For When partition does not exist, select Ignore and run task as normal.Parameter
Description
Tunnel Resource Group
This is the resource group for the tunnel quota. The default value is
Public Transmission Resource, which is the free quota for MaxCompute. For more information about selecting a data transmission resource for MaxCompute, see Purchase and use an exclusive Data Transmission Service resource group.ImportantIf a dedicated Tunnel Quota becomes unavailable due to expiration or an overdue payment, running jobs automatically switch to the
Public Transmission Resource.Tables
Select the source table to sync.
If no source tables are available, ensure that you have completed Test data preparation.
Filtering Method
Supports Partition Filter and Data Filtering:
-
For partitioned tables, you can select a data range to sync by specifying partitions.
-
For non-partitioned tables, you can use a
WHEREclause to filter the data to sync.
You can click Data Preview to check if the configuration is correct.
The Data Preview dialog box displays the source table data. In this tutorial, the data includes the
sentence(review text),label(sentiment label), anddataset(dataset source) columns. -
-
Configure Data Processing.
-
Enable data processing. In the Data Processing List, click to add a Data Embedding processing node.
-
Configure the Data Embedding node. For Name, enter
sentence2emb. For Model Name, select text-embedding-v4. For the field to vectorize, selectsentence. For Vectorization Output Field, entersentence_e. Set Vector Dimension to128and select the Convert NULL To Empty String checkbox. The following table describes the key parameters.Note-
The performance of the Data Embedding node depends on the configured model's performance. QWen models provided by Alibaba Cloud Model Studio have queries-per-second (QPS) limits. For the Alibaba Cloud PAI model marketplace, you must deploy a model on PAI-EAS, and its performance depends on the resource specifications used for deployment.
-
For a given set of parameters, embedding models produce deterministic vectors. Data Integration uses a Least Frequently Used (LFU) cache during synchronization to avoid redundant model calls for identical source data. This improves processing performance and reduces embedding costs.
Parameter
Description
Model Provider
The large model provider. The following providers are supported: Alibaba Cloud DataWorks model service, Alibaba Cloud Model Studio, and Alibaba Cloud PAI model marketplace.
Model Name
The name of the embedding model. Select a model based on your needs.
Model API Key
The API key used to access the model. Obtain the key from the model provider.
-
Alibaba Cloud Model Studio: Obtain a Model Studio API key.
-
Alibaba Cloud PAI model marketplace: Go to the deployed EAS task, enter online debugging, and get the value of the
Authorizationparameter in the headers. Use this value as the API key.
Model endpoint
If you select Alibaba Cloud PAI model marketplace as the Model Provider, you must configure the model endpoint (the endpoint API address).
Batch Size
The batch size for vectorization. This depends on whether the embedding model supports batch processing. Batch processing can improve embedding performance and reduce costs. The default value is 10.
Select Fields to Vectorize
Defines which columns to vectorize and specifies the name of the output field. Data Integration supports vectorizing a single source field or a combination of multiple concatenated fields.
Vectorization Output Field
The name of the vector field defined for the vectorized source field.
Vector Dimension
The dimension of the output vector. The embedding model must support this dimension. The default value is 1024.
Convert a NULL value to an empty string.
Large models cannot process NULL values for vectorization. Enable this option to convert NULLs in your source data to empty strings, which prevents errors. This option is disabled by default.
Concatenate Field Names
Specifies whether to concatenate the field name with the text for vectorization. If you enable this option, you must also configure a Field Name Delimiter. This option is disabled by default.
Skip Empty Fields
When concatenating multiple fields for vectorization, specifies whether to skip empty fields. This option is enabled by default.
-
-
Preview the data output.
In the upper-right corner of the Data Embedding node configuration area, click Preview Data Output and then Preview to view the vectorized results and verify the configuration.
You can also click Dry Run at the top of the offline sync editor page to preview the vectorized results.
In the preview results, the new sentence_e column displays the vector embedding (a sequence of floating-point numbers) for each sentence.
-
-
Configure the Destination.
The following parameters apply to the Milvus destination used in this tutorial. Configuration varies for other destinations, so adjust your settings accordingly.
In this tutorial, set Collection to Milvus_Collection, select insert for Write Mode, set Rows per write to 1024, and select Ignore for Collection creation mode.
Parameter
Description
Collection
The collection that receives the vector data.
Partition Key
Optional. If the collection is partitioned, you can specify a partition for the received vector data.
Write Mode
-
upsert:
-
If auto-ID is disabled for the collection: Updates an entity based on its primary key.
-
If auto-ID is enabled for the collection: Inserts the data as a new entity with an auto-generated primary key.
-
-
insert: Typically used to insert data into a collection with auto-ID enabled, where Milvus automatically generates primary keys.
Using
inserton a collection without auto-ID enabled causes data duplication.
-
-
Configure Destination Field Mapping.
After you configure the source, data processing, and destination, the offline sync task automatically generates field mappings. Because the destination has an unstructured schema, the task maps fields by their position by default. Click Edit next to a Source Field or Target Field to adjust the mapping order or remove unneeded fields to ensure the mapping is correct.
For example, in this tutorial, you manually delete unneeded fields. The adjusted mapping is as follows.
The source field sentence is mapped to the destination field sentence (Type: VarChar, maxLength: 32), and the source field sentence_e is mapped to the destination field sentence_e (Type: FloatVector, dimension: 128).
-
Configure more options in Advanced Settings.
Click Advanced Settings on the right side of the node configuration page. You can configure parameters such as task concurrency, sync rate, and dirty data policies as needed.
Step 3: Debug and run
-
On the right side of the offline sync node editor page, click Run Configuration. Set the Resource Group and Script Parameters for the debug run, and then click Running in the top toolbar to test the sync pipeline.
-
Go to Milvus and check if the data in the destination collection is as expected.
Step 4: Configure scheduling and publish
Click Scheduling Settings to the right of the offline synchronization task. Set the scheduling configuration parameters for scheduled runs, click Publish in the top toolbar, and then follow the on-screen prompts in the Publish panel to publish.
Script mode configuration
This tutorial shows how to configure an offline sync task in data integration using script mode. In this example, you will read data from a MaxCompute (ODPS) source, vectorize it into embeddings, and then sync it to Milvus.
Step 1: Create an offline sync node
-
Go to the Workspaces page in the DataWorks console. In the top navigation bar, select a desired region. Find the desired workspace and choose in the Actions column.
-
In the project directory, click the
icon and choose . Configure the Source and Destination (in this tutorial, the source is MaxCompute and the destination is Milvus), enter a Name for the node, and click OK.
Configure the sync script
-
Click the
 icon in the toolbar of the offline sync node to switch to script mode.
 -
This task syncs data from MaxCompute to Milvus.
The following script is used for this example. For details on the script format, see Appendix 1: Script mode format specification.
{ "type": "job", "version": "2.0", "steps": [ { "stepType": "odps", "parameter": { "partition": [ "split=dev" ], "datasource": "MaxCompute_Source", "successOnNoPartition": true, "tunnelQuota": "default", "column": [ "sentence" ], "enableWhere": false, "table": "test_tb" }, "name": "Reader", "category": "reader" }, { "category": "flatmap", "stepType": "embedding-transformer", "parameter": { "modelProvider": "bailian", "modelName": "text-embedding-v4", "embeddingColumns": { "sourceColumnNames": [ "sentence" ], "embeddingColumnName": "sentence_e" }, "apiKey": "sk-****", "dimension": 128, "nullAsEmptyString": true }, "displayName": "sentence2emb", "description": "" }, { "stepType": "milvus", "parameter": { "schemaCreateMode": "ignore", "enableDynamicSchema": true, "datasource": "Milvus_Source", "column": [ { "name": "sentence", "type": "VarChar", "elementType": "None", "maxLength": "32" }, { "name": "sentence_e", "type": "FloatVector", "dimension": "128", "elementType": "None", "maxLength": "65535" } ], "writeMode": "insert", "collection": "Milvus_Collection", "batchSize": 1024, "columnMapping": [ { "sourceColName": "sentence", "dstColName": "sentence" }, { "sourceColName": "sentence_e", "dstColName": "sentence_e" } ] }, "name": "Writer", "category": "writer" } ], "setting": { "errorLimit": { "record": "0" }, "speed": { "concurrent": 2, "throttle": false } }, "order": { "hops": [ { "from": "Reader", "to": "Writer" } ] } }-
For details on the Reader and Writer parameters, see MaxCompute Data Source and Milvus Data Source.
-
If you use other types of sources or destinations, see the List of Supported Data Sources.
-
The following table describes the parameters for the data vectorization script:
Parameter
Description
Required
modelProvider
Specifies the large model provider. The following providers are supported:
-
dataworksModelService: A model service deployed through DataWorks Large Language Model Service.
-
bailian: Alibaba Cloud Model Studio, which supports QWen models.
-
paiModelGallery: Alibaba Cloud PAI Model Marketplace, which supports BGE-M3 models.
Yes
modelName
The name of the embedding model to use.
-
When modelProvider is bailian, you can select
text-embedding-v4ortext-embedding-v3. -
When modelProvider is paiModelGallery, you can select
bge-m3.
Yes
apiKey
The API key used to access the model. Obtain the key from the model provider.
Yes
endpoint
The endpoint for accessing the model. This is required when modelProvider is set to paiModelGallery.
No
batchSize
The batch size for vectorization. This depends on whether the embedding model supports batch processing. Batch processing can improve embedding performance and reduce costs. The default value is 10.
No
embeddingColumns
Defines the columns to vectorize and the name of the output column. Data integration supports vectorizing a single source column or a concatenation of multiple columns.
Example:
{
  "embeddingColumns": {
    "sourceColumnNames": [
      "col1",
      "col2"
    ],
    "embeddingColumnName": "my_vector"
  }
}
Yes
appendDelimiter
The delimiter used to join values from multiple columns into a single text string for vectorization. Default:
\n.No
skipEmptyValue
Specifies whether to skip empty columns when concatenating multiple columns for vectorization. Default: false.
No
dimension
The dimension of the output vector. The embedding model must support this dimension. The default value is 1024.
No
nullAsEmptyString
Embedding models cannot process NULL input. If your source data contains NULL values, you can set this parameter to
trueto convert them to empty strings and prevent vectorization errors. Default:false.No
appendFieldNameEnable
Specifies whether to prepend the column name to the data before vectorization. If
true, you must also configure appendFieldNameDelimiter. Default:false.No
appendFieldNameDelimiter
The delimiter for concatenating column names. This parameter takes effect only when appendFieldNameEnable is set to
true.No
-
-
-
On the node's toolbar, click Dry Run, then click Start Collection and Preview to check the vectorized results and verify your configuration. In the dialog box, set Number of samples to 3 and click Start Sampling to fetch the input data. The input data table contains
sentence,label, anddatasetcolumns. The preview results show a newsentence_ecolumn, which displays the floating-point vector generated for each text entry after embedding conversion. No dirty data records were found in the input data. If the results are correct, click OK. -
Configure more options in Advanced Settings.
Click Advanced Settings on the right side of the node configuration page. You can configure parameters such as task concurrency, sync rate, and dirty data policies as needed.
Step 3: Debug and run
-
On the right side of the offline sync node editor page, click Run Configuration. Set the Resource Group and Script Parameters for the debug run, and then click Running in the top toolbar to test the sync pipeline.
-
Go to Milvus and check if the data in the destination collection is as expected.
Step 4: Configure scheduling and publish
Click Scheduling Settings to the right of the offline synchronization task. Set the scheduling configuration parameters for scheduled runs, click Publish in the top toolbar, and then follow the on-screen prompts in the Publish panel to publish.
Appendix 1: Script mode format
The basic structure of a script is as follows:
{
    "type": "job",
    "version": "2.0",
    "steps": [
        {
            "stepType": "xxx",
            "parameter": {
            },
            "name": "Reader",
            "category": "reader"
        },
        {
            "stepType": "xxx",
            "parameter": {
            },
            "name": "transformer1",
            "category": "map/flatmap"
        },
        {
            "stepType": "xxx",
            "parameter": {
            },
            "name": "transformer2",
            "category": "map/flatmap"
        },
        {
            "stepType": "xxx",
            "parameter": {
            },
            "name": "Writer",
            "category": "writer"
        }
    ],
    "setting": {
    }
}
The steps array defines each processing step. It must contain at least one Reader and one Writer, and can optionally include multiple Transformer steps in between. For example, if you set the concurrency to 2, the job will have two parallel data processing streams. Each Reader, Transformer, and Writer is considered a step in the task configuration.
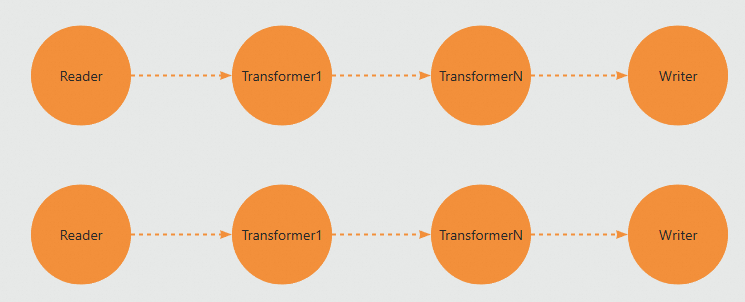
The steps array defines the type and parameters for each step. The data processing flow follows the order of the step elements in the array.
For detailed parameter configurations for the read/write connectors of various data sources supported by data integration, see: Supported Data Sources and Sync Solutions.
Appendix 2: Sync from OSS to Milvus
This example syncs JSON Lines (JSONL) data from OSS, parses it, vectorizes specified fields, and writes the output to Milvus. The following example shows the complete JSON configuration:
{
    "type": "job",
    "version": "2.0",
    "steps": [
        {
            "stepType": "oss",
            "parameter": {
                "datasource": "${YOUR_OSS_DATASOURCE_NAME}",
                "column": [
                    {
                        "name": "chunk_text",
                        "index": 0,
                        "type": "string"
                    }
                ],
                "fieldDelimiter": ",",
                "encoding": "UTF-8",
                "fileFormat": "jsonl",
                "object": [
                    "embedding/chunk1.jsonl"
                ]
            },
            "name": "Reader",
            "category": "reader"
        },
        {
            "stepType": "json-extracting",
            "parameter": {
                "column": [
                    {
                        "name": "text",
                        "fromColumn": "chunk_text",
                        "jsonPath": "$.text",
                        "type": "STRING",
                        "nullOrInvalidDataAction": "DIRTY_DATA"
                    }
                ]
            },
            "name": "jsonextract",
            "category": "flatmap"
        },
        {
            "stepType": "embedding-transformer",
            "parameter": {
                "modelProvider": "bailian",
                "modelName": "text-embedding-v4",
                "apiKey": "${YOUR_API_KEY}",
                "embeddingColumns": {
                    "sourceColumnNames": [
                        "text"
                    ],
                    "embeddingColumnName": "my_vector"
                },
                "batchSize": 8,
                "dimension": 1024
            },
            "name": "embedding",
            "category": "flatmap"
        },
        {
            "stepType": "milvus",
            "parameter": {
                "schemaCreateMode": "ignore",
                "enableDynamicSchema": true,
                "datasource": "${YOUR_MILVUS_DATASOURCE_NAME}",
                "column": [
                    {
                        "name": "my_vector",
                        "type": "FloatVector",
                        "dimension": "1024",
                        "elementType": "None",
                        "maxLength": "65535"
                    },
                    {
                        "name": "text",
                        "type": "VarChar",
                        "elementType": "None",
                        "maxLength": "65535"
                    }
                ],
                "collection": "yunshi_vector_07171130",
                "writeMode": "insert",
                "batchSize": 1024,
                "columnMapping": [
                    {
                        "sourceColName": "my_vector",
                        "dstColName": "my_vector"
                    },
                    {
                        "sourceColName": "text",
                        "dstColName": "text"
                    }
                ]
            },
            "name": "Writer",
            "category": "writer"
        }
    ],
    "setting": {
        "errorLimit": {
            "record": "0"
        },
        "speed": {
            "concurrent": 1
        }
    }
}