In a private service, all required resources and software are deployed in the customer's Alibaba Cloud account. This topic describes how a service provider can create a private service in the Compute Nest console.
Procedure
Log on to the Compute Nest console.
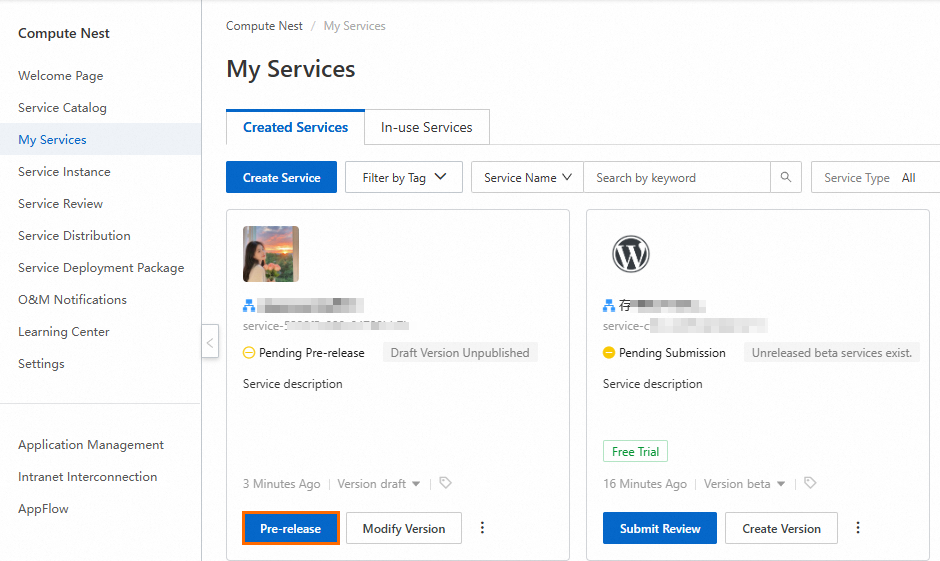
In the navigation pane on the left, choose My Services. On the My Services page, click the Created Services tab, and then click Create Service.
On the Create Service page, configure the service information.
Select a method to create the service.
You can select Create Service from Featured Templates or Build Custom Service.
Create from Featured Template: Compute Nest provides service templates for various architectures and applications to help you quickly create services.
Create Custom Service: This option guides you through the complete service creation process. You must configure service information, service deployment, O&M, and advanced settings.
For Select a service type, select Private Service.
If you select Create Service from Featured Templates, you must first select Private Service and then select a service template.
NoteAfter you select a service template, you can click View Details to view the template's deployment description and configuration file.
Click Next: Configure Settings.
On the service configuration page, configure the service information.
If you select Create Service from Featured Templates, you only need to configure the basic service information.
NoteThe service icon and service name are pre-filled based on the selected service template. You can modify them as needed.
If you select Build Custom Service, you must configure the complete service information.
In the Basic Information section, configure the basic service information.
Configuration description
Service Icon
The icon of the service. The JPG and PNG formats are supported. We recommend that you upload an image whose resolution is 192 × 192 pixels for optimal clarity.
Service Name
The name of the service. The name must be 3 to 200 characters in length, and can contain digits, letters, and underscores (_).
Service Description
The description of the service. The description must be 10 to 500 characters in length.
Service agreement document
Enter the name and URL of the custom service agreement document for the service.
Version Description
The description of the service version. The version description must be 1 to 200 characters in length. We recommend that you include a version number in the description. The description of each version of a service must be unique.
Default Prefix for Service Instance Name
The default prefix of service instance names. The prefix can be up to 40 characters in length, and can contain digits, letters, hyphens (-), and underscores (_). The prefix must start with a letter.
After you specify the default prefix, the prefix is automatically entered in the Service Instance Name field when customers create a service instance. Customers can modify the prefix.
Tag Settings
The tag key and value. Select or enter a tag key and a tag value to add a tag to the service resources. You can add up to 20 tags to each resource. If no tag key or tag value is available, you can create a custom tag. For more information, see Add a custom tag.
Resource group
Select a resource group for your resources.
Resource groups allow you to group your cloud resources by dimensions such as purpose, permissions, and ownership. This enables hierarchical resource management for multiple users and projects within your enterprise. For more information, see Resource groups.
In the Service Deployment section, configure the resources required for the service.
Setting
Description
Deployment Settings
Regions
The regions in which service instances can be deployed. By default, All Regions is selected.
nst.vendor.create.tplInputType.label
Enter the Template Name and Template Content. For the template content, you can upload a prepared template file. The template can be in ROS JSON, ROS YAML, or Terraform format. For more information, see Resource Orchestration Service.
If your business scenario requires you to create different types of templates in the same service, you can add multiple templates. Click the
 icon next to Template 1 to add another template. For example, to distinguish between single-zone and multi-zone deployments within the same service, you can add a single-zone template and a multi-zone template separately.Important
In templates that support trial services, you cannot create new VPCs or vSwitches. If your template supports trial services, set the VPC and vSwitch parameters as template parameters.
The security group used in a trial template must be a new one. You cannot select an existing security group.
Add package
Based on the template content, select the package parameters to configure and set their values. If you want service users to be able to customize all parameters in the package when they create a service instance, select Support Custom Packages. Otherwise, do not select it. For more information about package settings, see Package settings.
Deployed At
Estimated Time
The estimated time for deploying a service instance. If you configure this parameter, the specified value is displayed on the service instance deployment page to inform customers of the average time required to deploy a service instance.
Timeout Period
The timeout period for deploying a service instance. When customers deploy a service instance, if the time consumed exceeds the specified timeout period, the deployment fails. This parameter is required only for private services.
Deployment Package Association
Set ECS Image Association
You can set this parameter to replace the Elastic Compute Service (ECS) image specified in the template with the ECS image in the deployment package that has been distributed. For more information, see ECS image deployment packages.
Set Container Image Association
We recommend that you use Container image deployment packages if Docker container images are used for service deployment. For more information, see Container image deployment packages.
Set File Association
Compute Nest provides file deployment packages to resolve the issues that you may encounter when you download software resources for script-based deployment. For example, the cloud resources are inaccessible over the Internet, or the download source of the resources is not stable. For more information, see File deployment packages.
Set Helm association
To keep your Helm chart packages private, use Helm chart deployment packages from Compute Nest. For more information, see Helm chart deployment packages.
Application Group
Create Application Group
The application groups of resources in the template. You can add resources in the template to application groups. This facilitates resource check and management for customers. On the details page of service instances, customers can view resources, view monitoring data, perform O&M operations, and view logs by group.
NoteEach resource can be added to only one group.
In the Service O&M (Optional) section, configure the O&M features for the service.
Configuration item
Description
O&M
Obtain Permissions
Specifies whether to enable the hosted O&M feature.
To enable the hosted O&M feature, select Obtain Permissions and select the permissions that customers need to grant to service providers.
To disable the hosted O&M feature, clear Obtain Permissions.
For more information, see Enable the hosted O&M feature for a private service.
Add O&M operation
Specify the O&M operations to display on the user's O&M management page. For more information, see Custom O&M operations.
Monitoring
Resource Monitoring
The monitoring configurations. If you want to receive alert notifications, you must select Obtain Permissions and then select Monitoring Permissions.
Configure CloudMonitor Alert Template for All Resources: Select a CloudMonitor alert template.
Configure CloudMonitor Alert Template for All Resources: Select a CloudMonitor alert template for each application group.
NoteThis option is available only if application groups are configured.
If no alert template is available, create one first. For more information, see Overview of monitoring and alerting.
Log
Application Log
Configure the Logstore for the application logs of the service.
Click Add Logstore. In the dialog box that appears, set the Logstore name, path, and file name.
NoteIf a service is deployed on an ECS instance, you must set the path and file name for the Logstore.
If a service is deployed in a container, you must set the Logstore information in the environment variables of the container.
Upgrade
nst.vendor.create.upgrade.type.desc
Specifies whether to enable the upgrade feature. If you disable this feature, you do not need to configure the following parameters.
Rolled Back by Customers: specifies whether to allow customers to roll back their service instances to the original version from a later version. By default, this rollback is supported.
nst.vendor.create.upgrade.description.label: the upgrade content or the description of new features.
nst.vendor.create.upgrade.version.label: the service versions that have been published. You can select one or more versions. By default, All Versions is selected.
nst.vendor.create.upgrade.components.label: the upgrade scope.
Service Configurations: updates only the configurations of service instances, such as hosted O&M settings and O&M notification settings. No software applications are upgraded. This option is selected by default.
Resource Configurations: updates the resources in ROS or Terraform templates. No additional configurations are required if you select this option.
Application Configurations: upgrades software applications by replacing image or file deployment packages. Additional configurations are required if you select this option.
Configure Upgrade Parameters: This parameter is required if you select Application Configurations for nst.vendor.create.upgrade.components.label.
For more information about how to configure this parameter, see Configure service upgrades. If you have configured multiple application groups, you can separately configure upgrade settings for each application group.
Modify Configurations
Service Instance Configuration Change
Specifies whether to enable the configuration change feature. If you disable this feature, you do not need to configure the following parameters.
Click Add Operation. In the dialog box that appears, configure the configuration change operation.
Select Template: the template that is used to implement the configuration change.
NoteTo enable instance type change, you must set the
UpdatePolicyproperty of theALIYUN::ECS::InstanceGroupresource toForAllInstancesin the template.To enable the update of the
ALIYUN::ECS::RunCommandresource, you must set theSynsproperty totruein the template. The updatedALIYUN::ECS::RunCommandresource is re-executed during the configuration change.
Operation Name: the name of the configuration change operation.
Operation Description: the description of the configuration change operation.
Operation Type: the type of the configuration change operation. Valid values: Upgrade, Downgrade, and Custom. You can select only one operation type.
Upgrade: If you select Change Plan as Method, customers can upgrade service instances by changing the current parameter set to a parameter set with a larger serial number. If you select Change Parameter as Method, customers must set parameters of a numeric type to larger values when they upgrade service instances. Custom parameter sets do not support upgrade operations.
Downgrade: If you select Change Plan as Method, customers can downgrade service instances by changing the current parameter set to a parameter set with a smaller serial number. If you select Change Parameter as Method, customers must set parameters of a numeric type to smaller values when they downgrade service instances. Custom parameter sets do not support downgrade operations.
Custom: No limits are set on the configurations of parameter sets and parameters, and custom parameter sets are supported.
Method: the configuration change method.
Select Parameters: the parameters that can be modified by customers. This parameter is available only if you select Change Parameter as Method. Parameters that cannot be changed are filtered out.
In the Advanced Configuration (Optional) section, configure the advanced features for the service.
NoteSales-related settings, such as licenses and Alibaba Cloud Marketplace listings, are configured after the service is created. For more information, see Sales management.
Configuration Item
Description
Permission Settings
Permission Type
Set the permission for the service deployment URL.
Public: Any user who has the deployment URL can use it to create service instances.
Restricted: Only users added to the deployment URL's permission whitelist can use the URL to access the service or create service instances. For more information, see Modify service deployment permissions.
Hidden: The service details page is hidden from users who are not on the deployment URL's permission whitelist. When an unauthorized user opens the deployment URL, a message appears that indicates the service does not exist.
Trial Settings
Support free trial
Select whether to support a free trial for the service.
If you have configured packages, select one or more packages as trial packages. If you have not configured packages, specify one or more templates as trial templates. For more information, see Configure a free trial.
Maximum Trial Period
The maximum trial duration of a service instance. This parameter takes effect only for trial service instances. It is invalid for formal service instances. The trial duration can be up to 30 days.
ImportantThe resource fees generated by trial service instances are paid by Alibaba Cloud. However, these resources consume your free trial quota. To achieve a balance between a good trial experience and an ideal number of trial customers, we recommend that you configure appropriate parameter sets and templates for trial service instances and specify an appropriate trial duration.
Network Settings
VPC private access
Select whether to enable a private link from the service instance to the central service. You can set this parameter when the free trial feature is disabled. If you do not enable this feature, you do not need to configure the subsequent parameters.
NoteThis configuration currently supports only establishing a PrivateLink connection from the VPC Of A User's Privately Deployed Service to the Service Provider's Custom Endpoint Service.
Endpoint service configuration: Select the region and information of the endpoint service. You can set only one endpoint service in each region. If you want to provide Compute Nest services in multiple regions, you must set an endpoint service for each region.
If the endpoint service that you need is not found, create one. For more information about how to create an endpoint service, see Create and manage endpoint services.
Custom domain name: When users create service instances, they can use this domain name to access your service over a private network. We recommend that you use the public domain name of your service as the custom domain name.
Distribution Settings
Allow distributors to request distribution authorization
After you enable this feature, Compute Nest distributors can request authorization to distribute this service. You will receive a notification for review. If you grant the authorization, the distributors can re-create and distribute the service. You must settle payments with the distributors separately.
Click Create Service. In the confirmation dialog box that appears, click OK.
In the prompt that appears, click View List or Test Service.
Result
After the service is created, you can view it on the My Services page.
What to do next
Test the service.
After you save the service, you can run a self-test. Alternatively, you can pre-publish the service and share it with specific customers for testing. For more information, see Test a service.
Publish the service.
After the service passes all tests, submit it for review. After the service is approved, you can publish it. For more information, see Publish a service.