Compute Nest provides file deployment packages to resolve the issues that you may encounter when you download software resources for script-based deployment. For example, the cloud resources are inaccessible over the Internet, or the download source of the resources is not stable. This topic describes how file deployment packages work. This topic also describes how to create and use a file deployment package.
Background information
Purpose
Compute Nest provides file deployment packages to resolve the issues that you may encounter when you download software resources for script-based deployment. For example, the cloud resources are inaccessible over the Internet, a file is too large, or the download source of the resources is not stable. After you upload a file to the specified Object Storage Service (OSS) bucket, Compute Nest automatically replicates the file to multiple regions and replaces the file identifier in a template with an internal OSS URL of the file in the corresponding region. This ensures stability and security of data transmission.
Benefits
As a service provider, you need to only specify a file identifier in a template and associate a file deployment package with the file identifier on the service details page of the Compute Nest console.
File replication: Compute Nest replicates the file that you uploaded to the general account of Compute Nest. Then, the file is replicated to the OSS buckets in different regions within the account.
File association: Compute Nest identifies the file identifier
{{ computeneset::file::xxx}}in a template and associates the identifier with a file deployment package when you create a service. When a customer creates a service instance, Compute Nest identifies the region in which the customer wants to deploy the service instance and automatically selects the OSS URL of the file in that region. This way, the file URL dynamically changes by region.Permission management: The public or private attribute of a file deployment package is determined by the attribute of services. If a file deployment package is not associated with a service, the file deployment package is private. If at least one public service is associated with a file deployment package, the file deployment package is public. If all services that are associated with a file deployment package are private, the file deployment package is private.
Download over an internal network: Compute Nest downloads file deployment packages over an internal network. When a customer creates a service instance, Compute Nest automatically generates an internal HTTP URL of the file in the OSS bucket in the corresponding region to replace the file identifier. Downloads over an internal network are stable and secure.
Usage notes
Define a file identifier in the Resource Orchestration Service (ROS) template for deploying a service, and associate a file deployment package with the file identifier. When a customer creates a service instance, Compute Nest automatically identifies the file identifier in the template and replaces it with the file URL in the region in which the service instance is deployed.
You can specify a file identifier by using one of the following fixed expressions:
(Recommend) If a file deployment package uses a private URL, specify the file identifier by using the fixed expression
{{ computenest::file:: ${key}}}.If a file deployment package uses a public URL, specify the file identifier by using the fixed expression
{{ computenest::publicfile::${key}}}.NoteIn the preceding expressions,
${key}indicates a string without spaces.
The following sample YAML files show how to define file identifiers to use file deployment packages:
When you define a file identifier in a template, we recommend that you enclose the identifier by using single quotation marks (') or double quotation marks (").
If you run the wget command to download a file, we recommend that you use the -O parameter to specify the file name of the downloaded file.
Define file identifiers in a common template
The following sample code shows how to define file identifiers in the
UserDatasection of a template to download files and rename the files asTestFirst.txtandTestSecond.tar:TiDBServer: Type: ALIYUN::ECS::InstanceGroup Properties: ... UserData: Fn::Sub: - | #!/bin/sh sleep 10 wget '{{ computenest::file::DemoFirst }}' -O TestFirst.txt wget '{{ computenest::file::DemoSecond }}' -O TestSecond.tar ......Define a file identifier in a
MigrateTasktemplateSQLDump: Type: ALIYUN::RDS::MigrateTask Properties: ... DBName: mytest DBInstanceId: Fn::GetAtt: - Database - DBInstanceId OssObjectPositions: {{ computenest::file::DemoFirst }}
Create and use a file deployment package
Prerequisites
The file that you want to upload is prepared.
Create a file deployment package
Configure the basic information about the deployment package.
Log on to the Compute Nest console. In the left-side navigation pane, click Service Deployment Package. In the Deployment Package section of the Service Deployment Package page, click Create Deployment Package.
In the Deployment Package Information section, configure the parameters described in the following table.
Parameter
Description
Deployment Package Name
The name of the deployment package. The name must be 3 to 128 characters in length, and can contain letters, digits, and underscores (_). The name cannot be changed after the deployment package is created.
Version Name
The name of the deployment package version. The name must be 3 to 50 characters in length, and can contain letters, digits, and underscores (_).
Description
The description of the deployment package. The description must be 10 to 500 characters in length.
Resource Group
The name of the resource group to which the deployment package belongs.
Resource groups are used to group your resources by usage, permission, and region. You can use resource groups to organize your resources in a hierarchical manner and group resources based on users and projects. For more information, see Manage resource groups.
Tag Settings
The tags that you want to add to the deployment package. Select or enter complete tag keys and tag values. You can add up to 20 tags to a deployment package. If no tag key or tag value are available, you can create a custom tag. For more information, see Add a custom tag.
Configure the file deployment package.
In the Deployment Package Content section, select File for the Deployment Package Type parameter.
Select the region to which you want to upload the file for the Upload Deployment Package parameter. Then, select Upload Local File or Upload File Larger Than 5 GB based on the size of the local file that you want to upload.
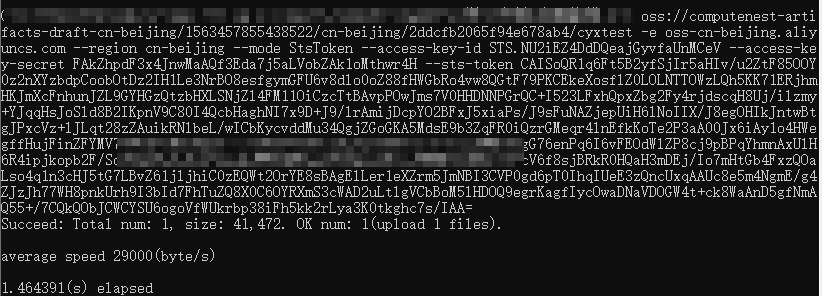
Click Obtain Access Credential. The upload command for local upload or upload over an internal network from an Elastic Compute Service (ECS) instance appears. Copy the upload command based on your upload environment. Then, replace
<source_file>and<target_file>in the command with the name of the source file and the name of the file after it is uploaded to Compute Nest.Upload the file by using Alibaba Cloud CLI.
Enter the name of the uploaded file for the File Upload URL parameter.
Optional. Turn Configure Script Command on or off. Script commands are used to update service instances. You do not need to configure script commands for file associations.
Configure the Distribution Region parameter. By default, All Regions is selected, which indicates that the file deployment package is distributed to all regions.
Click Publish Deployment Package.
After a deployment package is published, you cannot modify the content of the published version. To modify the content, create a new version or a new deployment package.
View the deployment package.
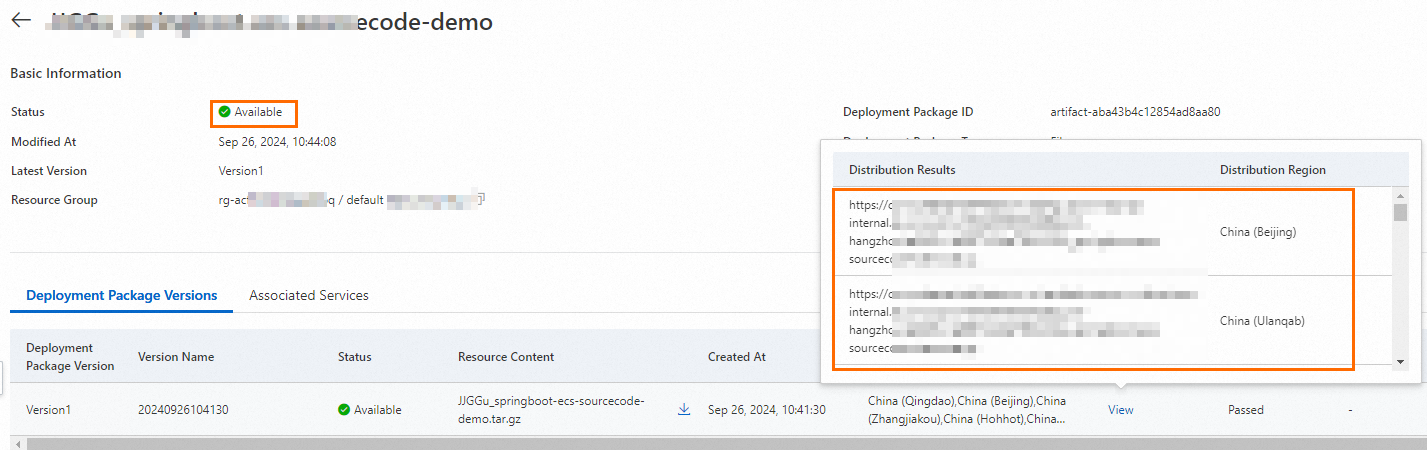
Return to the Service Deployment Package page. Find the deployment package that you want to view and click its name. On the Packages tab, you can view the deployment progress.
After the status of the file deployment package becomes Available, click View in the Actions column to view the distribution result of the file deployment package.
Use a file deployment package
In this example, a private service is created to describe how to use a file deployment package.
On the Create Service page, set Select Service Creation Method to Custom Launch, Select Service Type to Private Service, and then click Next: Configure Settings.

Enter the basic service information as prompted. Select a template type and template creation method, select ROS for the Deployment Method parameter, and then enter the template content.
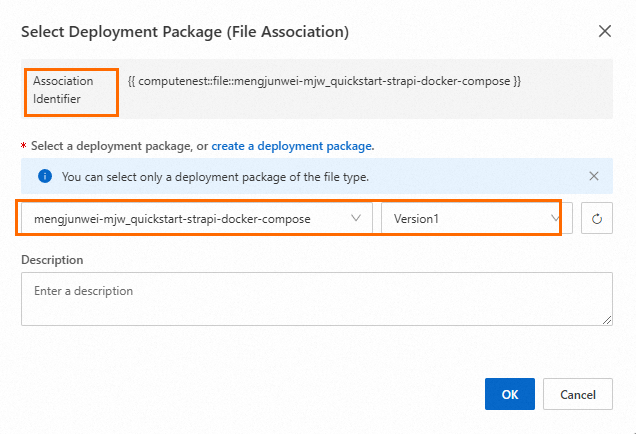
If
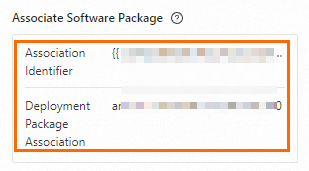
{{ computenest::file::test }}or{{ computenest::publicfile::test }}exists in the ROS template, you can configure the Set File Association parameter in the Deployment Package Association section.Click Deployment Package Association in the Associate Software Package section. In the dialog box that appears, select a deployment package and a version and click OK.
After the service is created and passes the test, check whether the service meets the review criteria of Compute Nest and submit the service for review. For more information, see Review criteria.
After the service is approved, publish the service. For more information, see Publish a service.
When a customer creates a service instance, Compute Nest automatically replaces the content in the template with the file URL in the region in which the service instance is deployed to use the file deployment package.
The following figures show the results after the file identifiers in a common template are replaced.
The following figure shows the replacement result of private file URLs.

The following figure shows the replacement result of a public file URL.

For a file identifier defined in a MigrateTask template, Compute Nest converts the file URL of a file deployment package to the format specified for the
OssObjectPositionsparameter.The value of the OssObjectPositions parameter is composed of the OSS endpoint, OSS bucket name, and backup file key in OSS. The three segments are separated by colons (
:). Example:oss-ap-southeast-1.aliyuncs.com:rdsmssqlsingapore:autotest_2008R2_TestMigration_FULL.bak. For more information, see ALIYUN::RDS::MigrateTask. The following figure shows the replacement result of a file URL in a MigrateTask template.
References
For more information about how to create a service in Compute Nest, see Create a service.
If you no longer need a deployment package or deployment package version, you can delete it. For more information, see Delete a deployment package.
If you need to modify a deployment package such as the distribution regions and content, you can create a new version. For more information, see Create a version.