Unlike Deployments, StatefulSets maintain the identity of each pod across restarts, making them the right choice for databases, message queues, and distributed storage systems. This topic describes how StatefulSets work and how to create one in Container Service for Kubernetes (ACK).
After completing this topic, you will know how to:
Explain the three identity guarantees StatefulSets provide
Create a StatefulSet using the ACK console or kubectl
Verify that pods retain their names and network identities after deletion
How StatefulSets work
A StatefulSet manages a fixed number of pods, just like a Deployment. The difference is that StatefulSets assign each pod a stable, persistent identity that survives restarts and rescheduling. This identity has three components:
Ordered pod names
Pods are named <StatefulSet name>-<serial number>, starting at 0. A StatefulSet named db-app with two replicas creates pods db-app-0 and db-app-1. If a pod is deleted and recreated, it gets the same name.
Stable network identity
Associate a headless Service with the StatefulSet by setting spec.serviceName to the Service name. The headless Service assigns each pod a stable DNS name in the format:
<pod name>.<headless Service name>.<namespace>.svc.<ClusterDomain>For example: db-app-01.db-app.default.svc.cluster.local
Unlike a standard Service, a headless Service does not load balance traffic — it returns the IP addresses of all backend pods directly for DNS queries. When a pod is recreated, its DNS name automatically resolves to the new pod's IP address.
Stable persistent storage
Define a persistent volume claim (PVC) template in spec.volumeClaimTemplates. The StatefulSet automatically creates a separate PVC for each pod, named <PVC template name>-<pod name>. When a pod is deleted, its PVC is retained. When the pod is recreated with the same serial number, the PVC is automatically reattached.
Together, these three guarantees ensure that a recreated pod picks up exactly where the original left off — same name, same DNS address, same persistent data.
For the full StatefulSet specification, see StatefulSets.
Limitations
Before using StatefulSets, be aware of the following:
Headless Service is required. You must create the headless Service yourself — ACK does not create it automatically. Without it, pods have no stable DNS names.
PVCs are not deleted with the StatefulSet. Deleting a StatefulSet does not delete the PVCs it created. Clean up PVCs manually after deleting a StatefulSet to avoid unexpected storage costs.
Pods are created and deleted in order. By default, pod
N+1is not started until podNis Running and Ready. Similarly, podN+1is terminated before podN. Scale the StatefulSet down to 0 before deletion for a clean, ordered shutdown.
Prerequisites
Before you begin, ensure that you have:
An ACK cluster with public network access, so the sample images can be pulled. To configure access:
(Recommended) Enable an existing ACK cluster to access the Internet: create a public NAT gateway for the virtual private cloud (VPC) hosting the cluster.
Assign static public IP addresses to nodes: assign a public IP to every node that runs workloads.
For kubectl-based creation, you also need:
kubectl connected to the cluster. For setup instructions, see Obtain the kubeconfig file of a cluster and use kubectl to connect to the cluster.
Create a StatefulSet
Create from the console
Log on to the ACK console. In the left navigation pane, click Clusters.
On the Clusters page, click the cluster name. In the left-side pane, choose Workloads > StatefulSets.
In the upper-left corner of the StatefulSets page, click Create from Image.
In the Basic Information step, configure the basic settings of the application. Click Next.
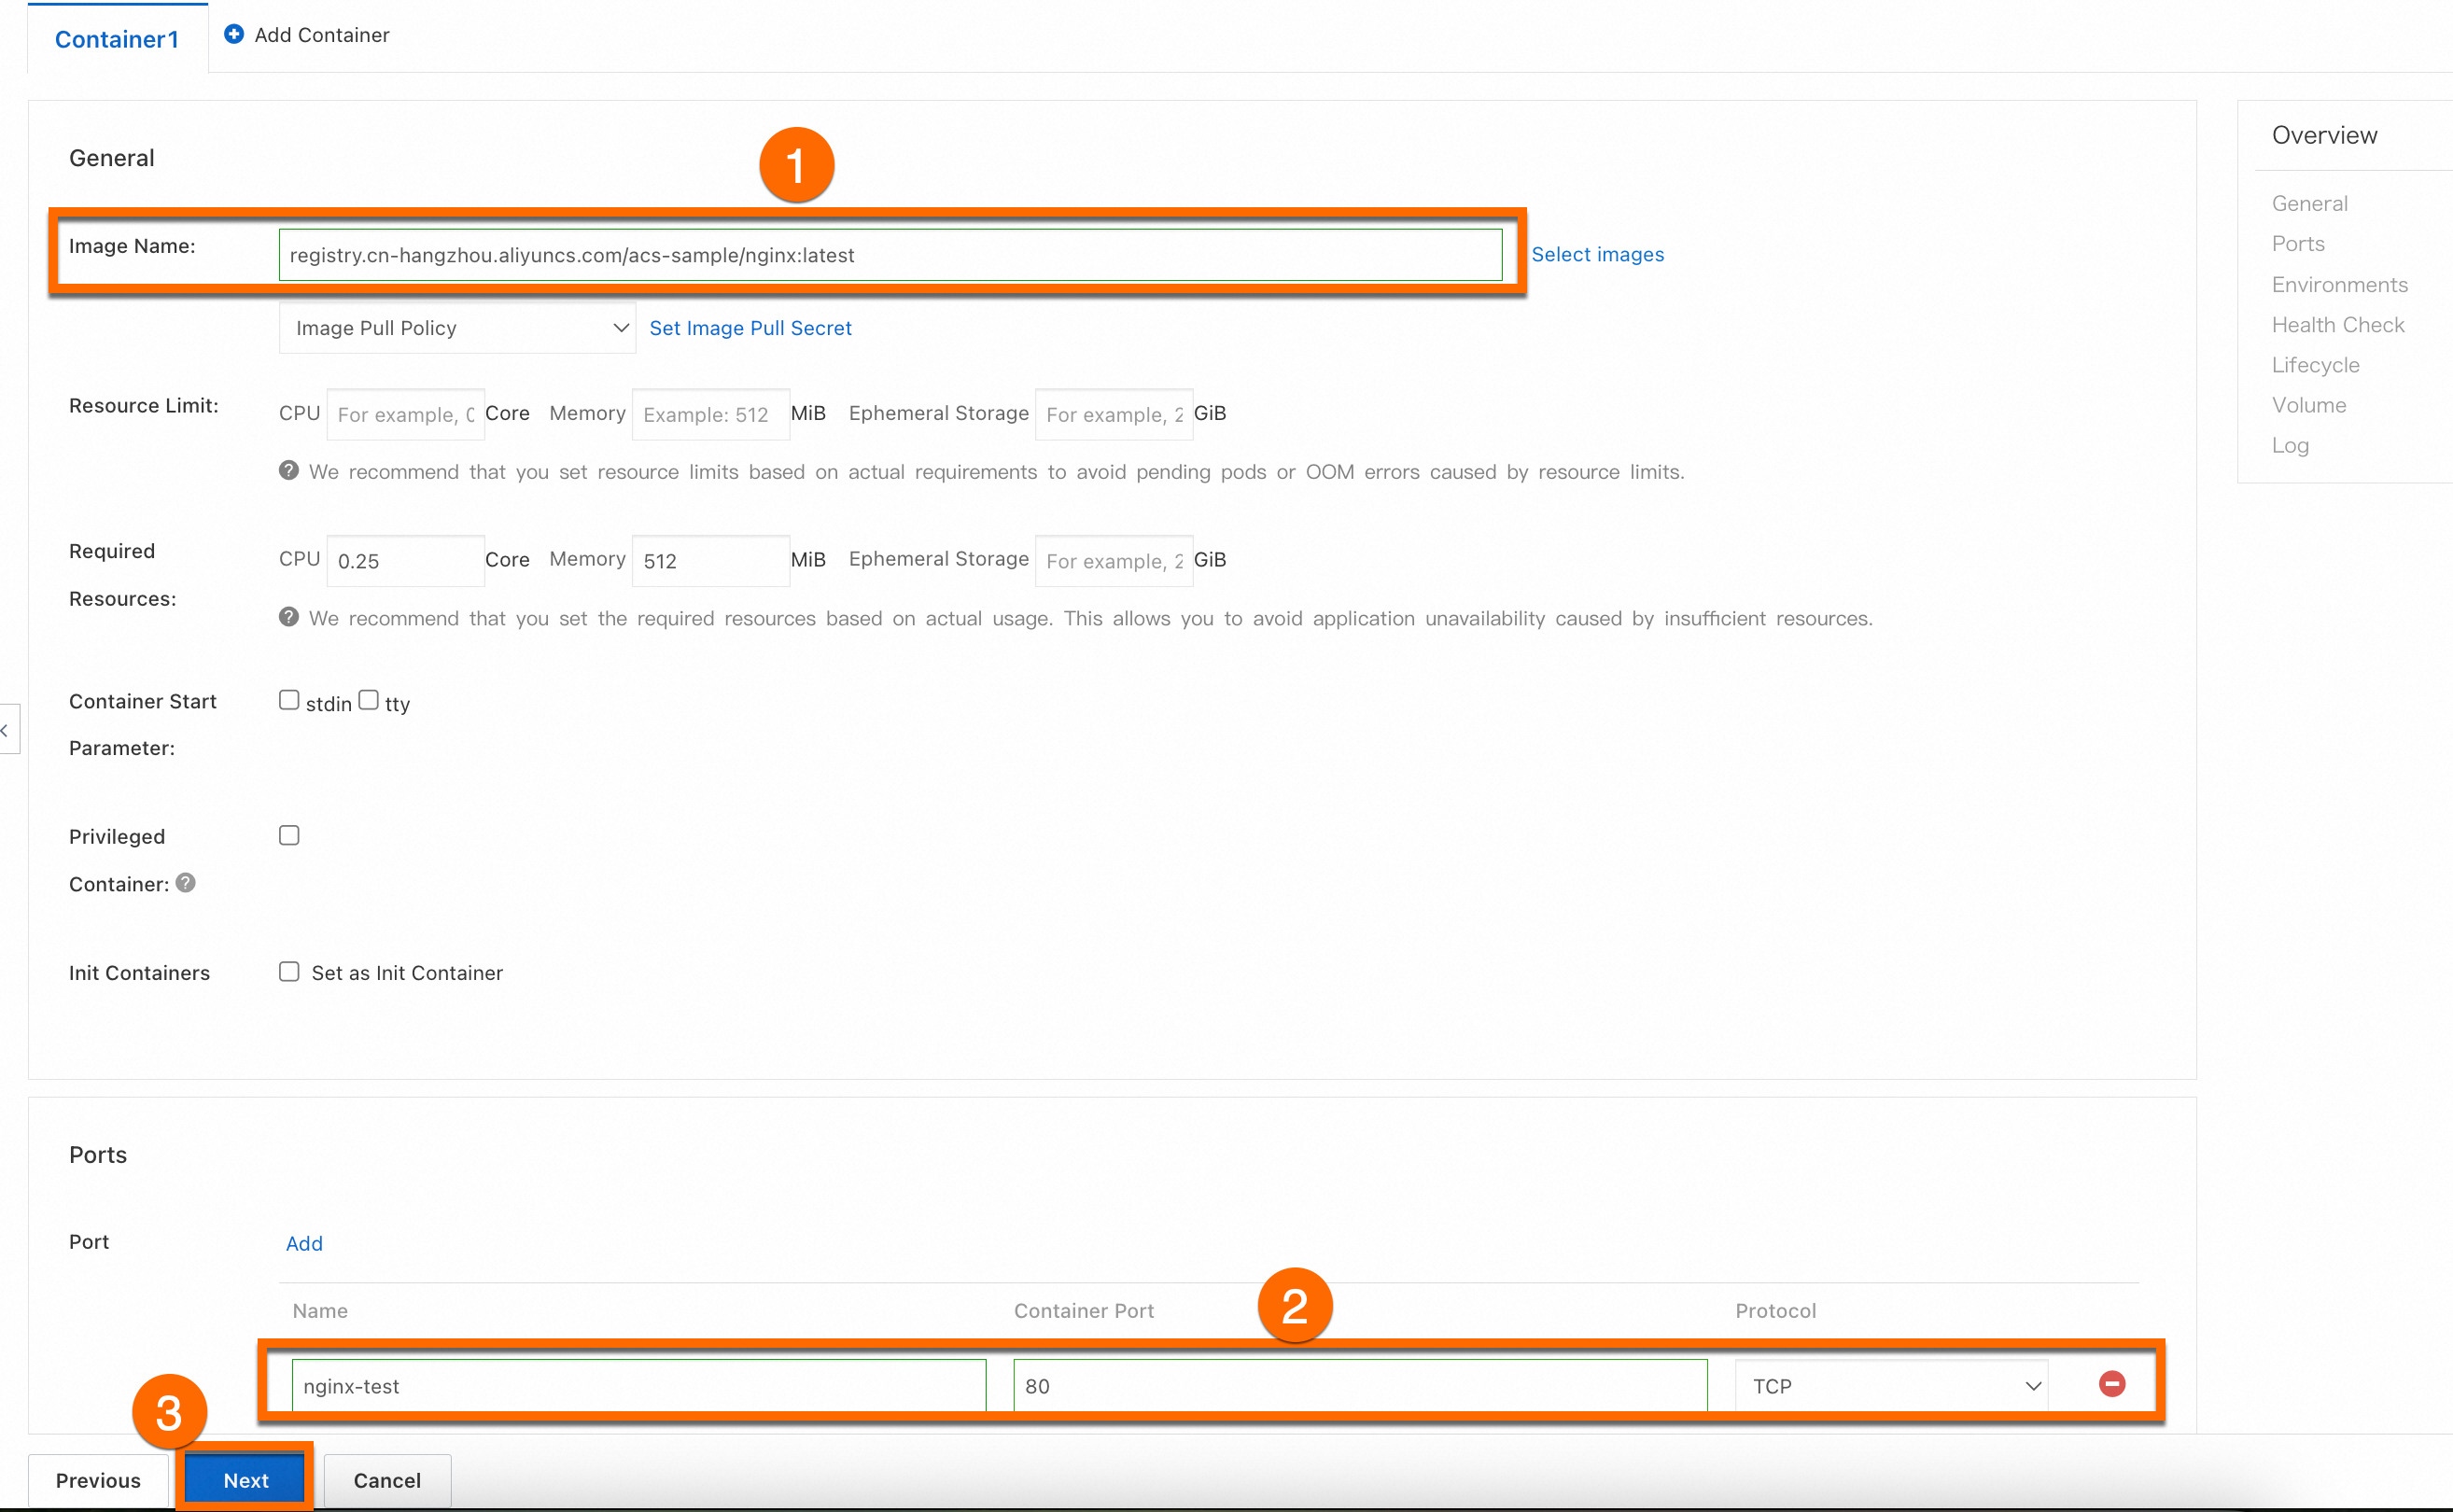
In the Container step, configure Image Name and Port. Keep other parameters at their default values. For Image Name, use:
ImportantThe cluster must have Internet access to pull this image. If you kept the default value for Configure SNAT for VPC when creating the cluster, Internet access is already enabled. For existing clusters, see Enable an existing ACK cluster to access the Internet.
registry.cn-hangzhou.aliyuncs.com/acs-sample/nginx:latestClick Next.
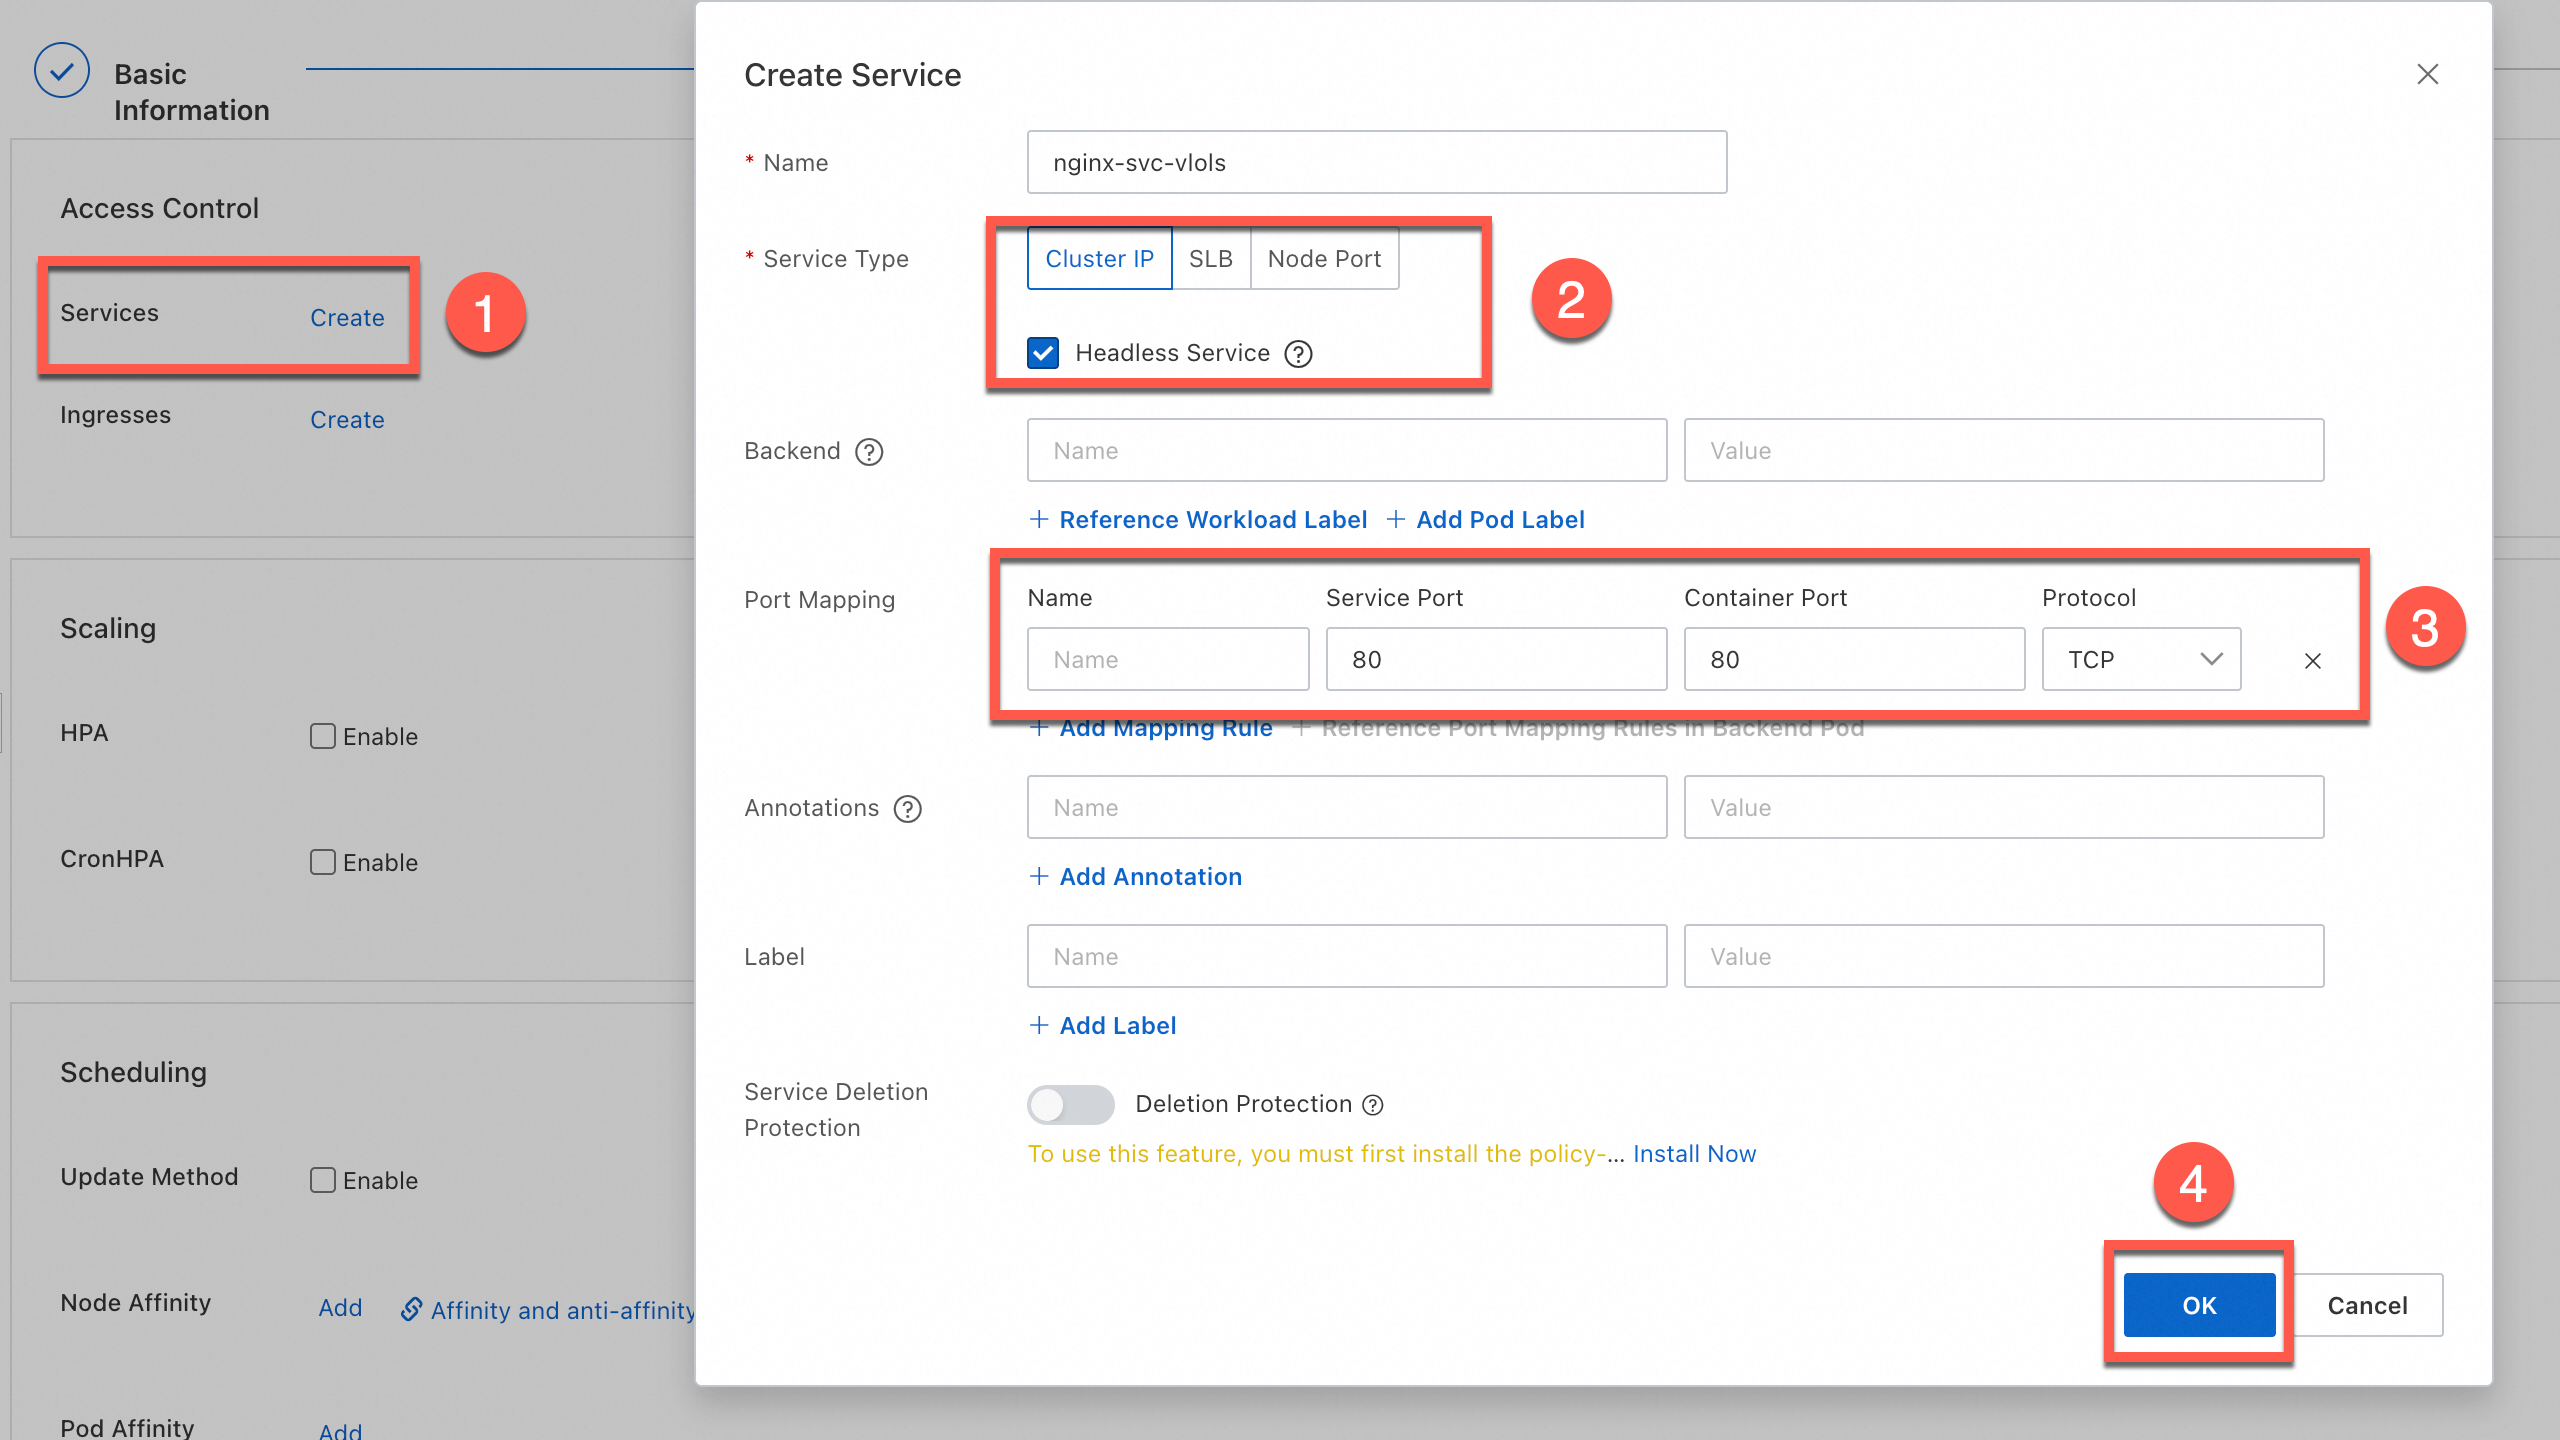
In the Advanced step, go to the Access Control section. Create a Cluster IP Service, select Headless Service, and click OK. Then click Create.
The parameters in the Basic Information, Container, and Advanced steps are the same as for a Deployment. For details on all parameters, see Parameters.
Create with kubectl
Create a file named
statefulset.yamland paste the following content. The manifest defines three resources:A headless Service named
nginx, providing stable DNS names for podsA StatefulSet named
nginx-testwith ahostPathvolume mountedA LoadBalancer Service named
nginx-test-svc, used to verify access to the StatefulSet
apiVersion: v1
kind: Service
metadata:
  name: nginx
  labels:
    app: nginx
spec:
  clusterIP: None  # Headless Service
  selector:
    app: nginx
  ports:
  - port: 80
    name: http
---
apiVersion: apps/v1
kind: StatefulSet   # The workload type.
metadata:
  name: nginx-test
  namespace: default  # Change the namespace as needed.
  labels:
    app: nginx
spec:
  serviceName: "nginx" # Specify the name of the headless Service you created.
  replicas: 2  # Specify the number of pods.
  selector:
    matchLabels:
      app: nginx
  template: # The pod configurations.
    metadata:
      labels: # The pod labels.
        app: nginx
    spec:
      containers:
      - name: nginx  # The name of the container.
        image: anolis-registry.cn-zhangjiakou.cr.aliyuncs.com/openanolis/nginx:1.14.1-8.6  # The version of the NGINX image.
        ports:
        - containerPort: 80  # The port exposed by the container.
          protocol: TCP  # Set the protocol to TCP or UDP.
        volumeMounts:
        - name: node-dir-volume  # The volume name. The value must be the same as the volume name specified in the following volumes section.
          mountPath: /tmp  # The mount path of the volume in the container.
      volumes:
      - name: node-dir-volume
        hostPath:
          path: /local_storage  # The directory on the host that you want to mount as a volume.
          type: DirectoryOrCreate     # If the specified directory does not exist, the system automatically creates the directory.
---
apiVersion: v1
kind: Service
metadata:
  name: nginx-test-svc
  namespace: default  # Change the namespace as needed.
  labels:
    app: nginx
spec:
  selector:
    app: nginx  # The label used to match backend pods.
  ports:
    - port: 80           # The port provided by the Service in the cluster.
      targetPort: 80     # The port on which the application in the container listens (containerPort).
      protocol: TCP      # The protocol. Default value: TCP.
  type: LoadBalancer      # The Service type. Default value: ClusterIP. ClusterIP Services are accessible from within the cluster.
Apply the manifest:
kubectl apply -f statefulset.yamlExpected output:
service/nginx created
statefulset.apps/nginx-test created
service/nginx-test-svc created
Get the public IP address of the LoadBalancer Service:
kubectl get svcExpected output:
NAME            TYPE           CLUSTER-IP       EXTERNAL-IP     PORT(S)        AGE
kubernetes      ClusterIP      172.16.**.***    <none>          443/TCP        4h47m
nginx           ClusterIP      None             <none>          80/TCP         1h10m
nginx-test-svc  LoadBalancer   172.16.**.***    106.14.**.***   80:31130/TCP   1h10m
Open a browser and go to the external IP address (
106.14..*) to confirm the NGINX container is accessible.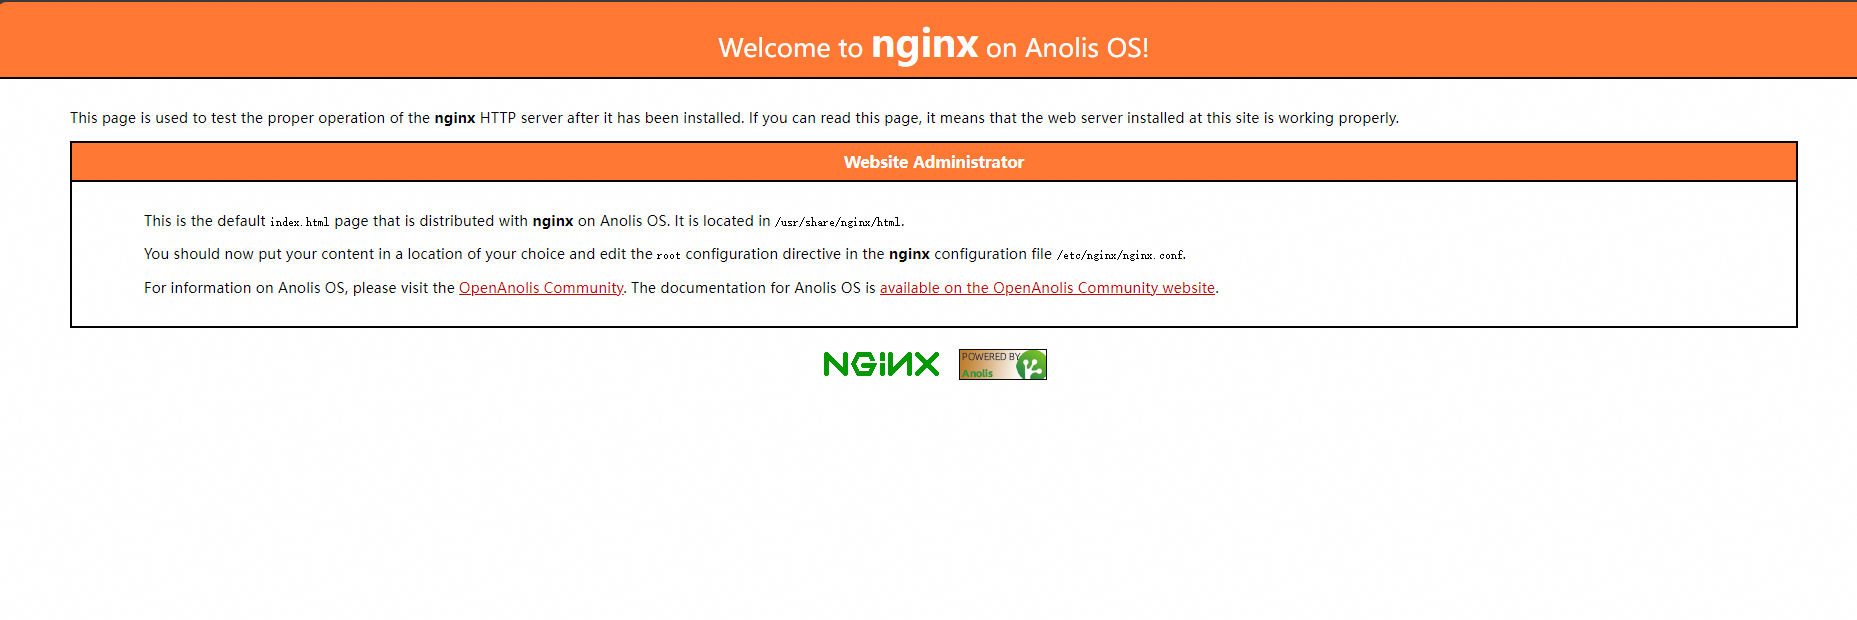
Verify StatefulSet guarantees
This section shows that when a pod is deleted, the StatefulSet recreates it with the same name — demonstrating the stable identity guarantee.
Check the status of pod
nginx-test-0:kubectl get pod nginx-test-0Expected output:
NAME           READY   STATUS    RESTARTS   AGE
nginx-test-0   1/1     Running   0          7m41s
Delete the pod:
kubectl delete pod nginx-test-0Expected output:
pod "nginx-test-0" deletedQuery the pod again:
kubectl get pod nginx-test-0Expected output:
NAME           READY   STATUS    RESTARTS   AGE
nginx-test-0   1/1     Running   0          20s
The pod is running again with the original name
nginx-test-0. TheAGEvalue resets because this is a new pod, but its name and serial number are preserved.
What's next
To troubleshoot issues during workload creation, see FAQ about workloads.
To troubleshoot pod exceptions, see Pod troubleshooting.