When a website faces both volumetric DDoS attacks and sophisticated web application attacks, a single security service is not enough. Anti-DDoS Pro or Anti-DDoS Premium defends against volumetric DDoS attacks, while Web Application Firewall (WAF) filters web application attacks. Deploying them together routes traffic through scrubbing first, then web application filtering, before it reaches your origin server.
This topic describes how to chain Anti-DDoS Pro or Anti-DDoS Premium with WAF to protect a website service.
Prerequisites
Before you begin, make sure that you have:
An Anti-DDoS Pro or Anti-DDoS Premium instance. For more information, see Purchase an Anti-DDoS Pro or Anti-DDoS Premium instance.
A WAF instance (WAF 3.0). For more information, see Purchase a subscription WAF 3.0 instance or Purchase a pay-as-you-go WAF 3.0 instance.
How it works
Traffic flows through three layers before reaching your origin server:
| Layer | Service | Role |
|---|---|---|
| Ingress | Anti-DDoS Pro or Anti-DDoS Premium | Scrubs volumetric DDoS attacks |
| Intermediate | WAF | Filters web application attacks |
| Backend | ECS, SLB, VPC, or on-premises server | Origin server — receives only clean traffic |

With this architecture, requests pass through multiple proxy servers before reaching the origin server. The origin server cannot directly obtain the originating IP addresses. For details, see Obtain the originating IP addresses of requests.
To complete the setup, perform the following steps in order:
Add your website service to WAF and get the CNAME assigned by WAF.
Add your website service to Anti-DDoS Pro or Anti-DDoS Premium, using the WAF CNAME as the origin server address.
Update the DNS record of your domain name to point to the CNAME assigned by Anti-DDoS Pro or Anti-DDoS Premium.
Step 1: Add your website service to WAF
Log on to the WAF 3.0 console. In the top navigation bar, select the resource group and the region where your WAF instance is deployed (Chinese Mainland or Outside Chinese Mainland).
In the left-side navigation pane, choose Asset Center > Website Access.
On the Domain Names tab, click Website Access.
Add a domain name using one of the following access modes.
Option A: CNAME record mode (default)
The Add Domain Name page uses CNAME Record mode by default. Keep the Access Mode setting as is.
In the Enter Your Website Information step, configure the following parameters:
Parameter Description Domain Name The domain name of the website to protect. Protection Resource The type of protection resource to use. Protocol Type The protocol supported by your website. Destination Server (IP Address) Select IP and enter the public IP address of the SLB instance or ECS instance that hosts your origin server, or the IP address of an origin server not deployed on Alibaba Cloud. Destination Server Port The port used by the origin server, based on Protocol Type. Load Balancing Algorithm The algorithm for distributing traffic when multiple IP addresses are specified for the origin server. Does a layer 7 proxy (DDoS Protection/CDN, etc.) exist in front of WAF Select Yes. Enable Traffic Mark Specify whether to enable the WAF Traffic Mark feature. Resource Group The resource group to which the domain name belongs. Click Next.
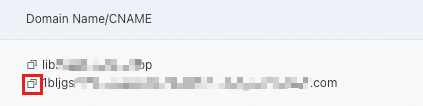
On the Domain Names tab, find the domain name you added and copy the CNAME assigned by WAF from the Domain Name/CNAME column. You will need this CNAME in Step 2.
Option B: Transparent proxy mode
On the Add Domain Name page, set Access Mode to Transparent Proxy Mode.
Configure the following parameters:
Parameter Description Domain Name The domain name of the website to protect. SLB-based Domains, Layer 7 SLB-based Domains, Layer 4 SLB-based Domains, or ECS-based Domains Find the instance to protect on the corresponding tab and select the ports. Does a layer 7 proxy (DDoS Protection/CDN, etc.) exist in front of WAF Select Yes. Enable Traffic Mark Specify whether to enable the WAF Traffic Mark feature. Resource Group The resource group to which the domain name belongs. Click Next.
Review the information in the Check and Confirm Added Information step, then click Next.
Click Completed. Return to the website list.
In transparent proxy mode, WAF does not assign a CNAME. In Step 2, use the public IP address of your origin server instead.
Step 2: Add your website service to Anti-DDoS Pro or Anti-DDoS Premium
Log on to the Anti-DDoS Pro console.
In the top navigation bar, select the region that matches your instance type:
Anti-DDoS Pro: select Chinese Mainland
Anti-DDoS Premium: select Outside Chinese Mainland
In the left-side navigation pane, choose Provisioning > Website Config.
On the Website Config page, click Add Domain.
In the Enter Your Website Information step, configure the following parameters:
Parameter Description Function Plan The function plan of the instance to use. Instance The Anti-DDoS Pro or Anti-DDoS Premium instance to use. Domain The domain name of the website to protect. Protocol The protocol supported by your website. Enable OCSP Whether to enable the Online Certificate Status Protocol (OCSP) feature. Server IP If you added the domain name in CNAME record mode, select Origin Server Domain and enter the WAF CNAME from Step 1. If you added it in transparent proxy mode, select Origin Server IP and enter the public IP address of your origin server. Server Port The port used by the origin server, based on Protocol. Cname Reuse If multiple website services share the same origin server, enable CNAME reuse to map all their domain names to the single CNAME assigned by Anti-DDoS Pro or Anti-DDoS Premium. Click Add.
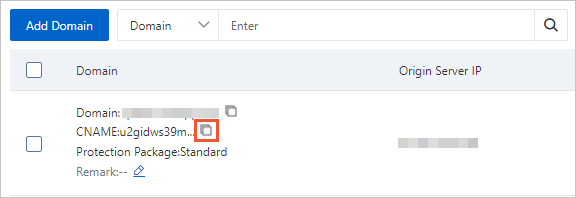
On the Website Config page, find the domain name you added and copy the CNAME assigned by Anti-DDoS Pro or Anti-DDoS Premium from the Domain column. You will need this CNAME in Step 3.
Step 3: Update the DNS record
Point your domain name to the Anti-DDoS CNAME from Step 2. The following steps apply to Alibaba Cloud DNS. If you use a third-party DNS provider, log on to that provider's console and make the equivalent change.
Log on to the Alibaba Cloud DNS console.
On the Manage DNS page, find your domain name and click Configure in the Actions column.
On the DNS Settings page, find the DNS record to update and click Edit in the Actions column.
If the record does not exist, click Add Record to create one.
In the Edit Record (or Add Record) panel, set Type to CNAME- Canonical name and set Value to the CNAME from Step 2.
Click OK and wait for the change to take effect.
Open a browser and verify that your website is accessible.
If you encounter slow responses, high latency, or access failures, see How do I handle the issues of slow response, high latency, and access failure on my service that is protected by an Anti-DDoS Pro or Anti-DDoS Premium instance?.
What's next
After traffic flows through Anti-DDoS Pro or Anti-DDoS Premium and WAF, consider the following:
Obtain the real client IP address. If your origin server needs the actual client IP, see Obtain the originating IP addresses of requests.
References
Add a domain name to WAF — Add a domain name in CNAME record mode.
Transparent proxy mode — Add a domain name in transparent proxy mode.
Add one or more websites — Add domain names to Anti-DDoS Pro or Anti-DDoS Premium, including bulk import.
Change DNS records to protect website services — Manually update DNS records for Anti-DDoS-protected website services.