If you want to allow users to view data of specific fields, you can enable the row-level permission management feature and grant users row-level permissions. Quick BI provides two authorization modes based on row-level permissions: authorization based on combined conditions and tag-based authorization. If your workspace has a small number of members, you can perform authorization based on combined conditions. This topic describes how to perform authorization based on combined conditions.
Scenarios
When you need to implement multiple rules that work together to meet detailed permission management requirements, such as ensuring that the office supplies department, home products department, and technology products department can access only data from their respective product lines, we recommend that you use authorization based on combined conditions to configure permissions. This authorization method can flexibly handle various permission configuration requirements and ensure the accuracy and efficiency of permission control.
Prerequisites
A dataset is created. For more information, see Create a dataset.
Limits
You can configure row-level permissions only in Pro and Professional Edition.
Only dataset owners and workspace administrators can configure row-level permissions.
NoteWorkspace developers can configure row-level permissions only for datasets that they create. Workspace administrators can configure row-level permissions for all datasets.
Precautions
This topic is suitable only for users who purchased or applied for a trial use of Quick BI on or after June 3, 2021. If you do not meet the requirements, update row-level permissions of the earlier version to the new version before you perform operations in this topic.
During the configuration of row-level permissions, the number of enumeration values for field filtering is limited to 10,000. If you cannot find the corresponding enumeration value, you can manually enter the enumeration value.
Entry point
Log on to the Quick BI console. You can configure row-level permissions for datasets on the Workbench tab or on the dataset editing page.
Entry point 1
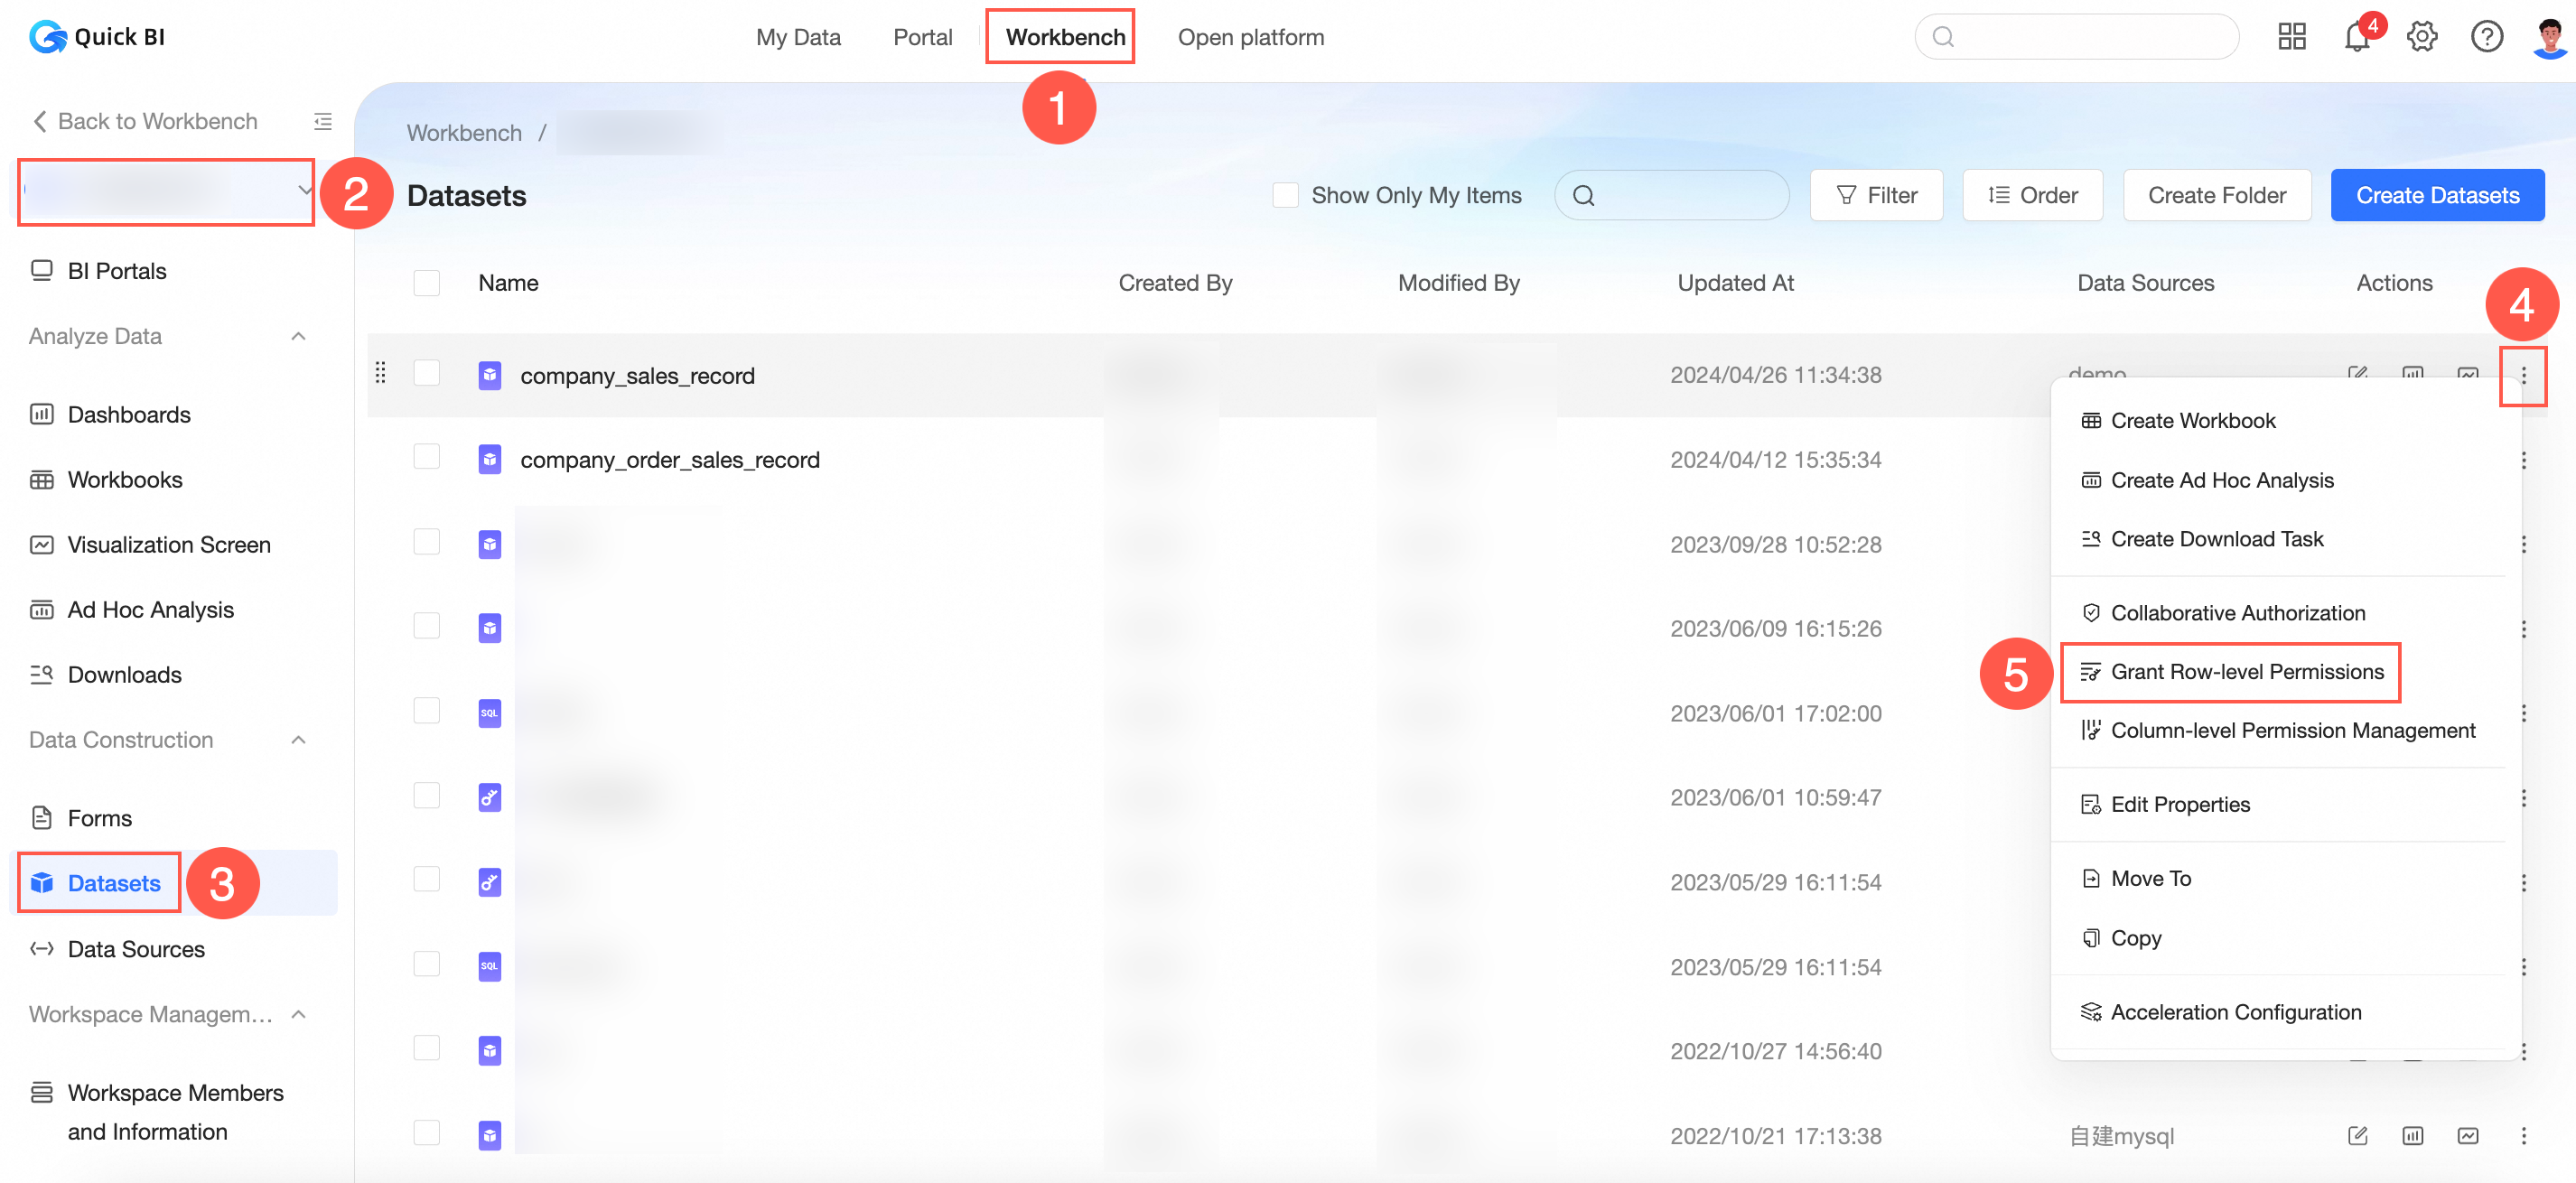
Configure row-level permissions for datasets on the Workbench tab.
Perform the steps shown in the following figure to go to the Row-level Permissions page.
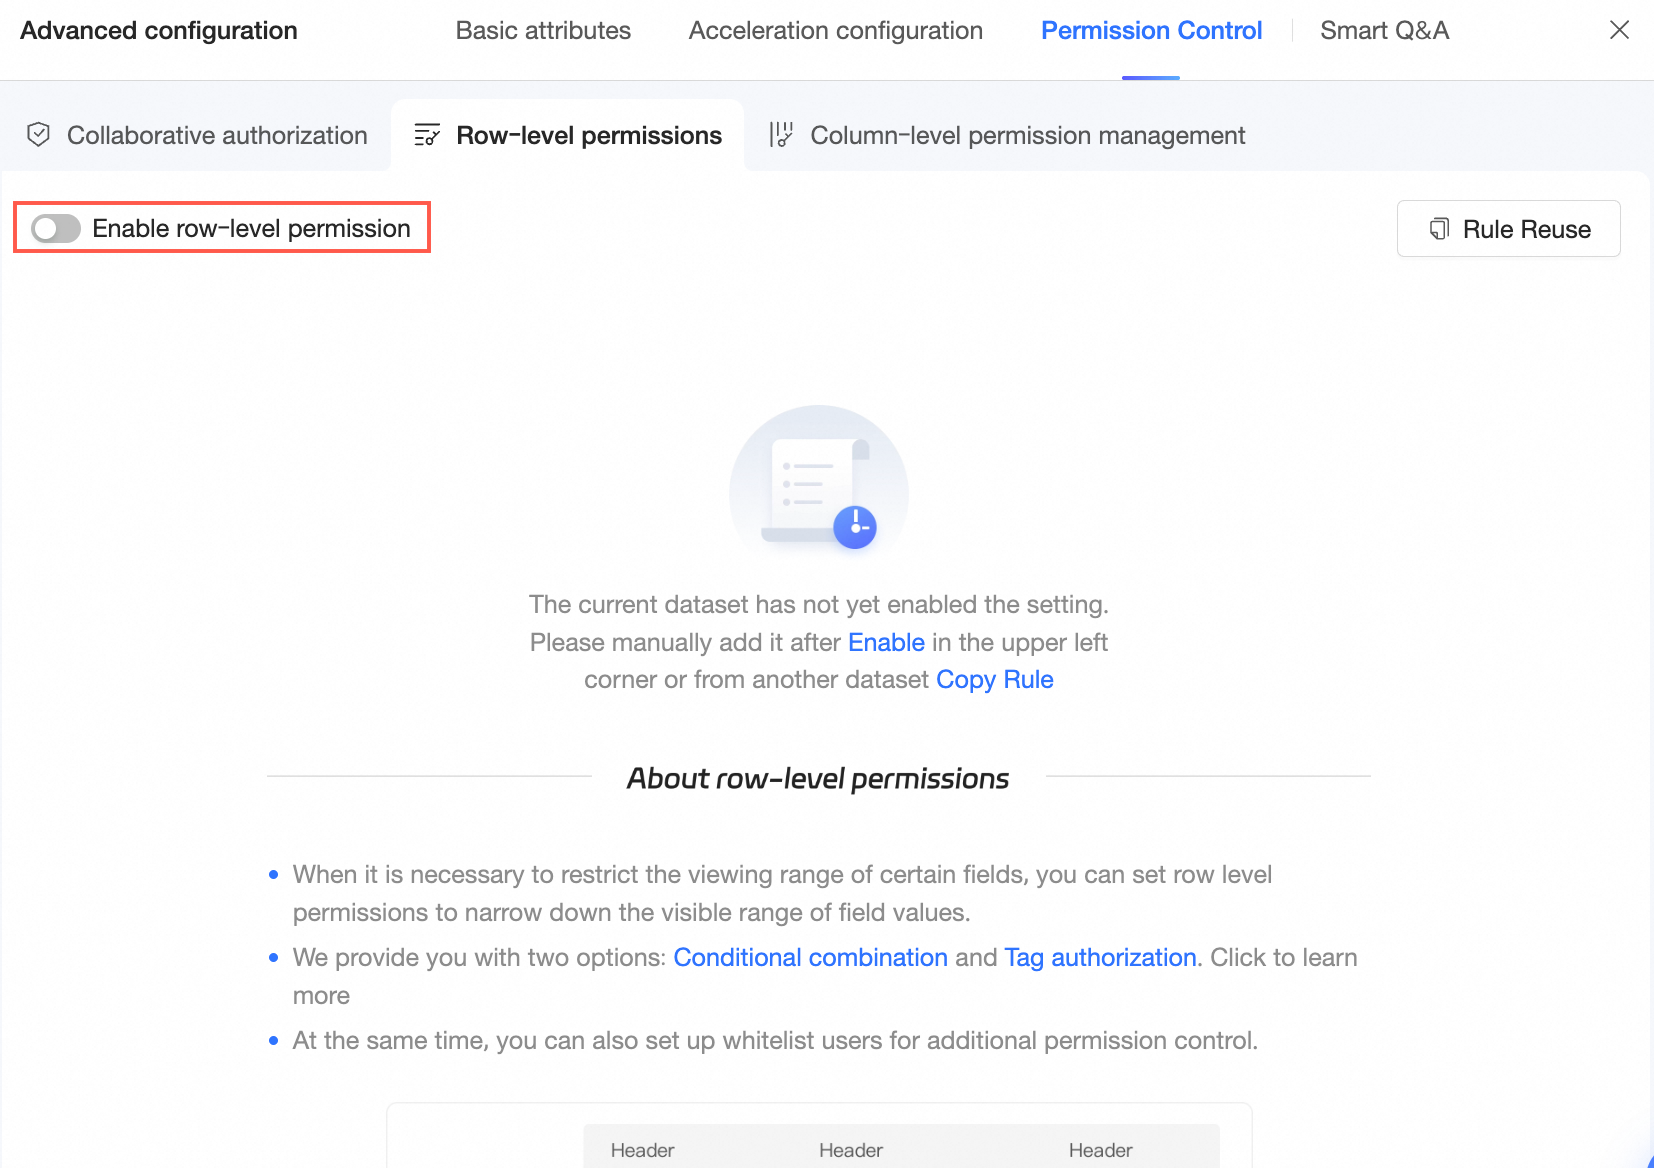
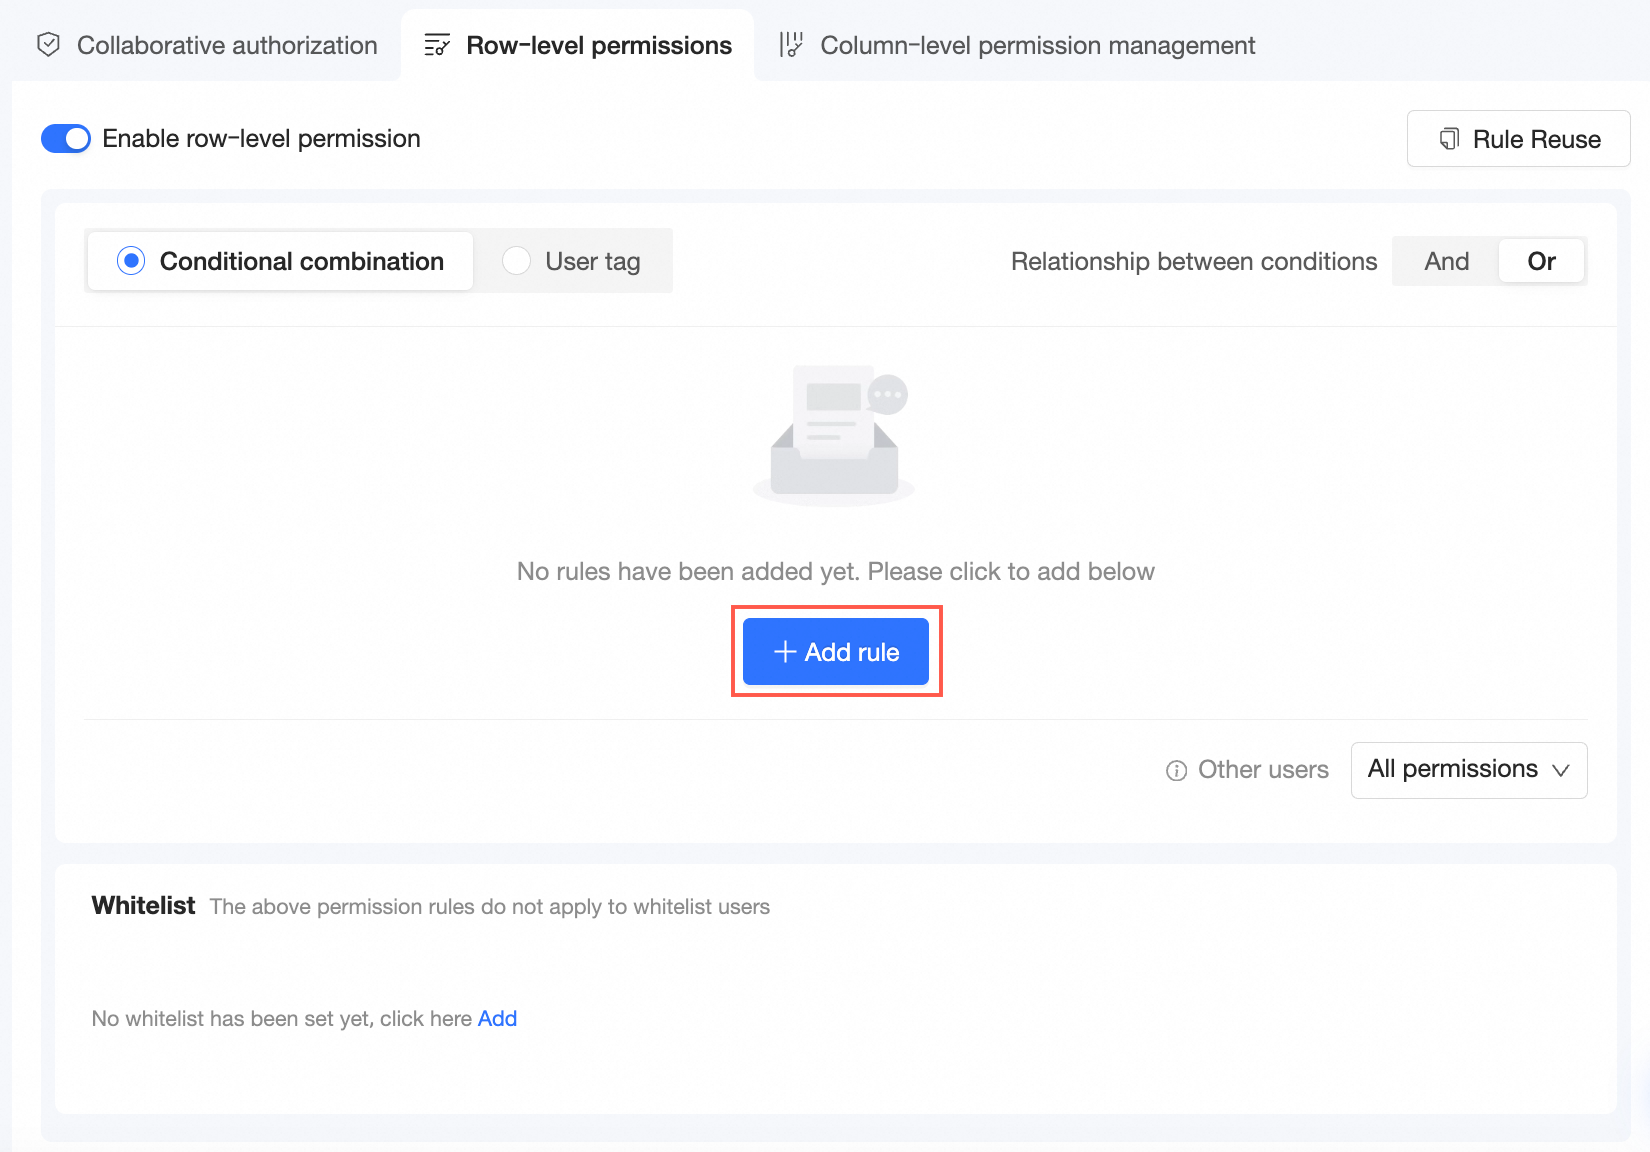
Turn on Enable Row-level Permission Management Feature.
On the Row-level Permissions configuration page, select Authorize Based on Combined Conditions, click Add Rule, and then configure the authorization method and content.

Click OK.
The specified user can view only data of the Northeast region.

Entry point 2
Configure row-level permissions for datasets on the dataset editing page.
Click Advanced Configuration in the top toolbar and select Permission Management > Row-level Permissions.
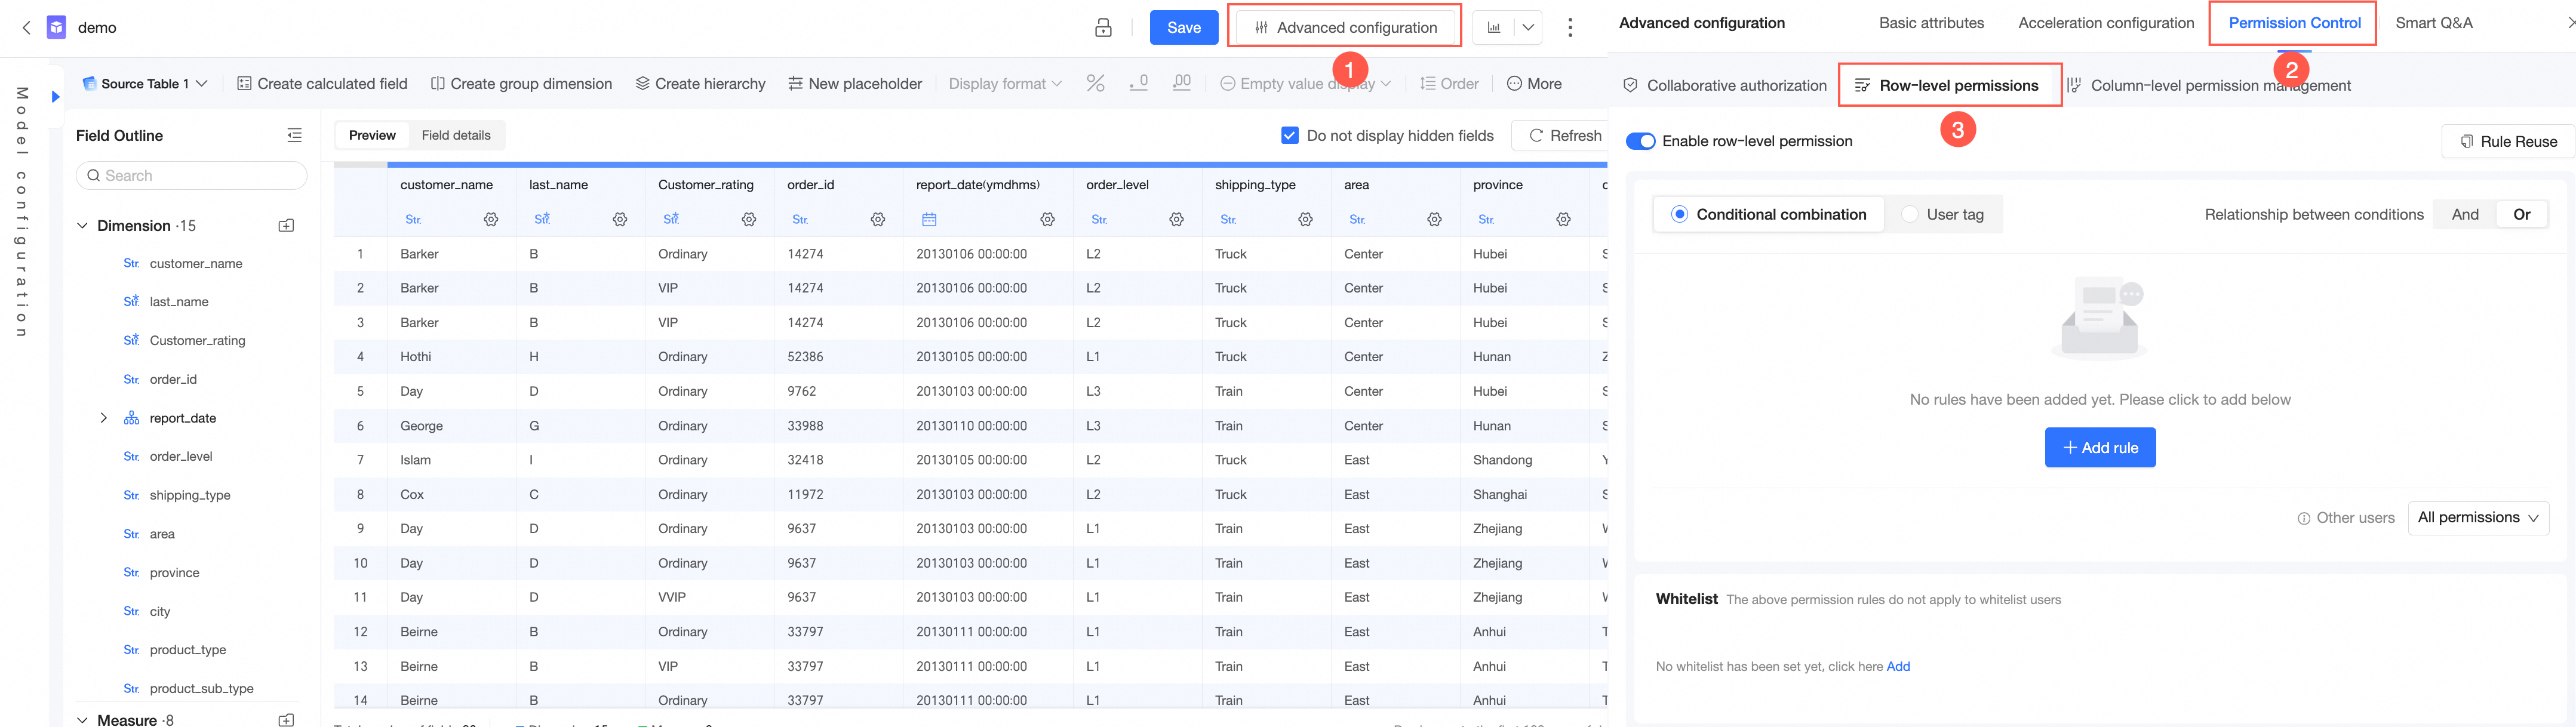
Turn on Enable Row-level Permission Management Feature.
On the Row-level Permissions configuration page, select Authorize Based on Combined Conditions, click Add Rule, and then configure the authorization method and content.
Click OK.
Entry point 3
Configure row-level permissions when you create a dataset.
On the dataset preview page, click the
 icon to go to the Row-level Permissions configuration page.
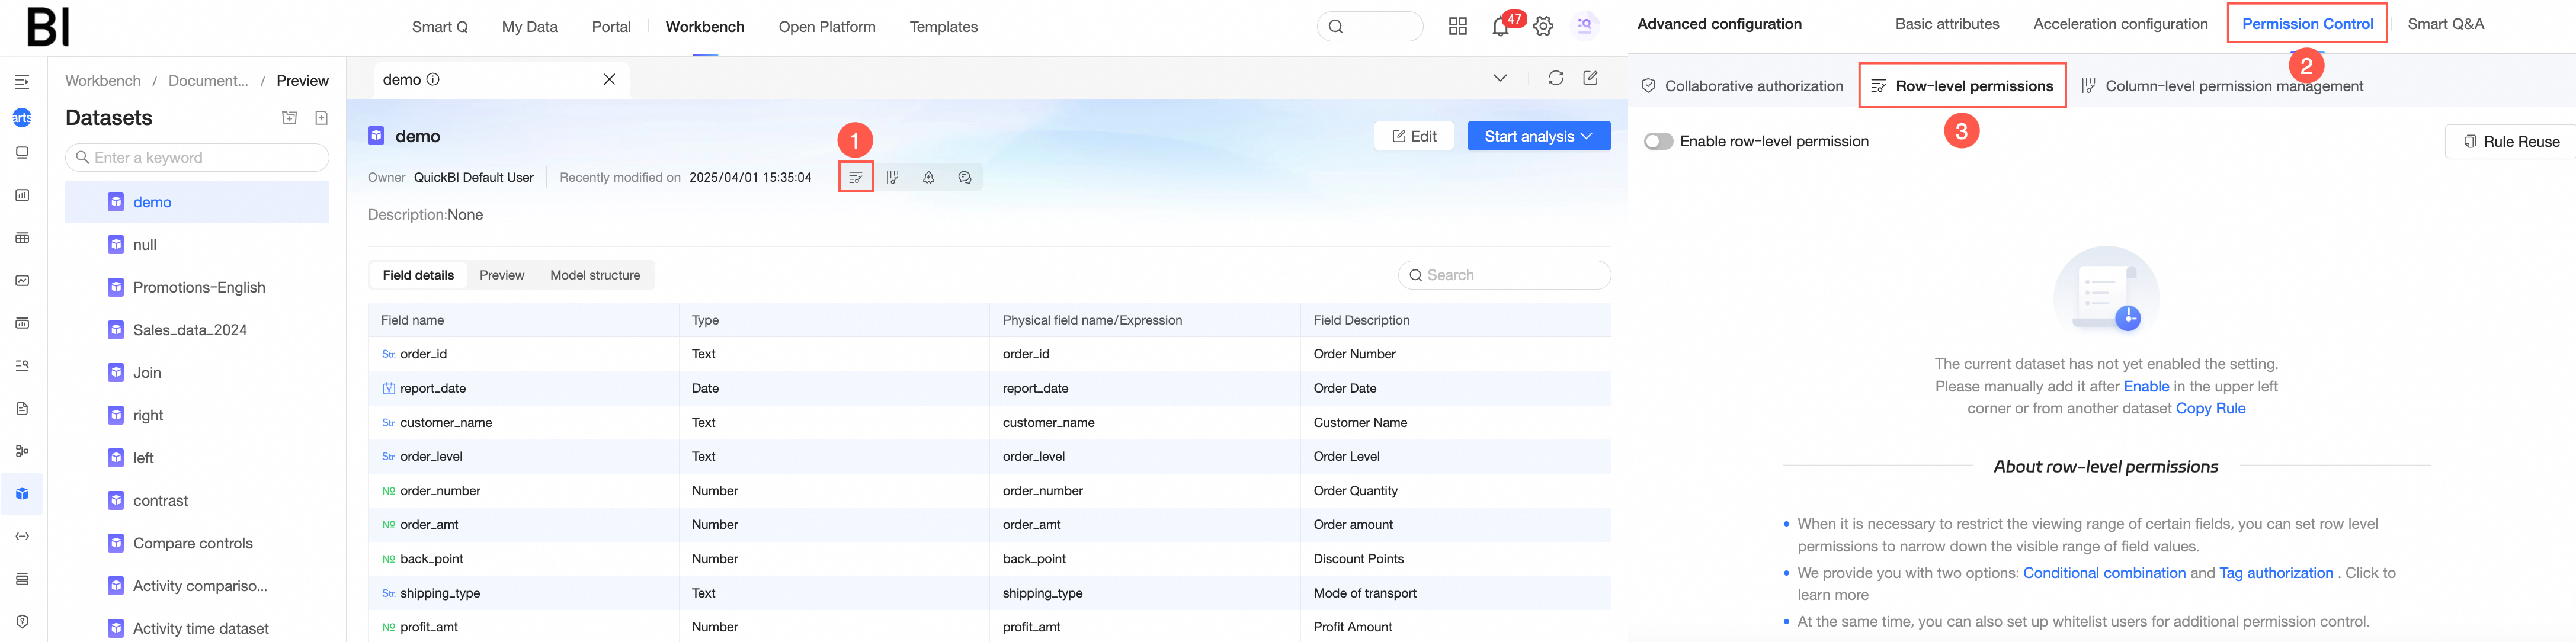
Turn on Enable Row-level Permission Management Feature.
On the Row-level Permissions configuration page, select Authorize Based on Combined Conditions, click Add Rule, and then configure the authorization method and content.
Click OK.
Grant row-level permissions
Turn on Enable Row-level Permission Management Feature, and select Authorize Based On Combined Conditions for Authorization Method.
Click Add Rule.
In the Visible Content Filtering section, click Add Relationship.
Configure the authorization rule.
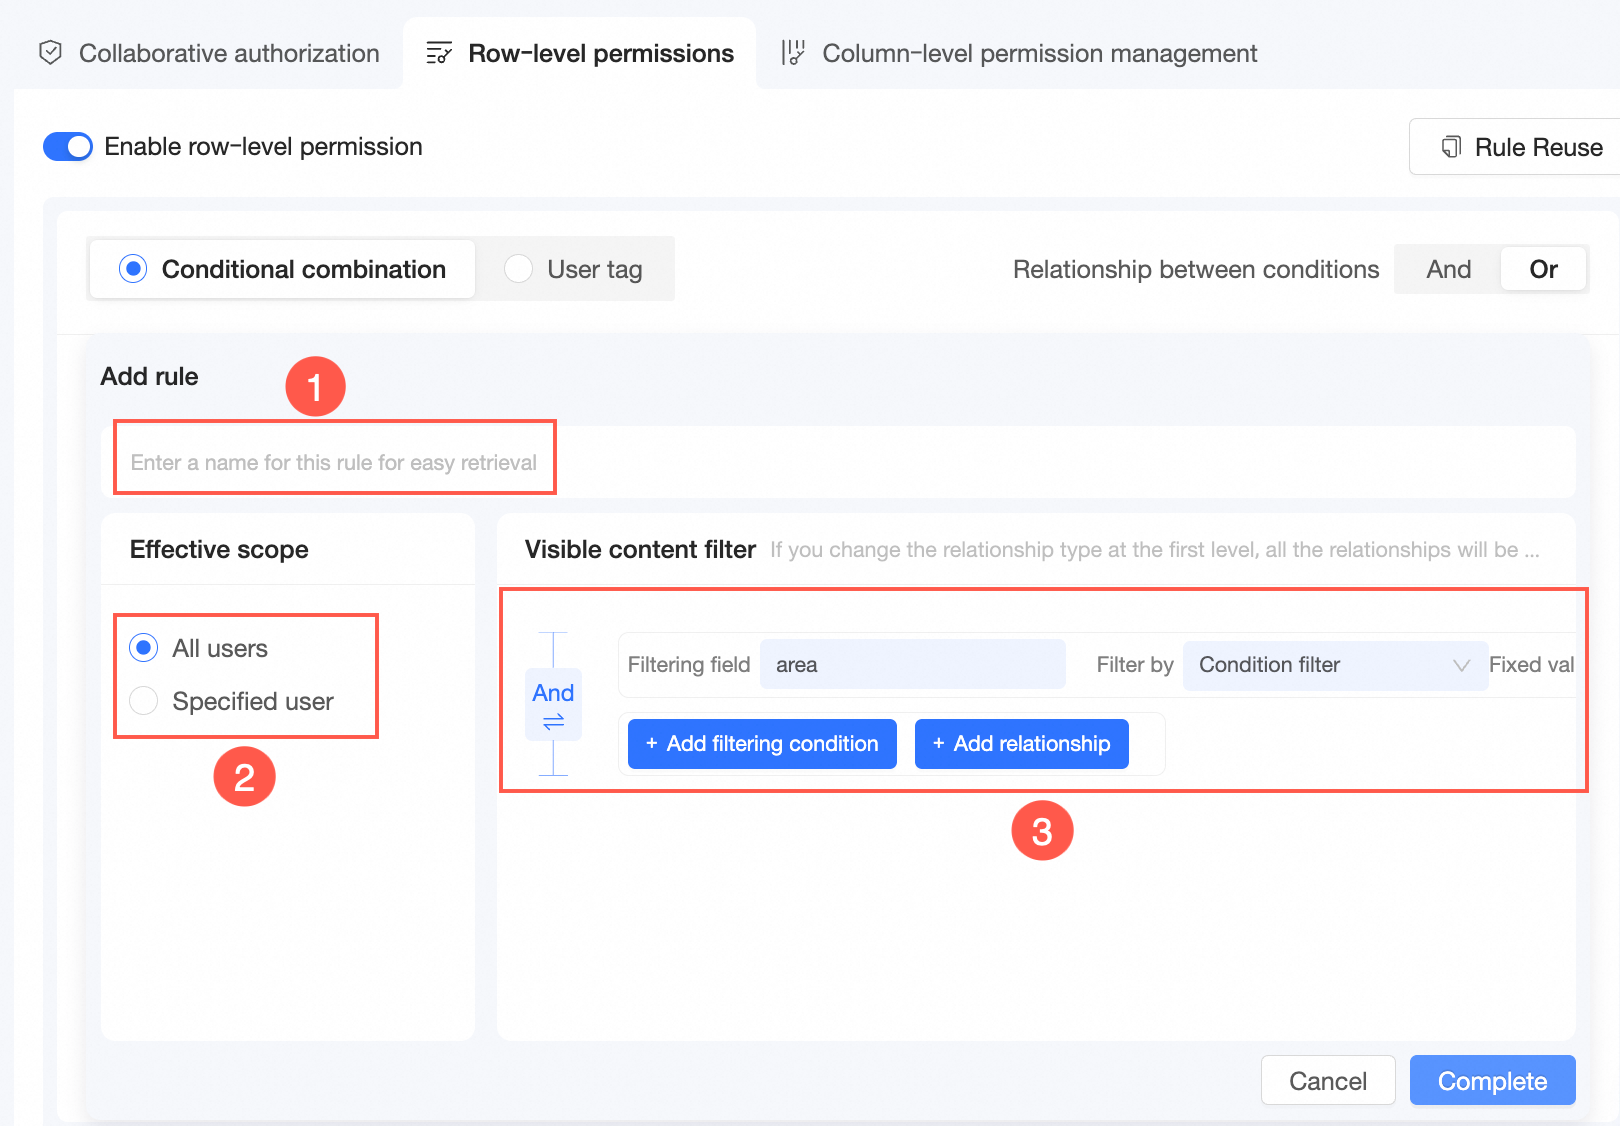
Enter a custom rule name (①).
You can use the name of a rule to search for the rule.
Specify the users to whom you want to grant row-level permissions (②).
You can grant row-level permissions to All Members, specified users, or user groups.
Configure Visible Content Filtering rules (③).
Click Add Filtering Condition.
Select a filter field and specify the value of the field.
If you select a dimension field from the Filtering Field drop-down list, the filter method can be set to Filter By Value, Conditions, or Bind Tag.
If you select Filter by Value, you can manually enter keyword fields in Fixed Value.
If you select a measure field from the Filtering Field drop-down list, the filter method can be set to Conditions or Bind Tag.
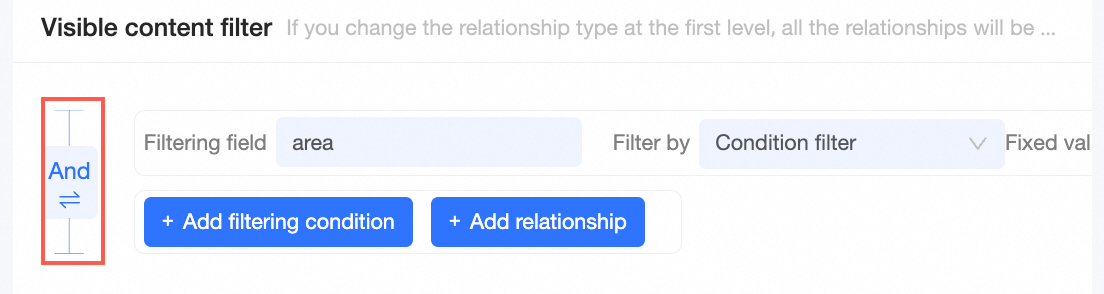
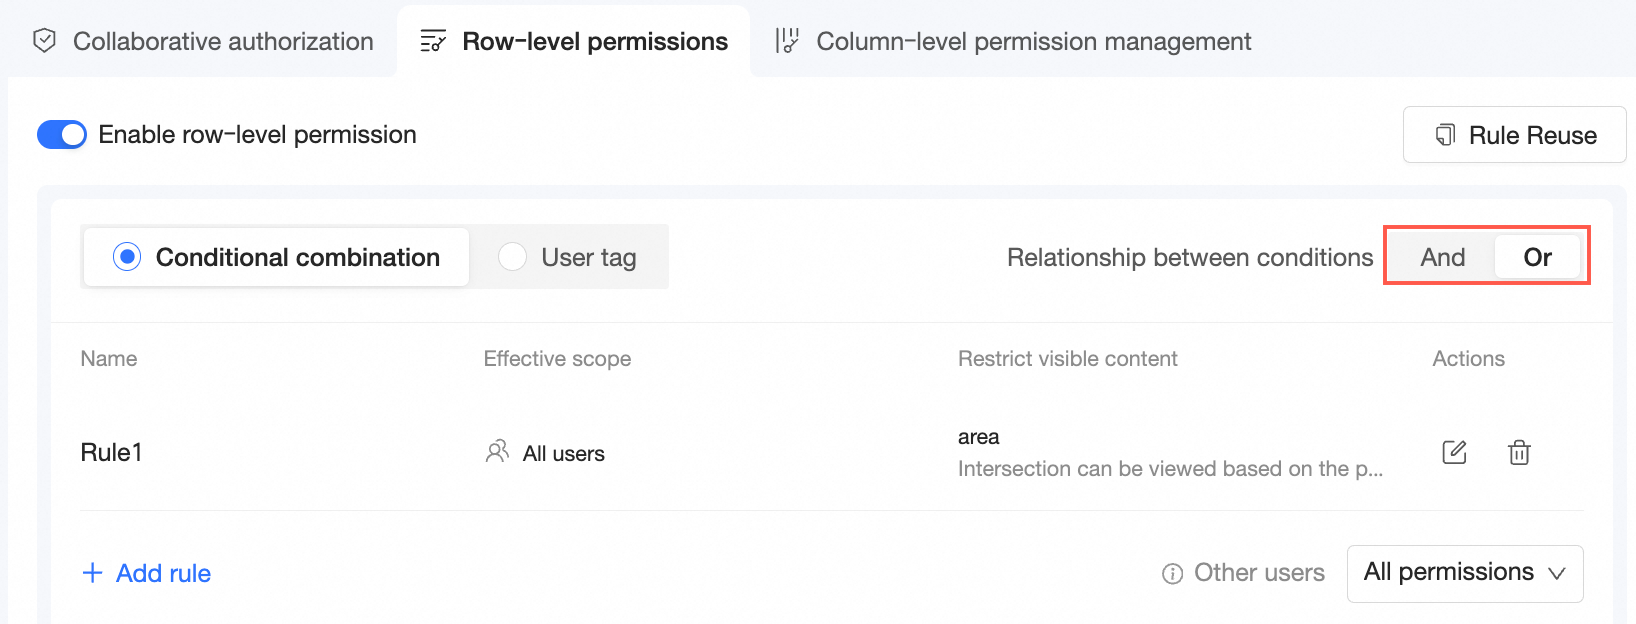
Click to switch between the AND and OR logical operators for the rule.
Click OK.
If you want to add multiple authorization rules, click Add Rule and repeat the preceding steps.
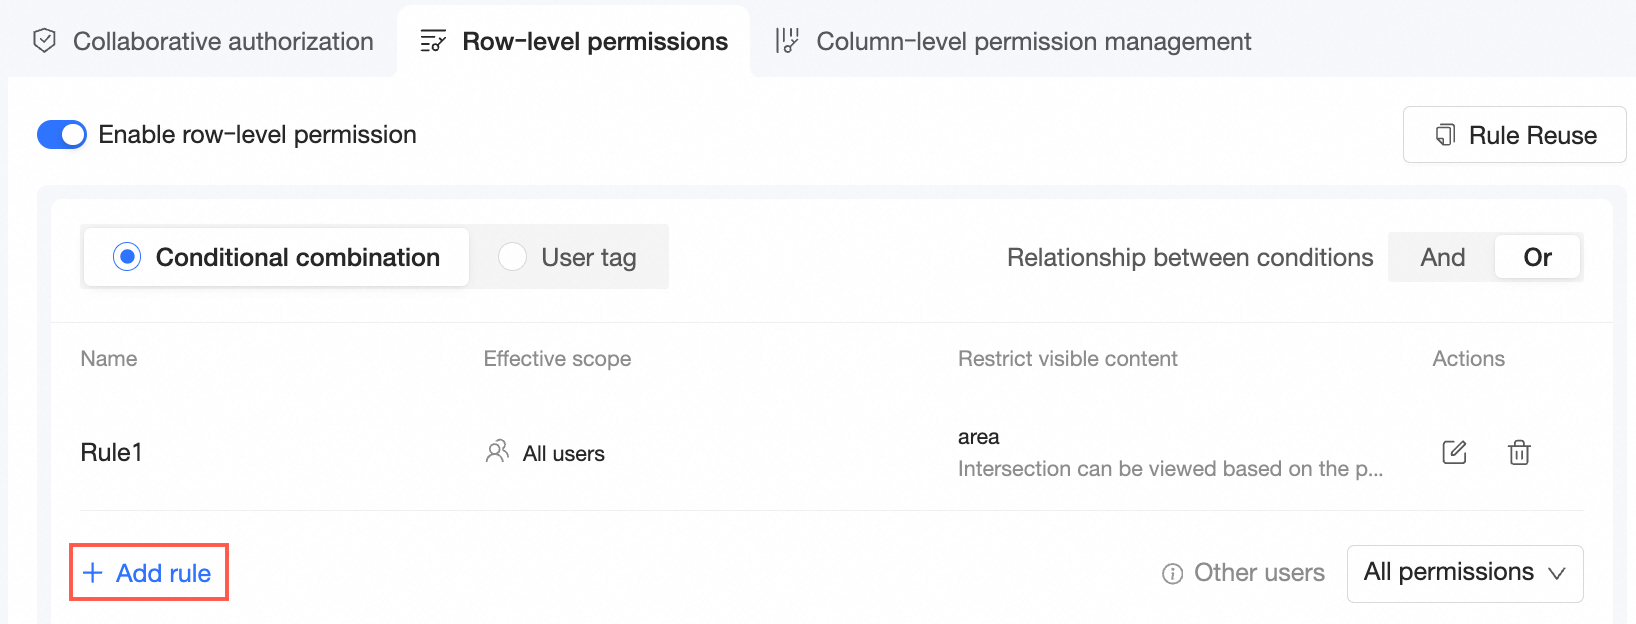
When adding multiple authorization rules, you can select "AND" or "OR" logic for rule relationships. If you select "AND", all rules must be hit for the authorization to take effect. If you select "OR", hitting any rule will make the authorization take effect.
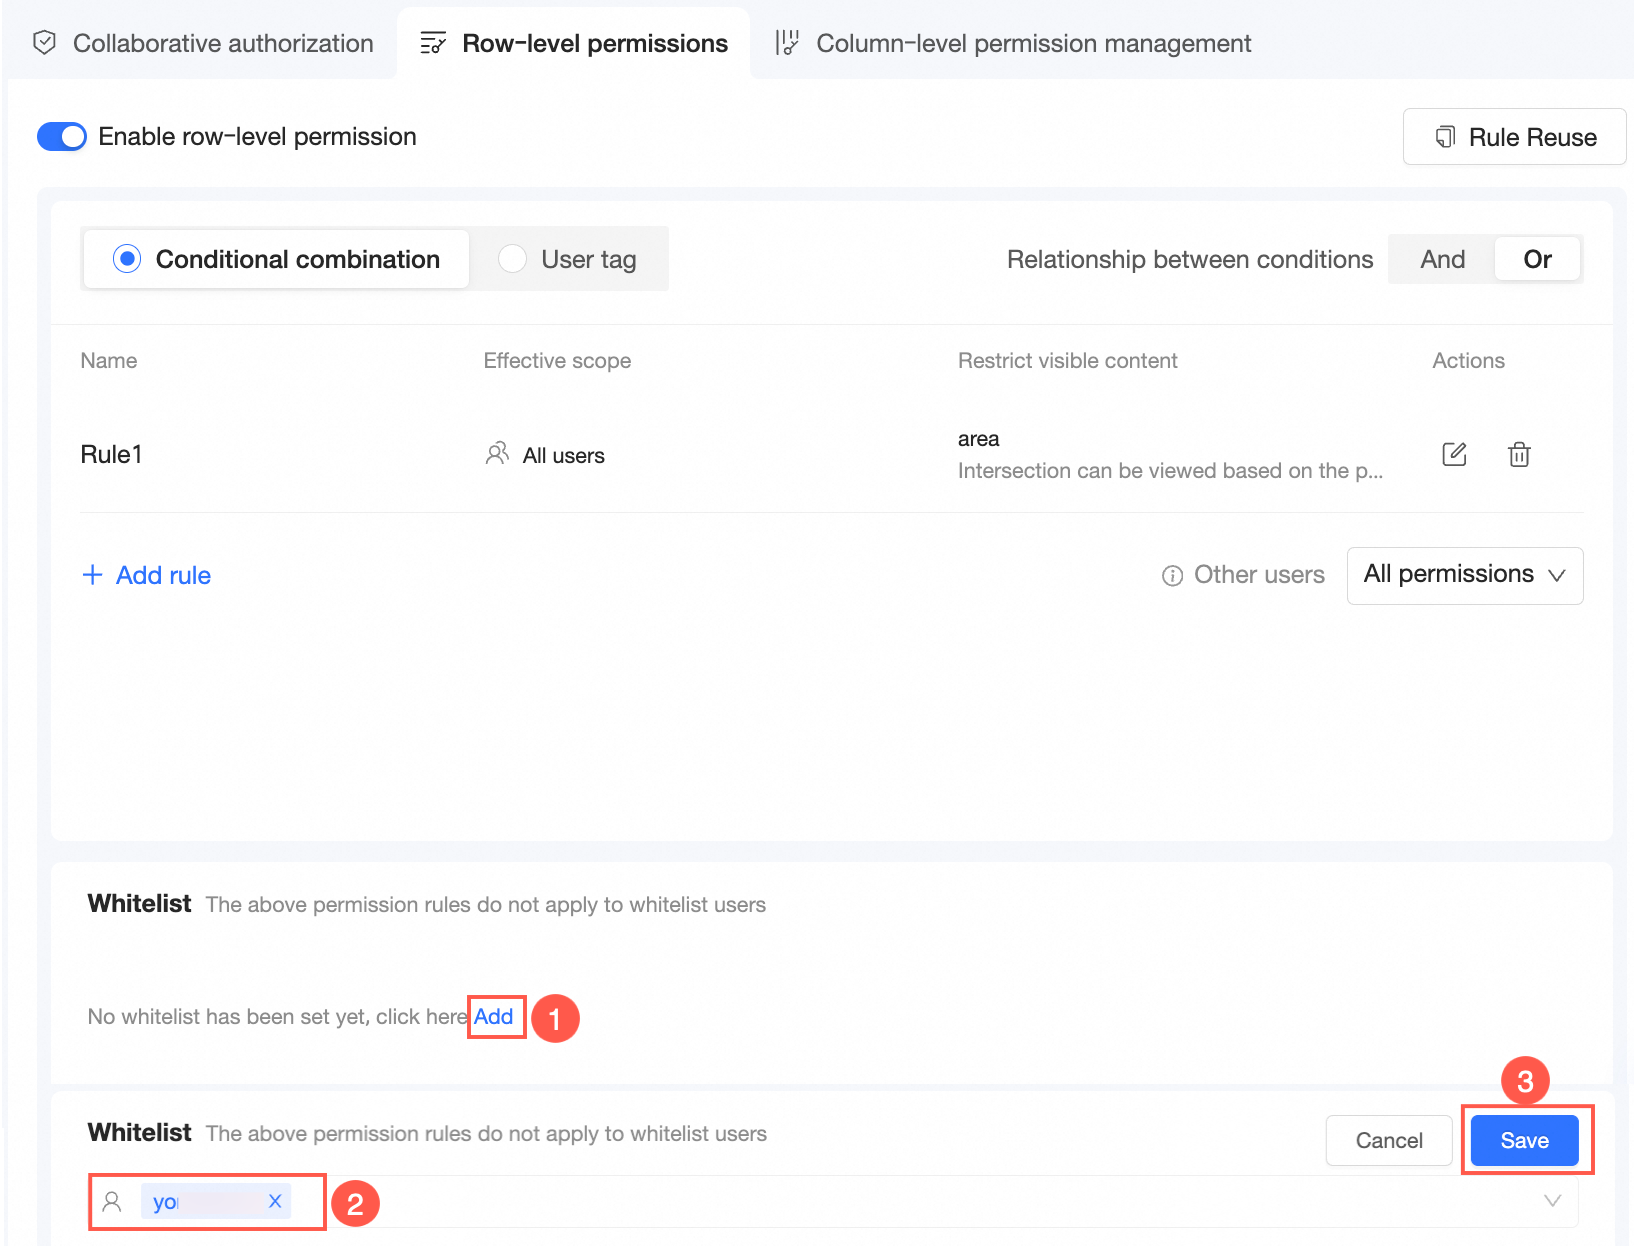
(Optional)
Add users to a whitelist.
If you do not want to apply the preceding rules to specific users, you can add these users to the whitelist.
Grant permissions to other users.
Users who do not meet the requirements of the preceding rules are considered other users.
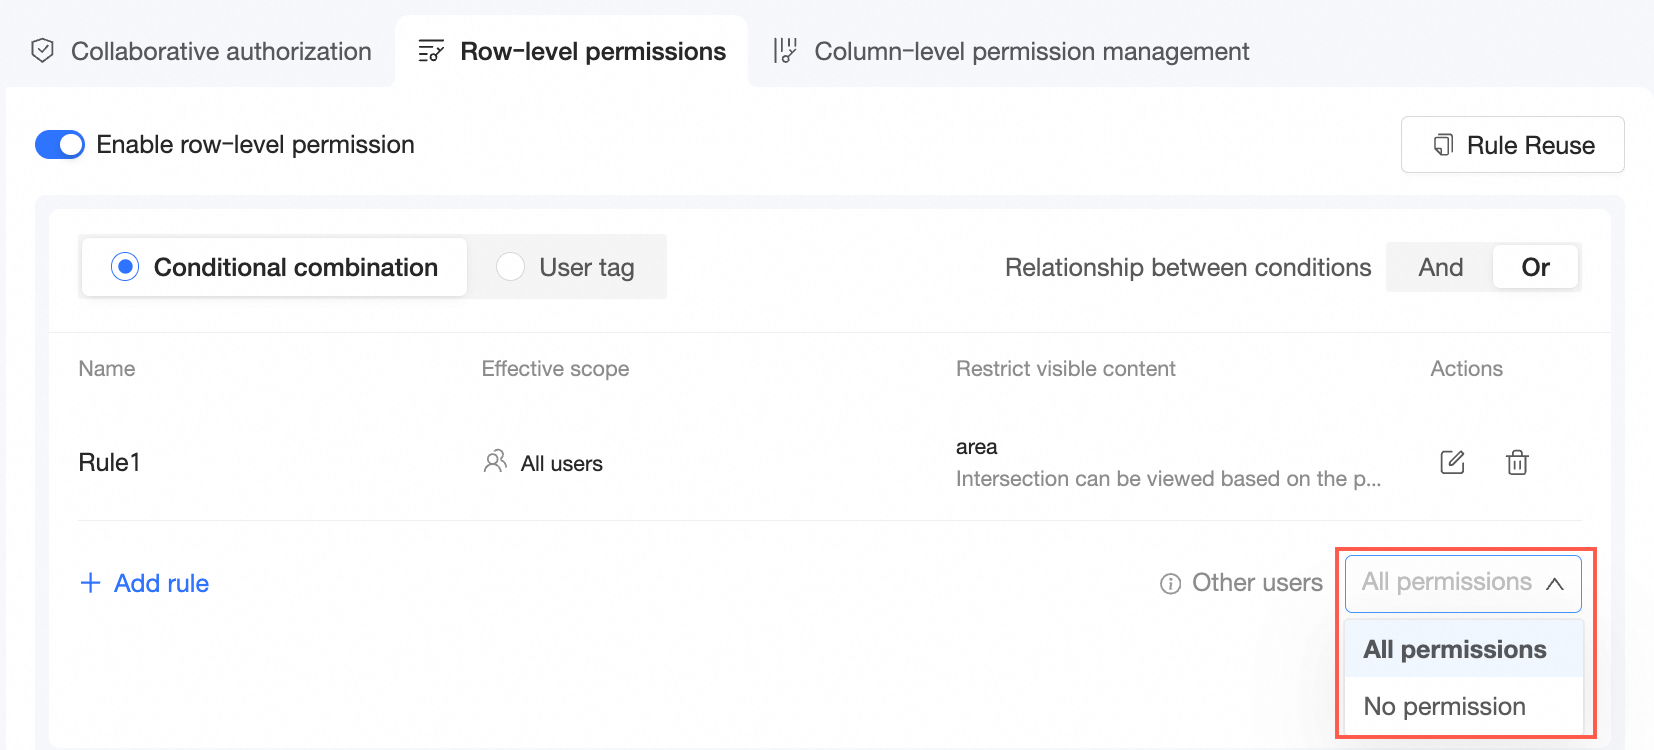
If you select All Permissions for Other Users, the users can view all data in the dataset.
If you select No Permission for Other Users, the users cannot view data in the dataset.
Copy row-level permissions
Go to the Row-level Permissions configuration page by using the entry point.
When the dataset has not enabled row-level permissions, you can click Copy Permission Rules on the description page or Rule Reuse in the upper-right corner, select a dataset in a workspace, and click OK.
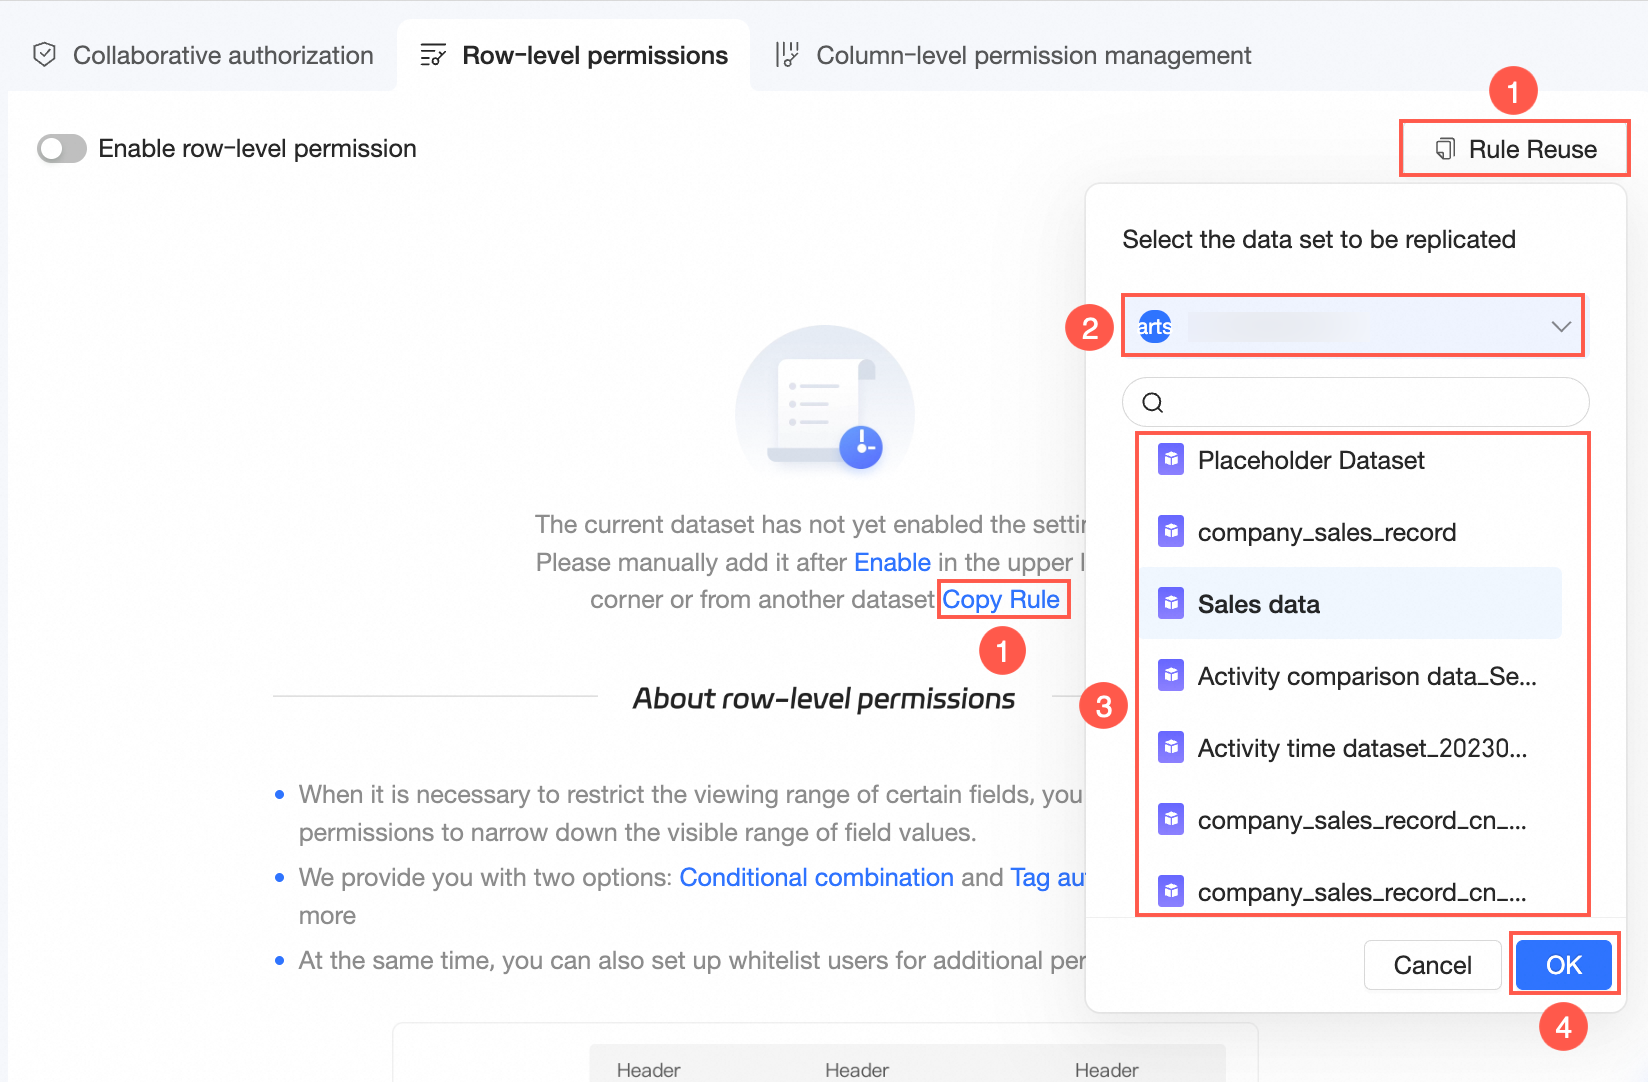
When the dataset has enabled row-level permissions, you can copy the row-level permissions through Rule Reuse in the upper-right corner.
 Note
NoteYou can copy only datasets for which you are the workspace administrator or dataset owner.
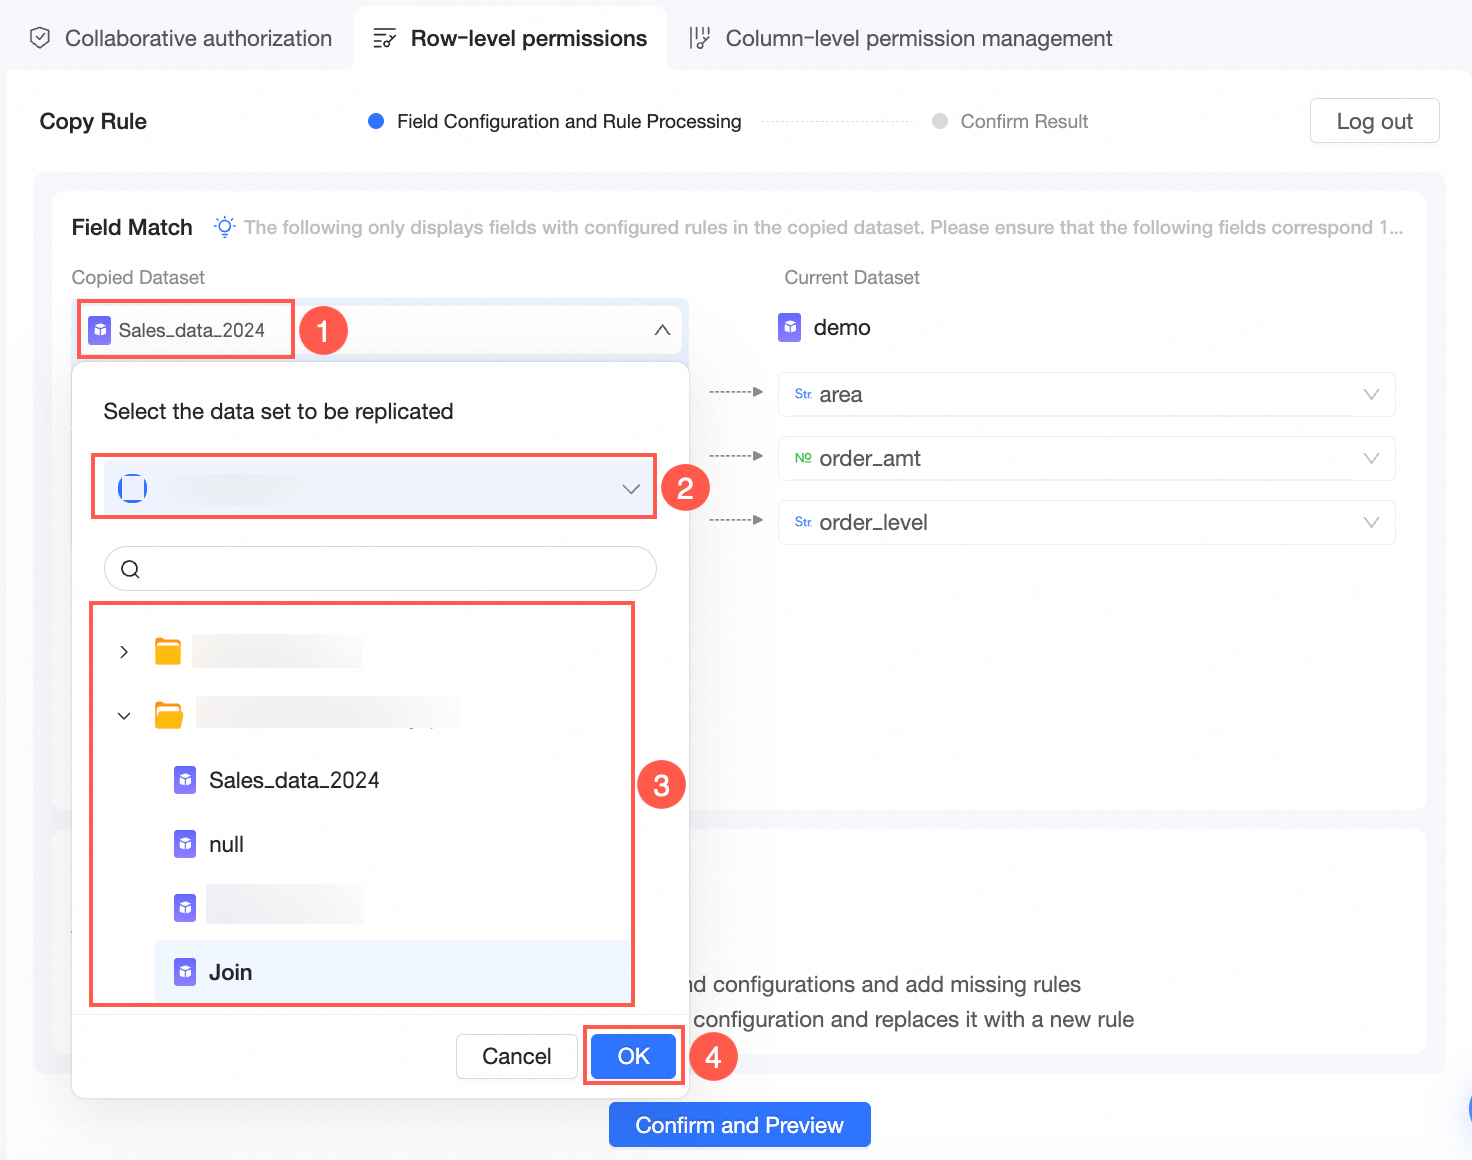
After you click OK, the row-level permission copy configuration page appears.
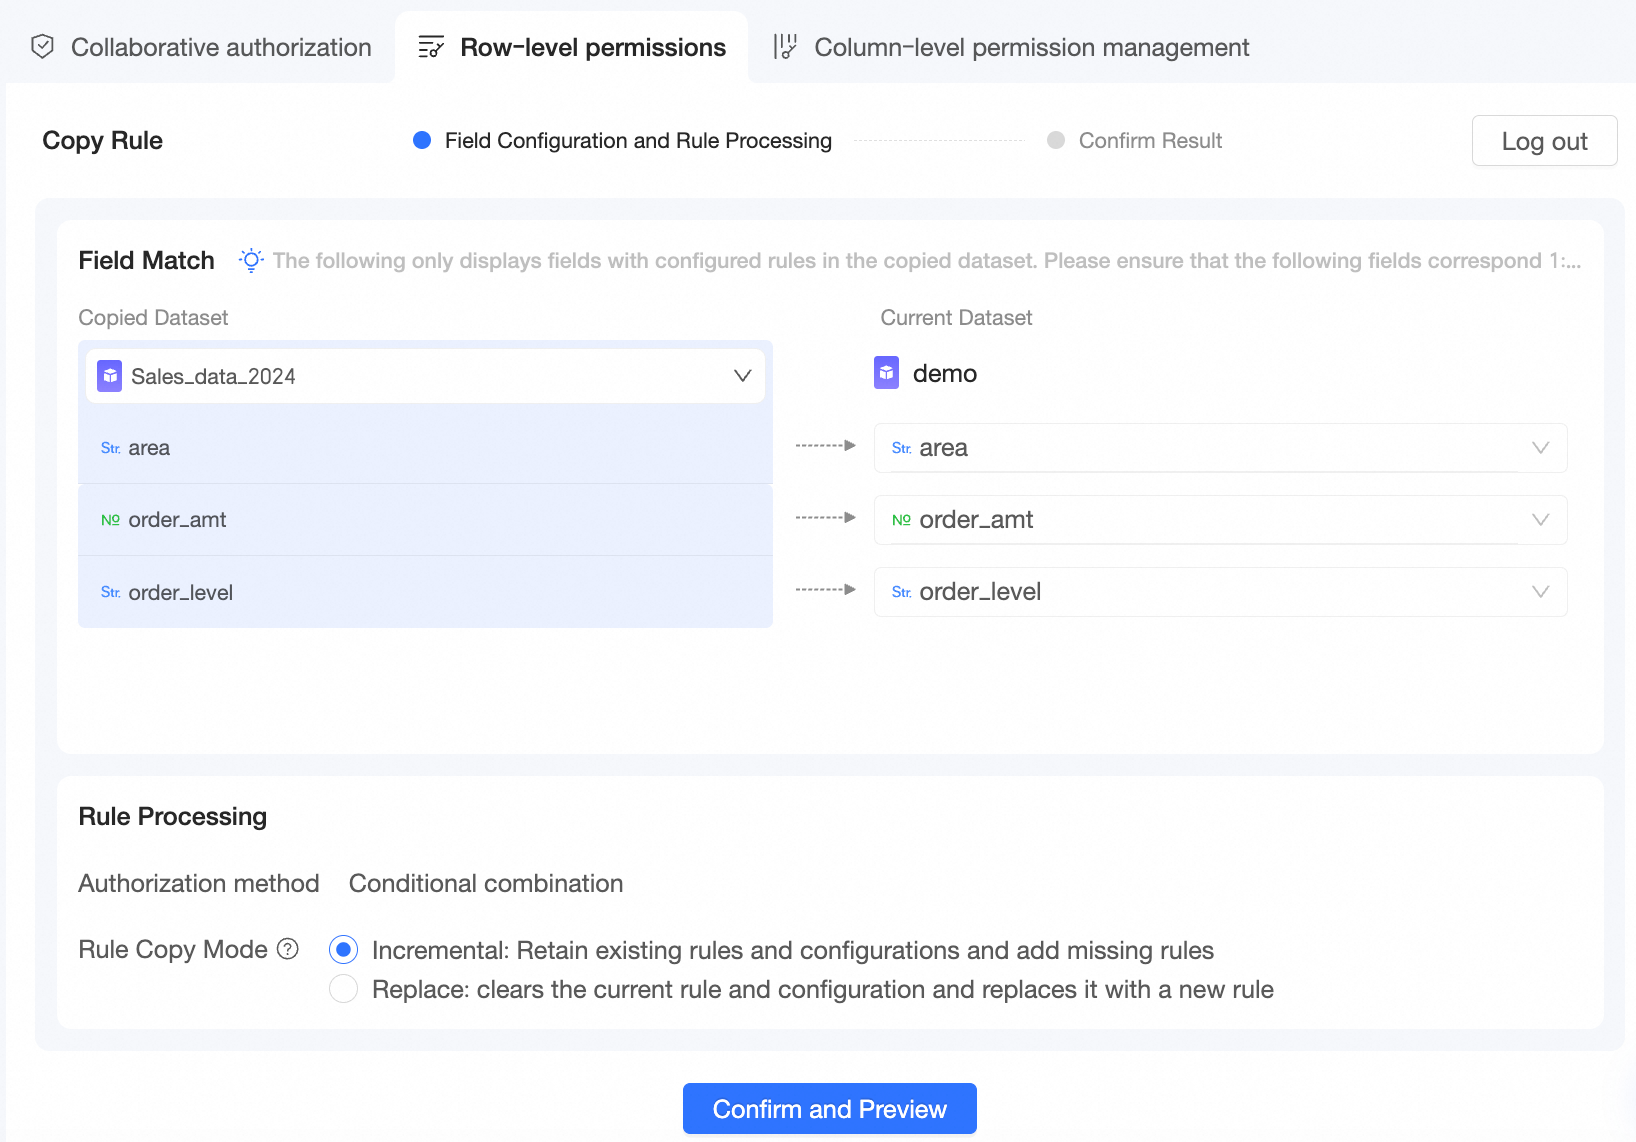
You can modify the dataset to be copied.
Field Matching
The system automatically matches field rules. You can manually select fields to modify the matching.
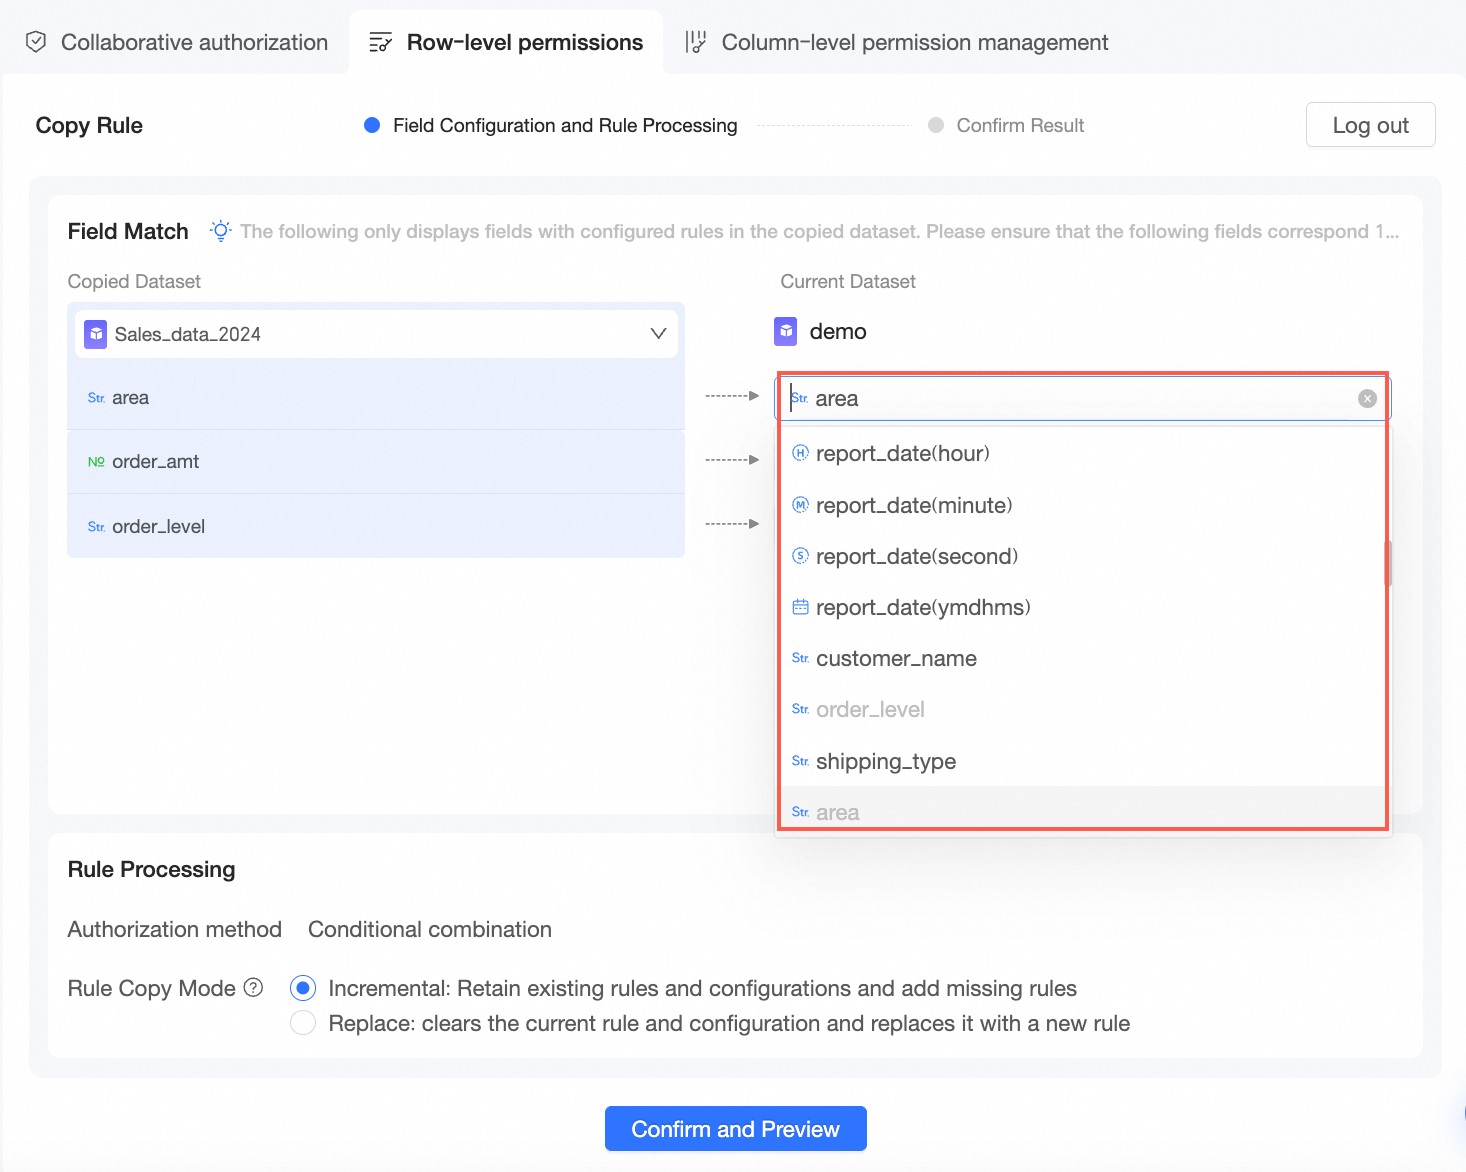 Note
NoteOnly fields that have configured rules in the dataset to be copied are displayed. Make sure that the fields can be mapped one by one.
Rule Processing
The Authorization Method is displayed as authorization based on combined conditions or tag-based authorization.
The Rule Copy Method can be Incremental or Replace.
Incremental retains existing rules and configurations and adds missing rules.
Replace clears current rules and configurations and replaces them with new rules.
The whitelist is synchronized based on the copy method.
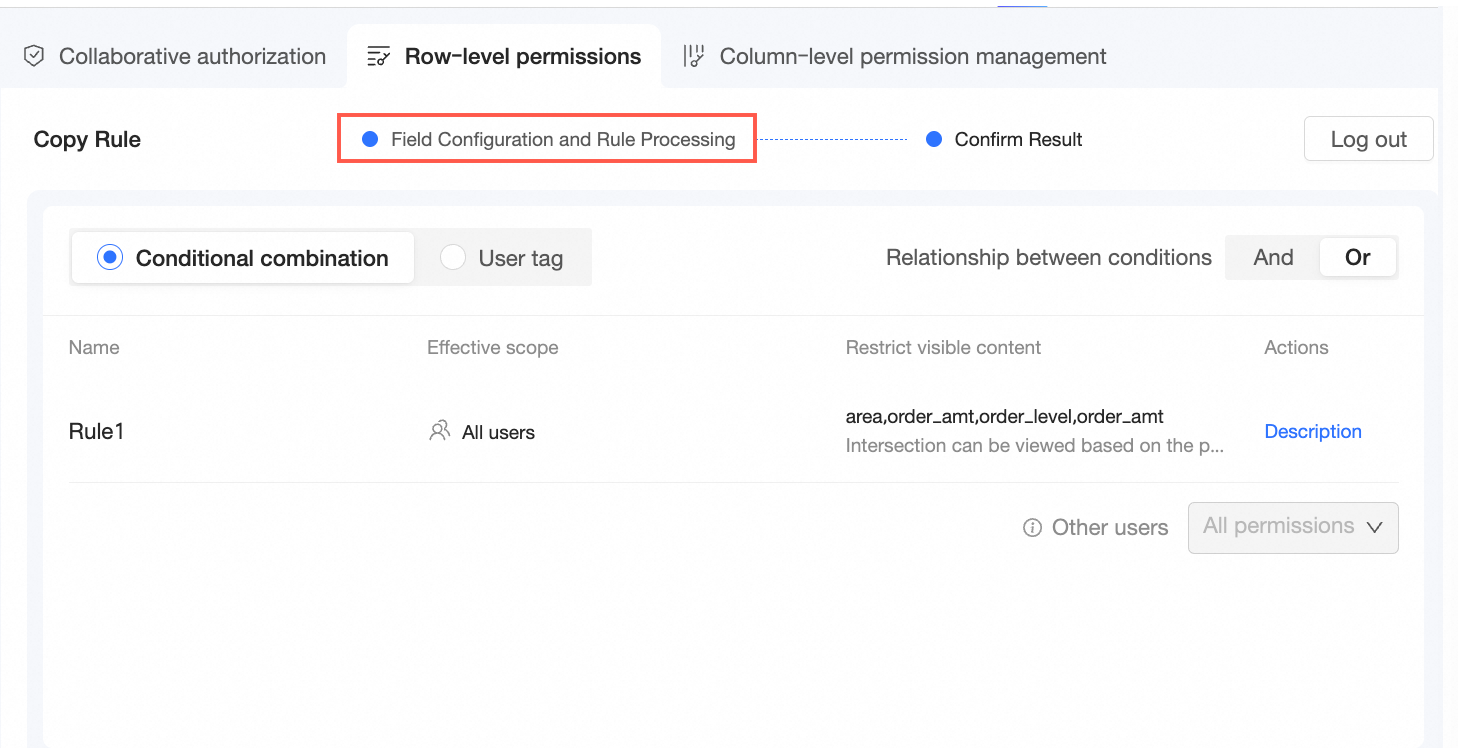
Click Confirm and Preview to complete the copying of row-level permissions.
Click Details in the Operation column of a rule to view the details of the rule.
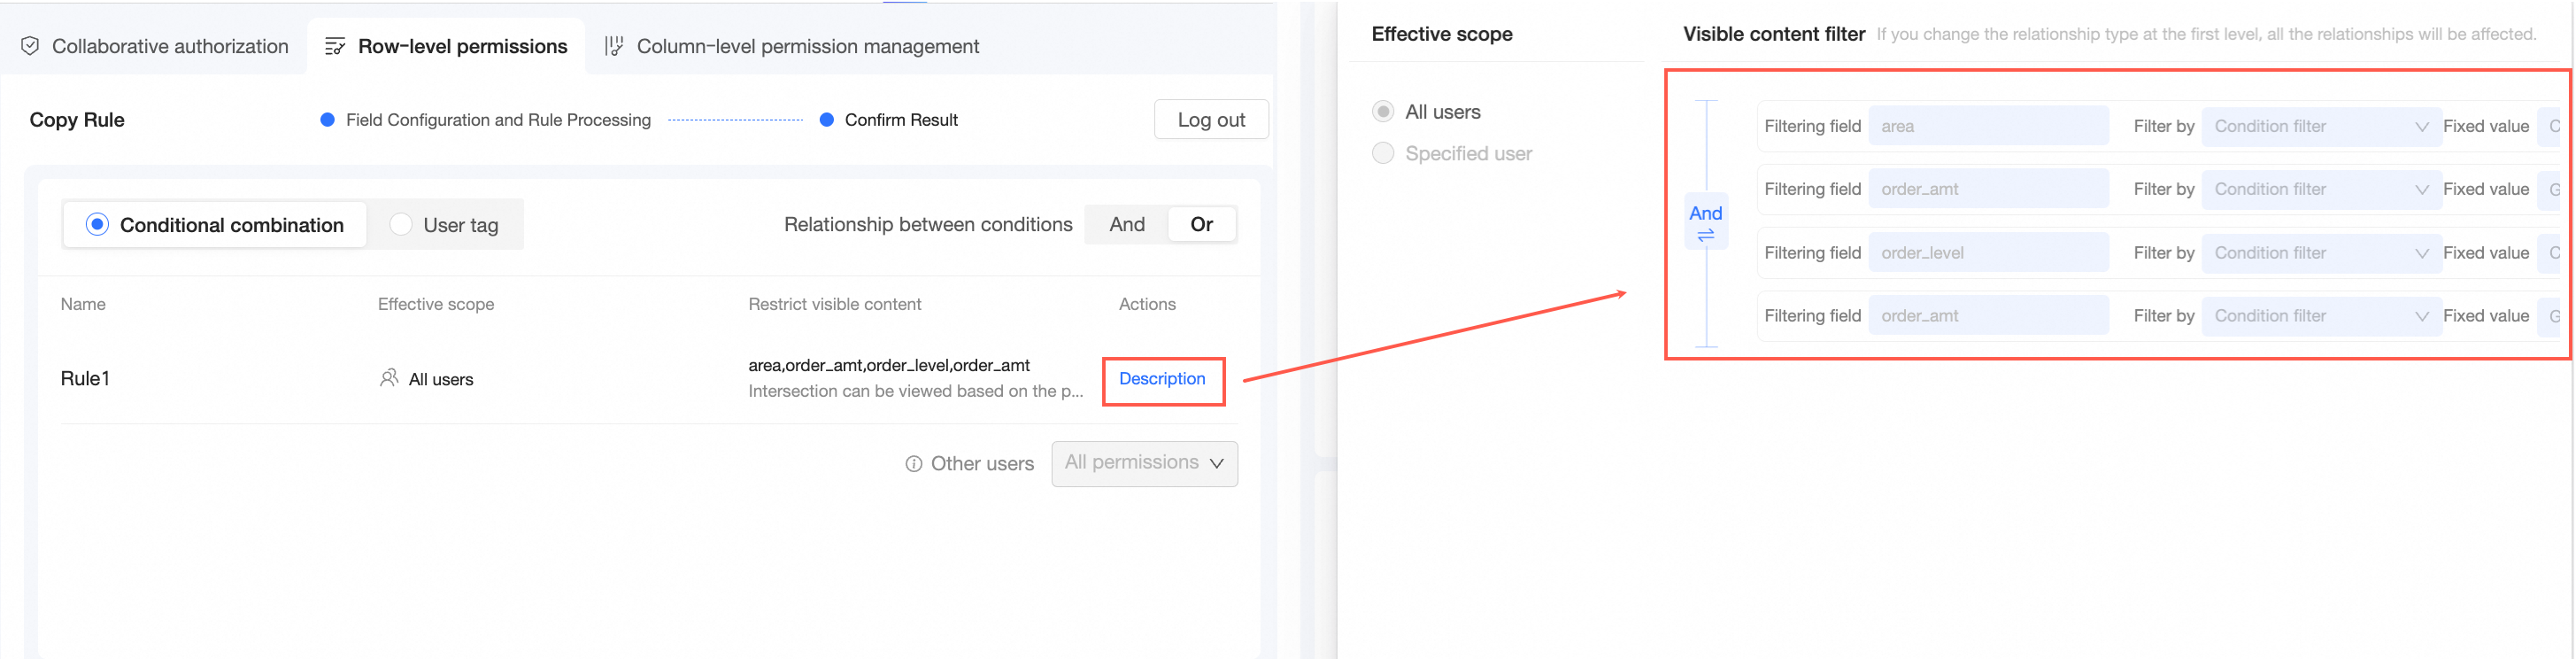
If you want to modify field configurations and rules, you can click Field Configuration and Rule Processing to return to the previous step.
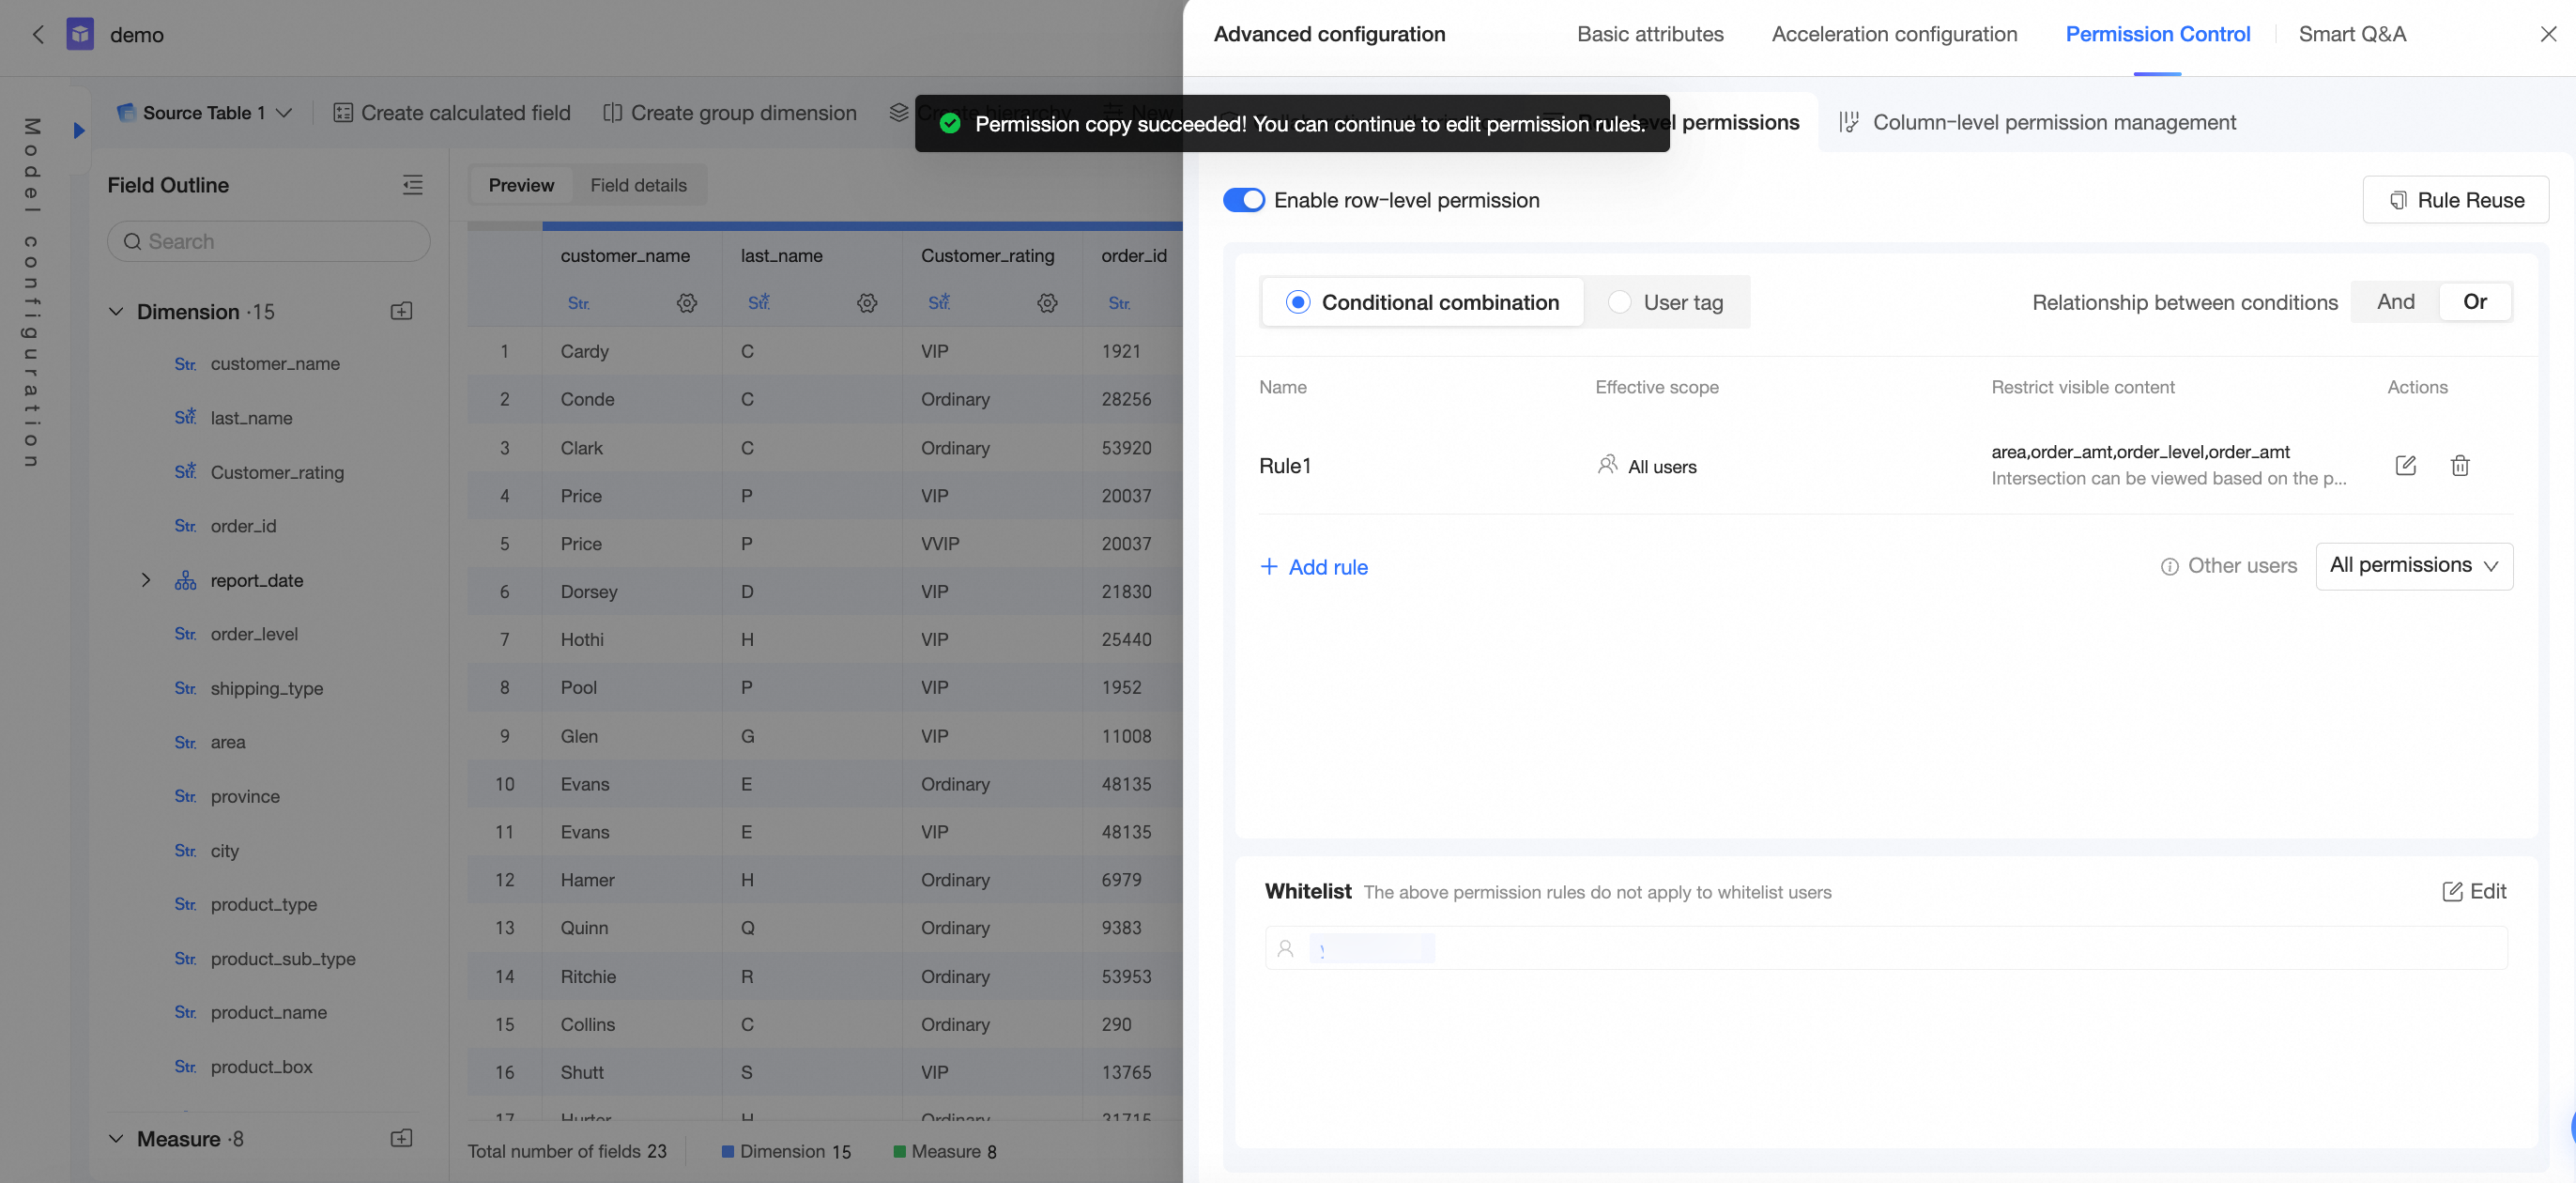
Click Confirm and Close to save the row-level permission settings.
You can continue to edit the permission rules for the dataset. For more information, see Grant row-level permissions.
What to do next
After a dataset is configured, you can perform data analysis. For more information, see Create a Dashboard and Create a chart.