This topic explains how to view, move, share, make public, copy, transfer, and add dashboards to favorites in Quick BI.
Prerequisites
A dashboard is created and saved. For more information, see Create a Dashboard and Overview of Visualization Charts.
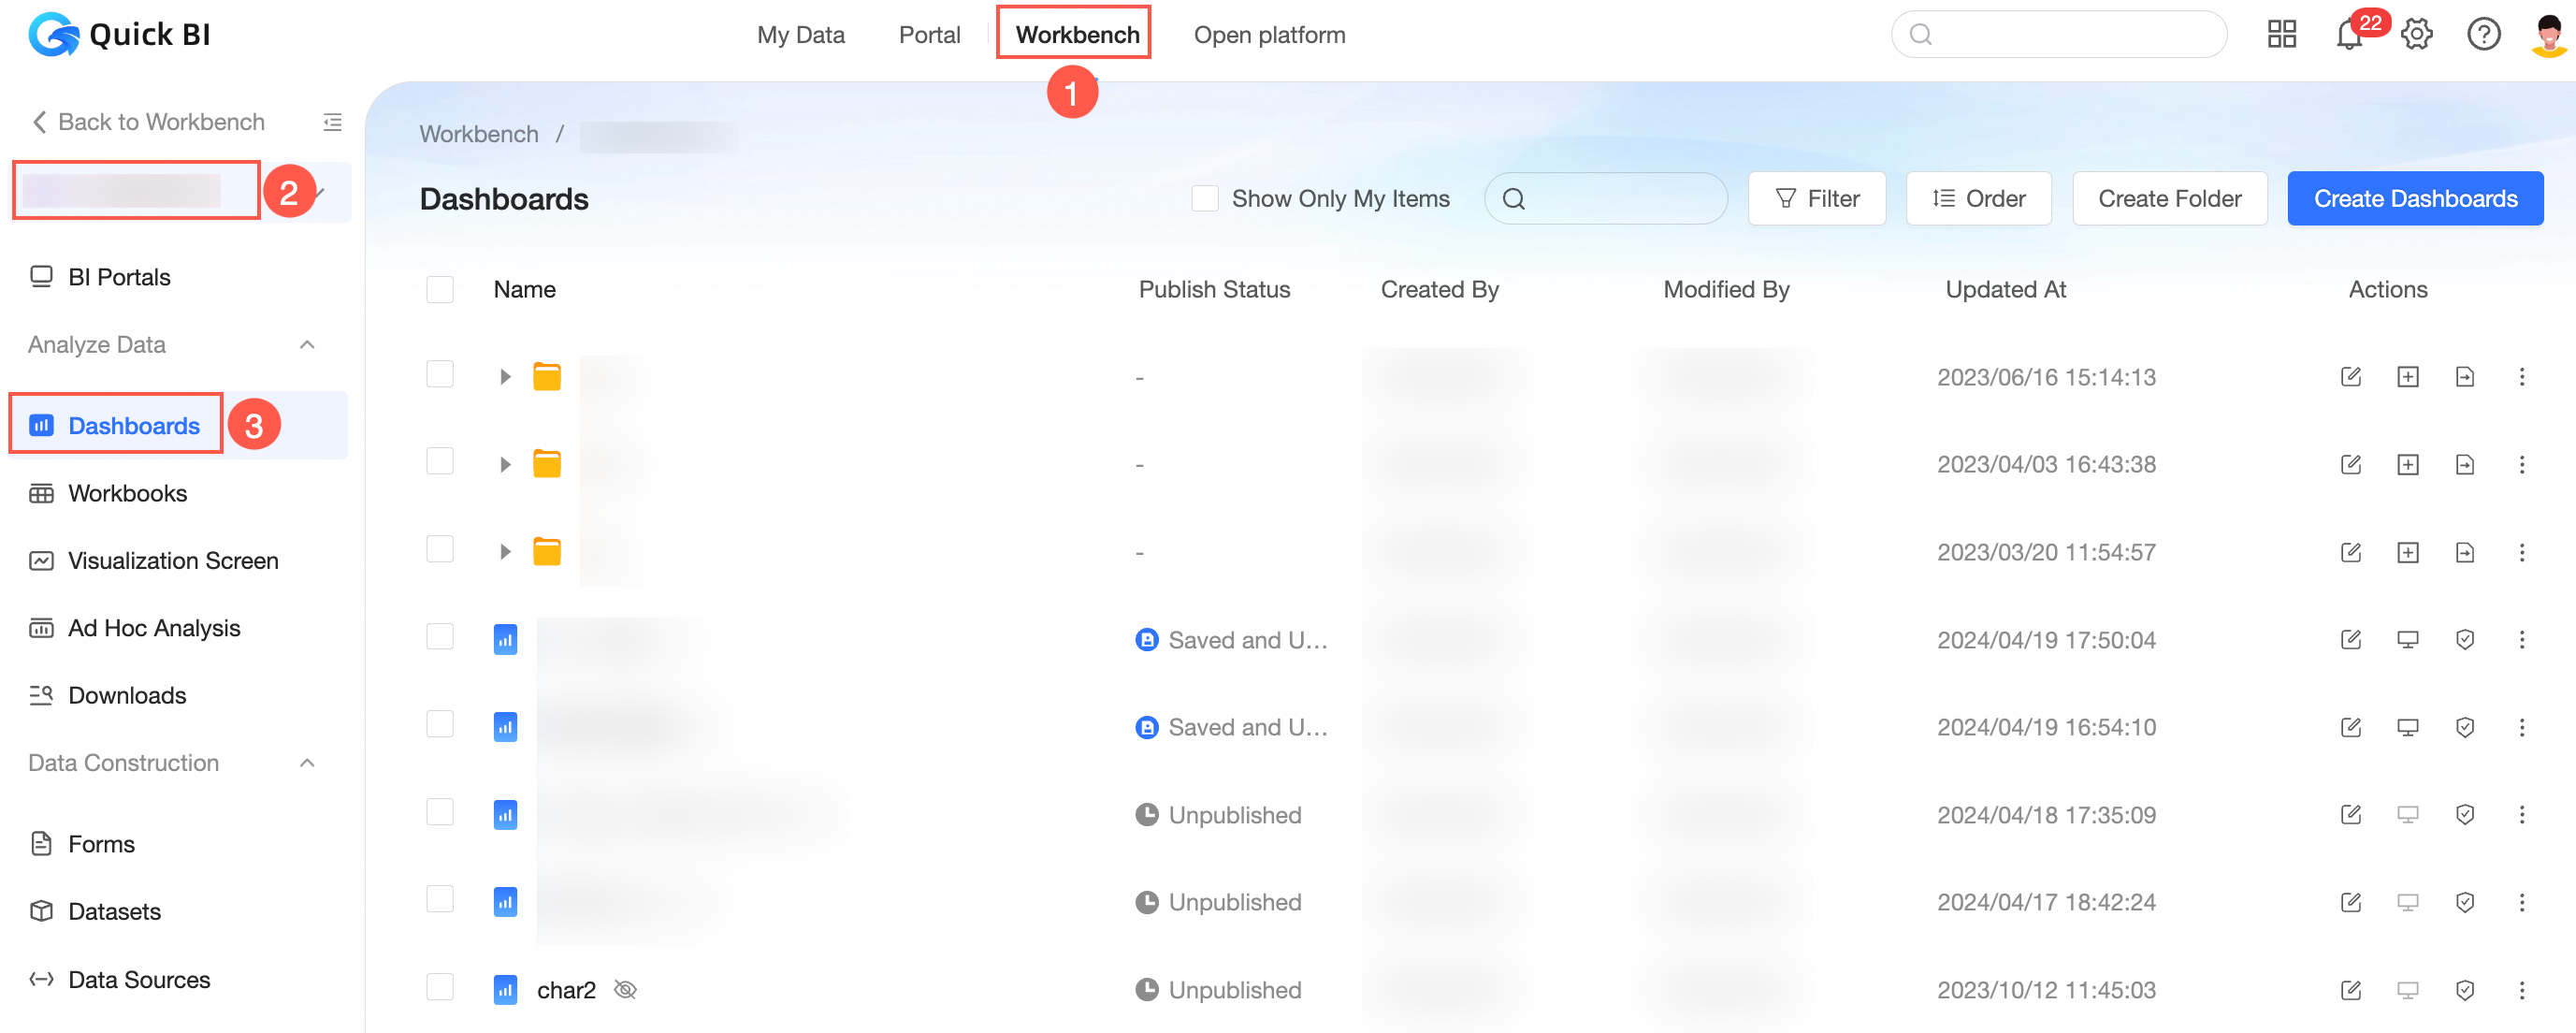
Go to the dashboards page
Log on to the Quick BI console and navigate to the dashboards management page as shown in the figure below.
On the Dashboards page, you can perform operations such as:
View a dashboard
Find the desired dashboard on the Dashboards page and click the
 icon.
icon.This action takes you to the dashboard preview page.
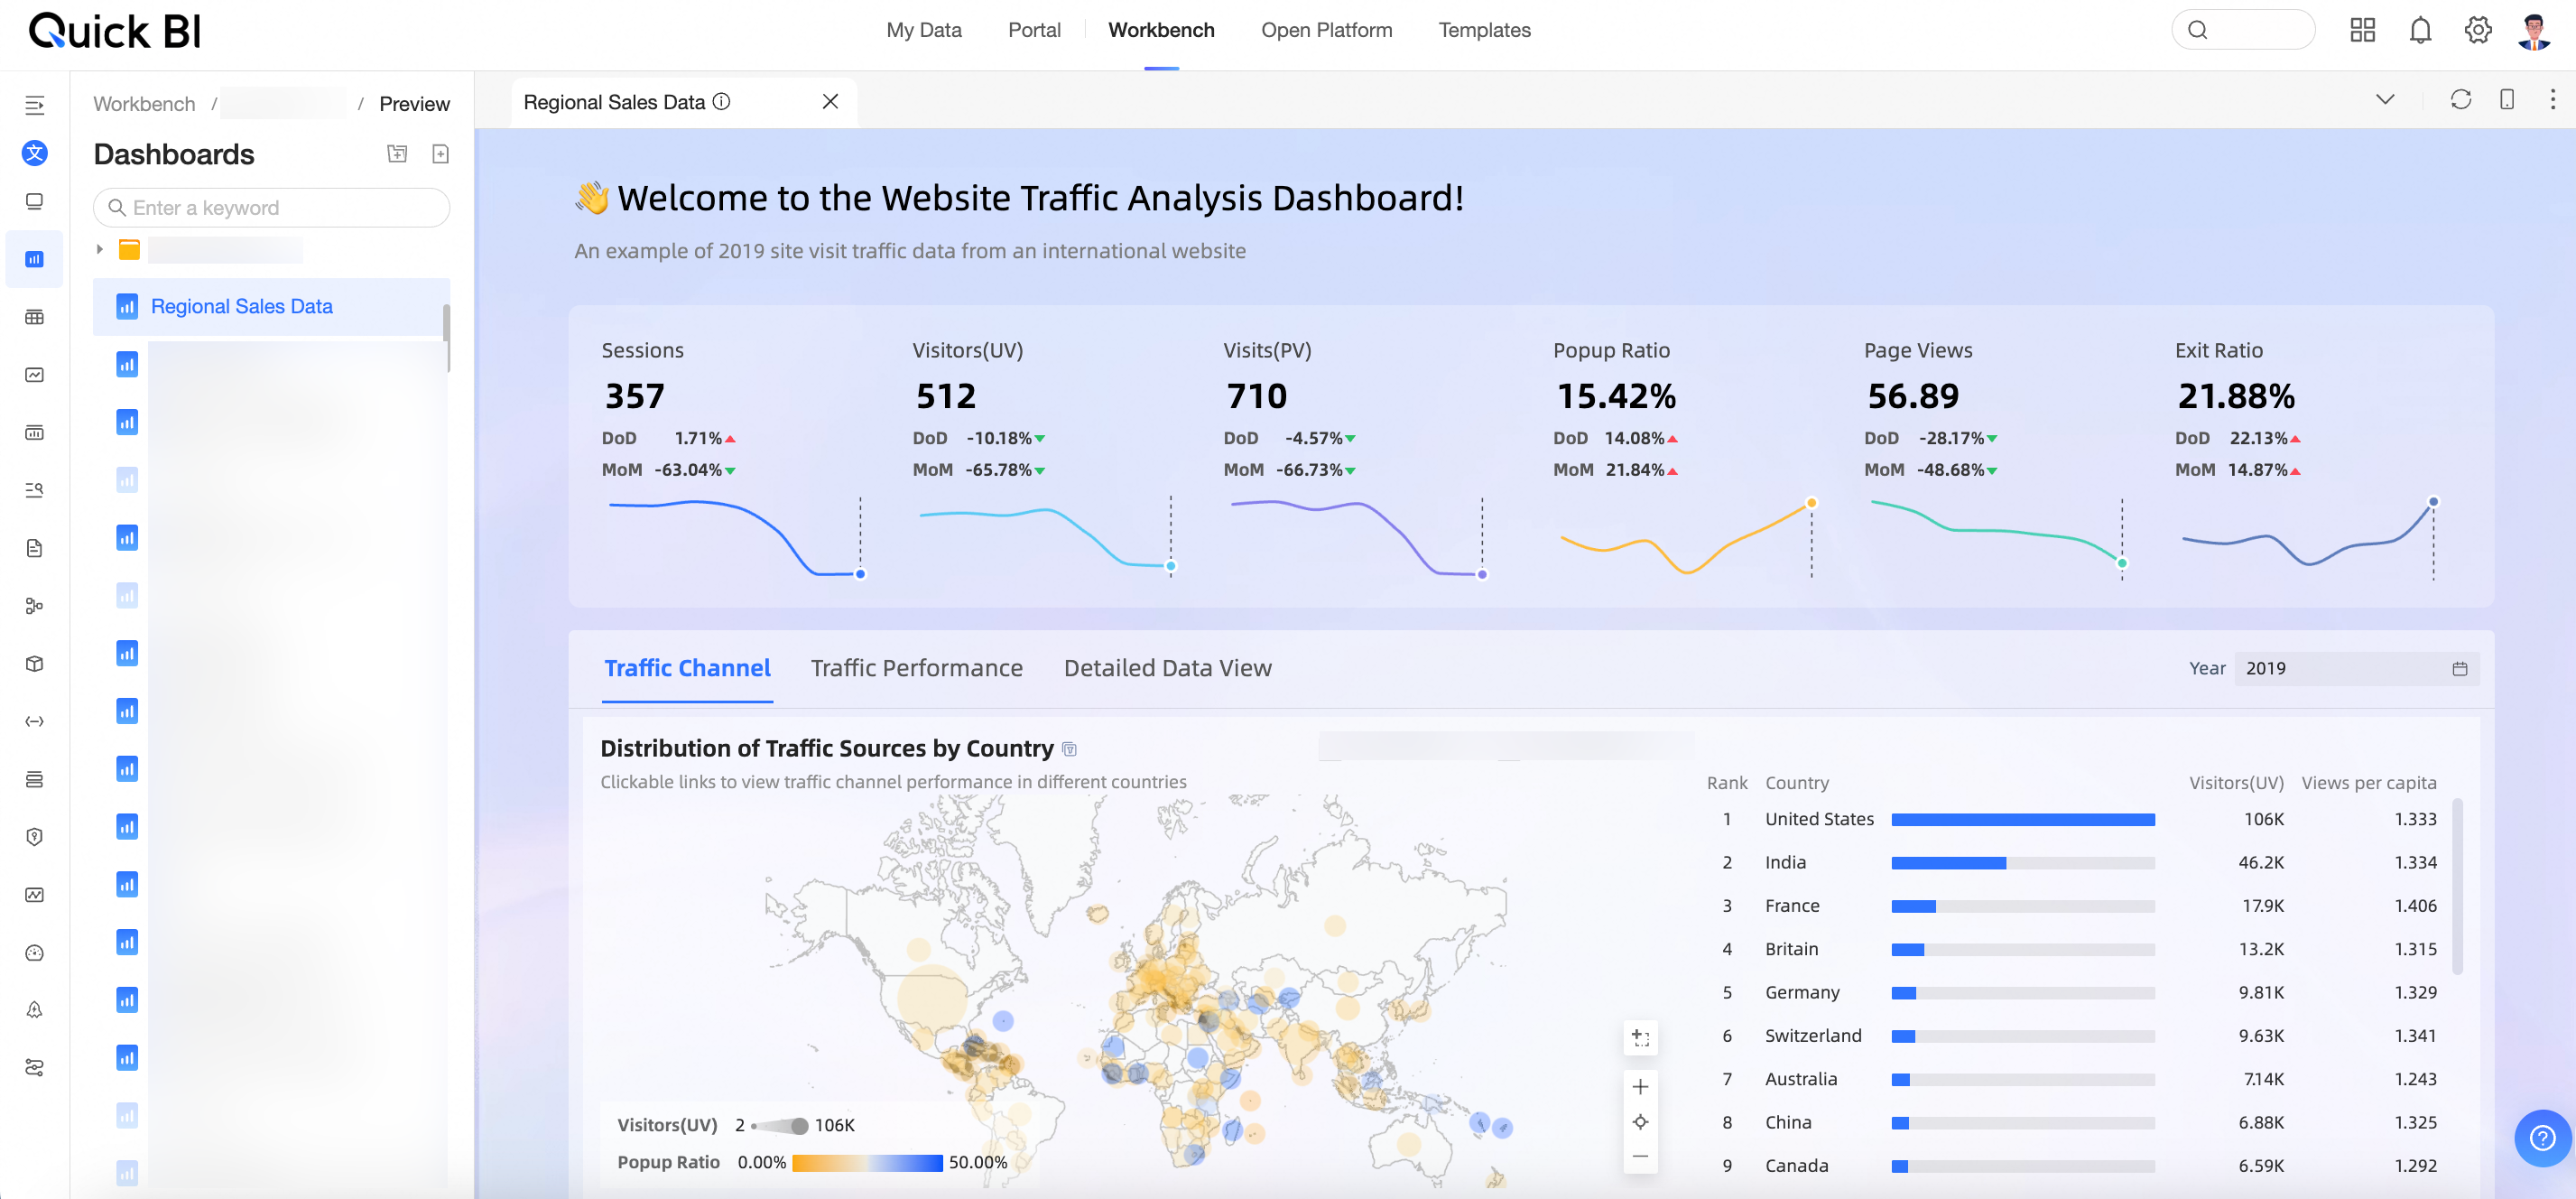
The dashboard supports multiple preview interfaces that you can switch between.
NoteA maximum of five menus are retained for your convenience.

Click the
 icon in the upper-right corner to close the current, all, or other menus.
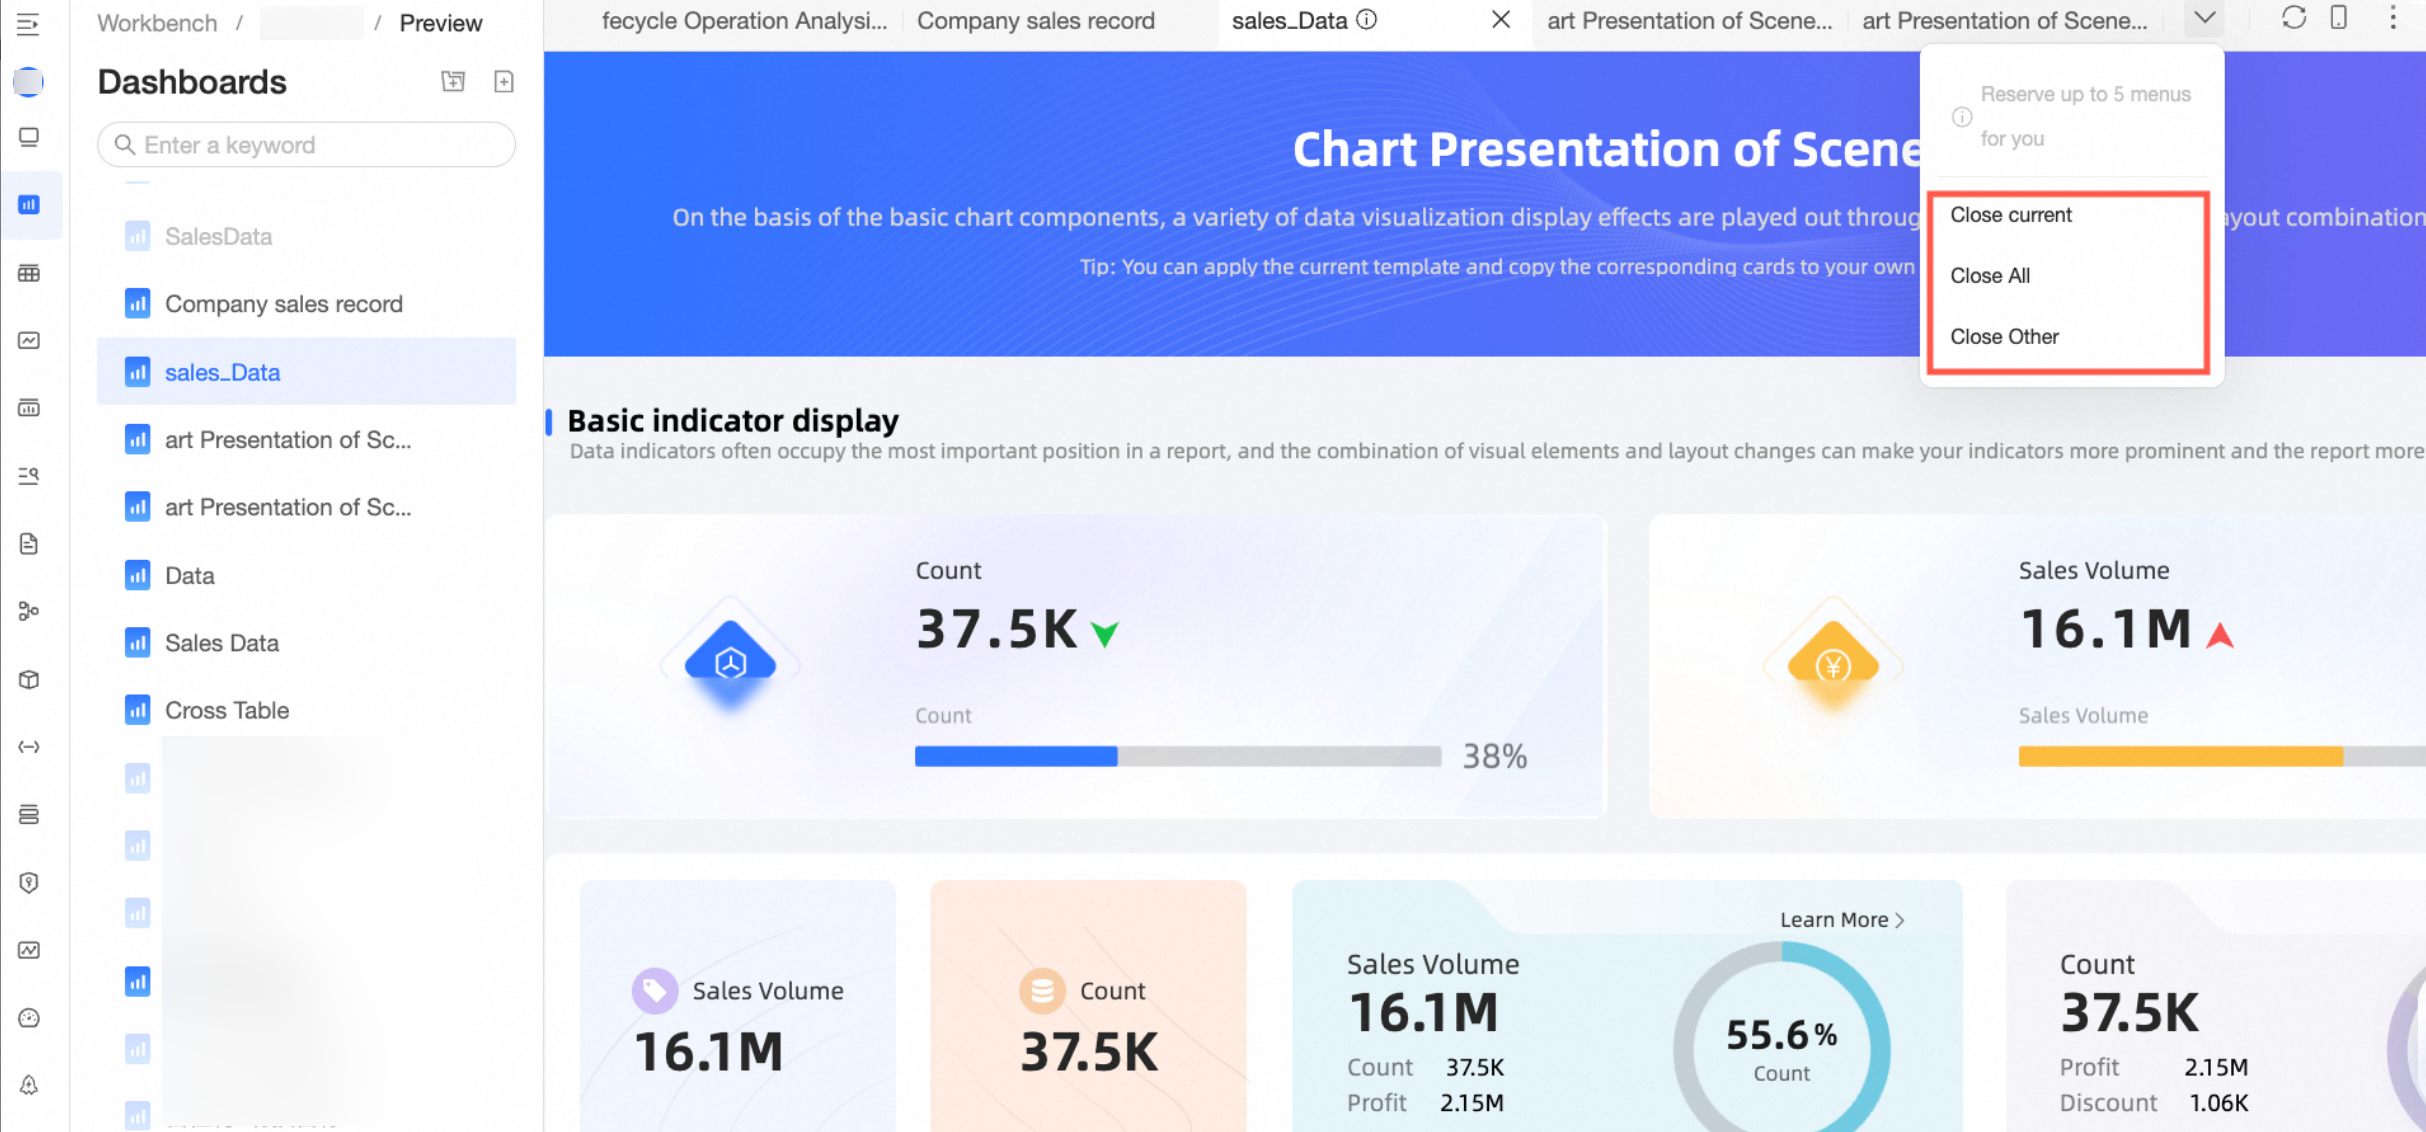
Close current: Closes the current preview page.
Close all: Closes all open preview pages.
Close others: Closes all preview pages except the current one.
Query a dashboard
Query the dashboard you're looking for.
Search Query
Use the search box on the Dashboards page to enter the dashboard name keyword and quickly locate the desired dashboard.
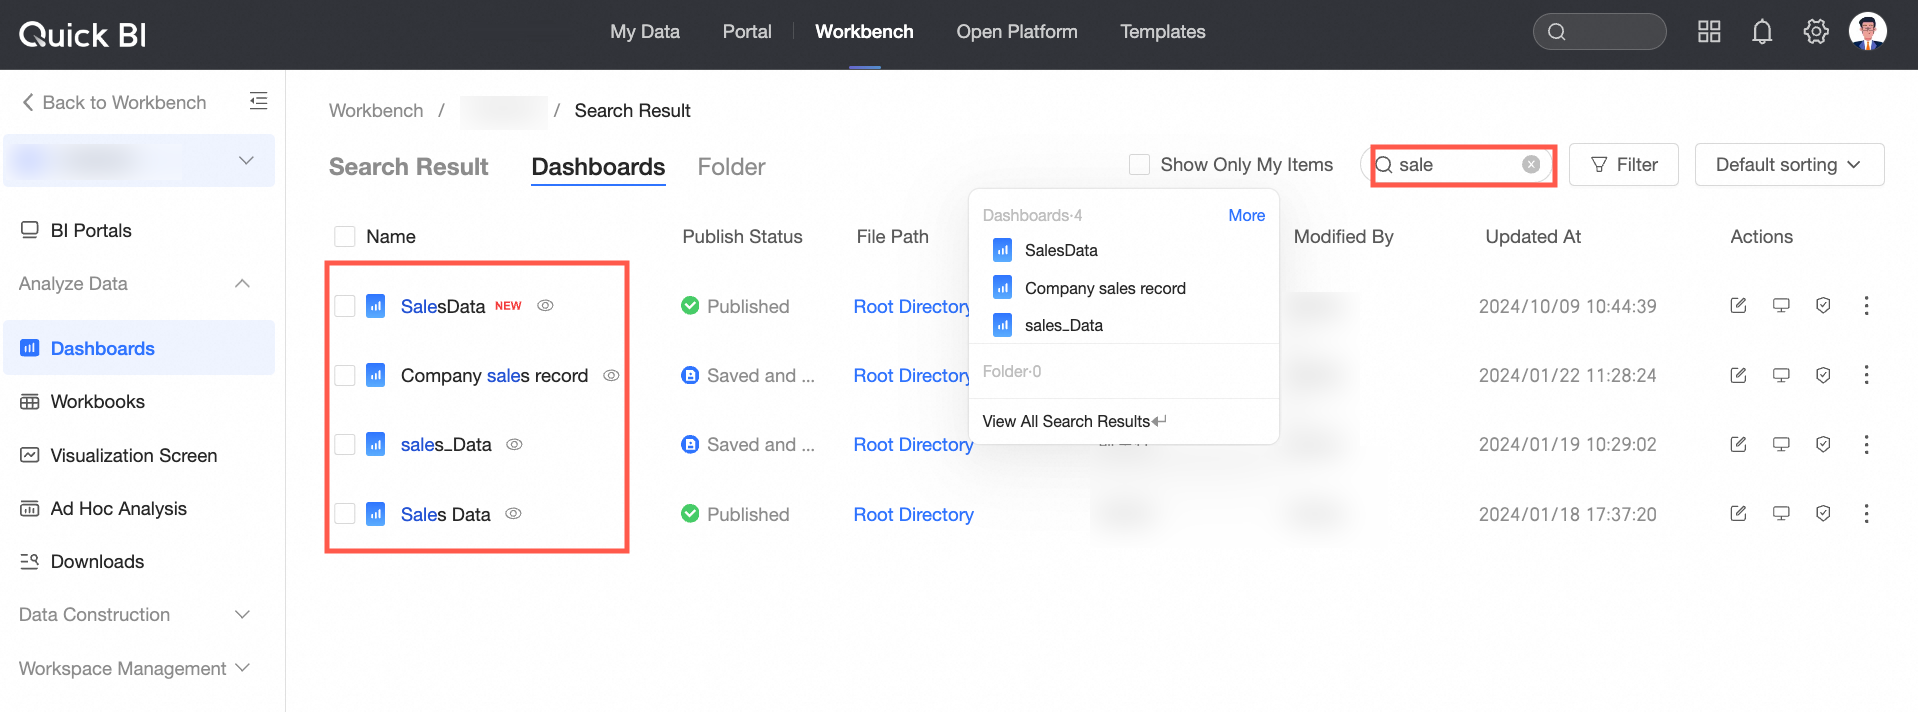
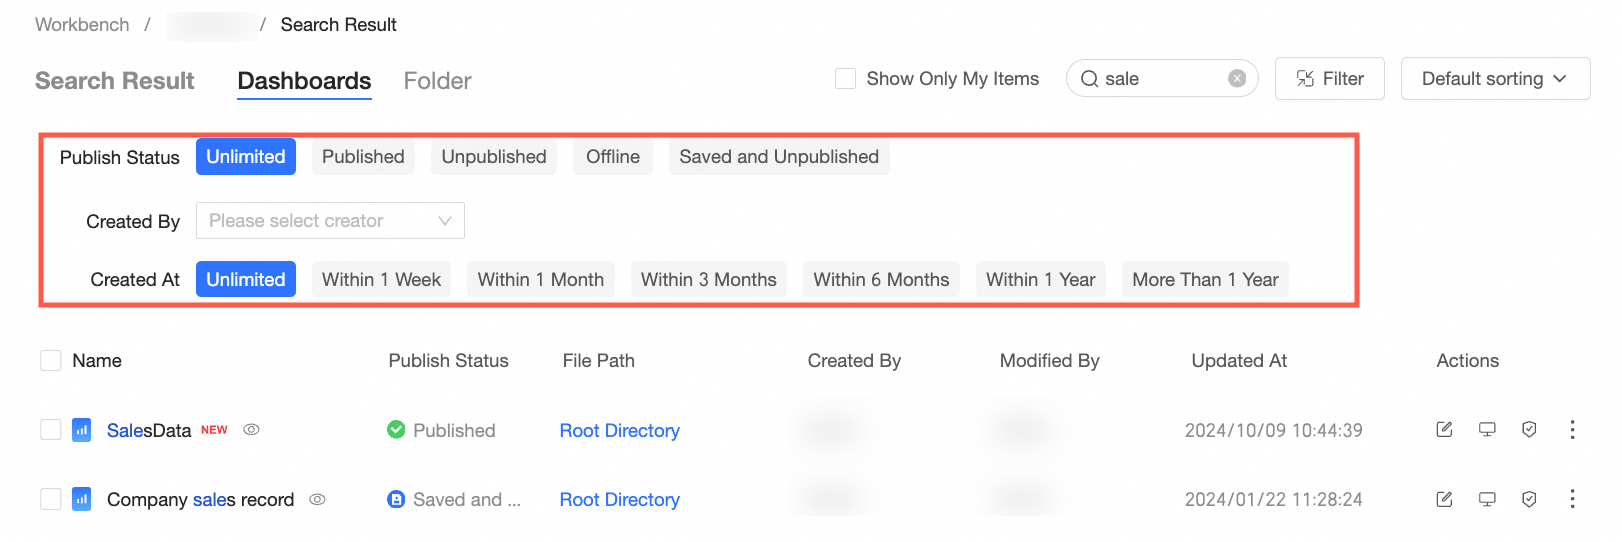
Filtered Query
Click Filter to open the filter area. You can filter by publication status, creator, and creation time.
After clicking the
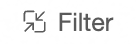 icon, the filter area can be hidden, allowing you to see and manage filter conditions.
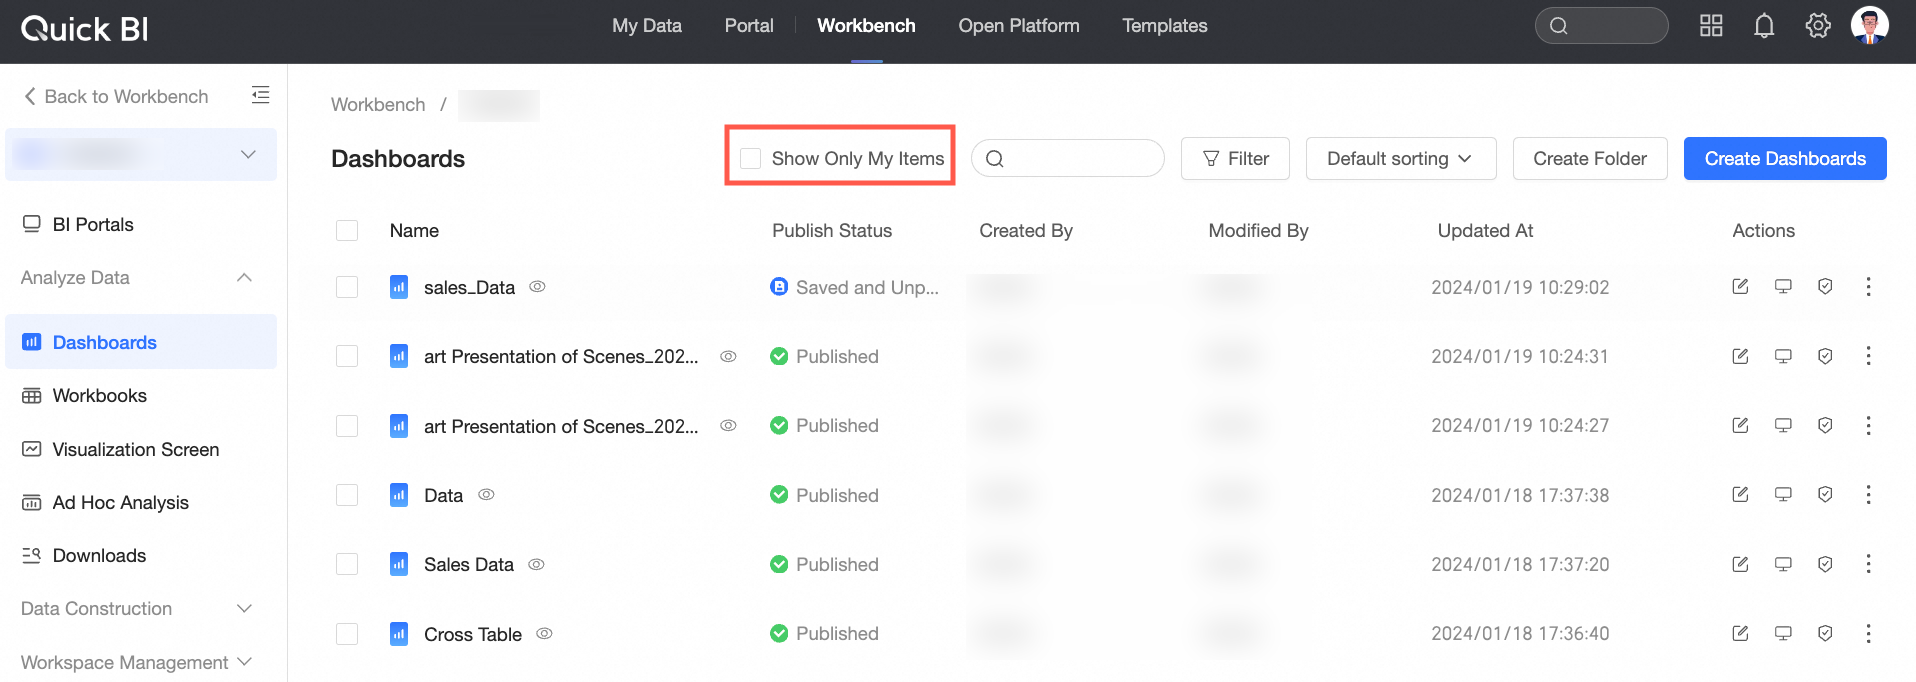
Select Only show mine to quickly find dashboards you've created.
Sort
Sort dashboards by name, creator, modifier, creation time, or modification time. By default, the folder structure is selected, and folders are not included in the sort.

Comment on a dashboard
The comment feature is available only when the organization administrator enables Comments in the View State Feature of Report Configuration and activates Report Comments on the dashboard editing page under Page Settings > Advanced tab.
Both Report-level and Component-level comments are supported.
Navigate to the dashboard preview page and view the dashboard.
Comment Entry
Report-level Comment Entry
On the preview page, click the floating menu in the lower-right corner and then select the
 icon (①) to open the comment page in a pop-up window (②).
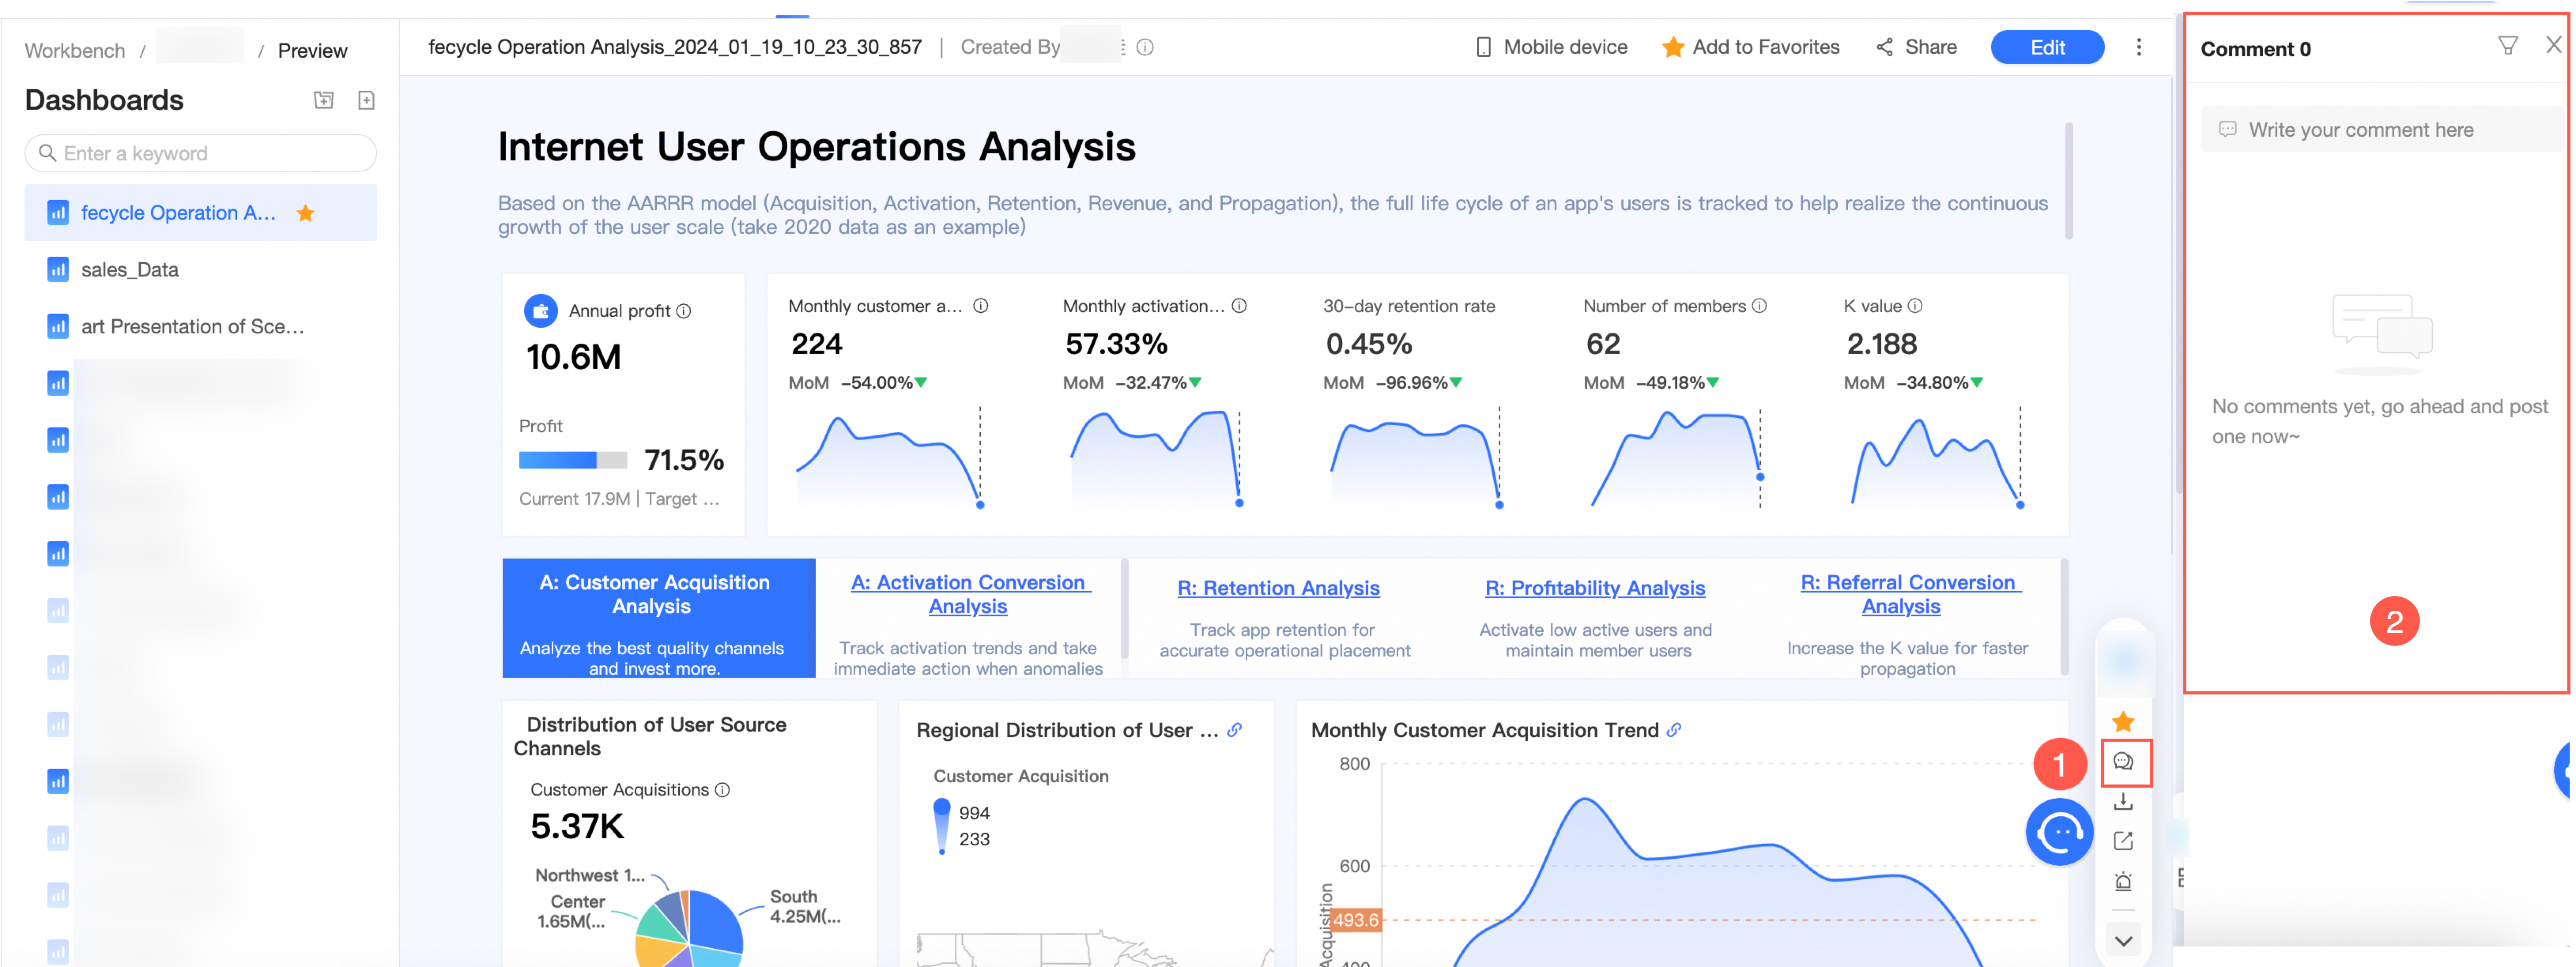
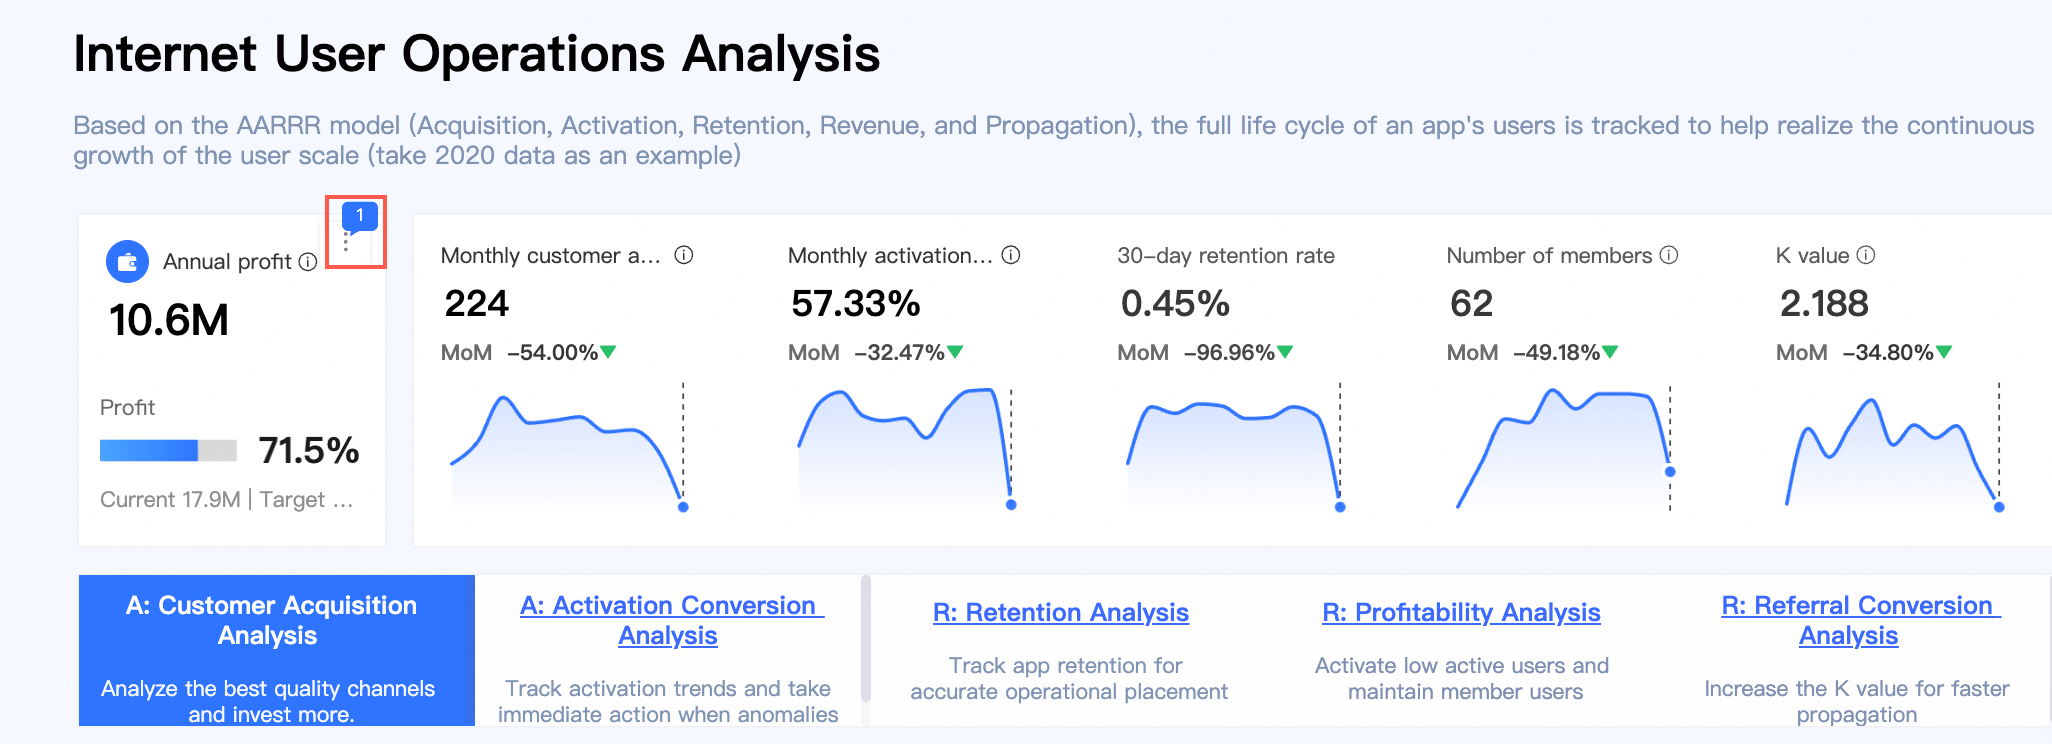
Component-level Comment Entry
Follow the instructions in the figure to navigate to the component's comment page on the preview page.

When a component has existing comments, click the comment icon in the upper-right corner of the component to access the comment page. Clicking the comment icon of other components will take you to their respective comment pages.
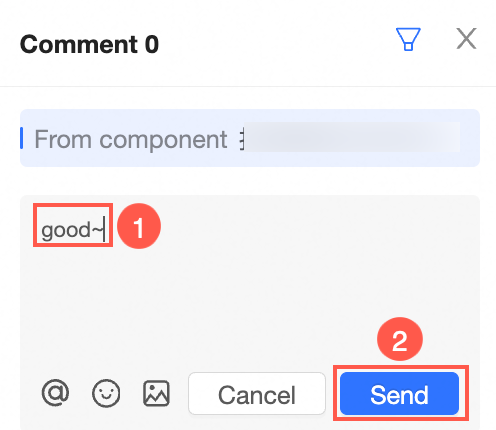
To post a comment, type your message into the Comment box (①) and then click Send (②).
Once you've commented, you can either Reply to or Delete your comments.

Click the
 icon in the upper-right corner to Filter comments. You can select from All comments, Comments related to me, or Global comments on the dashboard, depending on your needs.
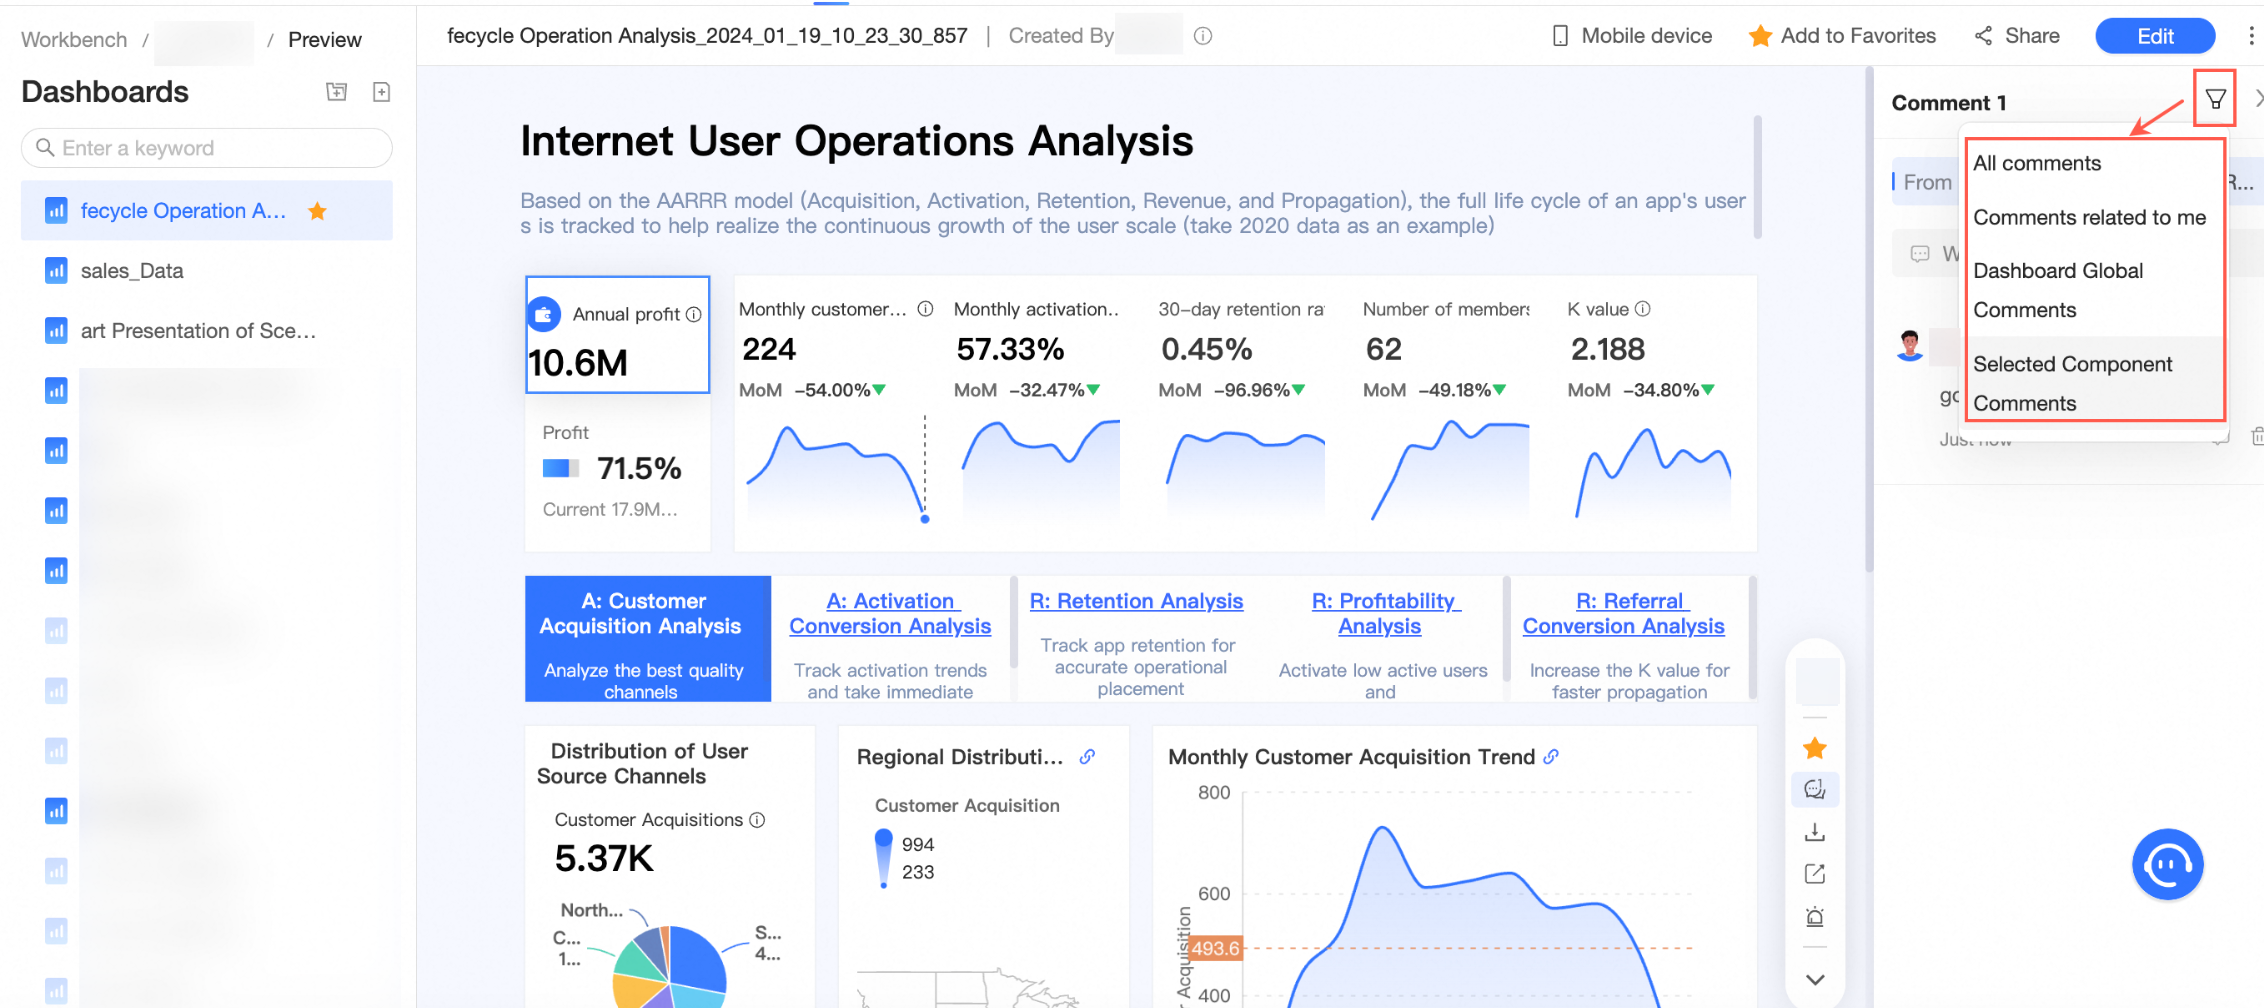
Upon accessing the comment page through an existing component comment, clicking the
icon will default to Selected component comments. You can then switch to any of the other three comment types.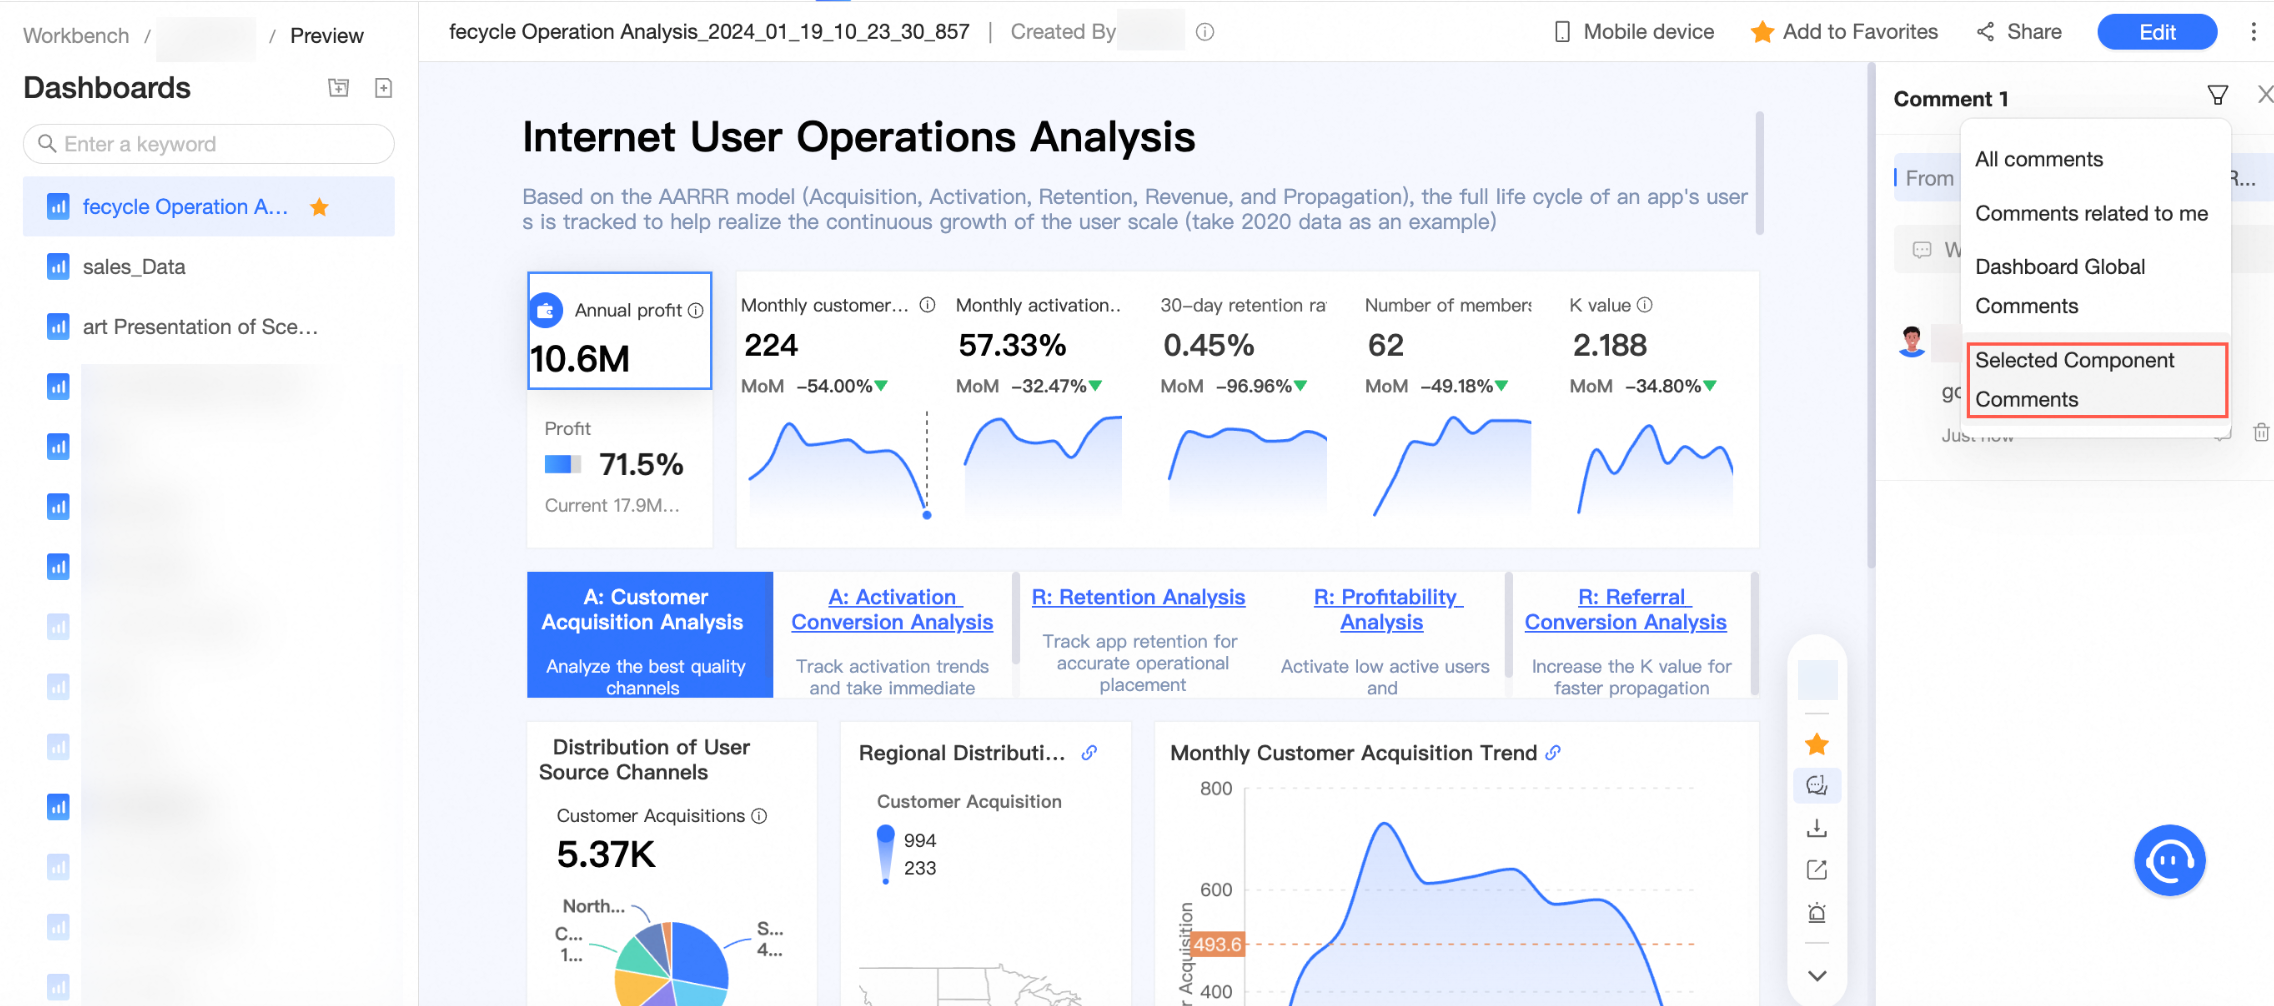
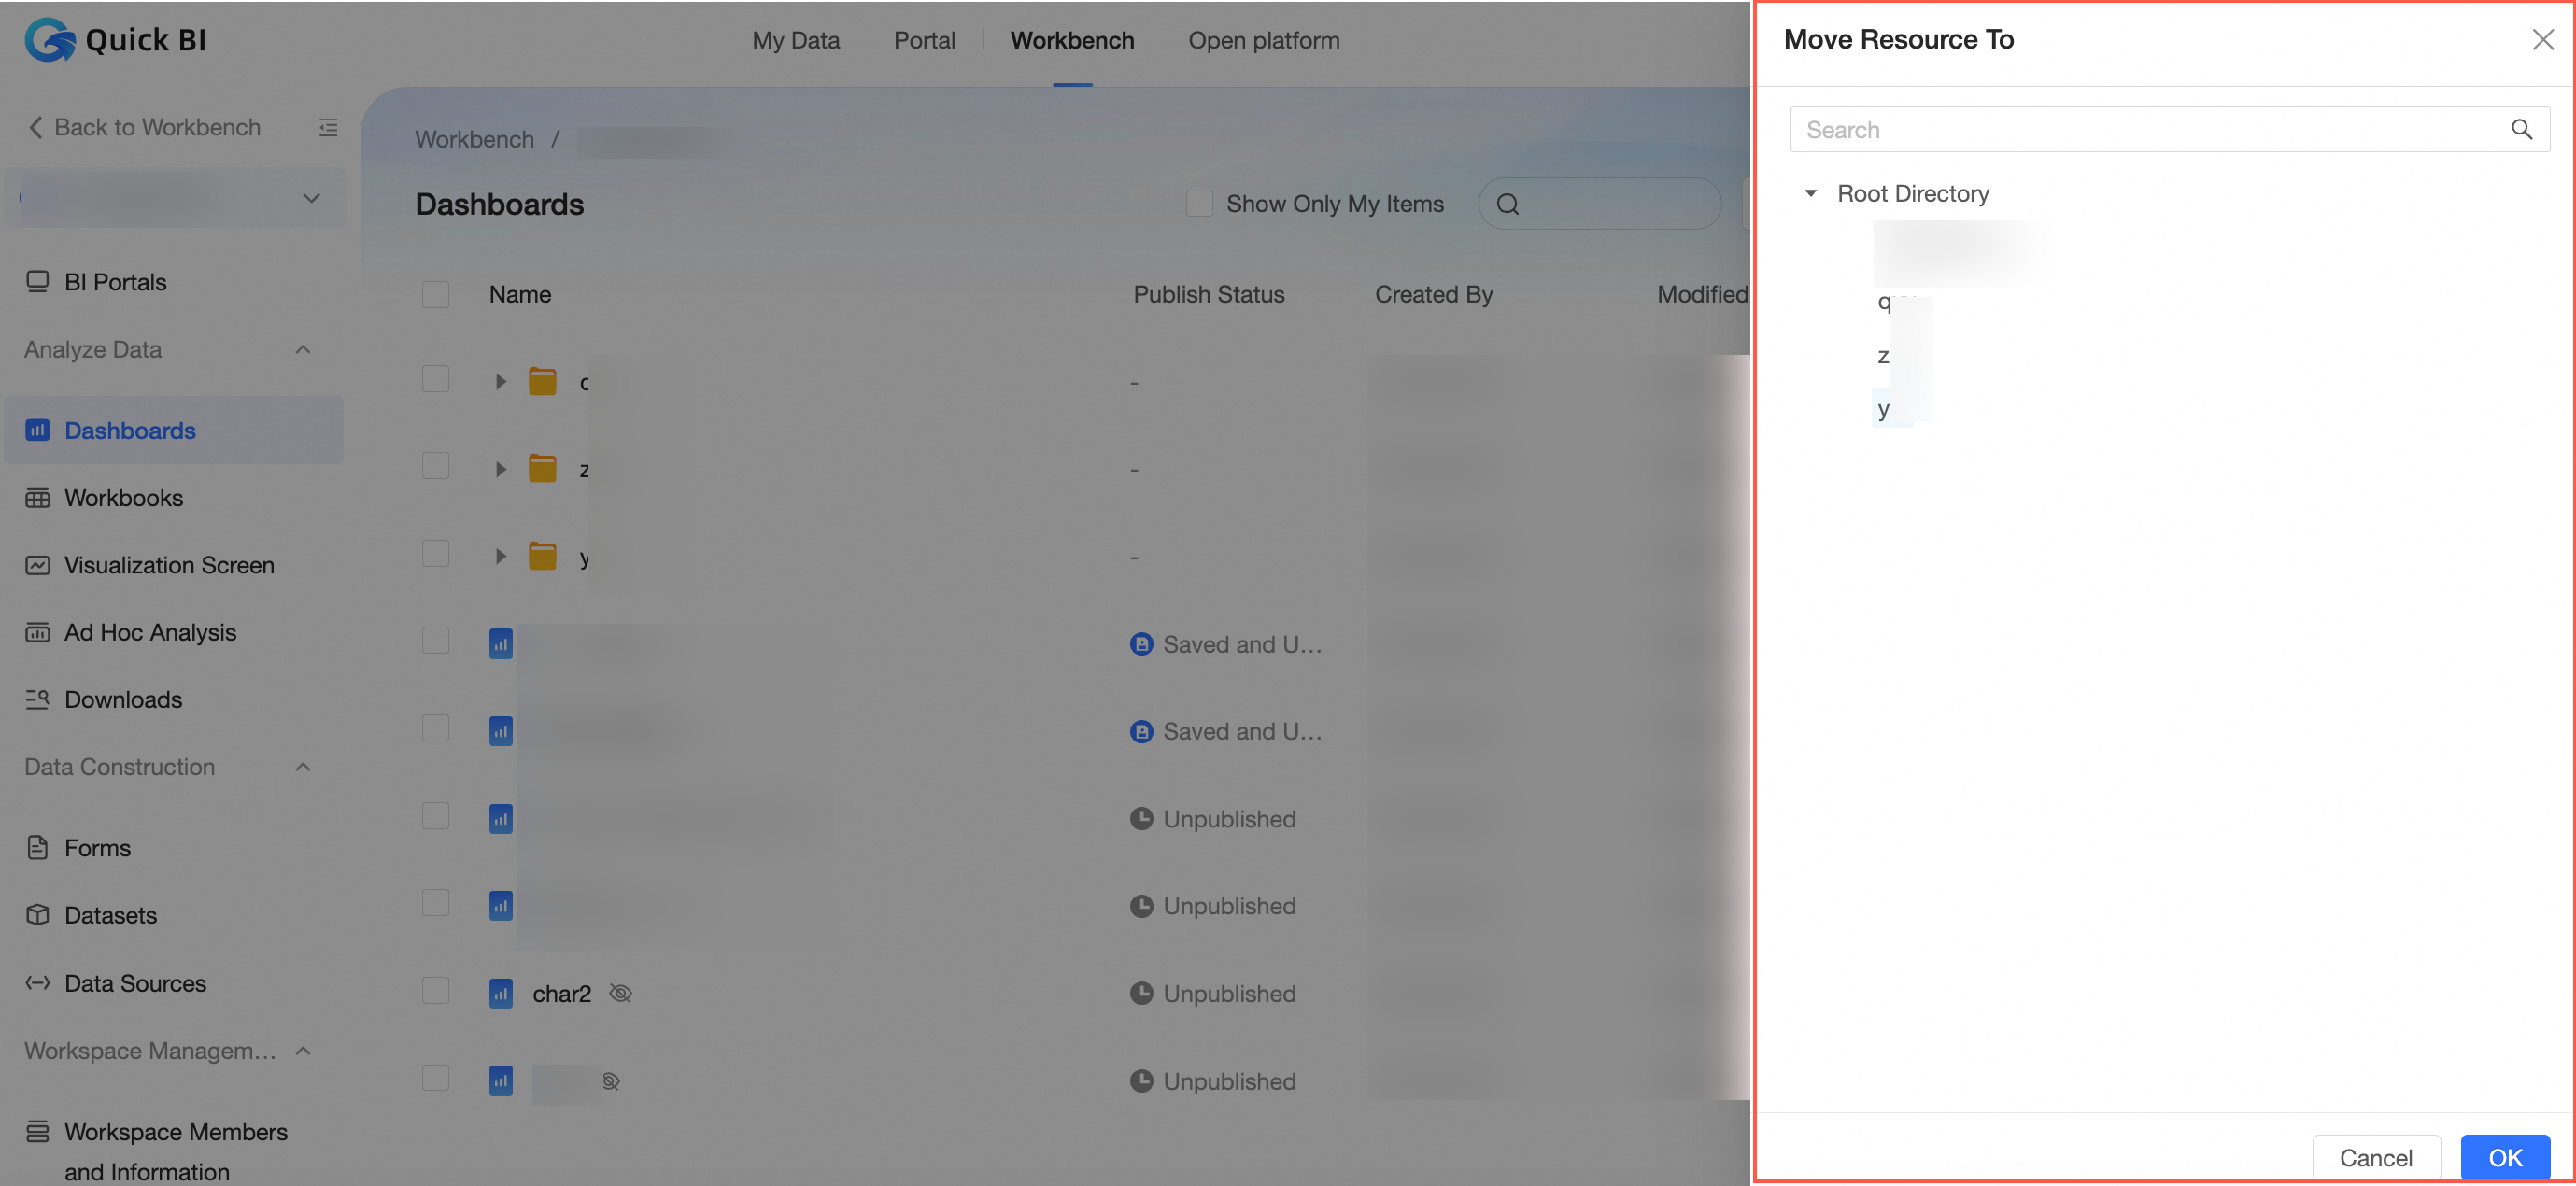
Move a dashboard
On the Dashboards page, click the
 icon next to the dashboard you want to move and select Move To.
In the Move To dialog box, choose the target folder and click Confirm.
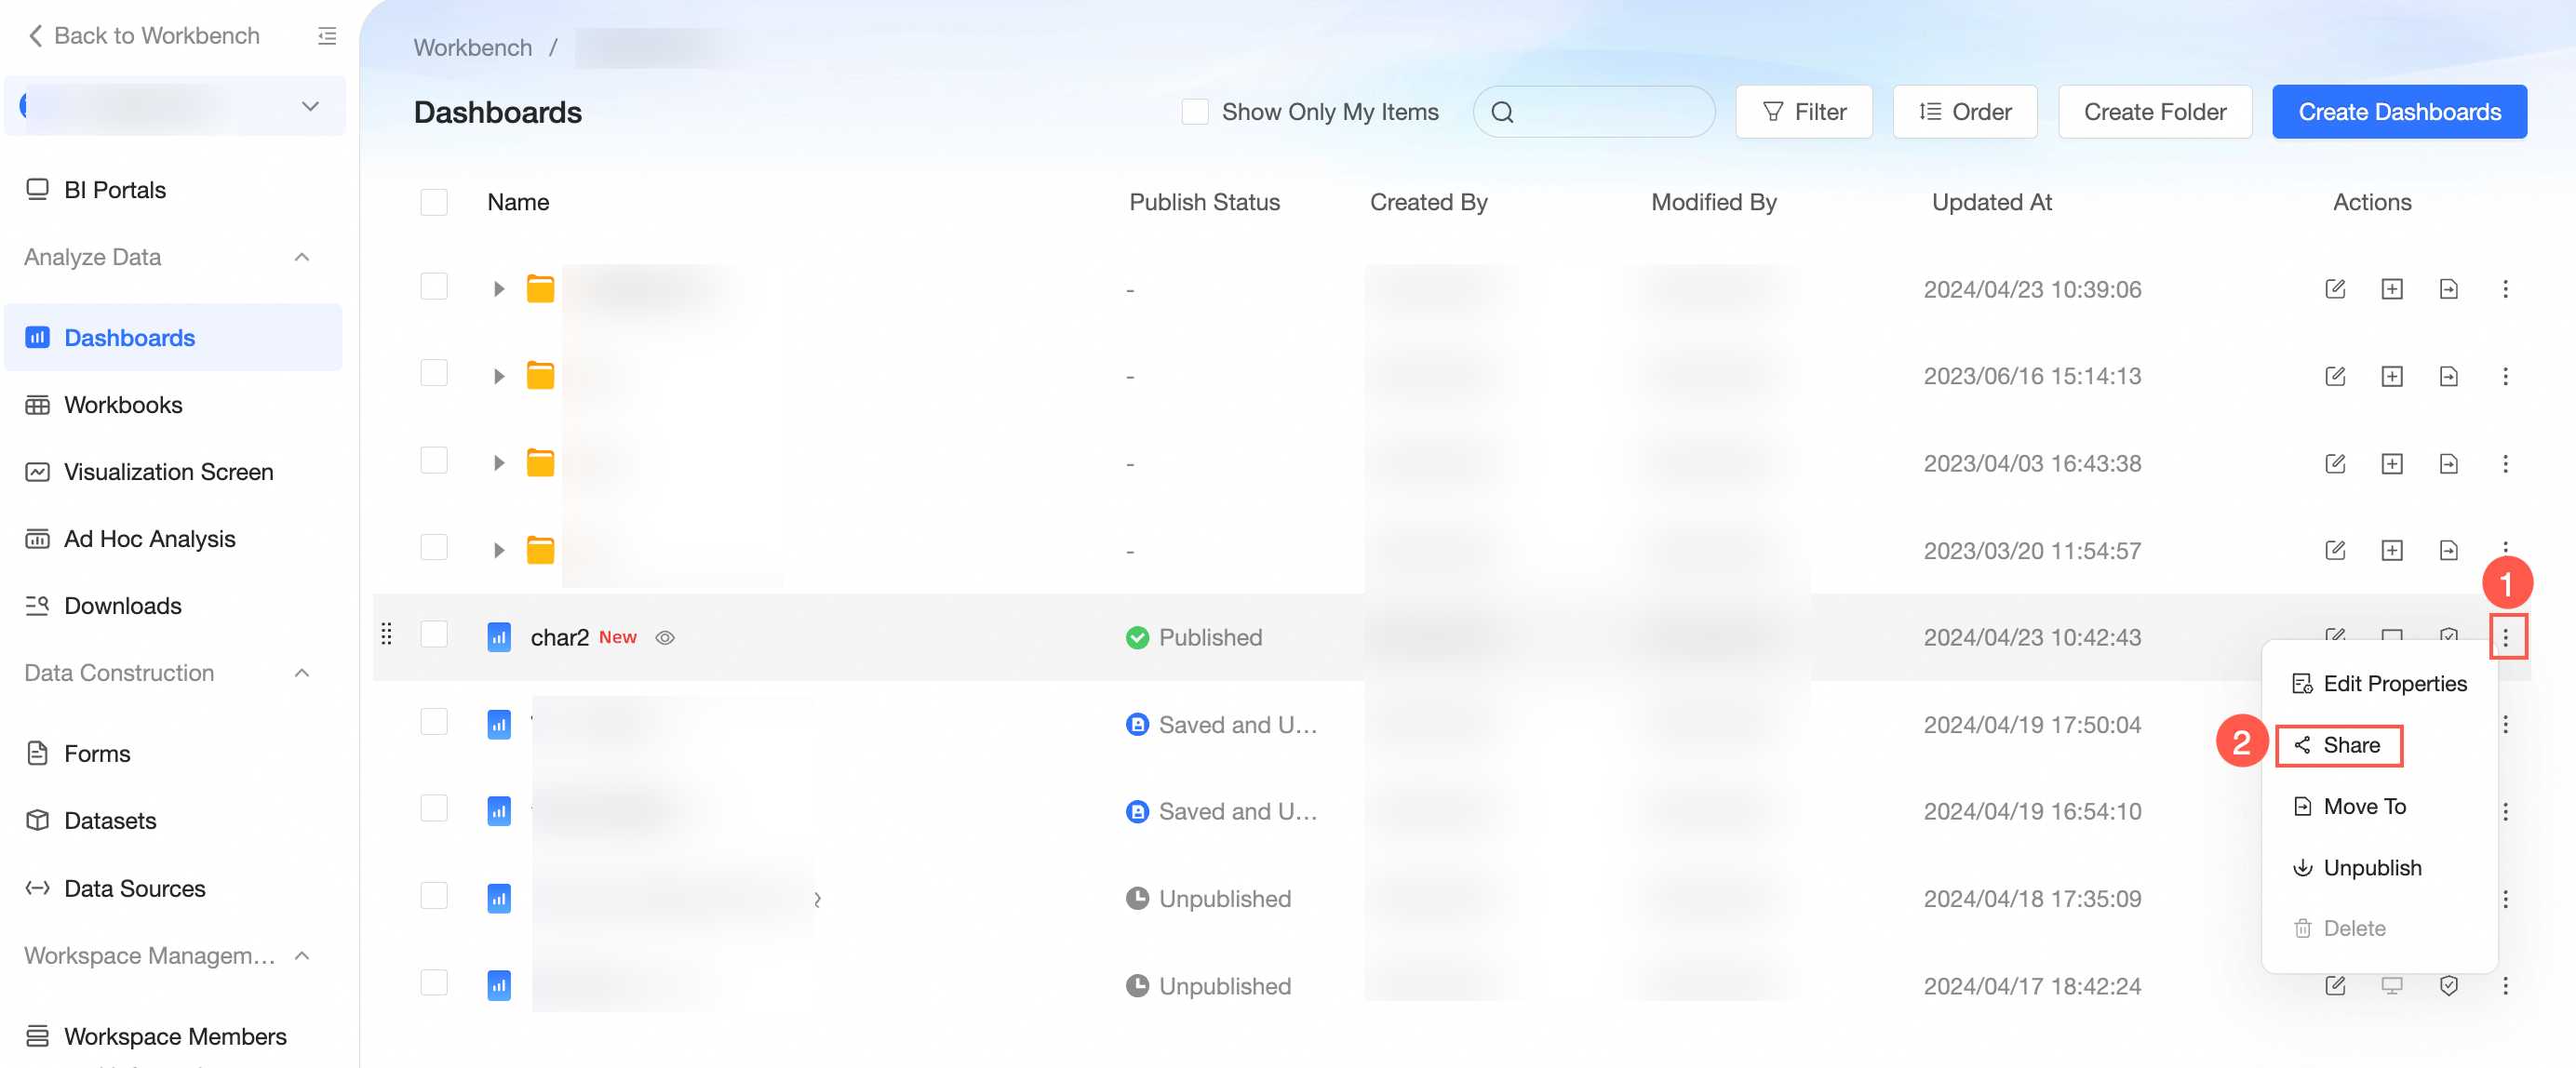
Share a dashboard
This feature is only available when the dashboard's Publication Status is set to Published.
Navigate to the sharing page by following the instructions provided on the Dashboards page as illustrated below.
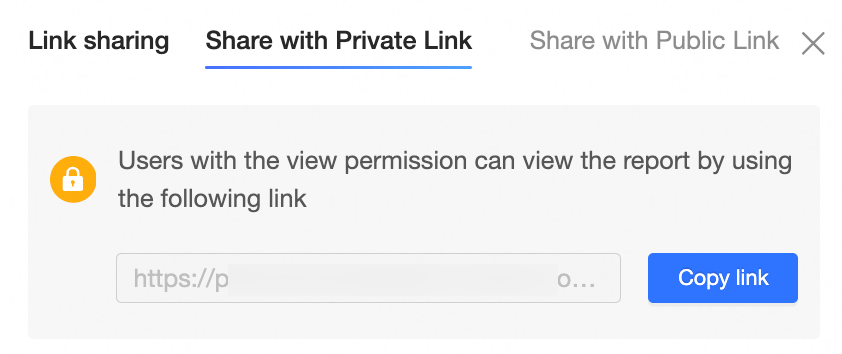
In the Private Link Sharing dialog box, you can copy the URL and share it with authorized users.
Make a dashboard public
On the Dashboards page, locate the dashboard you want to share, right-click and select Share.
Alternatively, click the
 icon next to the dashboard and choose Share.
In the sharing dialog box, navigate to the Public link sharing tab.
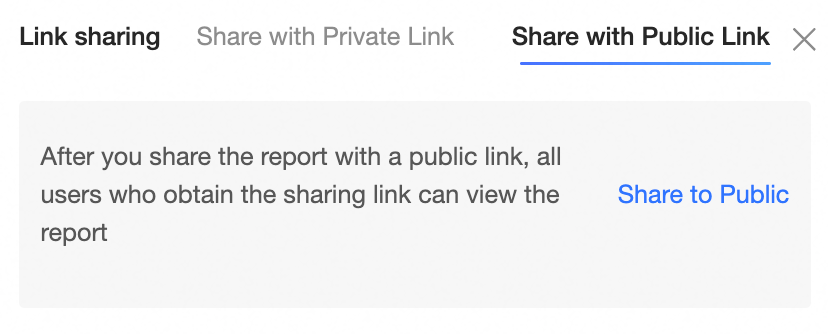
Click Public Share to make the dashboard publicly accessible.
Copy a dashboard
To copy a dashboard, use the Save As feature.
Click the dashboard you want to copy on the Dashboards page.
On the dashboard editing page, click the
 icon and select Save As.
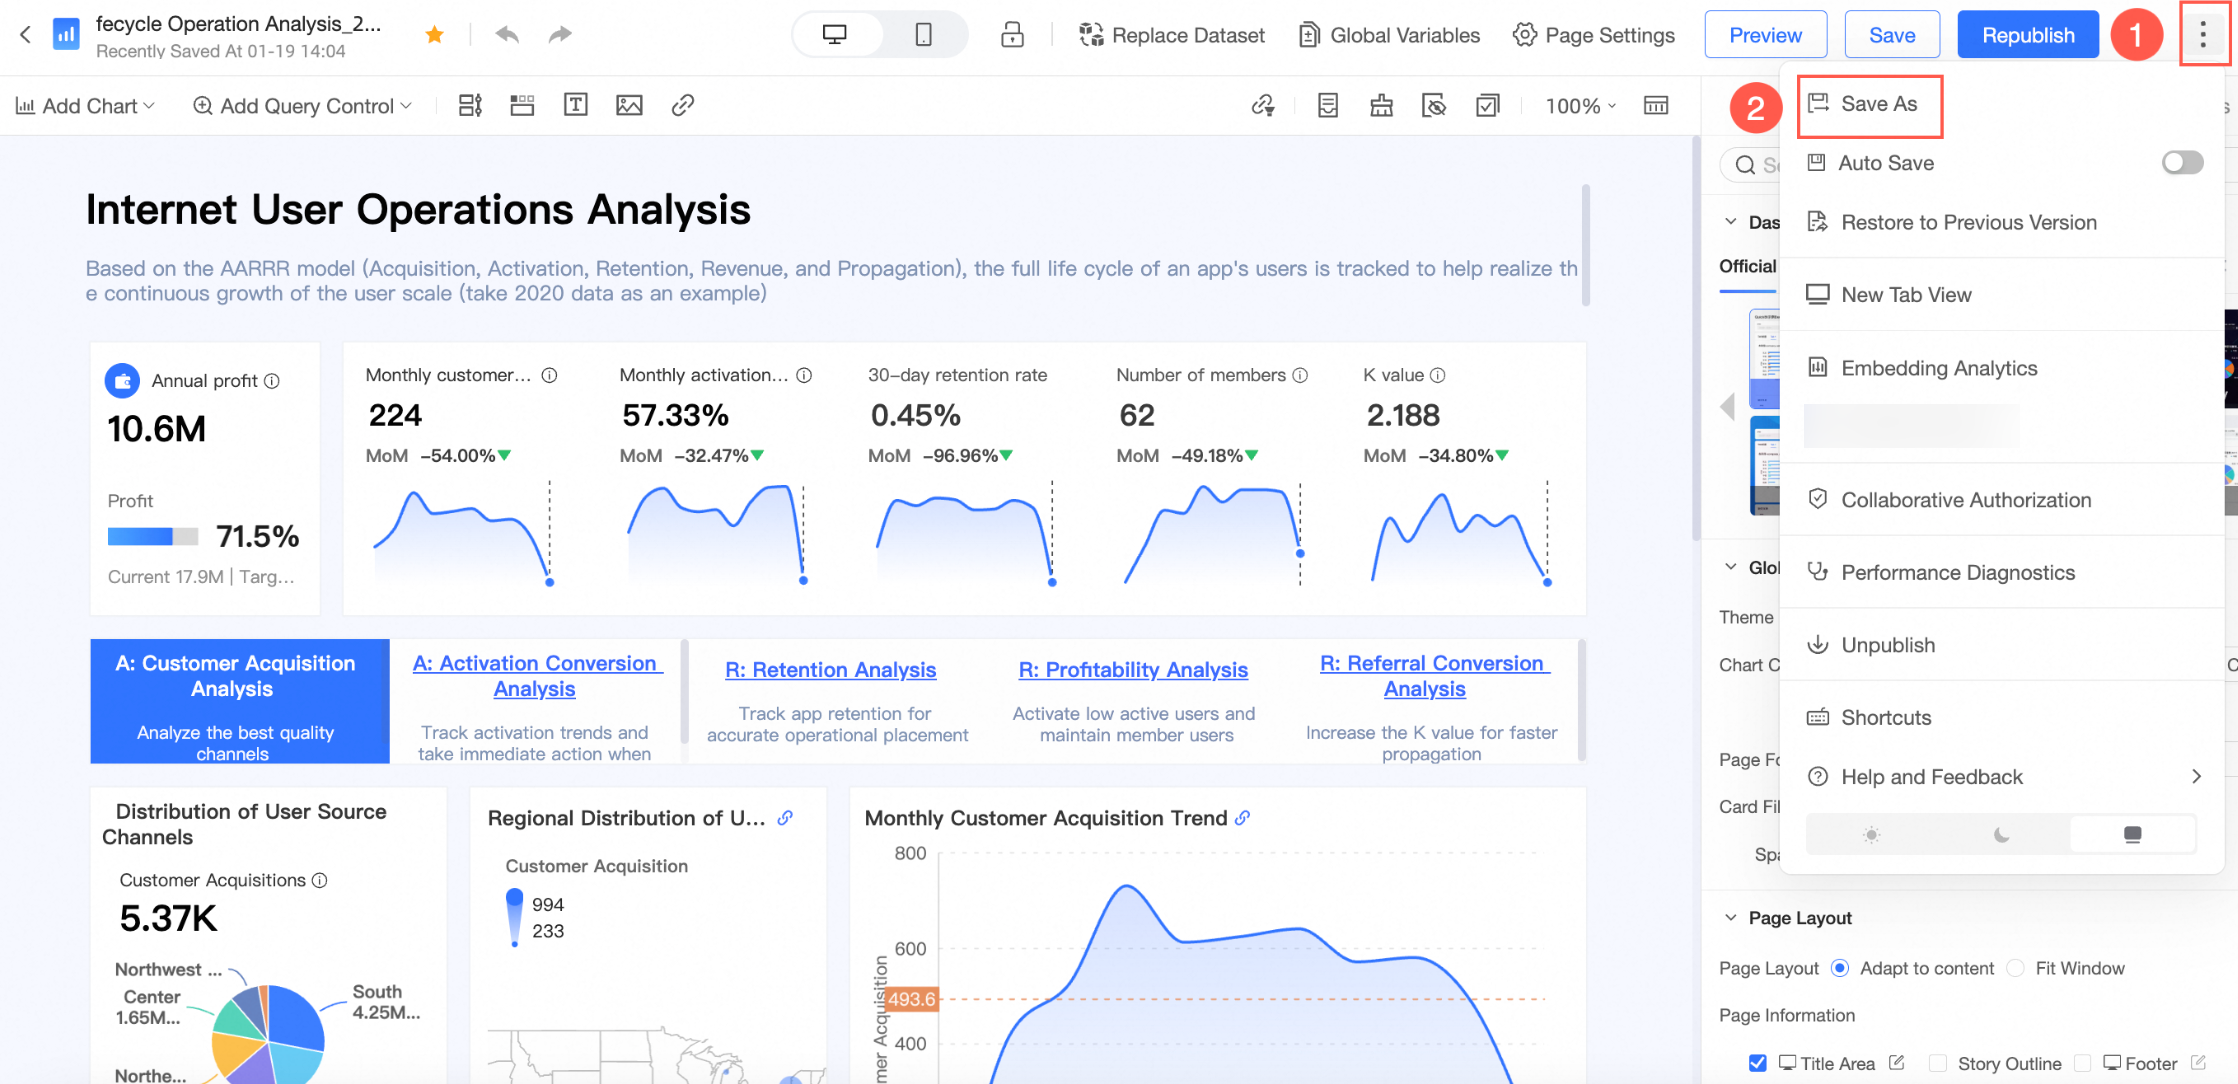
In the Save As Dashboard dialog box, you can enter the name and desired storage location for the dashboard, and then click OK.
Transfer and rename
On the Dashboards page, locate the dashboard you want, right-click it, and choose Properties.
Alternatively, click the
 icon next to the dashboard.
In the Properties dialog box, set the following parameters:
Parameter name
Description
Name
You can modify the name of the dashboard.
NoteDuplicate names are not supported in the same folder but are supported in different folders.
Owner
You can select the user to whom you want to transfer the dashboard from the drop-down list.
Description
You can add a description about the dashboard.
Click OK.
The transfer feature is available only in the Pro and Professional Editions.
Collaborative authorization
On the Dashboards page, locate the dashboard you want to share, right-click it, and choose Collaborative Authorization.
Alternatively, click the
 icon next to the dashboard.
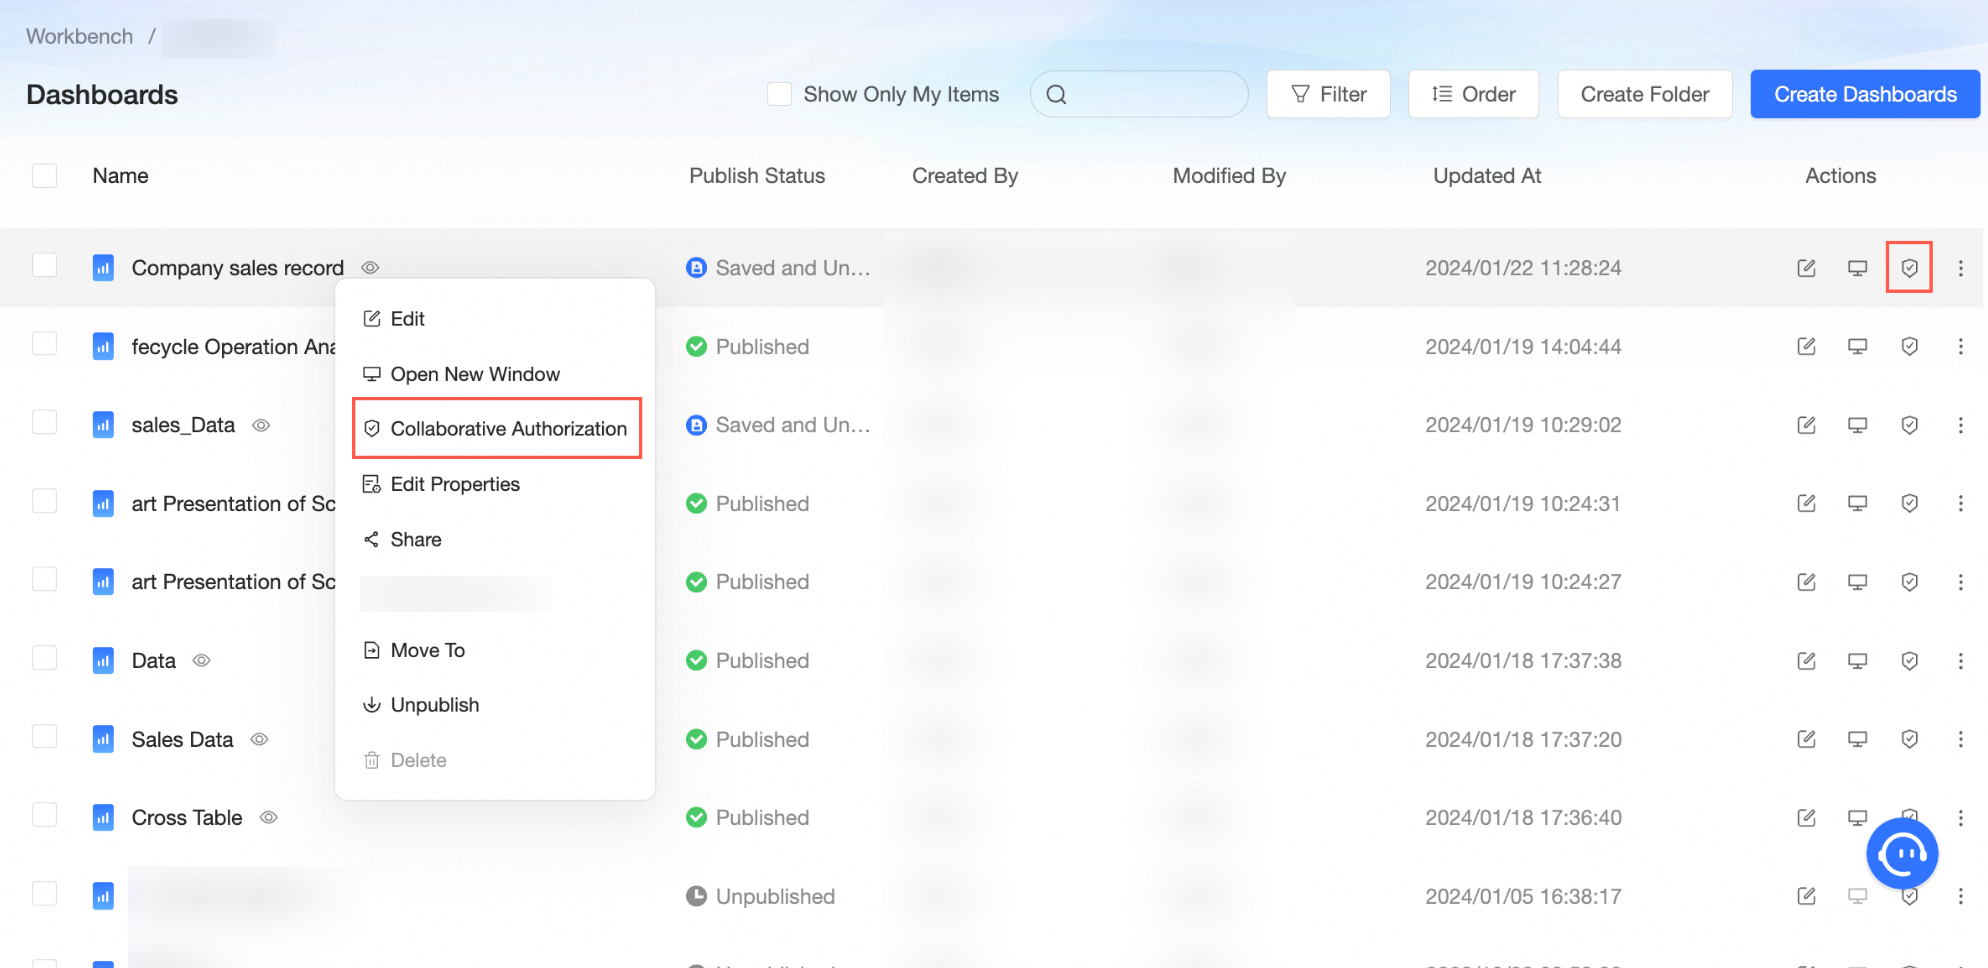 Note
NoteAfter granting collaborative authorization, the dashboard can be updated by multiple users simultaneously, but only one user can save the changes. The lock mechanism is as follows:
After User A saves and exits the dashboard, User B can open it without needing to obtain a lock.
In this scenario, User B's edits will not overwrite User A's changes.
If User A is disconnected or inactive for 3 hours, User B can open the dashboard without obtaining a lock.
Here, User B's edits will overwrite User A's changes.
If User A is editing the dashboard and User B also wants to edit, User B must obtain a lock.
If User A has saved but not exited the dashboard when User B attempts to lock it, the operation succeeds.
User B's edits will not overwrite User A's changes in this case.
If User A is actively editing and hasn't saved when User B attempts to lock the dashboard, User B can choose whether to sync User A's latest changes.
If User B opts to sync, the system saves User A's changes after User B locks the dashboard.
If User B opts not to sync, the system saves User B's changes after locking the dashboard.
After locking, User A can continue editing and save as a new dashboard or re-obtain the lock after coordinating with User B.
For more information, see Granting Permissions on Data Works.
Add a dashboard to favorites
Add a dashboard to favorites using the following methods:
On the dashboard editing page, click the
 icon next to the dashboard name.
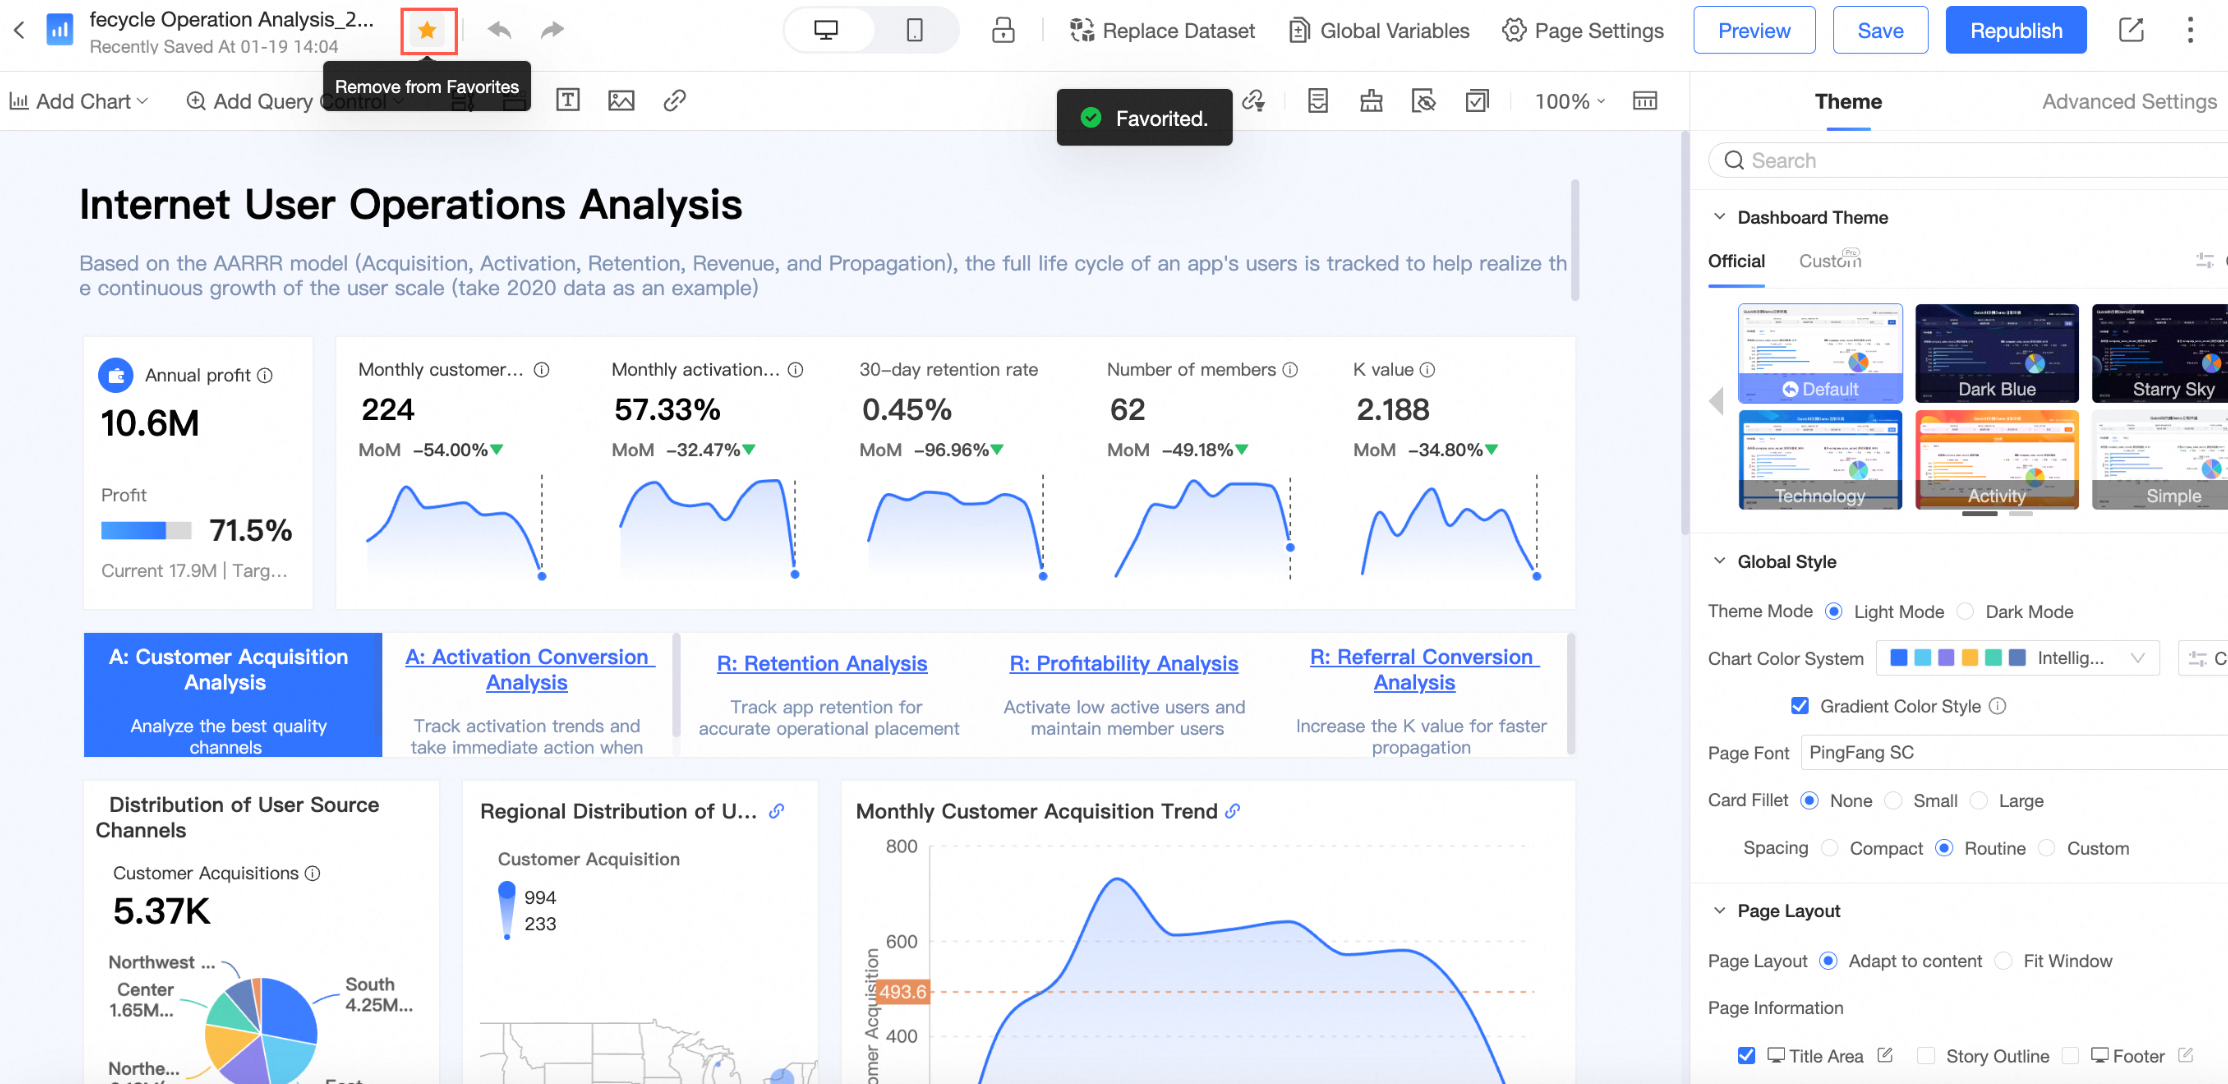 Note
NoteClick the
 icon again to remove the dashboard from favorites.
On the dashboard preview interface, click the
 icon next to the dashboard and select Favorites, or click the Favorites icon in the upper-right corner.
Switch between light and dark themes
On the dashboard editing page, click the
 icon in the upper-right corner and locate the icon at the bottom to toggle the dashboard theme.
 Note
NoteThe Personal Edition supports only the light mode.
①Light Mode
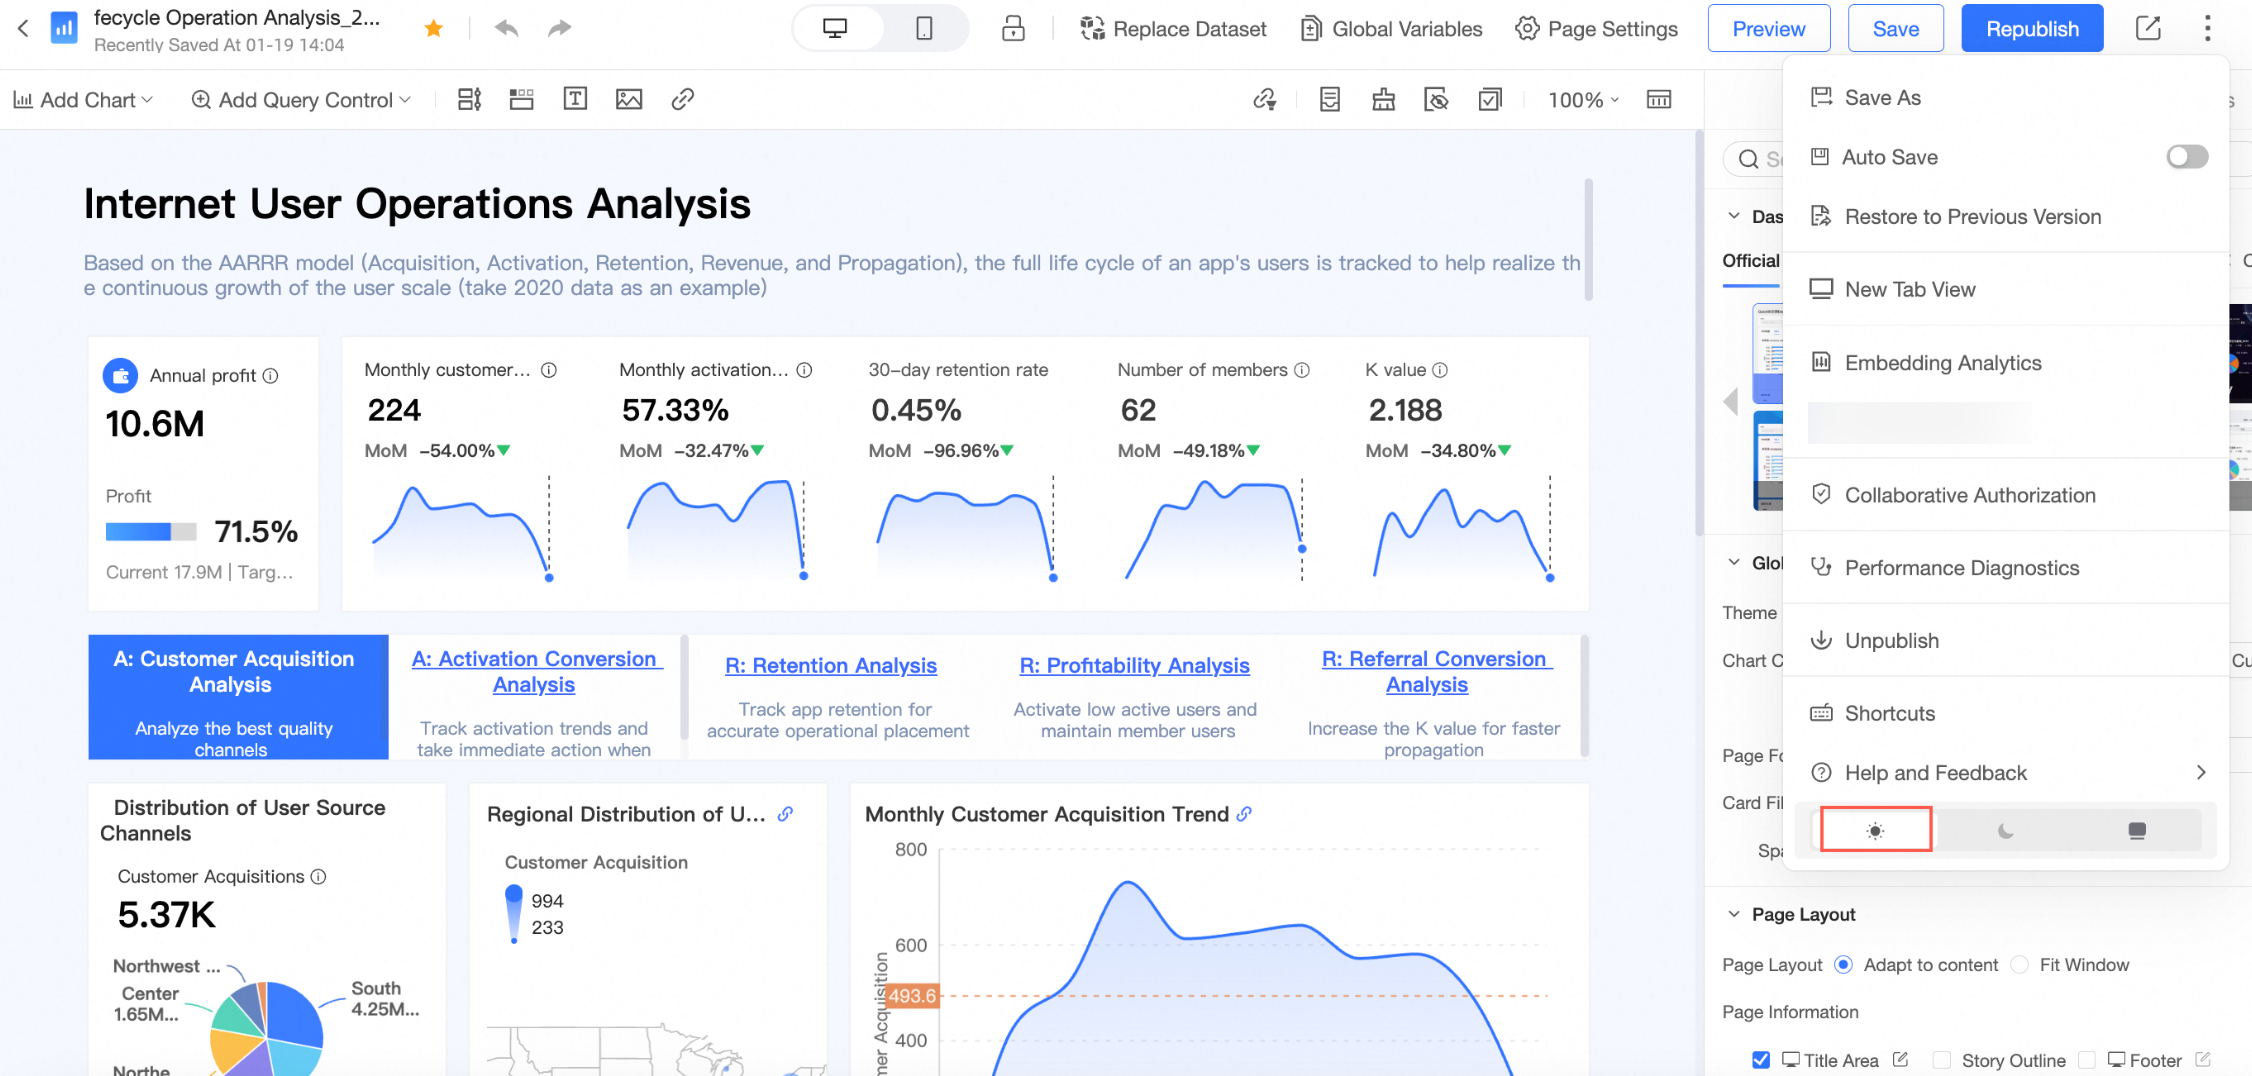
②Dark Mode

③Follow System
Adopts the system style in custom configurations.
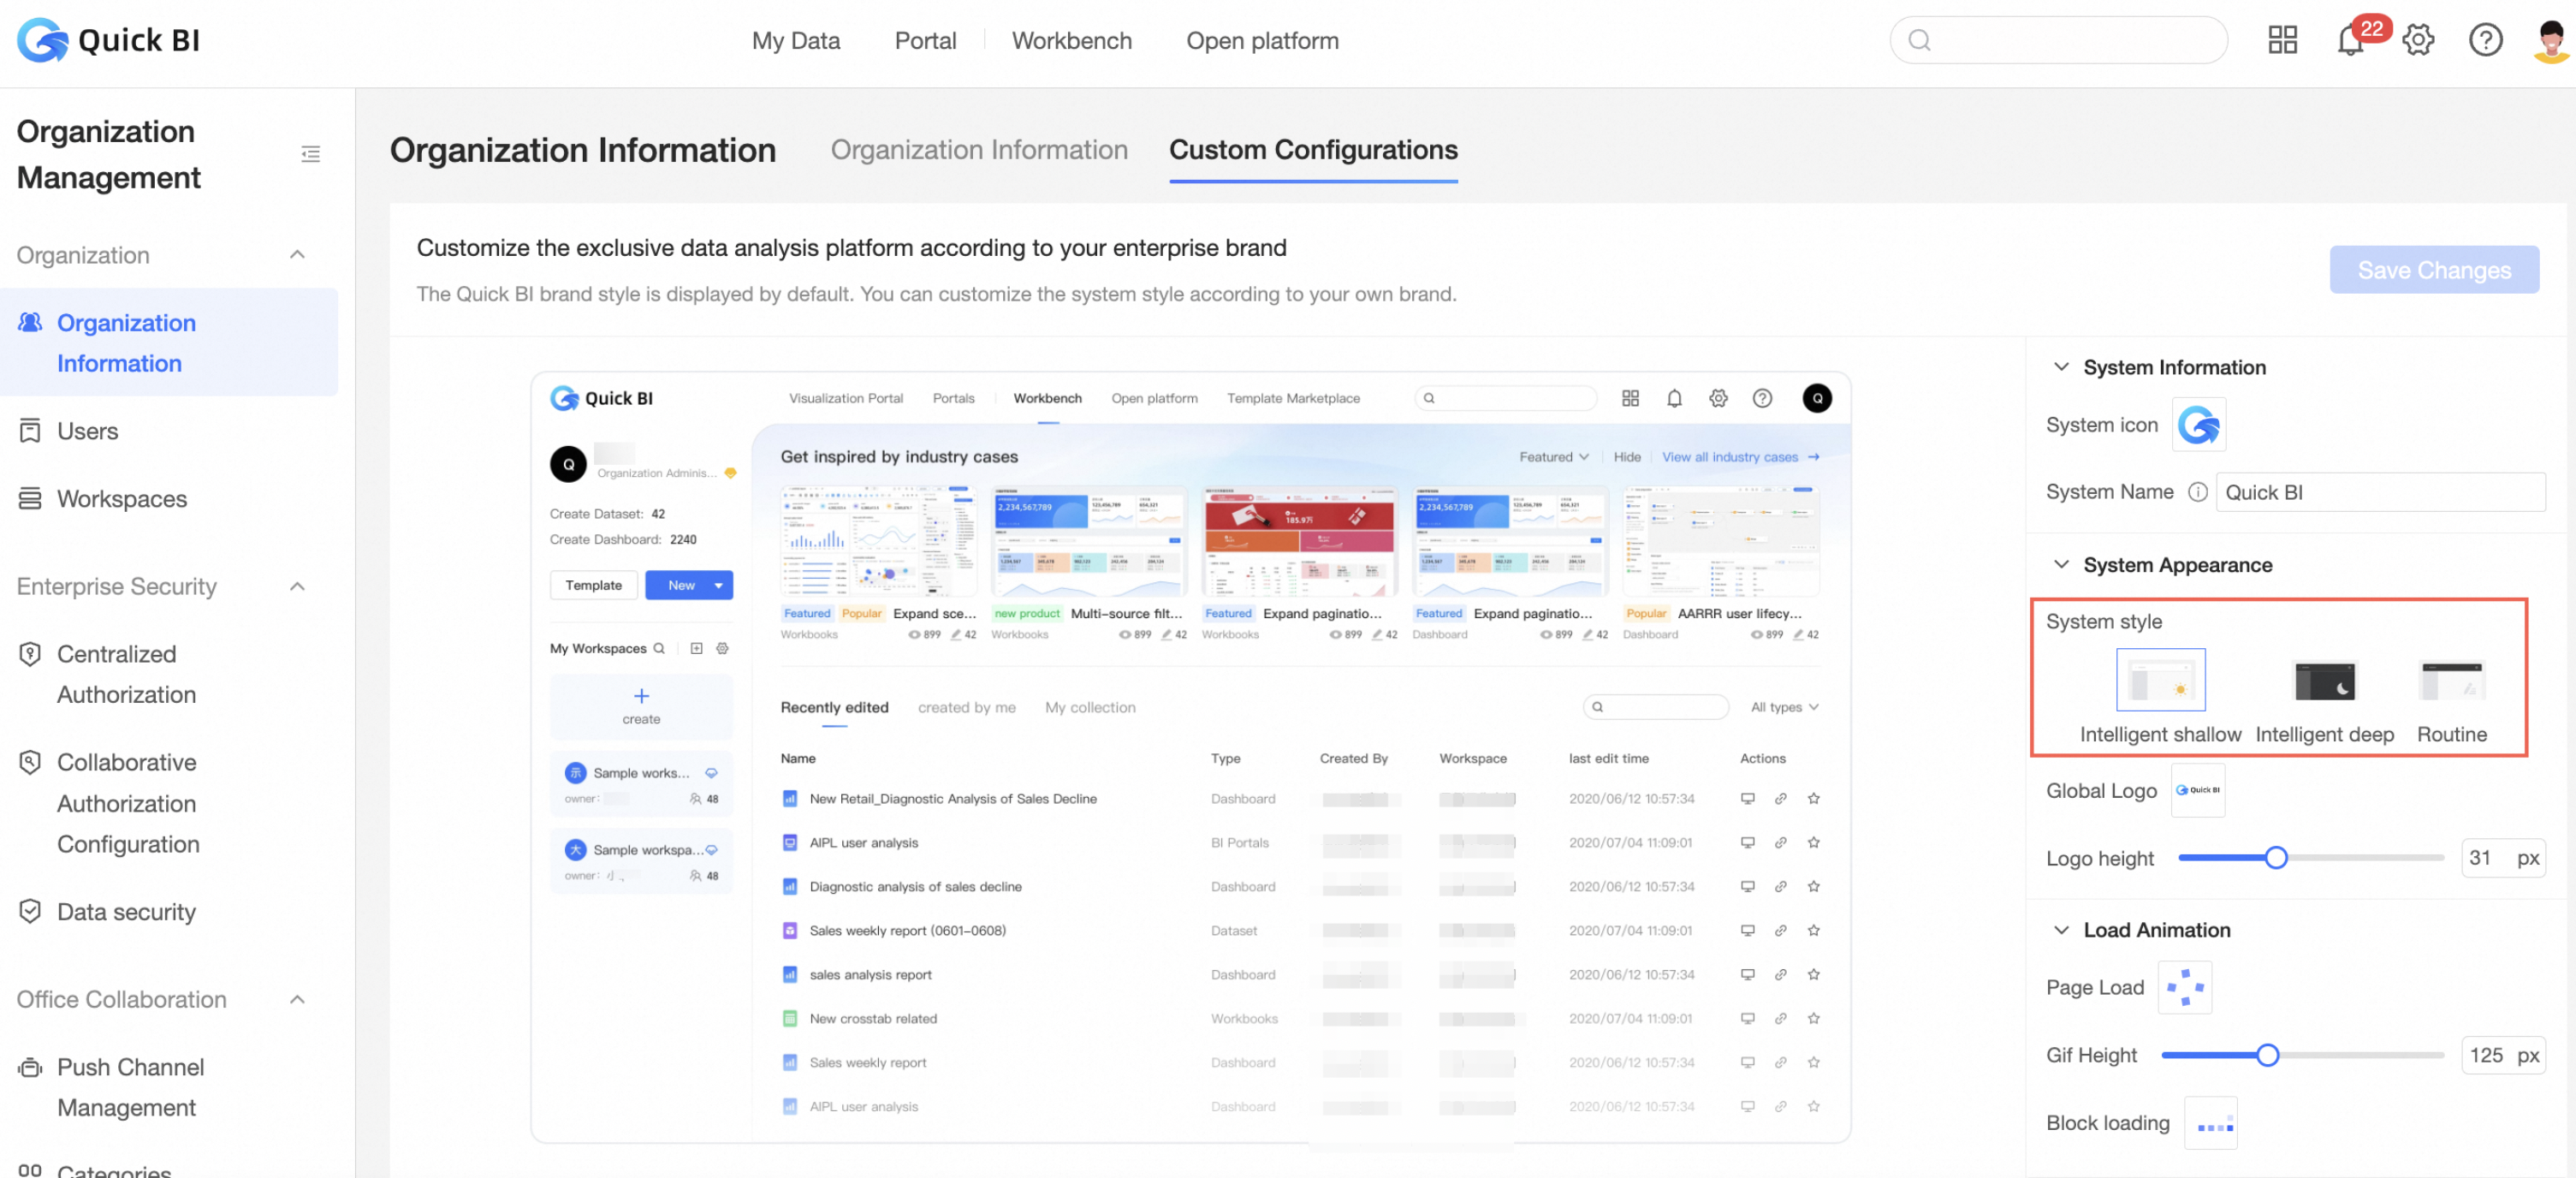
For more details, see System Theme Customization.
NoteOnly Tenant Management can set the system style in custom configurations. The dashboard-level theme takes precedence over the organization-level theme.
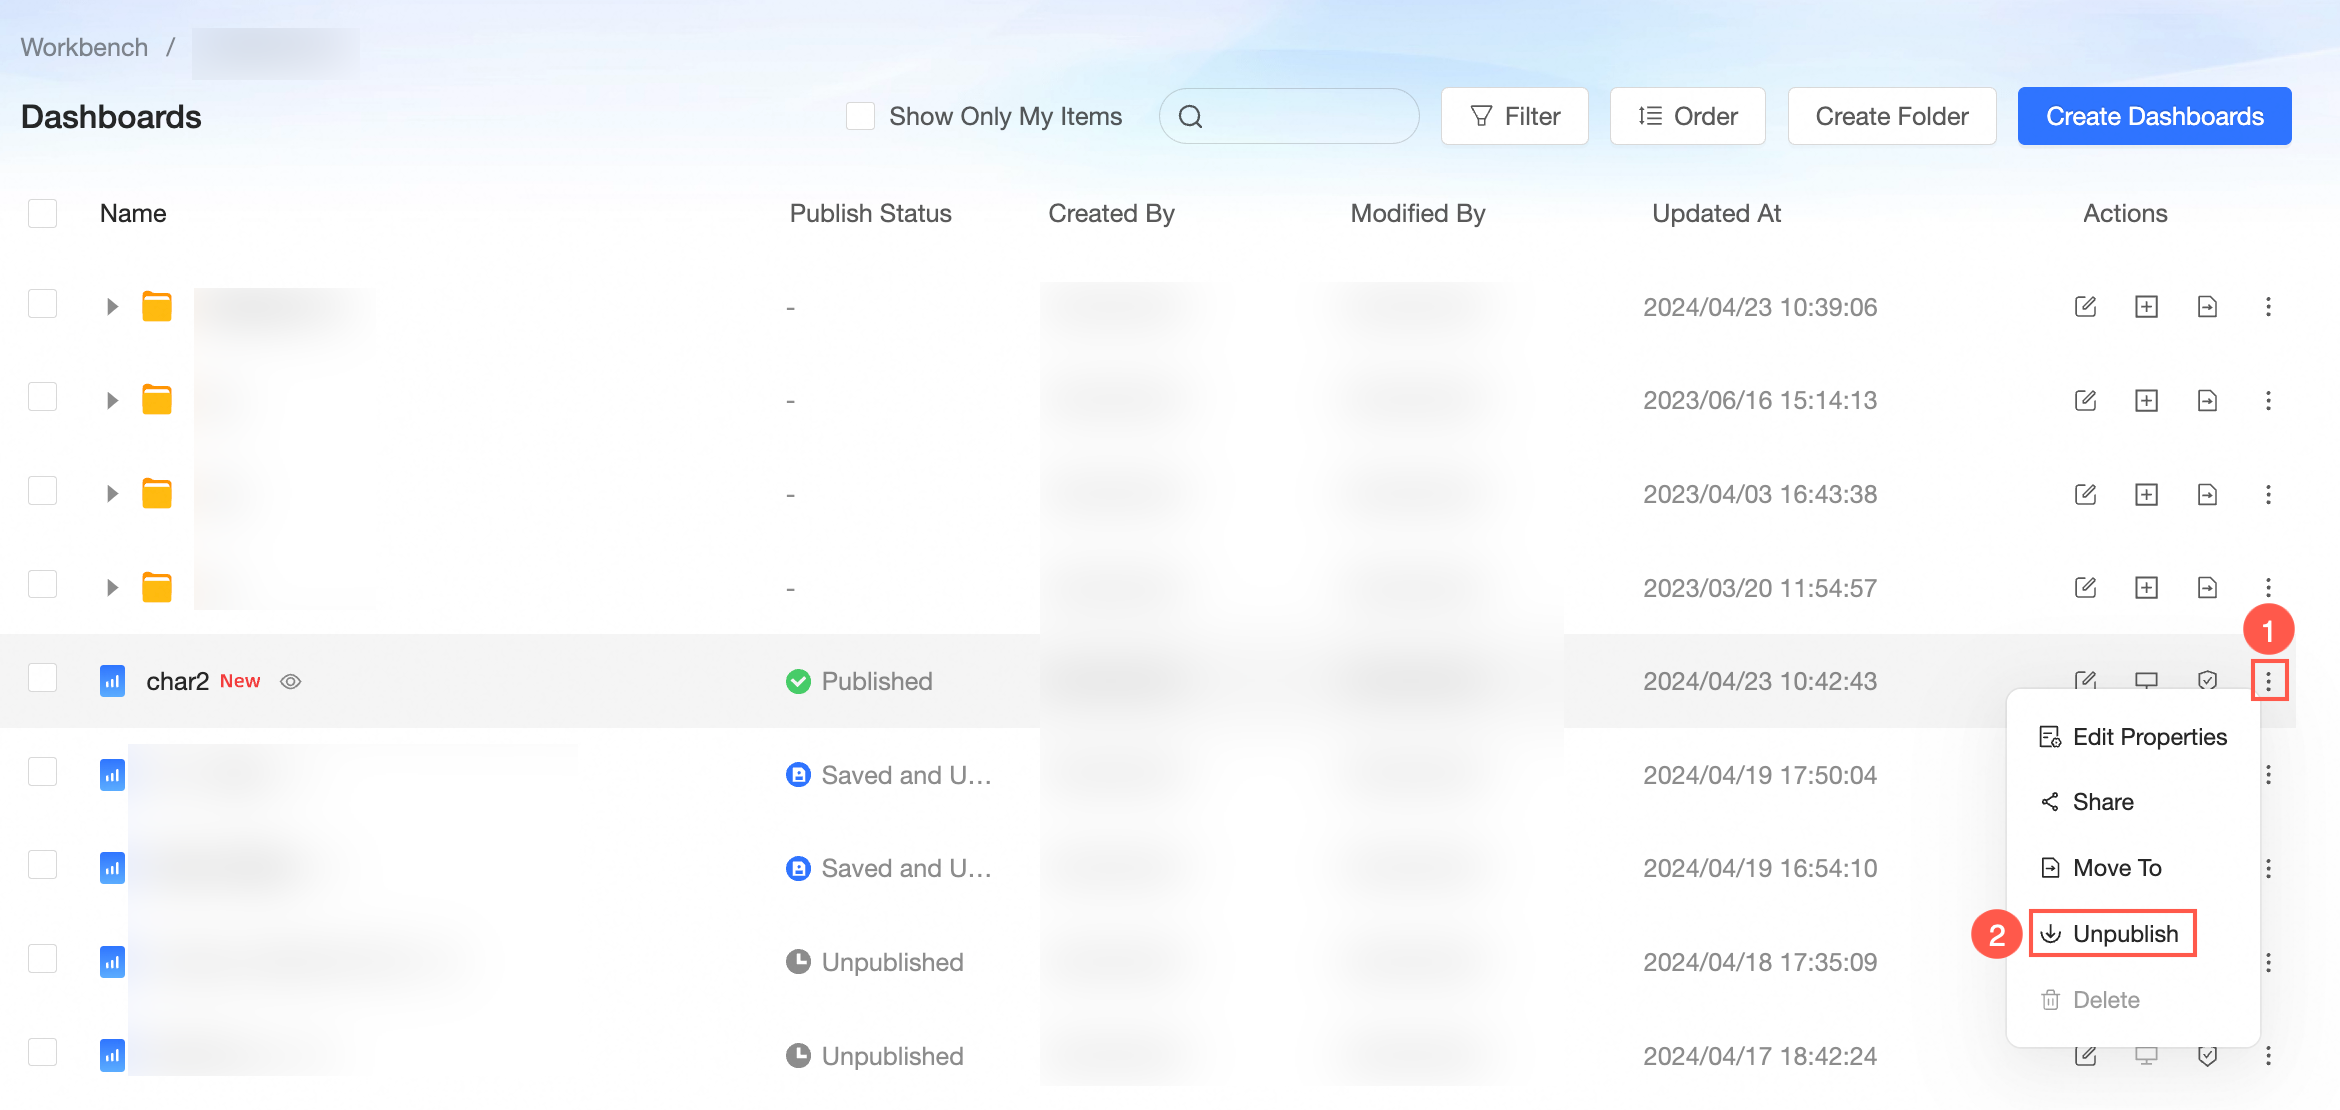
Delete a dashboard
Before deleting a dashboard in the Published status, you must first unpublish it.
- (Optional)
On the Dashboards page, you can unpublish a dashboard by following the steps illustrated in the figure below.
NoteSkip this step if your dashboard is already unpublished.
On the Dashboards page, use the steps illustrated below to delete a dashboard.
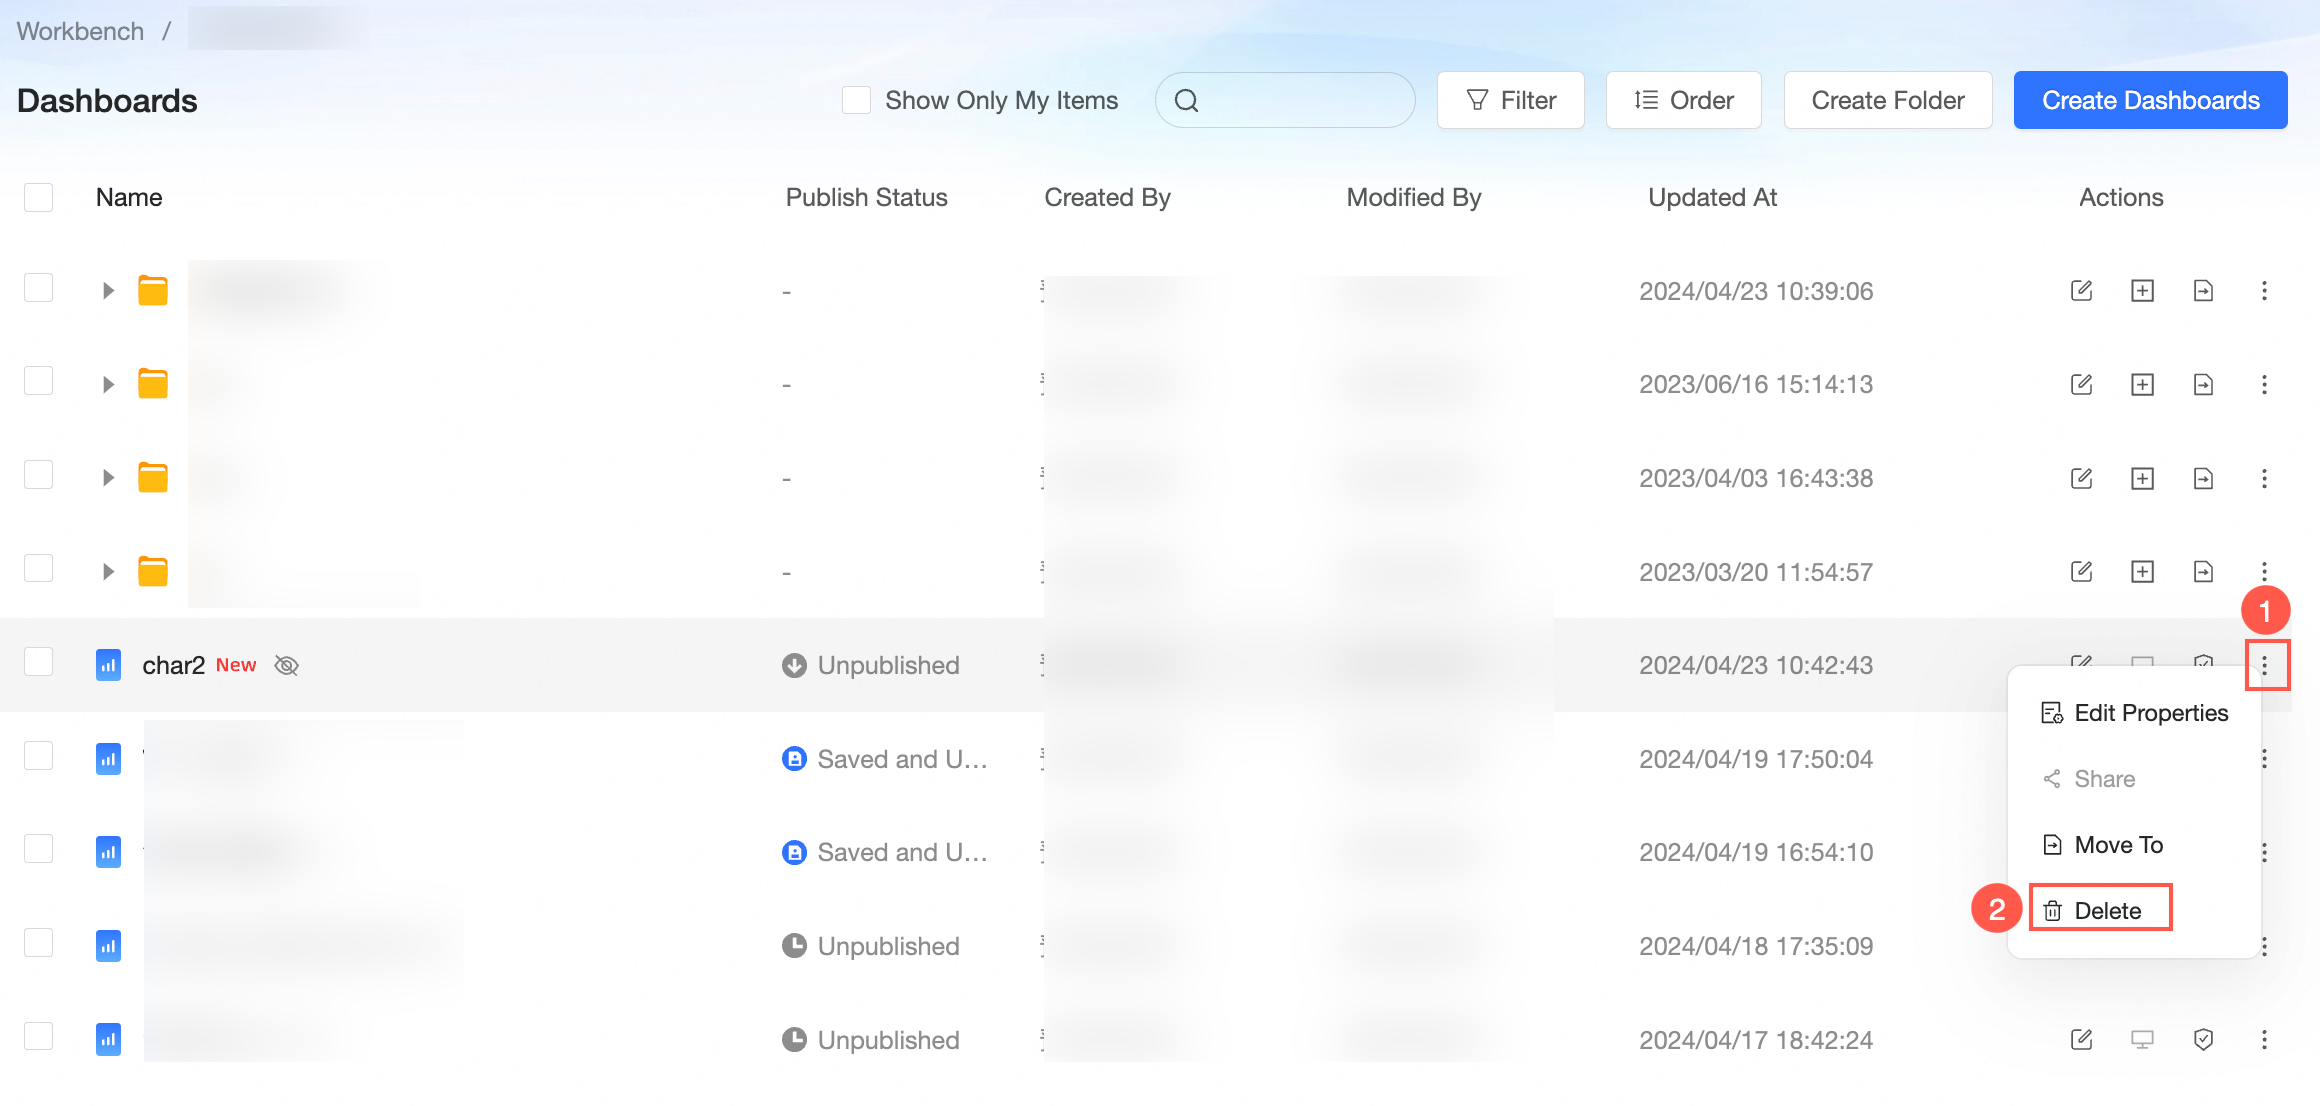
When you delete a dashboard that has been used to create a BI portal, subscription, or monitoring alert, or to establish a jump feature for a data dashboard, dashboard, or workbook, you will receive a prompt detailing the name, owner, last modifier, and last modification time of the published resources impacted by the dashboard.
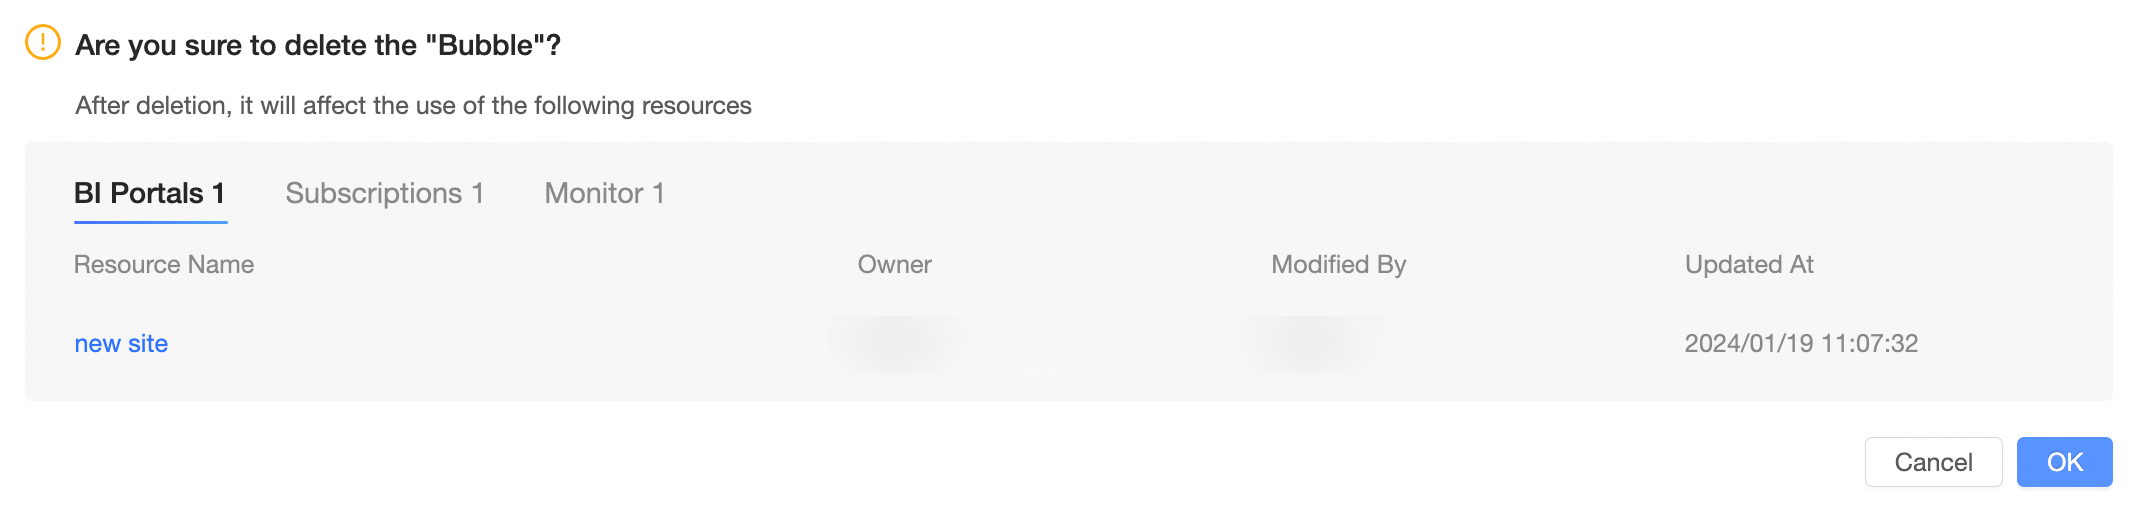
In the confirmation dialog box, click OK to proceed with the deletion.
Rename a dashboard
- (Optional)
On the Dashboards list page, locate the dashboard you need.
To modify and rename a dashboard, double-click on its name.