Quick BI enables the integration of reports (dashboards, workbooks) from group spaces into external systems, streamlining business processes. This guide details the embedding of reports into third-party systems and is relevant for both the Pro and Professional Editions.
Limits
The Basic Edition only supports the embedding of dashboards and workbooks.
For users aiming to embed workbook reporting pages into third-party environments, be aware that some browsers may block cross-origin iframe embedding, which can prevent cookie writing and cause data submission failures on complex workbook reporting pages. For instance, the WeCom built-in browser on iOS systems may encounter data submission issues after embedding a complex workbook reporting page and attempting to submit data.
As a result, it is advisable to utilize the workbook reporting feature directly on the Quick BI platform.
Background Information
To embed and utilize Quick BI reports within your system, you must set up the report embedding functionality.
With Quick BI Pro, third-party report embedding does not differentiate database permissions. After embedding, row-level permissions are ineffective, and permissions default to those of the report's author. The security enhancement solution is not supported.
In contrast, Quick BI Professional Edition allows for differentiated database permissions when embedding reports into third-party systems. This edition enables different users to view the same report with varying data and supports the security enhancement solution for embedding. For more information, see Security Enhancement Solution for Embedded Data Permission Control and Parameter Transmission in Reports.
There are five international sites, each with its own domain name:
Singapore: bi-ap-southeast-1.data.aliyun.com
Hong Kong (China): bi-cn-hongkong.data.aliyun.com
Kuala Lumpur, Malaysia: bi-ap-southeast-3.data.aliyun.com
Frankfurt, Germany: bi-eu-central-1.data.aliyun.com
Indonesia: bi-ap-southeast-5.data.aliyun.com
This guide uses the Hong Kong (China) domain name as an example for link concatenation. Replace it with the appropriate site domain name for other locations.
Step 1: Enable theReport to be Embedded
Report embedding is supported only for reports in published status.
To enable report embedding, access the open platform module:
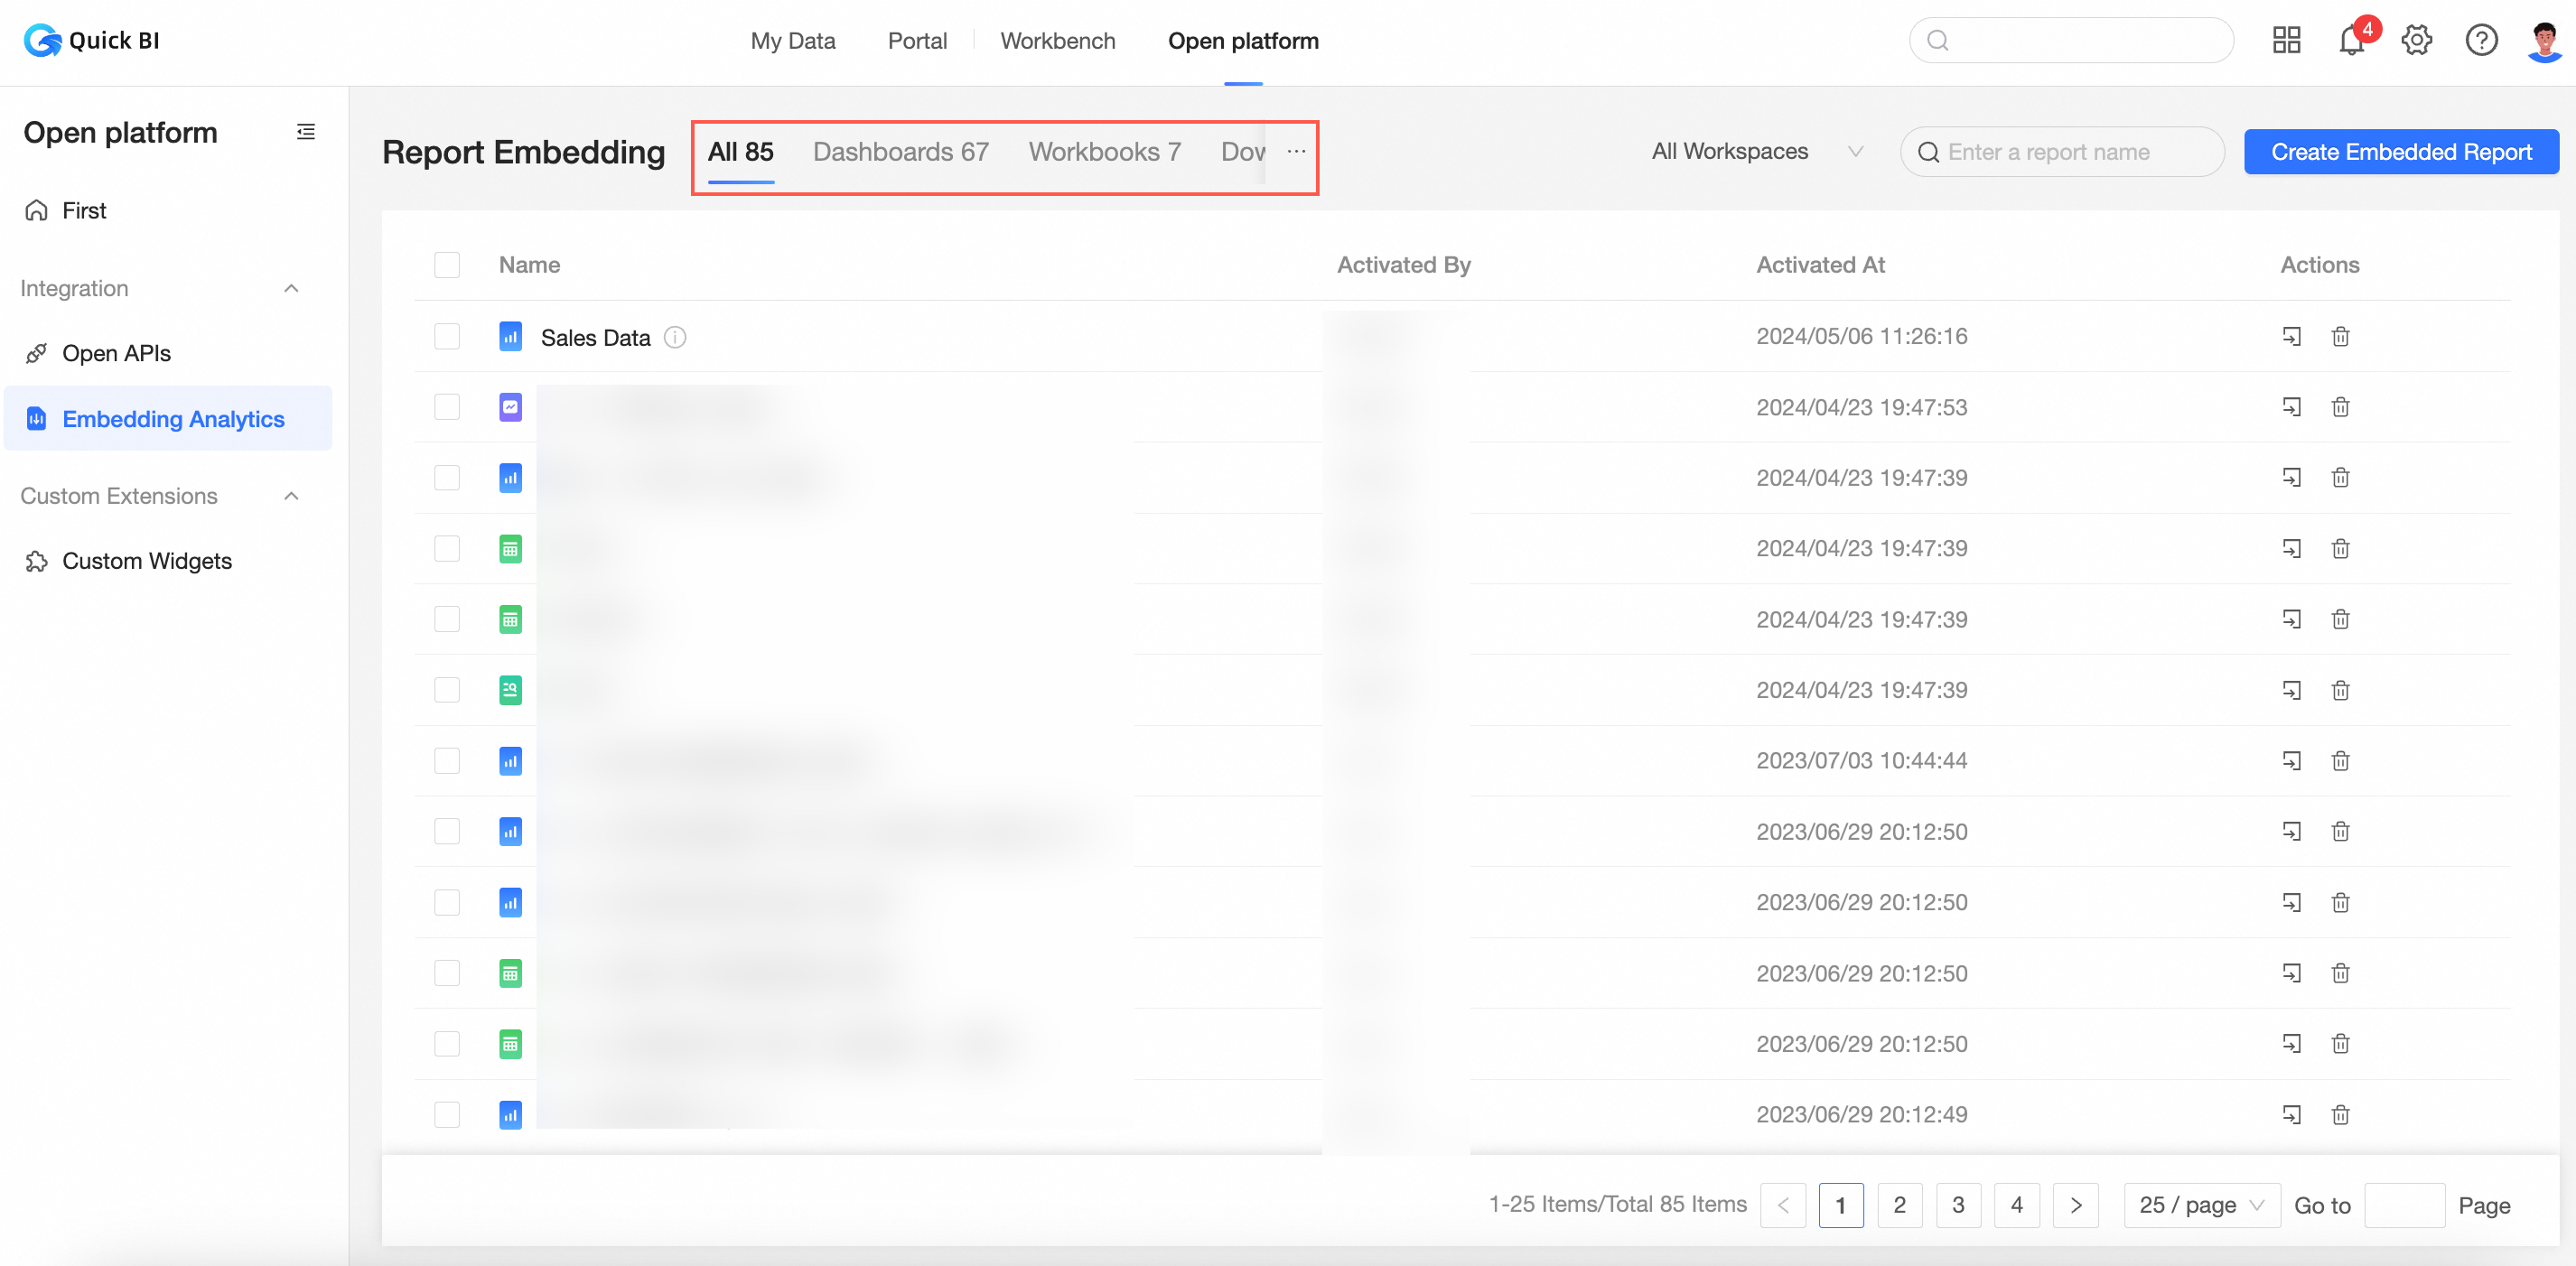
Navigate to the embedded report page from the Quick BI product home page as shown in the figure below.
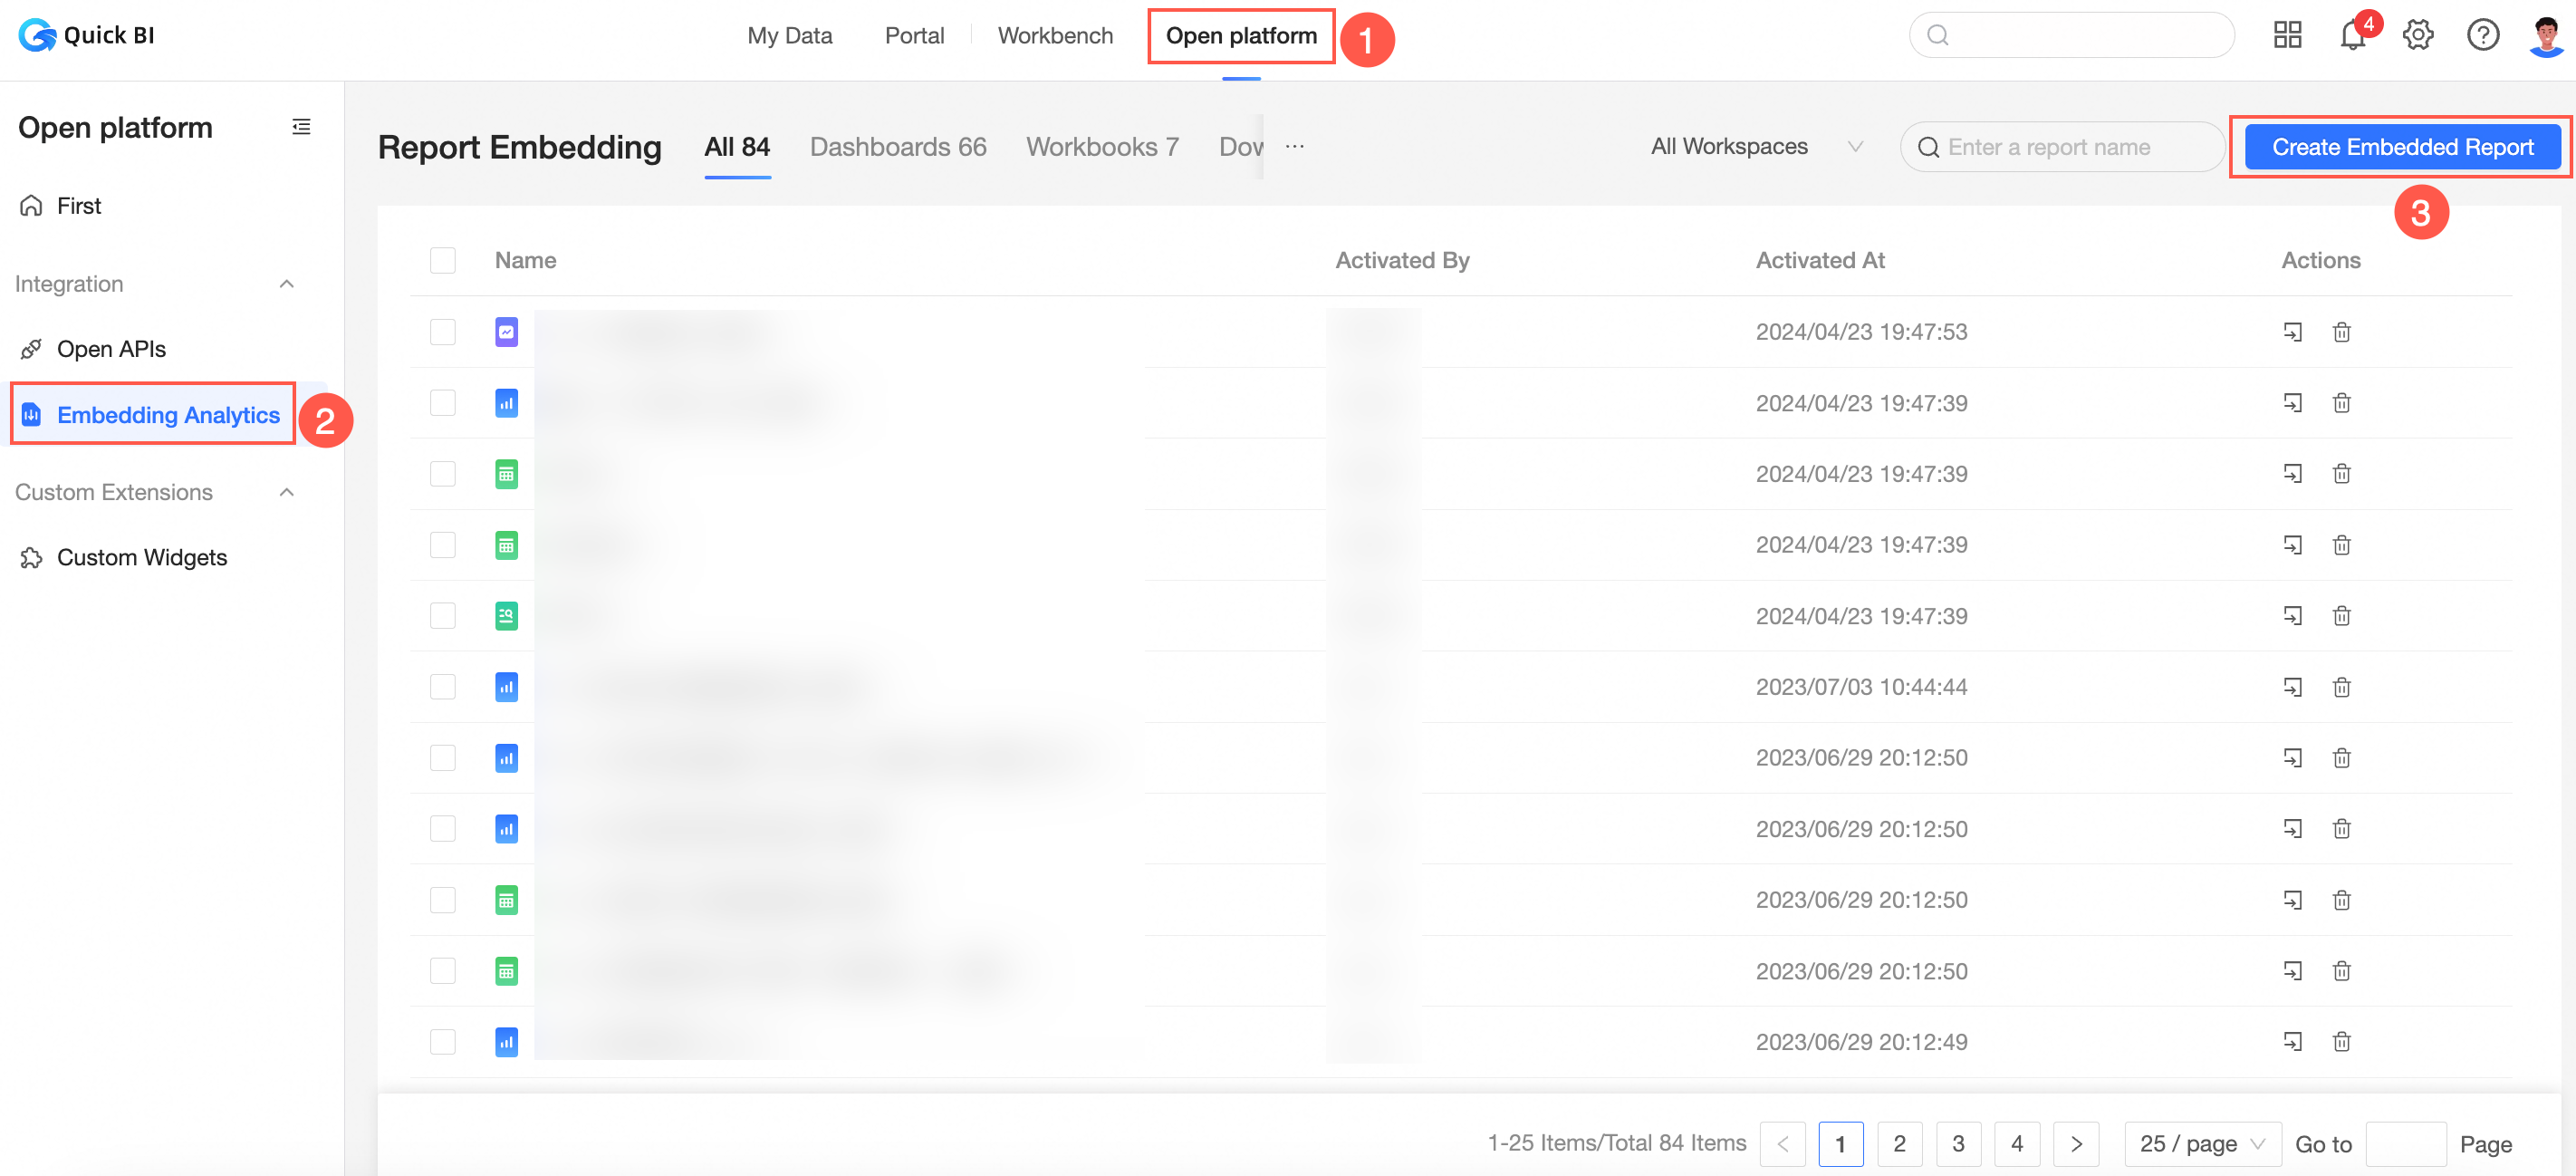
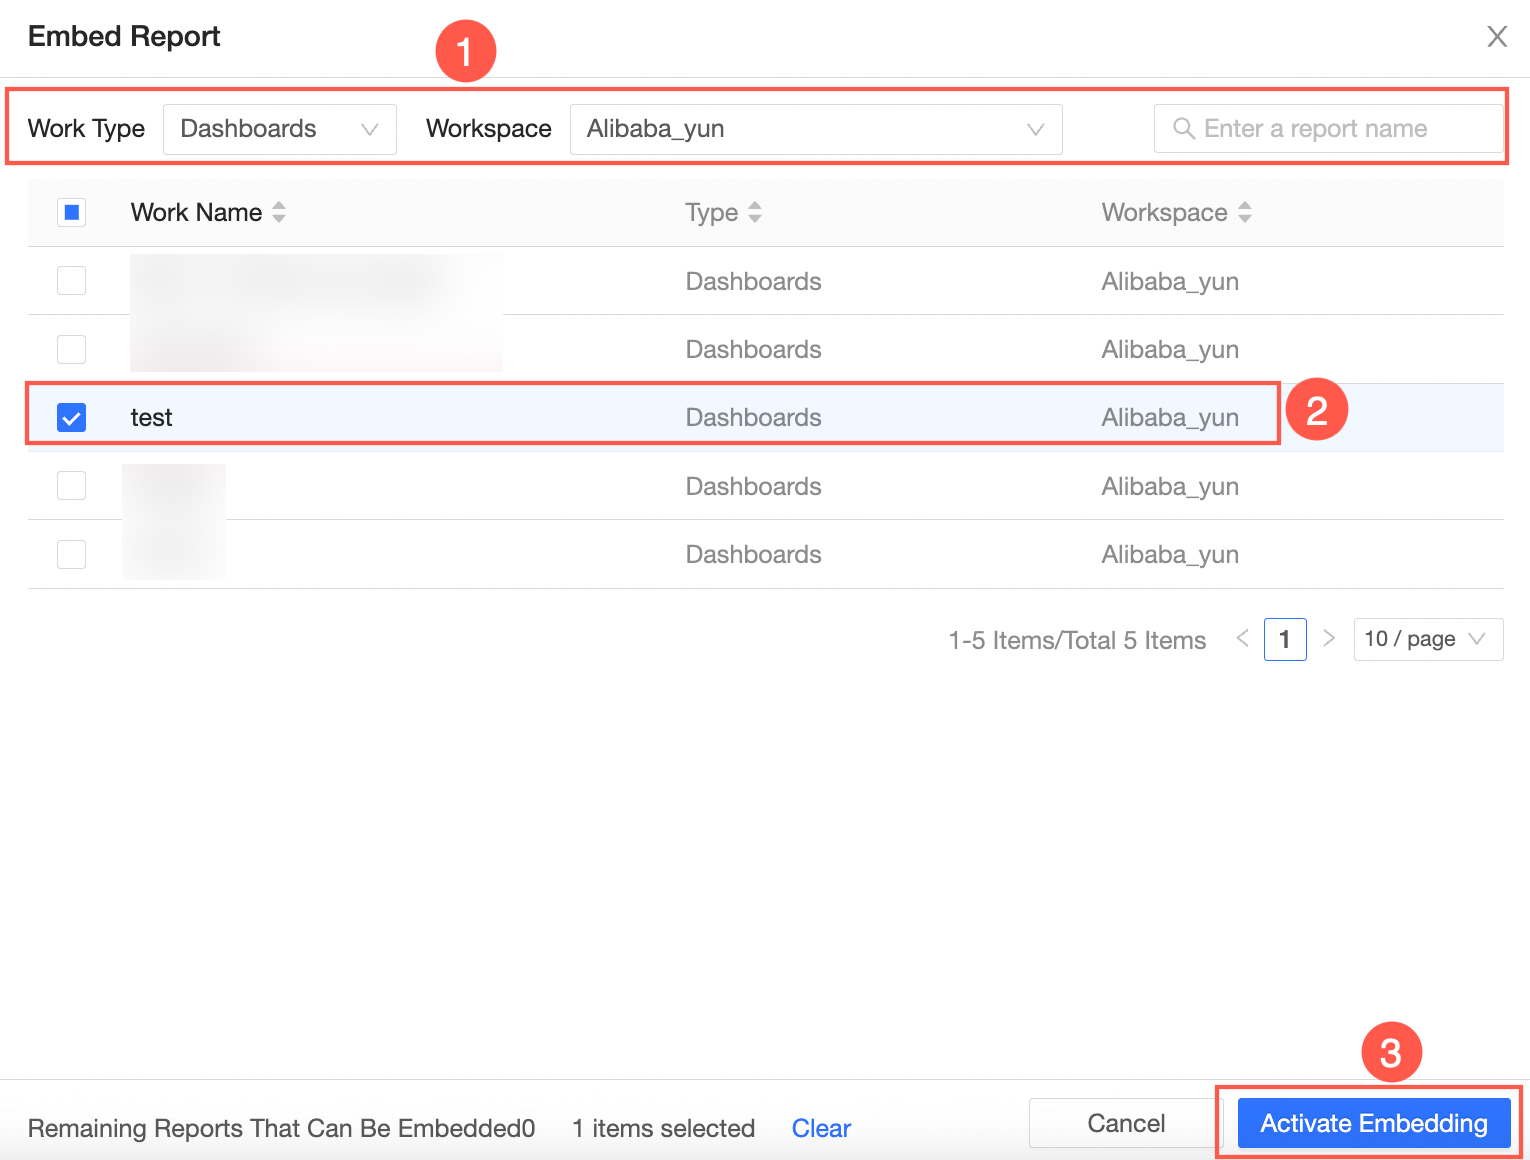
On the Add Embedded Report page, select the desired workspace and data object type, then choose the data object name from the list and click Enable Embedding. Use the report name search function to quickly locate the report you want to embed.
 Note
NoteFor users aiming to embed workbook reporting pages into third-party environments, be aware that some browsers may block cross-origin iframe embedding, which can prevent cookie writing and cause data submission failures on workbook reporting pages. Therefore, it is advisable to utilize the workbook reporting feature directly on the Quick BI platform.
Embedding Configuration
The debugging feature for report embedding configuration is intended for the enhanced solution.
ImportantThis debugging is for feature testing only. For actual deployment, please complete Step 2: Obtain AccessTicket through HTTPS Interface and Step 3: Concatenate the single sign-on URL.
After enabling embedding, the capabilities of the basic scheme and enhanced scheme differ during actual integration. Refer to the table below for details:
Capability
Basic scheme
Enhanced scheme
Bind user
Report owner, cannot be modified
Supports customization, personalized for each user
Access count
Up to 100,000 times per ticket
Unlimited, supports custom settings
Watermark
Not supported
Support
(Except for large screens that do not support watermarks)
Validity period
Maximum 240 minutes
Supports customization
Global parameter
Not supported
Support
Block embedding
Not supported
Supported
Jump times
NoteThe report to be jumped to also needs to enable embedding.
Can only jump once
For example: After report A jumps to report B, report B cannot jump to report C.
Supports unlimited jumps
For example: After report A jumps to report B, report B can still jump to report C, and C can continue to jump further, and so on.
Step 2: Obtain AccessTicket through HTTPS Interface
This section uses the example of embedding a dashboard from a group space into a third-party system.
If the account enabling dashboard access has developer or analysis permissions, it can only enable access for dashboards created by that account.
If the account has management permissions, it can enable access for all reports within that workspace.
Follow the steps below to obtain your AccessKey ID and AccessKey Secret, referred to as accessId and accessKey.
Log on to the Quick BI console.
On the Quick BI home page, follow the instructions in the figure below to obtain your AccessKey ID and AccessKey Secret.

Obtain your Alibaba Cloud account ID, also known as aliyunUid.
Log on to your Alibaba Cloud account and click the profile picture in the upper right corner to view the account ID.

On the report editing page, obtain the report ID, also known as worksId:

Obtain the accessTicket
Combine the accessId, accessKey, aliyunUid, and worksId parameters obtained in the previous steps into the following request address and send a GET request to retrieve the accessTicket.
NoteThe account used to obtain accessTicket has the following restrictions:
If the account is disabled in Tenant Management > User Management, you cannot generate new accessTickets. However, existing accessTickets remain valid.
If the account is deleted in Tenant Management > User Management, you cannot generate new accessTickets. Existing accessTickets become invalid.
The aliyunUid is used only to verify whether the current role has permission to enable single sign-on for organization reports when generating the accessTicket. It does not bind the identity of the third-party embedded report.
The validityTime is an optional parameter with a value range of 1 to 240, defaulting to 240. The unit is minutes.
To immediately invalidate the accessTicket, send a POST request with the corresponding values of aliyunUid, accessId, accessKey, and accessTicket.
http://bi-cn-hongkong.data.aliyun.com//openapi/ac3rd/ticket/invalid?aliyunUid=xx&accessId=xx&accessKey=xx&accessTicket=xx
Step 3: Construct the Login-free URL
This scheme does not support user authentication binding. By default, the report is accessed as if by the report owner.
Refer to the table below for the concatenation process and examples.
Process | Dashboard example | Workbook example |
|
| |
|
| |
|
| |
|
|
The format for concatenation and the report URL are as follows:
For dashboards, use this format:
https://<Quick BI domain name>/<preview report URL>?pageId=<report ID>&accessTicket=<AccessTicket>. The resulting URL is:https://bi-cn-hongkong.data.aliyun.com//token3rd/dashboard/view/pc.htm?pageId=dd0****83f&accessTicket=fd138bcb-****-4fde-b413-81bcee59bdb6For workbooks, use this format:
https://<Quick BI domain name>/<preview report URL>?id=<report ID>&accessTicket=<AccessTicket>. The resulting URL is:https://bi-cn-hongkong.data.aliyun.com//token3rd/report/view.htm?id=<42****18ef6>&accessTicket=fd138bcb-****-4fde-b413-81bcee59bdb6
Determine the Quick BI domain name.
For example, the domain name for the Quick BI Hong Kong (China) site is
bi-cn-hongkong.data.aliyun.com/. Use the domain name for your environment.Identify the preview report URL.
The URL for the preview page corresponding to the report type is listed below. Select according to your requirements.
For dashboards:
token3rd/dashboard/view/pc.htmFor workbooks:
token3rd/report/view.htm
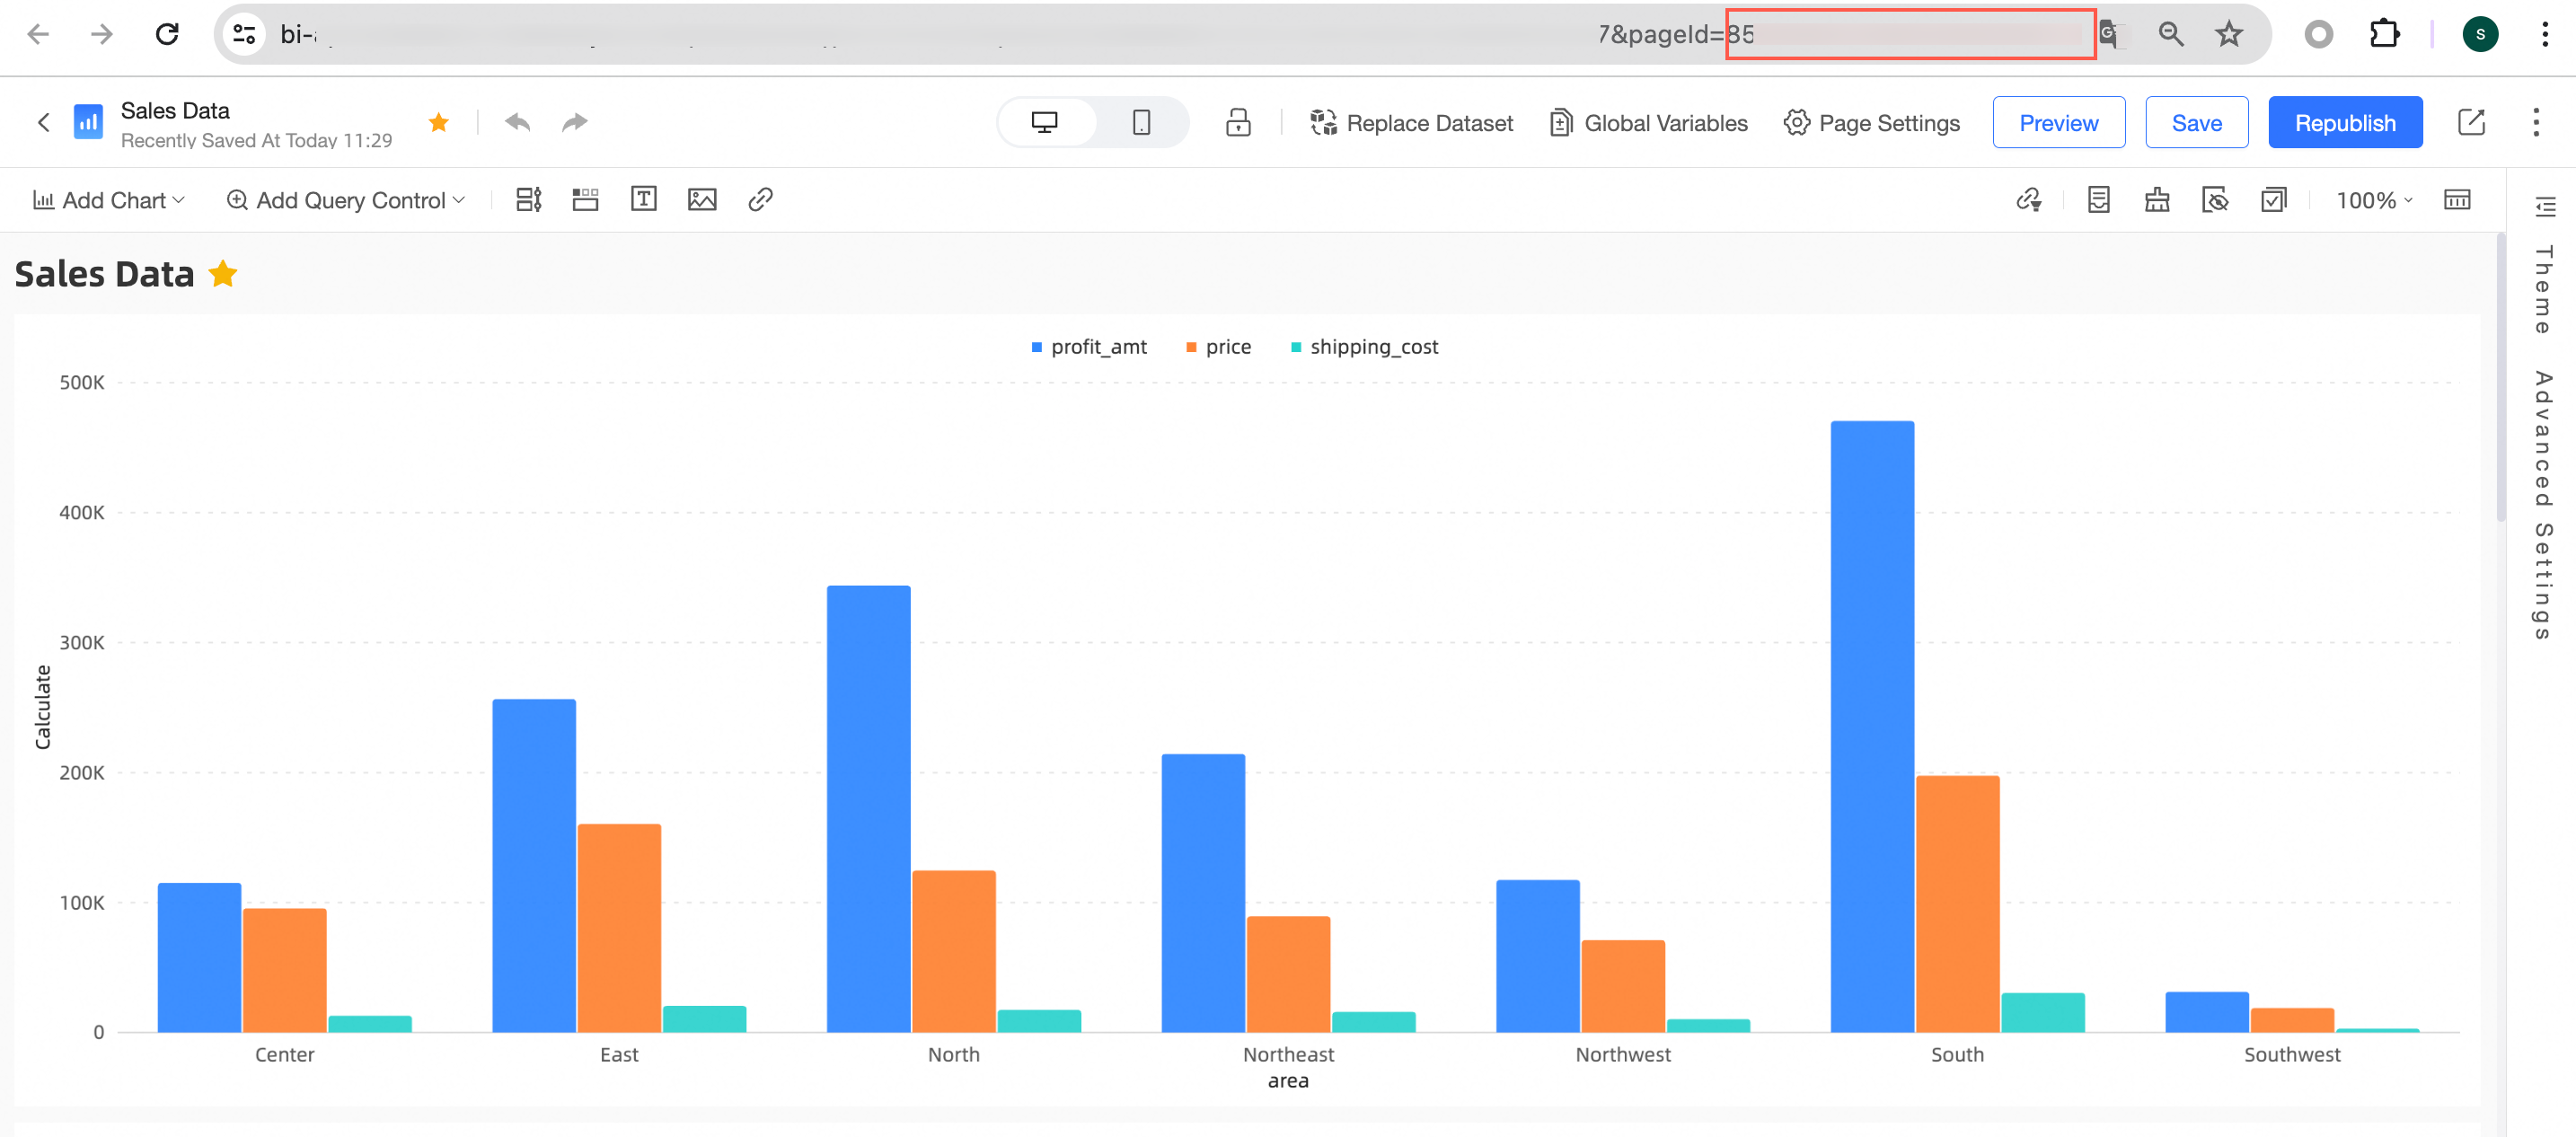
Acquire the report ID on the report editing page.
For Dashboard IDs
On the dashboard editing page, find the value of the dashboard pageId in the address bar.
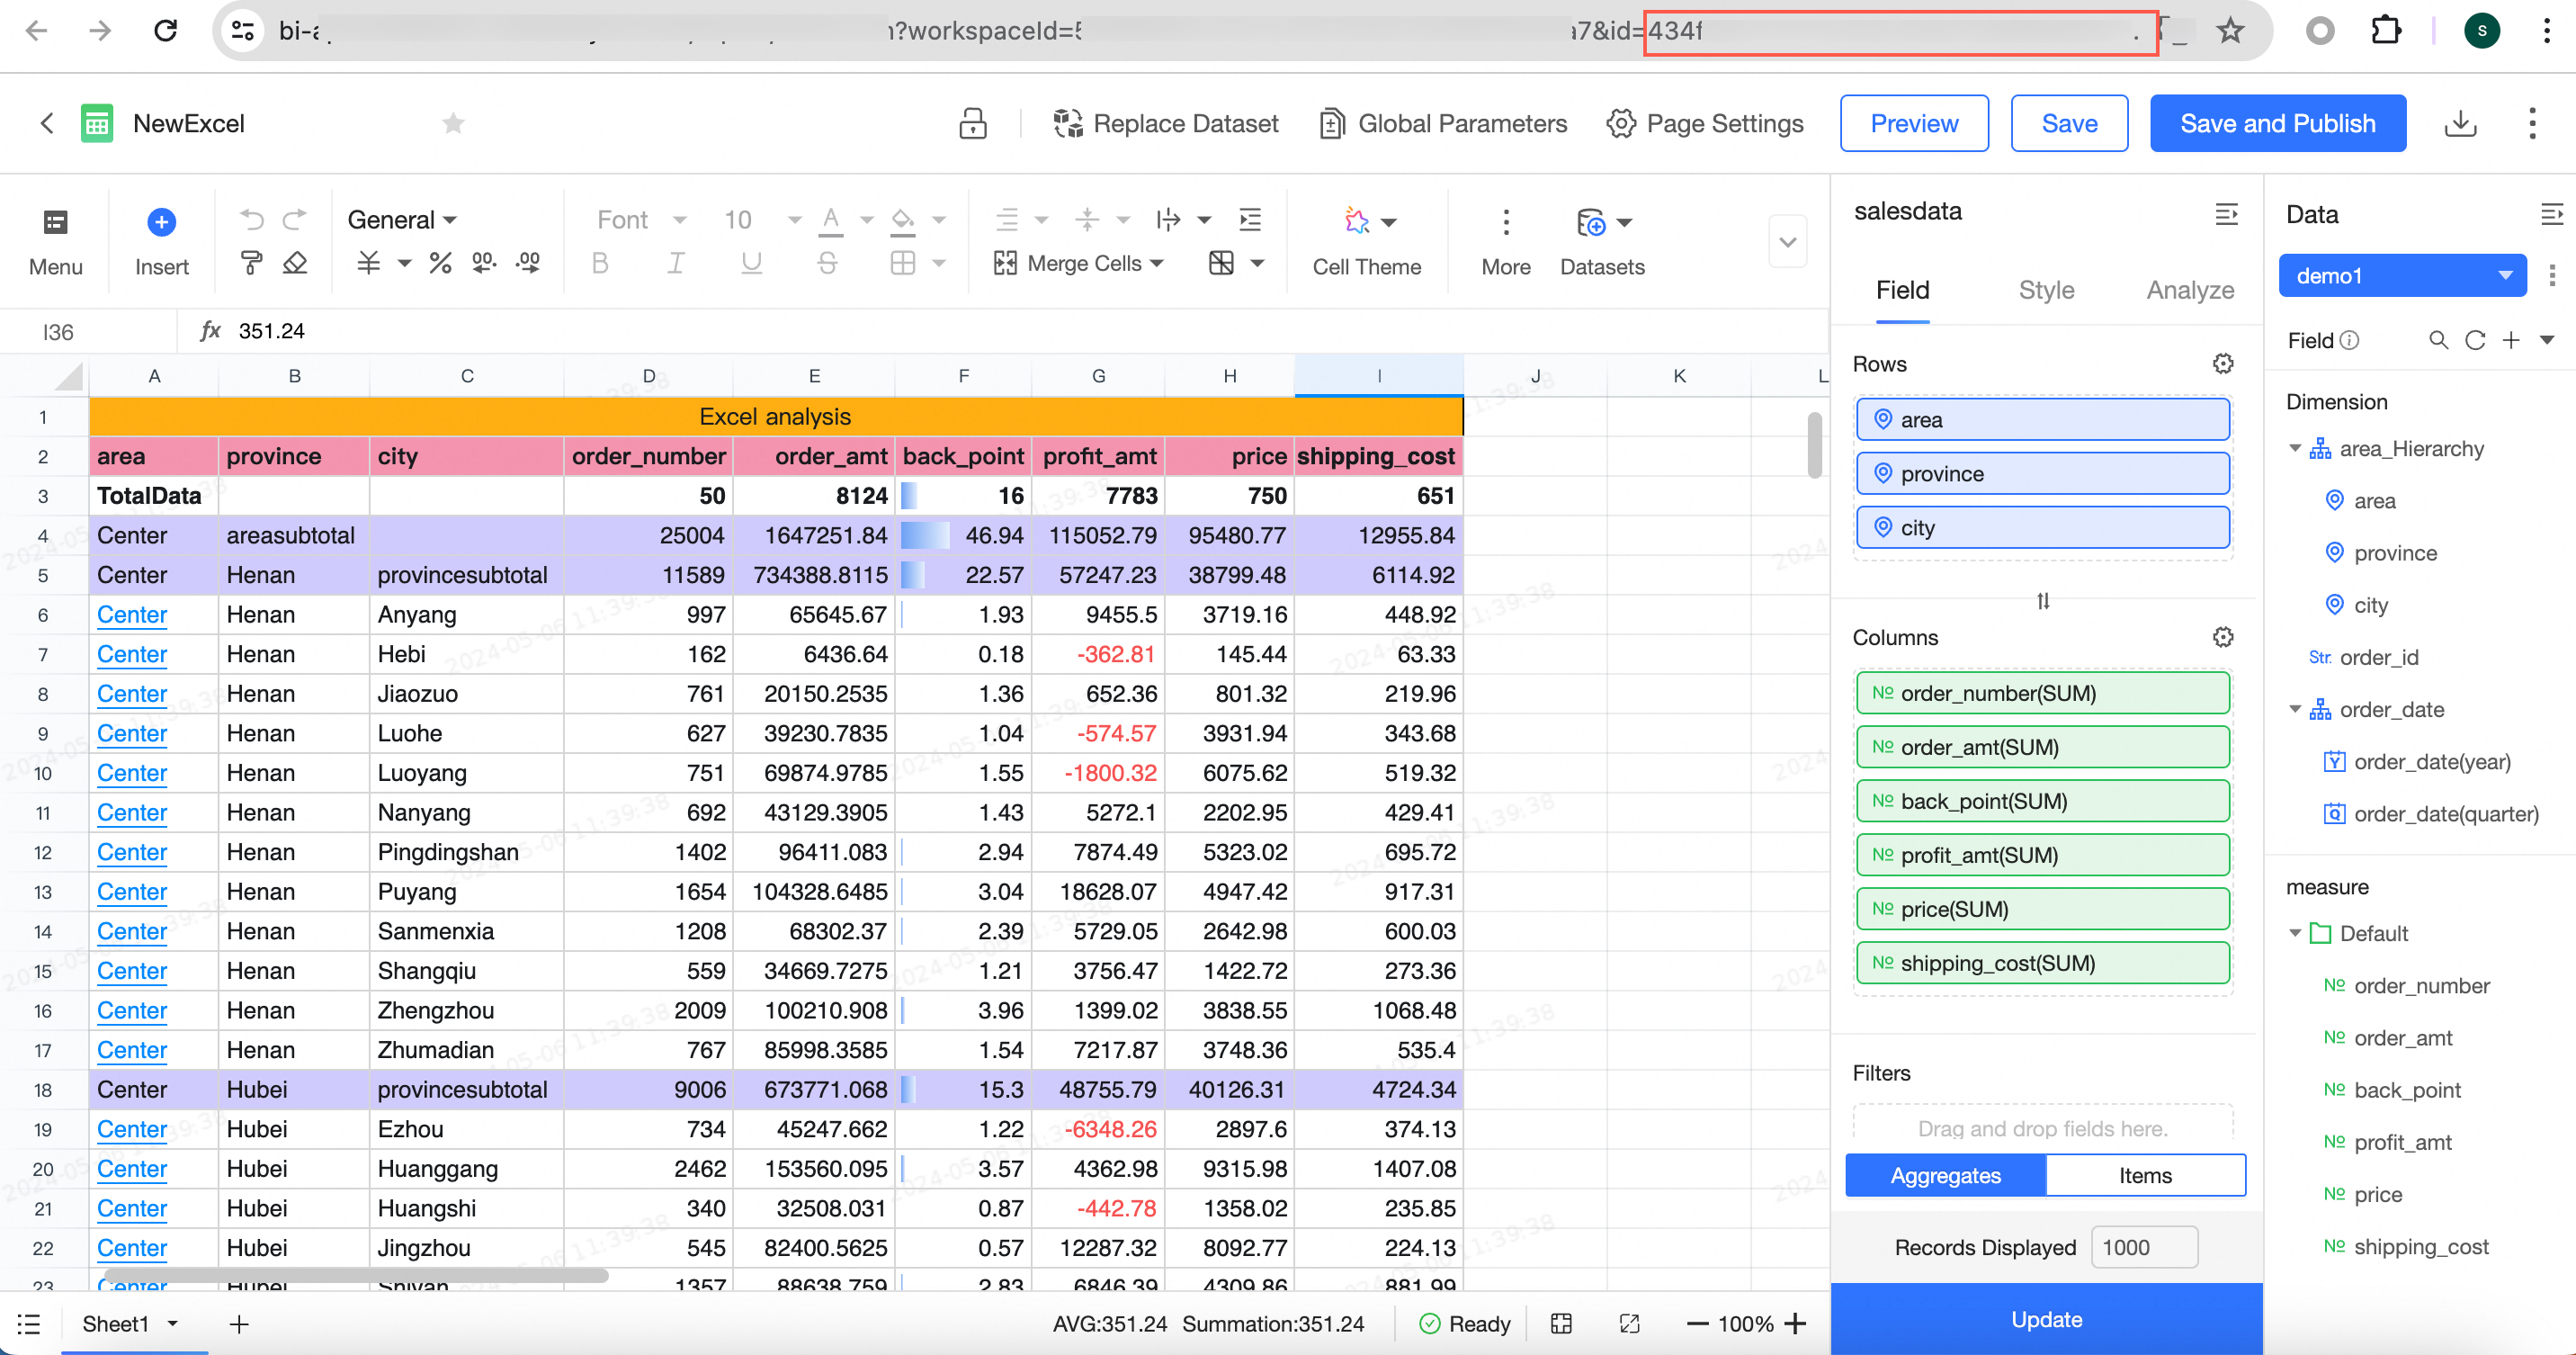
Workbook ID
On the workbook editing page, find the value of the workbook ID in the address bar.
Combine the Quick BI domain name, preview report URL, report ID, and the AccessTicket parameter obtained in Step 2 into the request address below.
For dashboards, use the format
https://<Quick BI domain name>/<preview report URL>?pageId=<report ID>&accessTicket=<AccessTicket>For workbooks, use the format
https://<Quick BI domain name>/<preview report URL>?id=<report ID>&accessTicket=<AccessTicket>
Manage Embedded Reports
For third-party reports that have been embedded, you can perform the following operations:
To query embedded reports, enter the report name keyword in the search box on the report list page and click the
 icon.
icon.You can refine your search by selecting the report's workspace or type.
To view the number of embedded reports, refer to View the Number of Embedded Reports.
To delete embedded reports, click the
 icon next to the report.
View the Number of Embedded Reports
On the Quick BI product home page, click Open Platform.
In the navigation pane on the left, click Embedded Analysis.
On the Report Embedding page, the number of reports embedded into third-party systems is displayed.
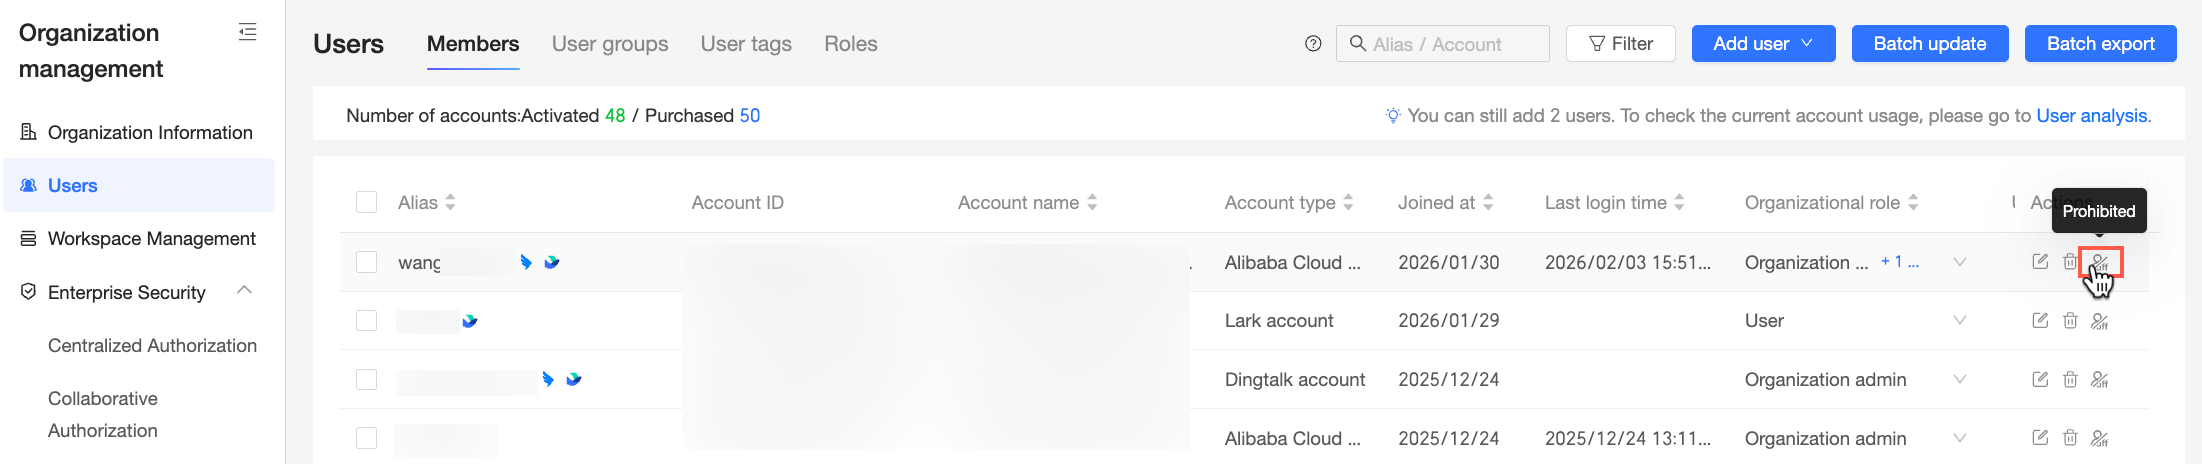
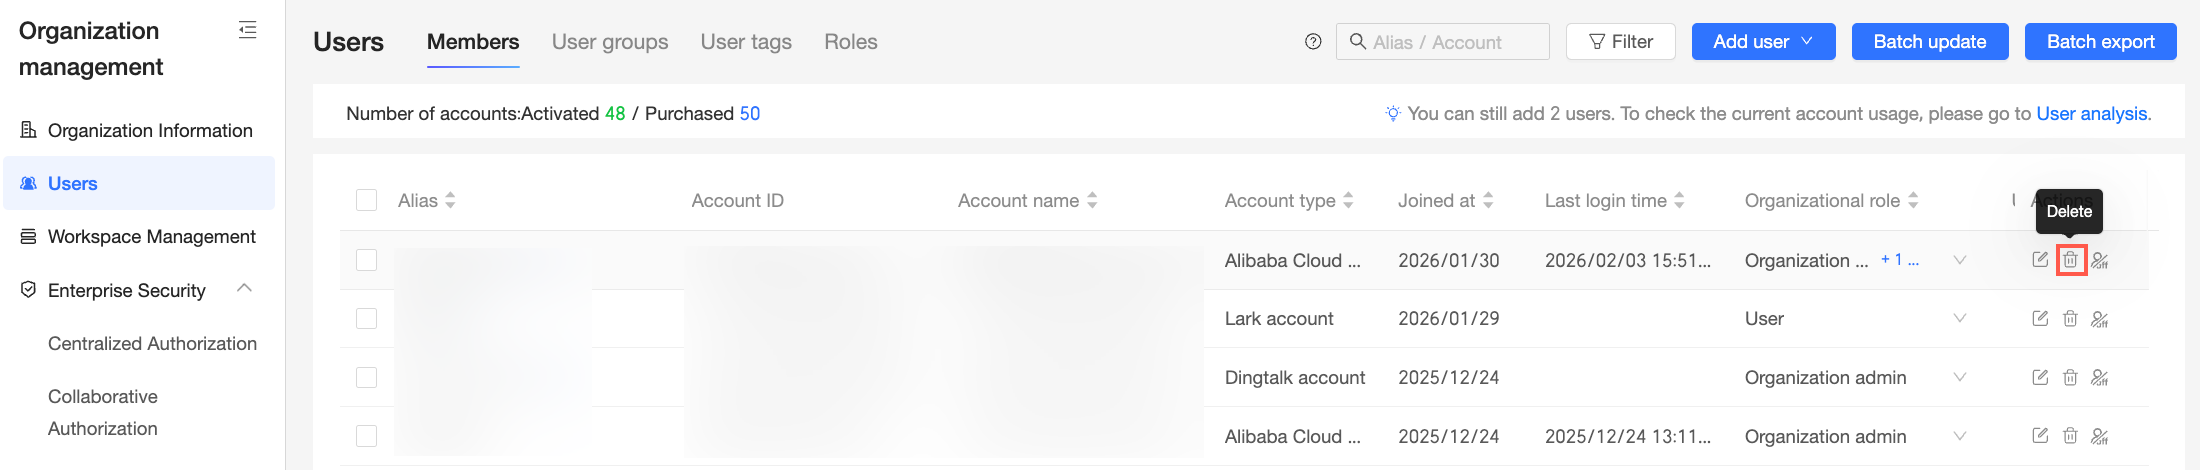
How to resolve the "access report_tree unauthorized" error when embedding reports?
Problem description
When embedding reports into third-party systems, you may encounter the following error message. 
Cause
This error occurs when report permissions have not been enabled in the corresponding group space.
Solution
Enable report permissions by following the steps illustrated below. 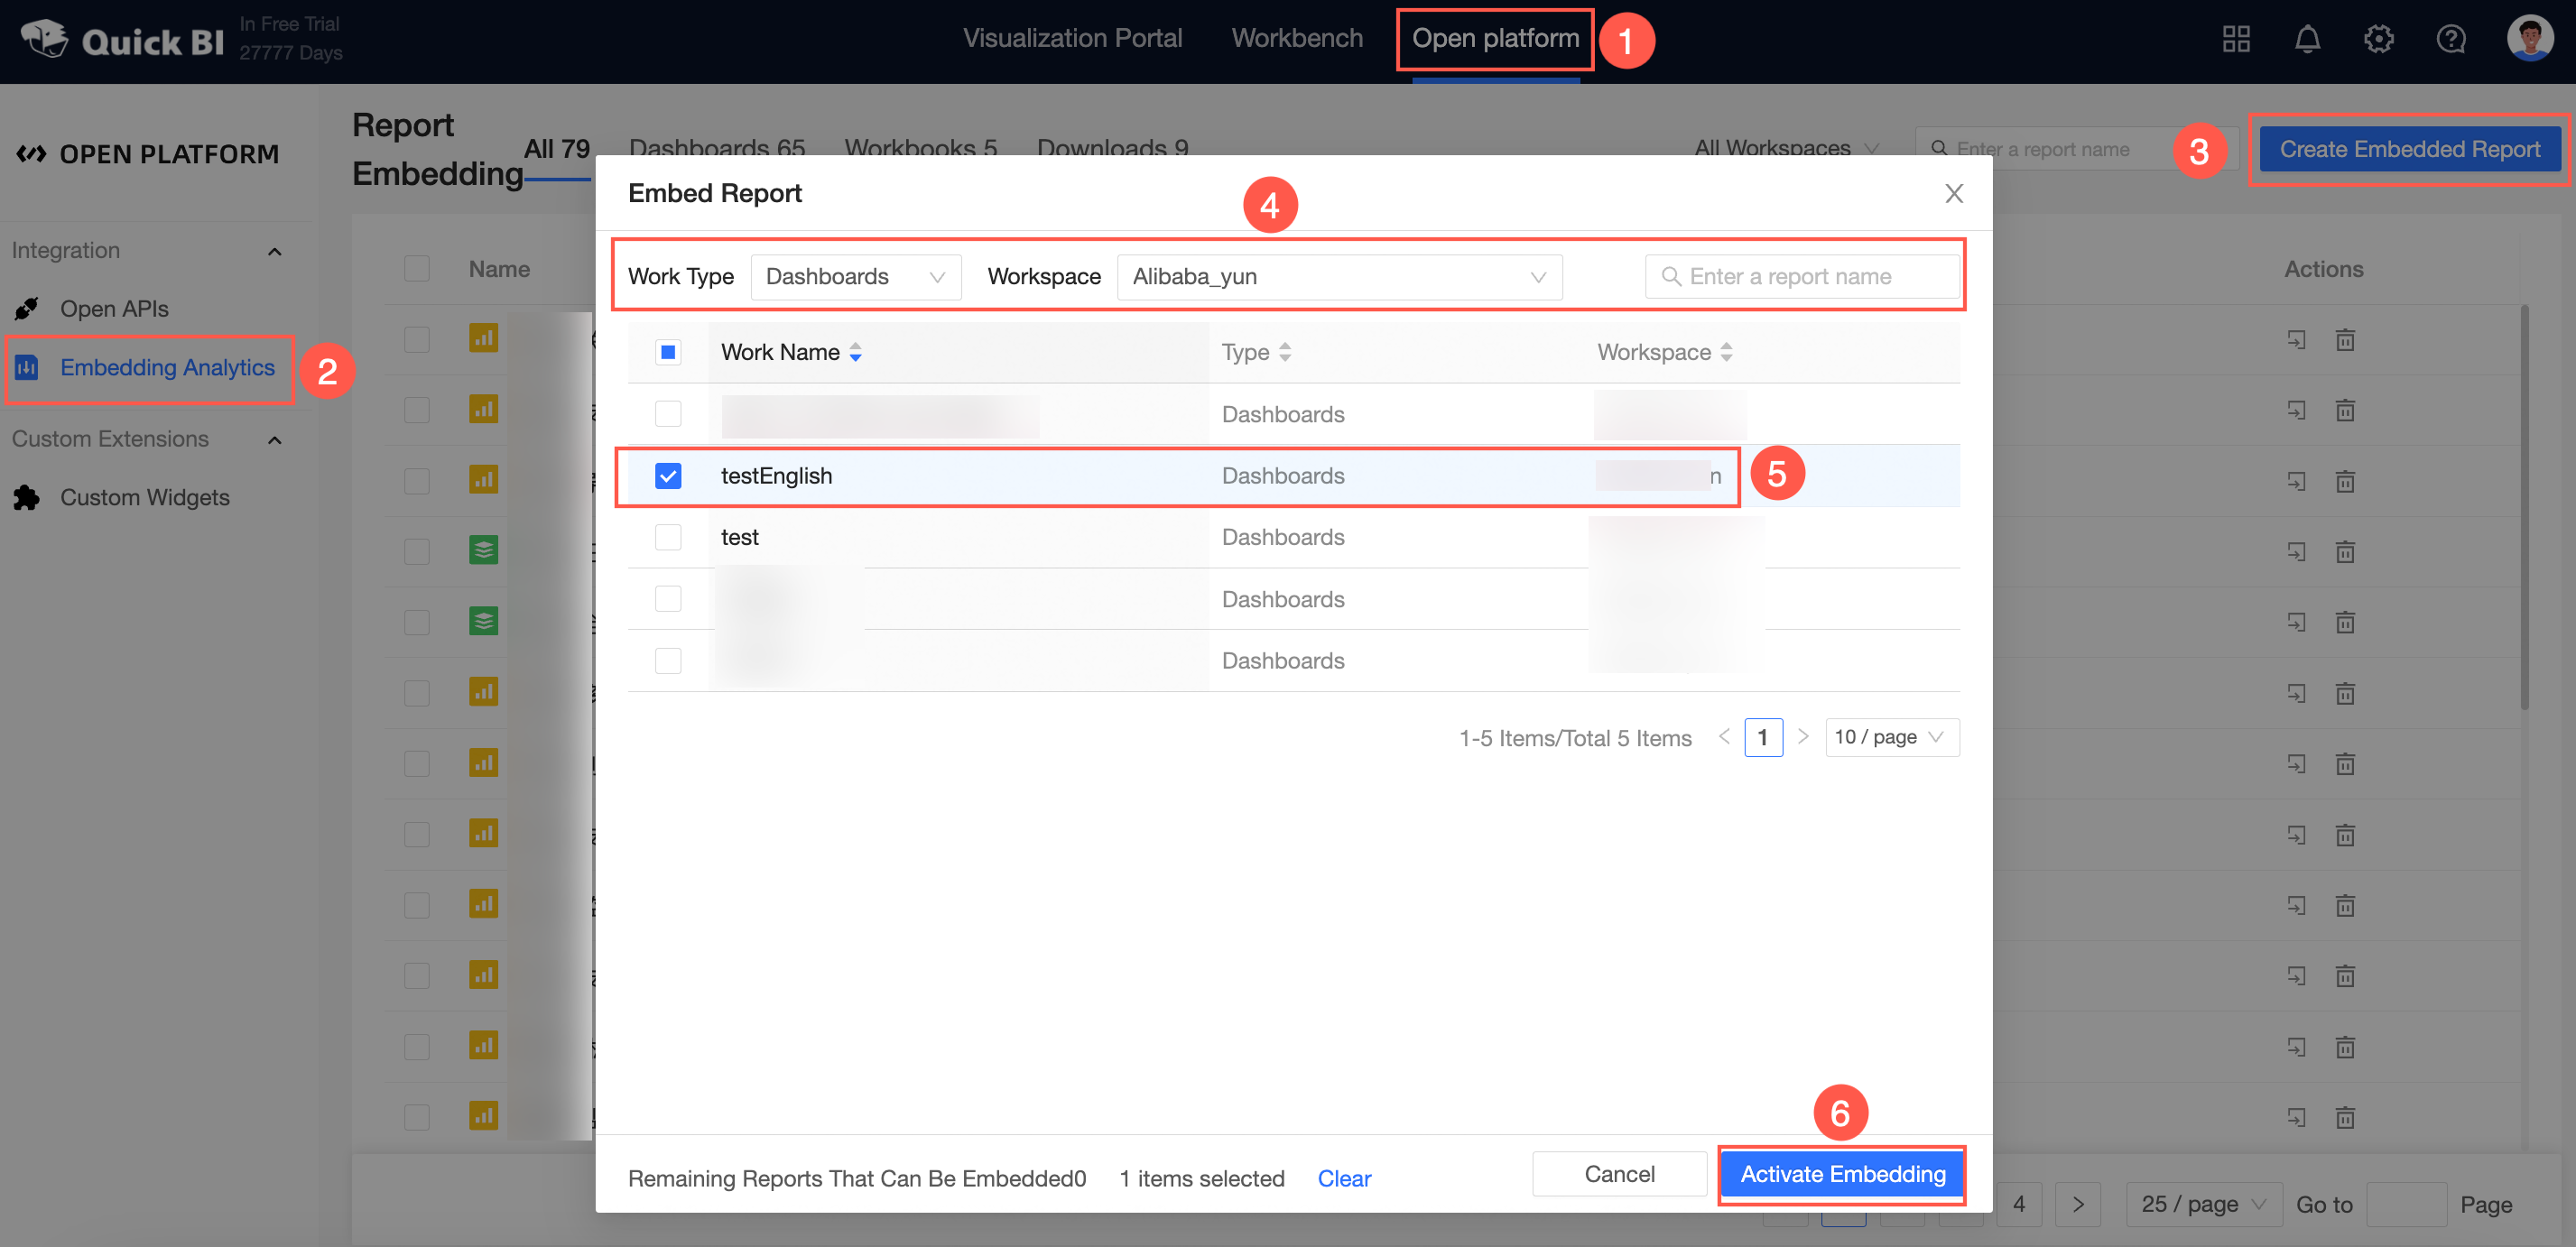
How to automatically adjust the height of third-party embedded Quick BI reports (PC)?
Problem description
When embedding Quick BI dashboards using Iframe, browser cross-domain security restrictions may prevent obtaining the dashboard's height, causing scroll bars to appear.
Solution
Quick BI transmits the dashboard's height to the external page using postMessage when loading. The external page can listen for this event to obtain the dashboard's height and ID.
There are two methods to achieve this:
Proactively send the Iframe content height to the external page.
// Quick BI address, supplement with other addresses if used
const quickBIURL = ['https://bi-cn-hongkong.data.aliyun.com/'];
function messageListener(event) {
  if (quickBIURL.includes(event.origin)) {
    // Height transmitted using postMessage
    console.log('Quick BI Dashboard Height:', event.data.height);
    // Dashboard page ID transmitted using postMessage
    console.log('Quick BI Dashboard Id:', event.data.pageId);
  }
}
// Listen before the dashboard loads
window.addEventListener('message', messageListener);
The external page sends a postMessage to the Iframe page to request the dashboard height.
Note:
The Iframe refers to the one embedding the Quick BI dashboard.
The message must include
{ getDashboardHeight: true }.
Below is an example code block.
// Quick BI address, supplement with other addresses if used const quickBIURL = ['https://bi-cn-hongkong.data.aliyun.com/']; function messageListener(event) { if (quickBIURL.includes(event.origin)) { // Height transmitted using postMessage console.log('Quick BI Dashboard Height:', event.data.height); // Dashboard page ID transmitted using postMessage console.log('Quick BI Dashboard Id:', event.data.pageId); } } // Listen before the dashboard loads window.addEventListener('message', messageListener); // Proactively request Quick BI dashboard height // Iframe that embeds the Quick BI dashboard const iframe = document.querySelector('iframe'); // The data passed in the message must include { getDashboardHeight: true } iframe.contentWindow.postMessage({getDashboardHeight: true}, '*');NoteThe width of the Quick BI dashboard automatically adjusts with the outer container, eliminating the need for vertical scroll bars and width adaptation.
Complete Example
<!DOCTYPE html>
<html lang="en">
    <head>
        <meta charset="UTF-8" />
        <meta name="viewport" content="width=device-width, initial-scale=1.0" />
        <meta http-equiv="X-UA-Compatible" content="ie=edge" />
    </head>
    <body>
        <iframe
        class="quickbi-iframe-demo"
    src="https://bi-cn-hongkong.data.aliyun.com//token3rd/dashboard/view/pc.htm?pageId=dd0****83f&accessTicket=fd138bcb-****-4fde-b413-81bcee59bdb6"
      scrolling="no"
     frameborder="0"
      width="100%"
      height="600">
    </iframe>
   <!-- <useBodyAutoHeight=true> for body height auto-adjustment, <page_Id> is the dashboard page ID, accessTicket is the access token for the dashboard -->
        <script>
      // Quick BI address, supplement with other addresses if used
      const quickBIURL = ['https://bi-cn-hongkong.data.aliyun.com'];
      function messageListener(event) {
        if (quickBIURL.includes(event.origin)) {
          // Height transmitted using postMessage
          console.log('Quick BI Dashboard Height:', event.data.height);
          // Dashboard page ID transmitted using postMessage
          console.log('Quick BI Dashboard Id:', event.data.pageId);
        }
      }
      // Listen before the dashboard loads
      window.addEventListener('message', messageListener);
      // Iframe that embeds the Quick BI dashboard
      const iframe = document.querySelector('iframe');
       // Proactively request Quick BI dashboard height
      // The data passed in the message must include { getDashboardHeight: true }
      iframe.contentWindow.postMessage({getDashboardHeight: true}, '*');
        </script>
    </body>
</html>
How to set the width when embedding into third-party applications using Iframe on mobile pages?
Problem description
Compatibility issues with Iframe on older iOS versions can cause the actual width of the Iframe to overflow, leading to various display issues such as the dashboard sliding, fixed list tables not scrolling, charts being truncated, and misaligned query control pop-up boxes.
Solution
Adjust the Iframe style accordingly.
Follow the example code below closely for modifications:
iframe {
    border-width: 0;
    min-width: 100%;
    width: 0;
    *width: 100%;
    height: 667px; /* The height must use a static field, which can be dynamically set after obtaining the screen height. height: 100% will have compatibility issues */
}