Connect your Amazon Athena database to Quick BI as a data source to analyze and visualize your data directly in Quick BI.
Procedure
-
You can add a whitelist.
Add the IP addresses of Quick BI to the Amazon Athena whitelist.
-
From the entry point, navigate to the Create Data Source page.
-
On the AWS Databases tab, select the Amazon Athena data source.

-
In the Configure Connection dialog box, configure the following parameters.
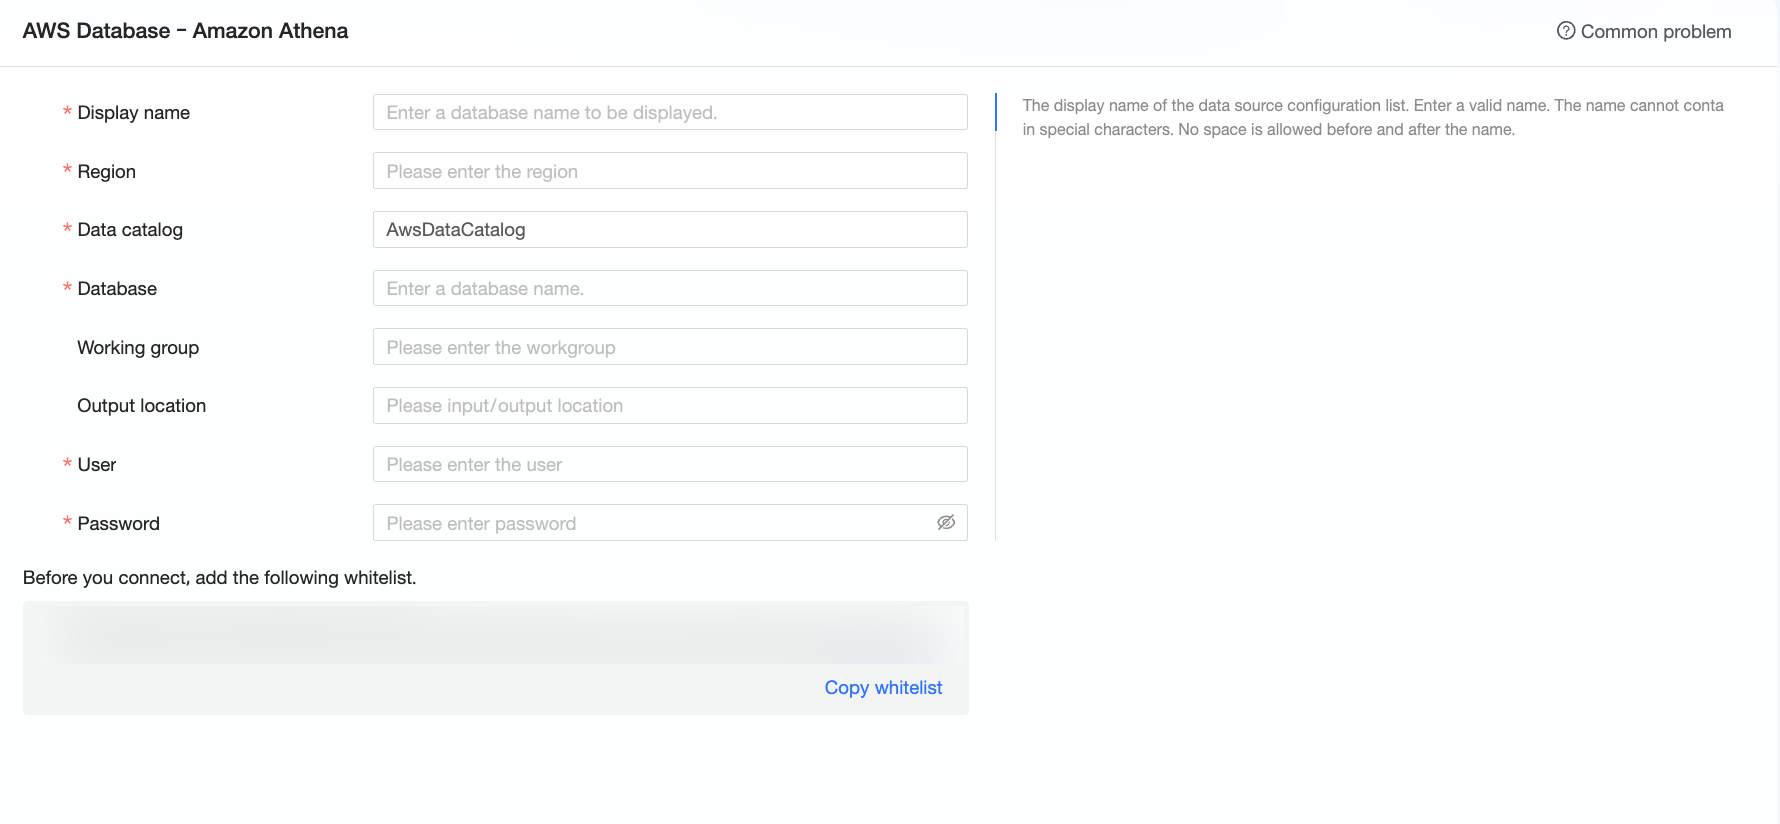
Name
Description
Display Name
The display name for the data source in the data source list.
Enter a standard name. The name cannot contain special characters or leading or trailing spaces.
Region
The region where the Athena instance is located.
Log on to the Amazon Athena console and view the region code in the upper-right corner. For example, enter us-east-1 for US East (N. Virginia).
Data Catalog
The catalog of the databases and tables that you want to access.
Log on to the Amazon Athena console and check the Data source option on the Editor page.
Database
The name of the database that you want to connect to.
Log on to the Amazon Athena console and check the Database option on the Editor page.
Workgroup
The workgroup to which the Athena instance belongs.
Log on to the Amazon Athena console and view the workgroup in the upper-right corner.
Output location
The location in Amazon S3 where query and calculation results are stored.
If S3 access authorization for query results is configured for the workgroup, you do not need to specify this parameter. If it is not configured, you must specify an output location for individual queries. Otherwise, the queries fail.
Log on to the Amazon Athena console and get the "Query result location" on the Settings page. Example: s3://path/to/query/bucket/.
Username and Password
The AccessKey ID and the corresponding SecretAccessKey for accessing Amazon.
For more information about AccessKey pairs, see Amazon security credentials in the *IAM User Guide*.
-
Click Test Connection to verify the data source connection.

-
After the connection test is successful, click OK to add the data source.
What to do next
After adding the data source, create a dataset to start analyzing your data.
-
To create a dataset from data tables or custom SQL queries, see Create a dataset.
-
To create charts for data visualization and analysis, see Create a Dashboard and Overview of charts.
-
To drill down into your data for in-depth analysis, see Step 3: Configure and display drilling settings.