This topic explains how to create a Presto data source, which is supported by both the Professional Edition and Pro.
Prerequisites
Ensure your network connectivity:
If connecting Quick BI to the Presto database over the Internet, add Quick BI's IP address to the database whitelist. For more information, see Security groups.
If connecting Quick BI to the Presto database over an internal network, ensure connectivity using one of the following methods:
For a Presto database deployed on an ECS instance, use a VPC to access the data source.
Deploy a jump server and access the database via an SSH tunnel.
The Presto database has been created.
You have obtained the username and password for the Presto database.
Limits
Supports PrestoDB version 0.219 and Trino version 354 or later.
Procedure
Log on to the or the international Quick BI console.
Follow the steps in the figure below to add a data source.
Navigate to the data source creation page via the data source creation entry.
Select Presto as the data source type.

In the Configure Connection dialog box, fill in the required fields.
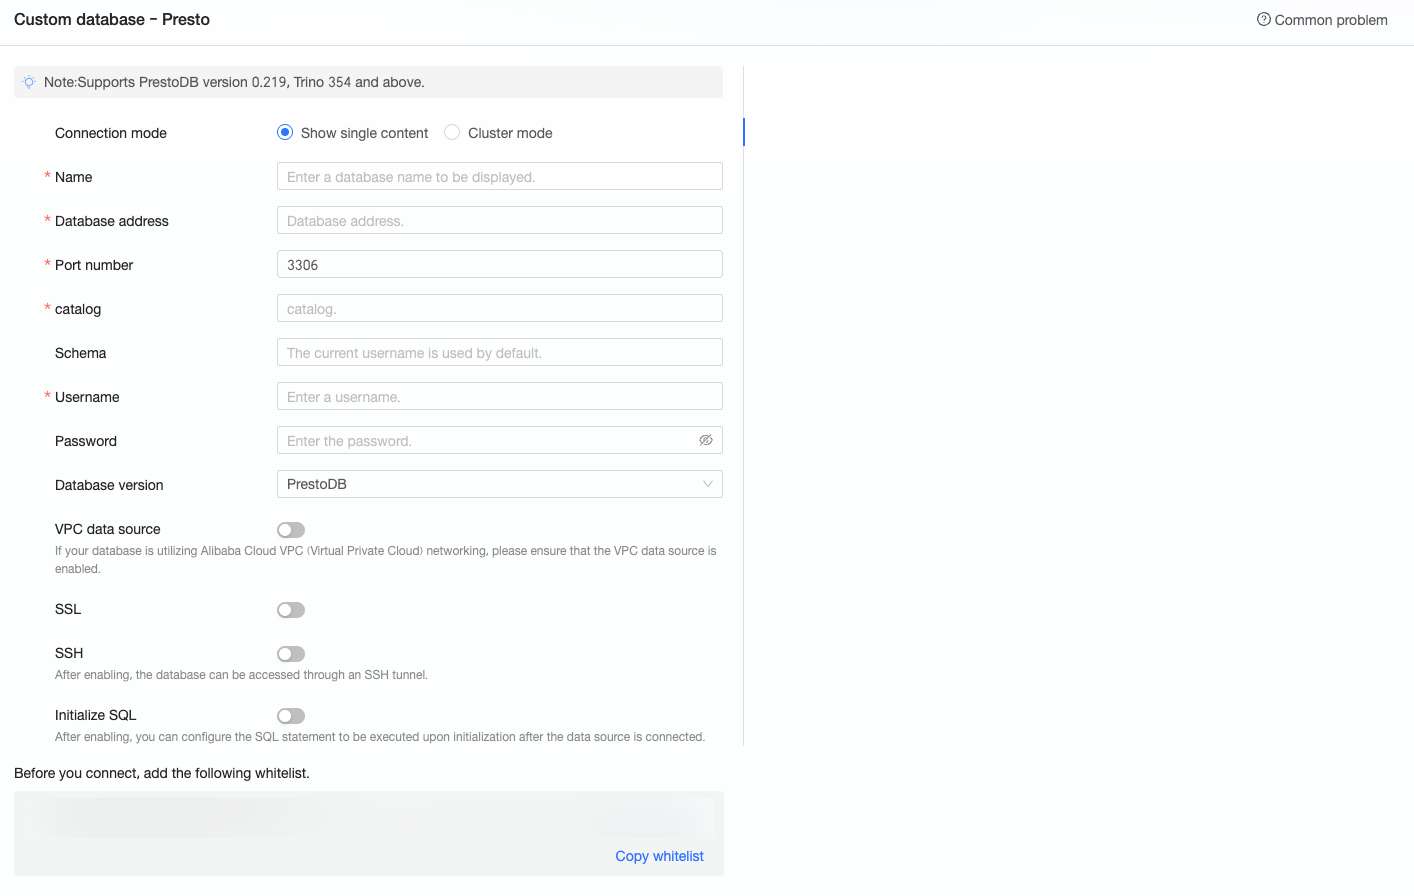
Name
Description
Connection mode
Supports selecting NAT mode or Cluster mode.
NoteVPC data sources and SSH are not supported in cluster mode.
Display Name
The display name in the datasource config list. The name cannot contain special characters or start or end with spaces.
Database Address
The address where the Presto database is deployed, including the IP address or domain name.
Port
When the connection mode is NAT mode, you need to enter the port number of the database. Default value: 3306.
Catalog
The data source that you use Presto to query.
Schema
The schema of the database that you want to access.
Username and Password
The username and password that are used to access the database.
Database version
Currently supports PrestoDB and Trino versions.
VPC Data Source
Based on your business scenario, specify whether the business data source is a user-created ECS VPC data source. If you select VPC Data Source, you need to configure the following parameters:
Purchaser Accessid: The AccessKey ID of the purchaser of this instance.
For more information, see Create an AccessKey.
NoteEnsure that the AccessKey ID has Read permission on the destination instance. If it has Write permission, the system automatically adds the whitelist. Otherwise, you need to add it manually. For more information, see create a custom policy.
Purchaser Accesskey: The AccessKey Secret of the purchaser of this instance.
For more information, see Create an AccessKey.
Instance ID: The ECS instance ID. Log on to the ECS console and obtain the instance ID on the Instances tab.
For more information, see view instance information.
Area: The area where the ECS instance is located. Log on to the ECS console and obtain the area in the upper-left corner.
For more information, see view instance information.
NoteVPC data sources are not supported in cluster mode.
SSL
If the destination data source is configured with SSL, you can also select the SSL security protocol to protect data security when connecting to the destination database.
SSH
Based on your business scenario, specify whether the connection method of the business data source is SSH. If you select SSH, you need to configure the following parameters:
SSH Host: The hostname or IP address.
SSH Username: The SSH username of the database.
SSH Password: The username password of the database.
SSH Port: The port of the database. Default value: 22.
NoteSSH is not supported in cluster mode.
Initialization SQL
You can select this option to set initialization SQL.
The SQL statement that is executed after each data source connection is initialized. Only SET statements are allowed, and statements are separated by periods.
Click Connection Test to verify the data source connectivity.

Once the test is successful, click OK to finalize the data source addition.
What to Do next
After creating the data source, proceed to create datasets and analyze data.
Incorporate data tables from the Presto database or custom SQL into Quick BI. For more information, see create and manage datasets.
Add visualization charts and perform data analysis. For more information, see create a dashboard and visualization chart overview.
Explore and analyze data in greater detail. For more information, see drill settings and display.