Performance Testing Service (PTS) lets you run cloud-based stress tests using Apache JMeter scripts. This guide walks you through creating a JMeter script on your on-premises device, uploading it to PTS, and running your first stress test.
Prerequisites
Before you begin, make sure that you have:
Apache JMeter 5.0 or 5.6.3 installed on your on-premises device
PTS supports JMeter 5.0 and 5.6.3. JMeter 4.x is not supported. The version you use locally must match the version you select in the PTS console.
Step 1: Create a JMeter script
In Apache JMeter, add an HTTP Request sampler and configure the following parameters on the Basic tab:
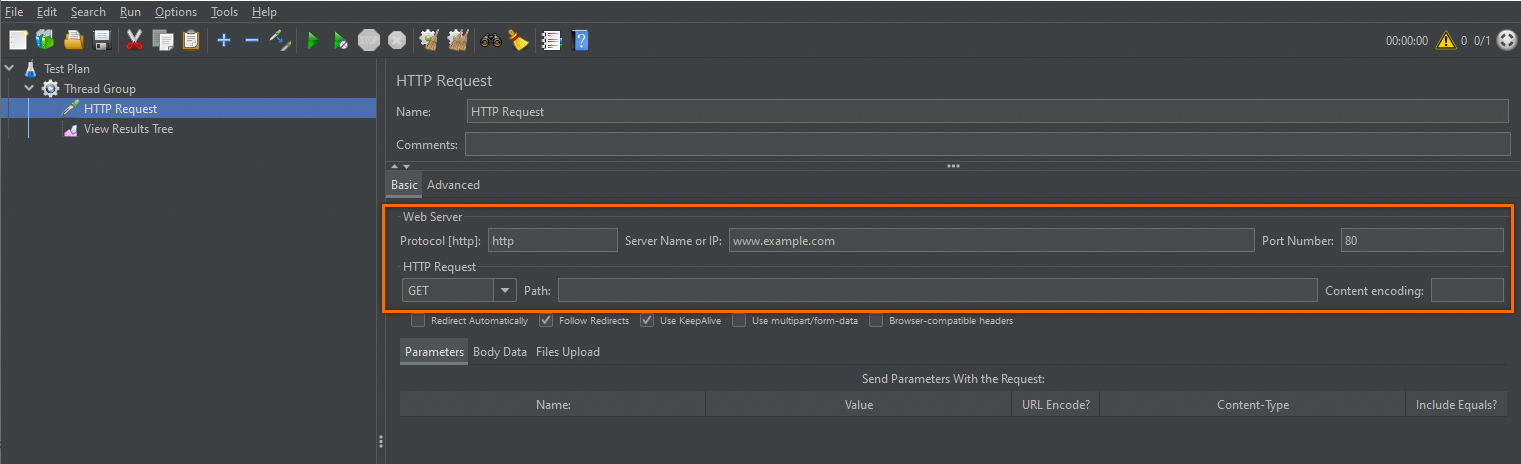
Parameter Description Example Protocol The request protocol httpServer name or IP The domain name or IP address of the target www.example.comPort Number The port used to access the target 80Method The HTTP method GETRun the test plan and check the View Results Tree listener for a successful response.
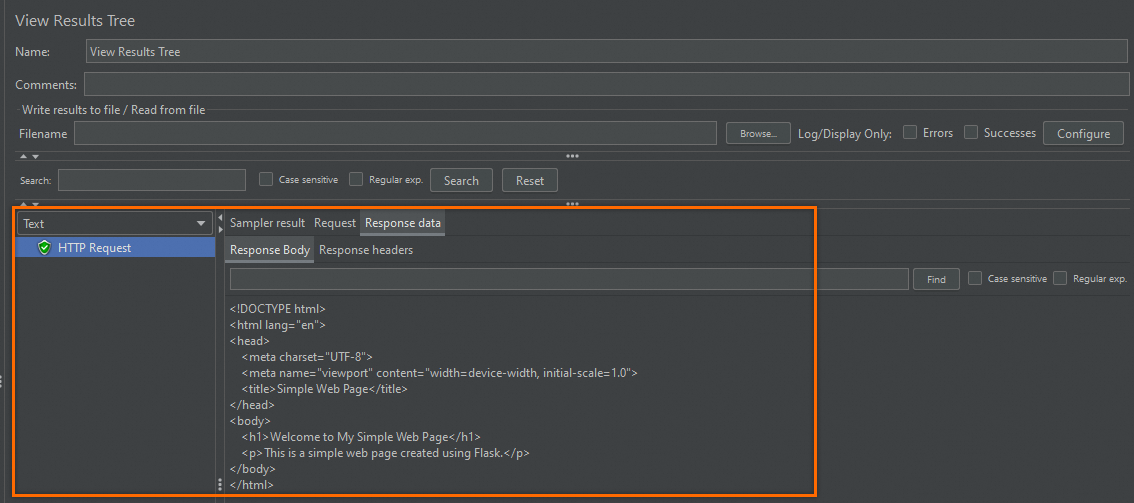
After you verify that the request succeeds, save and export the test plan as a
.jmxfile (for example,HTTP_Request.jmx).
Step 2: Upload the script and run the stress test
Log on to the PTS console, choose Performance Test > Create Scenario, and then click JMeter.
Configure the stress testing scenario.
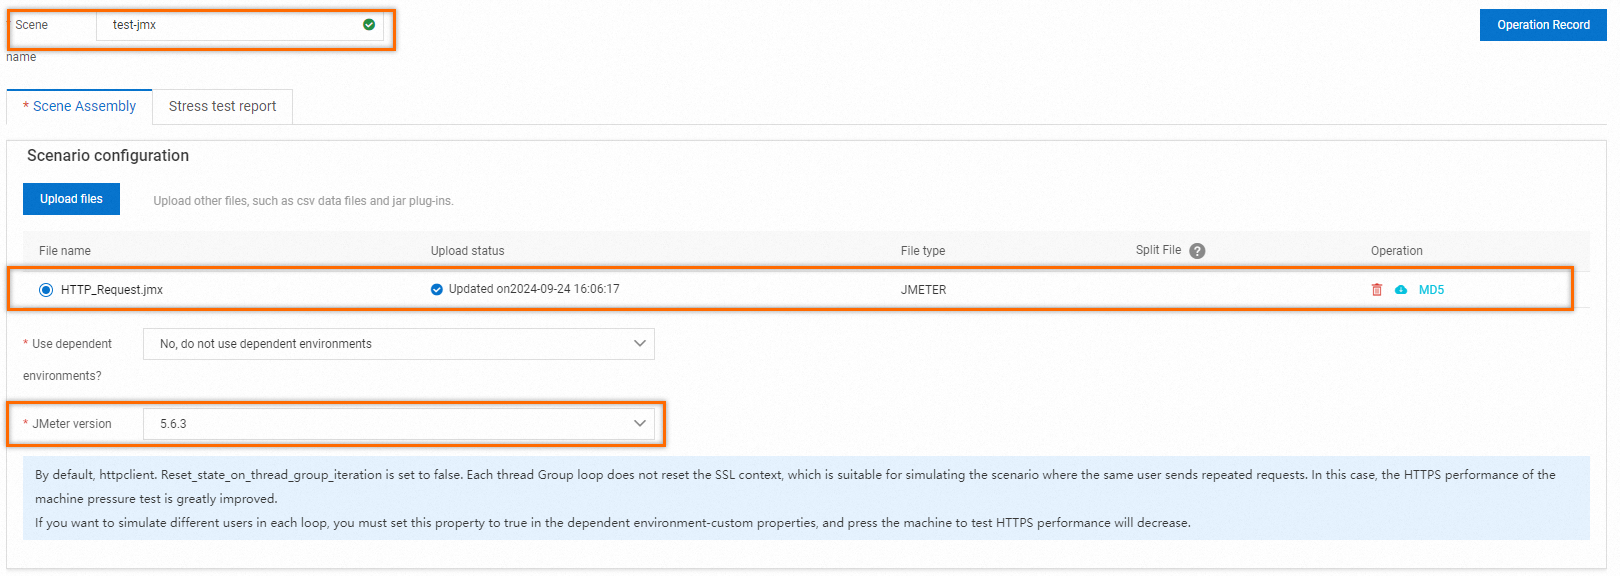
Parameter Description Example Scene The scenario name test-jmxUpload files On the Scene Assembly tab, upload your .jmxscript fileHTTP_Request.jmxJMeter version The JMeter version. Must match the version you used on your on-premises device. 5.6.3Configure load settings. Set the maximum virtual users to
10, the test duration to2minutes, and the increment duration to2minutes. Keep the default values for other parameters.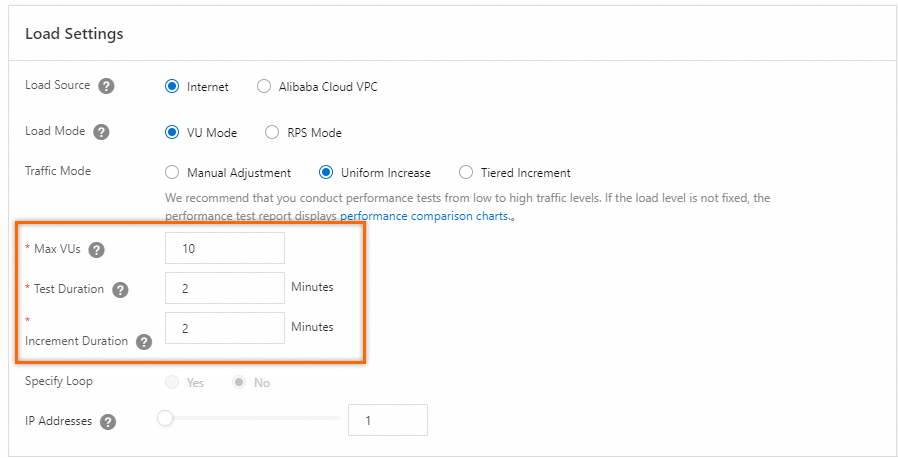 > Note: Stress tests are billed on a pay-as-you-go basis. Configure the load level based on your actual needs. For more information, see Billing overview and Configure the stress testing model and level.
Debug the scenario. Before you run the full stress test, debug the scenario to validate your configuration and prevent test failures. For more information, see Debug a stress testing scenario. A successful debug run returns an HTTP
200status code. If the status code is not200, check whether the HTTP request is configured correctly.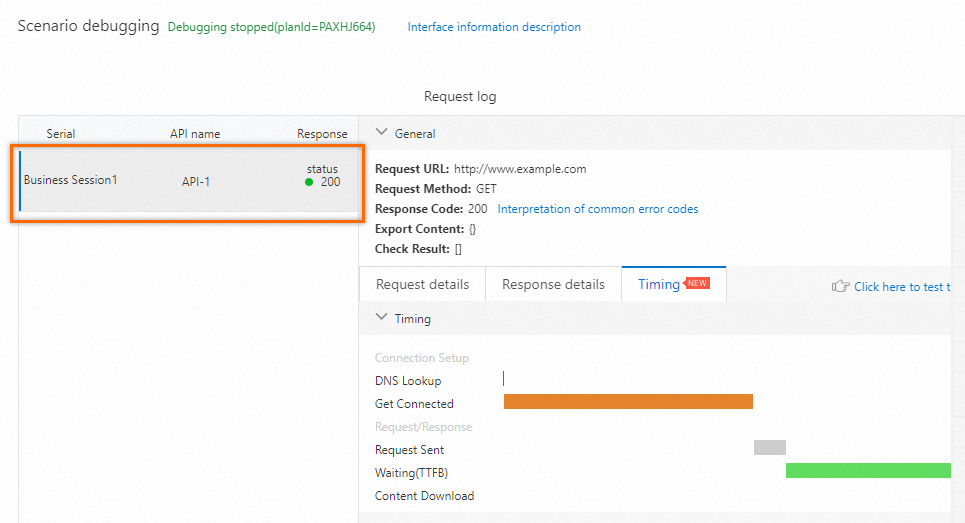 > Tip: Always debug before running the full test. Debugging catches configuration errors early.
Click Save and Start. On the Note page, select Execute Now, select the The test is permitted and complies with the applicable laws and regulations check box, and then click Start.
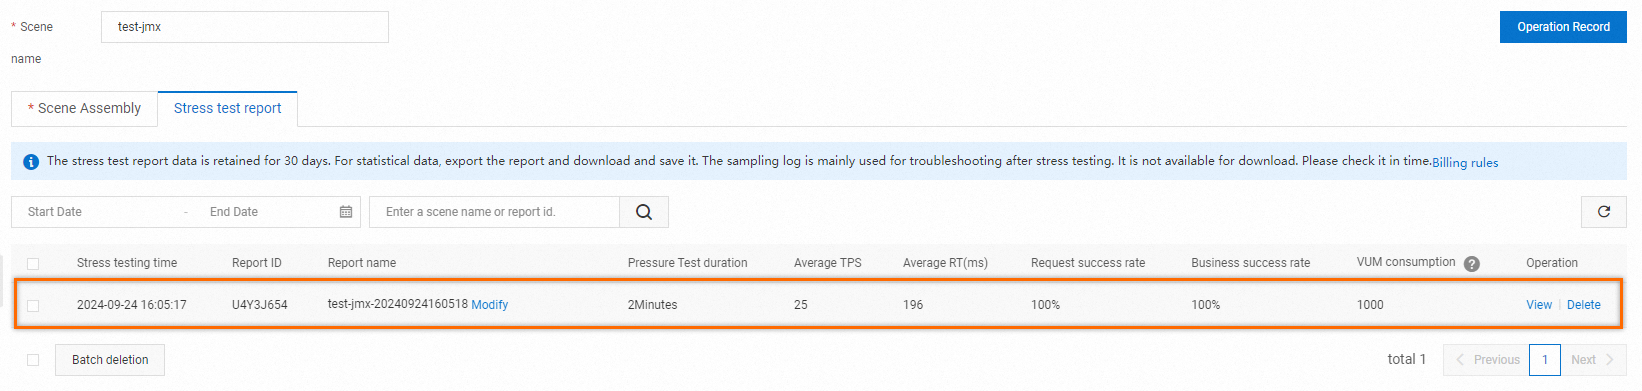
Analyze stress test results
After the stress test finishes, PTS automatically generates a report that includes scenario metrics, business details, monitoring details, and API sampling logs. View the report on the Stress Test Report page.
For more information, see View a JMeter performance testing report.
FAQ
Why does my JMeter stress test fail?
The most common cause is a JMeter version mismatch. Make sure the JMeter version you select in the PTS console matches the version you used to create the script. Although later JMeter versions are generally backward-compatible, subtle differences can cause failures. Always debug the scenario before starting the full test.
Do I need to upload JAR plugins and data files separately?
Yes. Upload all JAR plugins and data files that your script depends on along with the .jmx file on the Scene Assembly tab. If any file is missing, the stress test fails.
Why does my script fail with file path errors?
PTS runs your script on cloud-based load generators, not your on-premises device. Remove all local file paths from your script and keep only the file names. For example, change /Users/admin/data/test.csv to test.csv.
How does PTS allocate virtual users across thread groups?
PTS rewrites the thread count in your script at runtime to match the load settings you configure in the console. The original script file is not modified. Allocation works as follows:
PTS subtracts the threads in setUp Thread Group and tearDown Thread Group from the total concurrent threads you specify.
PTS distributes the remaining threads across your Thread Groups proportionally based on the thread count ratios in your script.
If the remaining thread count is 0, no threads are allocated.
For example, if you set 500 concurrent threads and your script has three Thread Groups with thread counts in the ratio a:b:c, PTS allocates 500 threads across the three groups at that same ratio.
To get predictable results, set up your thread counts correctly before uploading:
| Scenario | Thread count setting |
|---|---|
| Single Thread Group | Set the thread count to 1 |
| Multiple Thread Groups with even distribution | Set the same thread count in each Thread Group |
| Multiple Thread Groups with proportional distribution | Set the thread counts in the desired ratio (for example, 2, 3, 5 for a 2:3:5 split) |
What's next
Create a JMeter scenario - Full reference for scenario configuration options
Use CSV parameter files in JMeter - Parameterize your tests with external data
Configure RPS limits on JMeter - Control request throughput
Notes on using multiple thread groups in JMeter - Advanced thread group configuration
JMeter environment management - Manage JMeter runtime environments
Data sources - Configure data sources for your tests