Use Data Transmission Service (DTS) to continuously replicate data from a PolarDB-X 2.0 instance into a MaxCompute project. DTS performs an initial full load, then captures incremental changes from the source binary log and writes them to a dedicated incremental data table in MaxCompute alongside the full baseline table.
Prerequisites
Before you begin, ensure that you have:
-
A PolarDB-X 2.0 instance compatible with MySQL 5.7. See Create an instance and Create a database
-
MaxCompute activated. See Activate MaxCompute and DataWorks
-
A MaxCompute project created. See Create a MaxCompute project
-
A database account on the source PolarDB-X instance with the following permissions:
Permission Used when Why it is required SELECTInitial full data synchronization Reads rows from the objects to be synchronized REPLICATION CLIENTAlways Queries binary log status ( SHOW MASTER STATUS,SHOW BINARY LOGS)REPLICATION SLAVEIncremental data synchronization Connects to the source instance and reads the binary log For instructions on granting these permissions, see Data synchronization tools for PolarDB-X.
-
Binary logging enabled in the PolarDB-X 2.0 console with
binlog_row_imageset tofull. See Parameter settings. Ifbinlog_row_imageis not set tofull, the precheck fails and the task cannot start. -
Binary log retention period configured as follows:
Synchronization scope Minimum retention period Incremental synchronization only 24 hours Full + incremental synchronization 7 days (can be reduced to 24 hours after the full sync completes) If DTS cannot read the binary log because the retention period is too short, the task fails and data inconsistency or loss may occur. Ensure that you configure the retention period in accordance with the requirements above. Otherwise, the service reliability and performance stated in the Service Level Agreement (SLA) of DTS cannot be achieved.
Limitations
Foreign keys are not synchronized. CASCADE and DELETE operations triggered by foreign key constraints in the source database are not replicated to MaxCompute.
Source database limits
| Constraint | Detail | Workaround |
|---|---|---|
| Primary key or unique key required | Tables without PRIMARY KEY or UNIQUE constraints may produce duplicate records in the destination | Add a primary key or unique key to the source table before starting the task |
| Table limit when renaming objects | If you rename tables or columns in the destination, a single task can sync up to 5,000 tables; tasks with more than 5,000 tables fail with a request error | Split into multiple tasks, or sync the entire database without per-table renaming |
| TABLEGROUP and Locality not supported | PolarDB-X instances using TABLEGROUP or the Locality attribute are not supported | Remove TABLEGROUP definitions and Locality attributes before synchronization |
| Uppercase table names | Tables with uppercase letters in their names support schema synchronization only | Use lowercase table names, or sync schema only |
| No DDL during sync | Executing DDL statements during schema or full data synchronization causes the task to fail | Pause DDL operations until the initial synchronization phase completes |
Other limits
-
Only tables can be selected as sync objects. Views, triggers, and stored procedures are not synchronized.
-
DTS uses read and write resources on both source and destination during initial full data synchronization, increasing server load. Run synchronization during off-peak hours.
-
Full data synchronization uses concurrent INSERT operations, which can fragment destination tables. The destination tablespace may be larger than the source after full synchronization completes.
-
Do not use pt-online-schema-change for DDL operations during synchronization—it can cause the task to fail.
-
Write data to the destination only through DTS during synchronization. Writing via other tools can cause data inconsistency, and using DMS for online DDL operations on the destination may result in data loss.
-
MaxCompute does not support primary key constraints. If a network error occurs, DTS may write duplicate records to the destination. Design your queries to handle duplicates.
-
If a DTS task fails, DTS technical support attempts to restore it within 8 hours. The task may be restarted and task parameters (not database parameters) may be adjusted.
DTS updates thedts_health_check.ha_health_checktable in the source database periodically to advance the binary log file position.
Billing
| Synchronization type | Fee |
|---|---|
| Schema synchronization and full data synchronization | Free |
| Incremental data synchronization | Charged. See Billing overview |
Supported SQL operations
| Operation type | SQL statements |
|---|---|
| DML | INSERT, UPDATE, DELETE |
Create a synchronization task
Step 1: Go to the Data Synchronization Tasks page
-
Log on to the Data Management (DMS) console.
-
In the top navigation bar, click Data + AI.
-
In the left-side navigation pane, choose DTS (DTS) > Data Synchronization.
The console layout may vary. See Simple mode and Customize the layout and style of the DMS console. You can also go directly to the Data Synchronization Tasks page in the new DTS console.
Step 2: Configure the source and destination
-
On the Data Synchronization Tasks page, select the region where the data synchronization instance resides.
In the new DTS console, select the region from the top navigation bar instead.
-
Click Create Task. In the wizard, configure the following parameters.
Task name
Parameter Description Task Name Enter a descriptive name to identify the task. The name does not need to be unique. Source database
Parameter Description Select a DMS database instance Select an existing instance to auto-populate the parameters, or leave blank to enter the details manually. Database Type Select PolarDB-X 2.0. Access Method Select Alibaba Cloud Instance. Instance Region The region where the PolarDB-X instance resides. Database Account The database account with SELECT, REPLICATION CLIENT, and REPLICATION SLAVE permissions (see Prerequisites). Database Password The password for the database account. Destination database
Parameter Description Select a DMS database instance Select an existing instance to auto-populate the parameters, or leave blank to enter the details manually. Database Type Select MaxCompute. Access Method Select Alibaba Cloud Instance. Instance Region The region where the destination MaxCompute project resides. Project The name of the MaxCompute project. Find it on the Workspaces page in the DataWorks console. accessKeyId The AccessKey ID of the account used to connect to MaxCompute. See Obtain an AccessKey pair. accessSecret The AccessKey secret of the account used to connect to MaxCompute. See Obtain an AccessKey pair. -
Click Test Connectivity and Proceed. DTS automatically adds its server CIDR blocks to the whitelist of Alibaba Cloud database instances and to the security group rules of Elastic Compute Service (ECS)-hosted databases. For self-managed databases in data centers or on third-party clouds, manually add the DTS server CIDR blocks. See Add the CIDR blocks of DTS servers.
WarningAdding DTS server CIDR blocks to a whitelist or security group introduces security exposure. Before proceeding, take preventive measures: strengthen credentials, restrict exposed ports, authenticate API calls, and audit whitelist rules regularly. Alternatively, connect via Express Connect, VPN Gateway, or Smart Access Gateway to avoid whitelist changes.
-
Click OK to grant the required permissions to your MaxCompute account.
Step 3: Select objects and configure sync options
Configure the following parameters.
| Parameter | Description |
|---|---|
| Synchronization Types | Select Schema Synchronization, Full Data Synchronization, and Incremental Data Synchronization. By default, Incremental Data Synchronization is selected; you must also select Schema Synchronization and Full Data Synchronization. DTS syncs historical data first (the baseline for incremental sync), then continuously replicates changes. |
| Partition Definition of Incremental Data Table | Select partition names for the incremental data table. The default partition key fields are modifytime_year, modifytime_month, modifytime_day, modifytime_hour, and modifytime_minute. See Partition. |
| Processing Mode of Conflicting Tables | Precheck and Report Errors (default): fails the precheck if a destination table has the same name as a source table. Use this when destination tables must not be overwritten. If names conflict and the destination tables cannot be deleted or renamed, use object name mapping to rename the synced tables. See Map object names. Ignore Errors and Proceed: skips the name-conflict check. If schemas match and a record's primary or unique key already exists in the destination, DTS retains the existing record during full sync and overwrites it during incremental sync. If schemas differ, sync may fail or write only partial columns—proceed with caution. |
| Naming Rules of Additional Columns | DTS adds metadata columns to each destination table. If these conflict with existing column names, sync fails. Select New Rule or Previous Rule based on your setup. Check for name conflicts before configuring this parameter. See Naming rules for additional columns. |
| Capitalization of Object Names in Destination Instance | Controls the case of database names, table names, and column names in MaxCompute. Default: DTS default policy. See Specify the capitalization of object names in the destination instance. |
| Source Objects | Select objects and click the right-arrow icon to move them to Selected Objects. Select tables as objects—DTS does not synchronize views, triggers, or stored procedures. |
| Selected Objects | Right-click an object to rename it or filter SQL operations. To rename multiple objects at once, click Batch Edit. To filter data by condition, right-click and specify WHERE conditions. See Map object names and Specify filter conditions. |
Step 4: Configure advanced settings
Click Next: Advanced Settings and configure:
| Parameter | Description |
|---|---|
| Monitoring and Alerting | Select Yes to receive alerts when the task fails or synchronization latency exceeds the threshold. Configure the alert threshold and notification settings. See Configure monitoring and alerting. Select No to skip alerting. |
| Retry Time for Failed Connections | The window during which DTS retries failed connections after the task starts. Valid values: 10–1,440 minutes. Default: 720 minutes. Set this to at least 30 minutes. If multiple tasks share the same source or destination, the shortest retry window applies to all. DTS charges for the instance during retries. |
| Configure ETL | Select Yes to configure extract, transform, and load (ETL) rules and enter data processing statements. Select No to skip ETL. See What is ETL? |
Step 5: Run the precheck
-
Click Next: Save Task Settings and Precheck. To preview the API parameters for this task before saving, hover over the button and click Preview OpenAPI parameters.
-
Wait for the precheck to complete.
-
If an item fails, click View Details, fix the issue, then click Precheck Again.
-
If an item triggers an alert that cannot be ignored, fix it and rerun the precheck.
-
If an alert item can be ignored, click Confirm Alert Details > Ignore > OK, then click Precheck Again. Ignoring an alert may cause data inconsistency.
-
-
Wait until the Success Rate reaches 100%, then click Next: Purchase Instance.
Step 6: Purchase the instance
On the purchase page, configure:
| Parameter | Description |
|---|---|
| Billing Method | Subscription: pay upfront for a fixed term—more cost-effective for long-term use. Pay-as-you-go: billed hourly—suitable for short-term or trial use. Release the instance when no longer needed to avoid ongoing charges. |
| Resource group | The resource group for this instance. Default: default resource group. See What is Resource Management? |
| Instance Class | The synchronization throughput tier. See Instance classes of data synchronization instances. |
| Subscription Duration | (Subscription billing only) The term length: 1–9 months, or 1, 2, 3, or 5 years. |
Read and select Data Transmission Service (Pay-as-you-go) Service Terms, then click Buy and Start > OK.
The task appears in the task list. Monitor its progress there.
Incremental data table schema
Run set odps.sql.allow.fullscan=true; in MaxCompute to allow full table scans on the project.
DTS writes incremental changes from PolarDB-X 2.0 into an incremental data table in MaxCompute. In addition to the source table columns, DTS adds the following metadata columns to every incremental data table:

In this example,modifytime_year,modifytime_month,modifytime_day,modifytime_hour, andmodifytime_minuteform the partition key, as configured in step 3.
| Column | Description |
|---|---|
record_id |
Unique ID of the log entry. Auto-increments for each new entry. For UPDATE operations, DTS generates two entries with the same record_id—one for the pre-update values and one for the post-update values. |
operation_flag |
The operation type: I (INSERT), U (UPDATE), or D (DELETE). |
utc_timestamp |
The UTC timestamp of the operation, taken from the binary log. |
before_flag |
Y if the row contains pre-update values; N otherwise. |
after_flag |
Y if the row contains post-update values; N otherwise. |
How before_flag and after_flag work
The values of before_flag and after_flag depend on the operation type:
-
INSERT: The row holds the newly inserted values.
before_flag = N,after_flag = Y.
-
UPDATE: DTS generates two log entries with the same
record_id,operation_flag, andutc_timestamp. The first entry holds the pre-update values (before_flag = Y,after_flag = N). The second holds the post-update values (before_flag = N,after_flag = Y).
-
DELETE: The row holds the deleted record values.
before_flag = Y,after_flag = N.
Merge the full baseline table and incremental data table
After a synchronization task starts, DTS creates a full baseline table and an incremental data table in MaxCompute. Merge the two tables with SQL to reconstruct the full dataset at any point in time.
The following example merges data for a table named customer.

-
Create a destination table to store the merged result, using the same schema as the source table. The following example creates a table to hold the
customerdata at timestamp1565944878:CREATE TABLE `customer_1565944878` ( `id` bigint NULL, `register_time` datetime NULL, `address` string);Use the ad hoc query feature to run SQL statements in MaxCompute. See Use the ad hoc query feature to execute SQL statements. For supported data types, see Data type editions.
-
Run the following SQL to merge the full baseline table and the incremental data table. Replace the placeholders with your values.
set odps.sql.allow.fullscan=true;
insert overwrite table <result_storage_table>
select <col1>,
       <col2>,
       <colN>
  from(
select row_number() over(partition by t.<primary_key_column>
 order by record_id desc, after_flag desc) as row_number, record_id, operation_flag, after_flag, <col1>, <col2>, <colN>
  from(
select incr.record_id, incr.operation_flag, incr.after_flag, incr.<col1>, incr.<col2>, incr.<colN>
  from <table_log> incr
 where utc_timestamp< <timestamp>
 union all
select 0 as record_id, 'I' as operation_flag, 'Y' as after_flag, base.<col1>, base.<col2>, base.<colN>
  from <table_base> base) t) gt
where row_number=1
  and after_flag='Y'
Replace the following placeholders:
Placeholder Description <result_storage_table>The table that stores the merged data <col1>,<col2>,<colN>The column names of the table to merge <primary_key_column>The primary key column of the table to merge <table_log>The incremental data table name <table_base>The full baseline table name <timestamp>The point-in-time timestamp for the merge The following example retrieves the full
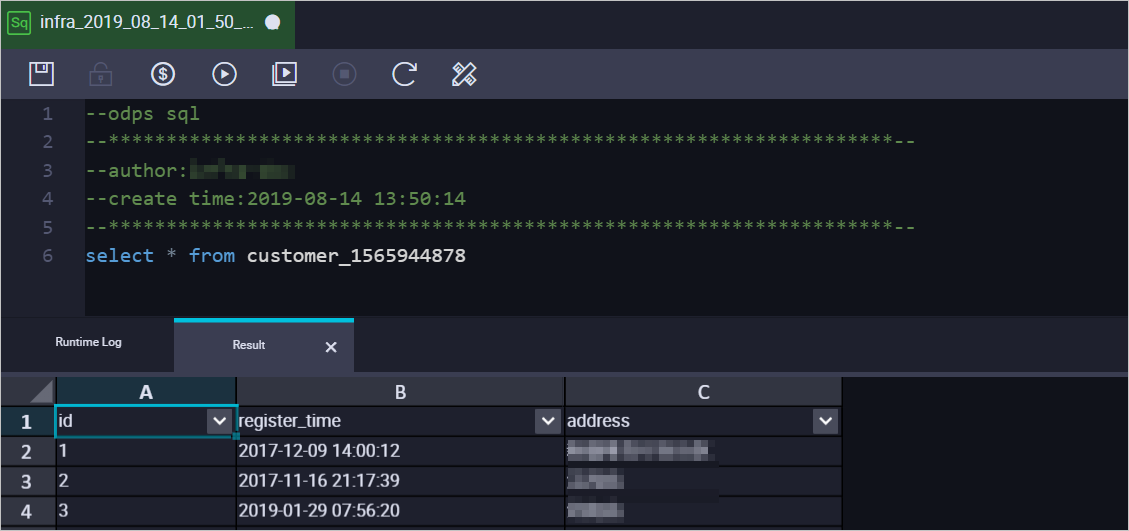
customerdataset at timestamp1565944878:set odps.sql.allow.fullscan=true; insert overwrite table customer_1565944878 select id, register_time, address from( select row_number() over(partition by t.id order by record_id desc, after_flag desc) as row_number, record_id, operation_flag, after_flag, id, register_time, address from( select incr.record_id, incr.operation_flag, incr.after_flag, incr.id, incr.register_time, incr.address from customer_log incr where utc_timestamp< 1565944878 union all select 0 as record_id, 'I' as operation_flag, 'Y' as after_flag, base.id, base.register_time, base.address from customer_base base) t) gt where gt.row_number= 1 and gt.after_flag= 'Y'; -
Query the merged data from
customer_1565944878.