Create an ACK Serverless cluster in the ACK console, deploy an application from an image, expose it through a public endpoint, and view pods.
Prerequisites
Complete the following:
-
ACK is activated and authorized to access Alibaba Cloud services
-
Elastic Container Instance (ECI) is activated
Step 1: Create an ACK Serverless cluster
Only key parameters are covered. See Create an ACK Serverless cluster for all options.
Configure cluster settings
-
Log on to the ACK console. In the left-side navigation pane, click Clusters.
-
On the Clusters page, click Create Kubernetes Cluster.
-
Click the ACK Serverless tab and configure the following parameters.
| Parameter | Description | Example |
|---|---|---|
| Cluster Name | The name of the cluster. | ask-hangzhou |
| Cluster Specification | The cluster edition. Select Pro, recommended for production and test environments. | Standard edition |
| Region | The cluster region. Choose a region close to your users to reduce latency. | China (Hangzhou) |
| VPC | The cluster VPC. Specify a zone to auto-create a VPC, or select an existing one. | Select Existing VPC |
| Configure SNAT for VPC | Allows instances in the VPC to access the internet. When selected, ACK configures SNAT automatically. See the SNAT behavior details below this table. | Configure SNAT for VPC |
| vSwitch | Select an existing vSwitch or click Create vSwitch. For high availability, select vSwitches in different zones. Used by the control plane and default node pool. | vsw-uf6x420ebylcwqclw\*\*\*\*,vsw-uf6qbh0tfvfuco0q7\*\*\*\* |
| Security Group | Options: Create Basic Security Group, Create Advanced Security Group, or Select Existing Security Group. The Select Existing Security Group option is available only when VPC is set to Select Existing VPC. See the security group details below this table. | Create Advanced Security Group |
| Service CIDR | The CIDR block for cluster Services. Cannot be changed after creation. Must not overlap with VPC, cluster, or pod CIDR blocks. See Network planning of an ACK managed cluster. | 172.21.0.0/20 |
| Access to API Server | An internal SLB instance is created by default for the API server. Modify its specification in Specification. Select or clear Expose API Server with EIP. See API server access details below. | Expose API Server with EIP |
SNAT behavior when Configure SNAT for VPC is selected:
-
No NAT Gateway exists: ACK creates one and configures switch-level SNAT rules for all cluster switches.
-
NAT Gateway exists without VPC-level SNAT rules: ACK auto-configures switch-level SNAT rules.
-
VPC-level SNAT rules already exist: No action is taken.
If cleared, create a NAT gateway and configure SNAT rules after cluster creation.
When using VPC sharing, do not select this option.
Security group details:
-
Auto-created security groups allow all outbound traffic. Traffic to
100.64.0.0/10must be allowed — this CIDR is used for Alibaba Cloud service access (image pulling, ECS queries). -
If you select an existing security group, the system does not auto-configure rules. Manually configure security group rules.
API server access details:
-
Expose API Server with EIP selected: An EIP is created and associated with the SLB instance. The API server is exposed on port 6443. Connect to and manage the cluster over the internet with kubeconfig files.
-
Expose API Server with EIP cleared: No EIP is created. Connect to the cluster only within the VPC with kubeconfig files.
If you delete the internal SLB instance, you lose access to the Kubernetes API server.
Configure components
-
Click Next:Component Configurations.
| Parameter | Description | Example |
|---|---|---|
| Service Discovery | Options: Disable, PrivateZone, or CoreDNS. PrivateZone resolves private domain names within VPCs. CoreDNS is the standard Kubernetes DNS server. | Disable |
| Ingress | Options: Do Not Install, Nginx Ingress, ALB Ingress, or MSE Ingress. Nginx Ingress provides Ingress-based routing. ALB Ingress supports complex routing, auto certificate discovery, and HTTP/HTTPS/QUIC. MSE Ingress integrates MSE gateways with ACK. | Do Not Install |
| Monitoring Service | View dashboards and metrics with Managed Service for Prometheus. Optionally install the metrics-server component. | Install metrics-server |
| Log Service | Enable Log Service. Select an existing project or create a new one. | Create Project |
| Knative | Enable Knative for request-based auto scaling, scale-to-zero, version management, and canary releases. | Enable Knative |
Confirm and create
-
Click Next:Confirm.
-
On the Confirm page, read the Term of Service and click Create Cluster.
After creation, find the cluster on the Clusters page. Click Details in the Actions column, then view the Basic Information and Connection Information tabs.
Step 2: Create an application from an image
Only key parameters are covered. See Create a stateless application from an image for all options.
Configure basic information
-
In the left-side navigation pane of the cluster details page, choose Workloads > Deployments.
-
On the Deployments page, click Create from Image.
-
On the Basic Information page, configure the following parameters.
| Parameter | Description | Example |
|---|---|---|
| Name | The name of the application. | serverless-app-deployment |
| Type | The resource type. Valid values: Deployment and StatefulSet. | Deployment |
-
Click Next.
Configure container settings
-
In the General section of the Container page, configure the following parameters.
| Parameter | Description | Example |
|---|---|---|
| Image Name | Click Select Image, or enter a private registry address in the format domainname/namespace/imagename:tag. |
An image from a Container Registry Personal Edition instance in China (Hangzhou). |
| Image Version | Click Select Image Version. Defaults to the latest version if unspecified. | No version specified. |
-
In the Ports section, click Add to configure a container port.
| Parameter | Description | Example |
|---|---|---|
| Name | The name of the container port. | nginx |
| Container Port | The container port to expose. Valid values: 1 to 65535. | 80 |
| Protocol | The protocol. Valid values: TCP and UDP. | TCP |
-
Click Next.
Configure advanced settings
-
In the Access Control section of the Advanced page, click Create next to Services. In the dialog box, configure the following parameters.
| Parameter | Description | Example |
|---|---|---|
| Name | The name of the Service. | serverless-app-svc |
| Type | The Service type. | Select Server Load Balancer. Then select Public Access and Create SLB Instance. Click Modify to change the specification. Default: Small I (slb.s1.small). |
| Port Mapping | The Service port and container port. Container port must match the exposed pod port. | Service port: 8080, Container port: 80 |
The Service appears in the Access Control section. Click Update or Delete to modify it.
-
Click Create.
Access the NGINX application
-
On the Complete page, click View Details. Find serverless-app-deployment on the Deployments page.

-
Access the NGINX application:
-
In the left-side navigation pane of the cluster details page, choose Network > Services. Locate serverless-app-svc.

-
Click the External Endpoint address to access the NGINX application.

-
You can also access services with an ALB Ingress.
Step 3: View the pod
-
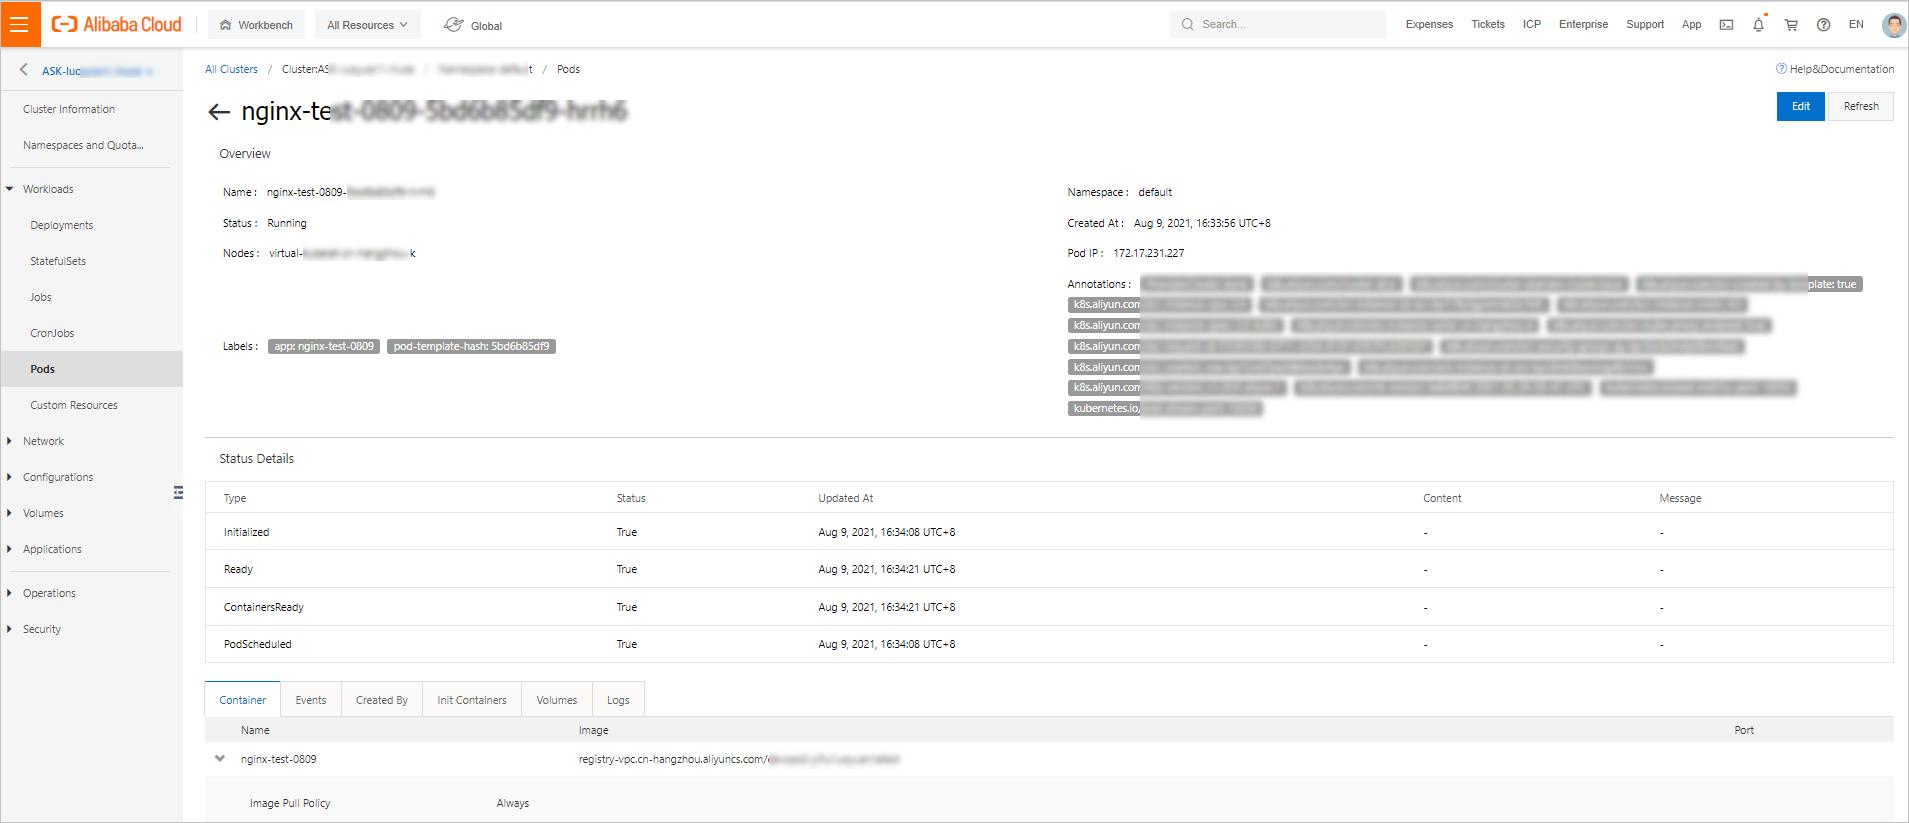
In the left-side navigation pane of the cluster details page, choose Workloads > Pods.
-
Select a pod and click Details in the Actions column.
Manage template-created pods through templates. Do not modify or delete them directly.
-
View the pod details.
Next steps
-
Create a stateless application from an image for advanced Deployment configurations
-
Access Services by using an ALB Ingress for Ingress-based routing
-
Create an ACK Serverless cluster for a comprehensive reference of all cluster parameters