Stateless workloads do not persist data or state—for example, Nginx. You can create a stateless application from an image, template, or CLI. When using a private image, configure an image pull Secret in the ACK console for security. This topic explains how to create a stateless application from an image in the console on an ACK Serverless cluster.
Prerequisites
Ensure the following:
-
An ACK Serverless cluster is created.
Step 1: Configure basic settings
-
Log on to the ACK console. In the left-side navigation pane, click Clusters.
-
On the Clusters page, click the target cluster. In the left-side navigation pane, choose Workloads > Deployments.
-
On the Deployments page, click Create from Image.
-
On the Basic Information page, select a namespace. This example uses the default namespace.
-
Configure the basic settings.
Parameter Description Name Enter a name for the application. Replicas Specify the number of pods to provision. Type Select the resource type: Deployment, StatefulSet, Job, or CronJob. Label Add labels to identify the application. Annotations Add annotations to the application. -
Click Next.
Step 2: Configure the container
In the Container step, configure the container image, compute resources, ports, environment variables, health checks, lifecycle, and volumes.
Click Add Container to add more containers.
Configure the image
In the General section, configure the following settings:
| Parameter | Description |
|---|---|
| Image Name | Select or enter a container image. See Choose an image source below. |
| Required Resources | Reserve CPU and memory for the container. Prevents disruption from resource contention and is required for HPA. |
| Container Start Parameter | stdin: passes input from the ACK console to the container. tty: allocates a pseudo-TTY so the container uses the console as standard input.: passes start parameters from a virtual terminal to the ACK console. |
| Init Containers | Create an init container for pod initialization. See Init containers. |
Choose an image source
Click Select images. Sources:
-
Container Registry Enterprise Edition: images in a Container Registry Enterprise Edition instance. Select the region and instance. No Secret required.
-
Container Registry Personal Edition: images stored in a Container Registry Personal Edition instance. Select the region and instance.
-
Artifact Center: base OS images, base language images, and AI/big data images maintained by Alibaba Cloud and OpenAnolis. This example uses an NGINX image. See Overview of the artifact center.
For questions or image requests, join DingTalk group 33605007047.
-
Private registry: enter the image address in the format
domainname/namespace/imagename:tag.
Image pull policy
| Policy | Behavior |
|---|---|
| IfNotPresent | Use a locally cached image if available; pull from the registry otherwise. |
| Always | Pull from the registry every time the application deploys or scales. |
| Never | Use only locally cached images; never pull from the registry. |
If none is selected, no pull policy is applied.
Set Image Pull Secret
To pull images from a private registry (such as Container Registry Personal Edition), click Set Image Pull Secret and select a Secret. See Manage Secrets. No Secret is required for Container Registry Enterprise Edition.
Configure ports
In the Ports section, click Add.
| Field | Description |
|---|---|
| Name | Enter a name for the port. |
| Container Port | Enter a port number (1–65535). |
| Protocol | Select TCP or UDP. |
Configure environment variables
In the Environments section, click Add to configure environment variables.
To use ConfigMaps or Secrets as environment variable sources, create them first. See Manage ConfigMaps and Manage Secrets.
Set Type to one of: Custom, ConfigMaps, Secrets, Value/ValueFrom, or ResourceFieldRef. Selecting ConfigMaps or Secrets passes all data in the selected resource to the container as environment variables.
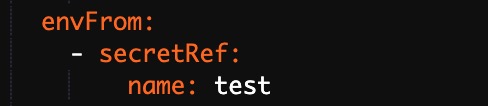
This example uses Secrets: select Secrets from the Type list, then select a Secret from Value/ValueFrom. All data in the selected Secret is passed as environment variables.
Configure health checks
In the Health Check section, enable probes as needed:
| Probe | Purpose | When to use |
|---|---|---|
| Liveness | Detects whether the container is running correctly; restarts it if not. | Always configure for long-running containers. |
| Readiness | Determines whether the container is ready for traffic. | Use when the app needs warm-up time before serving requests. |
| Startup | Checks whether the application has started; disables other probes until it succeeds. | Use for applications with long initialization time. |
Startup probes require Kubernetes 1.18 or later.
Each probe supports the following request types:
HTTP — sends an HTTP request to check container health.
| Parameter | Description | Default |
|---|---|---|
| Protocol | HTTP or HTTPS. | — |
| Path | HTTP path on the server. | — |
| Port | Port number or name exposed by the container (1–65535). | — |
| HTTP Header | Custom headers in key-value pairs; duplicates allowed. | — |
| Initial Delay (s) | Seconds to wait after container start before the first probe (initialDelaySeconds). |
Liveness: 3; TCP: 15; Command: 5 |
| Period (s) | Interval between probes (periodSeconds); minimum 1. Lower values detect failures faster but increase probe overhead. |
10 |
| Timeout (s) | Time before a probe times out (timeoutSeconds); minimum 1. |
1 |
| Healthy Threshold | Consecutive successes required to consider the container healthy. Must be 1 for liveness probes. | 1 |
| Unhealthy Threshold | Consecutive failures required to consider the container unhealthy. Higher values tolerate transient failures; lower values trigger restarts sooner. | 3 |
TCP — opens a TCP socket to check container health. Same parameters as HTTP except Protocol, Path, and HTTP Header.
Command — runs a command inside the container to check health. Supports Command, Initial Delay, Period, Timeout, Healthy Threshold, and Unhealthy Threshold.
Configure the lifecycle
In the Lifecycle section, configure lifecycle hooks:
-
Start: runs before the container starts.
-
Post Start: runs after the container starts.
-
Pre Stop: runs before the container stops.
Configure volumes
In the Volume section, add storage volumes:
-
On-premises storage volume
-
PVC (PersistentVolumeClaim)
-
NAS (File Storage NAS)
-
Disk
See Use a statically provisioned disk volume, Use a dynamically provisioned disk volume, and Mount a statically provisioned NAS volume.
Configure log collection
In the Log section, configure log collection. See Create an application from an image and configure Simple Log Service to collect application logs.
Click Next.
Step 3: Configure advanced settings
In the Advanced step, configure access control, scaling, labels, and annotations.
Configure access control
In the Access Control section, choose how to expose the application's pods.
Internal applications: create a ClusterIP or NodePort Service for intra-cluster communication.
External applications: expose the application to the internet:
-
LoadBalancer Service: set the Service type to Server Load Balancer. Select or create an SLB instance to route external traffic.
-
Ingress: use an Ingress resource to route HTTP/HTTPS traffic to the Service. See Ingress.
This example creates a ClusterIP Service and an Ingress to expose an NGINX application.
Create a Service
Click Create next to Services and configure the following parameters:
| Parameter | Description |
|---|---|
| Name | Enter a name for the Service. This example uses nginx-svc. |
| Type | This example uses Cluster IP.Server Load Balancer. Options: Cluster IP, Server Load Balancer, Node Port. |
| Port Mapping | Map a Service port to a container port. This example uses Service Port 80 and Container Port 80. |
| External Traffic Policy | Local: routes traffic only to the node where the Service runs. Cluster: routes traffic to pods on any node. Applies to NodePort and Server Load Balancer types only. |
| Annotations | Add SLB configuration annotations. For example, service.beta.kubernetes.io/alicloud-loadbalancer-bandwidth:20 limits bandwidth to 20 Mbit/s. See Use annotations to configure CLB instances. |
| Label | Add labels to identify the Service. |
When using SLB instances:
Listeners on an existing SLB instance overwrite the Service's listeners.
An SLB instance created with a Service cannot be reused by other Services. Only SLB instances created manually in the console or via API can be shared.
Services sharing the same SLB instance must use different frontend ports to avoid conflicts.
Do not modify listener names or vServer group names on shared SLB instances, as ACK uses them as unique identifiers.
SLB instances cannot be shared across clusters.
Create an Ingress
Click Create next to Ingresses and configure the following parameters:
| Parameter | Description |
|---|---|
| Name | Enter a name for the Ingress. This example uses nginx-ingress. |
| Rule | Define routing rules: Domain (this example uses the test domain foo.bar.com), Path (default /), Services (select nginx-svc), and EnableTLS. |
| Weight | Set the traffic weight for each Service in the path. Default: 100. |
| Canary Release | Enable canary release. Recommended: Open Source Solution. |
| Ingress Class | Specify the Ingress class. |
| Annotations | Add Ingress annotations. See Annotations. |
| Labels | Add labels to describe the Ingress. |
Each Service can have only one Ingress. This example uses a virtual host name as a test domain. Add the Ingress IP to your hosts file. To find it, go to the application details page > Access Method tab > External Endpoint column. In production, use a domain with an ICP filing.
101.37.xx.xx foo.bar.com # Replace with the actual Ingress IP addressAfter creating the Service and Ingress, they appear in the Access Control section. Click Update or Delete to modify them.
Configure auto scaling
In the Scaling section, configure Horizontal Pod Autoscaler (HPA) or CronHPA.
HPA requires Required Resources to be configured in Step 2.
HPA automatically scales pods based on CPU or memory usage:
| Parameter | Description |
|---|---|
| Metric | Select CPU Usage or Memory Usage. Must match the resource type configured in Required Resources. |
| Condition | Usage threshold that triggers scale-out. For example, 70% CPU means HPA adds pods when average usage exceeds 70%. |
| Max. Replicas | Maximum number of pods the application can scale to. |
| Min. Replicas | Minimum number of pods that must always run. |
CronHPA is also supported for scheduling-based scaling.
Add labels and annotations
In the Labels,Annotations section, click Add.
-
Pod Labels: labels to identify the pod.
-
Pod Annotations: annotations for the pod.
Click Create.
Step 4: Verify the deployment
Verify that the Deployment, Service, and application are running correctly.
Check the Deployment
In the Complete step, click View Details. On the Deployments page, confirm that the application named serverless-app-svc appears.

Check the Service
In the left-side navigation pane, choose Network > Services. Confirm that the Service named serverless-app-svc appears in the list.

Access the application
Open the external endpoint or domain name in a browser to visit the NGINX welcome page.

-
The Service type must be Server Load Balancer for browser access.
-
If using
foo.bar.com, add the Ingress IP to your hosts file as described in Create an Ingress.