This topic describes how to use ApsaraVideo Live for live streaming.
Before you start
Read the following topics to learn the basics of ApsaraVideo Live:
Preparations
Activate ApsaraVideo Live and top up your account.
ApsaraVideo Live supports two billing methods: pay-as-you-go and resource plans. Make sure that your account has sufficient balance to cover the fees.
For your reference, if the traffic generated during a test does not exceed 10 GB, the estimated pay-as-you-go fee is as low as USD 0.42, excluding costs for domain name registration, SSL certificates, and ICP filing.
We recommend using the pay-as-yo method for tutorial and testing.
The actual fees may vary by region and billing method. The bills displayed in the console shall prevail.
Procedure

Add ingest and streaming domains: ApsaraVideo Live implements live streaming based on domain names. This guide shows how to prepare domain names in the console.
Add CNAME records to enable acceleration: This step binds your domain name to an accelerated domain name assigned by Alibaba Cloud to ensure fast and stable live content delivery.
Associate ingest and streaming domains: ApsaraVideo Live uses edge ingest to ingest live streams to the optimal points of presence (POPs). Therefore, you must associate a streaming domain with an ingest domain.
Generate ingest and streaming URLs: An ingest URL is the endpoint to which a stream is pushed. A streaming URL is the endpoint to play the stream. This guide shows how to generate URLs using the tool in the console.
Ingest and play a stream: This guide shows how to use the demo application of Push SDK to ingest a stream and VLC media player to play it.
Step 1: Add ingest and streaming domains
To use ApsaraVideo Live, you must add an ingest domain and a streaming domain. The two cannot be the same, but can be different subdomains of a primary one.
For example, you can use a.test.com as the ingest domain and b.test.com as the streaming domain.
Add domain names:
Prepare domain names.
If you do not have one, register one with Alibaba Cloud Domain Names.
To provide services in the Chinese mainland, you must apply for an Internet Content Provider (ICP) number for your domain name.
NoteTo try the basic features, select a live center in a region outside the Chinese mainland and set the acceleration region to Outside Chinese Mainland. This eliminates the need for ICP filing.
If the ingest and streaming domains are subdomains, ICP filling is required only for the primary one.
Log on to the ApsaraVideo Live console.
In the left-side navigation pane, click Domain Names. The Domain Management page appears.
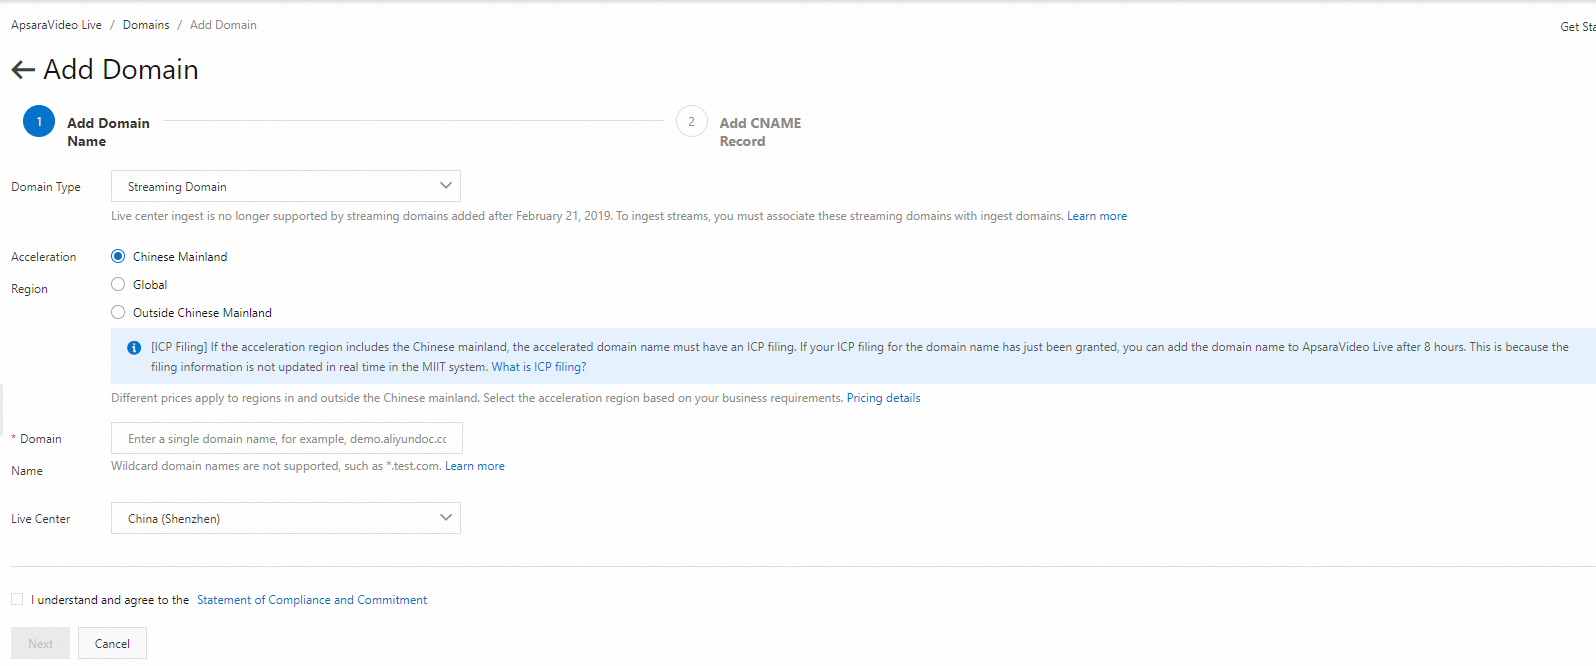
Click Add Domain.
To add a subdomain, append a prefix to the domain name you have registered. The subdomain does not require separate registration. Ensure you can differentiate between the ingest and streaming subdomains.
In the Add Domain Name step, configure parameters as needed.
ImportantWhen you add a domain name for the first time, ApsaraVideo Live verifies its ownership.
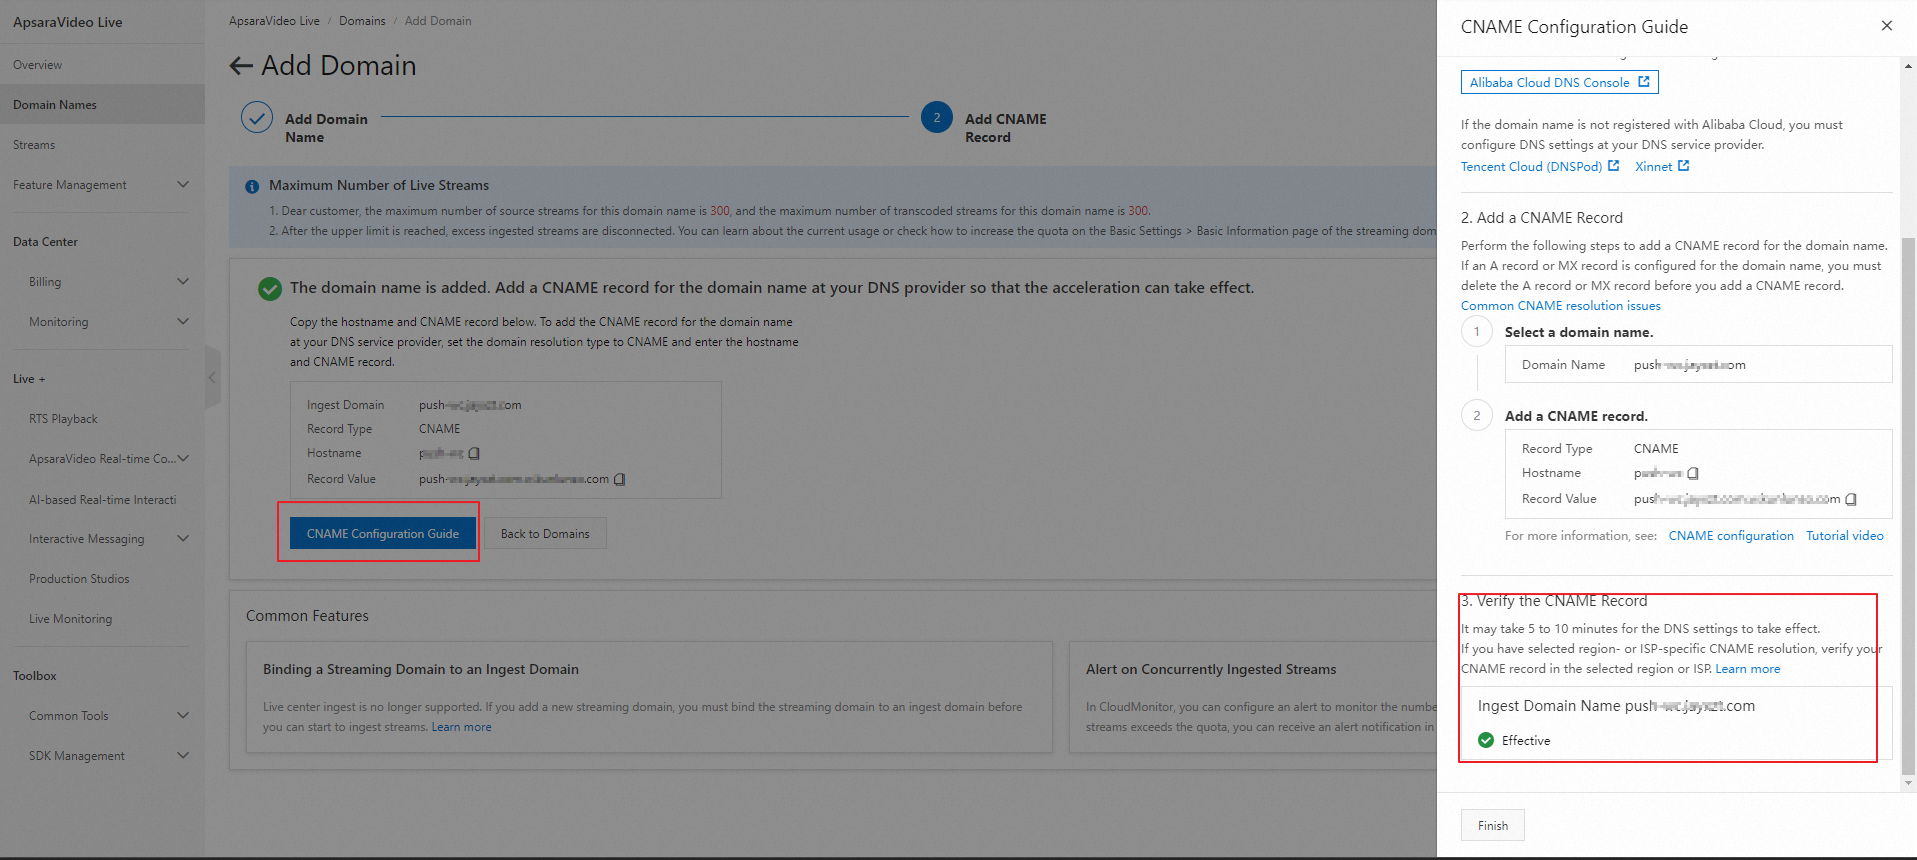
Note down the generated CNAME record for use in the next step.
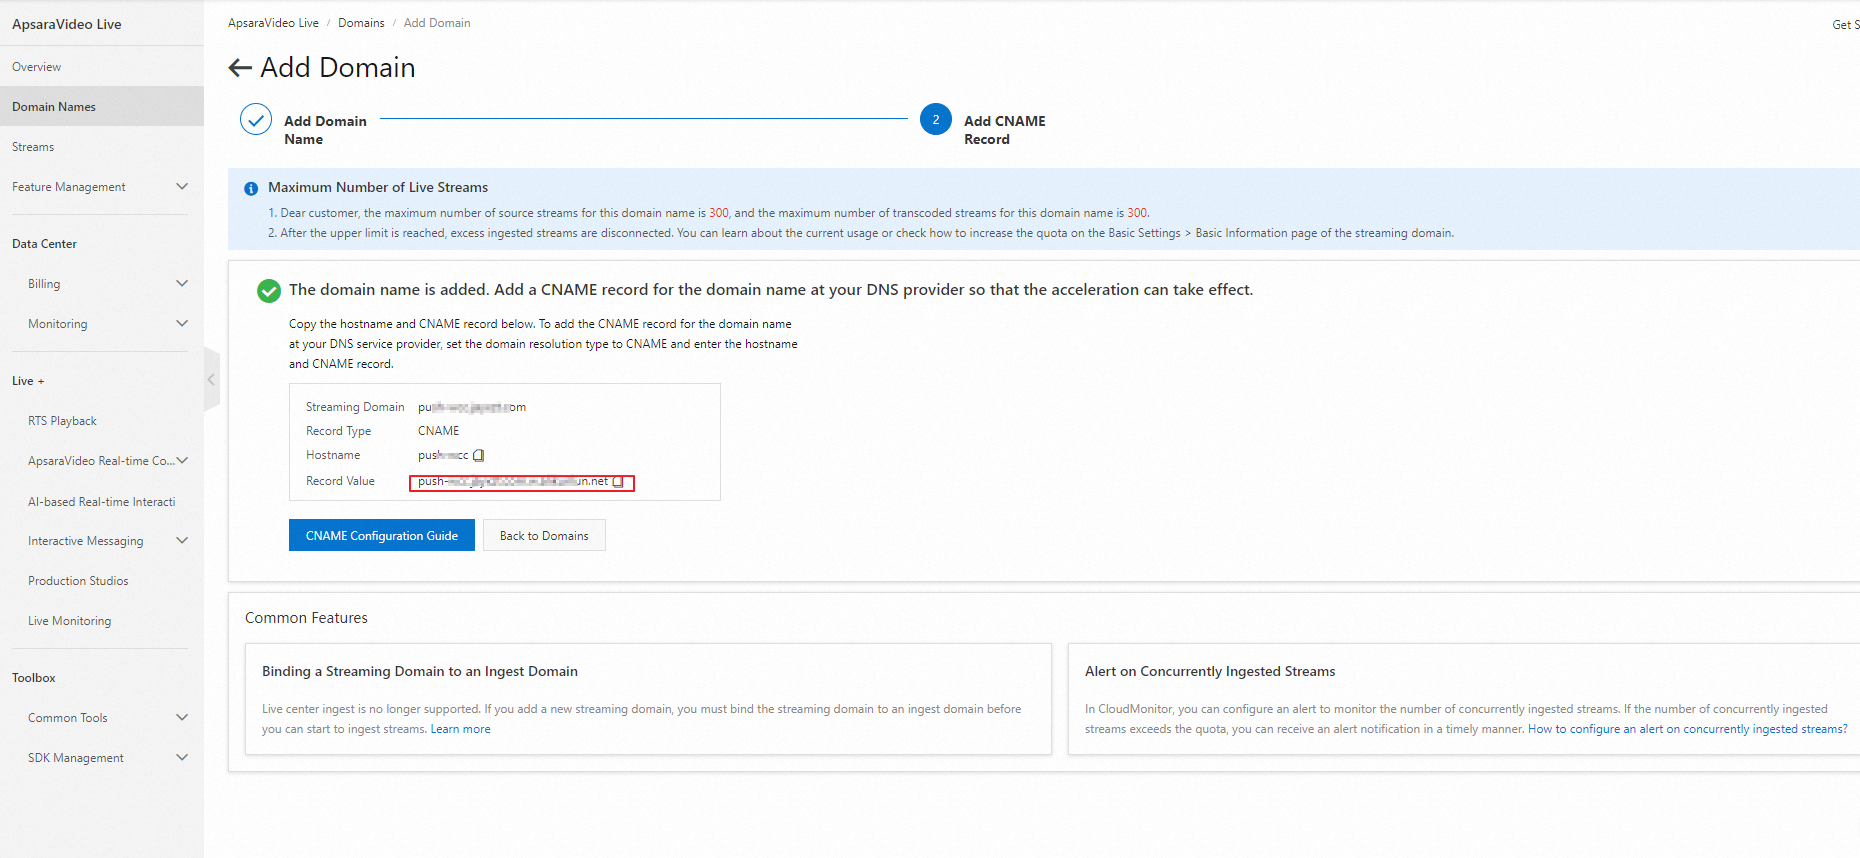
Step 2: Add CNAME records to enable acceleration
To accelerate content delivery in ApsaraVideo Live, add the CNAME record at your DNS provider to map your domain name to the CNAME assigned by ApsaraVideo Live. The following example shows how to add a CNAME record when your DNS provider is Alibaba Cloud.
The server that Alibaba Cloud CDN uses to resolve the CNAME is deployed in the Chinese mainland. If you configure region-specific DNS settings for your domain name, for example, you add a CNAME record in regions outside the Chinese mainland, including Hong Kong (China), Macao (China), and Taiwan (China), the domain name cannot be mapped to the CNAME. The status of the CNAME is Pending Configuration in the Alibaba Cloud CDN console. However, CDN acceleration for the domain name is not affected.
CNAMEs assigned by Alibaba Cloud CDN, DCDN, ApsaraVideo Live, and ApsaraVideo VOD can be used only for domain name resolution. If Alibaba Cloud detects that your CNAME is used for unauthorized or malicious activities, Alibaba Cloud reserves the right to close your Alibaba Cloud account and remove the domain names.
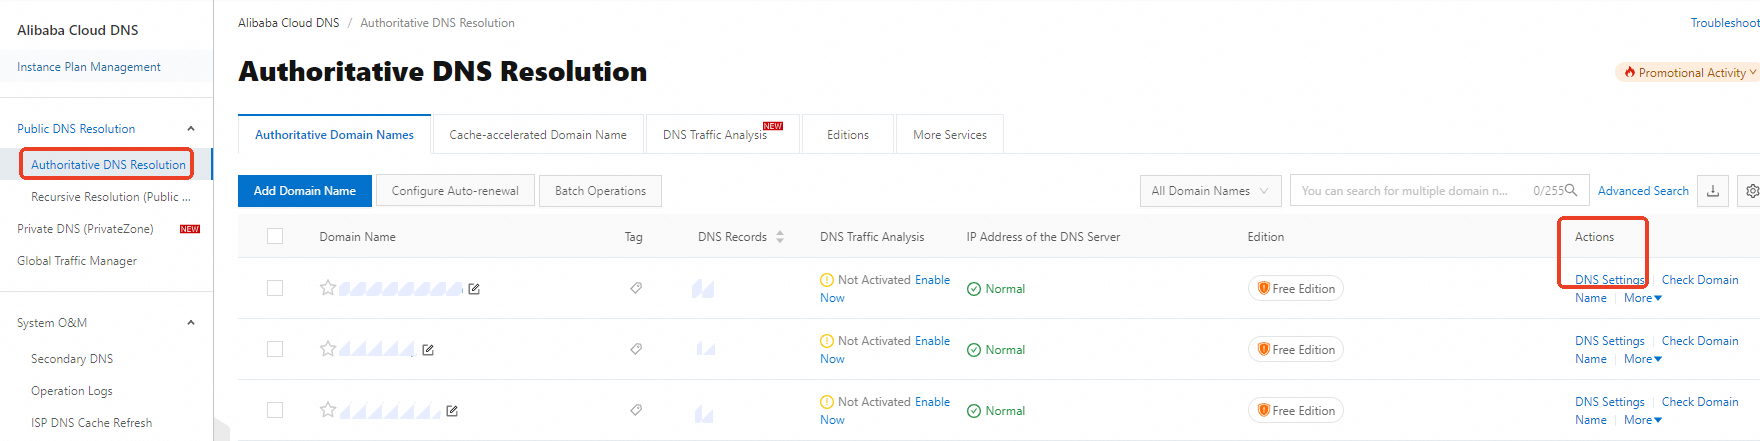
Log on to the Alibaba Cloud DNS console.
In the left-side navigation pane, click Authoritative DNS Resolution.
Find the domain name you want to manage and click DNS Settings in the Actions column.
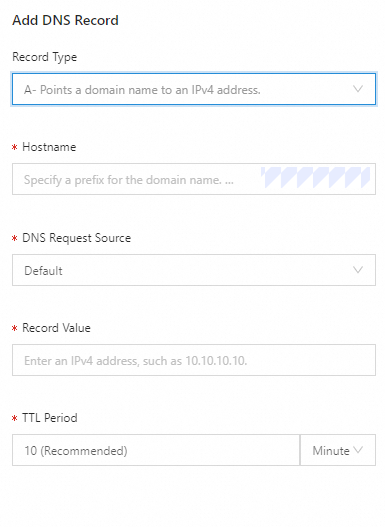
Click Add DNS Record and configure the following information:
Parameter
Description
Record Type
Select CNAME from the drop-down list.
Hostname
Specify a prefix for the domain name. For common prefixes, see the following table.
DNS Request Source
Use the default value.
Record Value
Enter the CNAME that you obtained.
TTL Period
Use the default value.
Prefix
Example
Description
demo
demo.aliyundoc.com
The subdomain name.
@
aliyundoc.com
The root domain name.
*
*.aliyundoc.com
The wildcard domain name.
Click OK.
Check whether a CNAME record takes effect
Method 1: Click CNAME Configuration Guide. In the right-side panel, click Verify in the Verify the CNAME record section.
Method 2: Run the nslookup -type=cname yourdomain.com command. If the returned result is consistent with the CNAME value of the domain name in the ApsaraVideo Live console, the CNAME configuration takes effect.

(Optional) Configure SSL certificates
For security reasons, if you want to play a stream in a native browser, you must configure Secure Sockets Layer (SSL) certificates for the ingest and streaming domains. For more information, see Configure HTTPS secure acceleration.
Step 3: Associate the streaming domain with the ingest domain
ApsaraVideo Live uses the edge ingest method. To ingest and play streams, you must associate the streaming domain with the ingest domain.
In the left-side navigation pane, click Domain Names. On the page that appears, find the streaming domain that you added and click Domain Settings in the Actions column. You are directed to .
Click the Stream Ingest Information tab.
Click Add Stream Ingest Information or the Edit icon next to Ingest Domain and select the ingest domain that you want to associate.
Step 4: Generate ingest and streaming URLs
URLs are used to ingest and play streams. You can use the live URL generator in the console to generate them.
Log on to the ApsaraVideo Live console.
In the left-side navigation pane, choose .
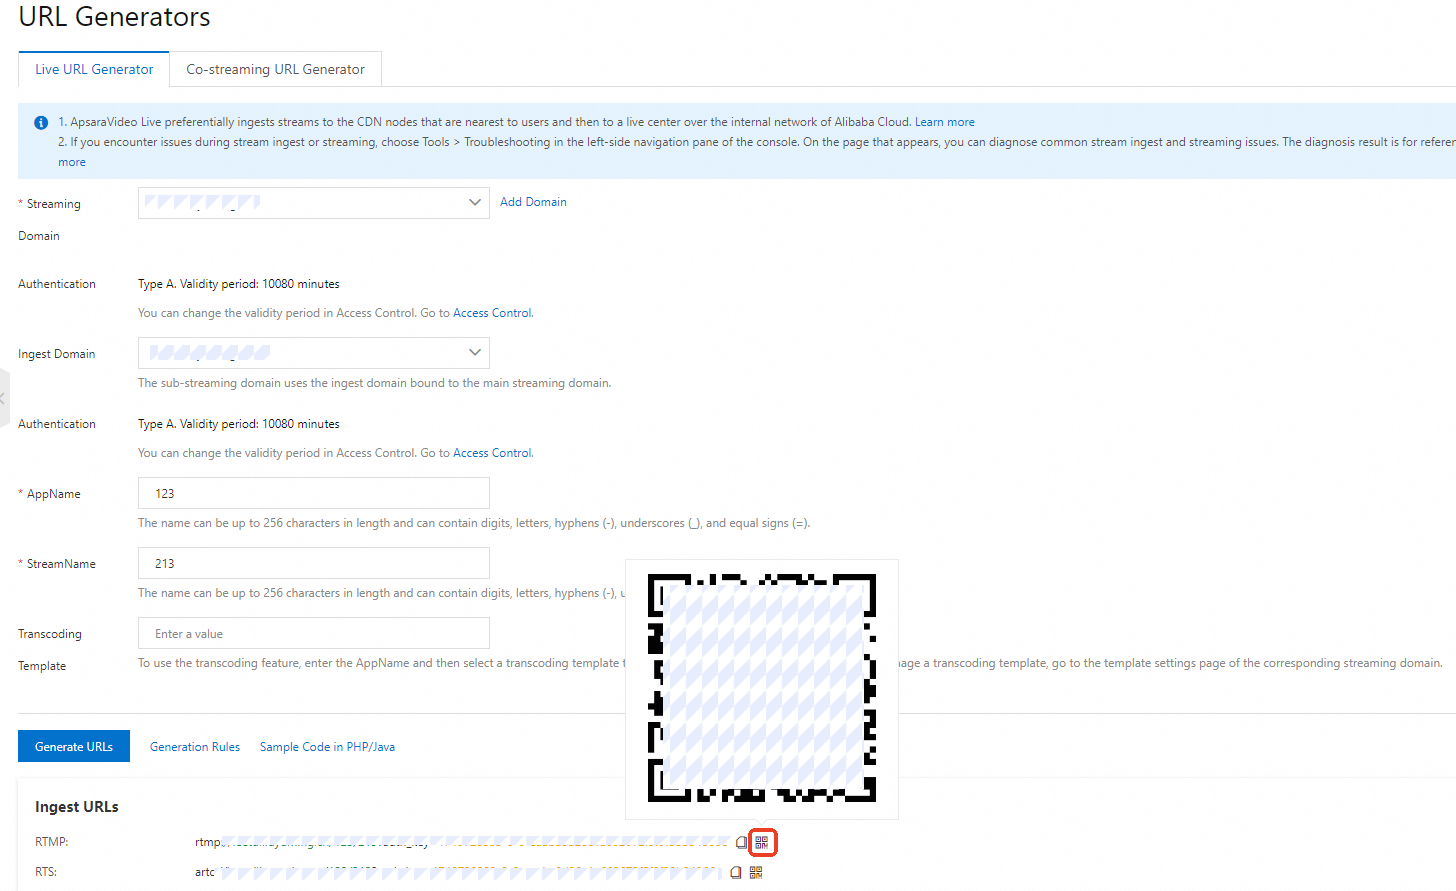
On the Live URL Generator tab, configure the parameters.
Parameter
Description
Streaming Domain
Select the streaming domain added in Step 1.
Authentication
The authentication type and validity period are displayed after you select the streaming domain.
By default, type A signing is used, which is based on the timestamp and signature.
To modify validity period, see Configure URL signing.
Ingest Domain
If you have associated domains, the associated ingest domain is displayed. Otherwise, you must associate them first.
If you do not need ingest URLs, you can leave it empty.
AppName
A unique identifier for distinguishing live streaming applications or business scenarios.
StreamName
The unique name of the stream.
Transcoding Template
Select a transcoding template. If you leave this parameter empty, the URL for the original quality stream is generated.
The system displays transcoding templates that match the specified AppName.
Click Generate URLs.
Copy the generated URLs or scan the QR codes to use them.
To learn about how URLs are constructed, see Generate ingest and streaming URLs.
Step 5: Ingest and play a stream
If exceptions occur during the ingest and playback process, you can use the troubleshooting tool in the console to diagnose common issues and get suggestions. For more information, see Troubleshooting.
Ingest a live stream
Live stream ingest is the process of delivering the collected audio and video streams to a live center of ApsaraVideo Live. Below is an example on how to ingest a stream by using the demo application of Push SDK.
Scan the QR code on your mobile device and install the demo application.
 Note
NoteOn an iOS device, you may receive a message indicating that the demo is from an untrusted enterprise developer. Go to , find the permissions required by Taobao, and tap Trust.
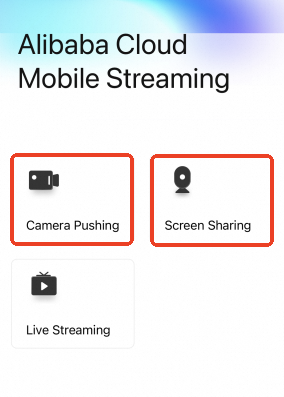
Open the application.
Choose Camera Pushing or Screen Sharing.
 Note
NoteWhen using a mobile device to ingest local video streams, only the original YUV format of the video is supported.
Scan the QR code generated in Step 4 to automatically fill in the ingest URL. For example,
rtmp://demo.aliyundoc.com/app/stream?auth_key=**********-0-0-9c6e7c8190c10bdfb3c0************. Configure other parameters as needed.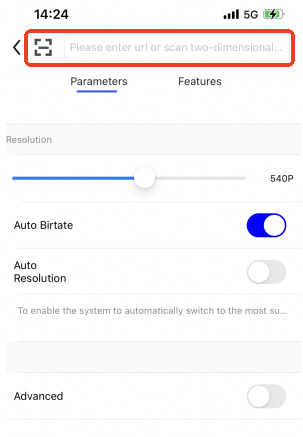
Click Start to ingest the stream.
Go to Streams to view and manage your ingested streams.
For other ingest methods, see Live stream ingest.
Play a live stream
Live stream playback is the process of delivering a live stream from a live center of ApsaraVideo Live to a player. The following steps provide an example on how to play a stream by using VLC media player.
Download and install VLC media player. Download link: VLC media player.
Run VLC media player.
In the menu bar, choose .
On the Network tab, enter a streaming URL. Example:
rtmp://example.aliyundoc.com/app/stream?auth_key=1543300311-0-0-d47ce016332bf280cf275********.Click Play.
If stream ingest is interrupted, the playback will fail.
For other playback methods, see Live stream playback.
References
To learn more about the features of ApsaraVideo Live, see Feature overview.
To learn how to add CNAME records at other DNS providers, see Add a CNAME record.