By Sunny Jovita, Solution Architect Intern
A blockchain network is a consortium consisting of multiple organizations. There are 2 types of mode in building blockchain environment:
In this blockchain tutorial, I will build a standard mode blockchain environment. This mode will allow user to create all the operations manually. Starting from creating the organizations until managing the blockchain network.

Image source: http://docs-aliyun.cn-hangzhou.oss.aliyun-inc.com/assets/pic/85734/intl_en/1536318054417/process.png
To build a standard mode blockchain environment, there are 4 steps to do:
There are 3 editions of BaaS (starter, basic, enterprise). In this tutorial, we are going to use the starter edition, which the consortium will automatically make the organizations itself. So, we can skip the step number 1 (creating the organizations).
a) Log in to the Alibaba Cloud BaaS console
b) On the overview page, click Create Consortium
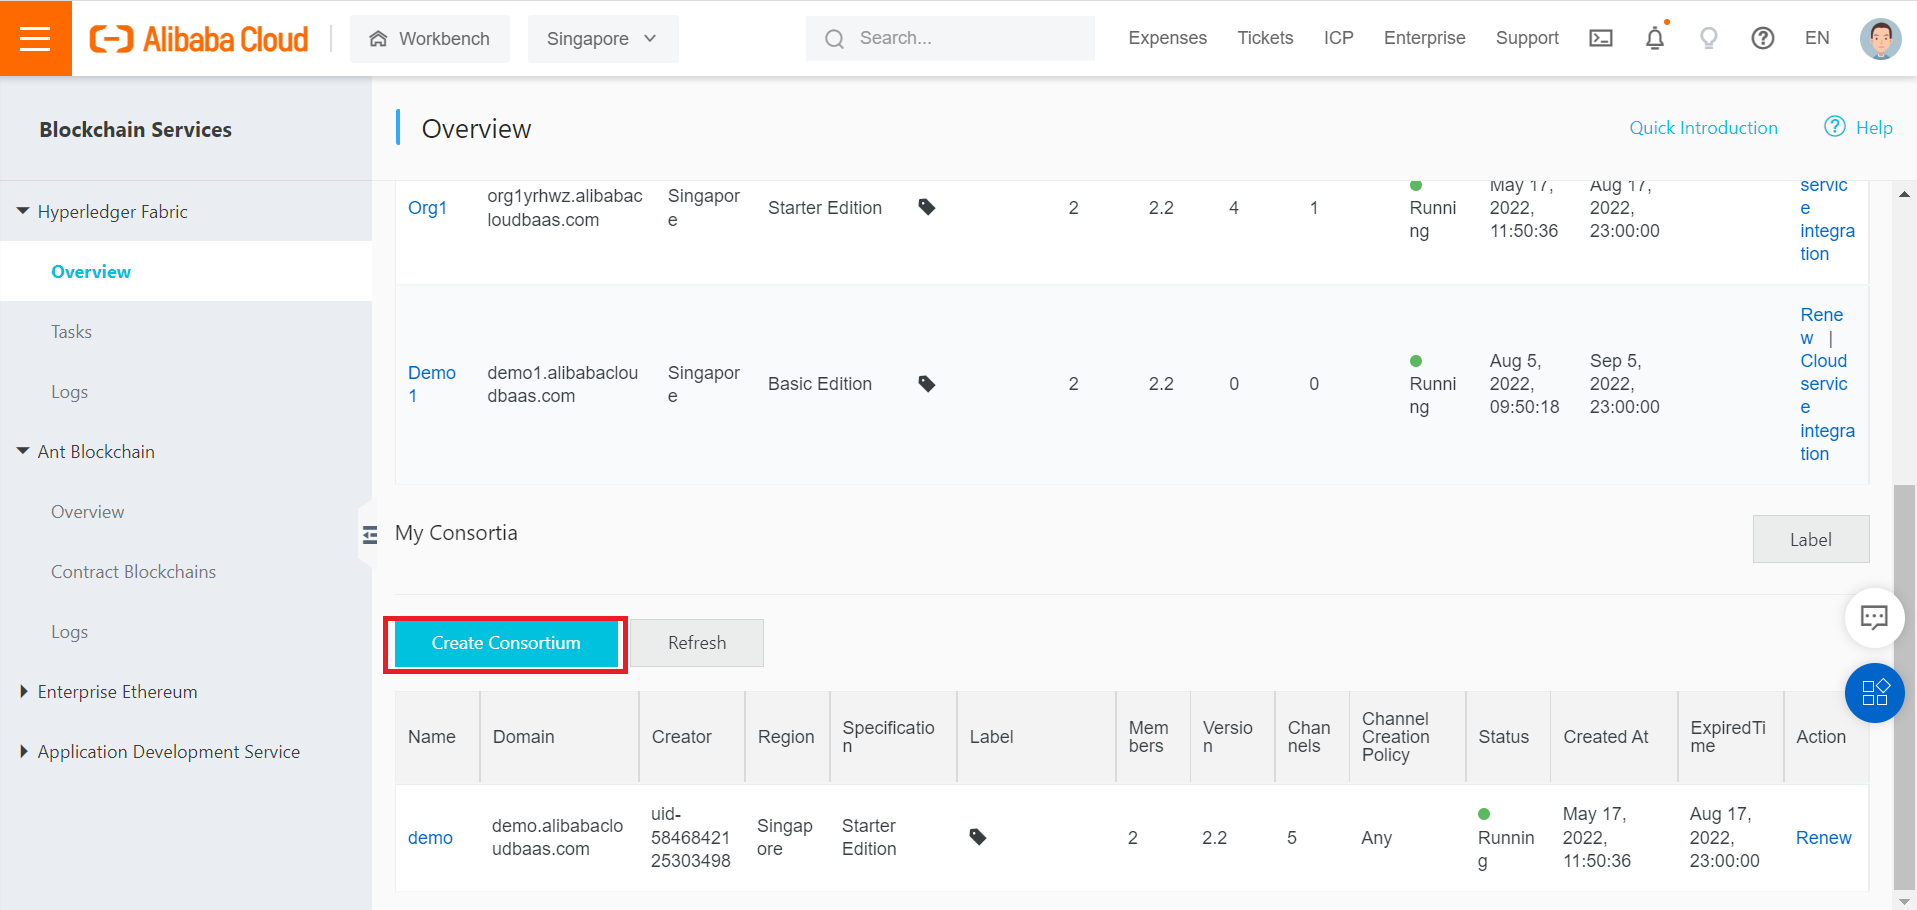
Link: https://baas.console.aliyun.com
c) Select your region (if your region is not available, select the nearest region), choose Consortium Instance Type and Starter Edition, specify the Organization Name (ex: Demo2), Organization DomainName (ex: Demo2), and Duration.
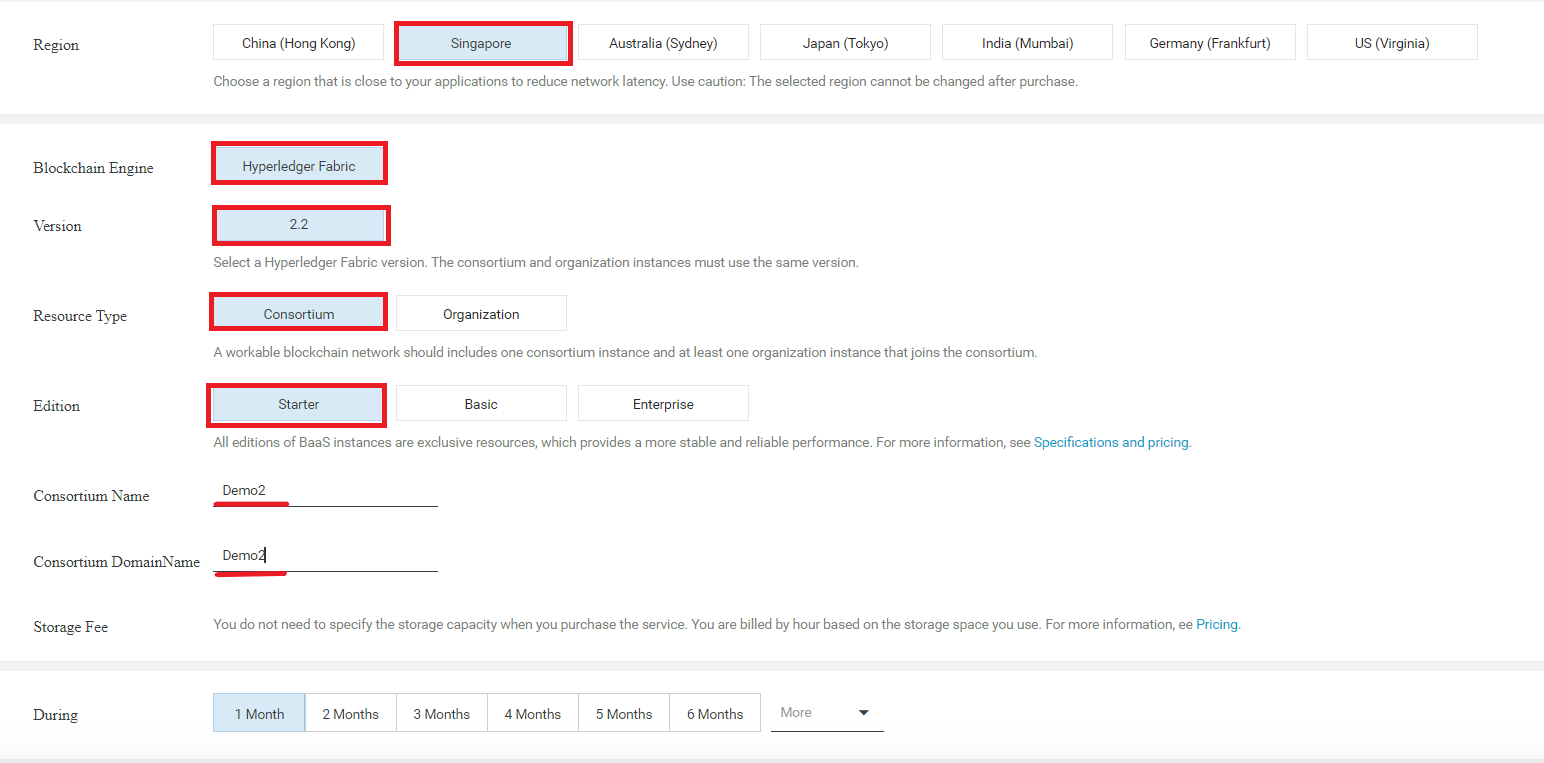
d) Click the Buy Now button and continue the transaction process.
e) Go back to the Overview page.
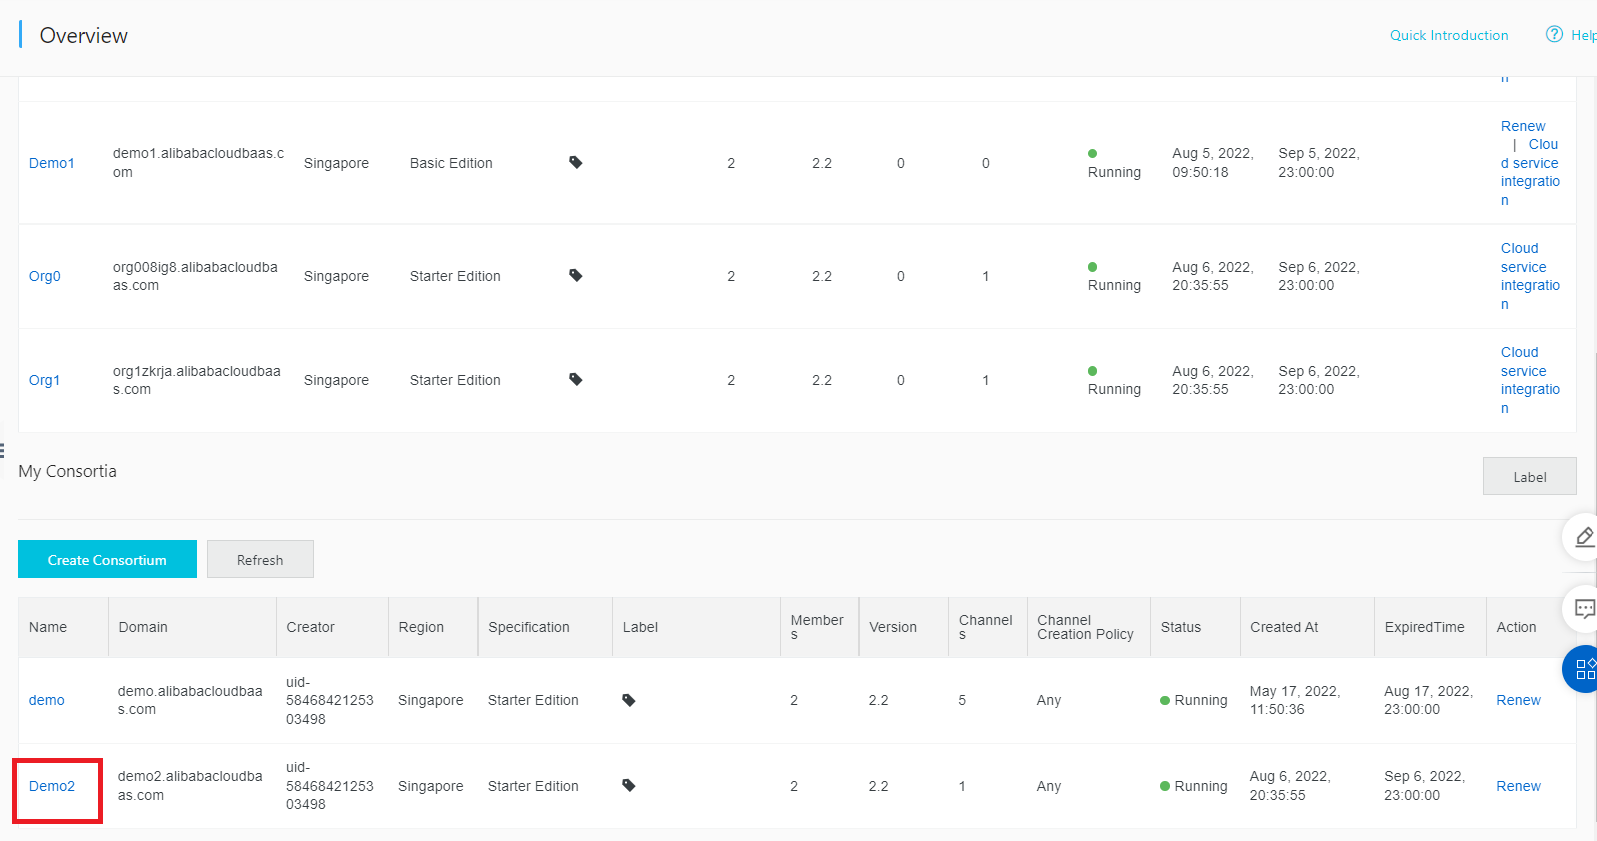
f) You will see the Consortium resource you have been created. It may take several minutes to run the resource.
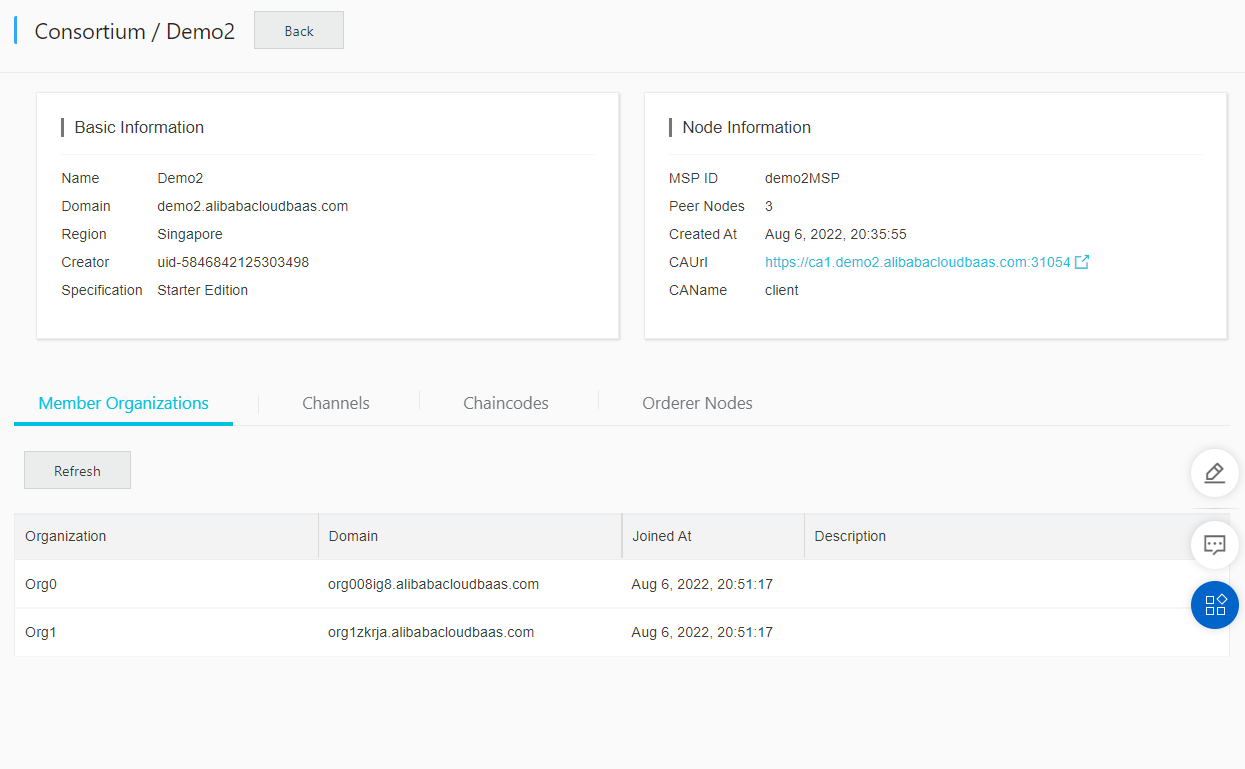
g) Click the name of the consortium blockchain to view the details. (in here I choose demo2)

h) The details are shown in the following figures, including the Member Organizations, Channels, Chaincodes, and Orderer Nodes tabs.
This section is not mandatory to be followed. When user creates a consortium, it will automatically create organizations (by default namely org0 and org1). But in case you want to add another organization to join a consortium, your consortium has to be in Basic Edition or Enterprise Edition (not Starter Edition). For Starter edition, it will automatically made you organizations. Click this link https://www.alibabacloud.com/help/en/blockchain-as-a-service/latest/invite-organizations-to-join-a-consortium#topic-2137017 to invite organizations to join consortium.
Channels are used to isolate the businesses in the blockchain network. One consortium can have multiple channels. Each channel represents a business and has its own ledger. Members in a channel are participants (organization in a consortium). An organization can join multiple channels.
1. Log in to the Alibaba Cloud BaaS console.
2. Locate the target consortium and click the name of the consortium
3. Click the Channels tab
4. Click Add Channels.

5. Enter the name of the channel, select the organizations to join the channel. (if the target of organization is not found, you need to invite the organization to join the consortium first).
6. Click submit.
Once submitted, the system will invite the organization to join the channel and the channel can only add the organization after obtaining consent/permission from the organization.
In the Hyperledger Fabric Network, chaincodes are the smart contracts that run on the peers and create transactions. Smart contracts are the digitized business logic used to help you exchange any asset of value (money, real estate, retail products, etc). By using smart contracts, it will automatically execute transactions and record information into the ledger. Hyperledger Fabric offers a number of APIs to support developing smart contracts (chaincode) and supports SDK for developing application in Node.js, Java, and Go programming languages. In this tutorial, we are going to use Go contract API and Node.js for the SDK.
Before deploying chaincodes, install Ubuntu first. (We use Ubuntu WSL here for example).
1. Install WSL
a) Open Windows Powershell administrator
b) Install WSL
wsl --installc) Wait the process to complete
2. Install Ubuntu
a) Open Microsoft Store
b) Search for Ubuntu and download the Ubuntu version that you prefer.
c) Ubuntu will install on your machine
d) Restart your machine
e) Ubuntu is ready running on your machine
3. Configure Ubuntu
a) Create username
b) Create password
c) Update and upgrade
sudo apt-get updatesudo apt-get upgrade4. Install Curl and the Golang software package
a) Install Curl
sudo apt-get install curlb) Install Golang
sudo apt-get install golang5. GO wont be available directly. Add the GO Path in the bin file
a) Open the bin file
vim ~/.bashrcb) edit the vim file and input these paths
export PATH=$PATH:/usr/local/go/bin:/home/root/.go/binexport GOPATH=/home/root/goexport GOROOT=/usr/local/goexport PATH=$PATH:/$GOPATH/bin
c) save the vim file
6. Install Node.js
sudo apt-get install nodejs7. install npm
sudo apt-get install npmDocker installation
1. install and upgrade docker and docker-composer
2. Install docker compose
sudo apt-get install docker-compose3. Update Node.js and Golang for the proper versions:
a) Download the file
wget https://go.dev/dl/go1.19.linux-amd64.tar.gzb) Extract the tar file
tar -xzvf go1.19.linux-amd64.tar.gzc) Download the Nodejs
curl -sL https://deb.nodesource.com/setup_16.x | sudo bash -sudo apt-get install -y nodejs4. verify version
a) curl --version
b) npm -v
c) docker version
d) docker-compose version
e) go version
f) node -v
Chaincode is a program written in Go, node.js, or Java that implements a prescribed interface. Chaincode runs in a secured Docker container. This tutorial applies to users who used BaaS instances of Fabric 2.2 (you can see the version in the BaaS overview page ).

Every chaincode program must implement the chaincode interface:
1. Install fabric samples, binaries, and docker images
while we work on developing real installers for the Hyperledger Fabric binaries, this command will download and install fabric samples (chaincode packages) to your system.
curl -sSL https://bit.ly/2ysbOFE | bash -sNote: if you get an error running the above curl command, you may have too old curl version that does not handle redirects or an unsupported environment. Follow these steps:
a) Check your docker version (docker –version)
b) Become a root
c) Make sure the docker daemon is running (sudo systemctl start docker OR sudo service docker start)
2. Verify docker images of fabric
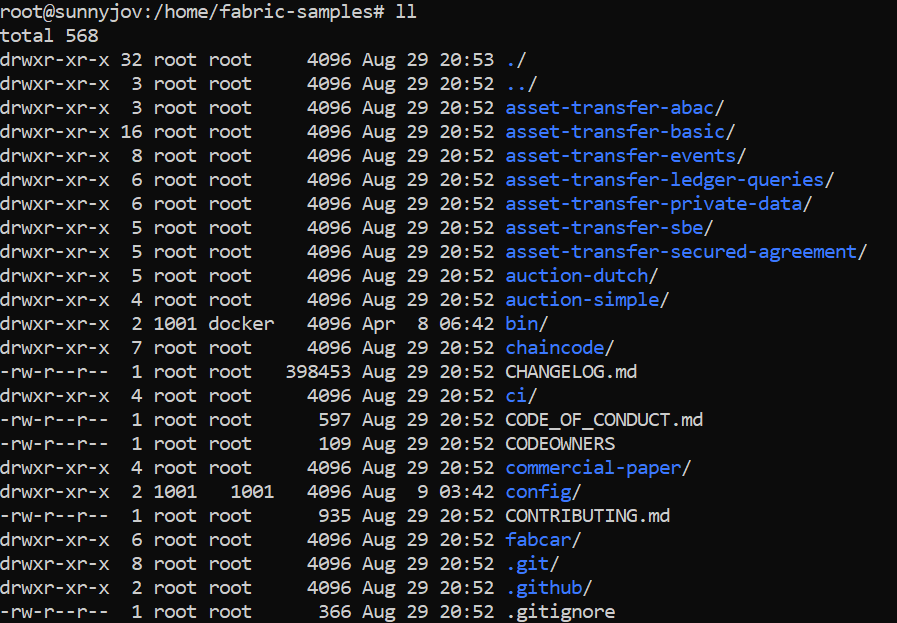
After you successfully completed install the fabric-samples, you will see a bunch of folders inside the fabric-samples directory.

Now you can start deploying the chaincode.
a) Go to folder /home/ fabric-samples/asset-transfer-basic/chaincode-go/chaincode
In here, you will see the smartcontract.go file

b) Go back to the chaincode-go folder

a) Before we build the Go application, we need to create a go.mod file to track our code’s dependencies.
b) Add the required imports to go.mod by running the following command:
c) Run the following command to automatically package dependencies into the vendor folder:
The go mod vendor command builds a directory named vendor that contains copies of all packages needed to support builds and tests of packages in the main module.
Peer is a fundamental element of a Hyperledger Fabric blockchain because they manage ledgers and smart contracts. The peer command allow administrator to interact with a peer. By using peer command, we can perform peer operations such as deploying a smart contract chaincode or joining a channel.
a) go to /home/fabric-samples/bin
inside the bin folder, you will find peer command
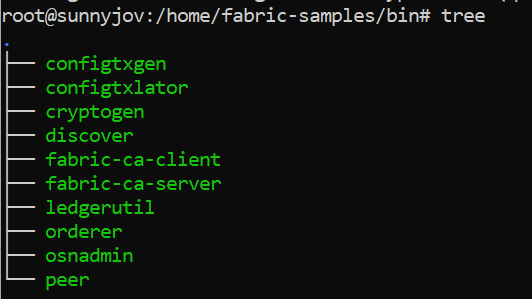
NOTE: in order to use the peer command globally (without having to access the bin file, we can put the peer path inside the vim ~./bashrc)
1. Type pwd

This is the bin path that we want to save.
2. Type vim ~/.bashrc
3. Add the bin path inside the vim file
export PATH=$PATH:/home/fabric-samples/bin
4. Save it and restart
5. Now we can use peer command globally
6. Type peer
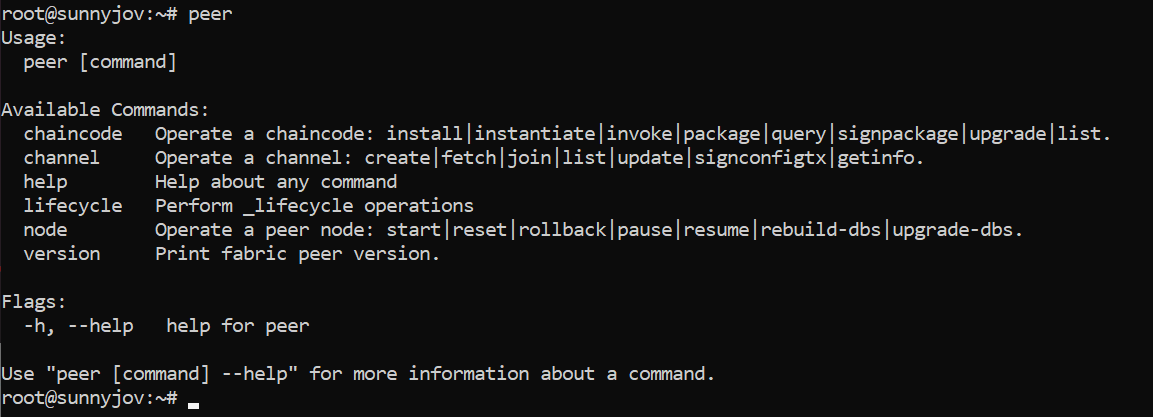
Now, we want to deploy the chaincode-go package into the BaaS console. Since the console only accepts tar.gz and .go file, we need to compress the chaincode-go file into tar.gz.
In here, I name the tar file with demo5:
peer lifecycle chaincode package -p /home/fabric-samples/asset-transfer-basic/chaincode-go --label demo5 -l golang demo5.tar.gzERROR WARNING
if you happen to face this kind of issue, where it says “Fatal error when initializing core config”

This means that we need to put the core.yaml file inside the chaincode-go folder. You can find the core.yaml file inside the fabric-samples/config directory.

Copy core.yaml to the chaincode folder
cp core.yaml /home/fabric-samples/asset-transfer-basic/chaincode-go
Re-run the peer lifecycle command
peer lifecycle chaincode package -p /home/fabric-samples/asset-transfer-basic/chaincode-go --label demo5 -l golang demo5.tar.gz
After successfully run the command, you can now download the tar.gz file into your local host
Move the tar.gz file into home directory

Download tar.gz file to local host
scp root@publicIP:remote_path/file local_path
After the chaincode is uploaded and installed, we need to submit the chaincode.
1. Locate to the targeted organization, and click its name.
2. Go to the Chaincode Package management tab.
3. Click Upload Chaincode button

4. After the tar file has uploaded, you will see the uploaded ones within the list. Click Installation.
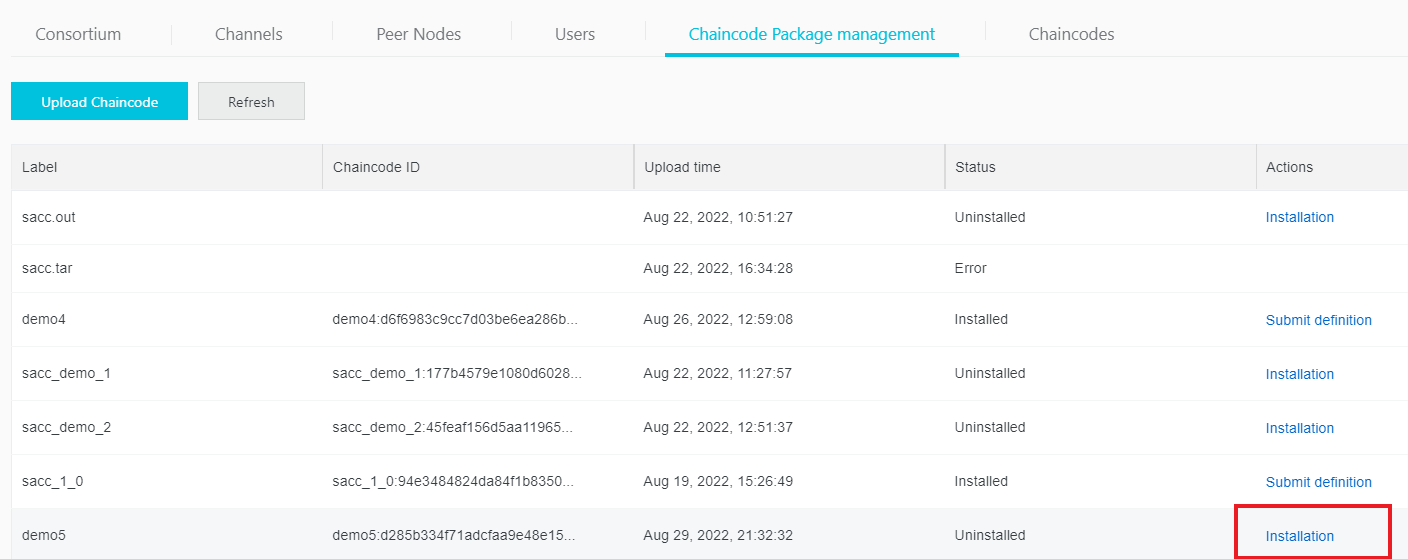
5. On the Chaincode Package management tab, find the chaincode whose definition you want to submit and click Submit definition in the Actions column.

6. In the panel that appears, set parameters based on the instructions.
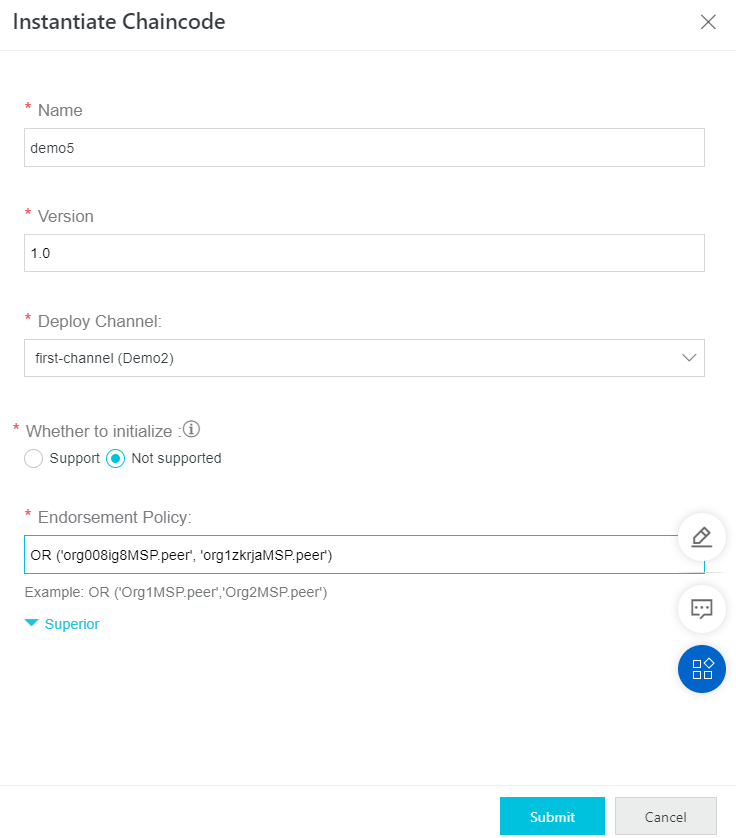
NOTE: for the Endorsement Policy, you need to input the MSP ID of organizations that joined in your targeted consortium.
7. On the other organization, you need to approve the submitted chaincode. Click Handle.
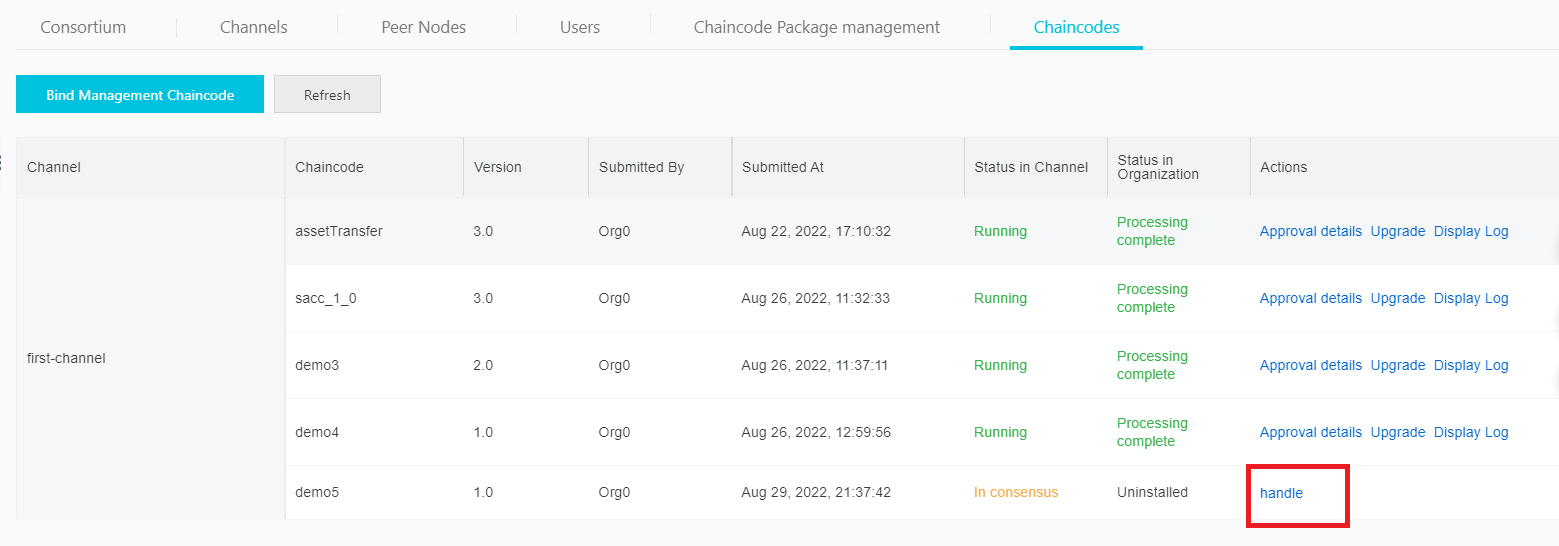
8. Click Submit.

9. If you find the status changes into Running and Processing Complete, it means you are done deploying the chaincode into BaaS console.


After you have created the user, you can access a blockchain network through the SDK.
To guarantee the security of the blockchain network, BaaS hosts the certificate and private key of the organization administrator. For operations that require administrator privileges, such as uploading the chain code, upgrading the chain code, instantiating the chain code, creating channels. And so on, please use the Baas console.

The baas-sdk.zip folder consists of these following files:
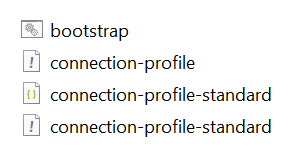
You can invoke or query smart contract through the REST API, to write or query information in the ledger. The blockchain REST-API uses the Bearer Token authentication method. When calling the API, we need to specify an additional HTTP header “Authorization: Bearer ” to provide your access token.
Generate Access Token
1. Locate to the targeted organizations, click Users tab

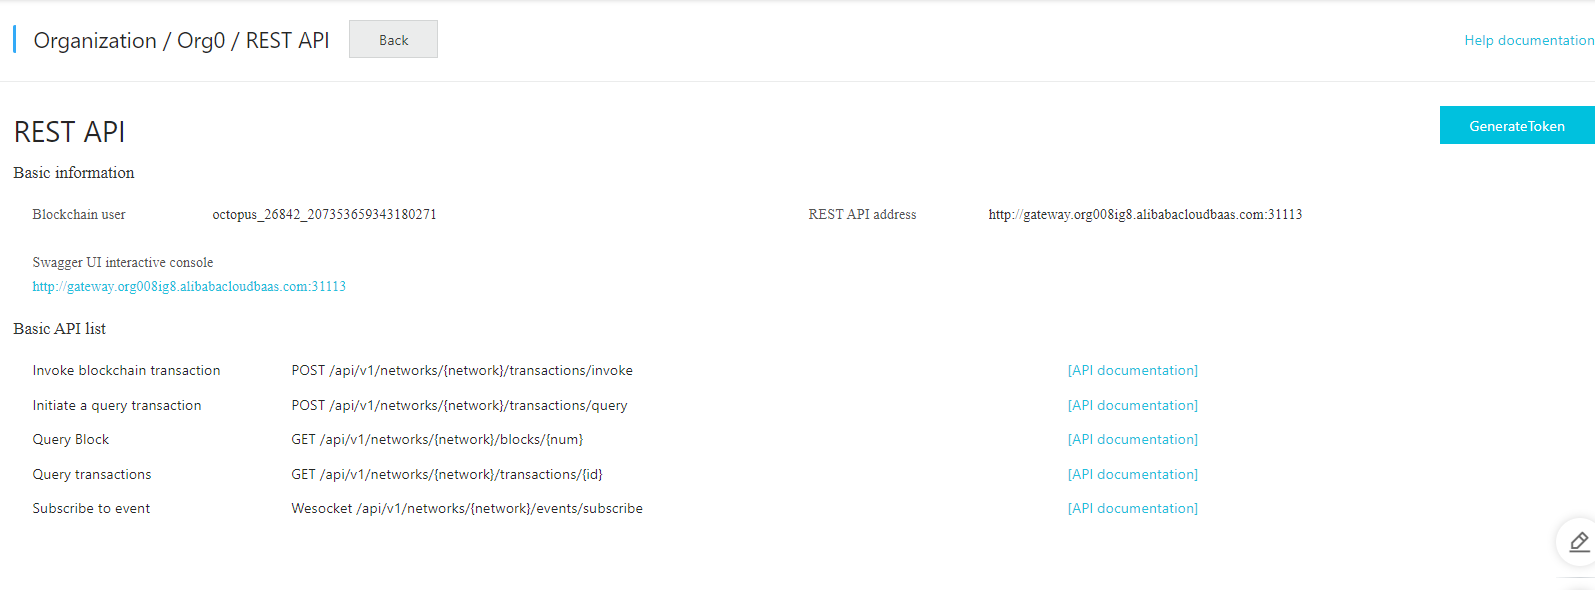
2. Click the REST-API button
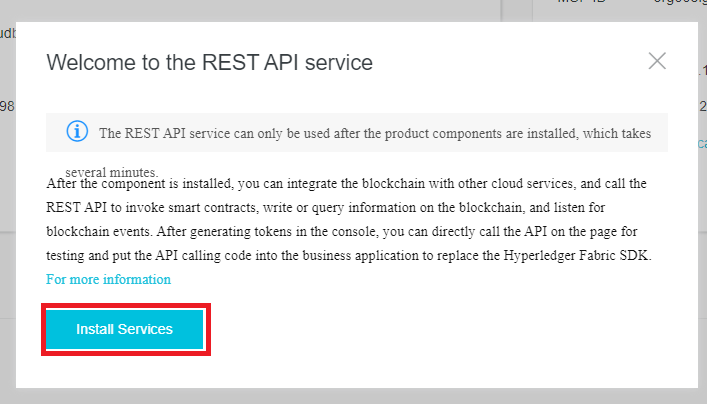
3. Click Install Services
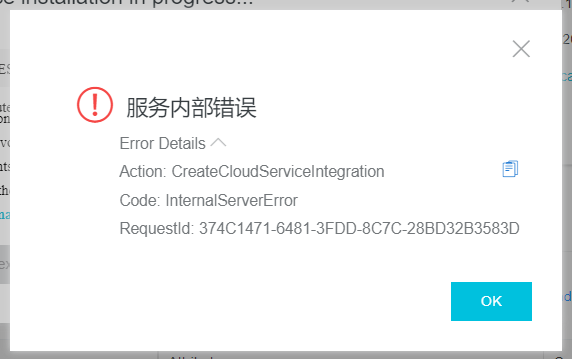
WARNING
If you face an error like this, this means you have not installed the Cloud Service Integration module, you need to follow this instruction first https://www.alibabacloud.com/help/en/blockchain-as-a-service/latest/install-cloud-service-integration
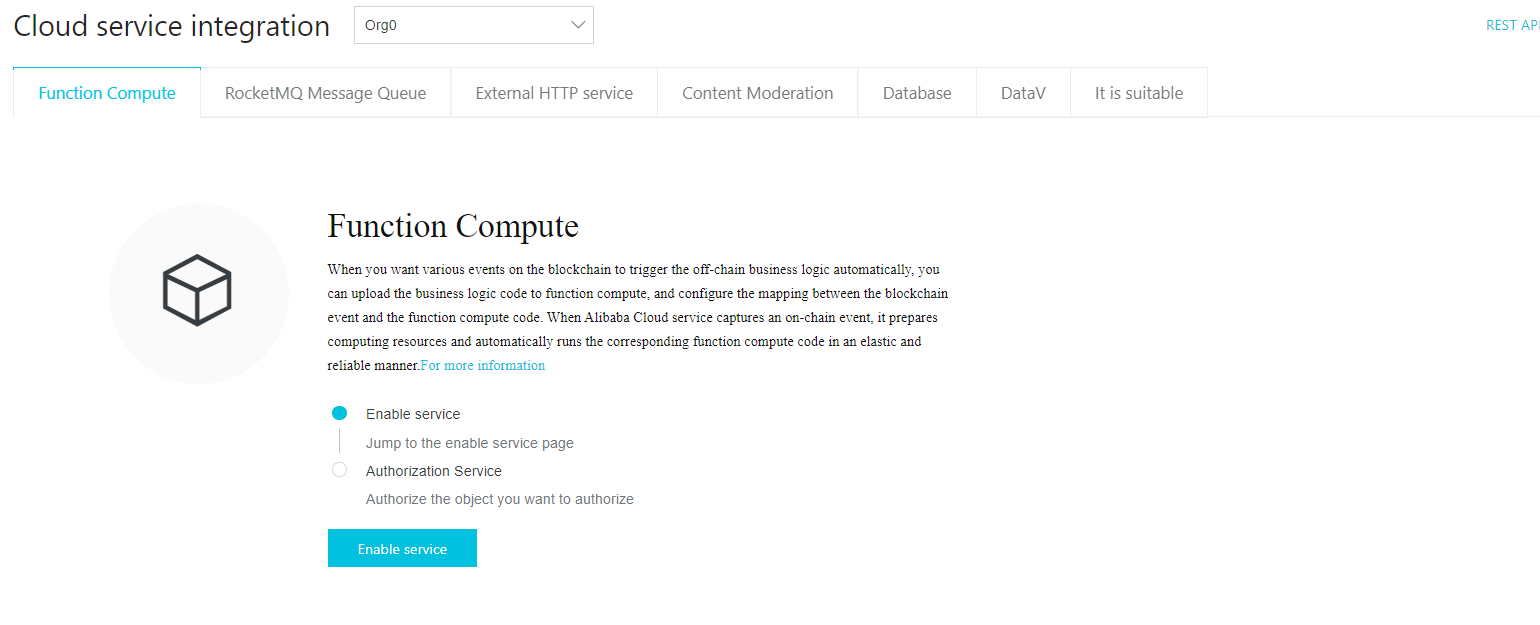
4. After successfully installed the Cloud Service Integration, like picture below,
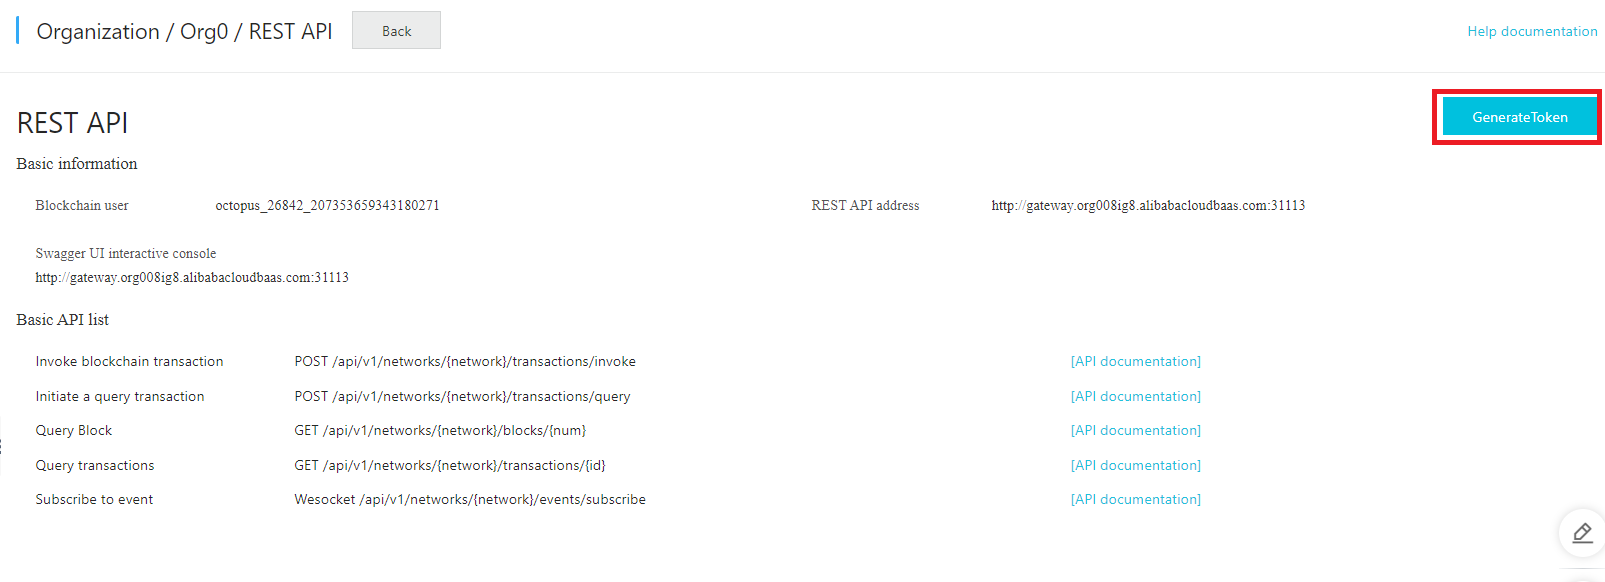
5. Go back to the REST API page, click Generate Token in the upper right corner of the page.
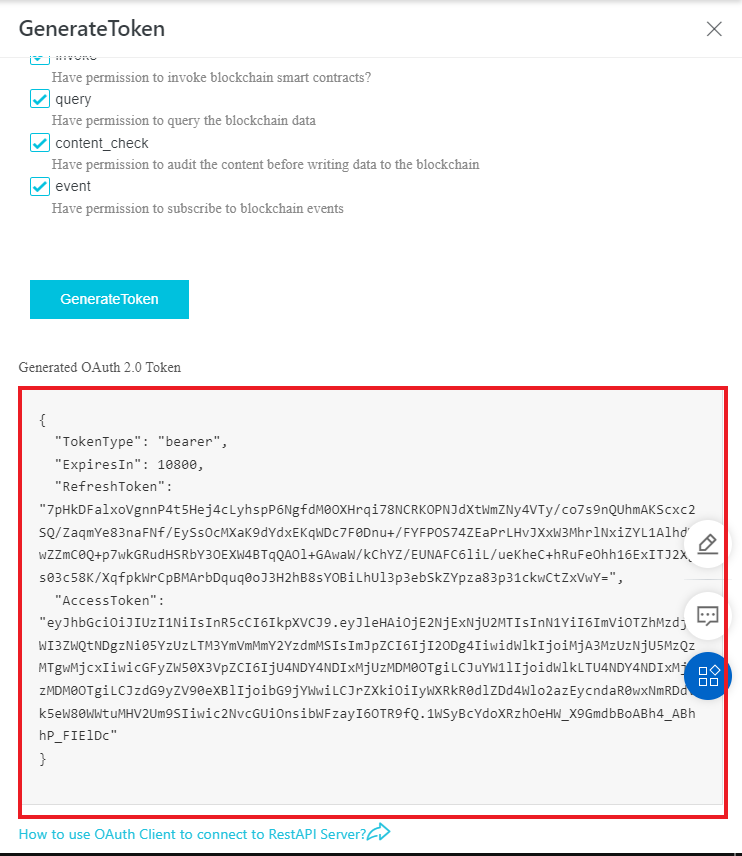
6. This following paper will pop up, select the appropriate validity period of the access token and refresh token, and check the permissions that the token needs.
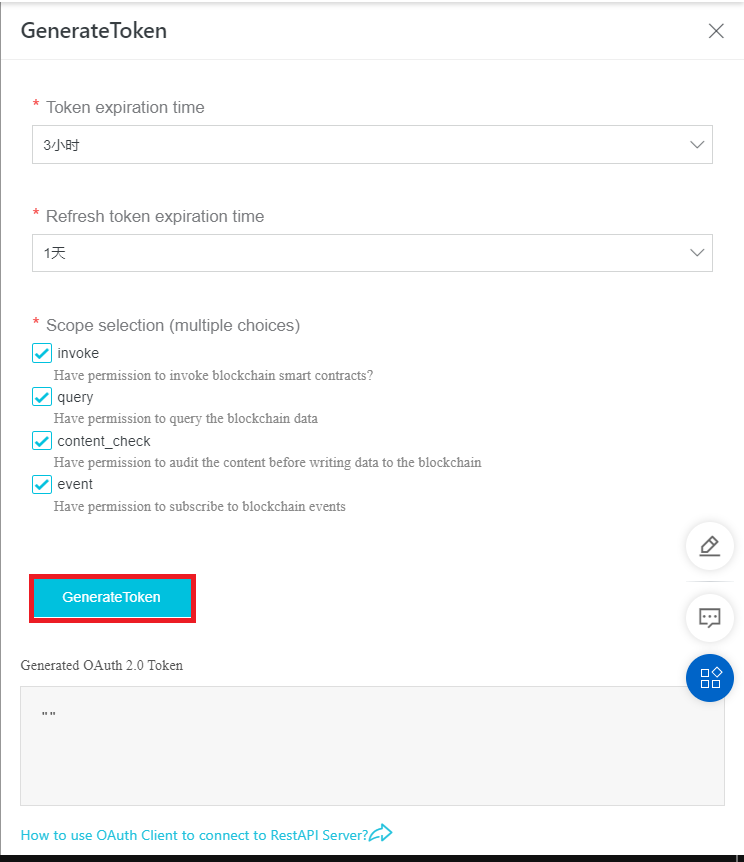
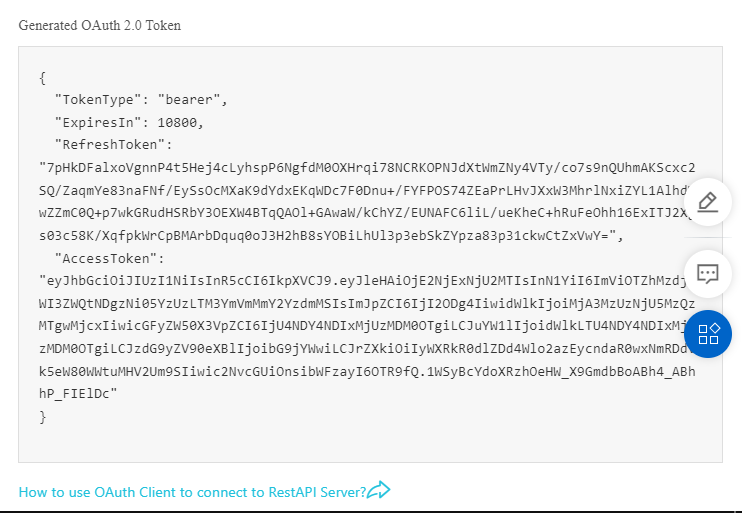
7. Click Generate Token, and the generated token will be displayed in the textbox.
Use Swagger UI for debugging
1. Click the Swagger UI interactive console link
Before using the Swagger UI for debugging, you need to Generate Access Token.
We already have the Access Token
Configure Access Token
If the Access Token has expired, or you want to test a specific Access Token used by your app, you can modify the Access Token used by the Swagger UI by following these steps
1. Click the Authorize button on the page

2. If an access token has been configured, first click Logout to delete the old authentication information.
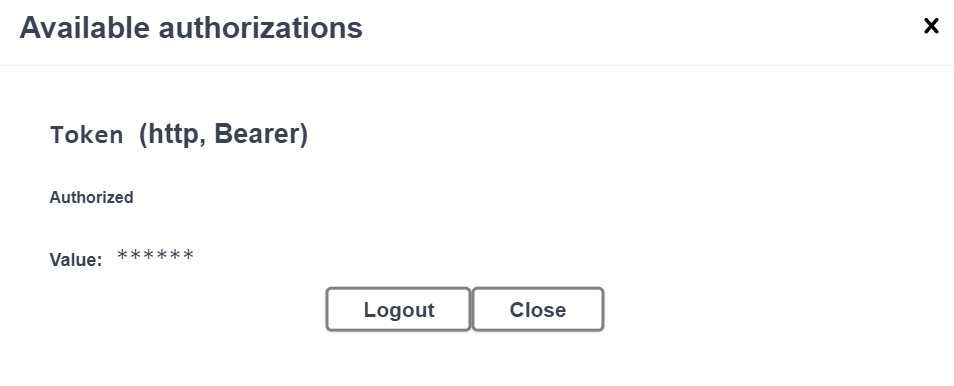
3. Enter the Access Token that we have generated, click Authorize
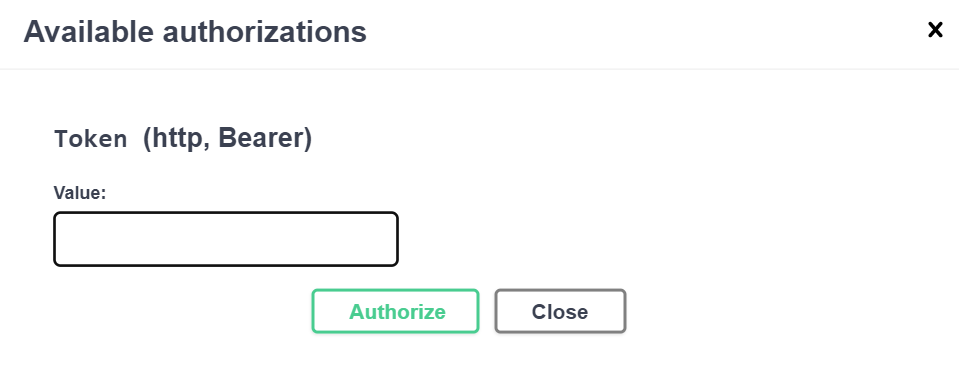
4. Click Close to close the dialog box.
5. We can see that the small lock on the right side of the API is already locked. Which means that we have successfully entered the authentication information.

Send request
1. Select the REST API you want to debug (for example, I try to use the invoke method). Click Try it out.

2. Fill in the parameters
3. In the examples area, change the chaincode name.

4. Click Execute. The response will return true if it is success.
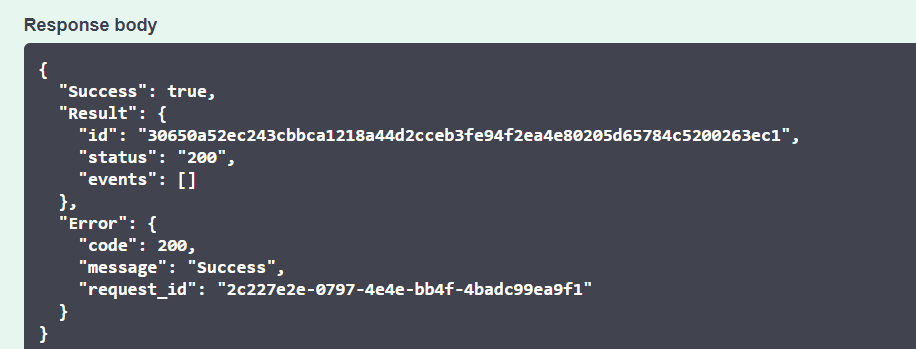

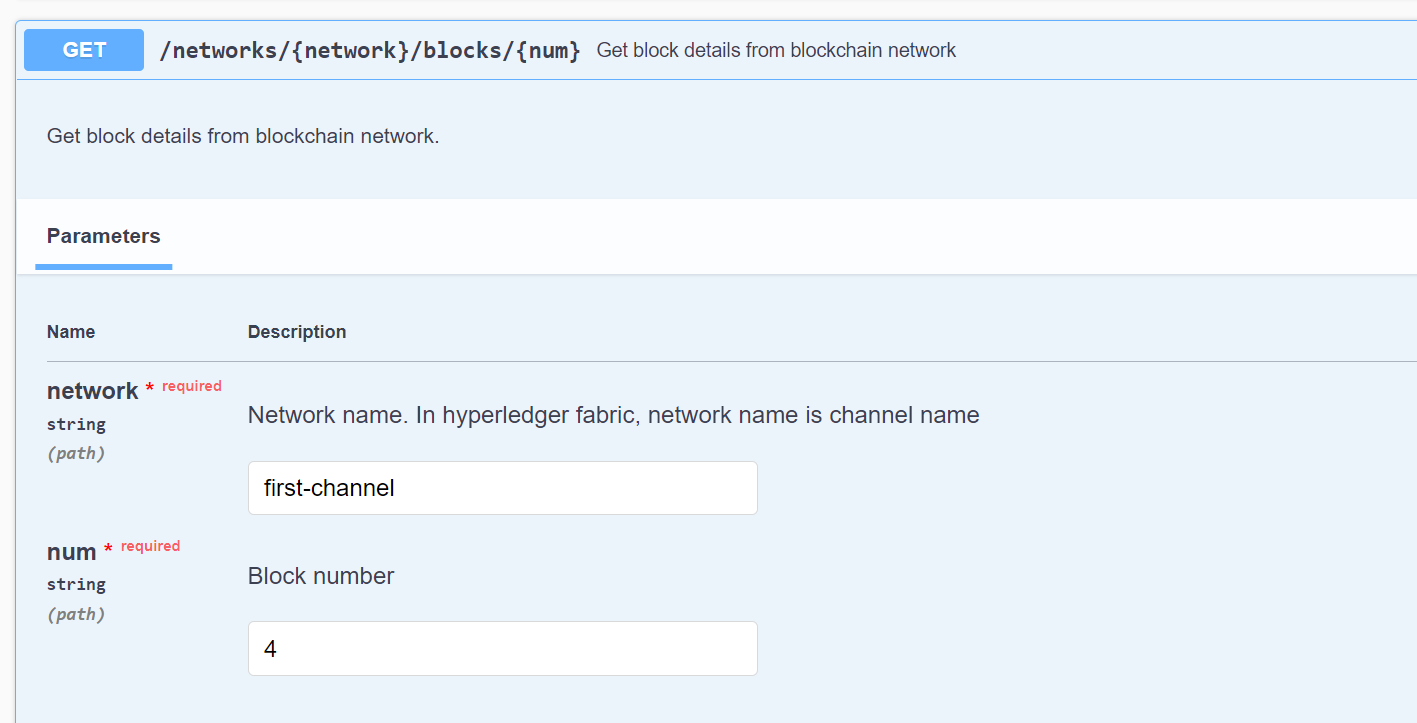
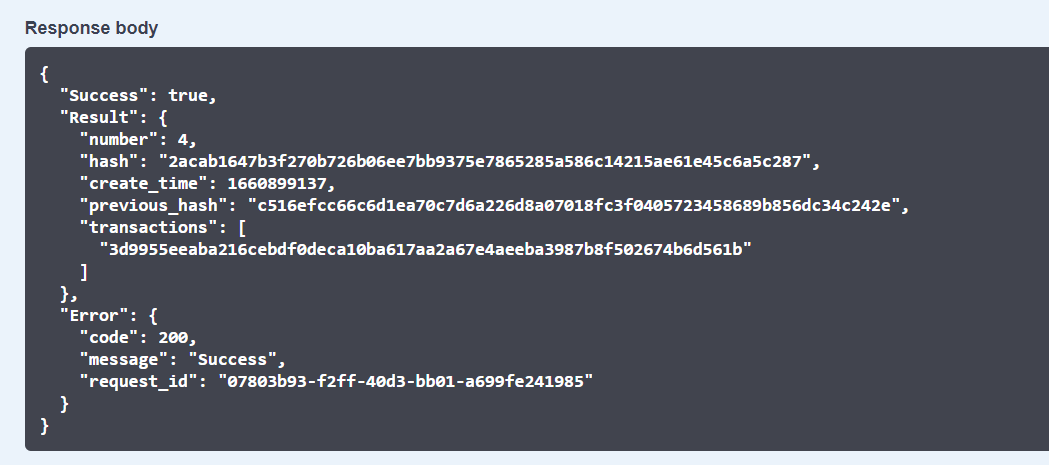
This section provides an introduction to how Fabric applications interact with deployed blockchain networks. This tutorial uses fabric-sample programs build using the Fabric SDK that we installed already from the BaaS console to invoke a smart contract which queries and updates the ledger with the smart contract API.
1. Open code editor application (I am using VScode)
2. Connect to the ECS Alibaba Cloud remote hosts
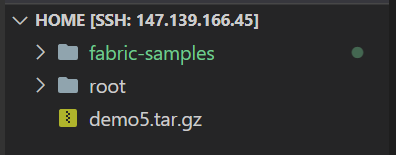
3. Copy the baas-sdk.zip into the home directory
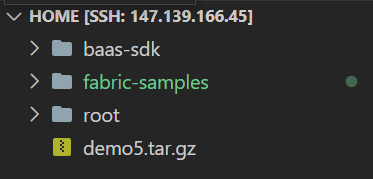
4. Open sample application: this will make calls to the blockchain network, invoking transactions implemented in the chaincode (smart contract).
cd fabric-samples/asset-transfer-basic/application-javascript directory.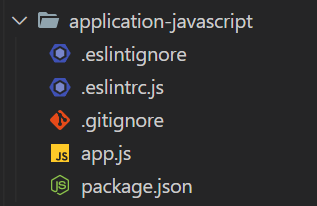
5. The application-javascript directory contains sample programs that were developed using the Fabric SDK for Node.js. Run the following command to install the application dependencies.
6. Once npm install completes, you should see the following files and folders.
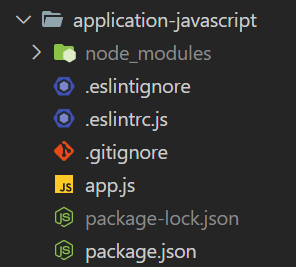
7. Copy the script of baas-sdk “connection-profile-standar.json” to the /home/fabric-samples/test-network/organizations/peerOrganizations/org1.example.com/connection-org1.json
8. Inside the connection-org1.json, delete the non-correlated organizations, channels, and peers. (select only the organizations where you uploaded the chaincode).
9. Inside the app.js, comment this following line

10. Run the application.
POSSIBLE ERRORS
1. Error: failed constructing descriptor for chaincodes:

Solutions:


2. TypeError: Cannot read property ‘tlsCACerts’ of undefined.

Solutions:

Change into


Change into

3. error: [DiscoveryResultsProcessor] or error: [Discovery Service]

Solutions:
node app.js
4. error: [ServiceEndpoint] and error: [DiscoveryResultsProcessor]


Solutions:

Change into

To learn more about Alibaba Cloud Blockchain as a Service, visit the official product page at https://www.alibabacloud.com/product/baas
If you have any issues, feel free to contact us directly to apply for free consultation service.
AIRec: Layanan Rekomendasi Alibaba Cloud Berkualitas Tinggi untuk Aplikasi Anda
Alibaba Cloud Indonesia Webinar: "The Importance of Security Products to Prevent Ransomware Attack"
115 posts | 21 followers
FollowAlibaba Cloud Community - October 28, 2022
Alibaba Clouder - August 12, 2019
Alipay Technology - August 21, 2019
James Lee - October 11, 2023
Alibaba Cloud Product Launch - January 22, 2019
Alibaba Clouder - October 15, 2020
115 posts | 21 followers
Follow Blockchain as a Service
BaaS provides an enterprise-level platform service based on leading blockchain technologies, which helps you build a trusted cloud infrastructure.
Learn More LedgerDB
A ledger database that provides powerful data audit capabilities.
Learn More IDaaS
IDaaS
Make identity management a painless experience and eliminate Identity Silos
Learn More Elastic Desktop Service
A convenient and secure cloud-based Desktop-as-a-Service (DaaS) solution
Learn MoreMore Posts by Alibaba Cloud Indonesia