By Haoran Wang, Sr. Big Data Solution Architect of Alibaba Cloud

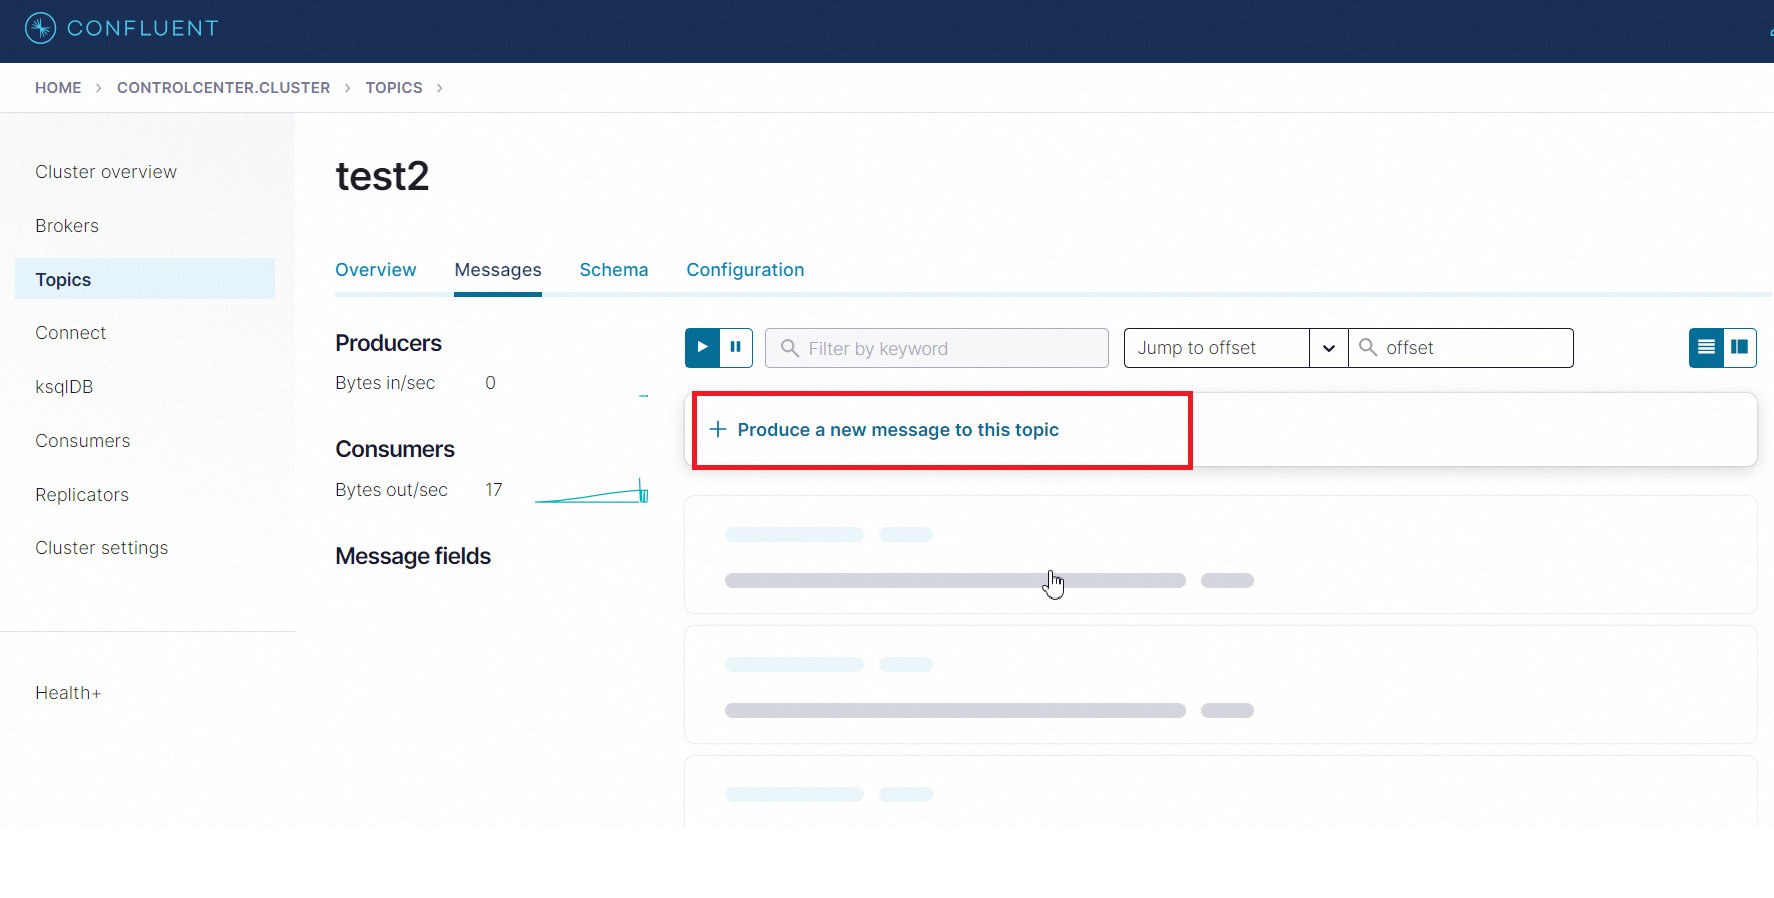
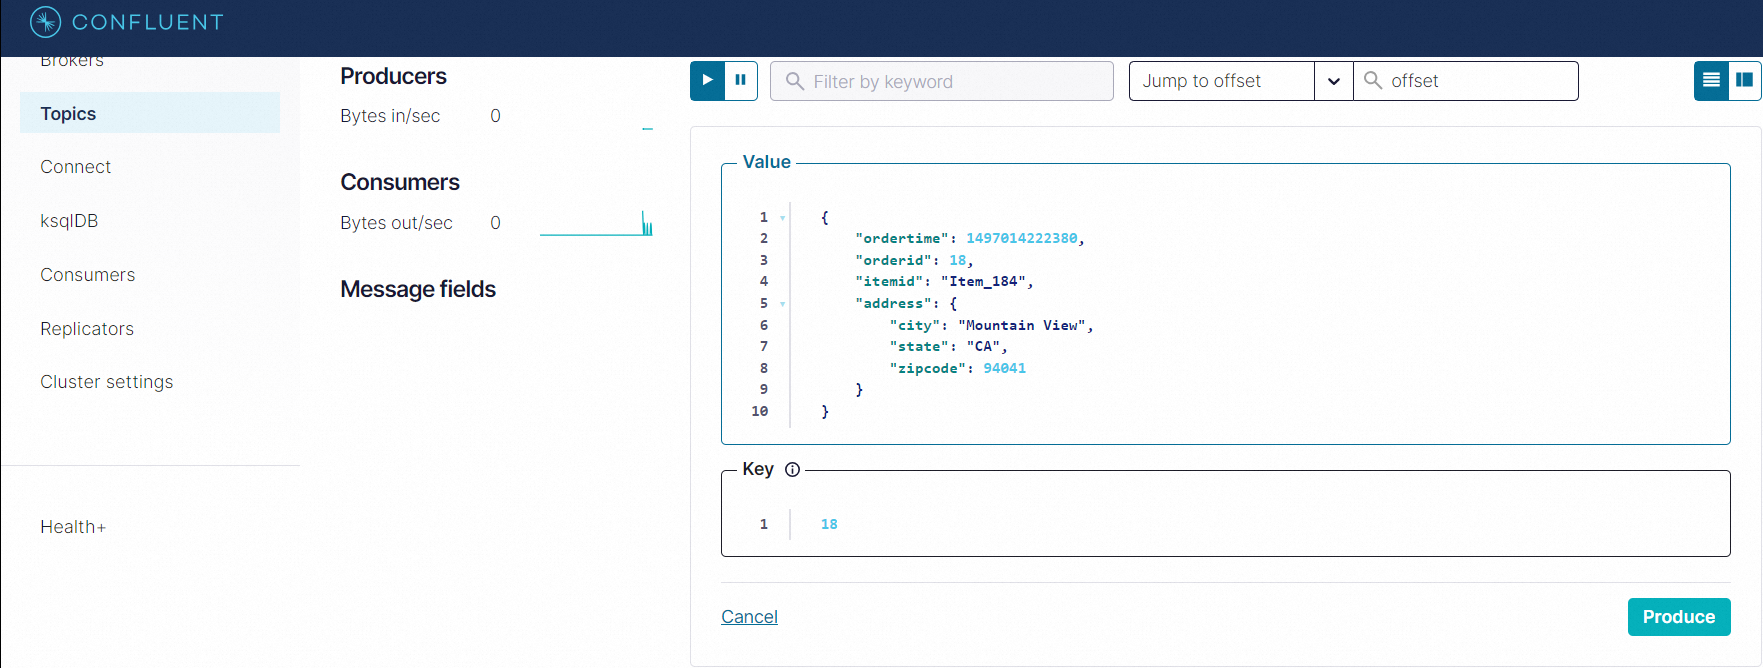
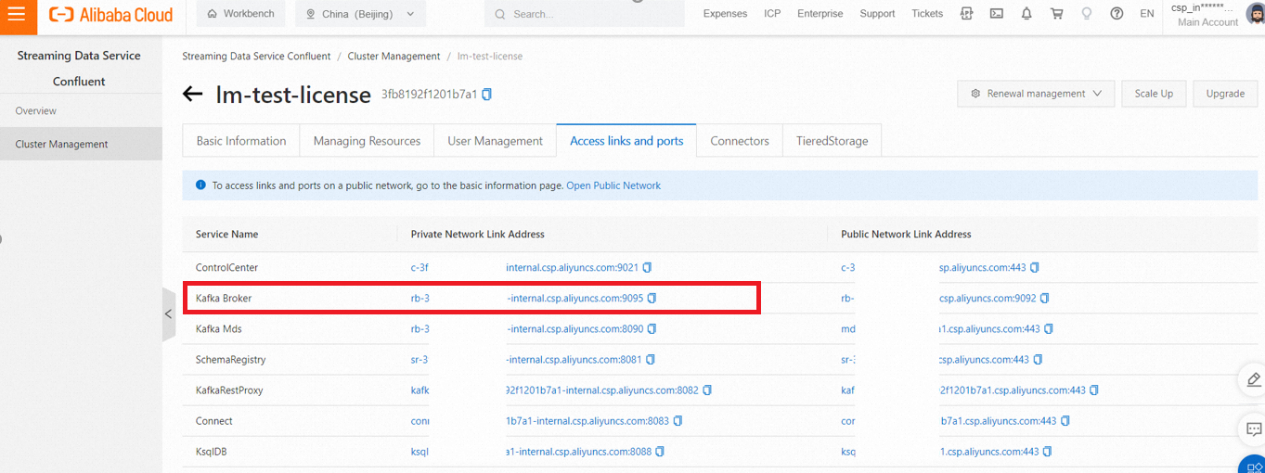
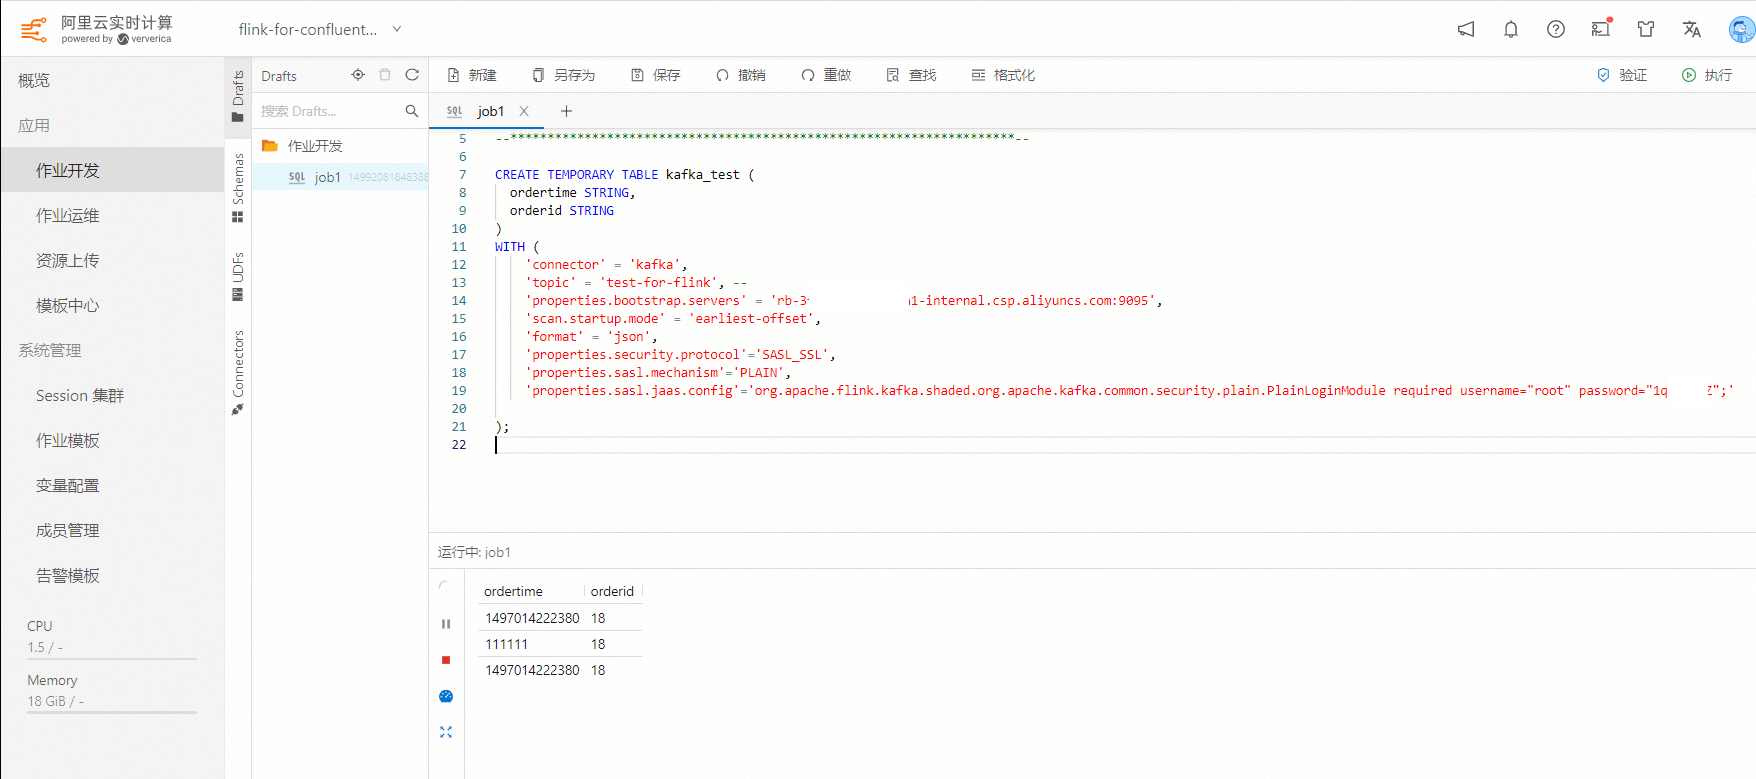
CREATE TEMPORARY TABLE kafka_test (
  ordertime STRING,
  orderid STRING
)
WITH (
    'connector' = 'kafka',
    'topic' = 'test-for-flink', --
    'properties.bootstrap.servers' = 'rb-3fb81xxxxxa1-internal.csp.aliyuncs.com:9095',
    'scan.startup.mode' = 'earliest-offset',
    'format' = 'json',
    'properties.security.protocol'='SASL_SSL',
    'properties.sasl.mechanism'='PLAIN',
    'properties.sasl.jaas.config'='org.apache.flink.kafka.shaded.org.apache.kafka.common.security.plain.PlainLoginModule required username="root" password="1qxxxxxxAZ";'

);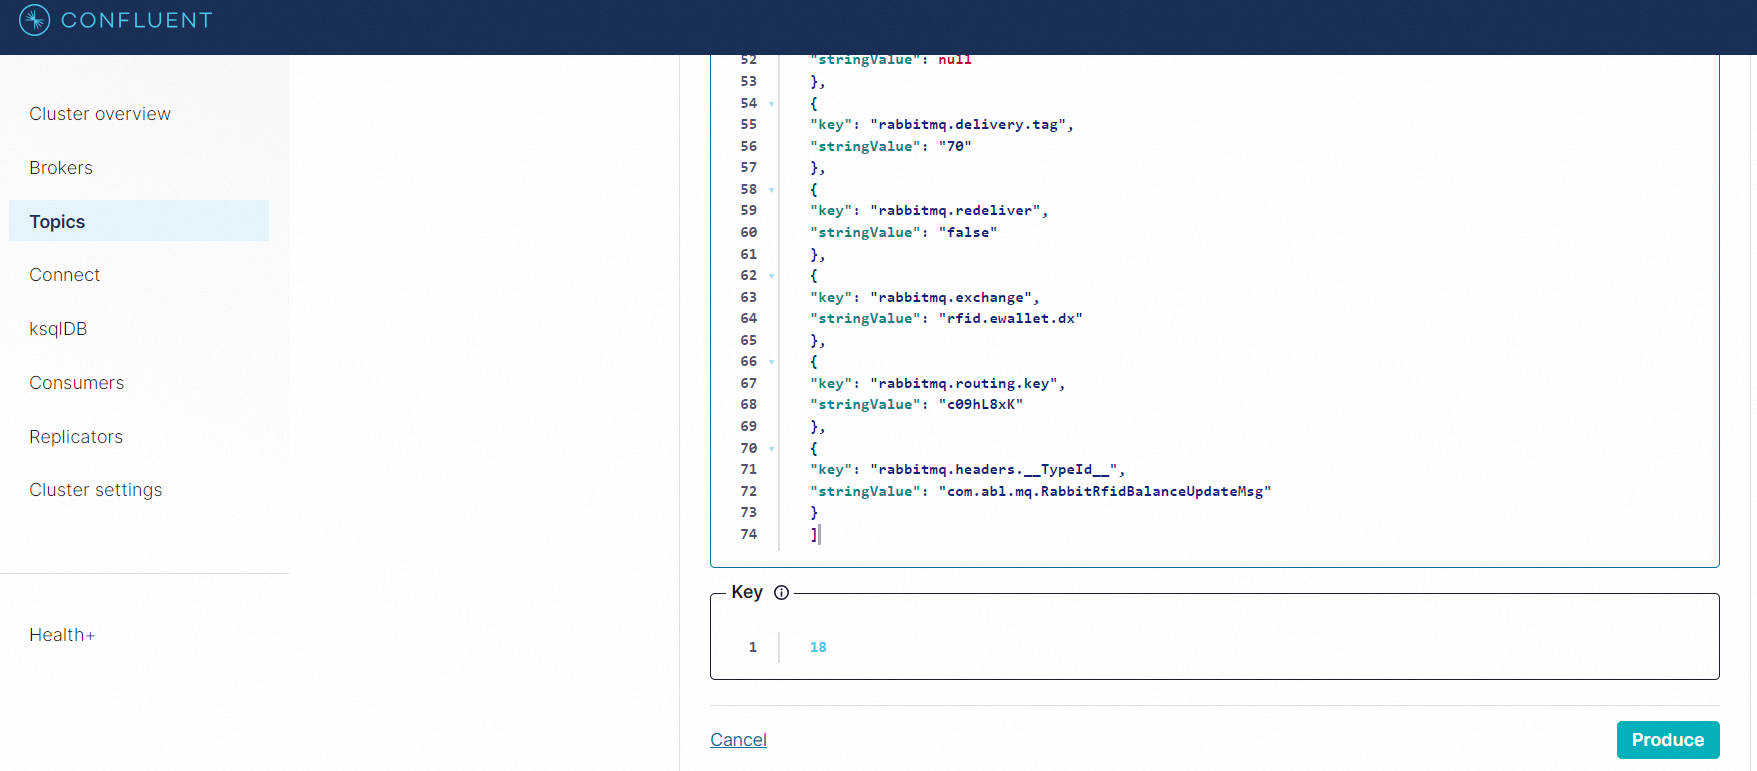
Sample Data:
[
{
"key": "rabbitmq_consumer_tag",
"stringValue": "amq.ctag-Pj3q7et9gEclrgw-9kwpdg"
},
{
"key": "rabbitmq.content.type",
"stringValue": "application/json"
},
{
"key": "rabbitmq.content.encoding",
"stringValue": "UTF-8"
},
{
"key": "rabbitmq.delivery.mode",
"stringValue": "2"
},
{
"key": "rabbitmq.priority",
"stringValue": "0"
},
{
"key": "rabbitmq.correlation.id",
"stringValue": null
},
{
"key": "rabbitmq.reply.to",
"stringValue": null
},
{
"key": "rabbitmq.expiration",
"stringValue": null
},
{
"key": "rabbitmq.message.id",
"stringValue": null
},
{
"key": "rabbitmq.timestamp",
"stringValue": null
},
{
"key": "rabbitmq.type",
"stringValue": null
},
{
"key": "rabbitmq.user.id",
"stringValue": null
},
{
"key": "rabbitmq.app.id",
"stringValue": null
},
{
"key": "rabbitmq.delivery.tag",
"stringValue": "70"
},
{
"key": "rabbitmq.redeliver",
"stringValue": "false"
},
{
"key": "rabbitmq.exchange",
"stringValue": "rfid.ewallet.dx"
},
{
"key": "rabbitmq.routing.key",
"stringValue": "c09hL8xK"
},
{
"key": "rabbitmq.headers.__TypeId__",
"stringValue": "com.abl.mq.RabbitRfidBalanceUpdateMsg"
}
]
Then, you have two methods to consume it.
AS JSON_VALUE(`log`, '$[0].key')
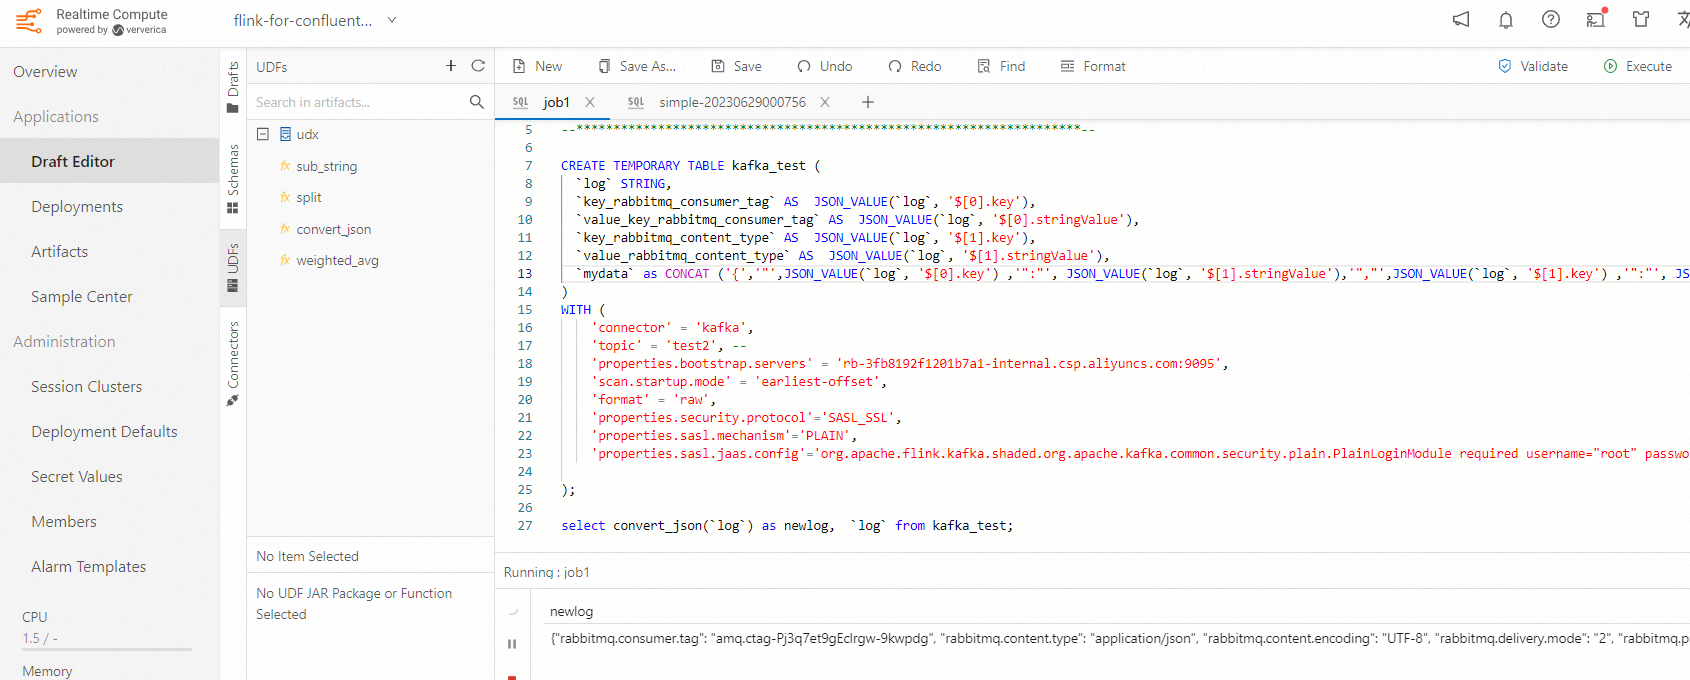
CREATE TEMPORARY TABLE kafka_test (
  `log` STRING,
  `key_rabbitmq_consumer_tag` AS  JSON_VALUE(`log`, '$[0].key'),
  `value_key_rabbitmq_consumer_tag` AS  JSON_VALUE(`log`, '$[0].stringValue'),
  `key_rabbitmq_content_type` AS  JSON_VALUE(`log`, '$[1].key'),
  `value_rabbitmq_content_type` AS  JSON_VALUE(`log`, '$[1].stringValue')
)
WITH (
    'connector' = 'kafka',
    'topic' = 'test2', --
    'properties.bootstrap.servers' = 'rb-3fb8192f1201b7a1-internal.csp.aliyuncs.com:9095',
    'scan.startup.mode' = 'earliest-offset',
    'format' = 'raw',
    'properties.security.protocol'='SASL_SSL',
    'properties.sasl.mechanism'='PLAIN',
    'properties.sasl.jaas.config'='org.apache.flink.kafka.shaded.org.apache.kafka.common.security.plain.PlainLoginModule required username="root" password="1qaz!QAZ";'

);

select key_rabbitmq_consumer_tag, value_key_rabbitmq_consumer_tag, key_rabbitmq_content_type, value_rabbitmq_content_type, `log` from kafka_test;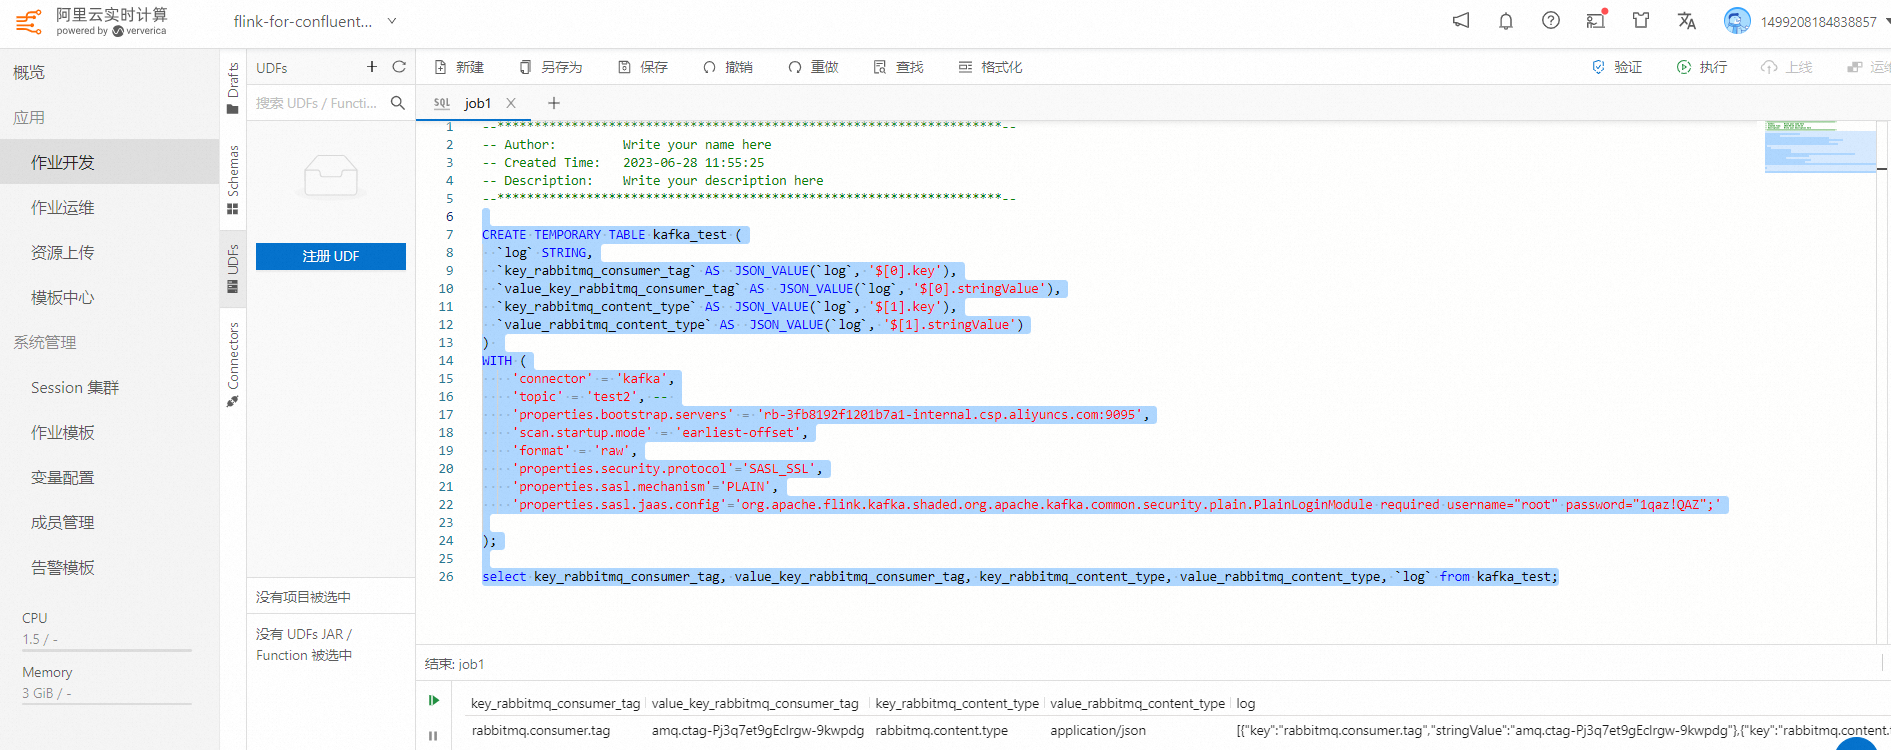
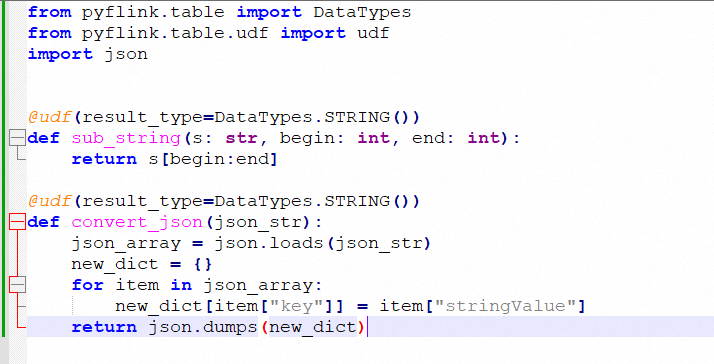
import json

@udf(result_type=DataTypes.STRING())
def convert_json(json_str):
    json_array = json.loads(json_str)
    new_dict = {}
    for item in json_array:
        new_dict[item["key"]] = item["stringValue"]
    return json.dumps(new_dict)
In the future, you can edit or add some new function there, and zip the file again to upload.
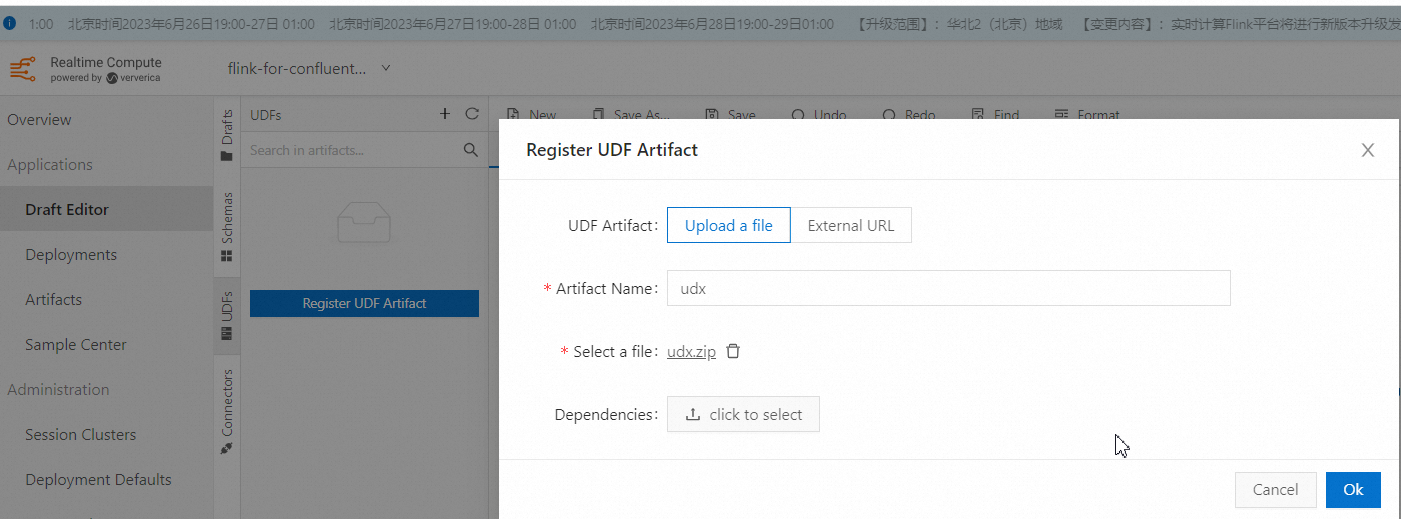
Upload the zip file, you cannot upload a single .py file, because it requires the init.py as well.
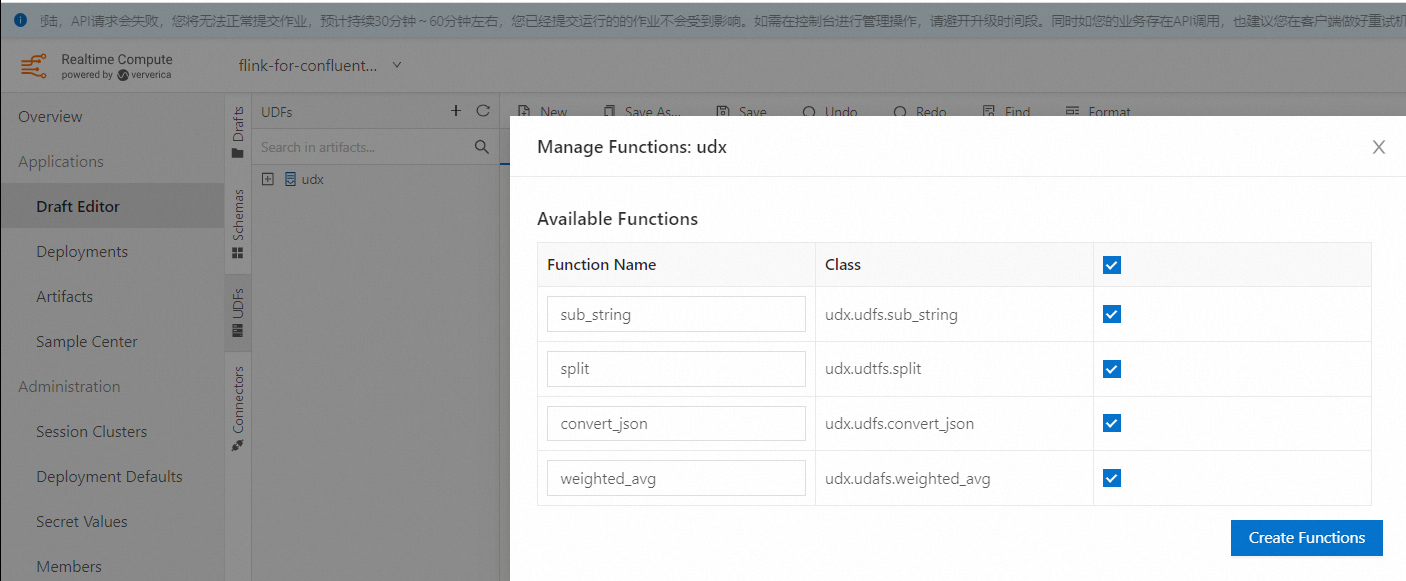
Then you can use this UDF directly
Empowering Generative AI with Alibaba Cloud PAI's Advanced LLM and LangChain Features
How to Configure MySQL and Hologres Catalog in Realtime Compute for Apache Flink
Alibaba Cloud Community - October 16, 2023
Alibaba Cloud Community - March 5, 2025
digoal - September 17, 2019
Apache Flink Community China - December 25, 2019
Apache Flink Community China - July 27, 2021
Alibaba Cloud Indonesia - November 27, 2023
 Realtime Compute for Apache Flink
Realtime Compute for Apache Flink offers a highly integrated platform for real-time data processing, which optimizes the computing of Apache Flink.
Learn More Big Data Consulting for Data Technology Solution
Alibaba Cloud provides big data consulting services to help enterprises leverage advanced data technology.
Learn More Big Data Consulting Services for Retail Solution
Alibaba Cloud experts provide retailers with a lightweight and customized big data consulting service to help you assess your big data maturity and plan your big data journey.
Learn More Quick BI
A new generation of business Intelligence services on the cloud
Learn MoreMore Posts by Farruh