In this blog we discuss on how to connect ECS instances included in Virtual Private Cloud (VPC) instances within the same and different regions. The tutorial walks through with the latest terms, conditions and interfaces of Alibaba Cloud console. This takes the below steps to follow.
Step 1: Create VPCs in same and different regions
For an example scenario we have created two VPCs in Kuala Lumpur region and one VPC in Bangkok region. Firstly, the VPCs are created in from each zone of Kuala Lumpur region as shown below.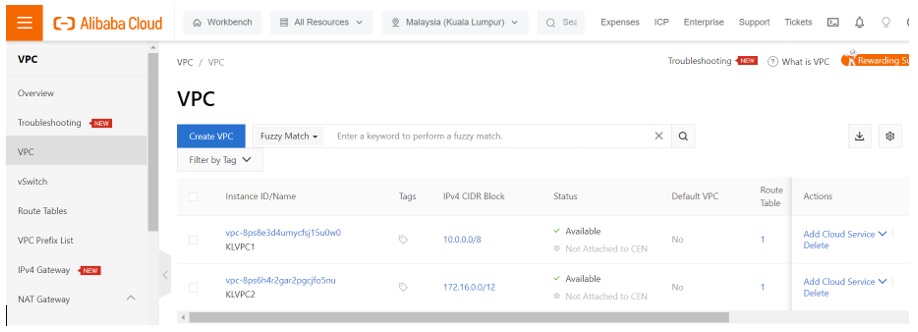
Another VPC is created in Bangkok region.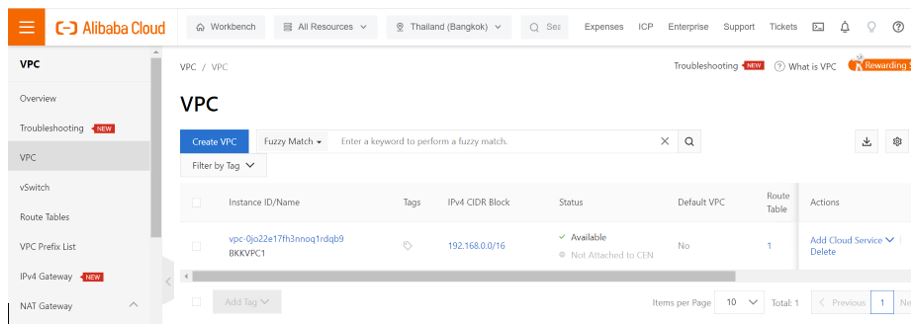
Now we have 2 VPCs in two different zones of Kuala Lumpur region and one VPC in Bangkok region’s only zone.
Step 2: Create ECS instances and connect with the VPCs created
We have created two ECS instances in Kuala Lumpur and connect each instance from two different zones available. These instances are configured to get included in the VPCs we created in the corresponding zones.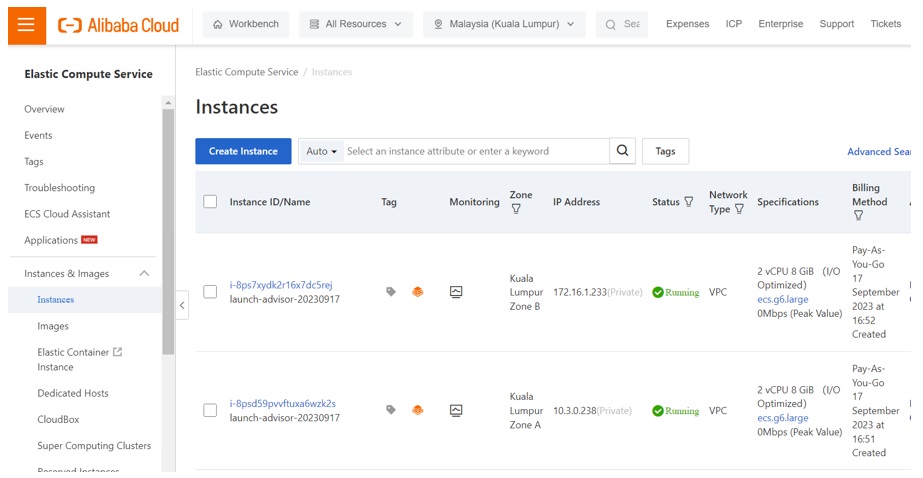
ECS instances in Kuala Lumpur zones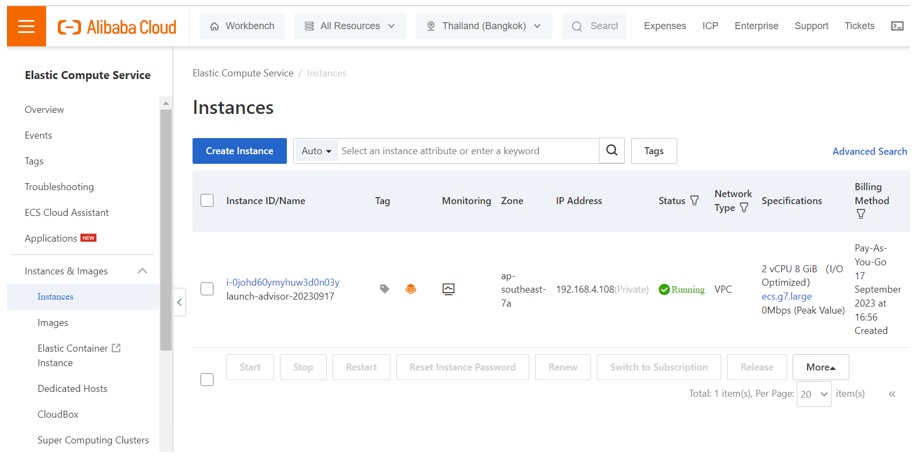
ECS Instance in Bangkok region
Scenario 1: Connect VPCs in the same region
To connect VPCs created in the same region, express connect is used. Enter into the console of express connect and click on “VPC to VPC” in the left pane of options available.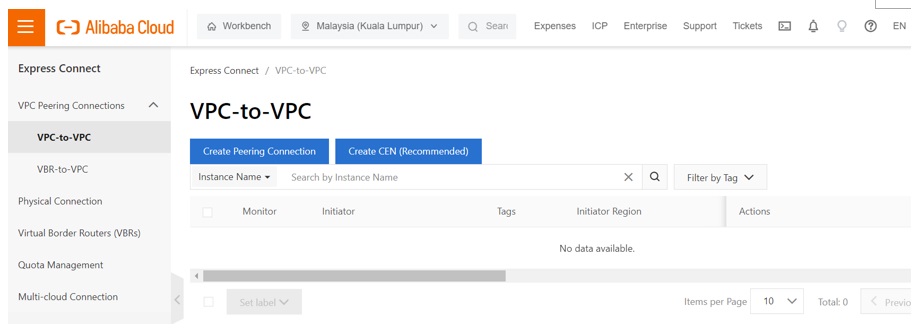
The region is set to Kuala Lumpur where we have already created two VPCs with an ECS instance connected to each of them. Click on Create CEN (Recommended). This will lead to the console of Cloud Enterprise Network (CEN).
Click on Create CEN Instance button. Fill the details corresponding to the CEN to create.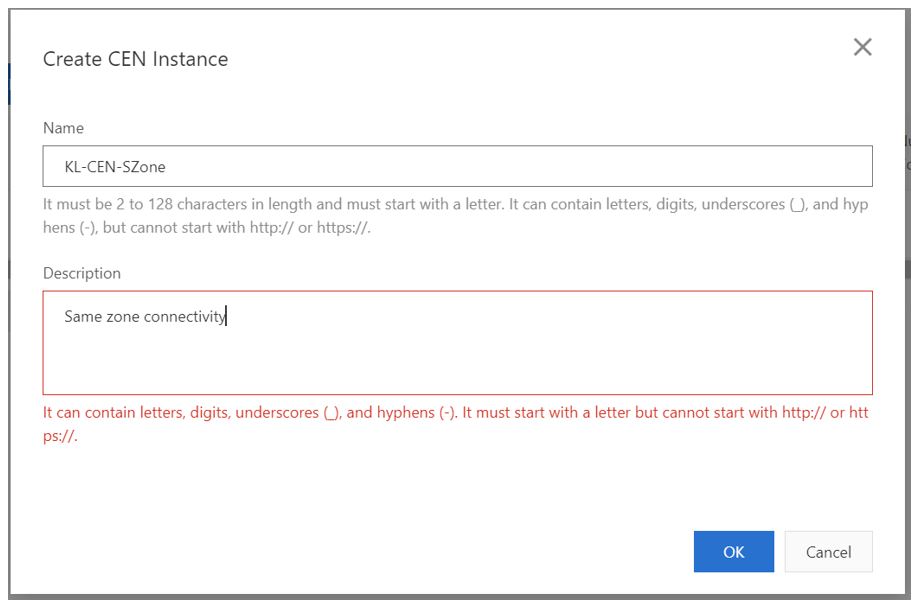
Description doesn’t allow whitespaces. Enter according to the condition and click ‘OK’.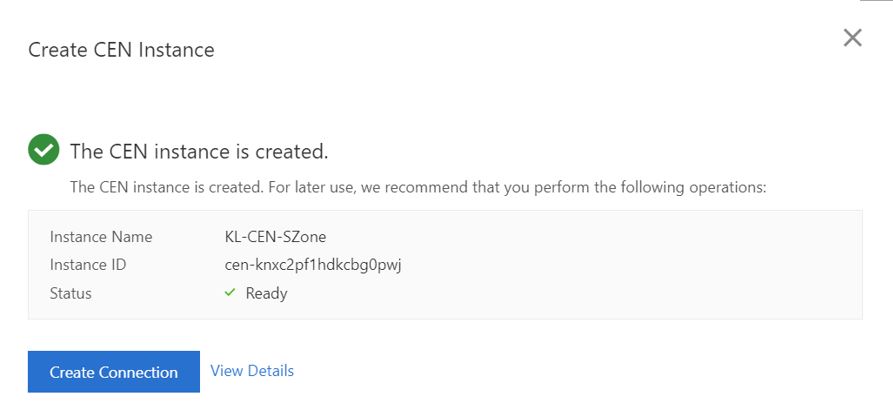
Click on the view details link and it will show the CEN instance created.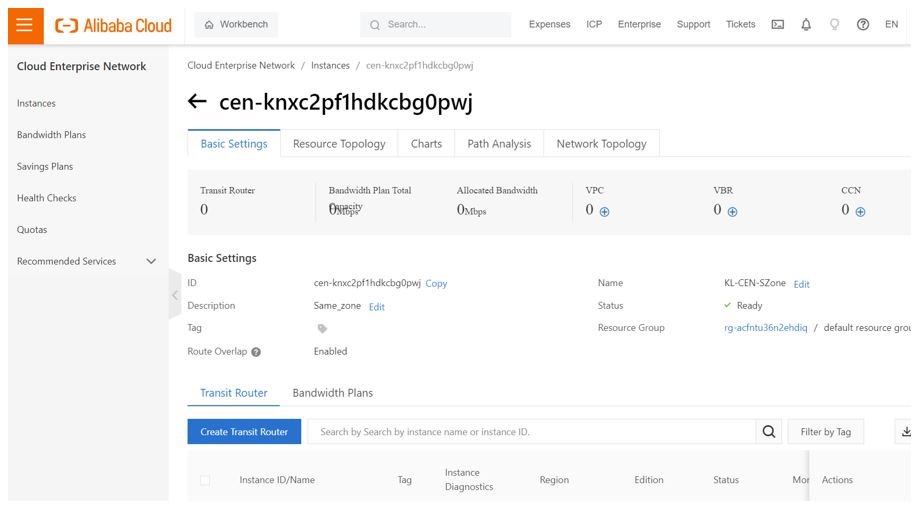
Now click on the “Create Transit Router” in that page and enter the VPCs corresponding to that region. Here the source and destination routers are in Kuala Lumpur. Click on Activate Transit Routers to activate the connection for CEN.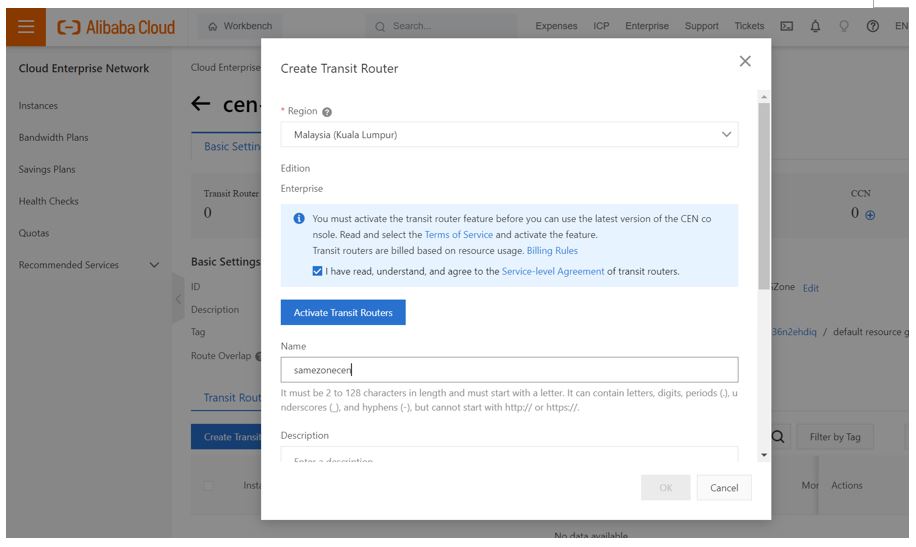
Then click Activate.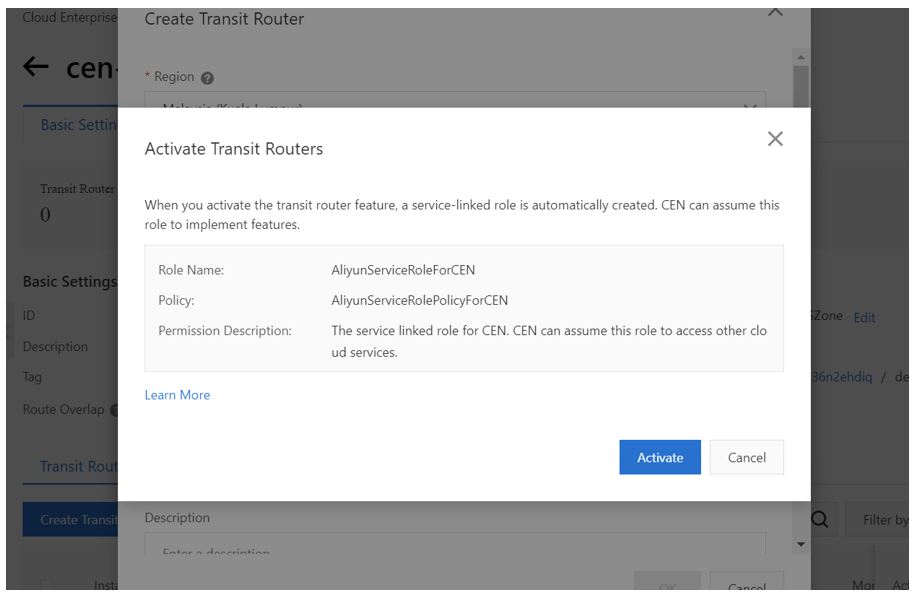
After the transit router is activated, enter a CIDR block in the interface and click OK.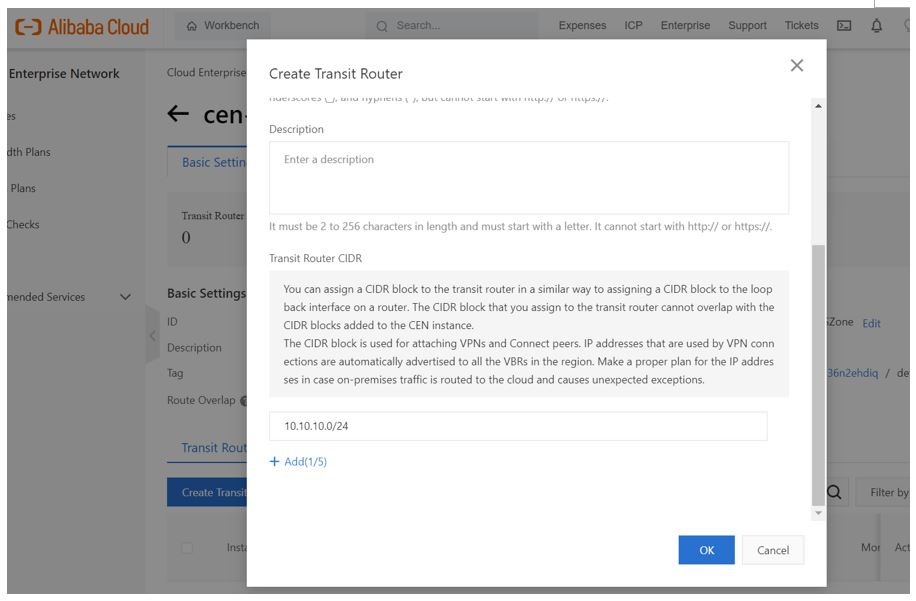
Now the CEN instance is created.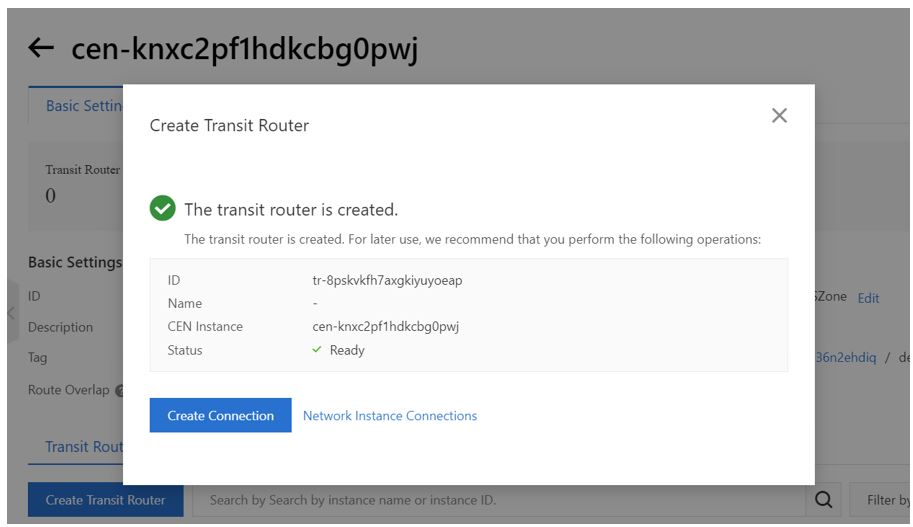
After creating the CEN, click on “Create Connection”.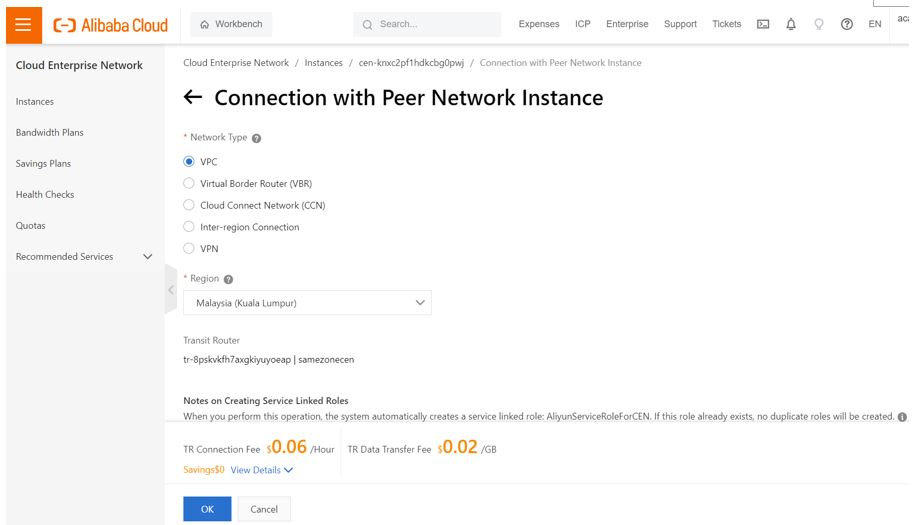
Choose the network type as VPC as the VPCs are in the same region of Kuala Lumpur. Select current owner ID as both VPCs are created under the same account.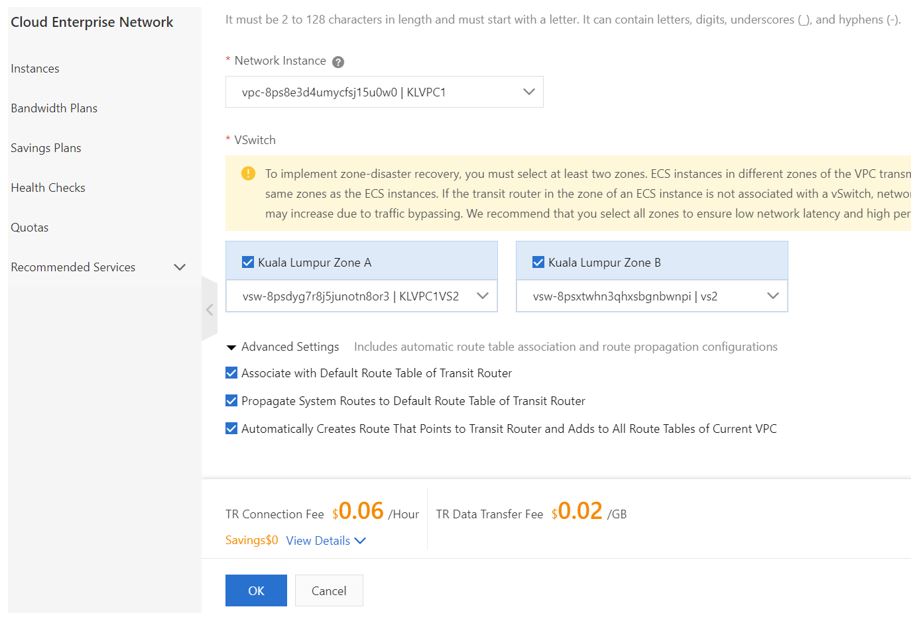
Now click ‘OK’.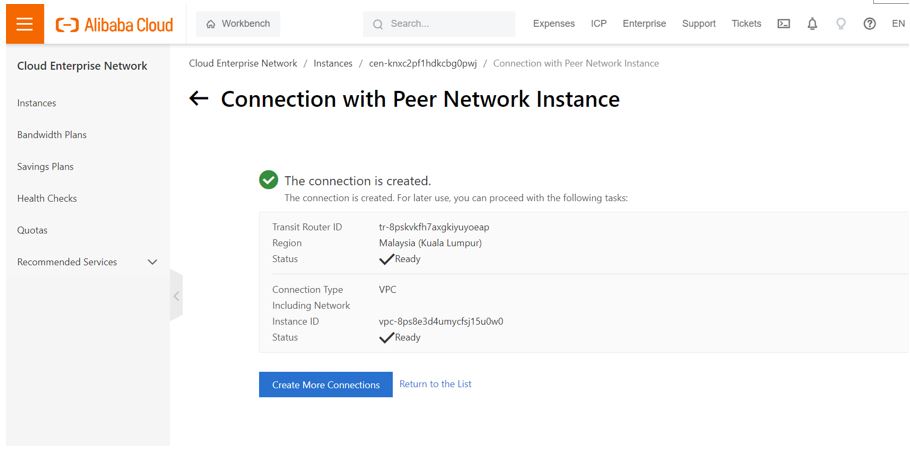
Thus, the CEN connectivity is established between VPCs created in the same region.
Scenario 2: Connect VPCs from different regions
Click on create more connections.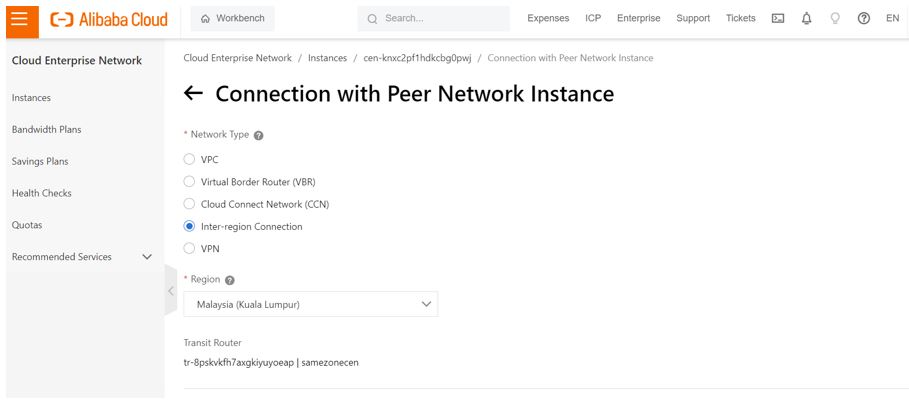
Select “Inter-region Connection”. Now we need to specify the VPCs in Bangkok as source and the VPC in Kuala Lumpur as destination.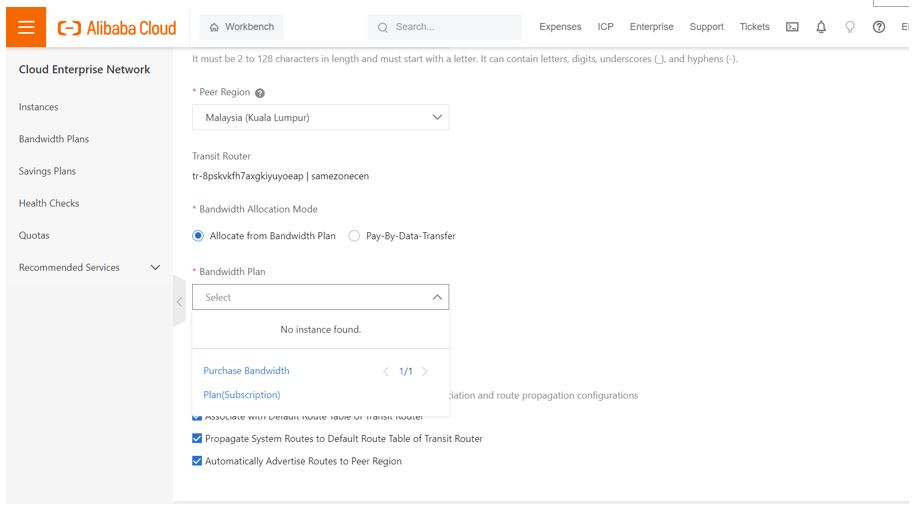
Now click on “Purchase Bandwidth Plan” and select the required parameters.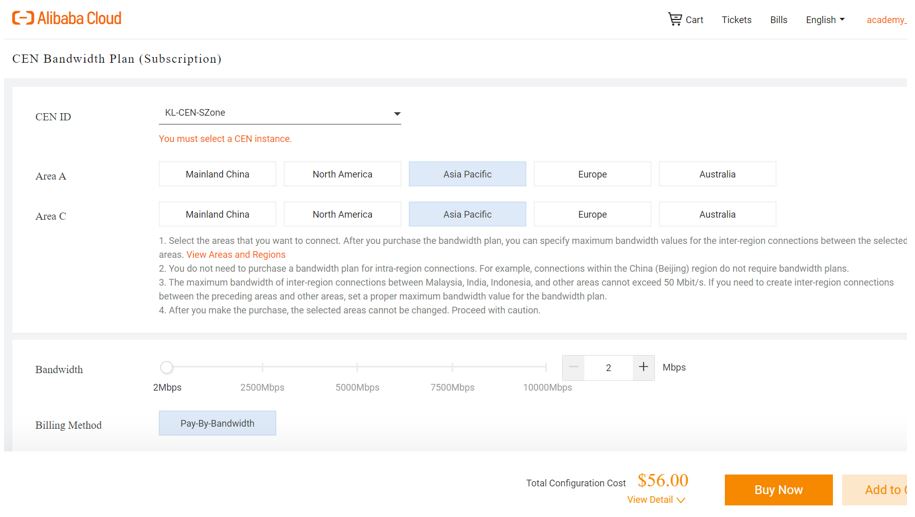
Click on “Buy Now.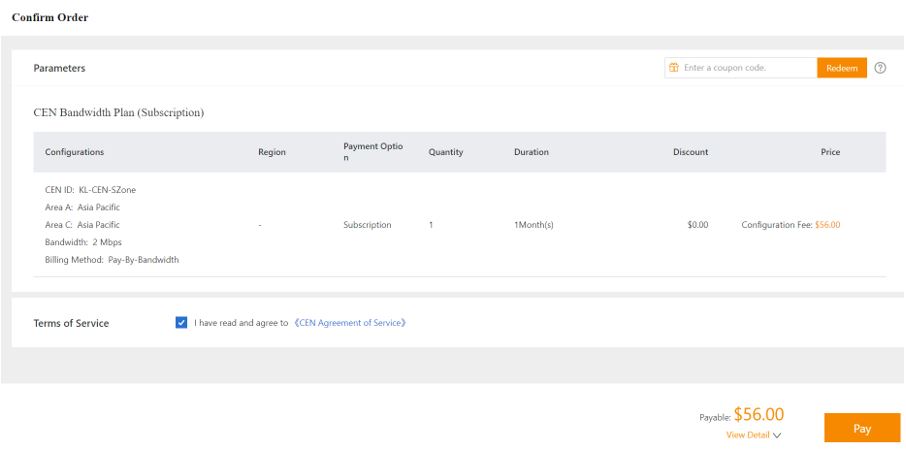
Click to agree and click Pay and then click Subscribe. Now in the CEN console enter the VPC parameters of the one created in Bangkok region.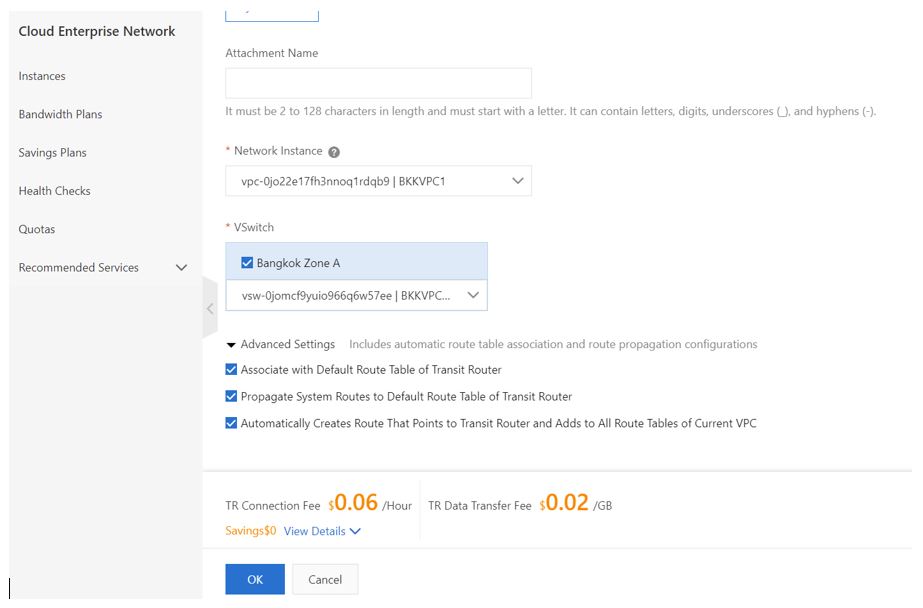
Now click OK.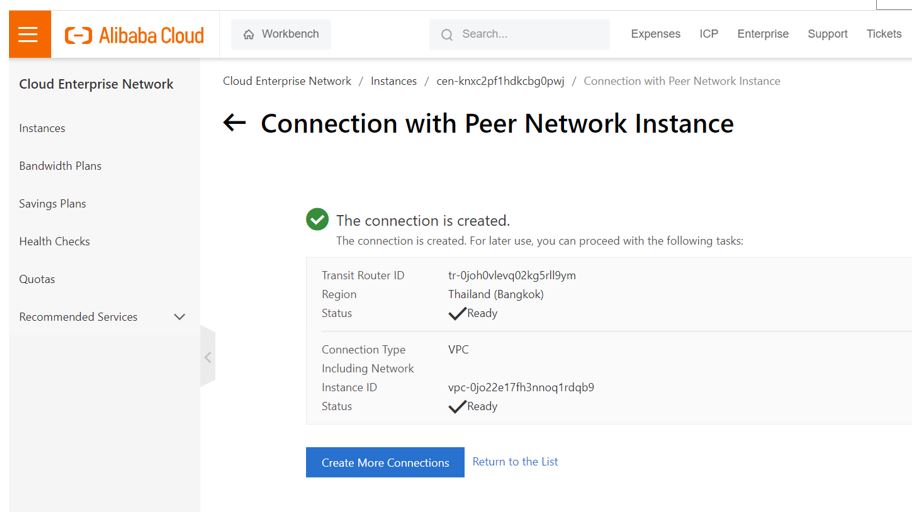
In the CEN console, we can see the transit routers establishing the connection between two VPCs in the same region of Kuala Lumpur and a heterogenous connectivity of one VPC from Bangkok and another from Kuala Lumpur.
Uniqueness to Consider Alibaba Cloud's Object Storage Service
Alibaba Clouder - February 25, 2020
Fouad - June 29, 2018
Alibaba Clouder - January 9, 2020
Alibaba Clouder - June 18, 2020
Alibaba Clouder - December 15, 2017
Alibaba Clouder - January 14, 2021
 Express Connect
A dedicated network connection between different cloud environments
Learn More Alibaba Cloud PrivateZone
Alibaba Cloud DNS PrivateZone is a Virtual Private Cloud-based (VPC) domain name system (DNS) service for Alibaba Cloud users.
Learn More VPC
VPC
A virtual private cloud service that provides an isolated cloud network to operate resources in a secure environment.
Learn More Apsara Stack
Apsara Stack is a full-stack cloud solution created by Alibaba Cloud for medium- and large-size enterprise-class customers.
Learn MoreMore Posts by ferdinjoe