Deep Learning has been gaining popularity in the recent years for AI application development for object detection and classification problems. A wide range of Convolutional Neural Networks and Transformer architectures were developed using PyTorch and Tensorflow. These applications are given demonstration with inbuilt datasets like MNIST or CIFAR mostly. The real time use case is different. For each application, the datasets differ and the architectures used has to be re-engineered to fit the scenario. I had been using NVIDIA RTX3060 GPU in a standalone PC with Tensorflow and Keras installed with Python 3.0. The memory and GPU capacity is limited in such a way that huge image datasets with a normal batch size of 50 will result in resource exhaustion error. Then the batch size has to be downgraded to a lesser value and tried. This results in a slower training of models. To overcome the limitations of these standalone PC based deep learning model training, I explored into the options with Cloud AI with Alibaba Cloud.
The Platform for AI (PAI) provides machine learning model development platforms like Visualized Modeling (Designer), Deep Learning Container (PAI-DLC) and Data Science Workshop (PAI-DSW). The models developed using these platforms can be deployed using Elastic Algorithm Service (PAI-EAS). The assets supporting these platforms are stored in asset management platform which houses the custom-made machine learning models, datasets, jobs, images etc. From this blog, we learn on how and where to store custom image database, mount it to a DSW instance and get access to the images from the OSS bucket just like we access those images in the local standalone PC. This will help cloud engineers and solution architects using Alibaba Cloud can leverage the limitless possibilities to create customized deep learning models and deploy the same using EAS.
Prerequisites
Before creating the PAI-DSW instance, we need to have the following to be setup:
I have discussed extensively on how to create and configure a VPC and configuring a security group through my blog posts earlier. We look into the other prerequisites of creating the dataset from the OSS bucket and creation of NAS storage which serves as primary disk to mount on DSW instance. I have chosen Singapore region for all the cloud services. An OSS bucket is created in Singapore region and the image datasets are uploaded with folders ‘Train’ and ‘Test’ for the training and testing the models respectively. The image dataset used here is the dataset owned by the blog author for his earlier research work of “BettaNet Architecture”. That dataset consists of few hundreds of wild native Betta fish species from the Kingdom of Thailand. The images were captured in an uncontrolled environment using smartphone cameras from various pet shops in Chatuchak market in Bangkok. Our ultimate purpose is to mount this OSS image dataset to the DSW instance and enable the usage of the dataset the same way I used in the standalone PC loaded with Tensorflow and PyTorch supported by NVIDIA RTX 3060 8GB GPU. The installation of GPU hardware and softwares like Python, CUDA toolkit etc., are not necessary because the DSW instances support this infrastructure by default.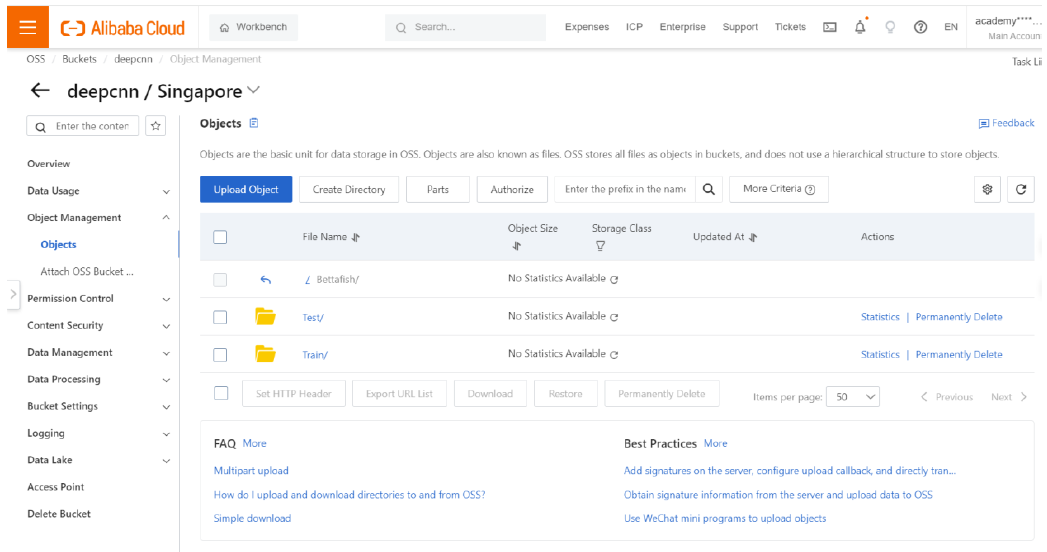
Now a NAS file storage needs to be created. Go to the NAS console and click on Create General Purpose NAS File System.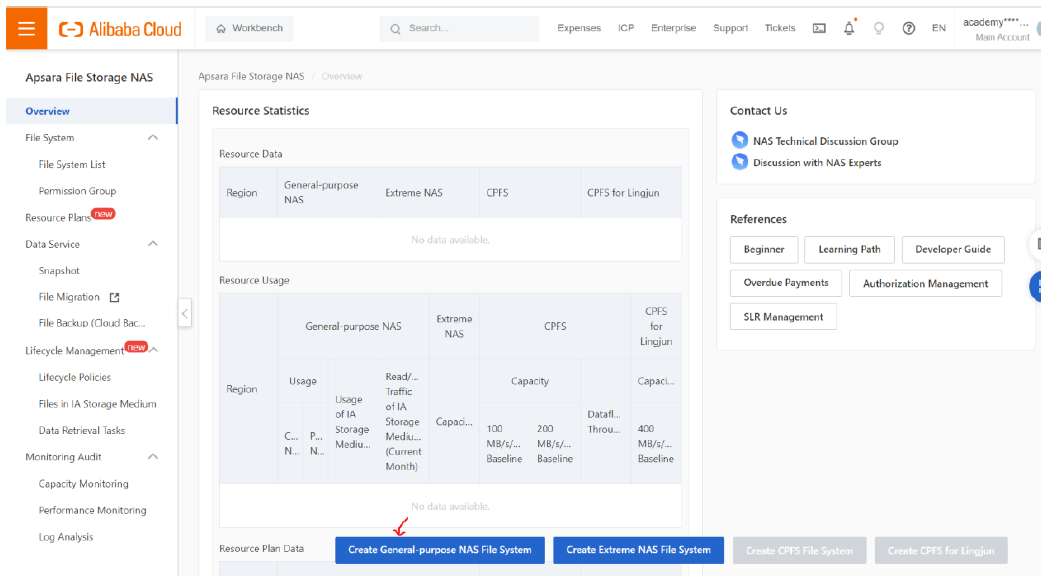
Select the region and zone from the list and scroll down for other options. Here we have chosen Singapore as Region and Zone A is opted.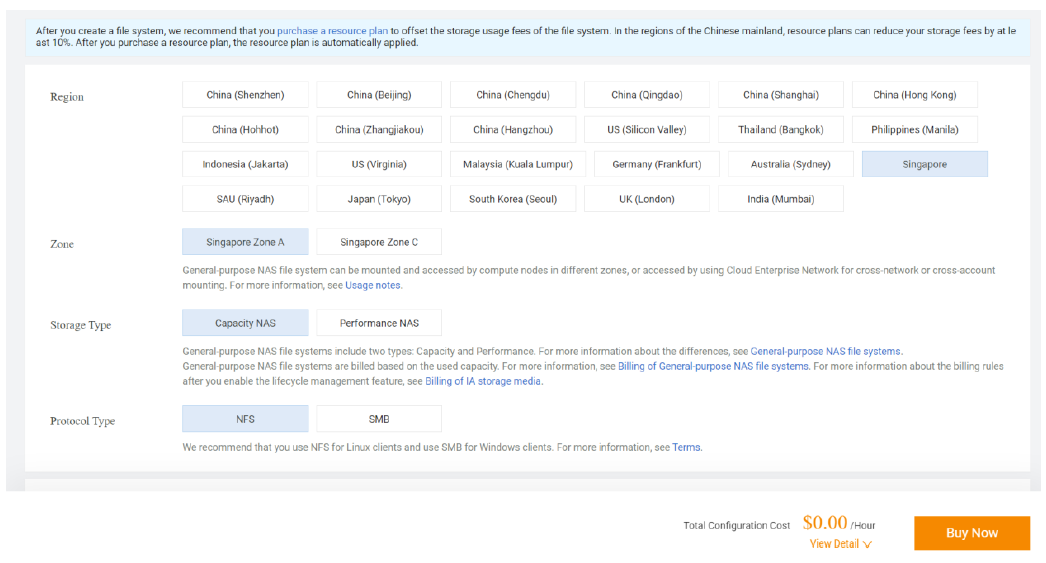
Select the VPC and the corresponding vSwitch.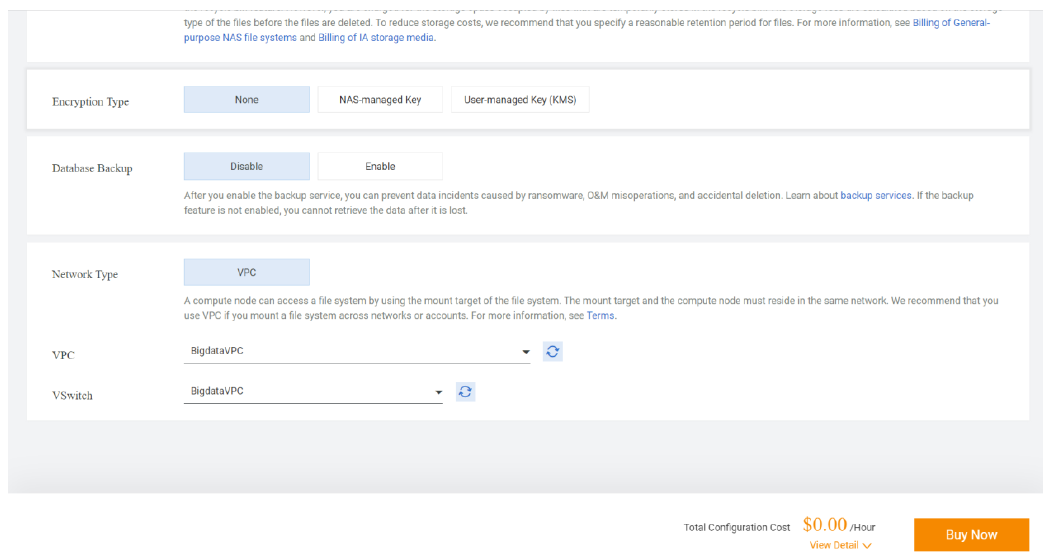
Click on “Buy Now”.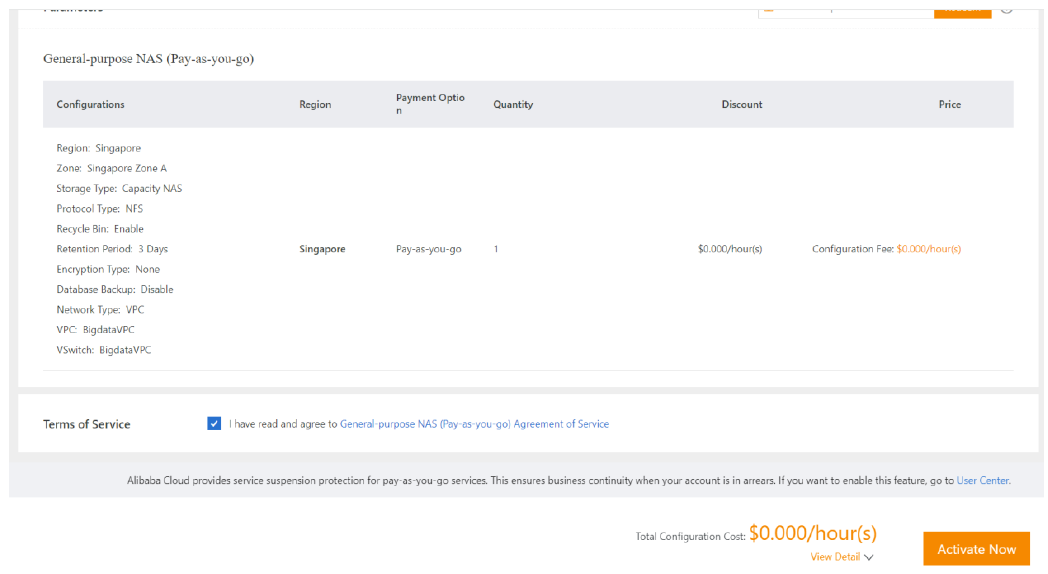
Check the configuration details, click to agree with NAS Agreement of Service and click on “Activate Now”.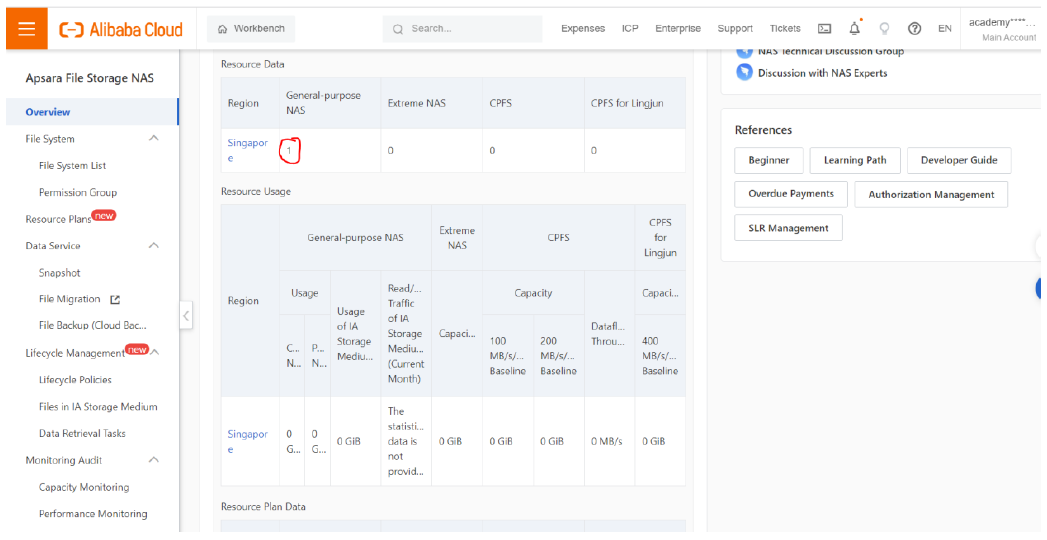
In the NAS console, we can get the newly created NAS storage displayed. With this, we have the images stored as dataset in OSS, VPC and NAS file storage as prerequisites. Now we need to open the PAI console.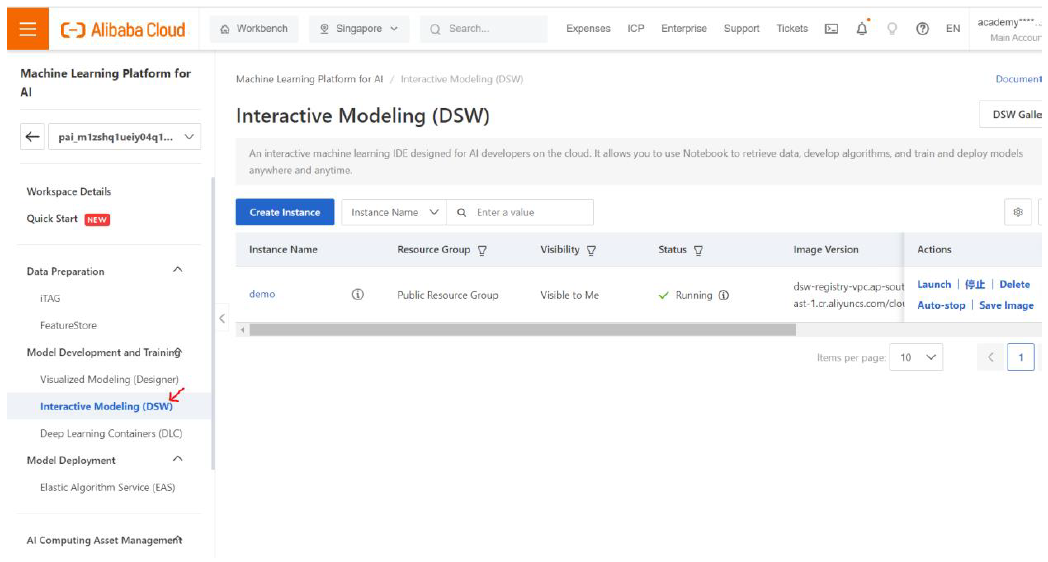
Click on Interactive Modeling DSW. This displays the list of DSW instances available. Click on “Create Instance”.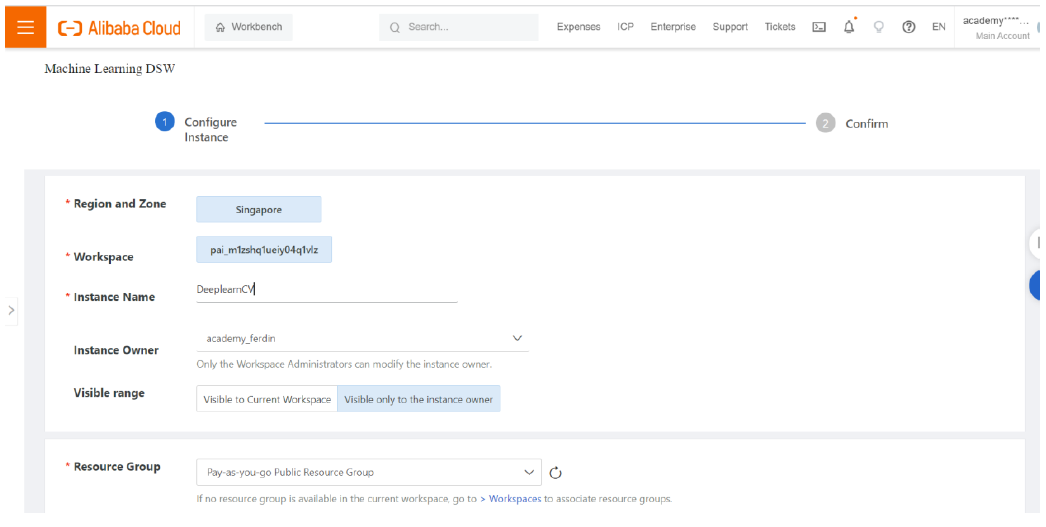
Enter a name for the DSW instance and scroll down.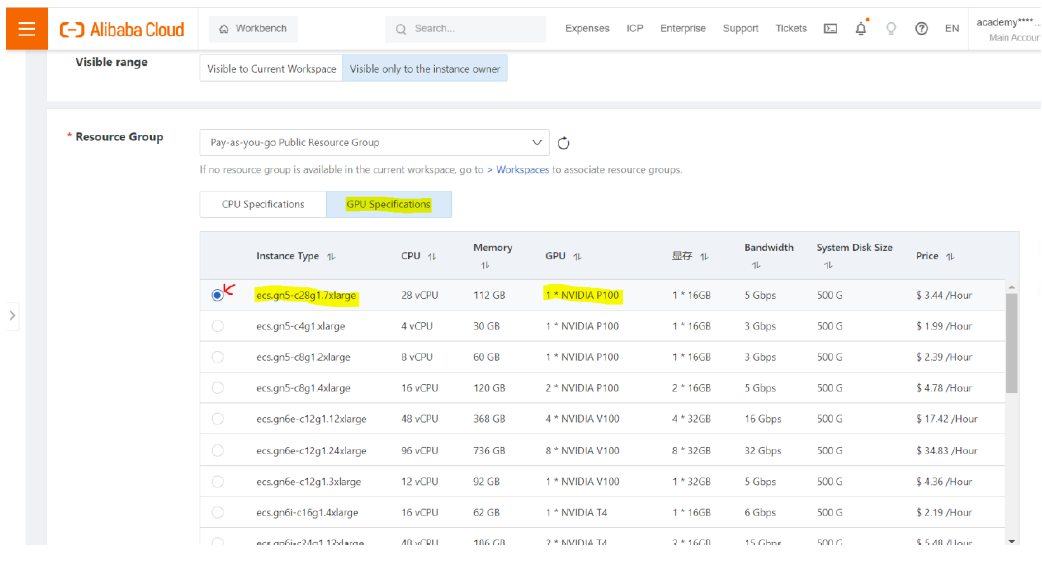
Click on GPU Specifications as we need to use deep learning libraries extensively. Select the ECS instance as per your requirement. Here I have chosen the highlighted option as it has more CPU cores and better memory capacity.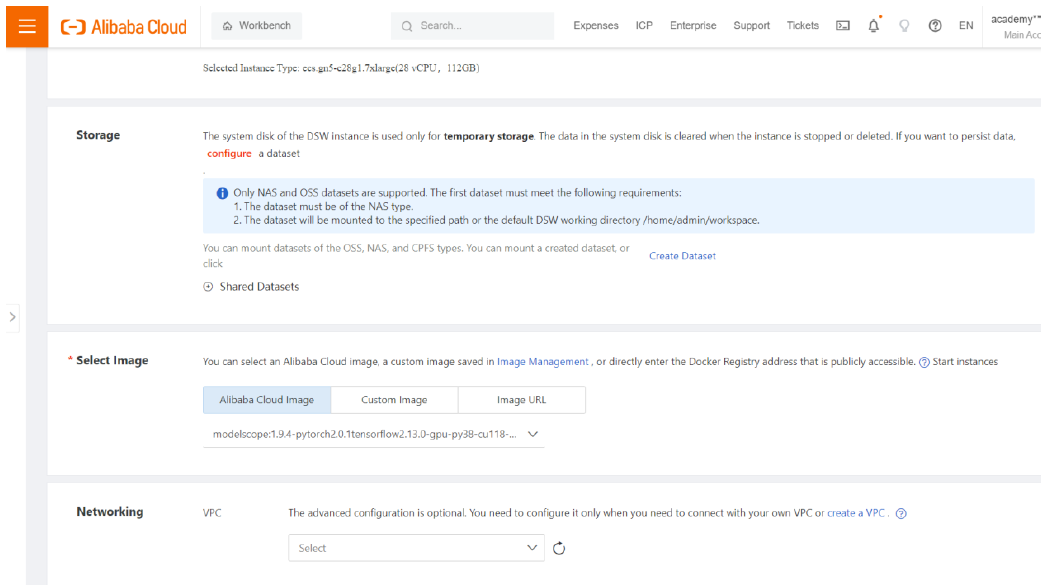
Click on Create Dataset.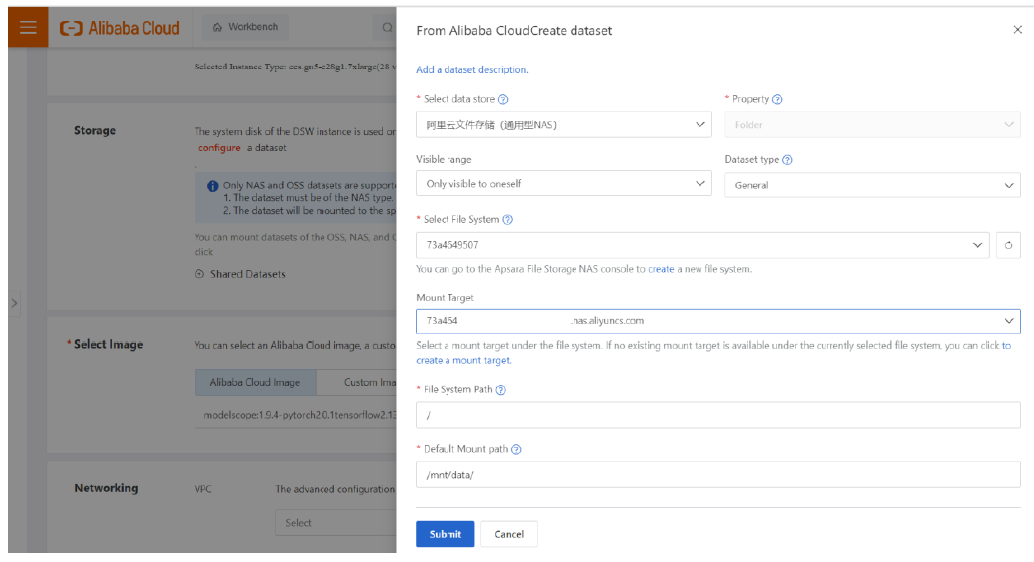
Enter the details of the NAS file storage created earlier in prerequisite and Click Submit.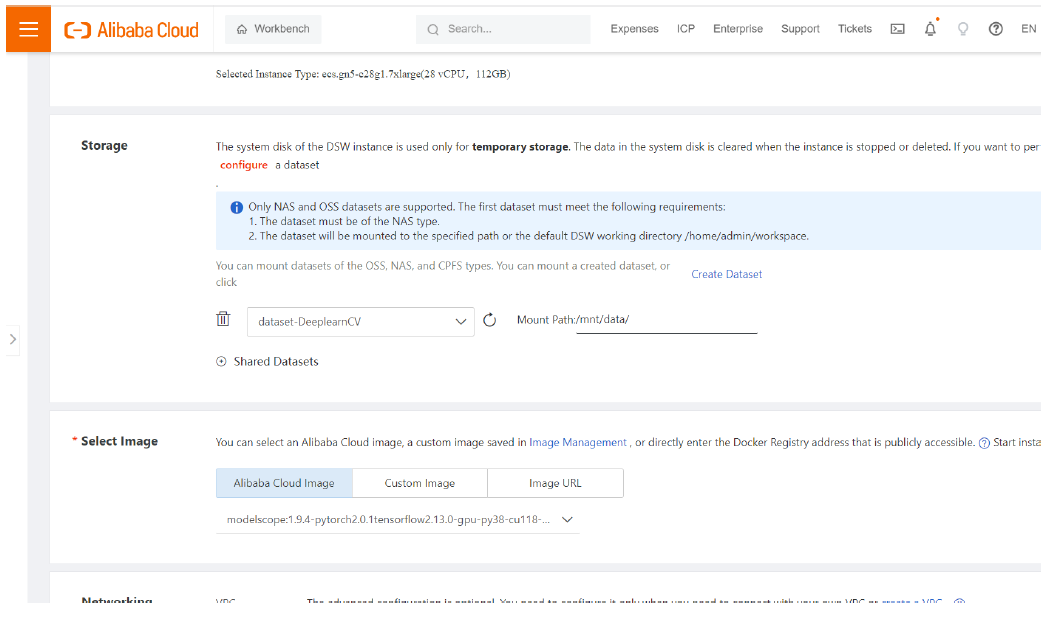
Now it is mounted to the DSW instance being created with a path /mnt/data/. Click on “Shared Datasets”. Earlier in the PAI Asset Management, I configured the OSS bucket as a public dataset which we need to use here. Now that OSS dataset gets listed in the drop down and select it.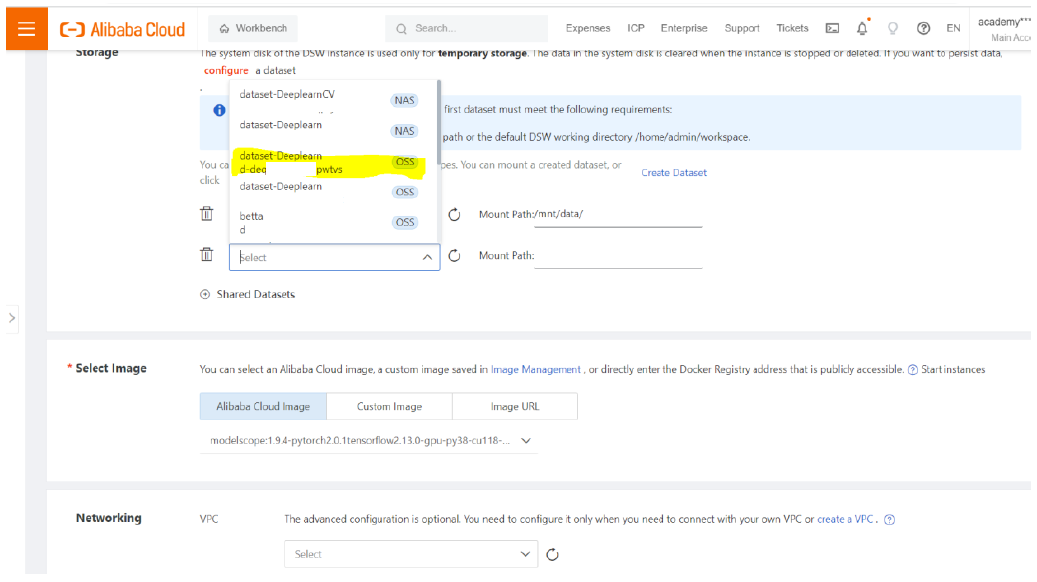
Edit the mount path so it doesn’t conflict with the path of other storage.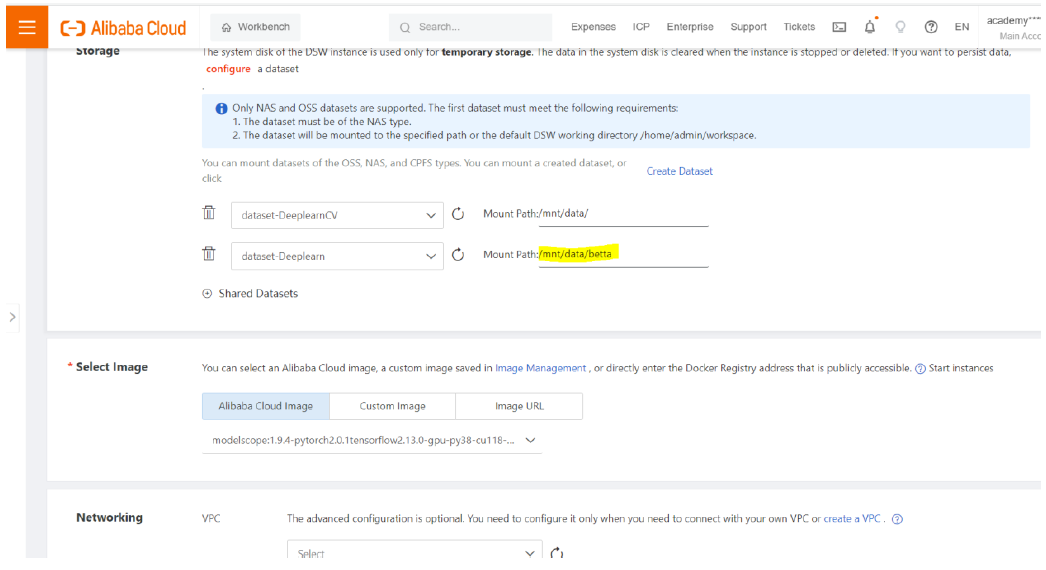
Select the image from Alibaba Cloud Image where it supports Tensorflow 2.13 and above with GPU support and scroll down.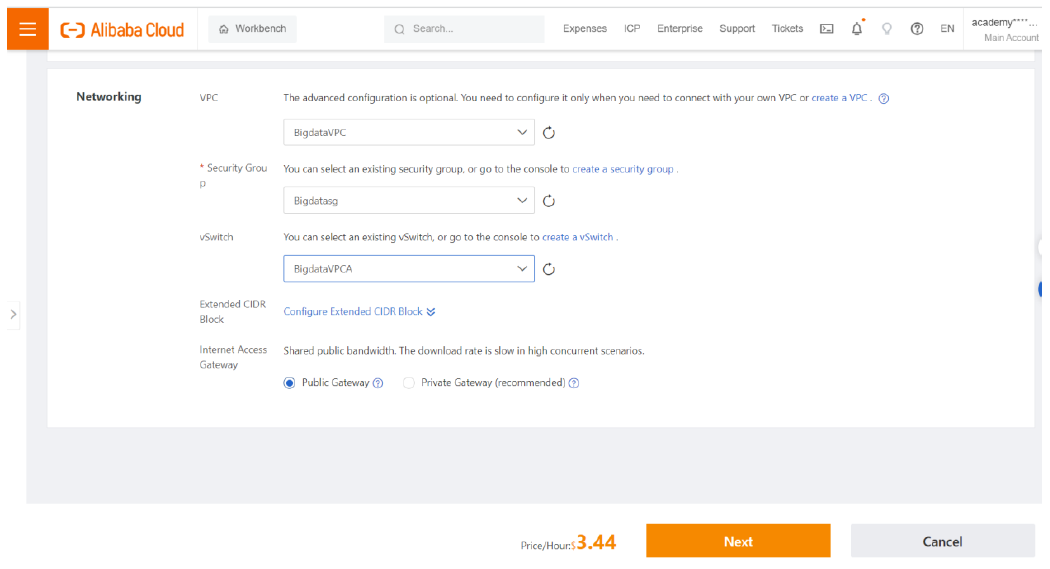
Select the VPC configurations and click Next.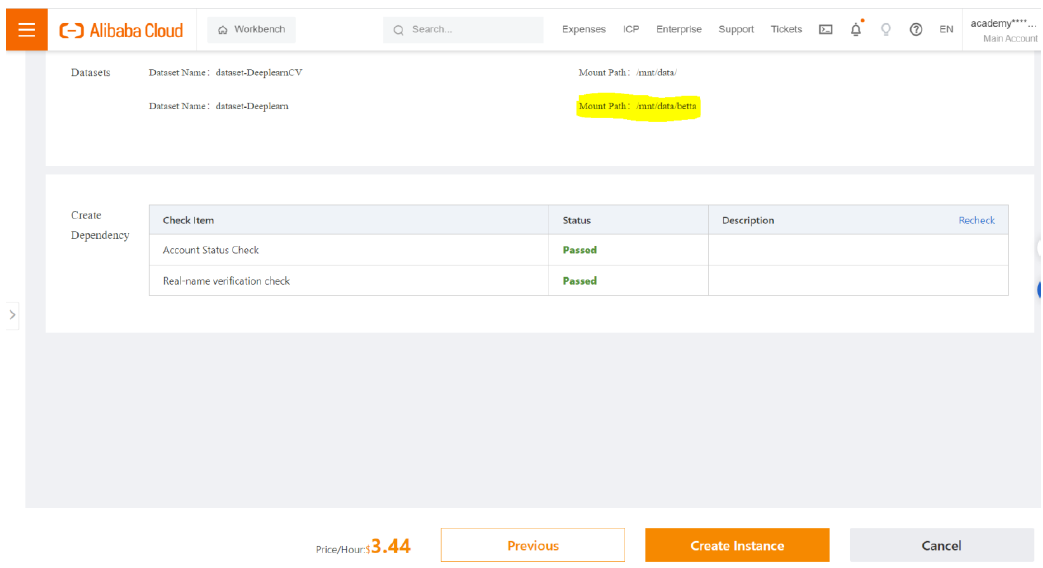
The parameters of the DSW are checked and the status becomes “Passed”. Our desired dataset is located in “/mnt/data/betta/”. Now click on “Create Instance”.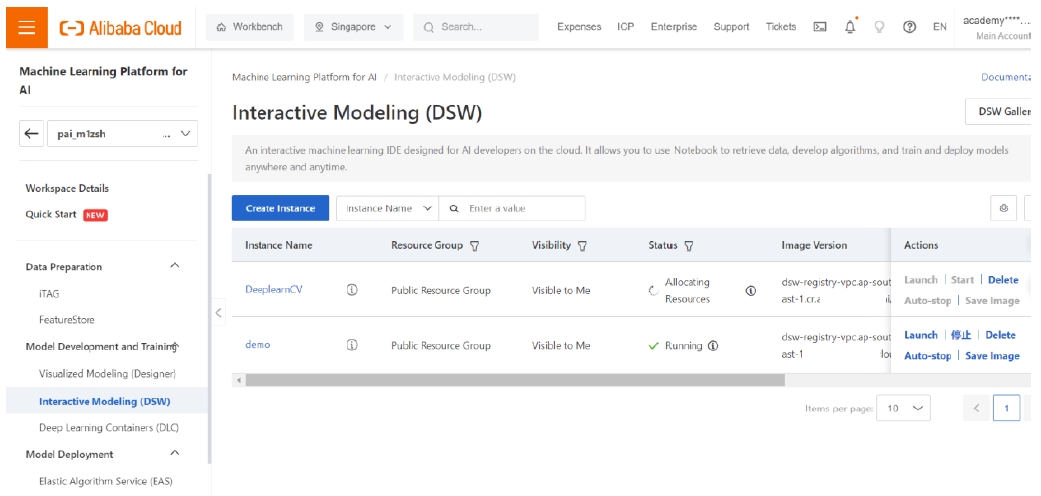
Wait until the DSW instance is done with creation and the status becomes running. You can close the tab and go ahead with other errands and then come back after sometime the instance gets created. The instance creation will work in background. I got a lecture to deliver during this time of instance creation. Manage the DSW instance the same way as Elastic Compute Service (ECS) Pay as You Go. So, the user has to be vigilant enough to start and stop the DSW instance. The billing is effective for the time lapse between the start and stop of instance.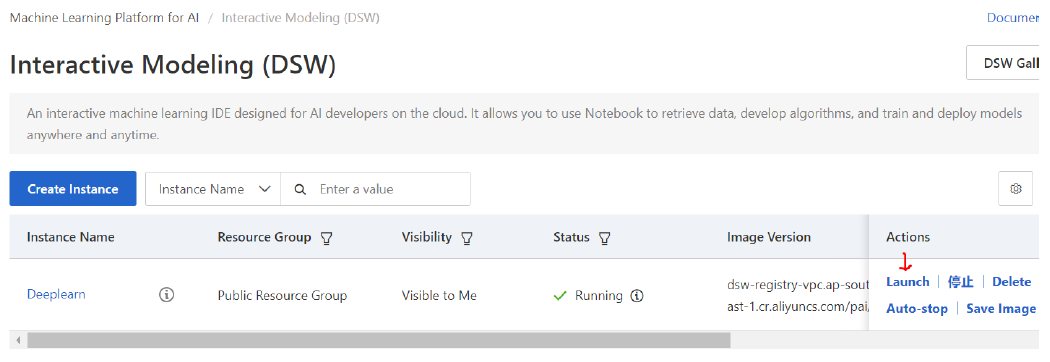
Now click Launch.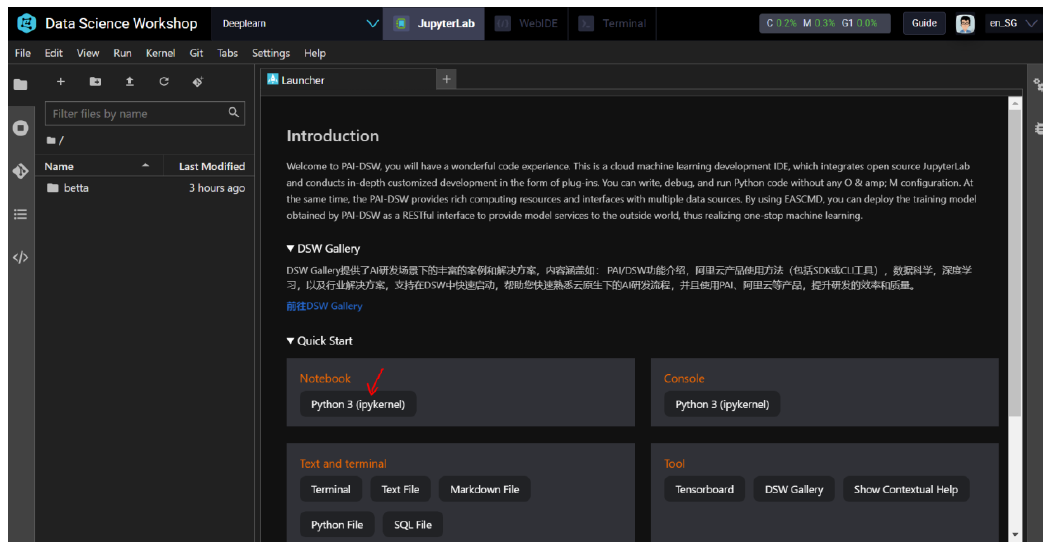
Click on Python3 (ipykernel) in Notebook. It opens a new python notebook. It has almost all the libraries preinstalled. If some libraries are missing, you can use pip to install them and use.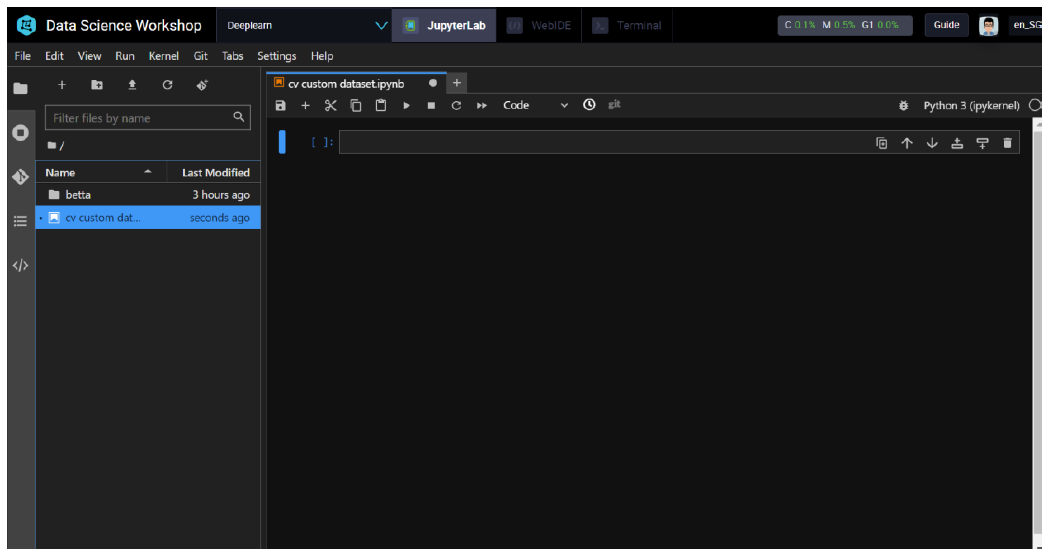
Now to use the dataset from our OSS bucket, we have two methods.
Step 1: Using oss2 library to call by API using secret key and token
Use the below code snippet in the Jupyter Notebook.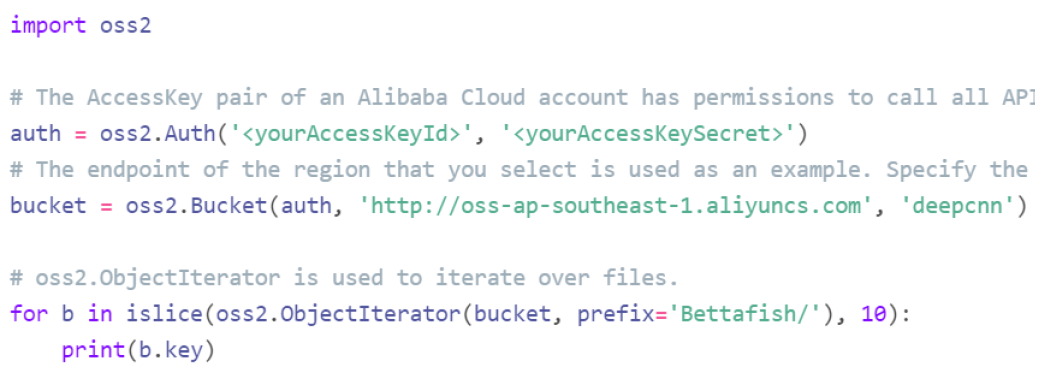
Replace the and with the ones generated for your Alibaba Cloud Account or the RAM User Account. The function of islice is imported from the library of itertools. The latter is not preinstalled and it can be done using pip.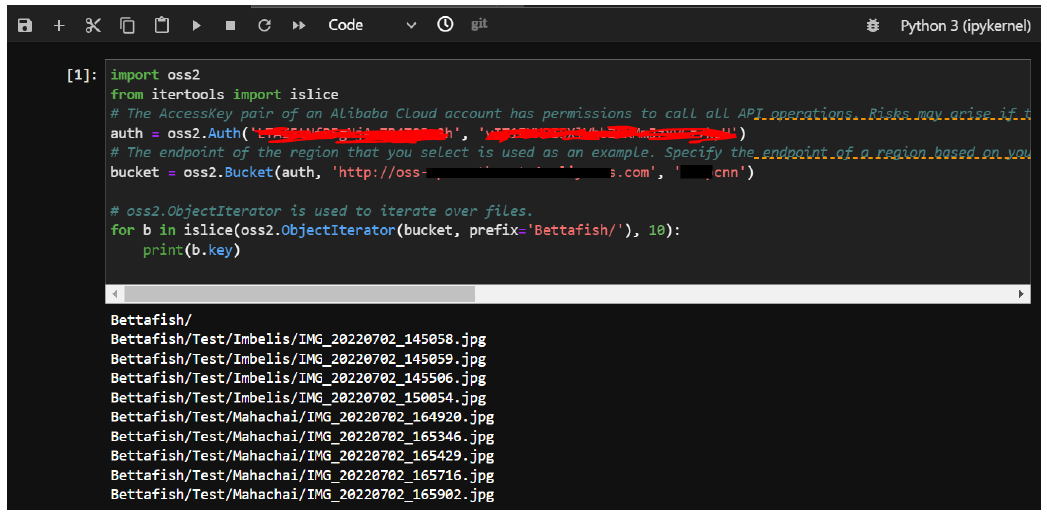
Step 2: Using the linux commands to enter into the OSS bucket mounted to DSW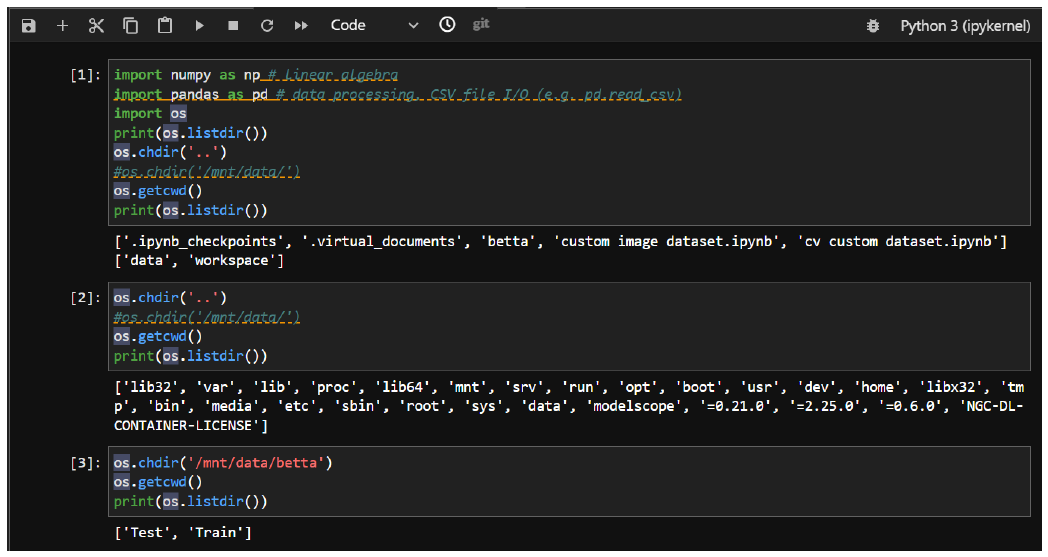
The batch size is set to 50.
The dataset has 5 classes and the CNN layers are arranged to accommodate in the fully connected neural network layers.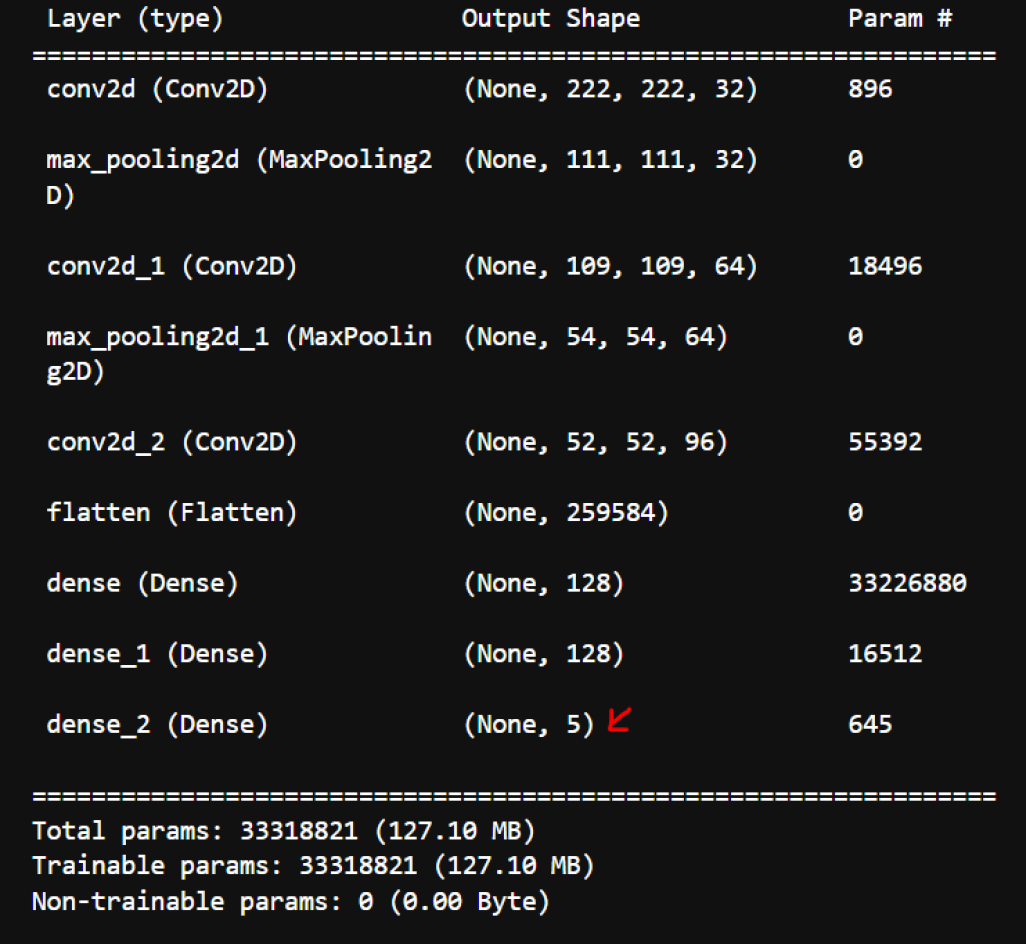
Ignore the warnings and run the training with 10 epochs first and see the performance.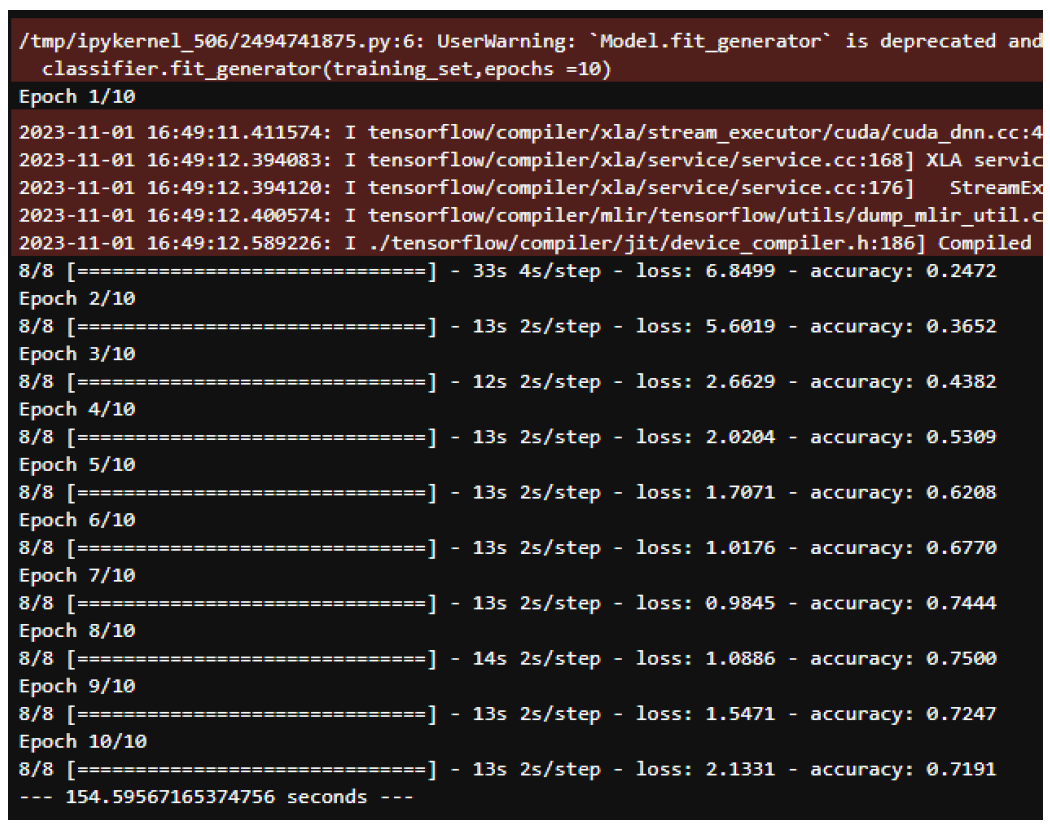
The training accuracy is around 72%. To get a better model we need to increase the training accuracy. Now increase the epoch to 100.
Observe the CPU and GPU performance from the menu at the right top corner.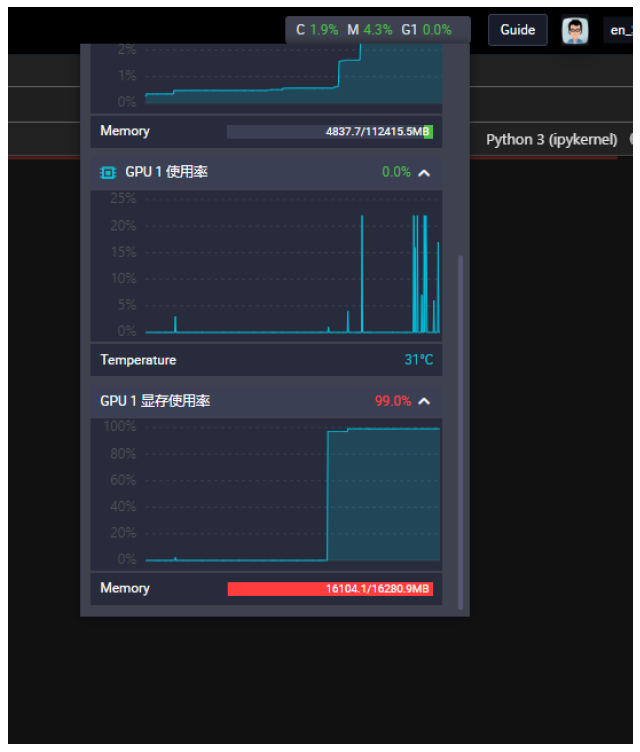
There is a significant increase in the performance that the cross entropy error has reduced and the training accuracy has increased.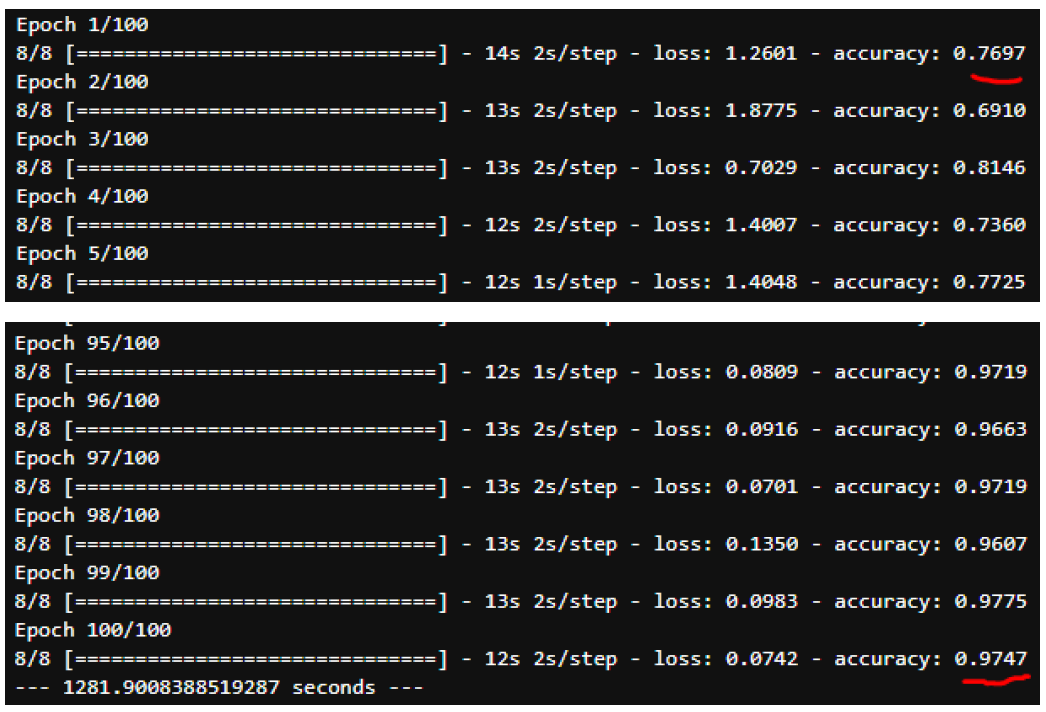
The model is evaluated with the images stored in the Test folder.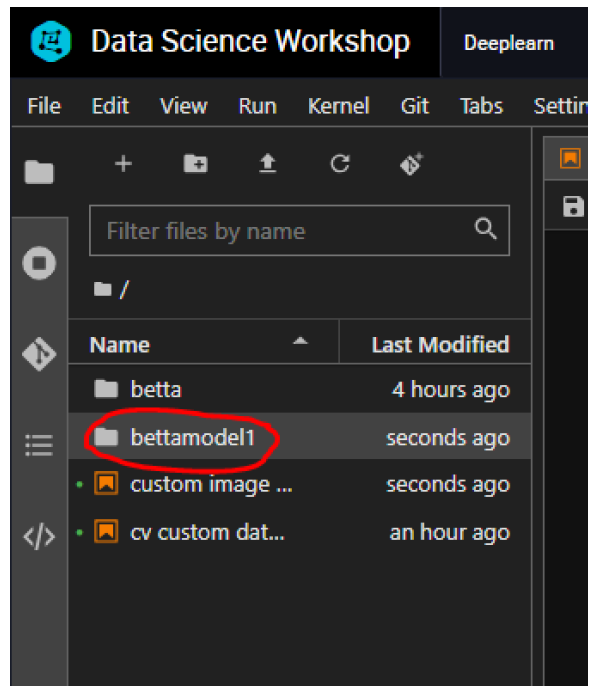
The testing performance of our trained model is as below.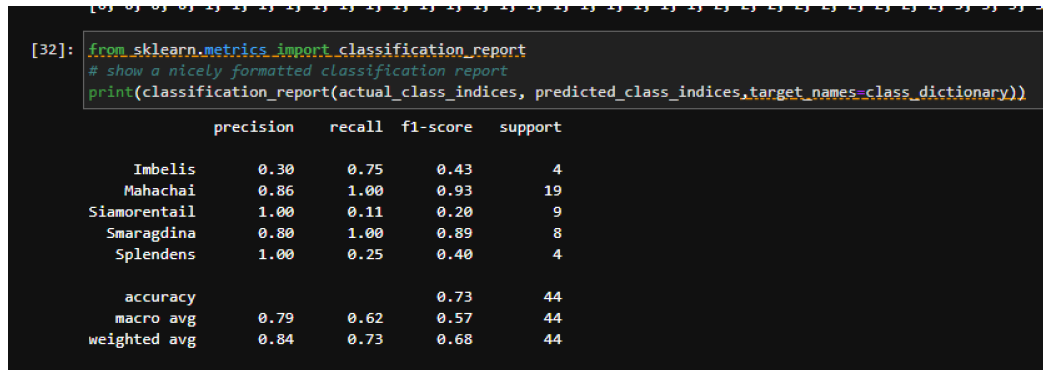
We can save the model file in pb format. The model file saves along with the ipynb files.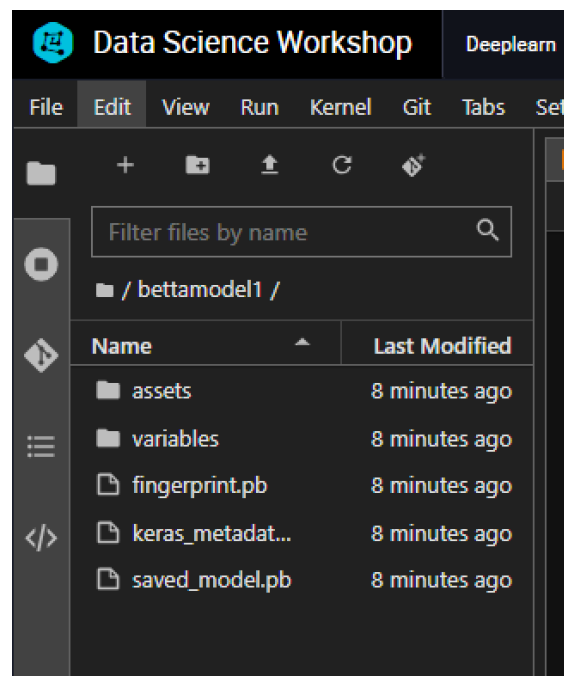
Transfer the file to an OSS bucket which we have.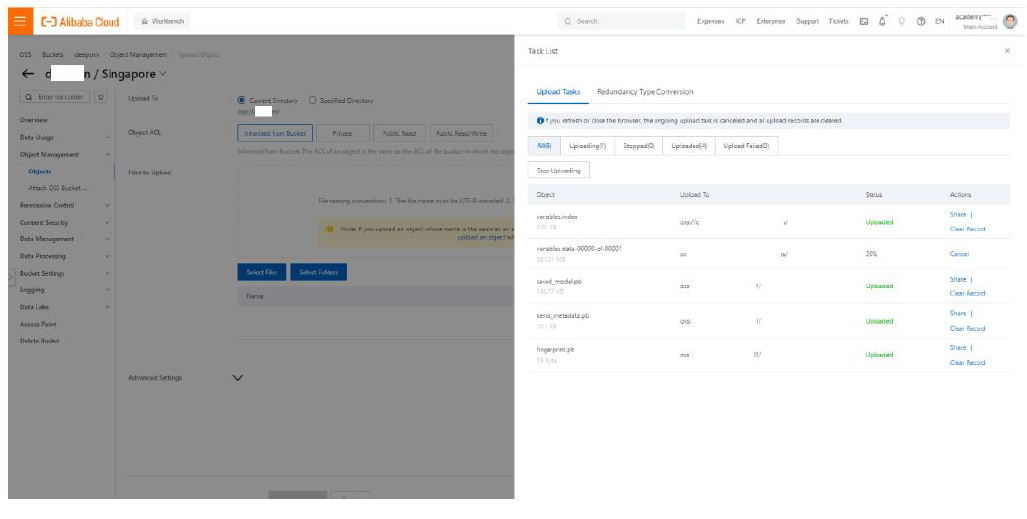
Deployment in EAS
Go to the console of Platform for AI and click on Models in AI Computing Asset Management.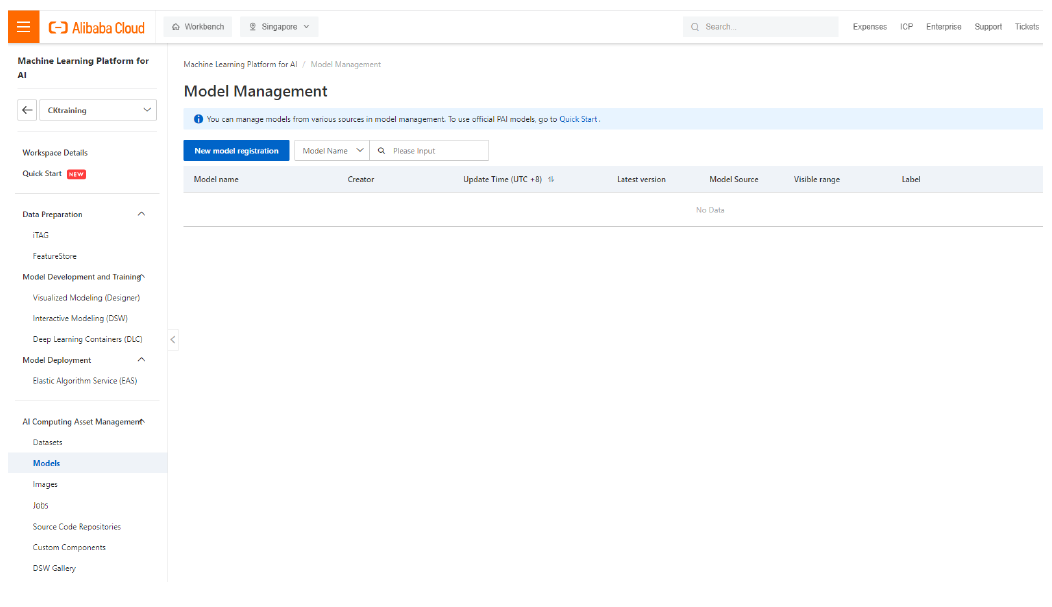
Click on New Model Registration.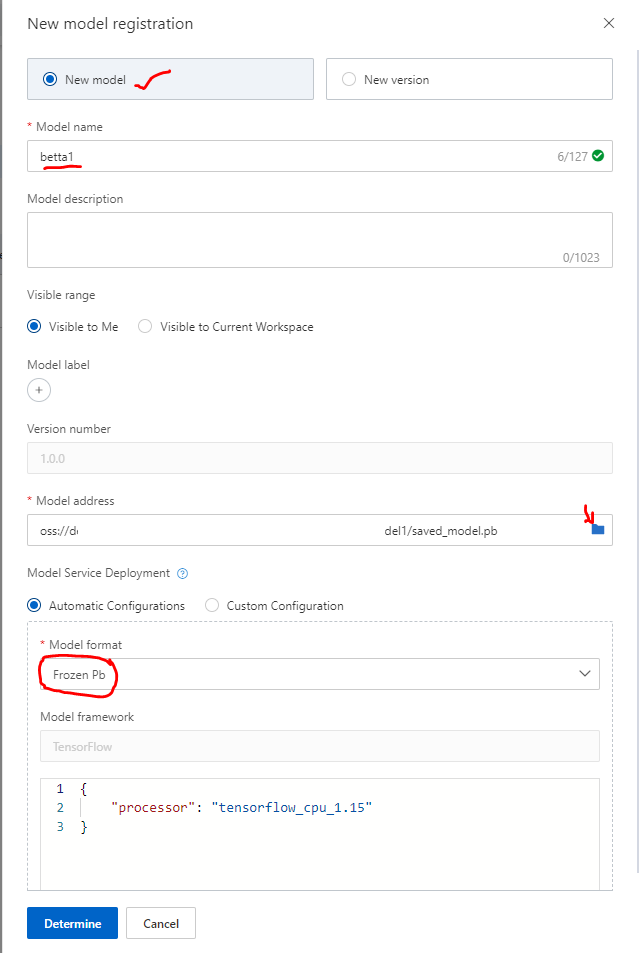
Enter the relevant details and locate the Pb file and click on “Determine”.
Now click on “Deploy to EAS”.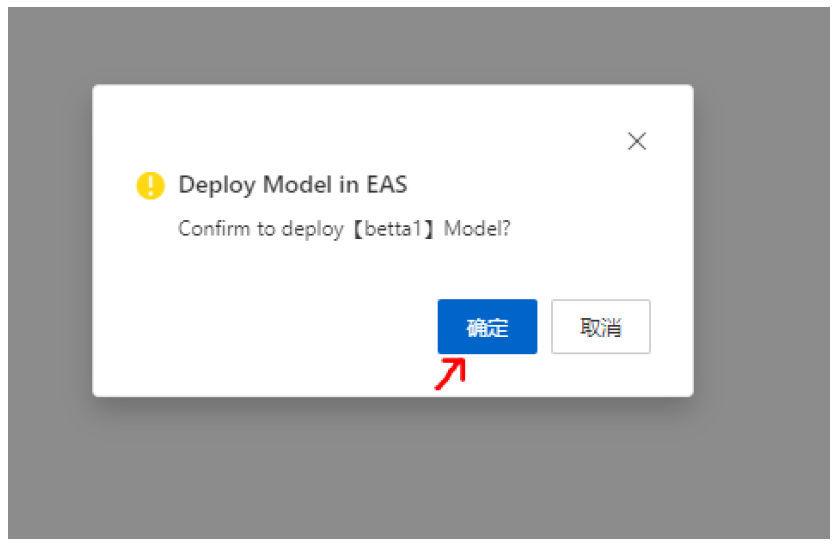
Click on “Confirm”.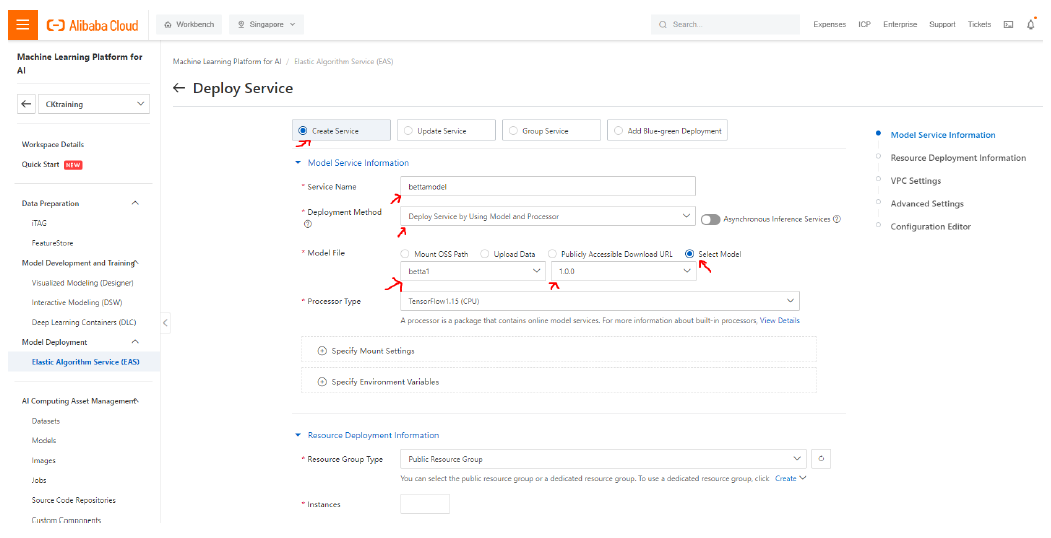
Choose the model options as shown in the figure and scroll down.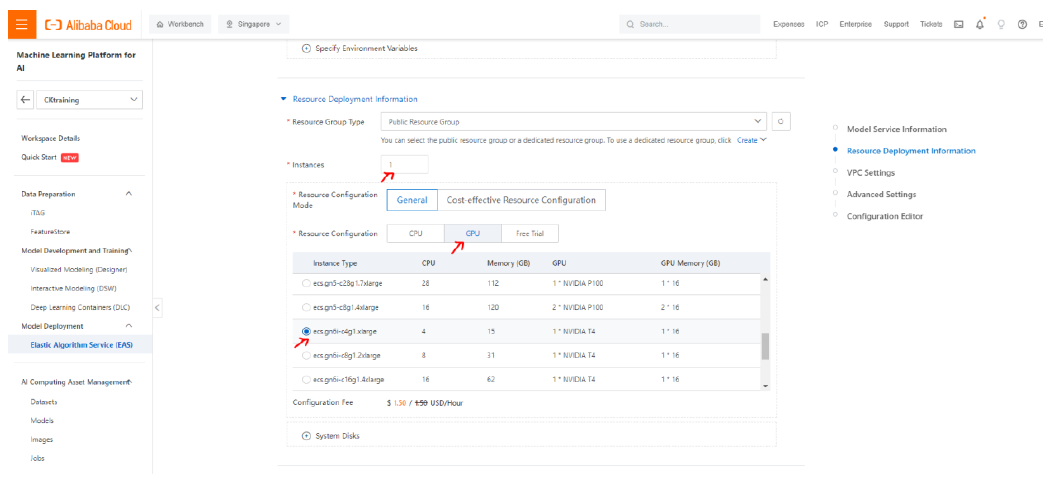
Choose the deploying instance as shown in arrows. Now select the VPC parameters.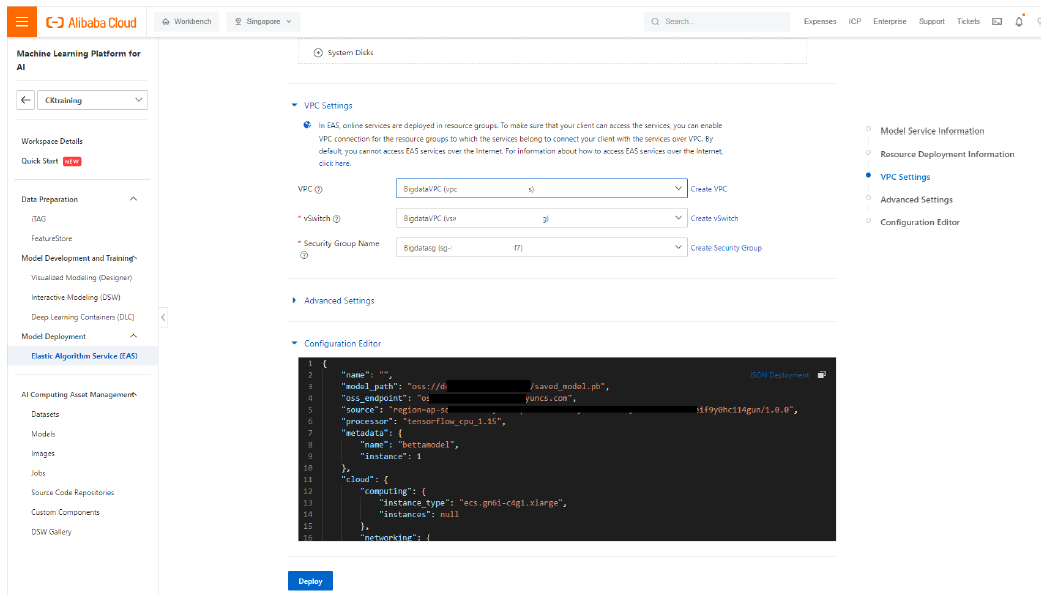
The configuration file in JSON format is automatically generated. Now click “Deploy” and then “OK”. The EAS model deployment gets created.
Wait until the status changes to “Waiting”.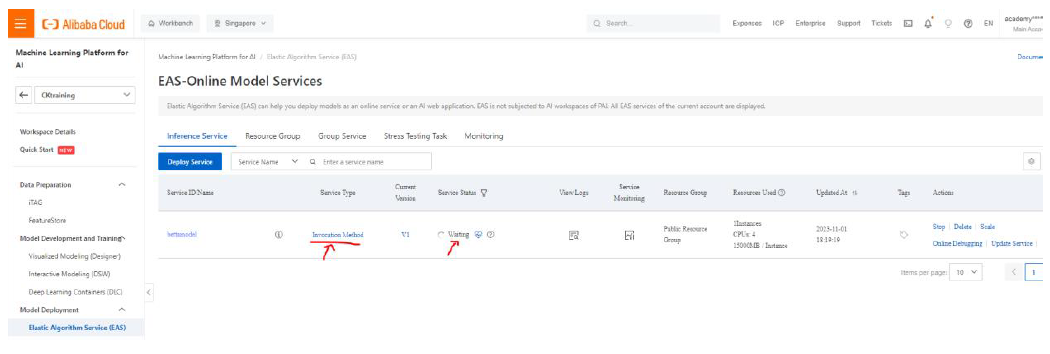
Click on “Invocation Method” and copy the Public endpoint and the hidden token.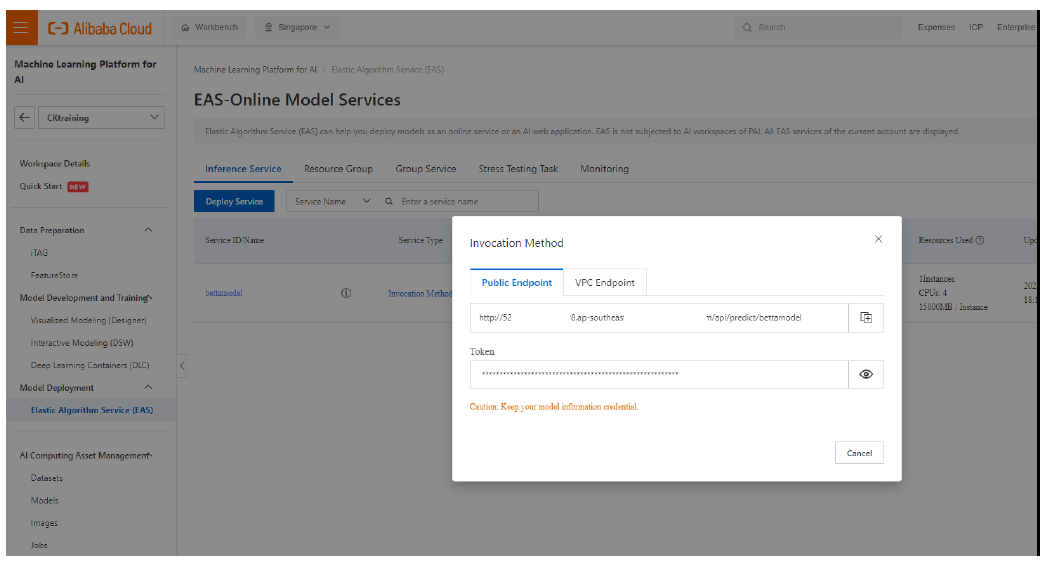
This information can be used in options given in EAS deployment call services listed in: https://www.alibabacloud.com/help/en/pai/user-guide/call-a-service-over-a-public-endpoint?spm=a2c63.p38356.0.0.24bf4b43HEg9NG .
PAI Visualized Modeling: Enroute from Development to Deployment
Development to Deployment of 3-Tier Architecture of a Simple Web Application Using Alibaba Cloud
JDP - June 18, 2021
Farruh - October 1, 2023
Farruh - October 2, 2023
Alibaba Cloud Data Intelligence - June 18, 2024
Merchine Learning PAI - October 30, 2020
Regional Content Hub - March 8, 2024
 AgentBay
Multimodal cloud-based operating environment and expert agent platform, supporting automation and remote control across browsers, desktops, mobile devices, and code.
Learn More Online Education Solution
This solution enables you to rapidly build cost-effective platforms to bring the best education to the world anytime and anywhere.
Learn More YiDA Low-code Development Platform
A low-code development platform to make work easier
Learn More mPaaS
mPaaS
Help enterprises build high-quality, stable mobile apps
Learn MoreMore Posts by ferdinjoe