Visualized Modeling is a drag and drop service available with Platform for AI (PAI) for developing and deploying machine learning models. This helps the users to conceptualize the flowchart they developed into a fully functional machine learning model and applications. The development functionality is by connecting the functional blocks available with the library and it is similar to connecting Lego blocks. Once the blocks are connected, the parameters are fine tuned in order to get the pipeline of functionalities get aligned in the way it is designated to work. This blog walks through the procedures to develop a machine learning model, deploy the same using Elastic Algorithm Service (EAS) and using the deployed model with API connectivity.
Step 1: Get familiarized with the Visualized Modeling tool
Get into the PAI console and in the left pane, the Visualized Modeling (Designer) will be available under model development and training.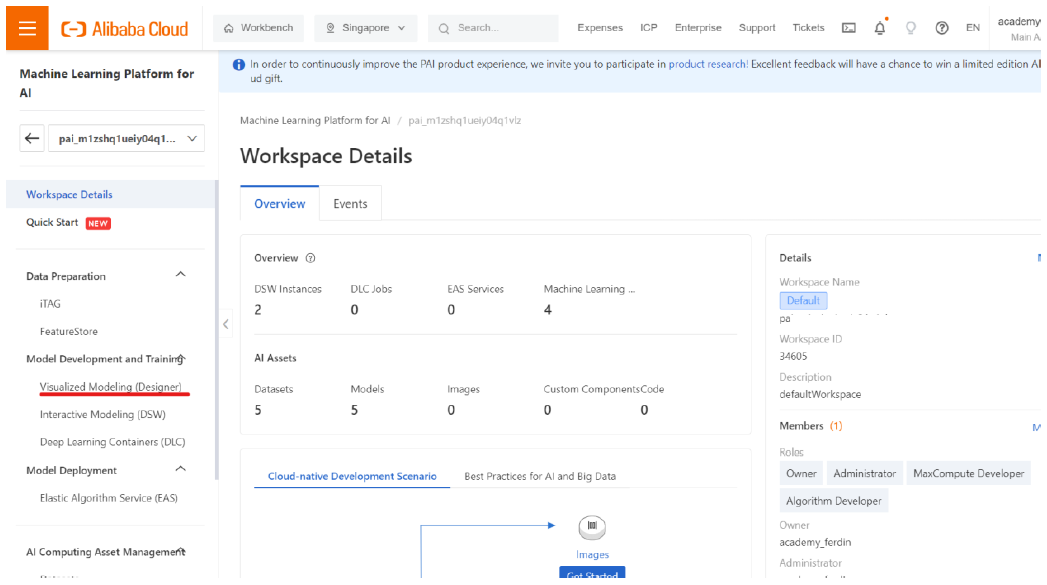
The model deployment section below has Elastic Algorithm Service (EAS) which houses the deployment models already available and acts as a platform to deploy the customized models created by the users. When you scroll down a bit, the AI Computing Asset Management will be found. This section manages the datasets, models, images, jobs etc., as resources. We can add our custom datasets and model files as we store in the OSS in this asset management.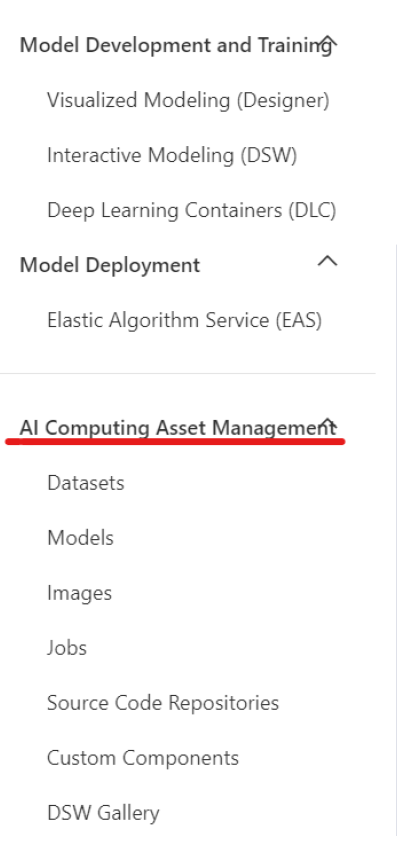
Step 2: Development of Visualized Modeling
Click on the Visualized Modeling (Designer) in the left pane under the Model Development and Training.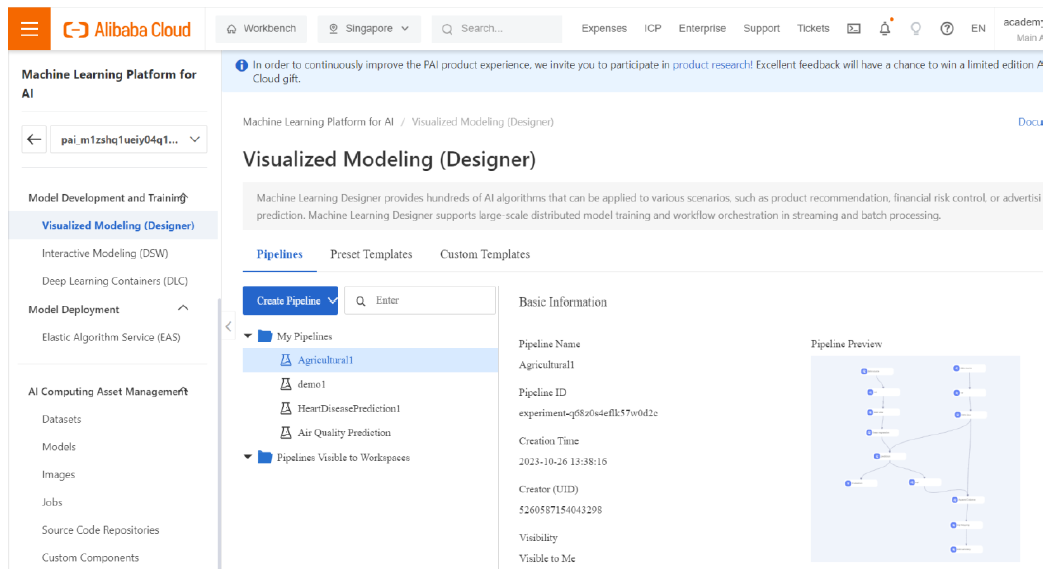
The Preset Templates tab has some preloaded pipelines developed and ready to use. While clicking on create pipeline under Pipelines, you can create a new pipeline or load pipeline from files saved. While the pipeline is created, click on the pipeline file. Then browse through the left pane to look for the components available. Drag and drop the components into the pipeline area and establish connections between them as needed. Here in this blog, I have loaded the heart disease prediction pipeline.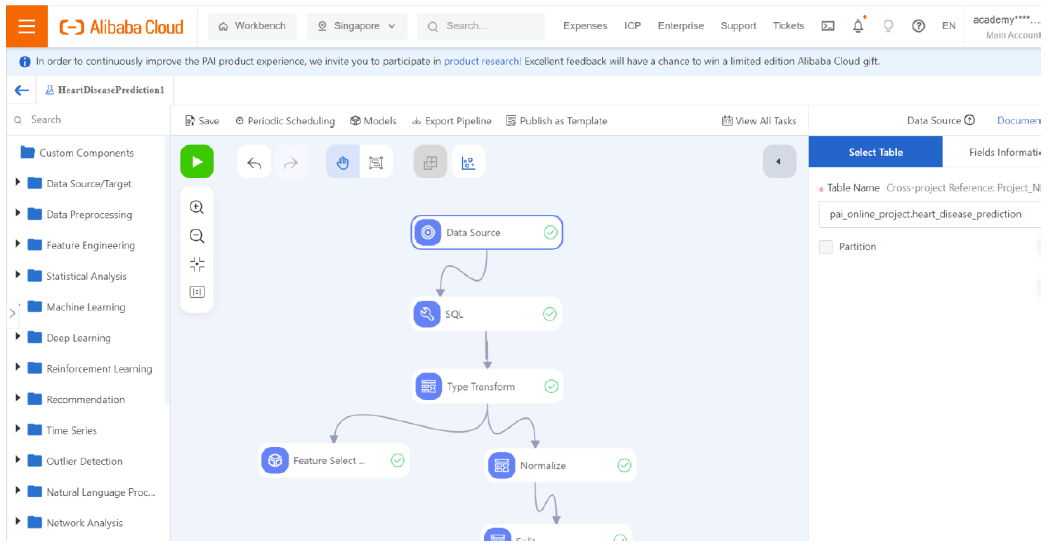
Click on each component and set the parameters corresponding to the nodes created and connected. After all the blocks connected are confirmed to work good enough, we need to create PMML file.
Step 3: Development of Machine Learning model
Most of the machine learning models available with visualized modeling support PMML format. Click on to the machine learning algorithm block in the pipeline. Here it is logistic regression.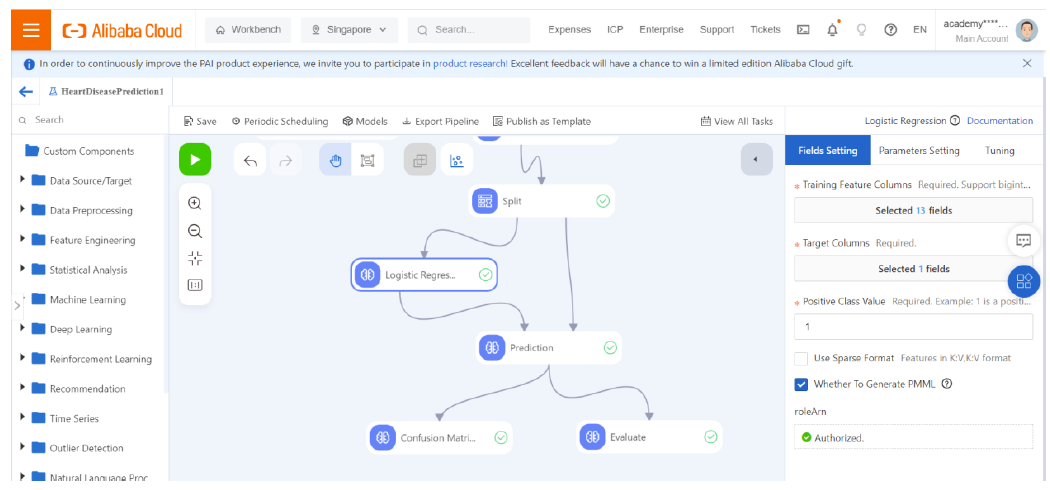
Check on the “Whether to Generate PMML” in the right pane. Now it is set to develop the machine learning model. Now click on somewhere outside of the blocks and observe the right pane.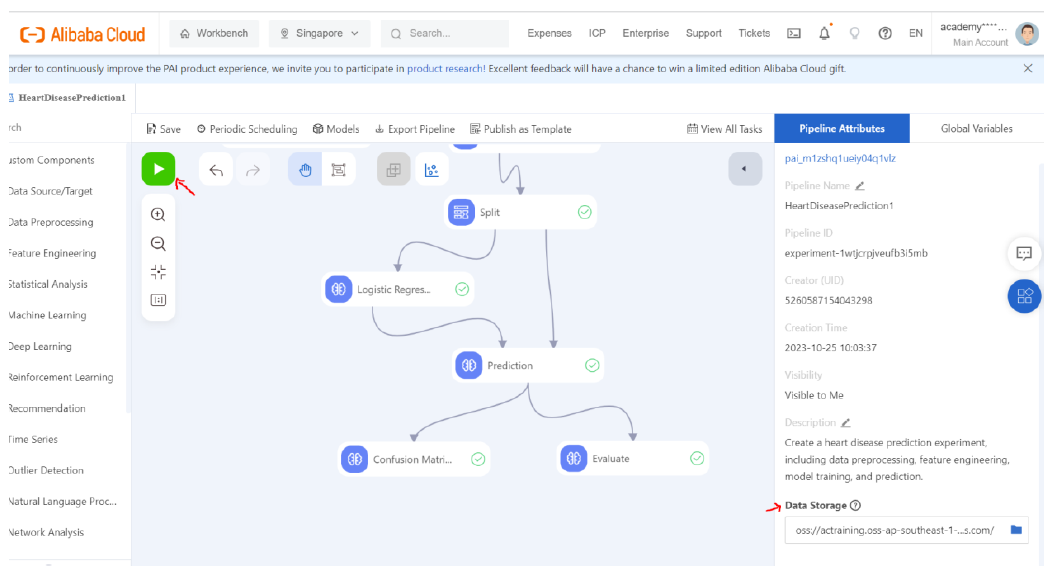
Configure the right pane to store the corresponding files to an OSS bucket you have designated for this purpose. Now click on the green play button on the left top corner of the pipeline area. This will run the processes designated in the pipeline. This execution process will give a look and feel experience. The entire flow of the pipeline can be monitored by the flow it visualizes. The green tick on the blocks represents the blocks which has completed execution and the green dotted lines on the connections show the ongoing execution.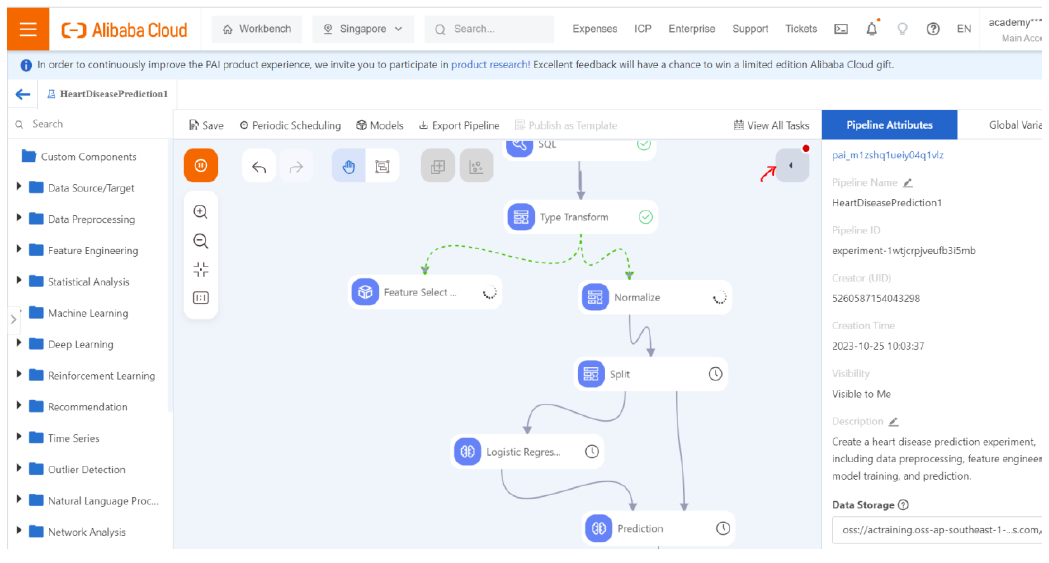
Click on the task button on the right top corner of the pipeline to watch over the ongoing processes.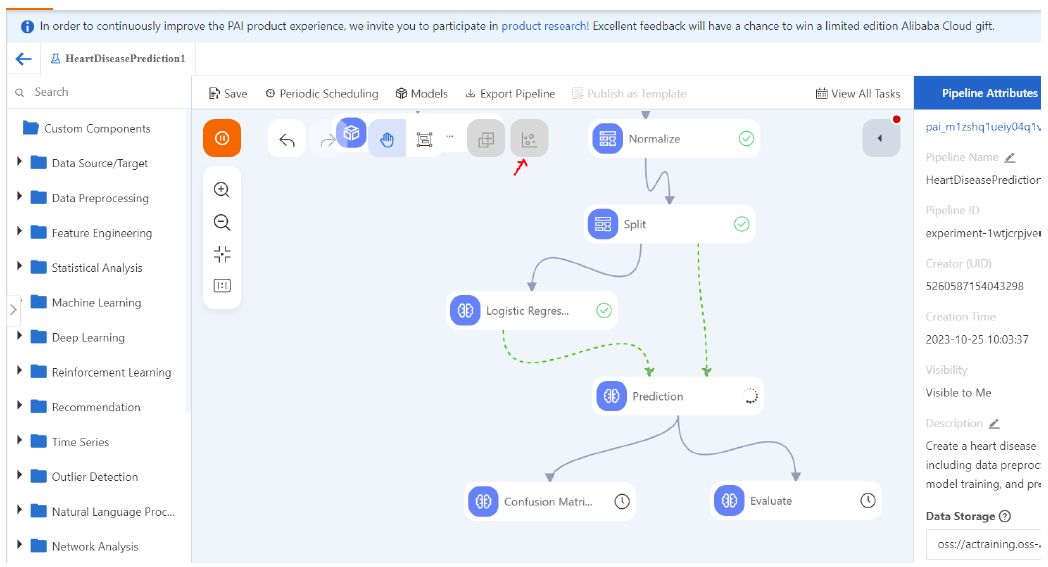
Until the outputs are available, the visualization button on the center top of the pipeline remains disabled. We got to wait until the blocks completed execution. Upon completion of execution, the visualization button becomes active.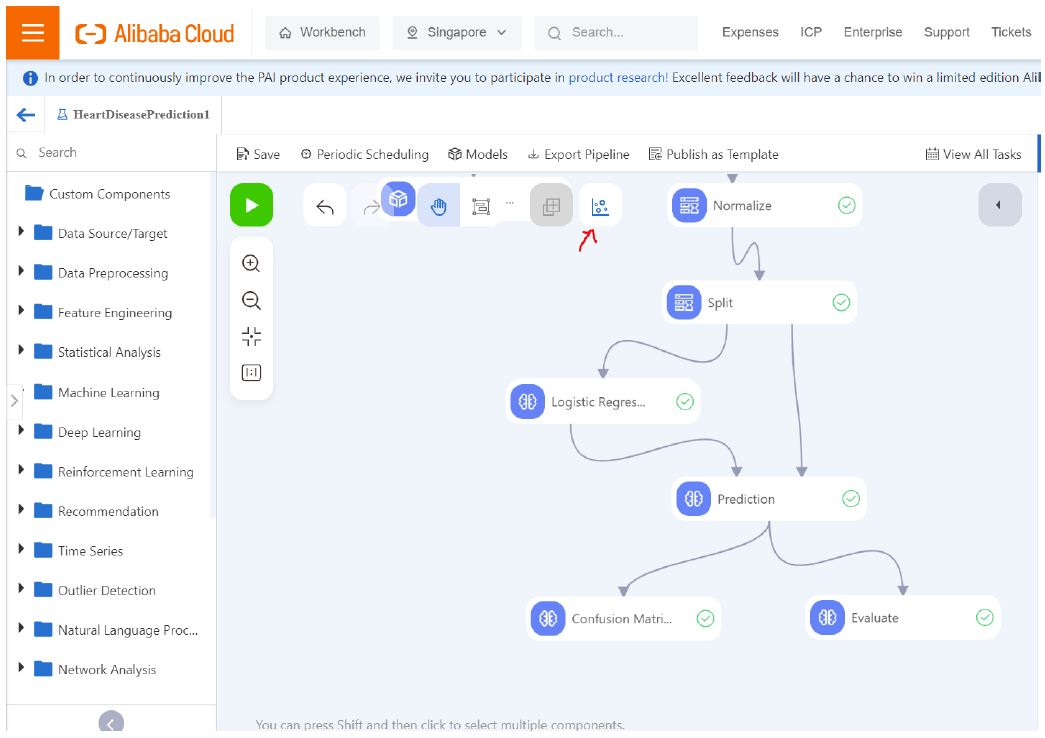
When the visualization button is clicked, it displays all the graphs and metric statistics generated.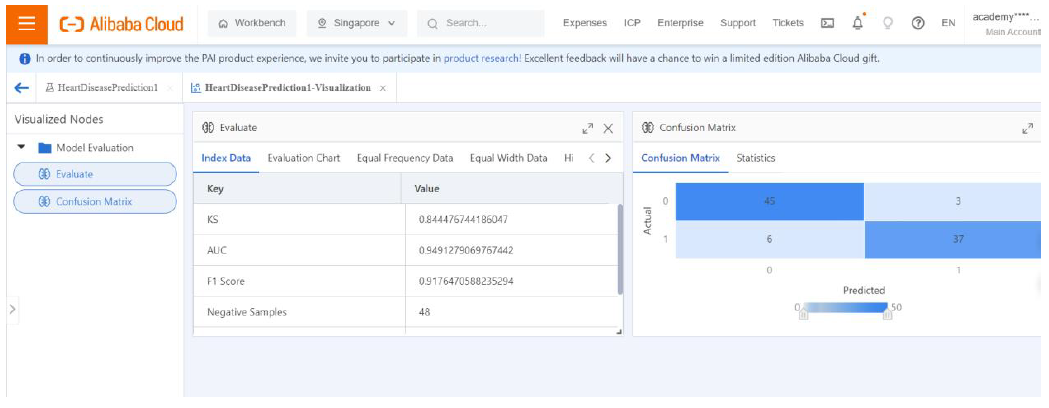
Then we can save the pipeline. As we enabled the PMML generation earlier, the model file is generated already. This will be seen active by clicking on the ‘Models’ menu available above the pipeline area.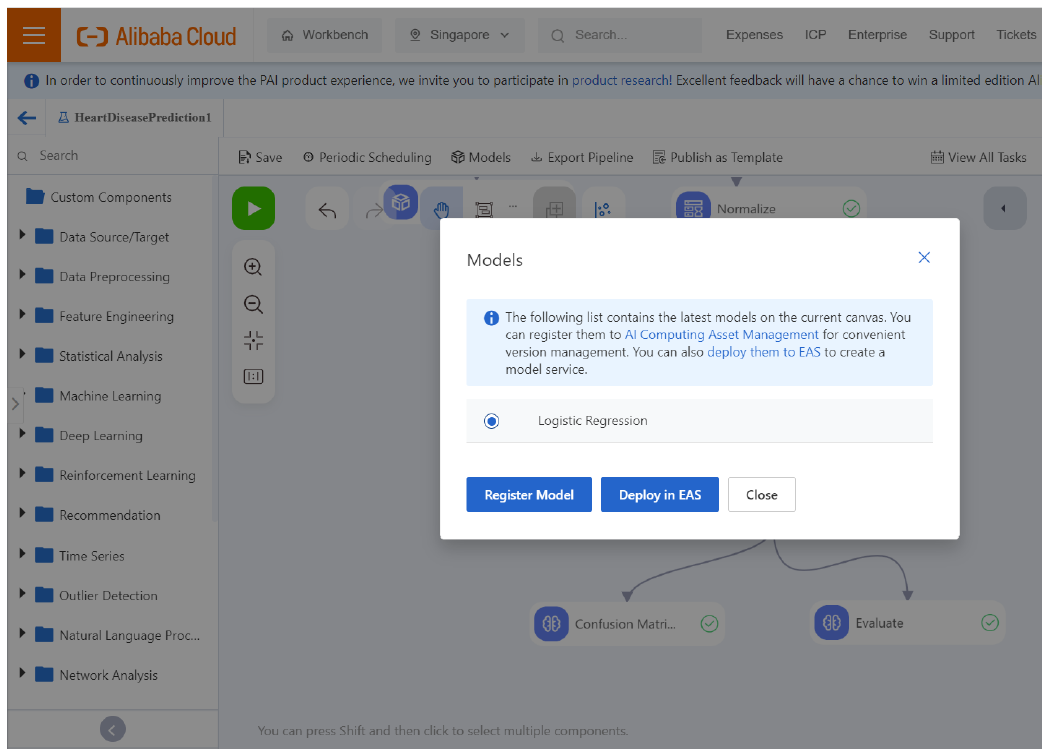
Step 4: Registering the model
Depending on the number of machine learning algorithms available, model files in PMML gets generated and displayed in models tab. Select the algorithm from which you need the model to be saved and click “Register Model”.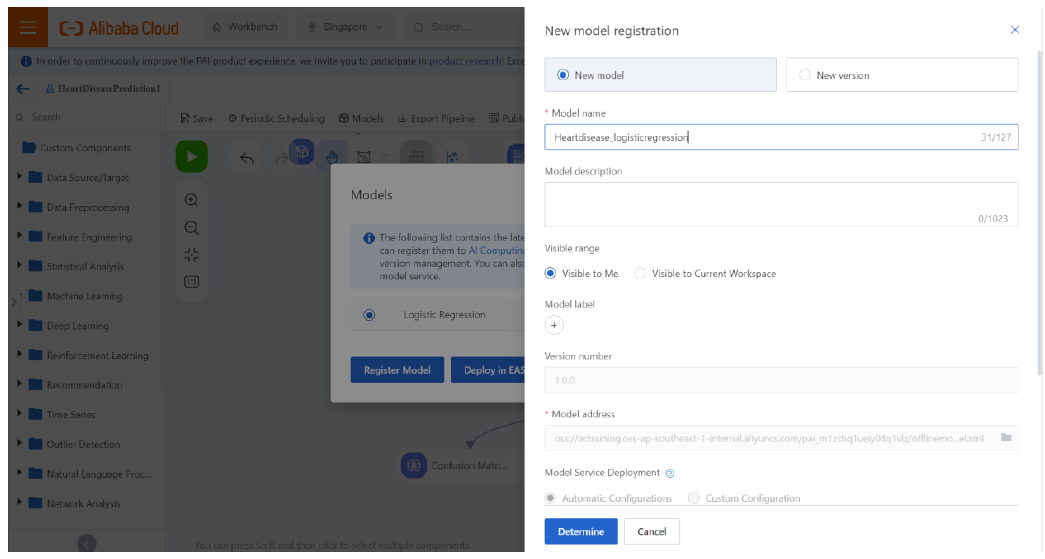
Enter the name to save the model and scroll down. Check on all the parameters available and click on “Determine”. Now the machine learning model generated will get stored under the “Models” section.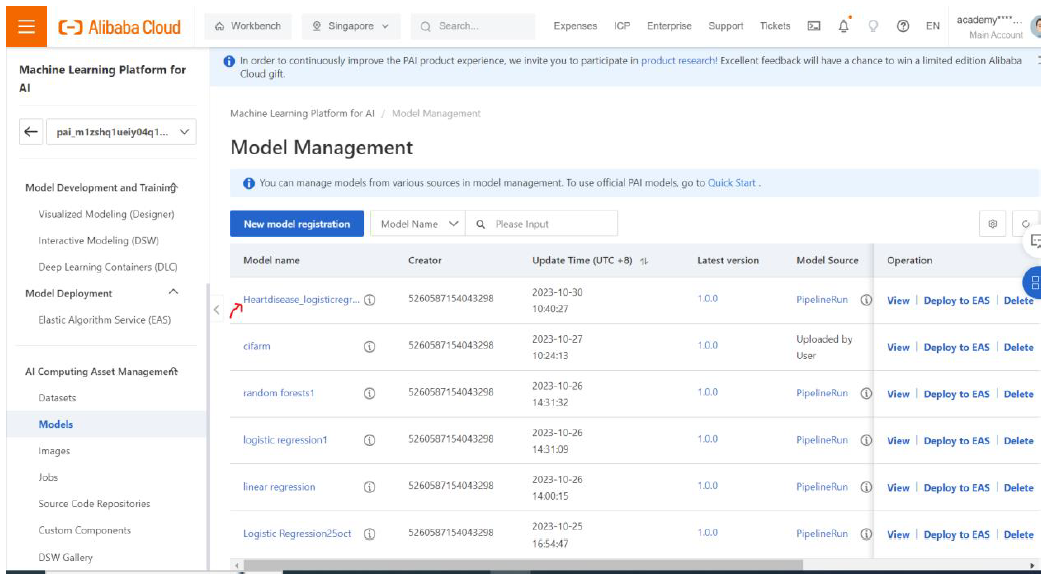
We can deploy this model by clicking on “Deploy to EAS” option and we can deploy by getting into the EAS section as well. On the console of PAI’s left pane, click on Elastic Algorithm Service (EAS) under Model Deployment.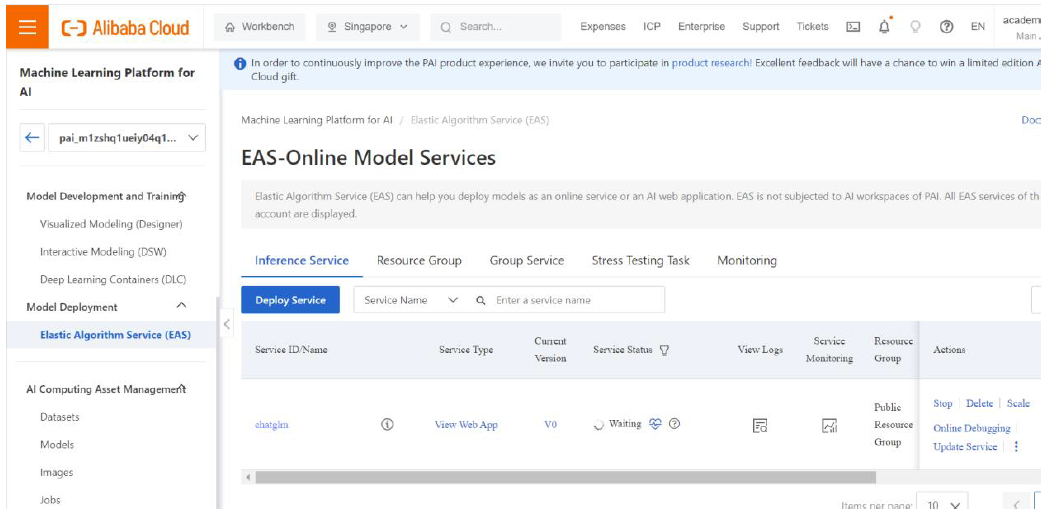
Click on Deploy Service and proceed further.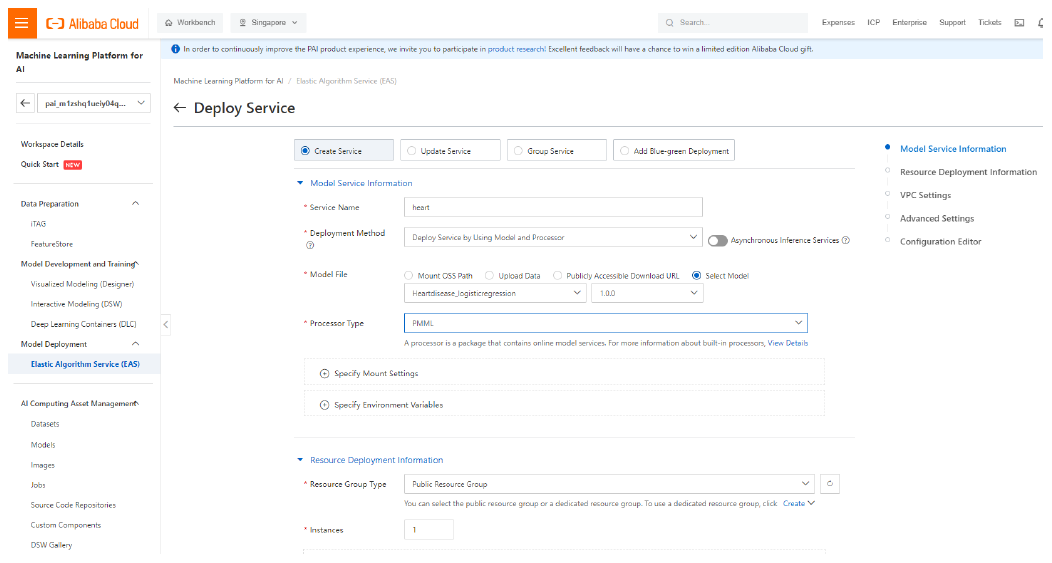
Enter a name for the service. Under deployment method, choose “Deploy Service by Using Model and Processor”. In Model File, click “Select Model” Then specify the name of the model registered earlier and its version. Then for the Processor Type, select “PMML”. Now scroll down further and enter the details as needed.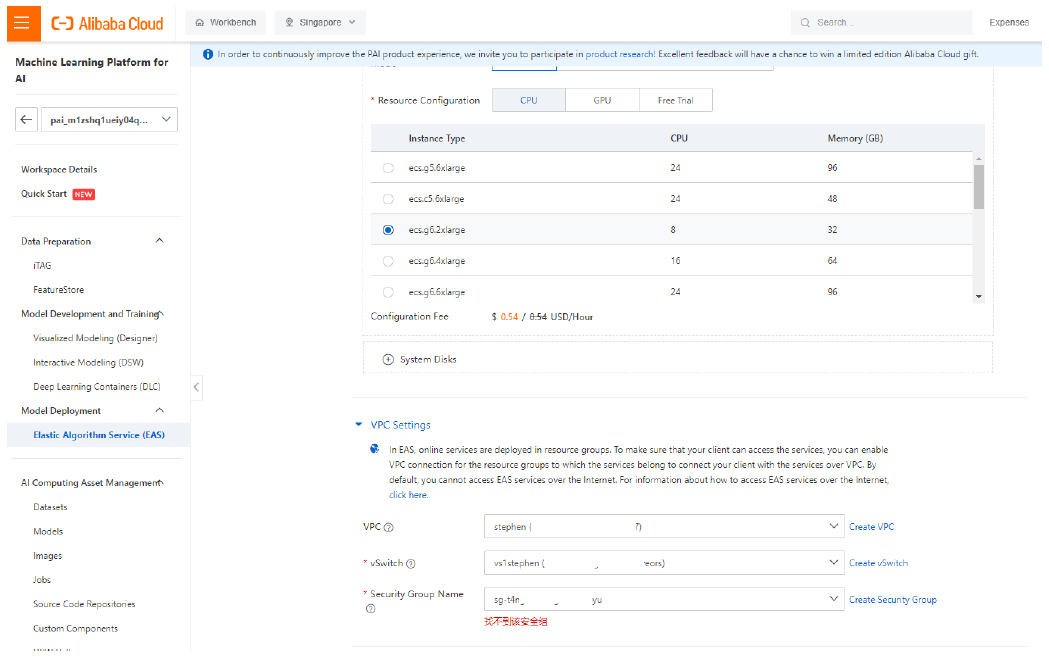
Choose the CPU/GPU required as per the application scope and choose the VPC and security groups.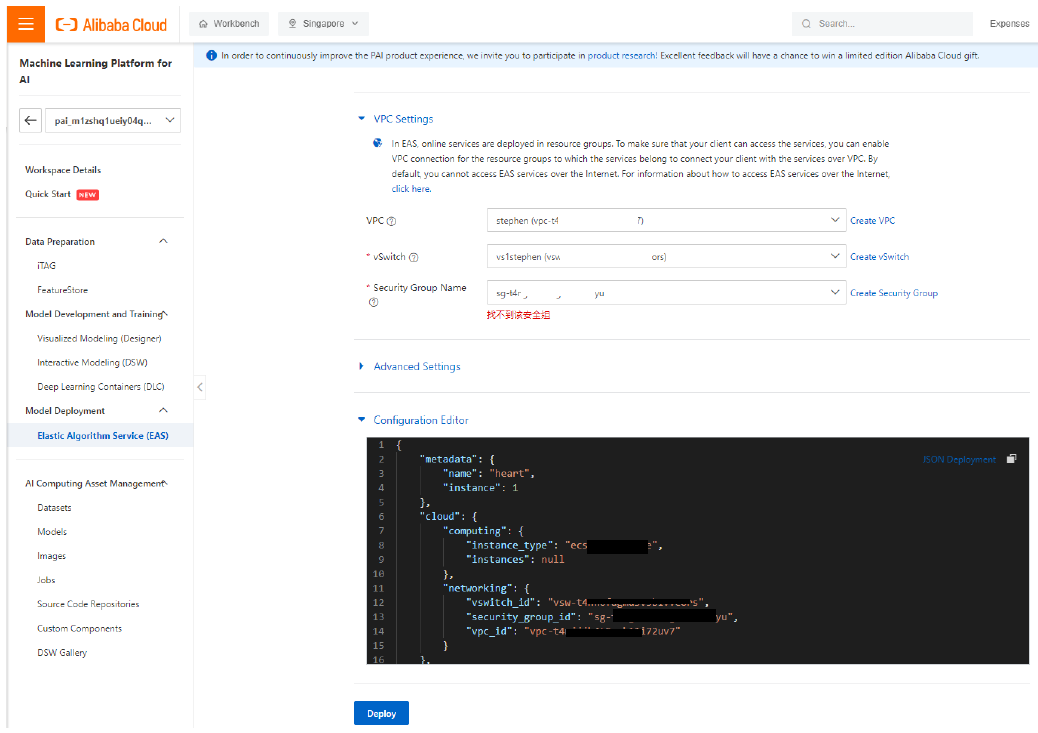
The configuration is auto generated and it can be saved as JSON format. The JSON file can be loaded to create new deployment too. Then Click on Deploy.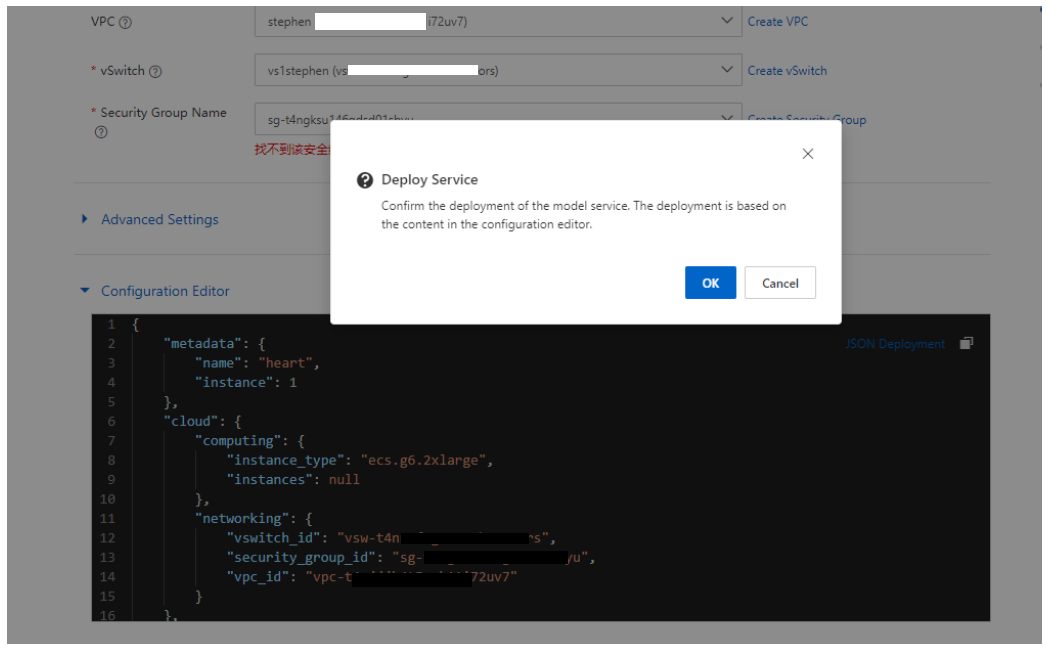
To confirm the deployment of model service, click “OK”.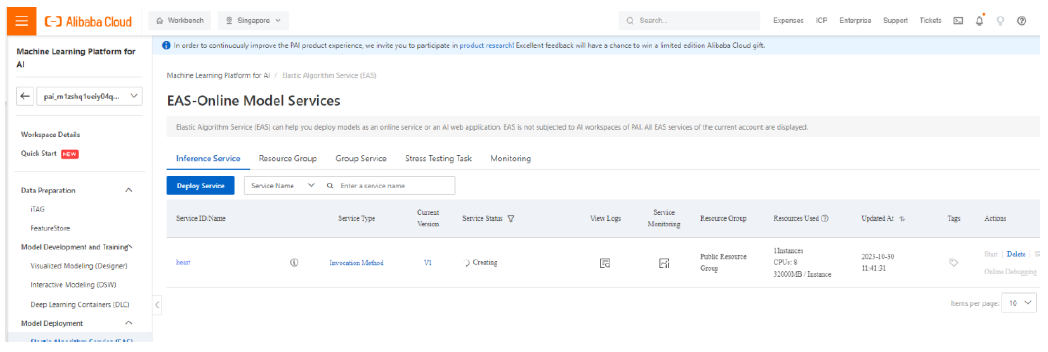
The deployment is done. We need to wait until the service is created. Upon creation when we click on Invocation method, it shows Public Endpoint and a Token. These two information are needed to call the model from application as API call.
Step 5: API call on the model invocation using public endpoint : Using Jupyter Notebook in local PC/Laptop or PAI DSW
Open Jupyter Notebook on your PC or Laptop. Create a new notebook.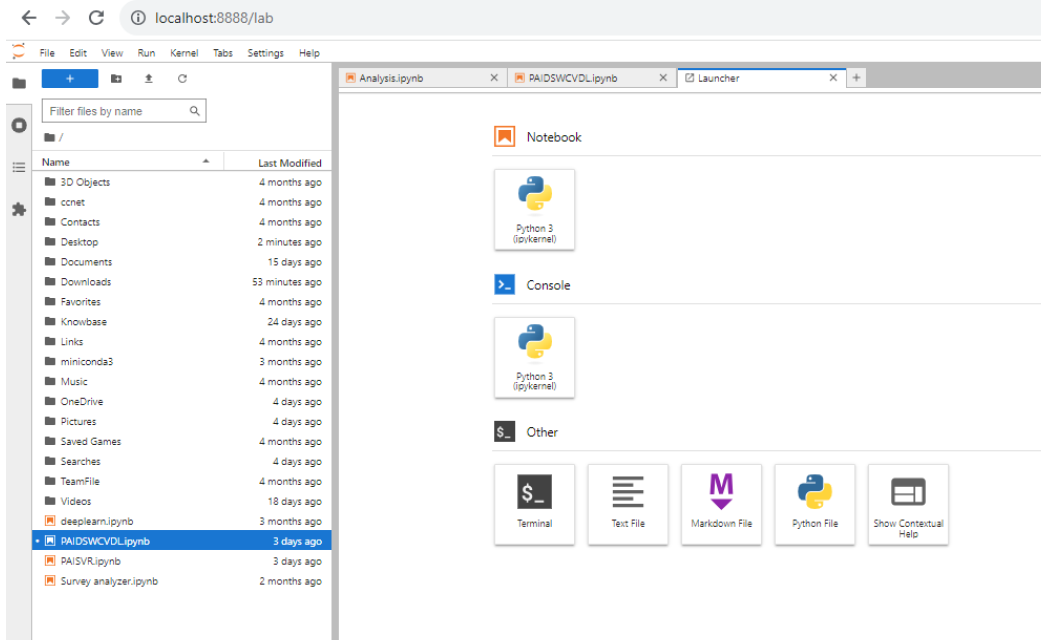
Install the library function of eas-prediction using pip to ensure the endpoints can be used.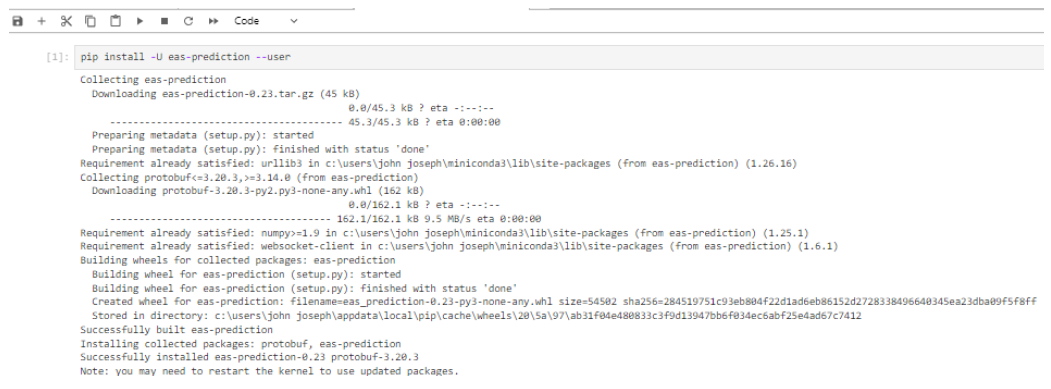
Developing and Deploying a Tensorflow Model Using PAI DSW and PAI EAS for a Custom Image Dataset
Merchine Learning PAI - October 30, 2020
5055118765133237 - January 17, 2023
Alibaba Clouder - April 28, 2021
ferdinjoe - December 26, 2023
PM - C2C_Yuan - June 3, 2024
Alibaba F(x) Team - September 2, 2021
 Platform For AI
A platform that provides enterprise-level data modeling services based on machine learning algorithms to quickly meet your needs for data-driven operations.
Learn More Epidemic Prediction Solution
This technology can be used to predict the spread of COVID-19 and help decision makers evaluate the impact of various prevention and control measures on the development of the epidemic.
Learn More Machine Translation
Relying on Alibaba's leading natural language processing and deep learning technology.
Learn More Offline Visual Intelligence Software Packages
Offline SDKs for visual production, such as image segmentation, video segmentation, and character recognition, based on deep learning technologies developed by Alibaba Cloud.
Learn MoreMore Posts by ferdinjoe