>> Get hands-on experience with this tutorial in a lab environment.
This section is for reference. If you have already configured your resources, please skip this section and move to the next.
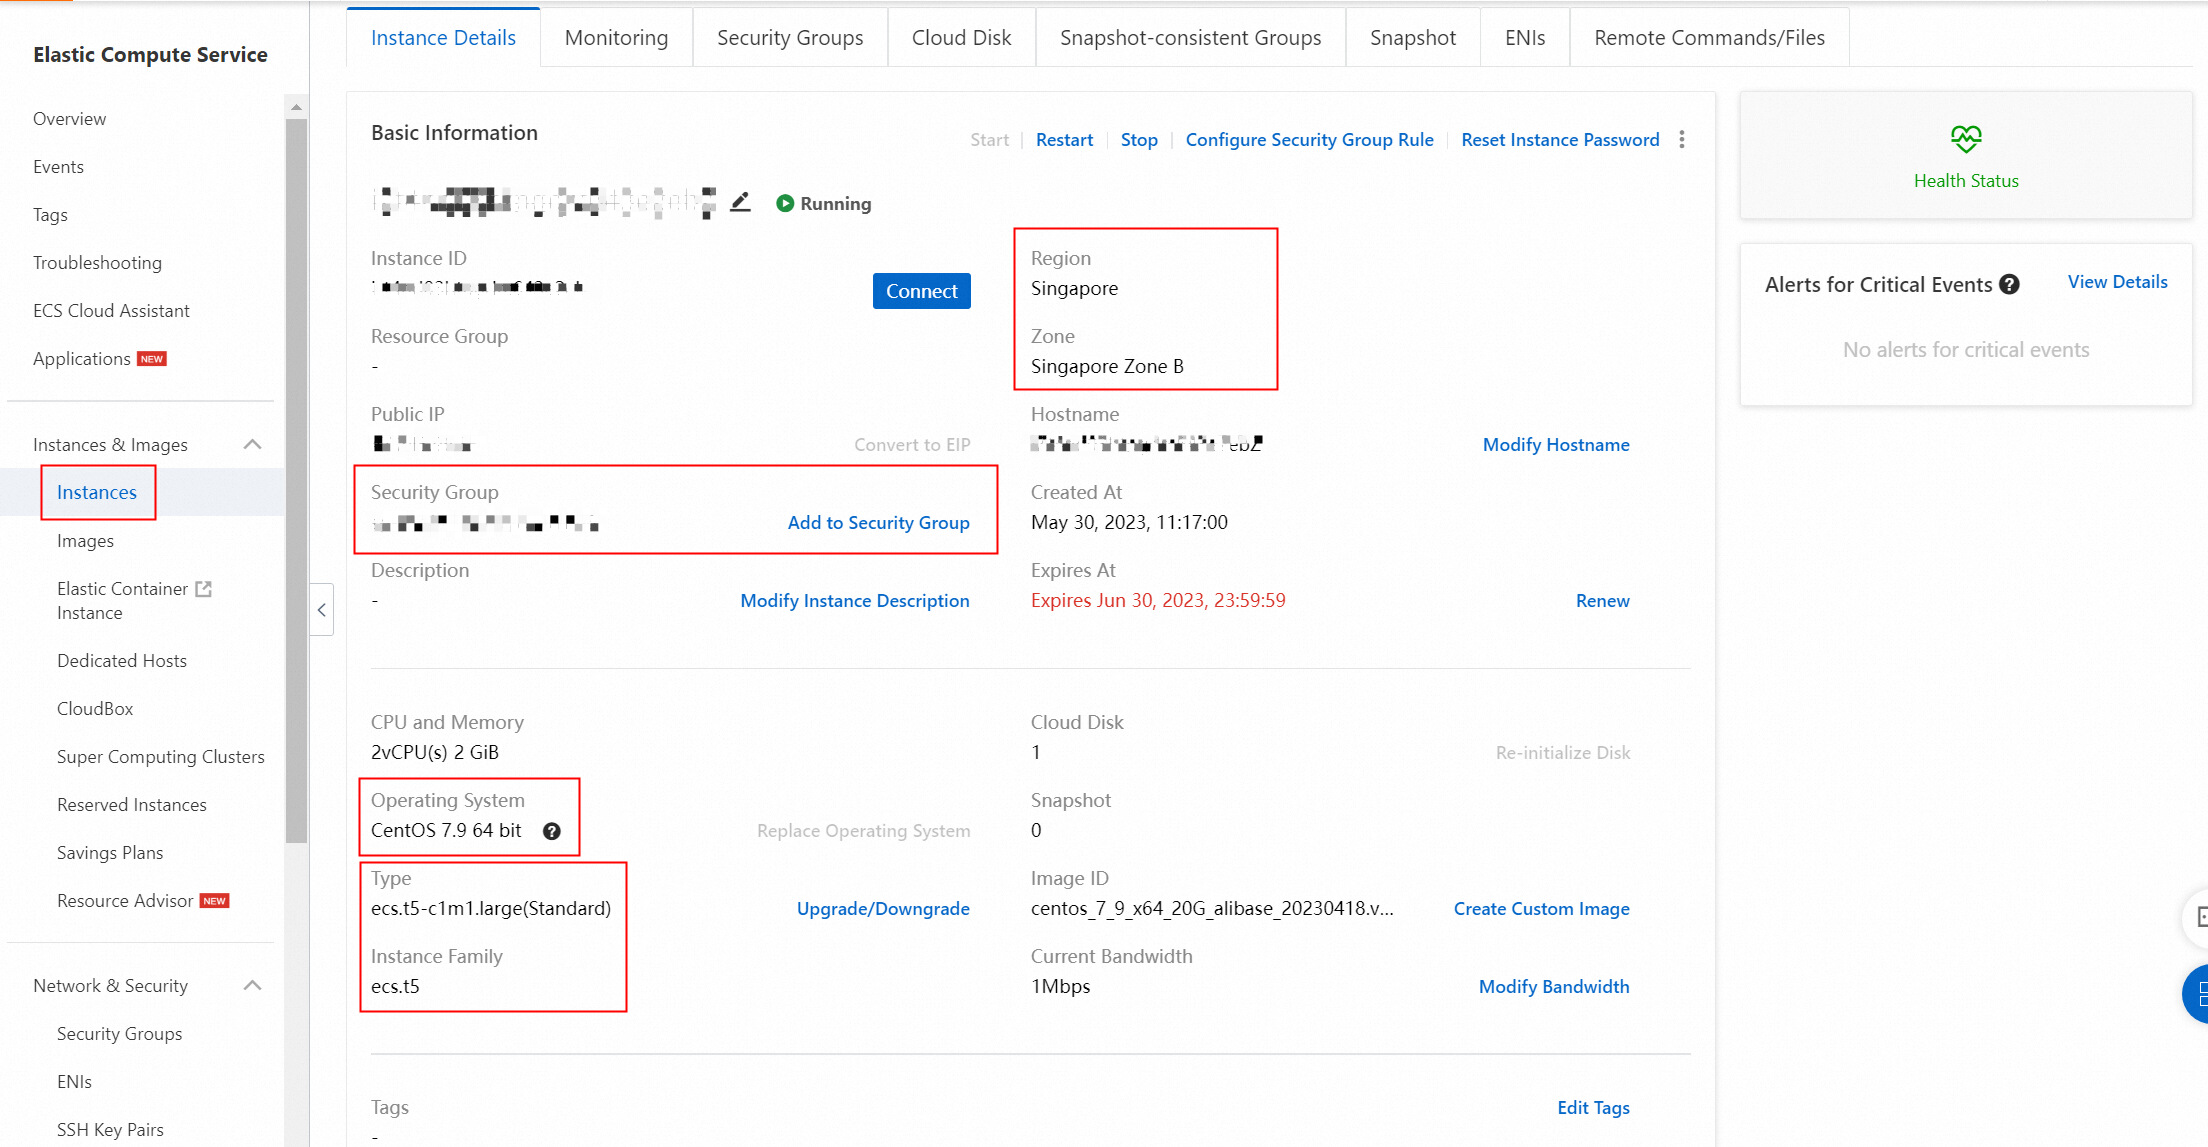
1. On the basic configuration page, configure the ECS basic configuration according to the following instructions. The configuration that is not mentioned remains the default option, and then click Next: Network and security group.

Note: the following configurations are used in this experiment. The configurations not mentioned remain the default options.
Configuration description:

| Configuration item | Example | Explain |
| Region and zone |
Region: Singapore Zone: Singapore Zone B |
After an instance is created, you cannot directly change the region and zone. |
| Instance type | Type family: ecs.t5-c1m1.large (Standard) | You can go to the ECS instance purchase region to view the instance purchase status in each region. |
| Image |
Type: Public image Version: CentOS 7.9 64 bit |
After the instance is started, the system disk will completely copy the operating system and application data of the image. |
2. On the network and security groups page, configure the ECS network and security group according to the following instructions. The configuration that is not mentioned remains the default option, and then click Next: Network and security group.
Configuration description:
| Configuration item | Example | Explain |
| VPC | Default VPC | Select your VPC. To create a VPC, click create in the console. |
| VSwitch | Default vSwitch | Select your vSwitch. To create a vSwitch, click create in the console. |
| Assign public IPv4 addresses | Select assign public IPv4 address | When selected, a public IPv4 address is automatically assigned. |
| Bandwidth billing mode | Pay-by-traffic | You only need to pay for the Internet traffic consumed by using the traffic mode. For more information, see Internet bandwidth billing. |
| Peak bandwidth | 5 Mbps | None. |
| Security Group | Default security group | Select your security group. You must enable ports 80, 443, 22, 3389, and 3306. To create a security group, click Create Security Group. |
3. On the System configuration page, configure the ECS system configuration according to the following instructions. The configuration that is not mentioned remains the default option, and then click Next: Group settings.
Configuration description:
| Configuration item | Example | Explain |
| login credentials | Custom password | In this tutorial, select a custom password and manually set a password for remote connection and sign in to the ECS instance. |
| Sign-in password | Ecs123456 | When you select a custom password for the Sign-in credential, you must set this option and confirm the password. When you connect to the ECS instance later, you must enter the username root and the password set here. |
| Instance name | EcsQuickStart | You can customize the instance name. |
4. On the Group settings page, all configurations remain the default option, confirm the order, and Create an instance.
1. On the left side of the lab page, click  Icon, switch to the Web Terminal, connect to the ECS instance. Enter the username and password for signing in to the ECS instance.

2. Run the following command to install vsftpd.
yum install -y vsftpdIf you return to the interface shown in the following figure, the installation is successful.

3. Run the following command to set the FTP service to start automatically.
systemctl enable vsftpd.service4. Start the FTP service.
systemctl start vsftpd.service5. Run the following command to view the port on which the FTP service listens.
netstat -antup | grep ftpThe result shown in the following figure indicates that the FTP service is started and the listening port number is 21. By default, the anonymous access function is enabled for vsftpd. You can sign in to the FTP server without entering a username and password, but you do not have the permission to modify or upload files.

vsftpd (very secure FTP daemon) is the most popular FTP server in Linux distributions. vsftpd supports both anonymous access and local user access. Anonymous access: any user can access the FTP service;In the local user mode, only the added local users can access the FTP service.
Note: Only one anonymous user mode and the local user mode can be configured at the same time.
This experiment mainly introduces how to use local users to access FTP servers in passive mode. For more information about how to configure other modes, see manually build an FTP site (CentOS 7).
1. Run the following command to create a Linux user for the FTP service. In this example, the username is ftptest.
adduser ftptest2. Run the following command to modify the password of the ftptest User. After running the command, follow the command line prompts to modify the password of the FTP user.
passwd ftptest
3. Run the following command to create a file directory for the FTP service.
mkdir /var/ftp/test4. Run the following command to create a test file.
This test file is used when the FTP client accesses the FTP server.
touch /var/ftp/test/testfile.txt5. Run the following command to change the owner of the/var/ftp/test directory to ftptest.
chown -R ftptest:ftptest /var/ftp/test6. Run the following commands to modify the vsftpd.conf configuration file and set FTP to passive mode.
Note: You need to replace the <public IP address of the FTP server> in the echo "pasv_address = <public IP address of the FTP server>" >> /etc/vsftpd/vsftpd.conf command with the public IP address or elastic IP address of the ECS server in this experiment.
sed -i 's/listen=NO/listen=YES/' /etc/vsftpd/vsftpd.conf #Listening on IPv4 sockets
sed -i 's/listen_ipv6=YES/#listen_ipv6=YES/' /etc/vsftpd/vsftpd.conf #Disable listening on IPv6 sockets
sed -i 's/#chroot_local_user=YES/chroot_local_user=YES/' /etc/vsftpd/vsftpd.conf #All users are restricted to the home directory
sed -i 's/#chroot_list_enable=YES/chroot_list_enable=YES/' /etc/vsftpd/vsftpd.conf #Enable exception user list
sed -i 's/#chroot_list_file=/chroot_list_file=/' /etc/vsftpd/vsftpd.conf #Specify a list file of exception users, the users in the list are not locked in the home directory
echo "allow_writeable_chroot=YES" >> /etc/vsftpd/vsftpd.conf
echo "local_root=/var/ftp/test" >> /etc/vsftpd/vsftpd.conf #Set the directory where the local user is logged in

echo "pasv_enable=YES" >> /etc/vsftpd/vsftpd.conf #Enable passive mode
echo "pasv_address=<FTP server public IP address>" >> /etc/vsftpd/vsftpd.conf #In this tutorial, the ECS server elastic IP
echo "pasv_min_port=20" >> /etc/vsftpd/vsftpd.conf #Set the minimum value of the port range that can be used for data transmission in passive mode
echo "pasv_max_port=21" >> /etc/vsftpd/vsftpd.conf #Set the maximum value of the port range that can be used for data transmission in passive mode
7. Create a chroot_list file and write an exception username in the file.
7.1 run the following command to create the chroot_list file.
vim /etc/vsftpd/chroot_list7.2 Press I to enter the edit mode.
7.3 Enter an exception username list. Users in this list are not locked in the home directory and can access other directories. In this example, you do not need to enter an exception user list.
7.4 Press ECS to exit editing mode, then enter: wq and press enter to save and close the file.
Note: If there are no exceptions, you must also create a chroot_list file. The content can be empty.
8. Run the following command to restart the vsftpd service.
systemctl restart vsftpd.serviceAfter setting up the FTP service, add rules in the inbound direction of the ECS instance security group and allow the following FTP ports.
Note: Most clients are located in local area networks and their IP addresses are converted. Therefore, the IP addresses returned by ipconfig or ifconfig commands are not necessarily the real public IP addresses of clients. If the subsequent client cannot sign in to the FTP server, reconfirm its public IP address.
1. Be bound for somewhere ECS console.
2. In the left-side Navigation pane, choose Instances and Images> Instances.

3. In the top navigation bar of the ECS console, Switch the region of your ECS instance.

4. On the instances page, click the instance ID.

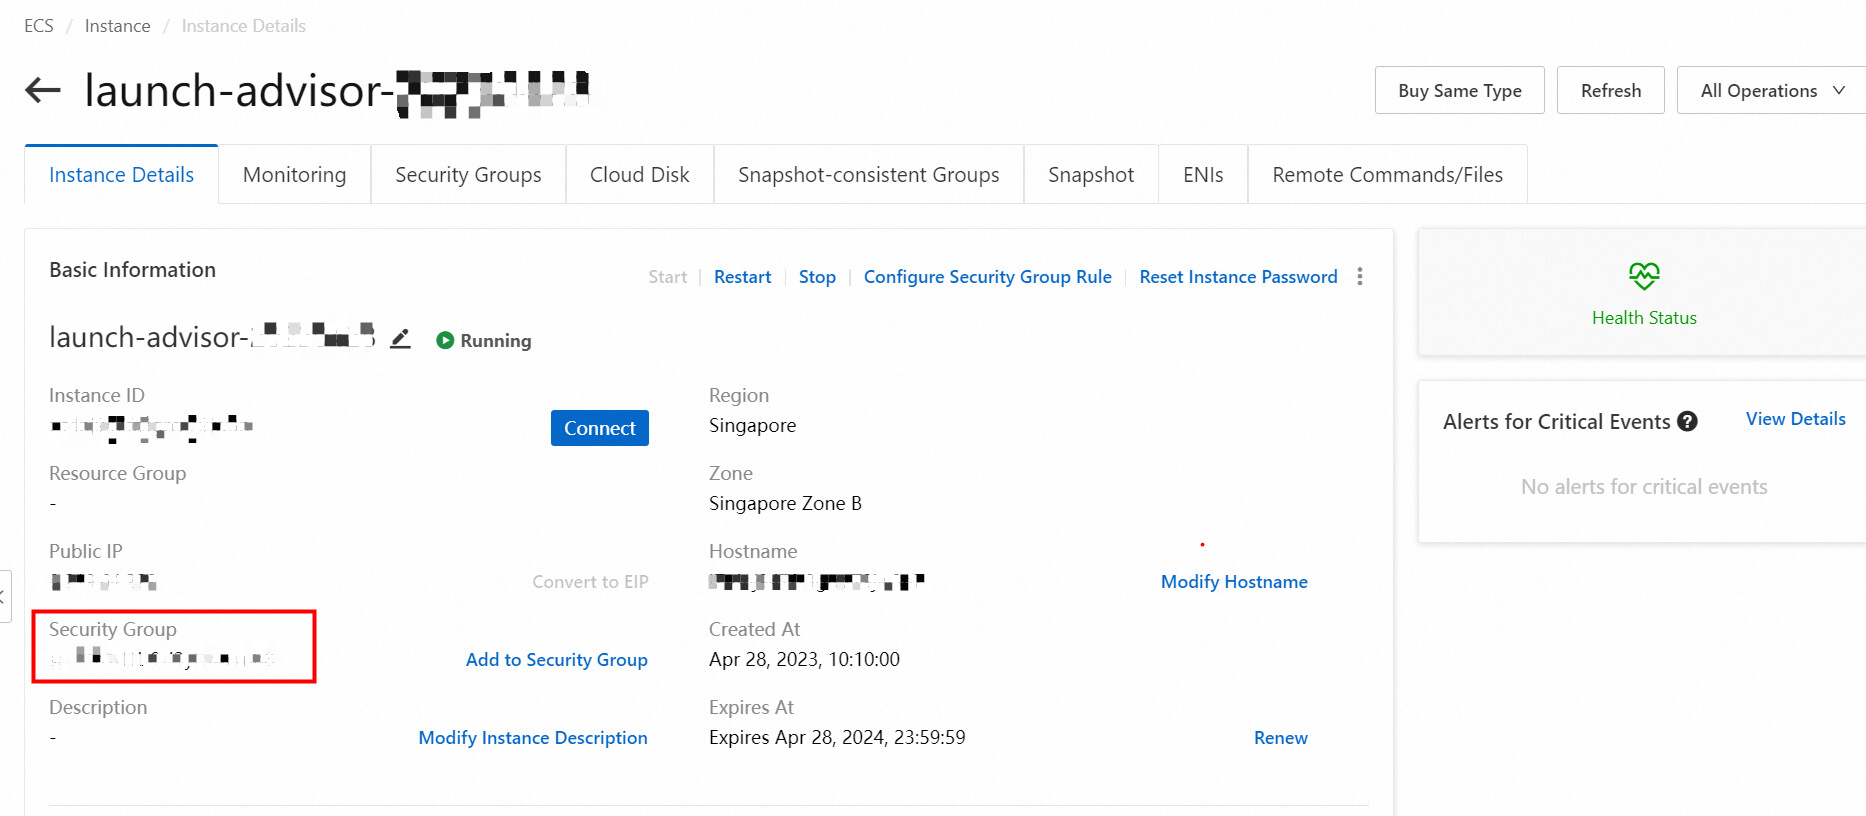
5. On the instance Details tab, click security groups in the basic information section.

6. On the security group rules tab, select inbound>manually add.
Note:
a) 0.0.0.0/0 to allow access from all IP addresses, you can add security based on your local public IP address or CIDR block (enter an IP address in the browser to view your local IP address).
b) To facilitate the experiment, all ports are open in the current port range. It is better to set the port range according to your own needs, such as port 21 for ftp and Port 3306 for database.

7. Add the configuration, as shown in the following figure, and then click Save.

FTP clients, Windows command line tools, or browsers can be used to test FTP servers. (This step applies only to local users and does not require testing in anonymous mode)
Note: If an error occurs when you use a browser to access the FTP server, we recommend that you clear the browser cache and try again.
1. On your local host, turn on this computer.
2. Enter ftp://<FTP server public IP address>:FTP port in the address bar. The FTP server public IP address is the elastic IP address of the ECS server. For example, ftp:// 127.0.0.1:21.
Note: If you use Mac OS system, you can use a browser to access it.
3. In the displayed dialog box, enter the user name and password (the user name and password configured in section 3).

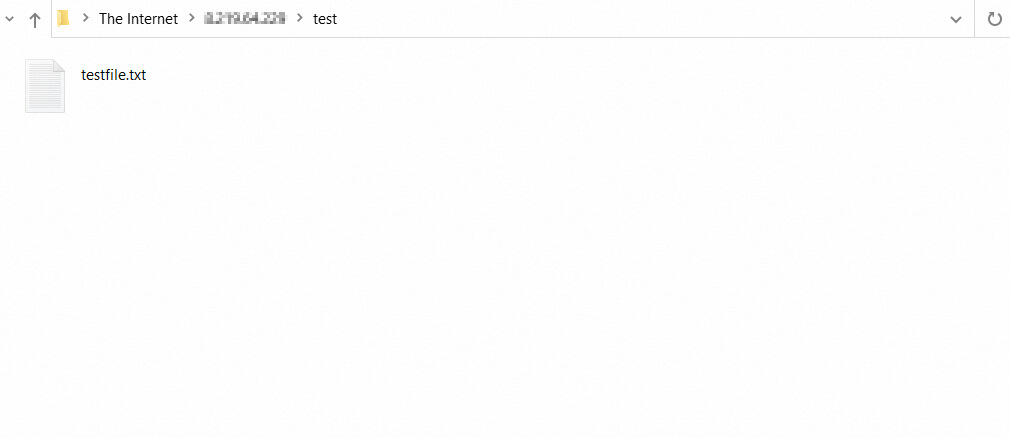
4. The successful sign in interface is as follows. You can view the testfile.txt file on the FTP server. At this time, you can also perform corresponding permissions on the FTP file.

Note: If the following error occurs during connection:

Solution:
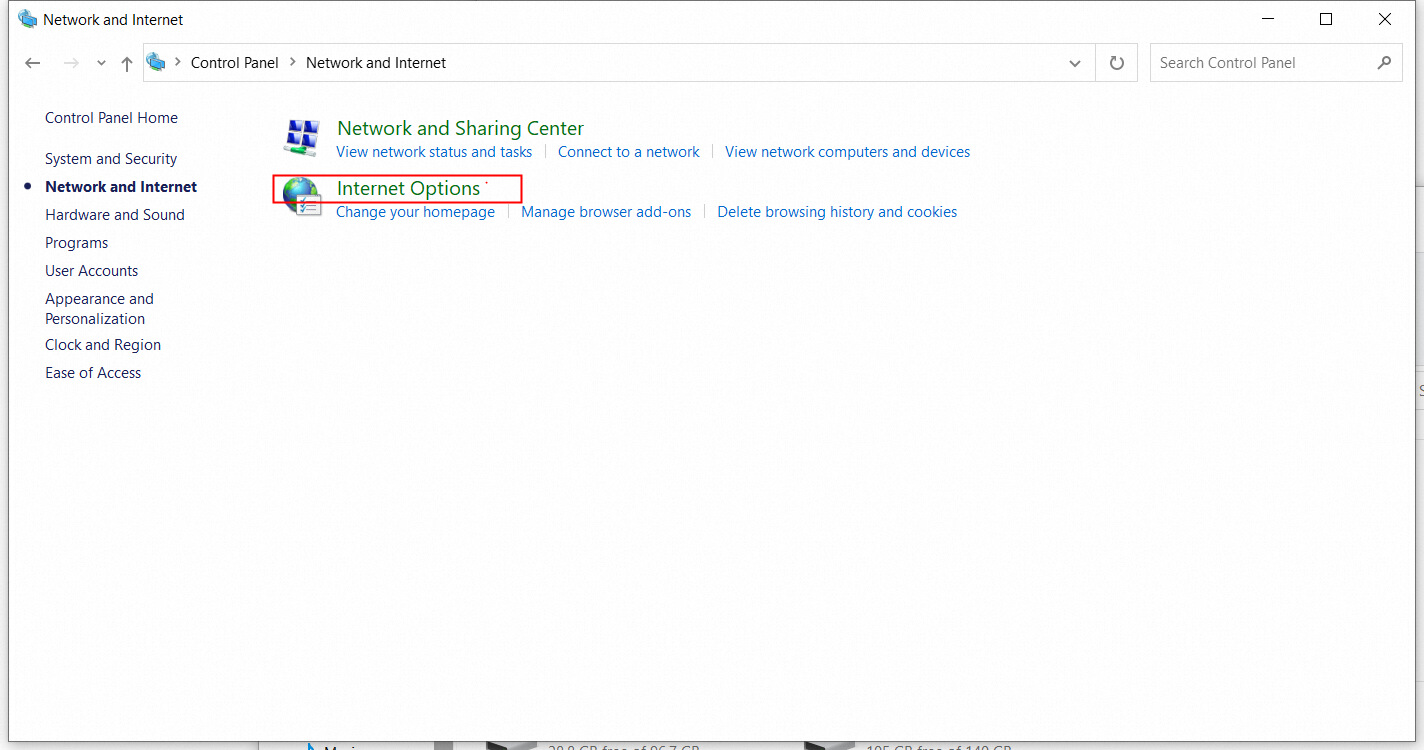
Open the control panel of the local computer, find the Internet option-Advanced-Remove the check box in front of [use Passive FTP (compatible with firewall and DSL modem)], and click application in the lower right corner. Just visit.


>> Get hands-on experience with this tutorial in a lab environment.

1,304 posts | 461 followers
FollowAlibaba Cloud Community - December 12, 2023
Alibaba Cloud Community - July 2, 2024
Alibaba Cloud Community - July 5, 2024
Alibaba Cloud Community - July 3, 2024
Alibaba Cloud Community - July 3, 2024
Alibaba Cloud Community - July 11, 2024

1,304 posts | 461 followers
Follow ECS(Elastic Compute Service)
Elastic and secure virtual cloud servers to cater all your cloud hosting needs.
Learn More Web Hosting Solution
Explore Web Hosting solutions that can power your personal website or empower your online business.
Learn More YiDA Low-code Development Platform
A low-code development platform to make work easier
Learn More mPaaS
mPaaS
Help enterprises build high-quality, stable mobile apps
Learn MoreMore Posts by Alibaba Cloud Community