This article is from Alibaba Cloud Advent Calendar 2023, focusing on launching services with Alibaba Cloud's Kubernetes and Serverless products like SAE.
I have been actively working on solutions, development techniques, and deployments by Alibaba Cloud, continuously striving to acquire cutting-edge technology from China and around the world.
The Advent Calendar serves as a platform to share these activities with the outside world. Through the articles written by each member, our goal is to generate interest in Alibaba Cloud among as many people as possible.
This article focuses on deploying Magento on Alibaba Cloud Container Service for Kubernetes (ACK).
Magento is a popular open source EC platform. Available as an open source version with all necessary e-commerce features included, Magento is easy to use for both small startups and large websites and has a strong track record.
Returning to the main topic. We are going to deploy Magento to Alibaba Cloud Container Service for Kubernetes (ACK). Why ACK? Because I want to compare the procedure with deploying Magento to the Serverless App Engine, which is scheduled for publication later. Furthermore, ACK will undergo performance and scalability testing as a container application management service.
This tutorial is intended for people who have basic knowledge about the following services:
From the top of the Alibaba Cloud Management Console, go to the Container Service for Kubernetes console.
As ACK was never activated with the account before, the following message appears.
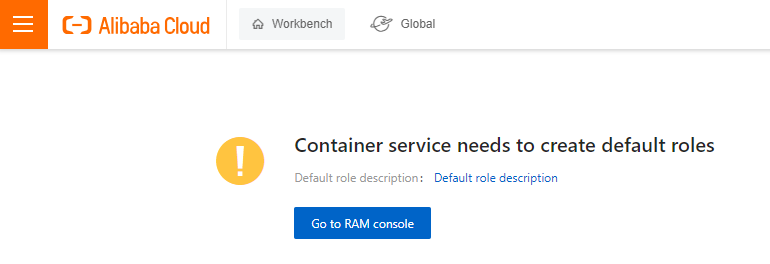
Click Go to RAM console to authorize the RAM role.
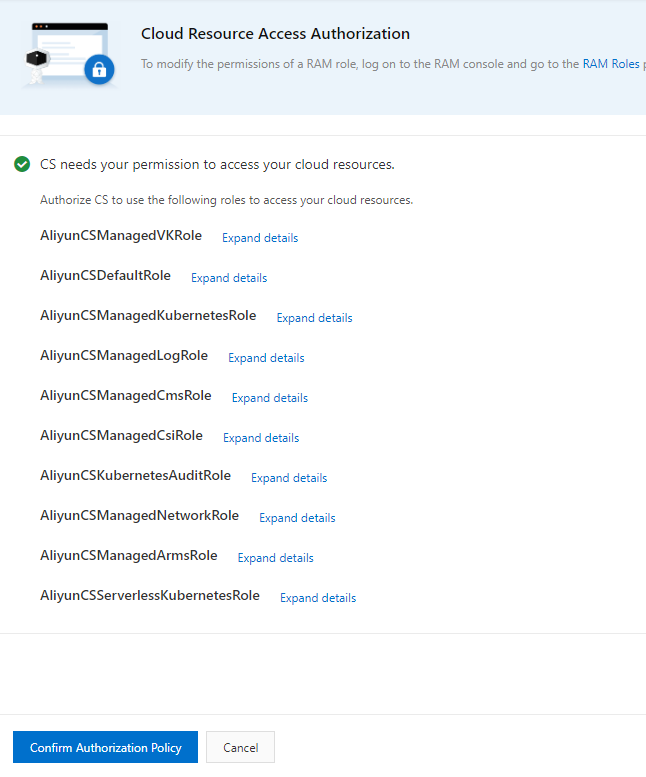
The Container Service for Kubernetes console is then displayed. The real work starts here.

Click Create Kubernetes Cluster on the right. On the Managed Kubernetes tab, follow the configuration shown below. If you use internal connections, the cluster must be in the same VPC as the working environment.
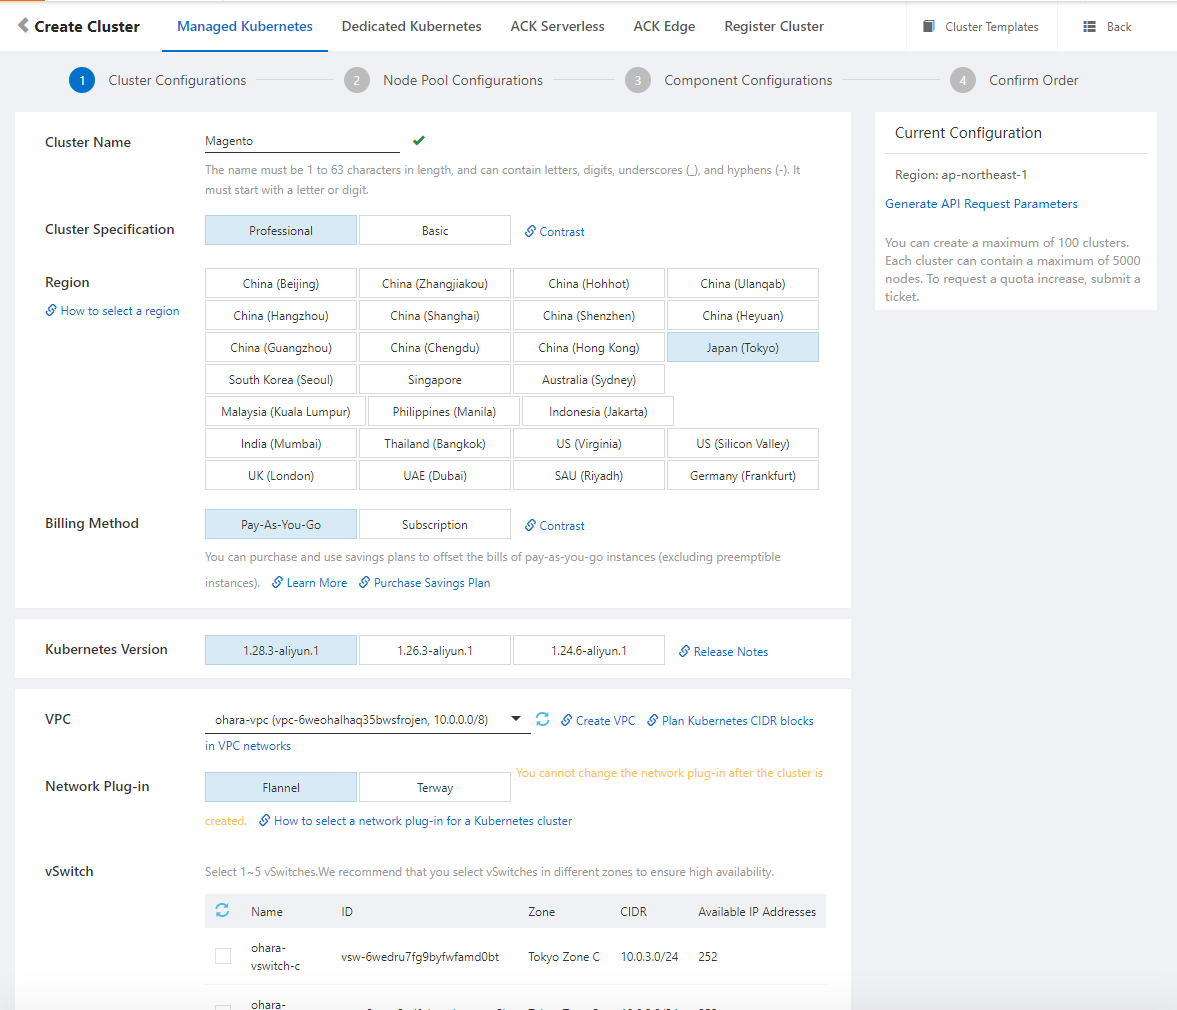
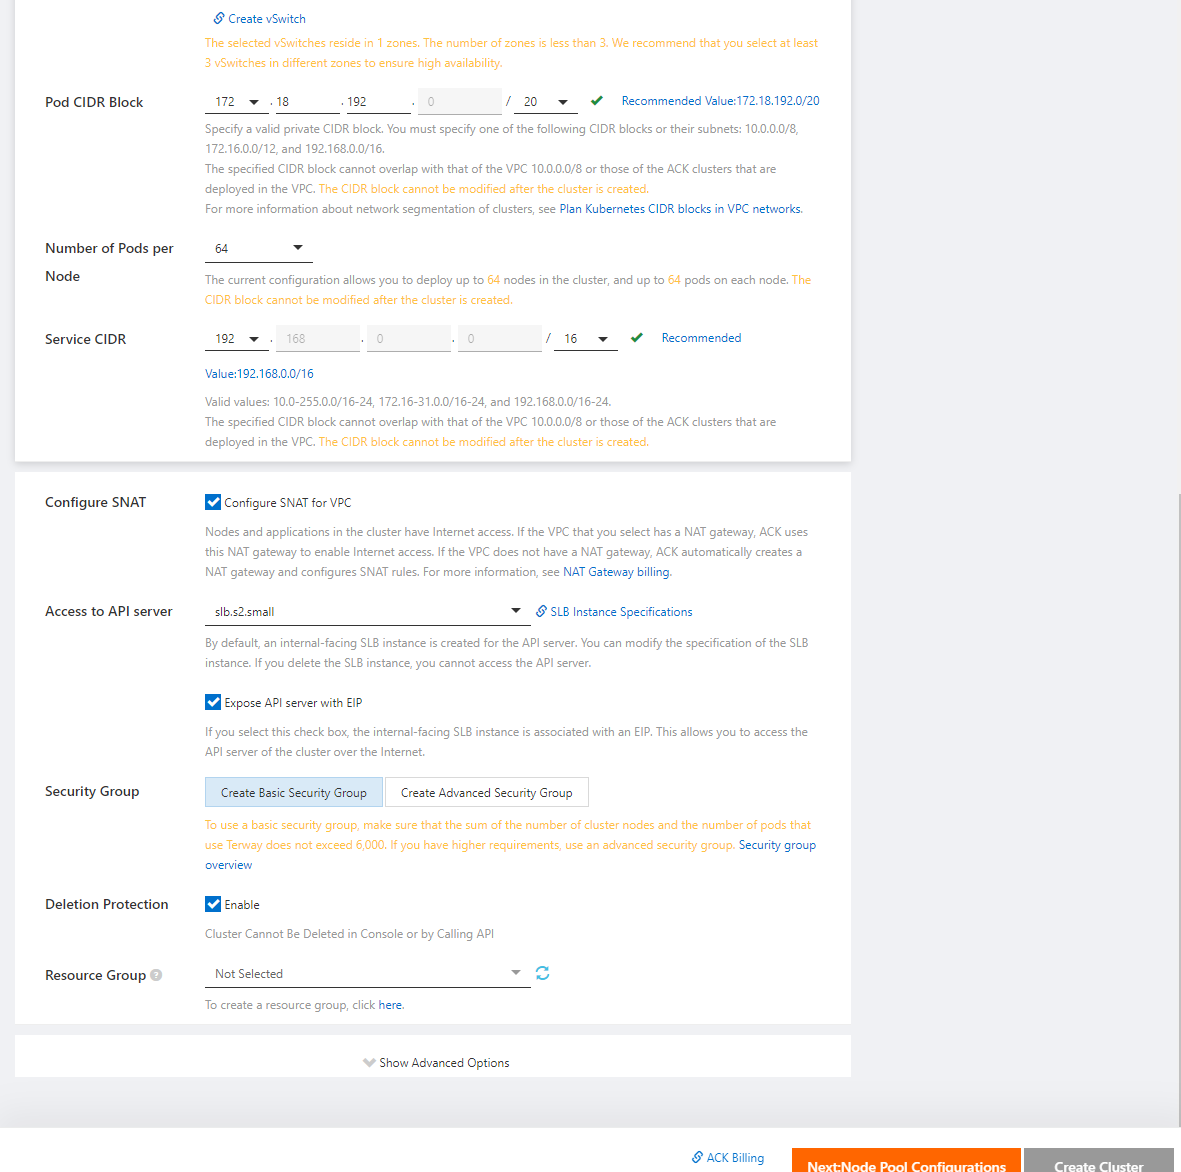
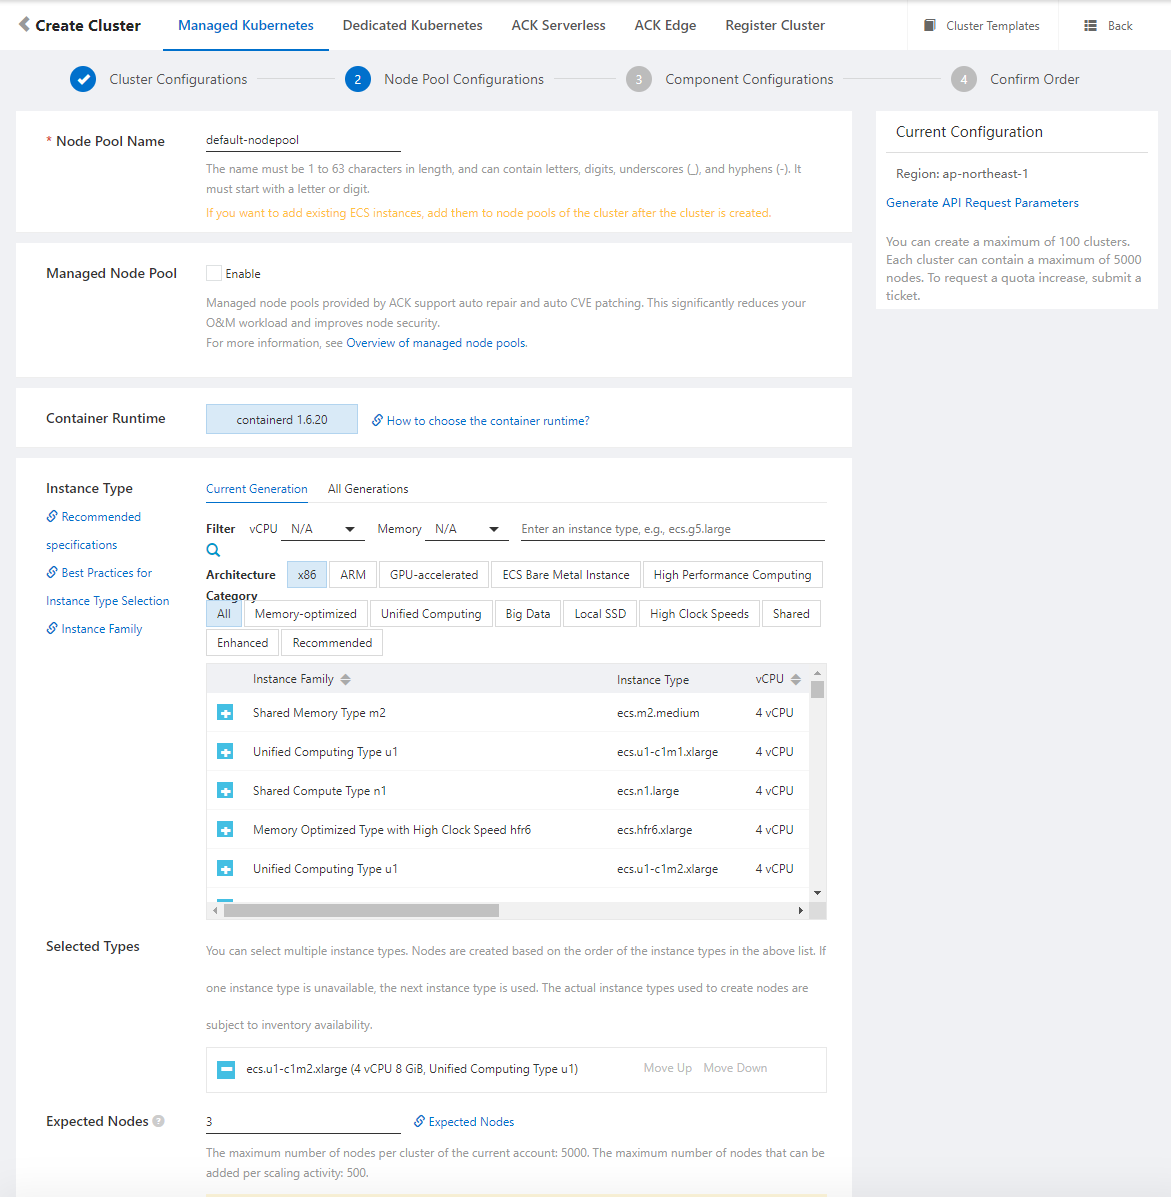
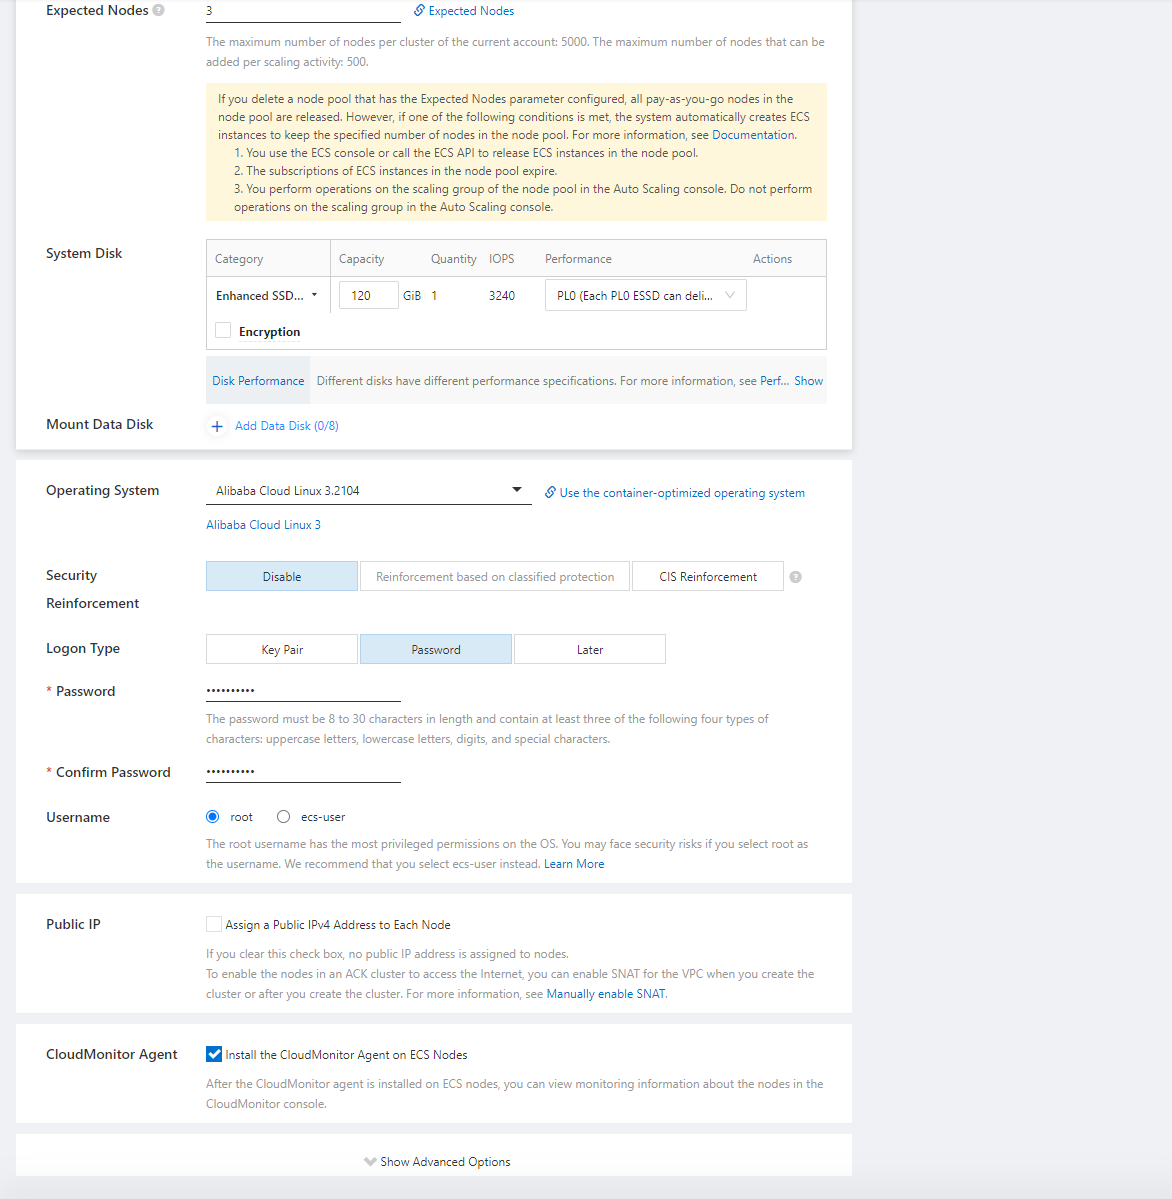
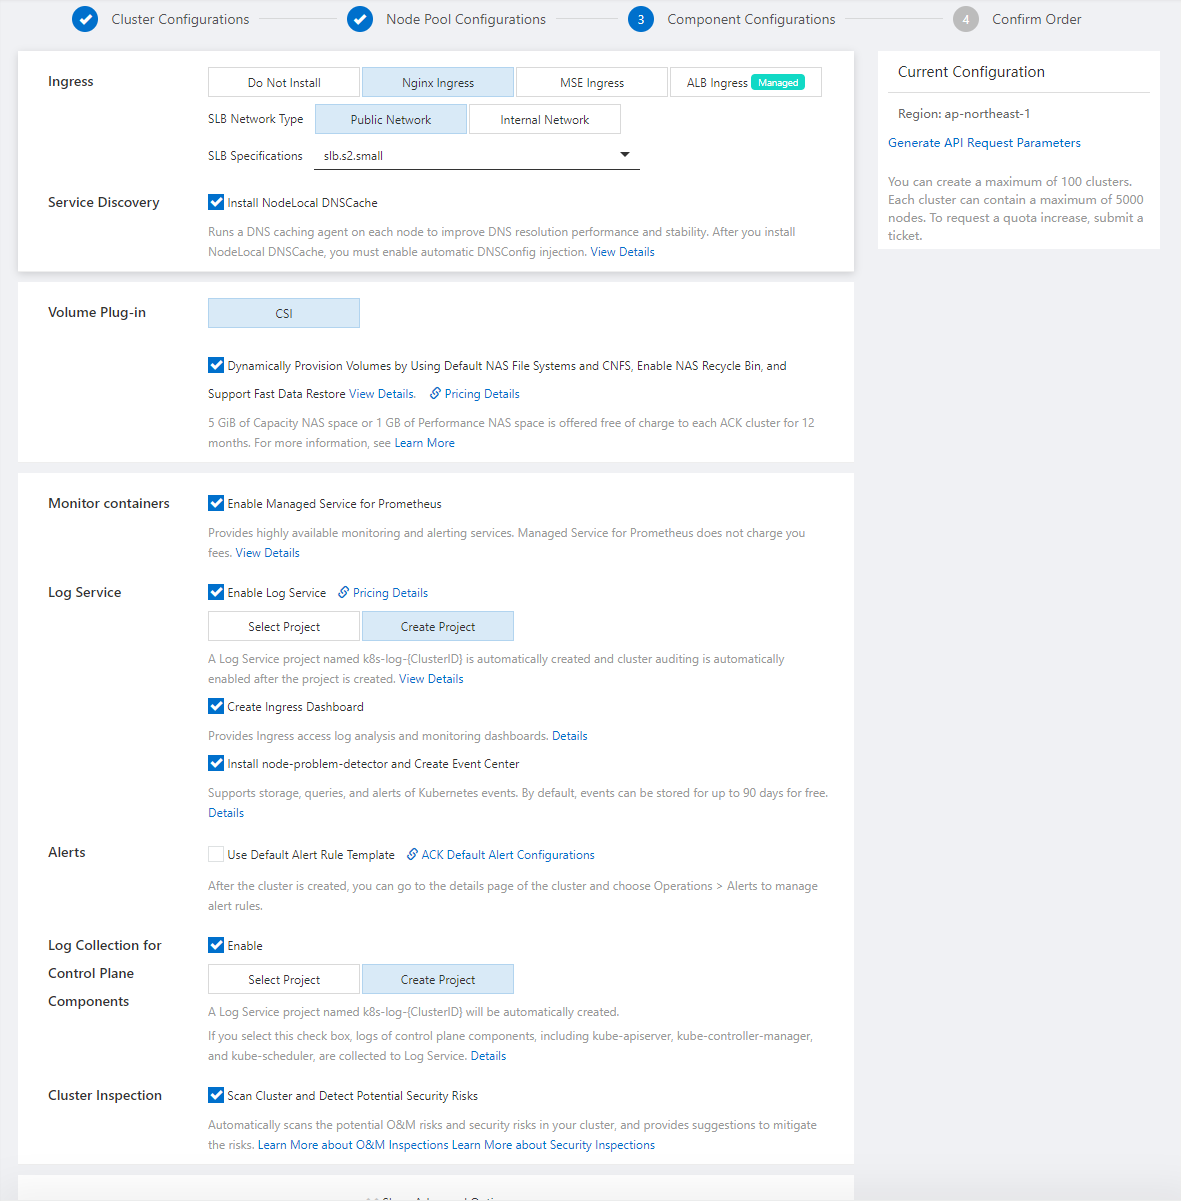
With this configuration, click Create Cluster to create a cluster. It is in the initialization status, so wait for a while.
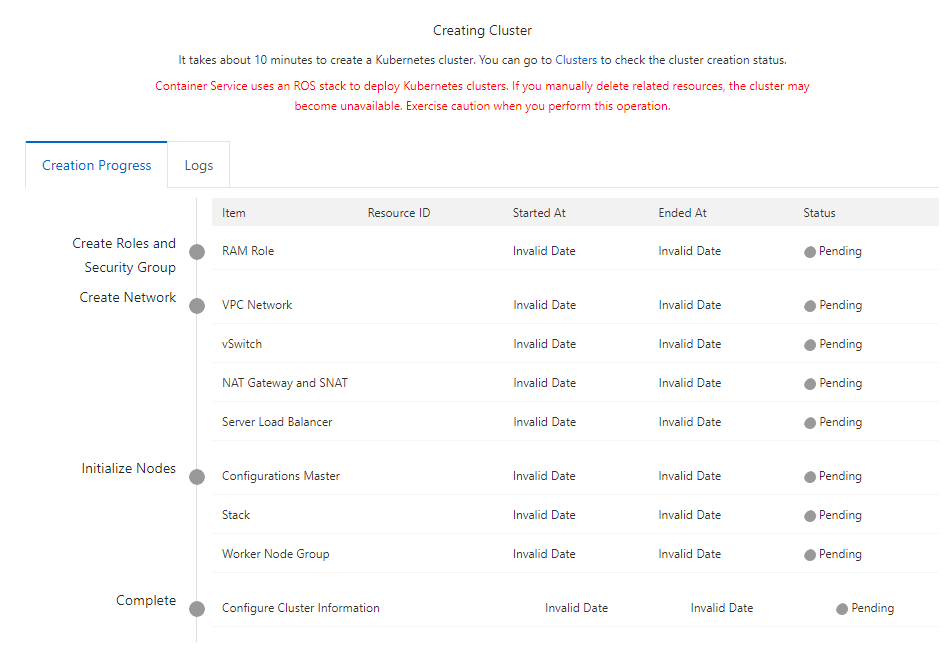
After a while, the cluster is successfully created, and the status becomes Running. The time needed for the creation depends on the number of nodes.

Log on to the working environment and install kubectl and Helm. Since CentOS is used, refer to Install and Set Up kubectl on Linux and Installing Helm for the installation commands as they are entered.
$ curl -LO "https://dl.k8s.io/release/$(curl -L -s https://dl.k8s.io/release/stable.txt)/bin/linux/amd64/kubectl"
$ sudo install -o root -g root -m 0755 kubectl /usr/local/bin/kubectl
$ kubectl version --client
The Helm version can also be changed based on the description on the Helm release page.
$ wget https://get.helm.sh/helm-v3.7.1-linux-amd64.tar.gz
$ tar -zxvf helm-v3.7.1-linux-amd64.tar.gz
$ mv linux-amd64/helm /usr/local/bin/helm
$ helm version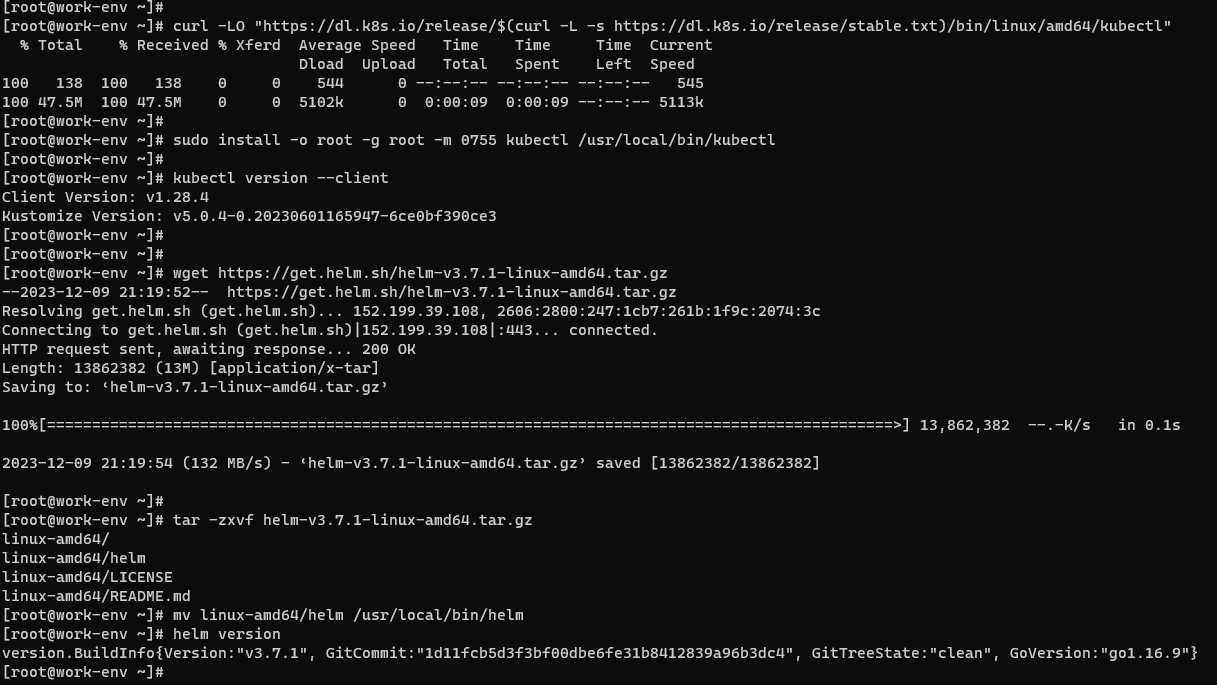
Create a namespace for deployment in the cluster. Name it magento.
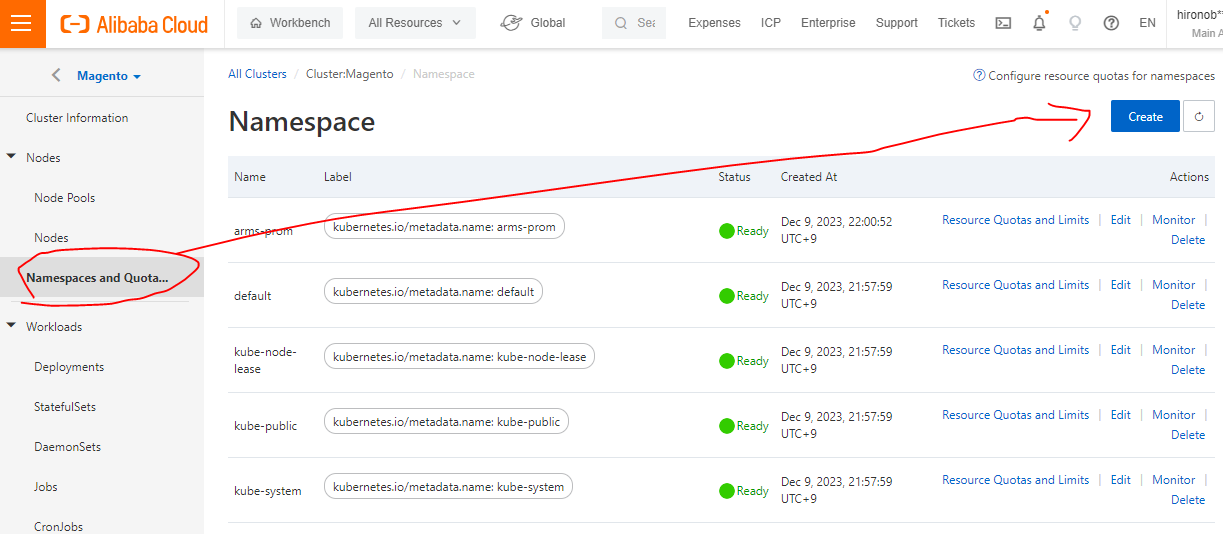
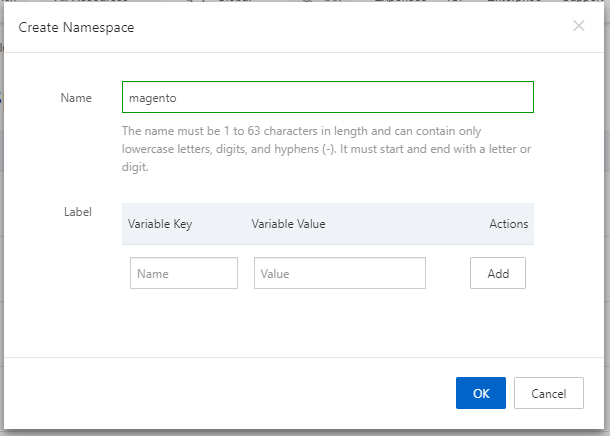
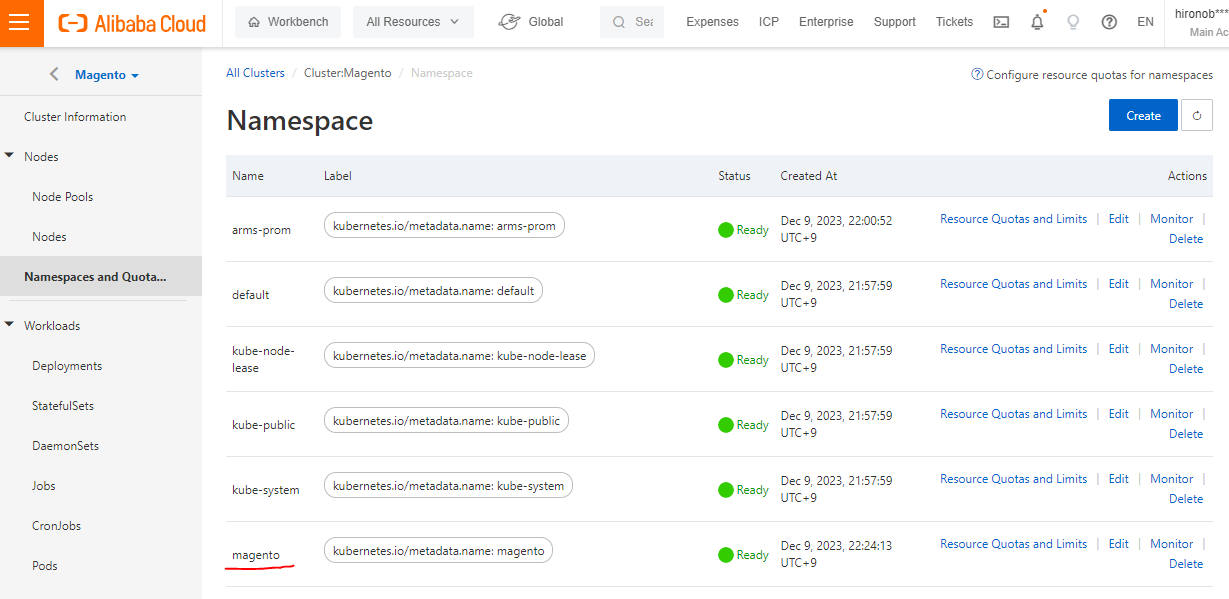
Configuration can be performed from the working environment, such as obtaining authentication information and configuring to connect to the cluster.
Go to the Connection Information tab on the Cluster Information page, and click Generate Temporary kubeconfig to create credentials for the temporary connection configuration of kubectl.
For more information, see Obtain the kubeconfig file of a cluster and use kubectl to connect to the cluster. The description in the Help document may be more detailed than this one.
If you want to use public access, refer to Control public access to the API server of a cluster.
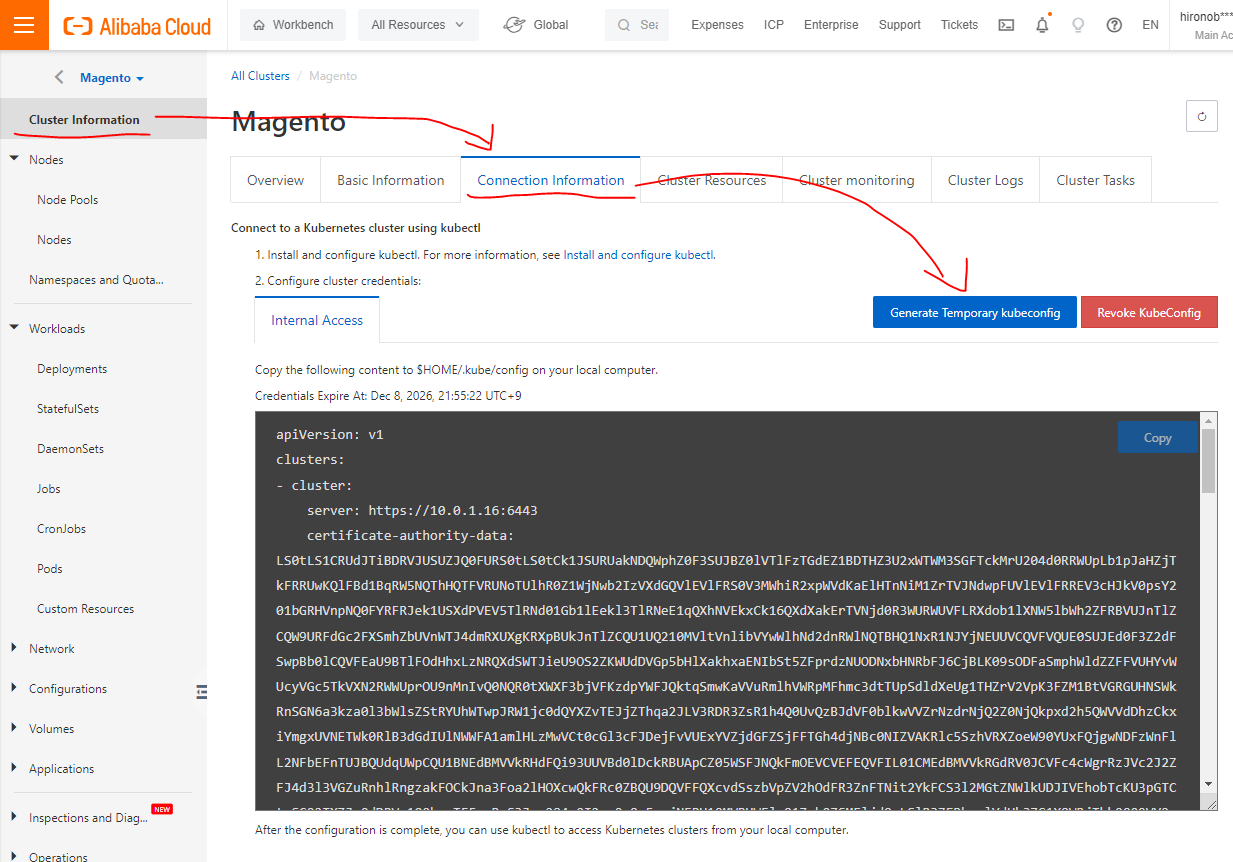
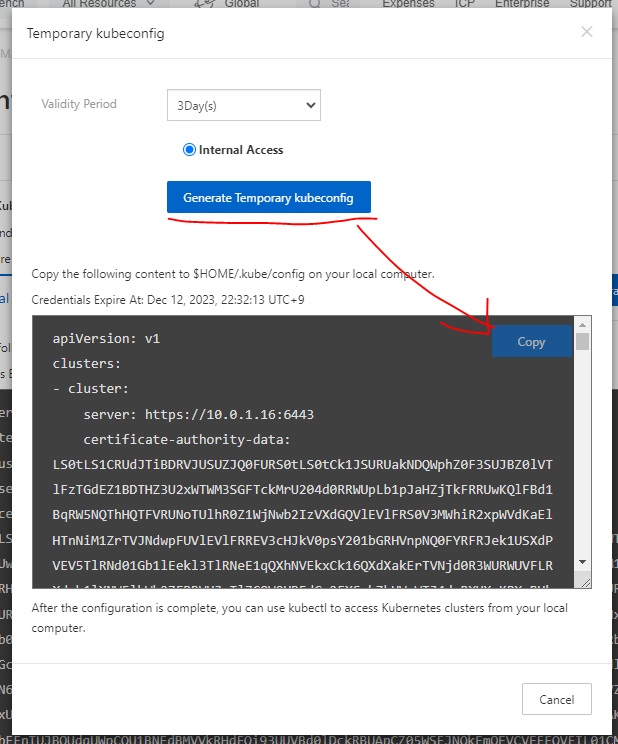
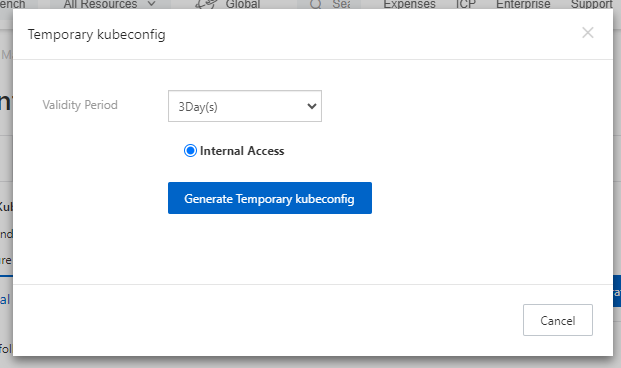
Copy the credentials created and add them in the working environment. For CentOS, they are pasted to /root/.kube/config.
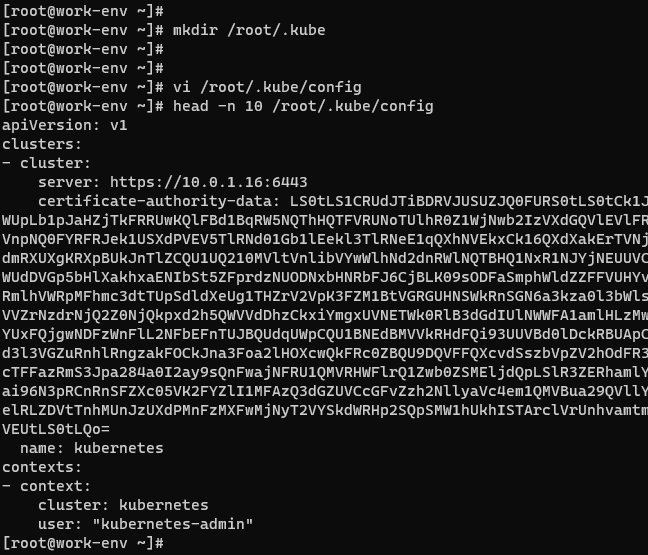
Use the kubectl command to verify the connection.
$ kubectl get namespace
$ kubectl get pods
$ kubectl get pods -n magento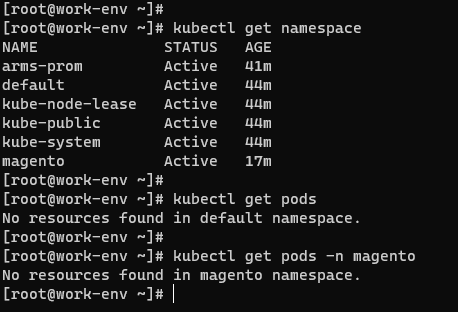
Since the connection is working, move on to the next step. Set the context in which Helm connects to the cluster.
kubectl config current-context
kubectl config set-context magento --namespace magento
After that, in the working environment, Helm will be used to work with ACK.
Add the required repository in Helm.
$ helm -n magento repo add bitnami https://charts.bitnami.com/bitnami
$ helm -n magento repo list
WARNING: Kubernetes configuration file is group-readable. This is insecure. Location: /root/.kube/config
WARNING: Kubernetes configuration file is world-readable. This is insecure. Location: /root/.kube/config
If the above warning message is displayed, the permissions for the configuration file need to be updated.
$ chmod g-r /root/.kube/config
$ chmod o-r /root/.kube/config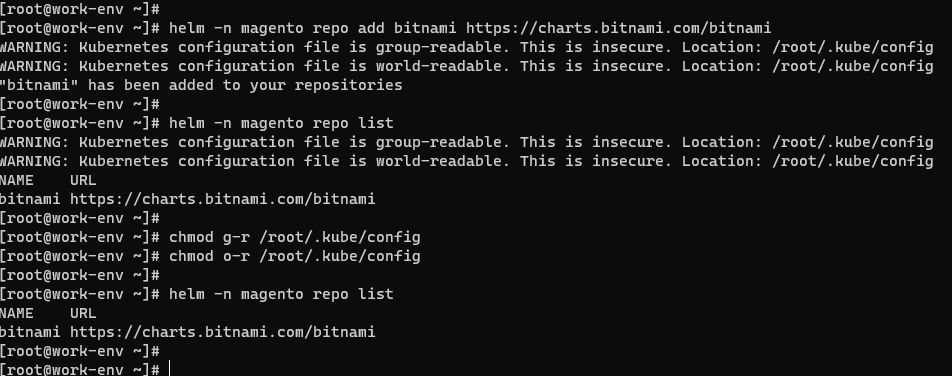
Next, deploy Magento with Helm if the work so far is successful.
$ helm -n magento install magento-demo bitnami/magento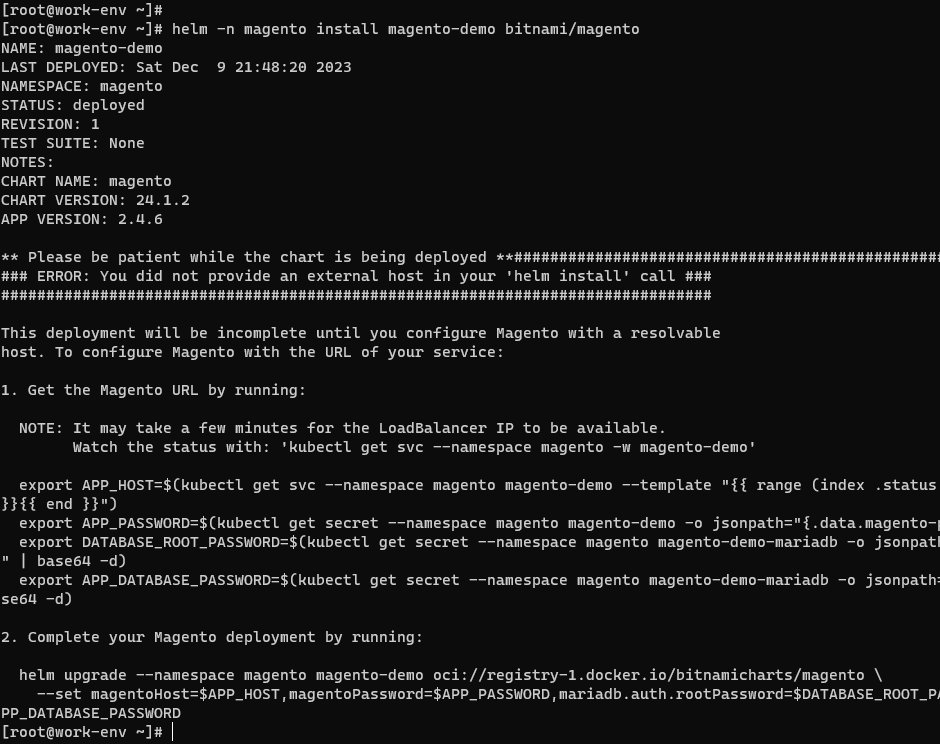
Check what happened on the ACK side. In the Container Service for Kubernetes console, make sure the resource is deployed.
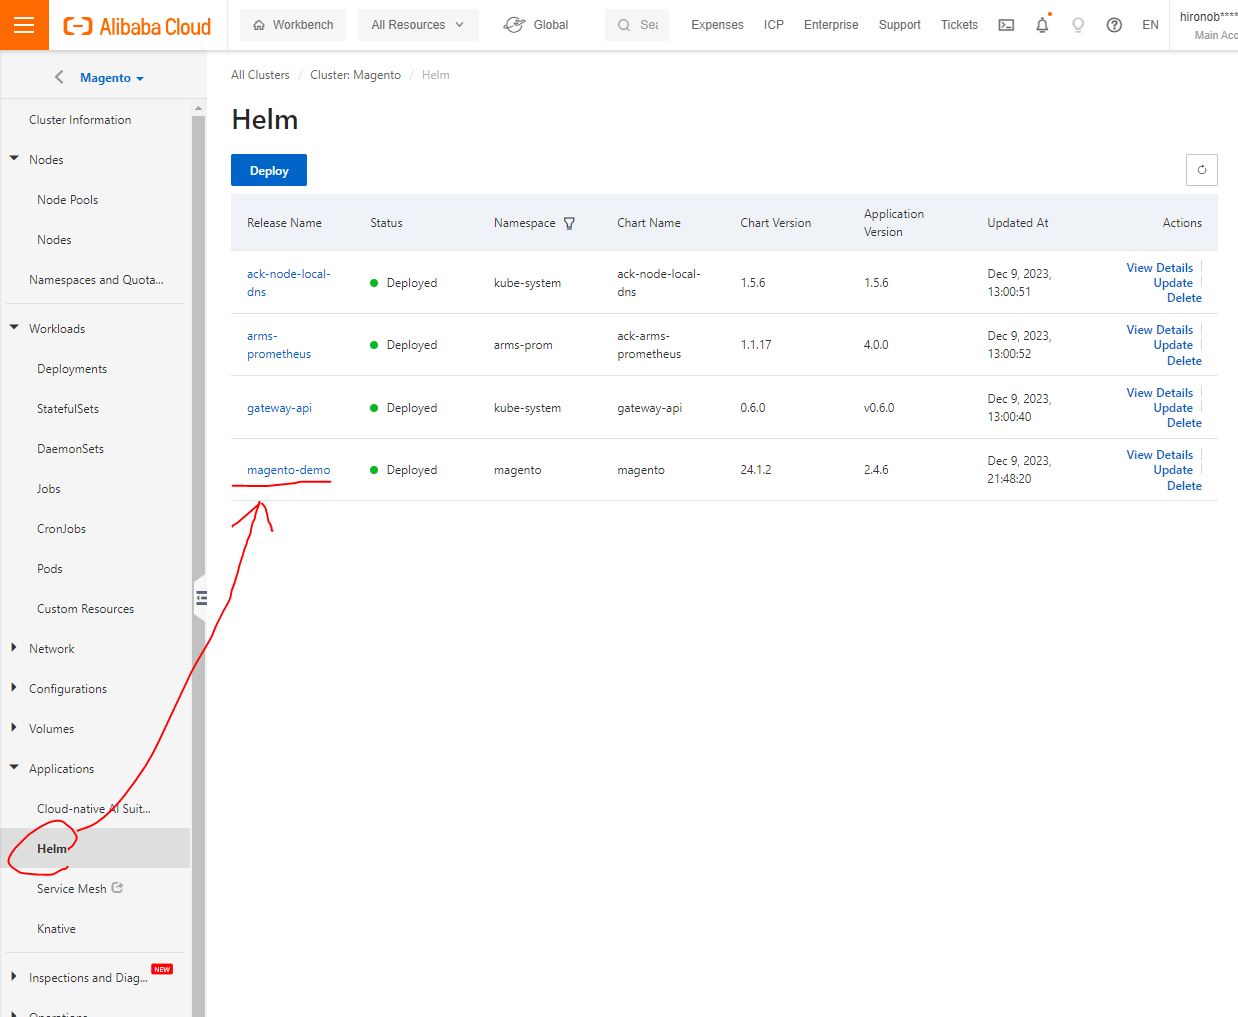
It can be seen that the deployment has been successfully reflected. Return to the working environment and run the related commands listed. It takes several minutes for the IP address of Load Balancer to become available.
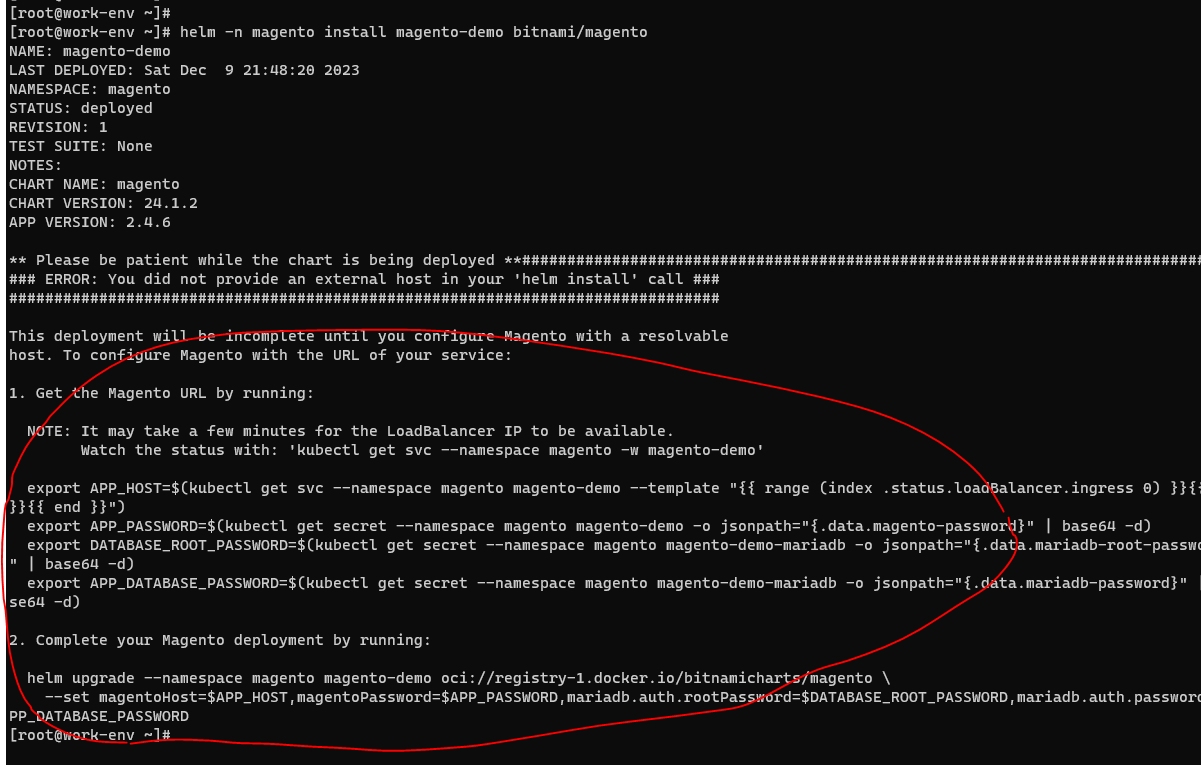
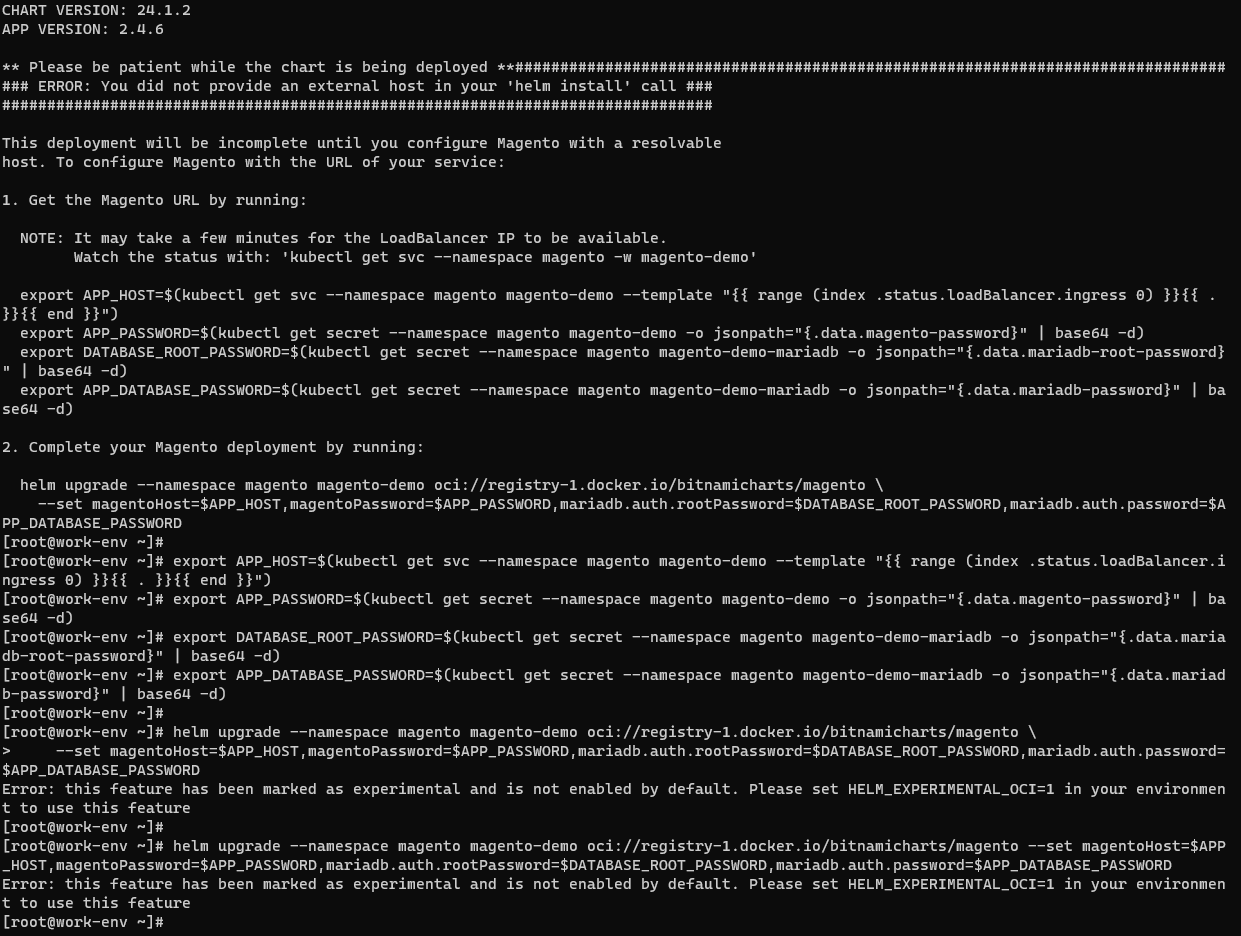
Well, the last 2. Complete your Magento deployment by running: seems to be having an error.
Check the repo on dockerhub.
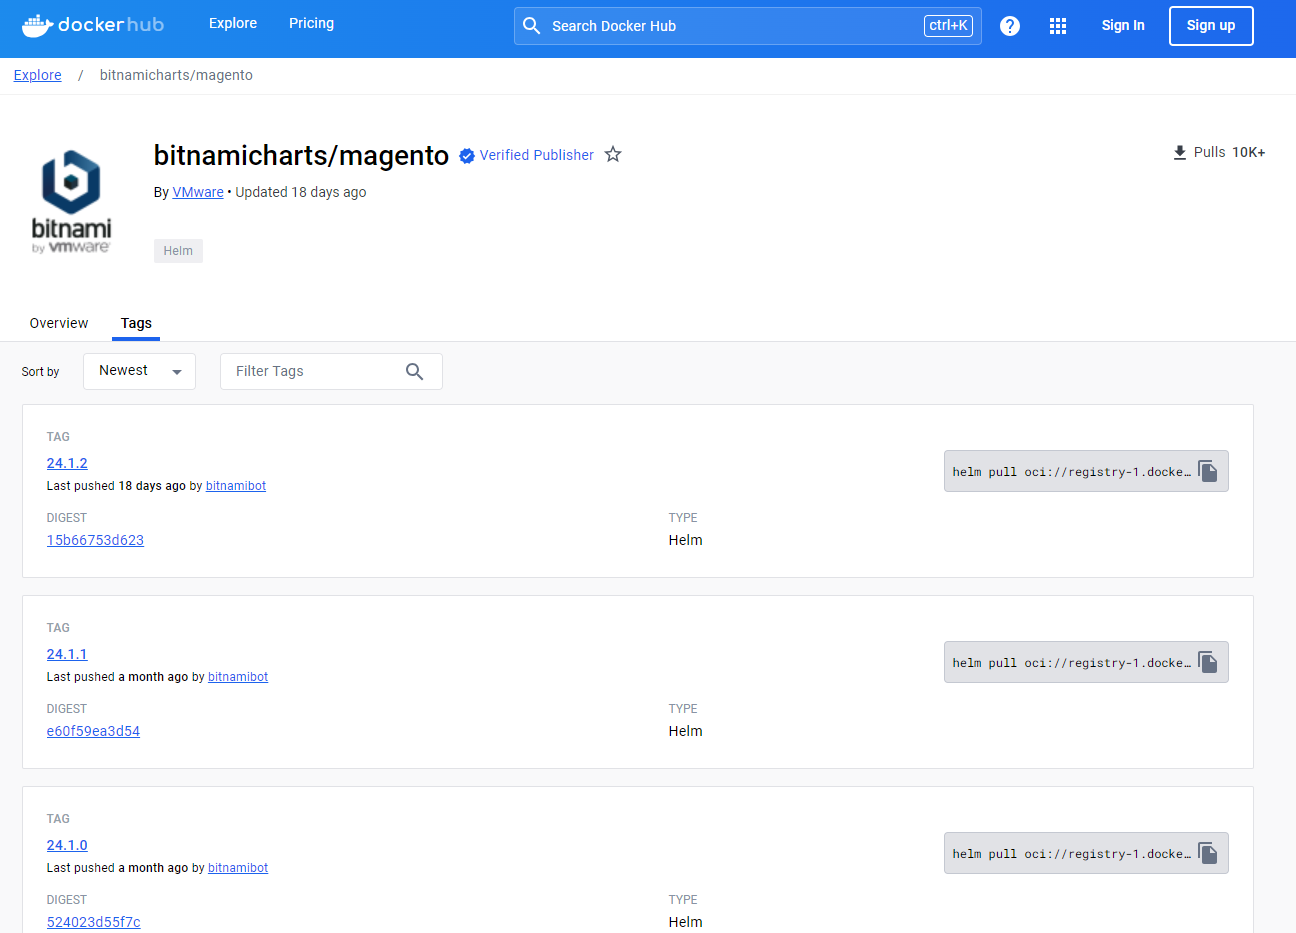
This time, to address Error: version is explicitly required for OCI registries in 2. Complete your Magento deployment by running:, we'll explicitly specify the chart version of Helm.
$ helm upgrade magento-demo oci://registry-1.docker.io/bitnamicharts/magento --version 24.1.2 --namespace magento --set magentoHost=$APP_HOST,magentoPassword=$APP_PASSWORD,mariadb.auth.rootPassword=$DATABASE_ROOT_PASSWORD,mariadb.auth.password=$APP_DATABASE_PASSWORD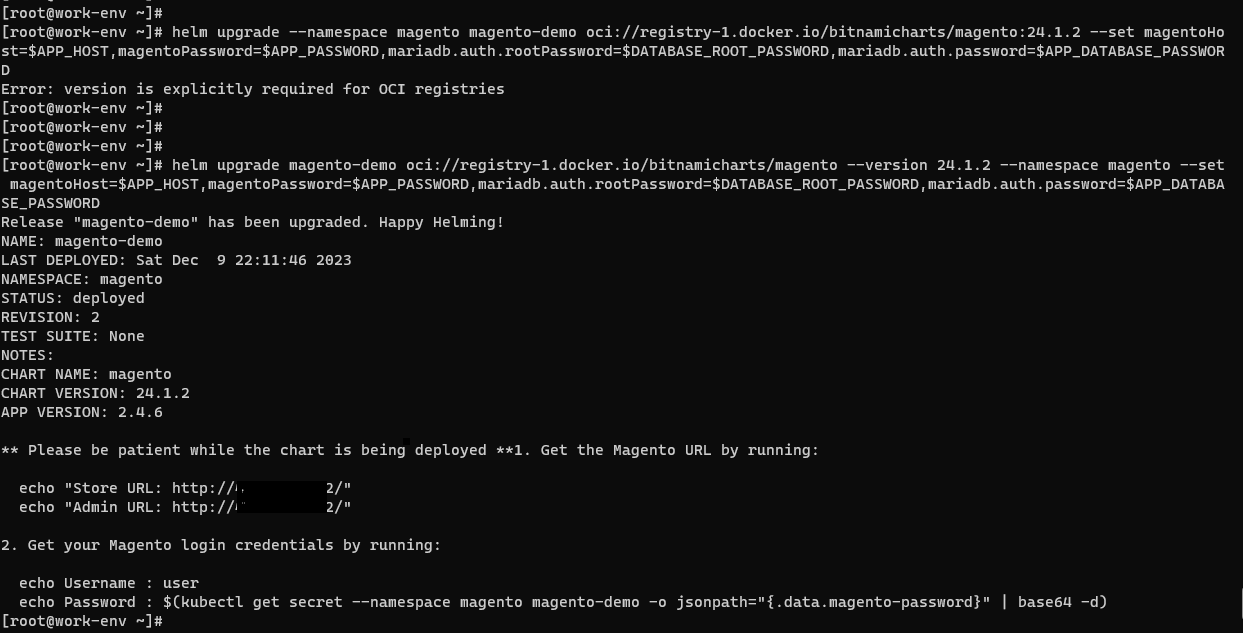
Now it has been solved. Check the status of the Pod in the namespace magento in the console. 0/3 nodes are available: pod has unbound immediate PersistentVolumeClaims. , preemption: 0/3 nodes are available: 3 Preemption is not helpful for scheduling.. Do you see an error message?
When we check the Persistent Volume Claims (PVC) and PV from the terminal, we can see that the PVC is not bound.
$ kubectl get pvc
$ kubectl get pv
Check the storage class for Magento creation.
$ kubectl get pvc -n magentoReviewing the details in the storage class list revealed that the storage class was not specified for data-magento-demo-elasticsearch-data-0 or data-magento-demo-elasticsearch-master-0.
$  kubectl describe pvc data-magento-demo-elasticsearch-data-0 -n magento
$  kubectl describe pvc magento-demo-elasticsearch-master-0 -n magento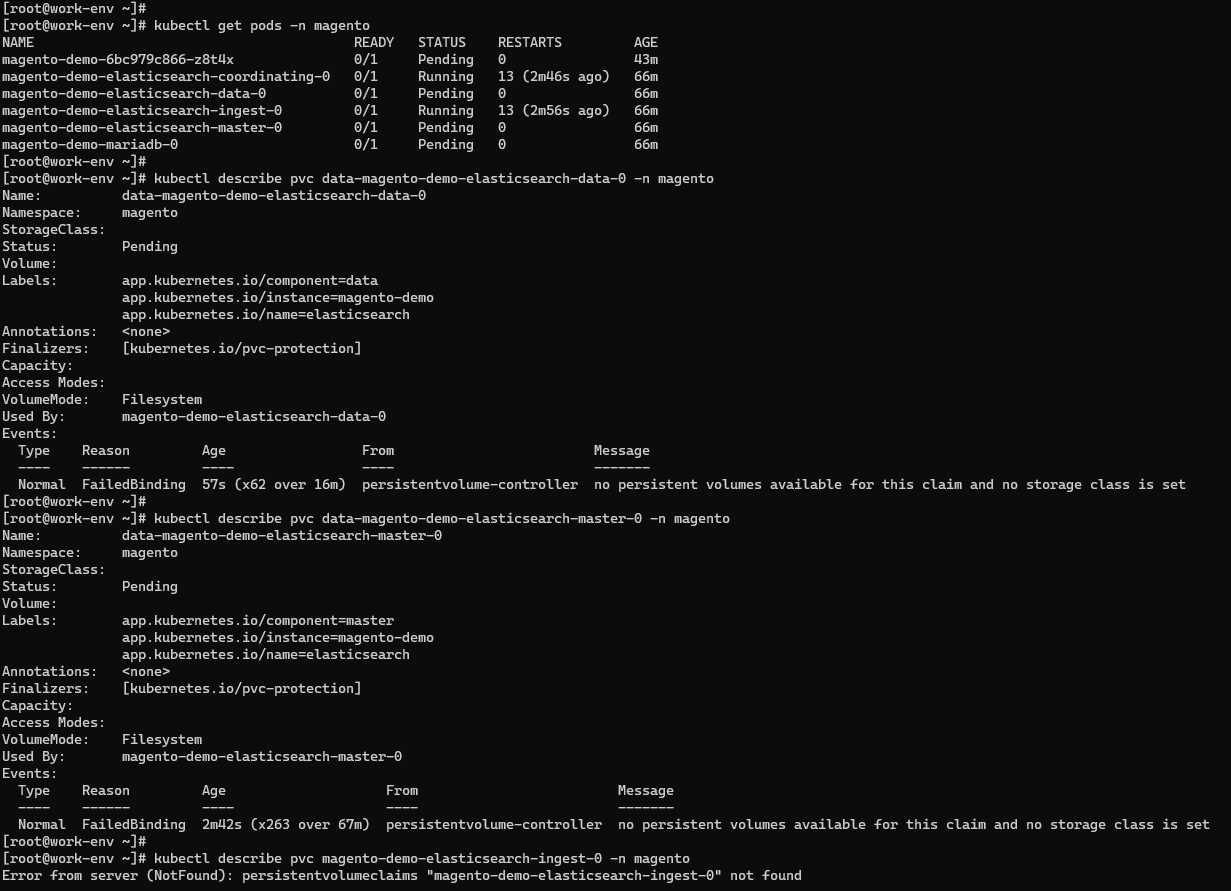
The author was also a bit stuck as well and it kept him puzzled for a while, but this was caused because the default PV type of Helm charts is not accepted by Alibaba Cloud. The PVC information in the console needs to be manually updated.
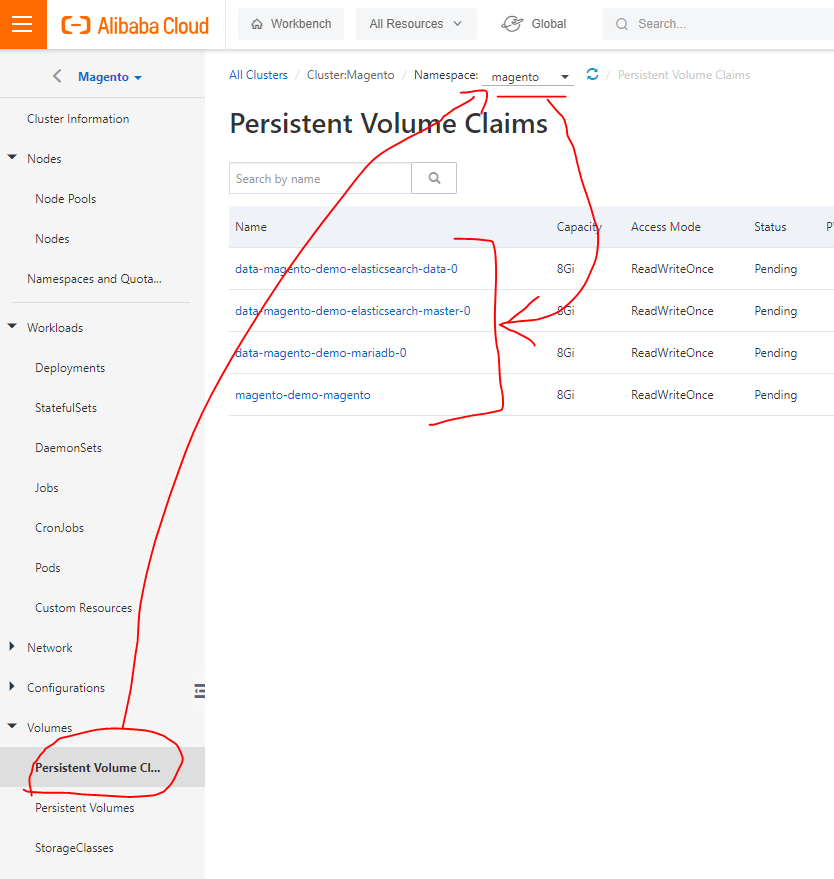
Check the PVC status in the console. All required PVCs are in the Pending status, and the PV type is not recognized.
Check the storage classes supported by the cluster.
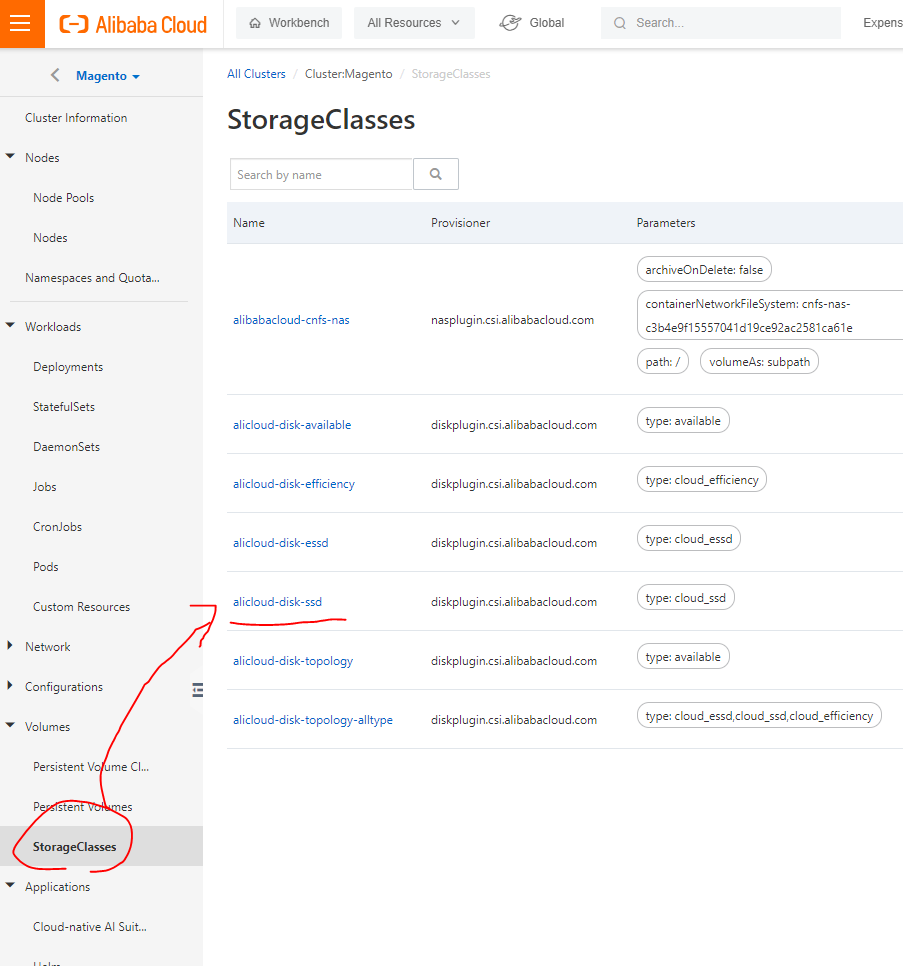
Based on this information, check the data-magento-demo-elasticsearch-data-0 YAML file. Apparently storageClassName: AliCloud-disk-ssd wasn't added, so add it and update.
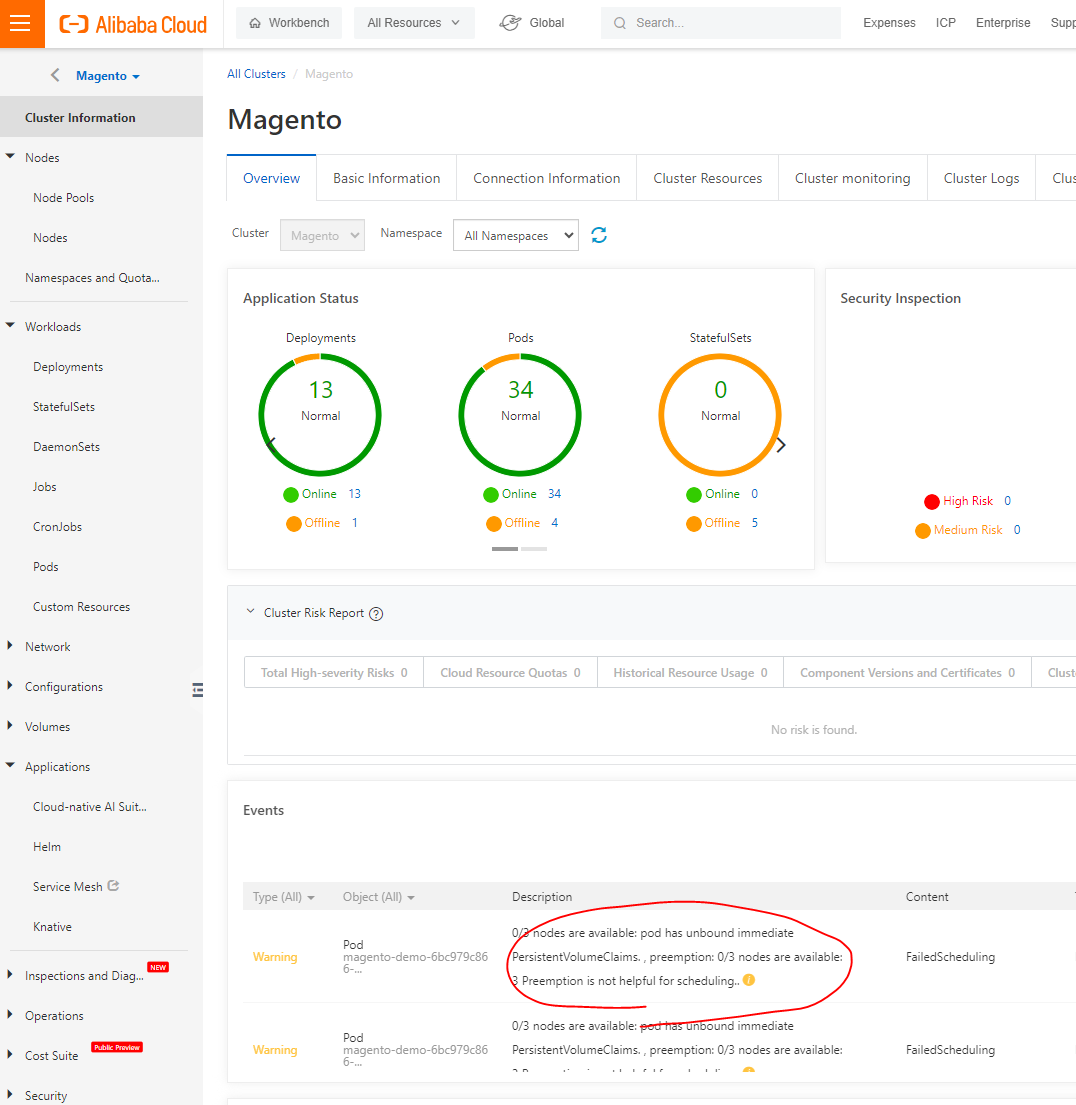
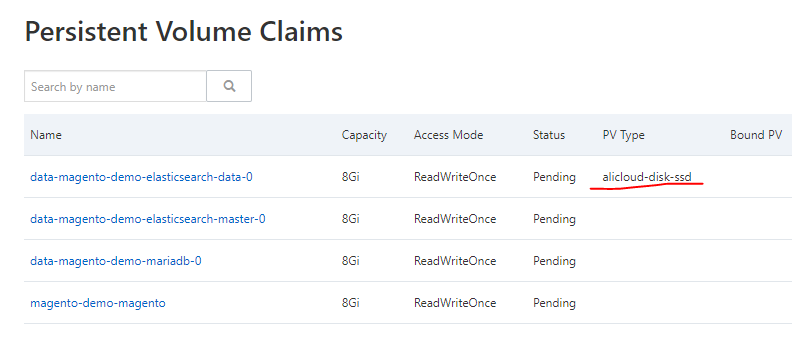
Repeat this for data-magento-demo-elasticsearch-master-0, data-magento-demo-mariadb-0, and magento-demo-magento.
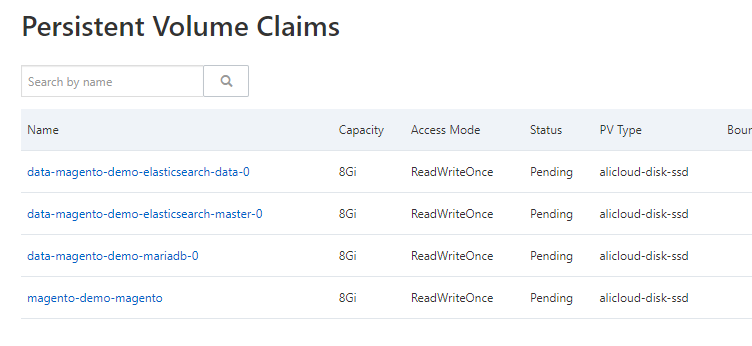
For more information about this task, see Use a dynamically provisioned disk volume.
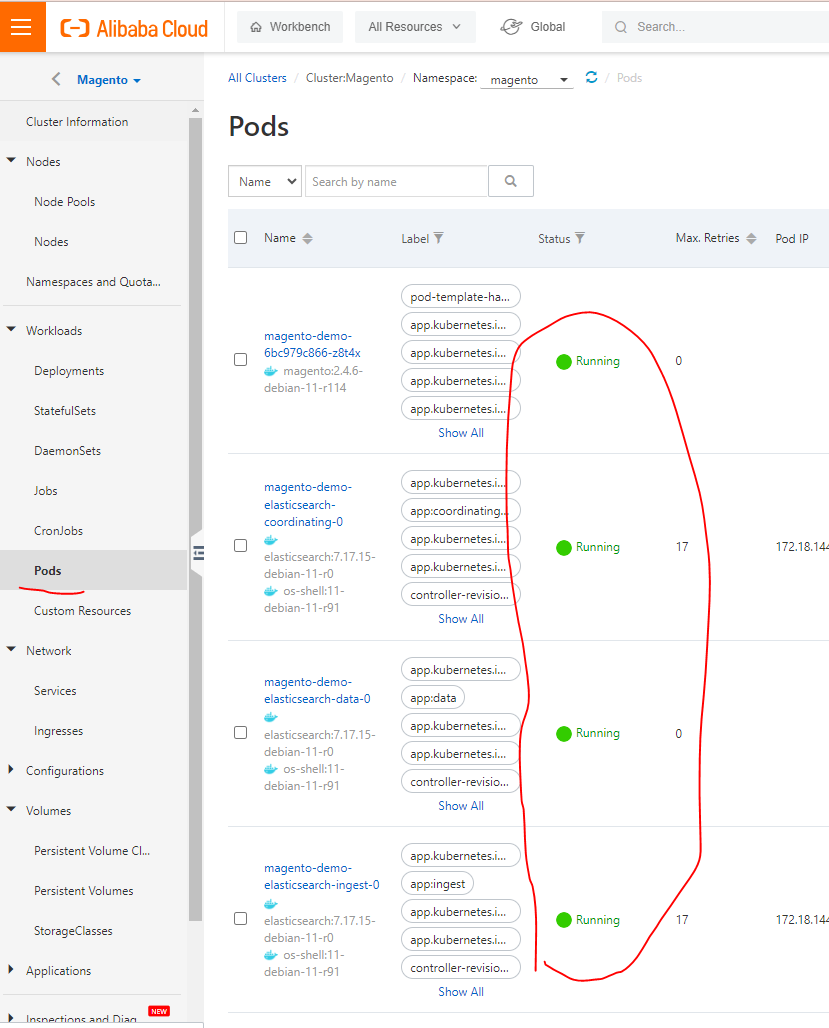
Return to the Pods list and wait until all the Pods are in the Running status.
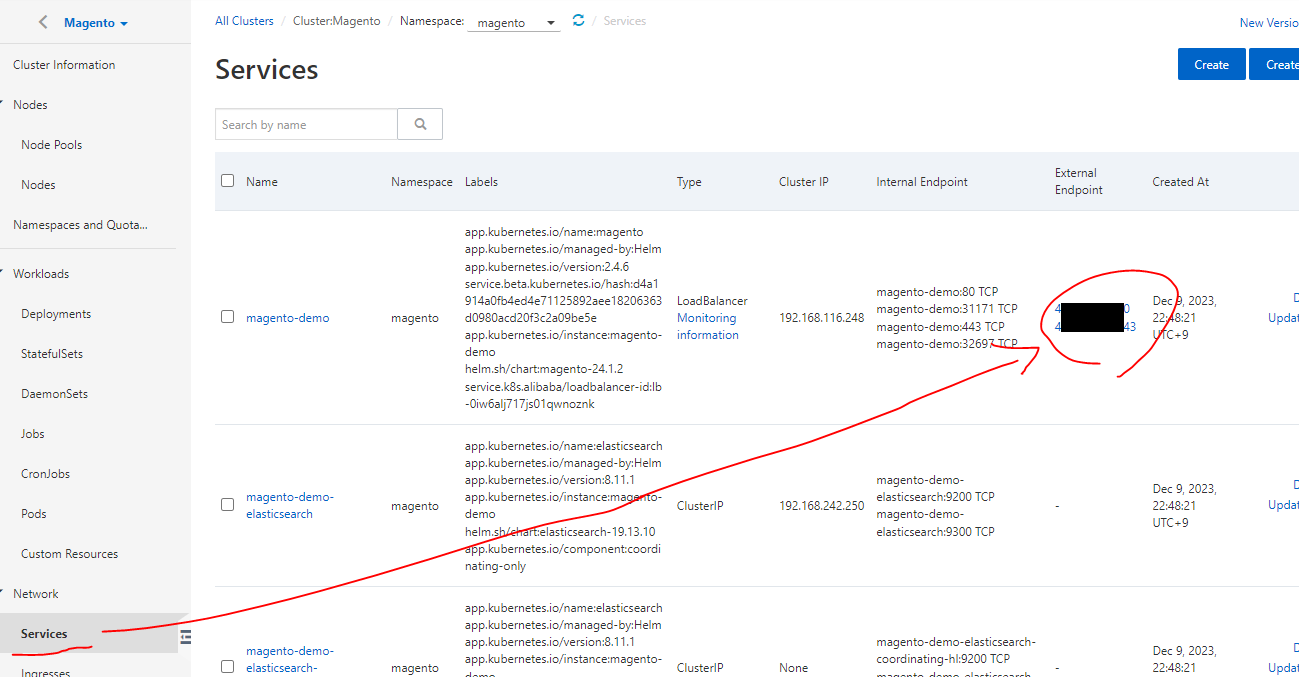
On the Services page, obtain the URL of the Magento service.
Paste the URL above to the web browser to display the page.

Then, append /admin to the URL by default to go to the administrator management page.
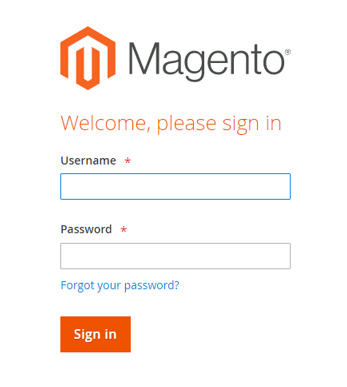
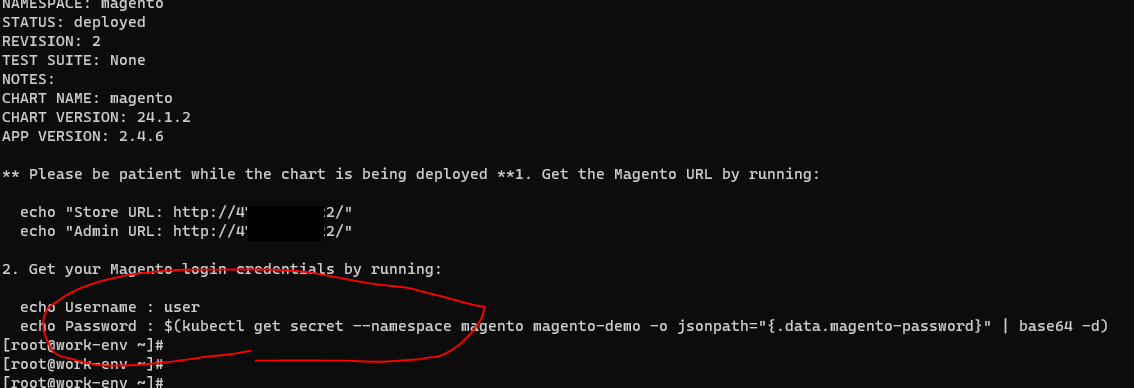
In the working environment console, use the command to obtain the generated password and log on.
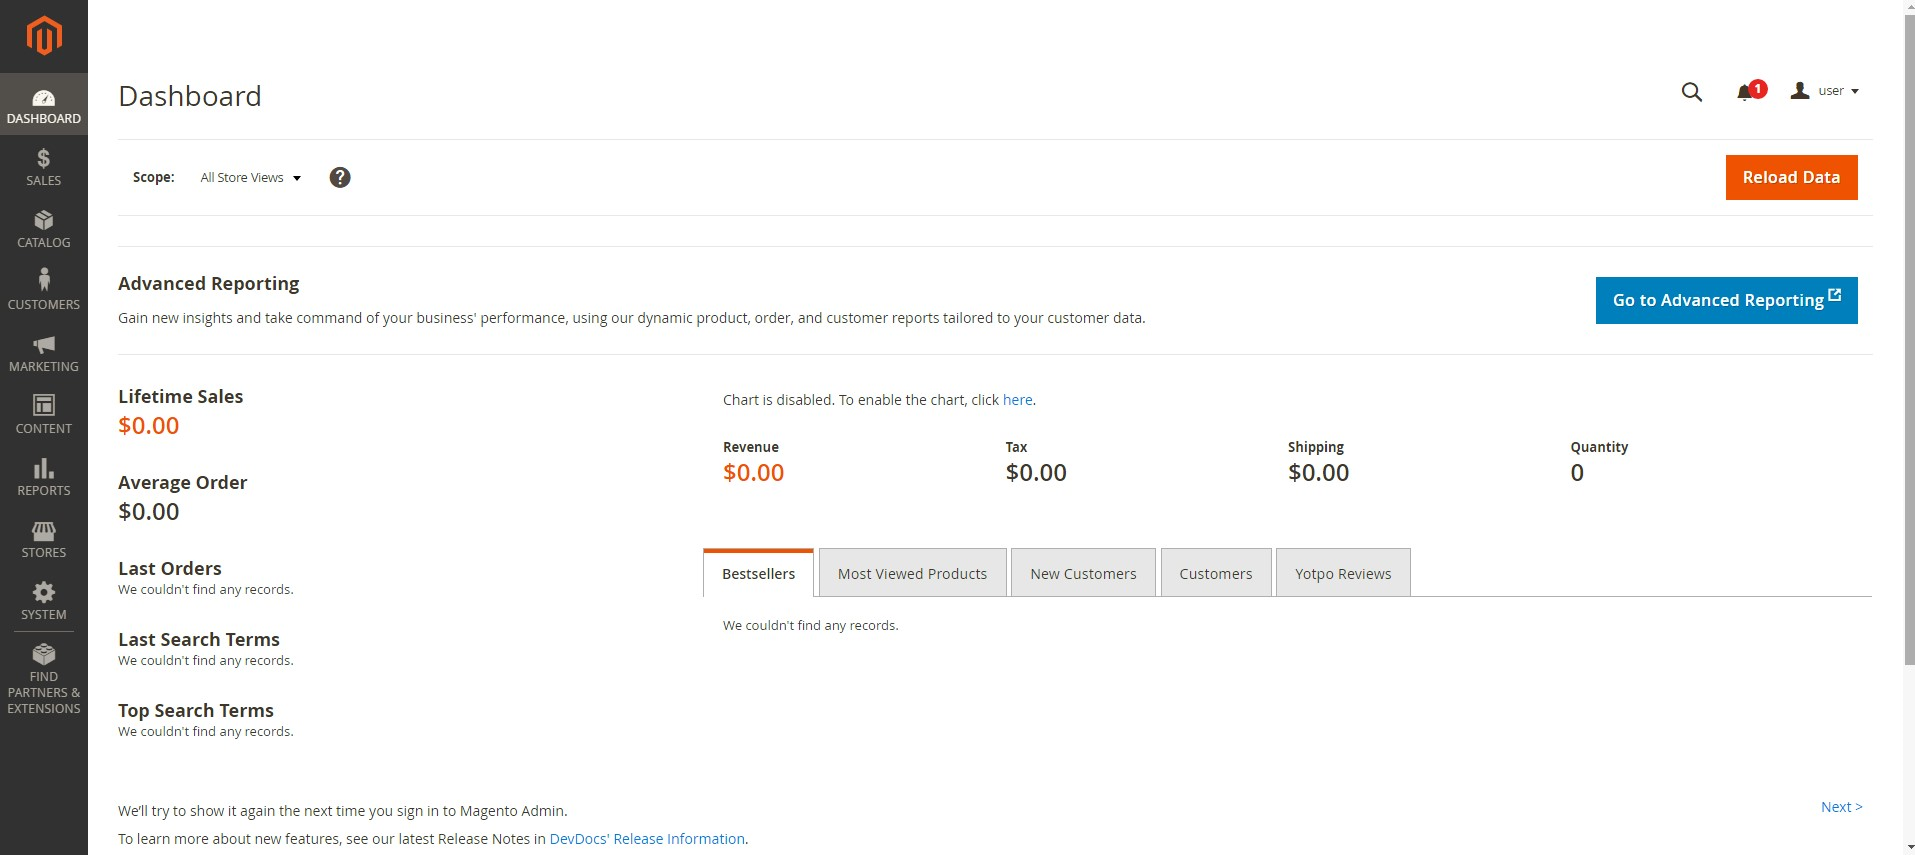
You are in Magento now.
I ran into some issues with PVC and PV, but Alibaba Cloud's Container Service for Kubernetes (ACK) fully supports Kubernetes and is flexible and scalable, so I was able to customize it to resolve these problems smoothly. I was able to launch the Magento service within an hour of launching the cluster. This showcases the strength of Alibaba Cloud's Kubernetes. If you're looking to effortlessly launch Magento, give it a try.
This article is translated from Qiita.
Disclaimer: The views expressed herein are for reference only and don't necessarily represent the official views of Alibaba Cloud.
Use Terraform to Quickly Deploy Magento by Alibaba Cloud ECS + RDS
H Ohara - May 8, 2024
Alibaba Clouder - September 2, 2020
Alibaba Clouder - October 21, 2019
Alibaba Clouder - February 24, 2020
Alibaba Clouder - December 18, 2017
Hironobu Ohara - February 3, 2023
 Managed Service for Prometheus
Multi-source metrics are aggregated to monitor the status of your business and services in real time.
Learn More Application Real-Time Monitoring Service
Build business monitoring capabilities with real time response based on frontend monitoring, application monitoring, and custom business monitoring capabilities
Learn More Container Service for Kubernetes
Alibaba Cloud Container Service for Kubernetes is a fully managed cloud container management service that supports native Kubernetes and integrates with other Alibaba Cloud products.
Learn More Resource Management
Organize and manage your resources in a hierarchical manner by using resource directories, folders, accounts, and resource groups.
Learn MoreMore Posts by H Ohara