By Jeremy Pedersen
One of Alibaba Cloud's many neat built-ins is a tool called DMS (Data Management Service).
DMS is a handy way to manage database permissions and users, import and export data, create and update tables, and more.
Let's take a look at two of the simplest use-cases for DMS: Importing data in CSV format, and executing SQL commands via the DMS web console.
Before we can get started with DMS, we need to create a database. For the purposes of this blog post I'll be setting up a Pay-As-You-Go RDS instance in Singapore, but RDS (and DMS) are available in all Alibaba Cloud regions.
After logging into my Alibaba Cloud Account, I navigate to the RDS console, click on Instances, choose the Singapore region from the dropdown in the upper left, and then click on Create Instance:
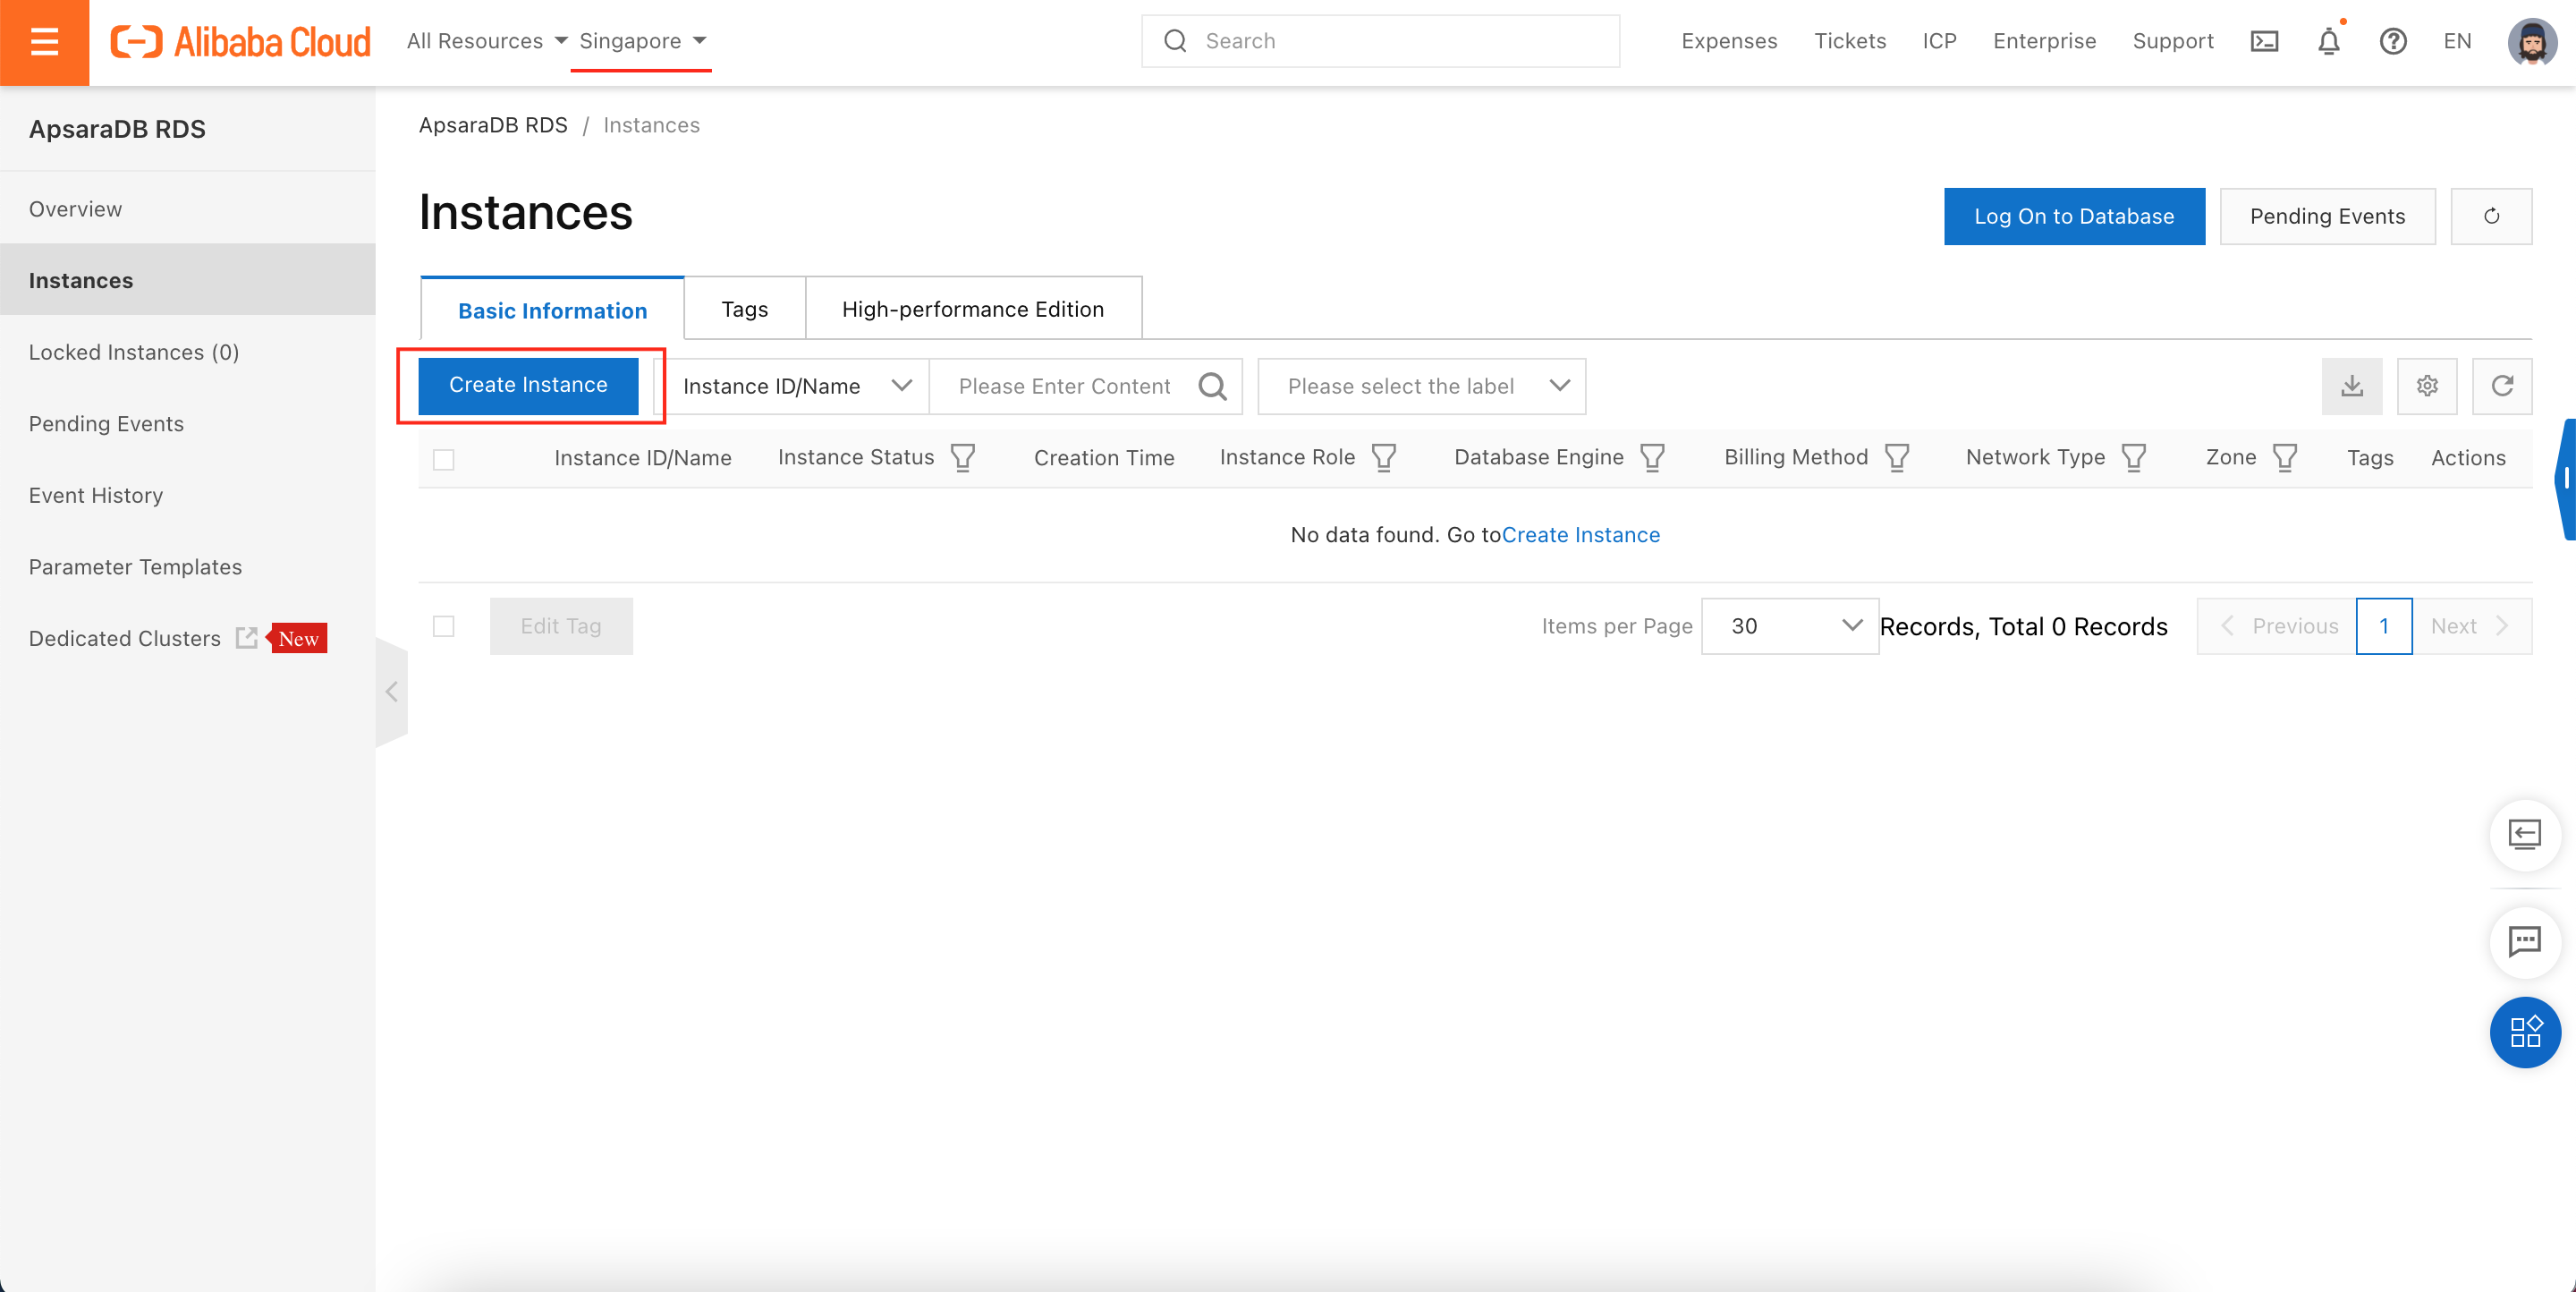
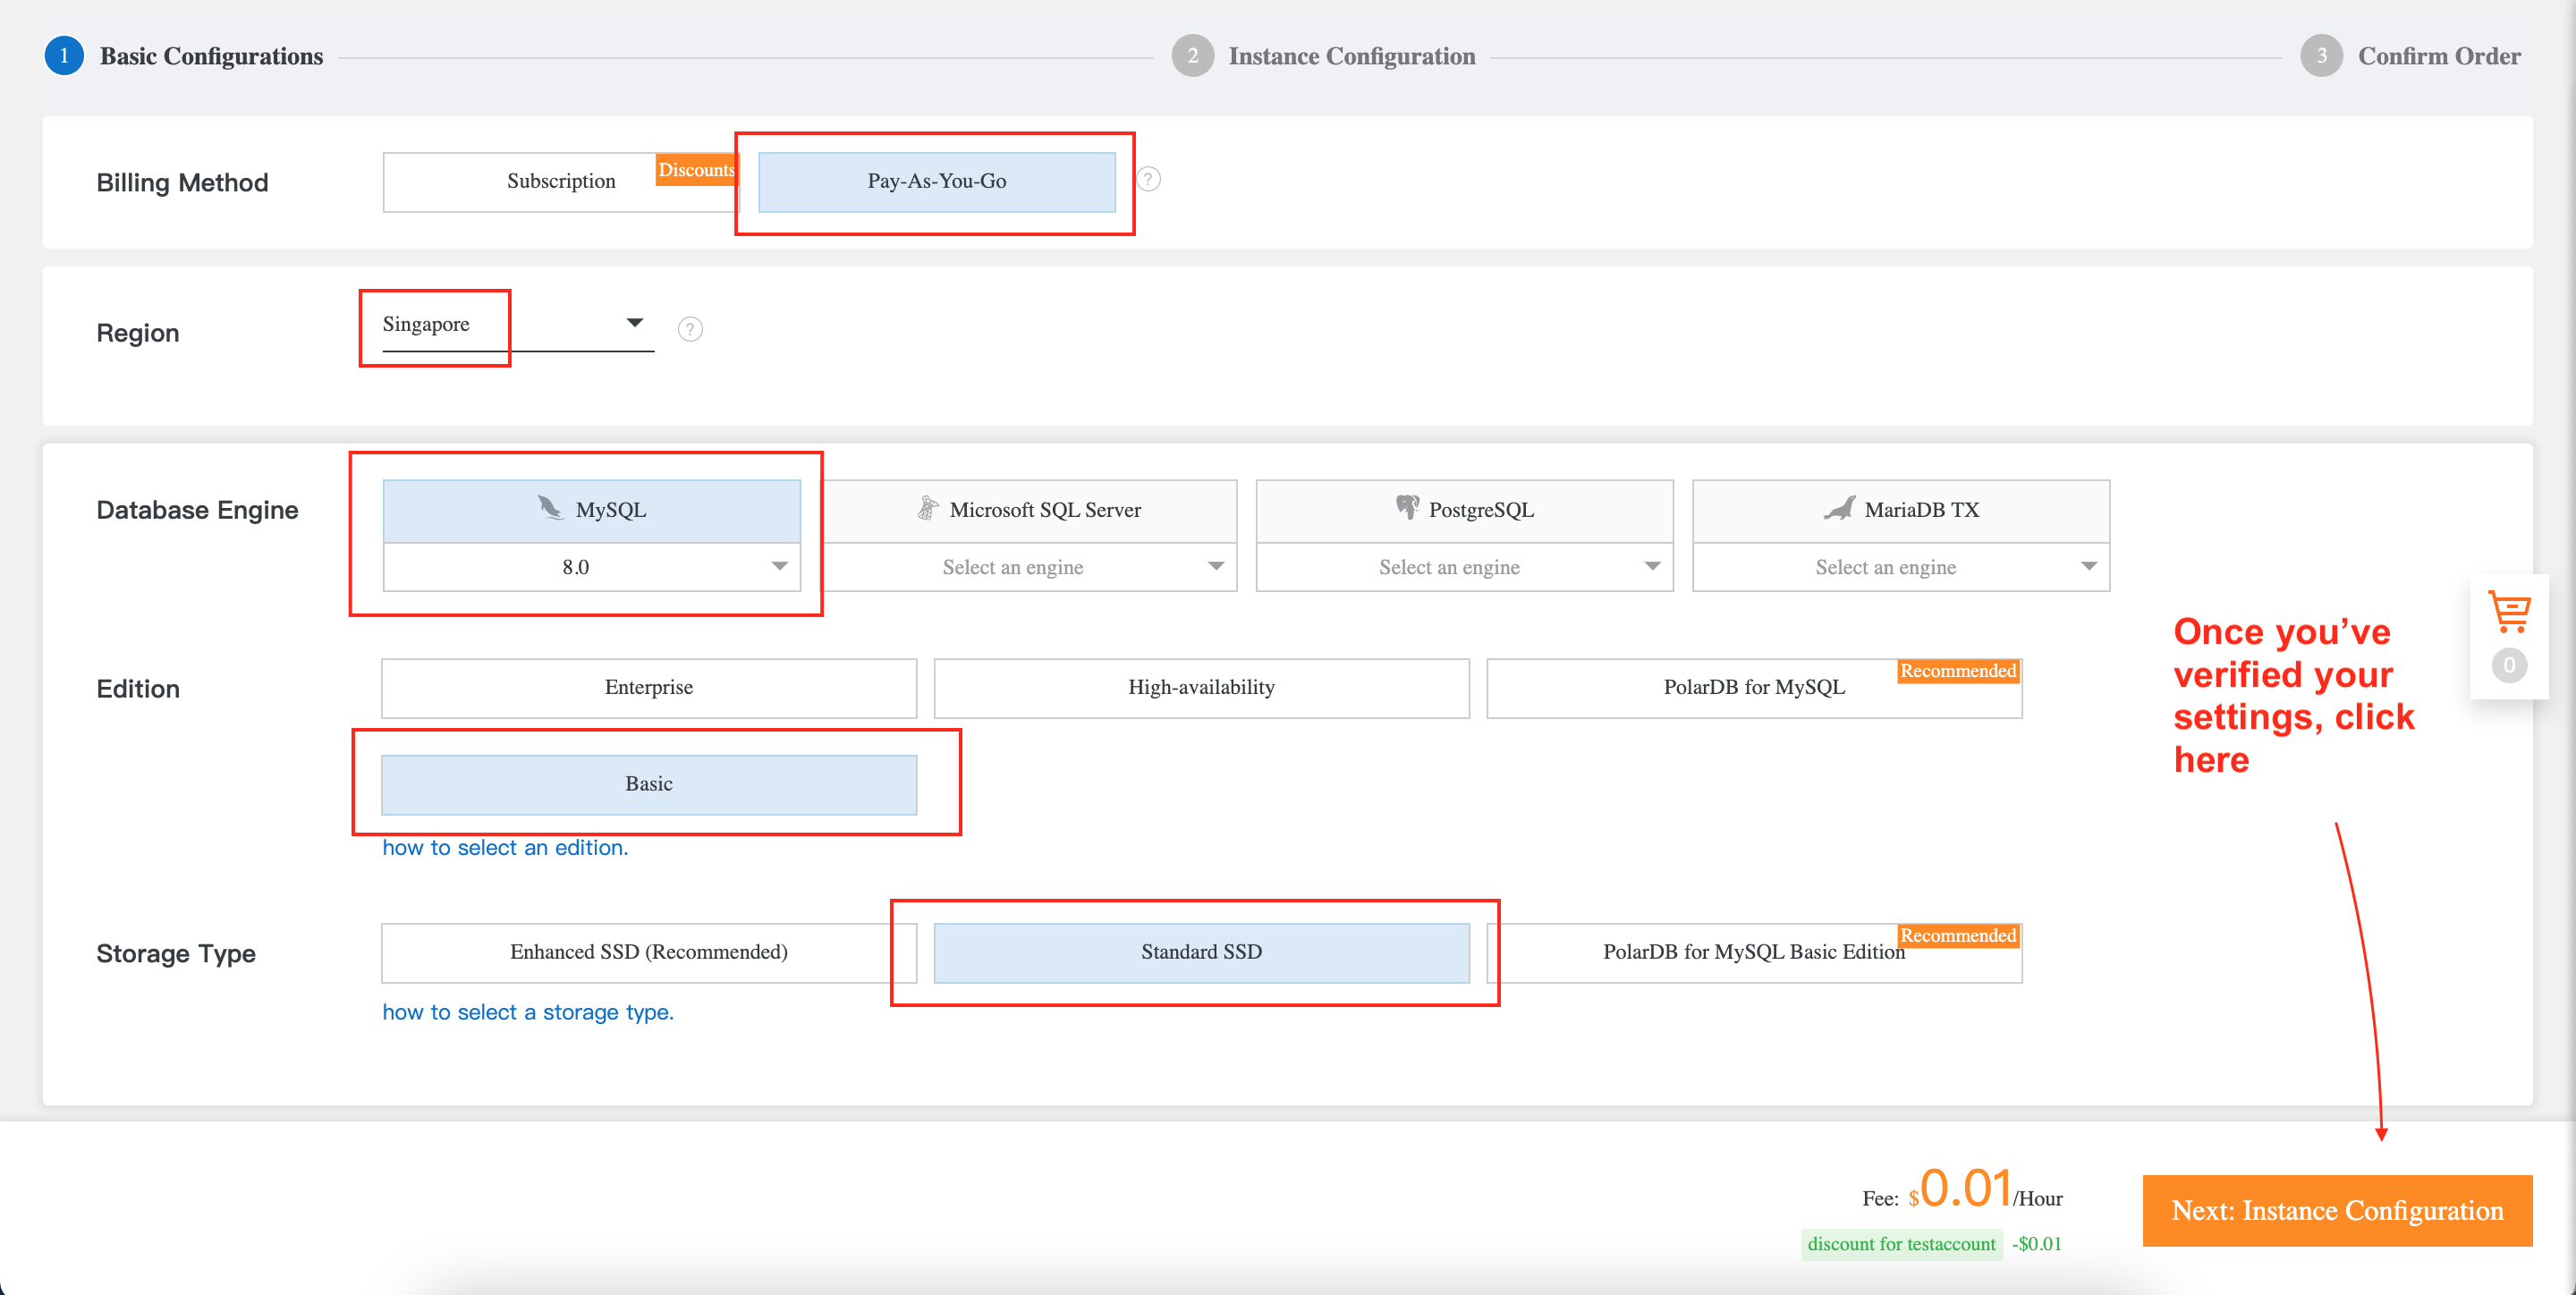
This will open up a new tab, where you can select the type of RDS instance you want to purchase. To keep costs low, we'll choose the Basic RDS instance type, and choose Standard SSD as our disk type. Make sure your settings match the ones shown here, then click on Next: Instance Configuration:
On the next page, you'll need to choose a VPC and VSwitch to house your RDS instance (if you don't know what these are, just go with the default settings the console offers you). You'll also have to choose your MySQL database engine type (you can safely choose the default, InnoDB):
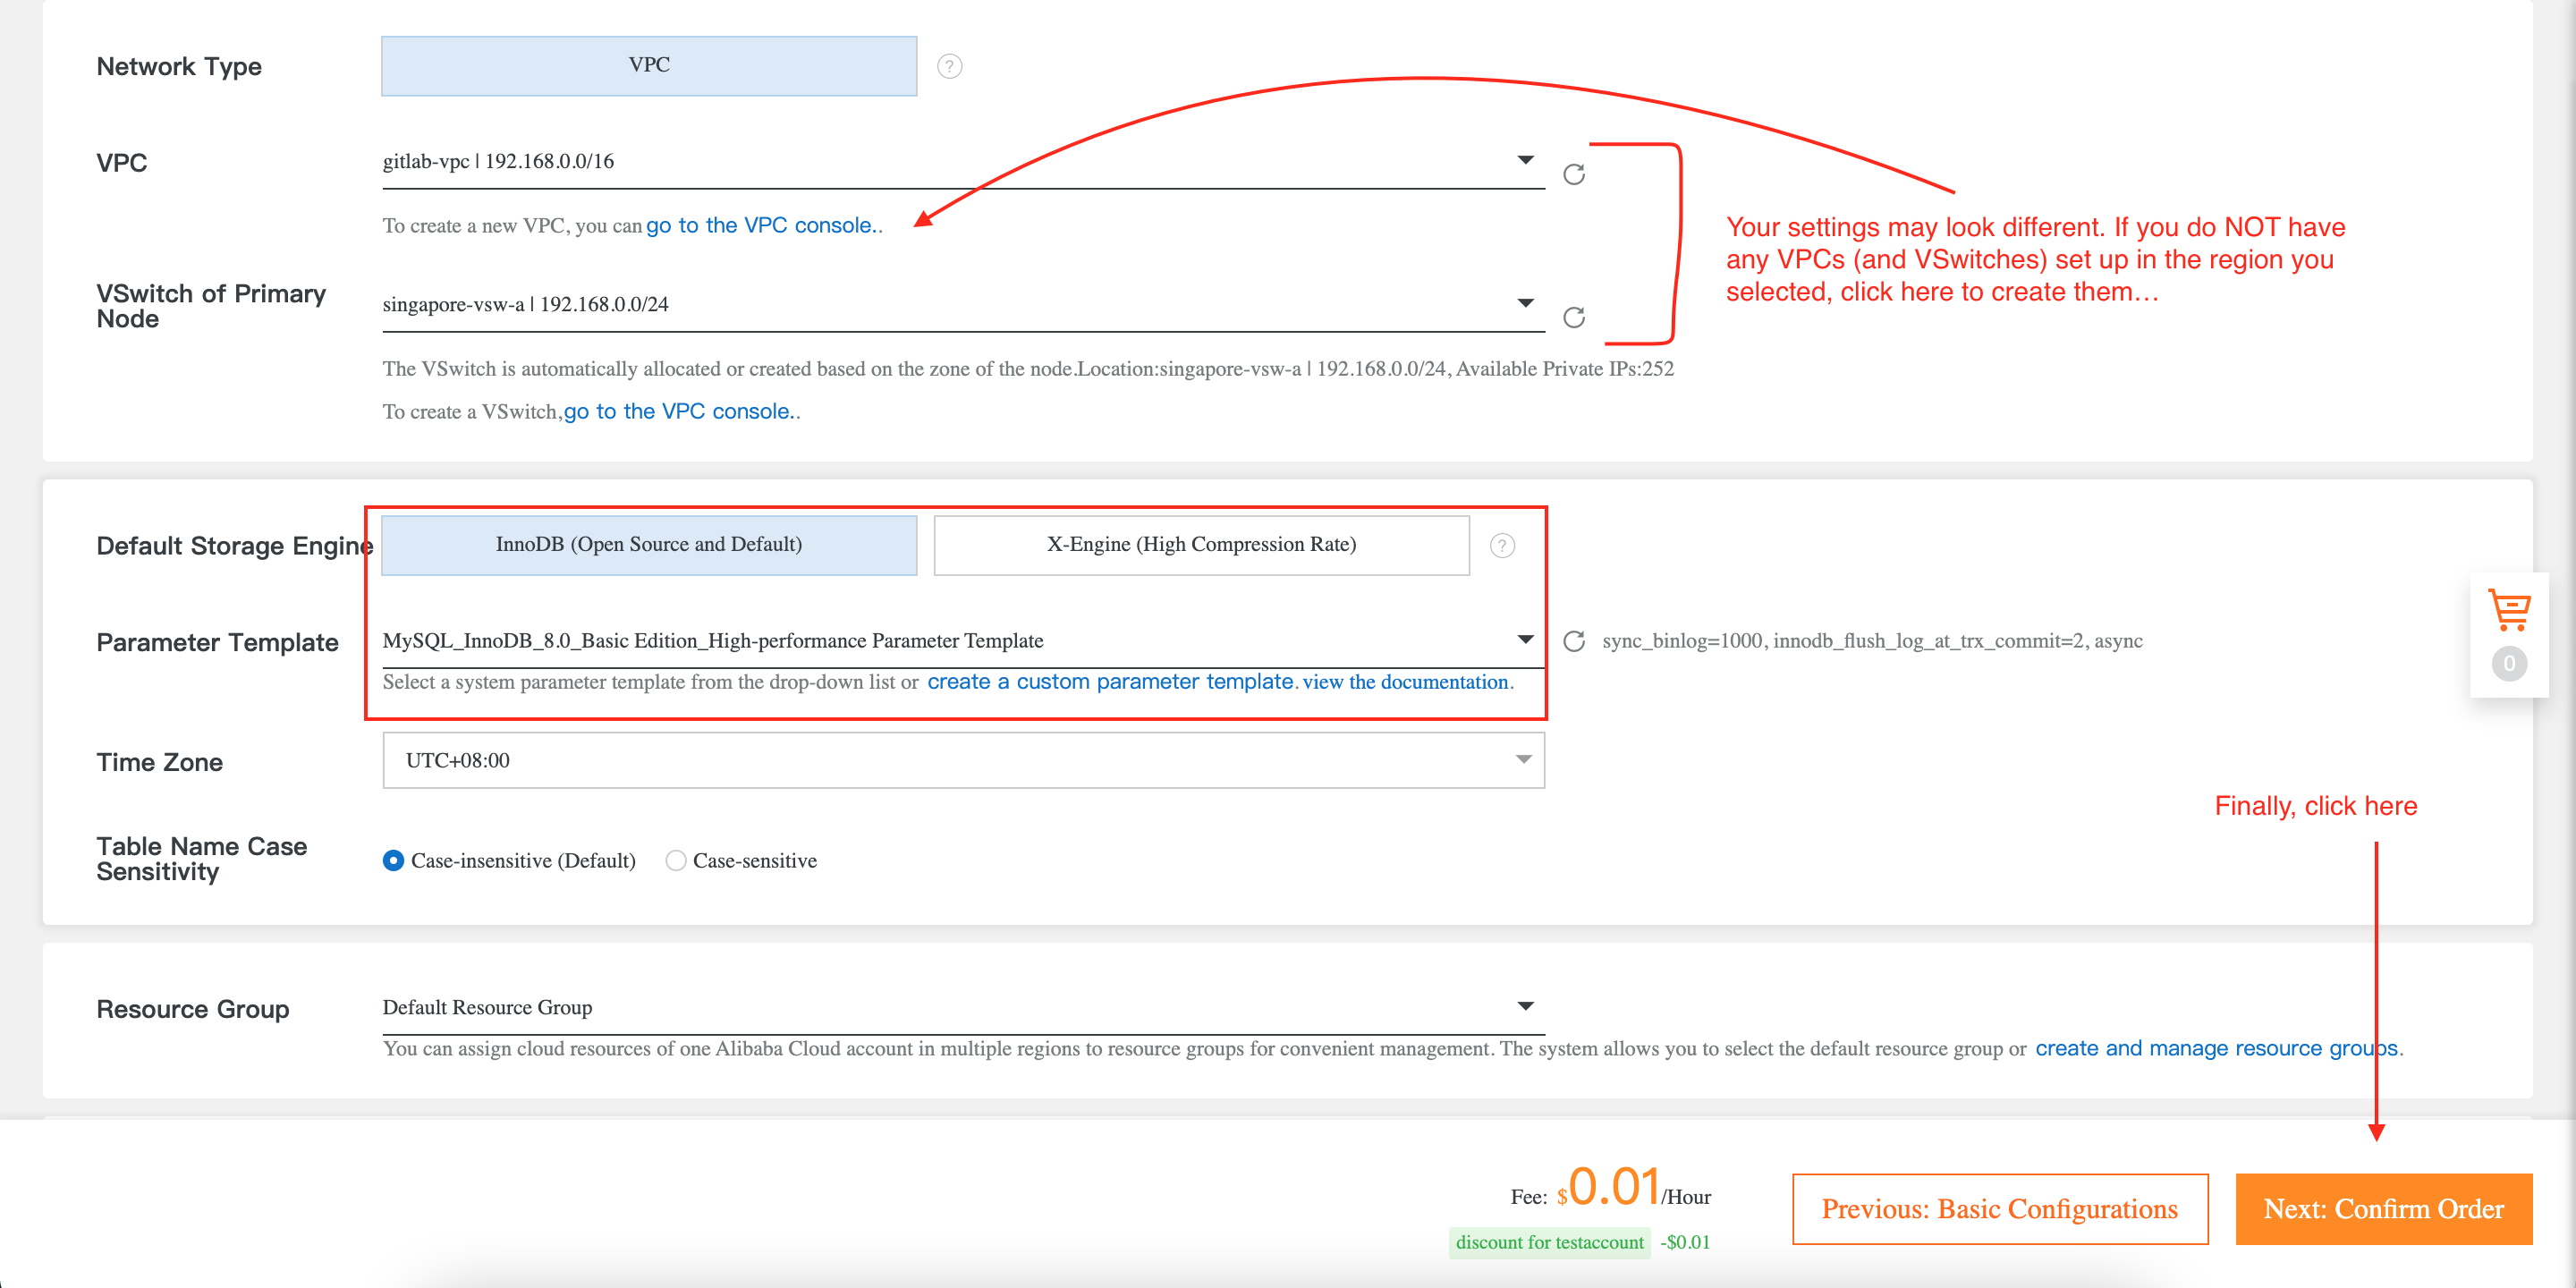
After clicking Next: Confirm Order, you'll be taken to the (final) step in the purchase process:
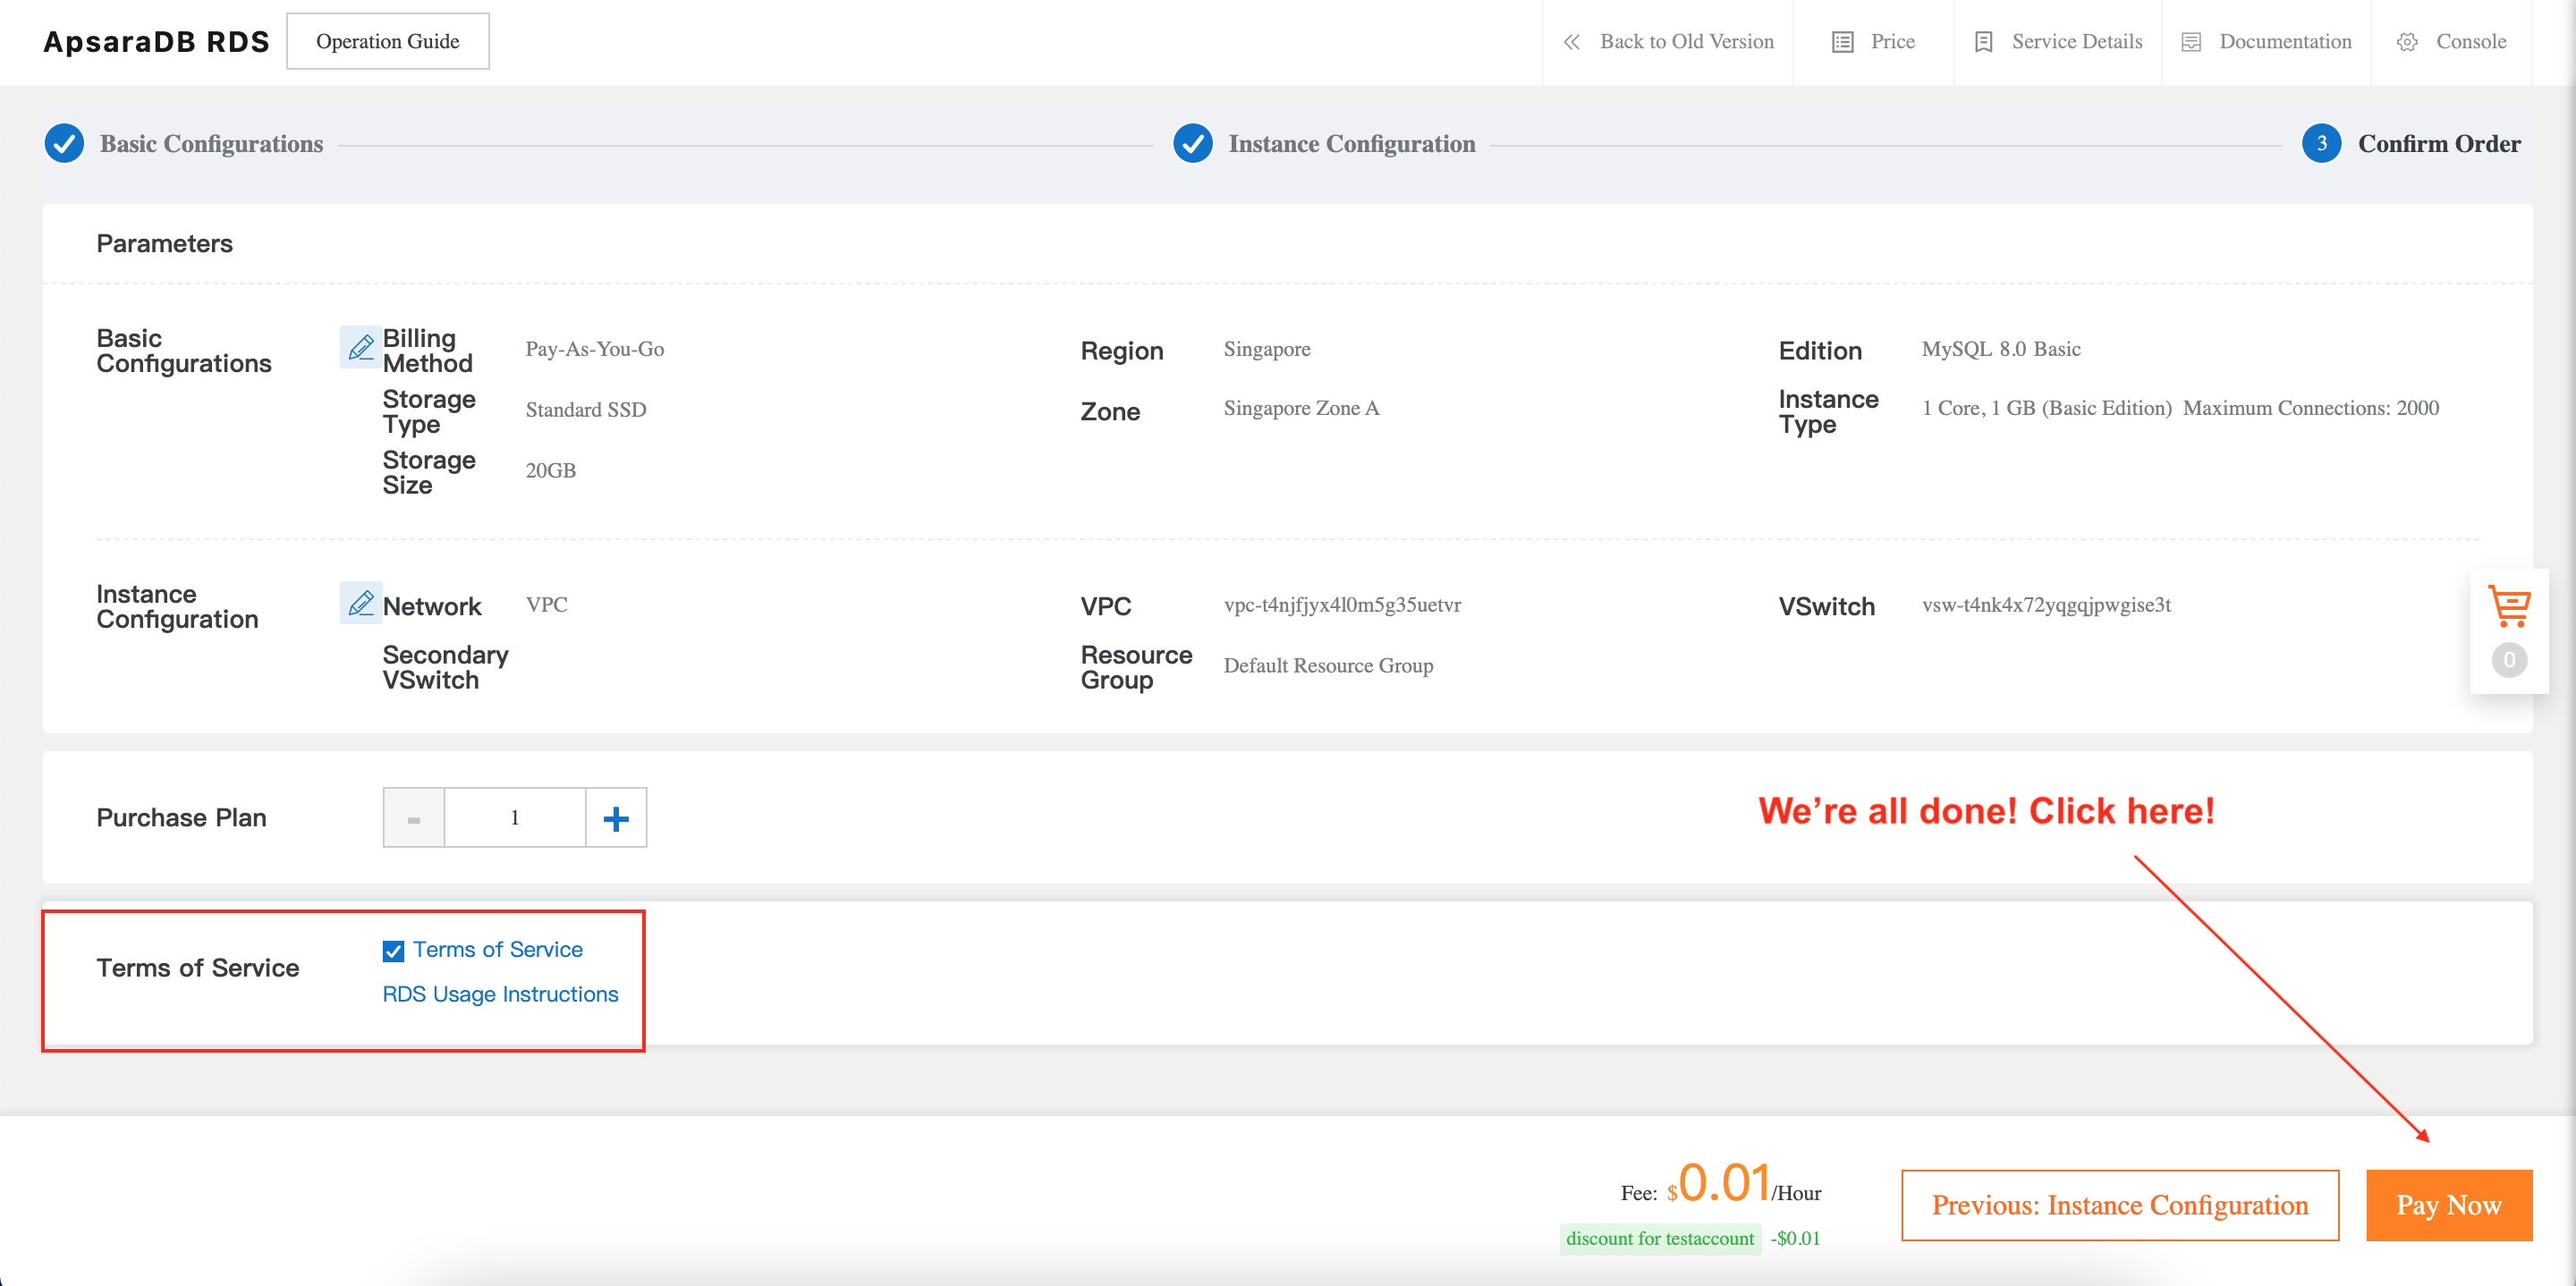
Verify the RDS configuration settings shown at the top of the page, tick the box to agree to the RDS terms of service, then click Pay Now.
Note that the price you see will probably be higher than the one shown in my screenshots. I used an internal Alibaba Cloud test account, and that account is subject to a special discount!
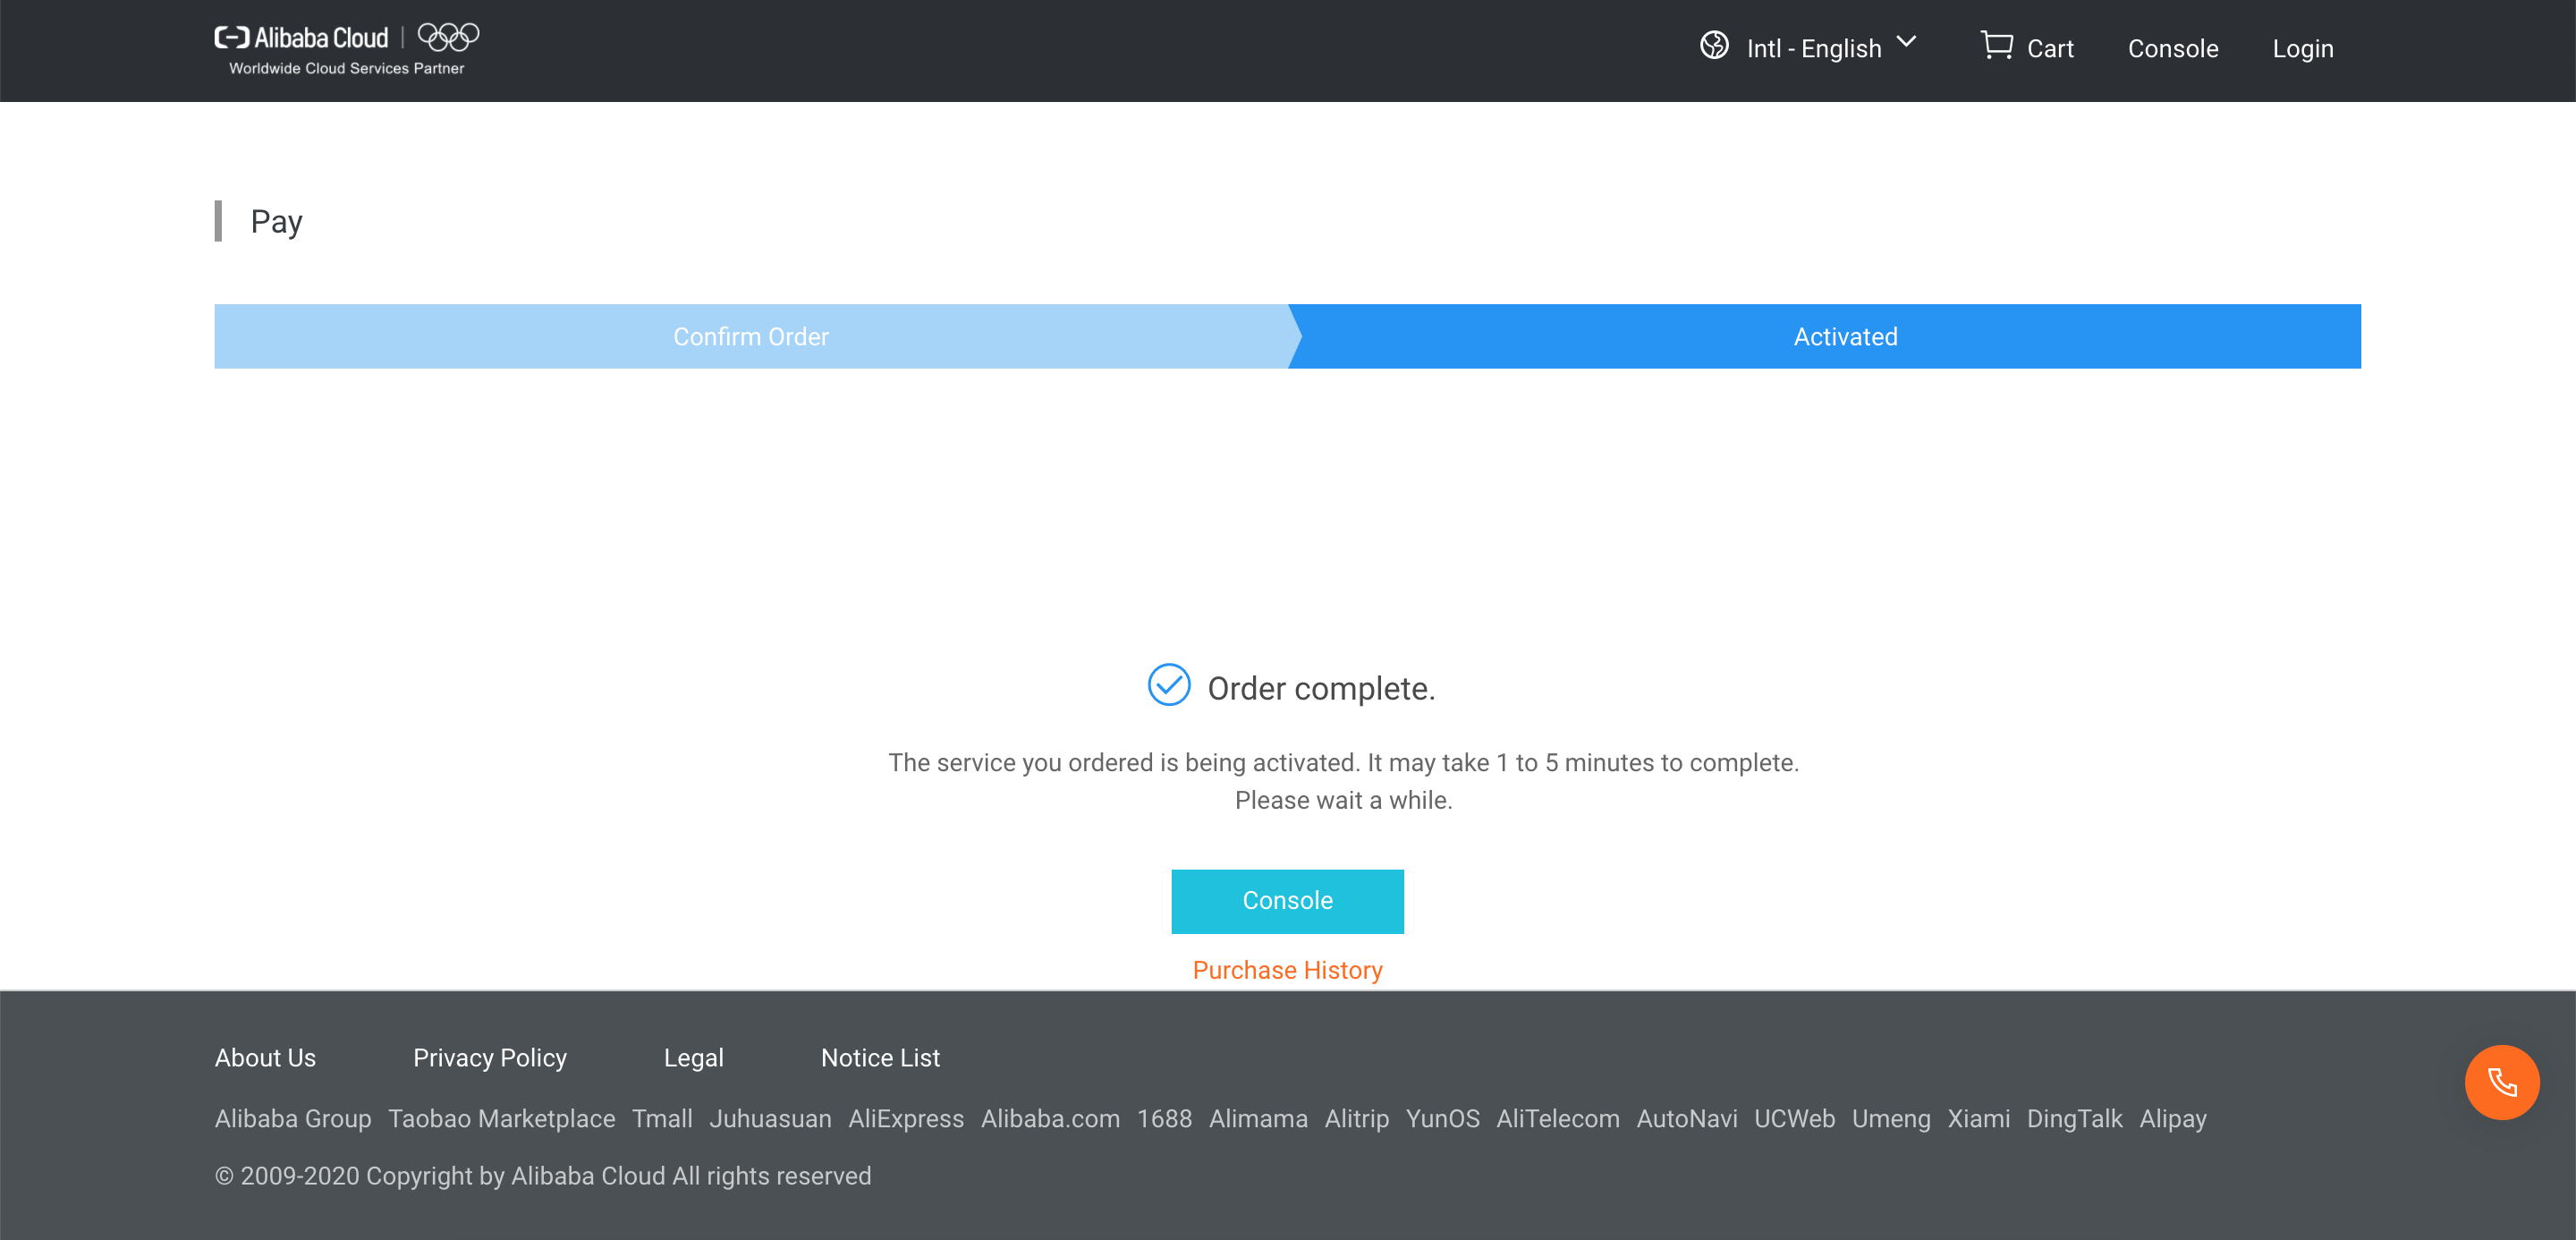
If everything worked, you should see an order confirmation page like this one:
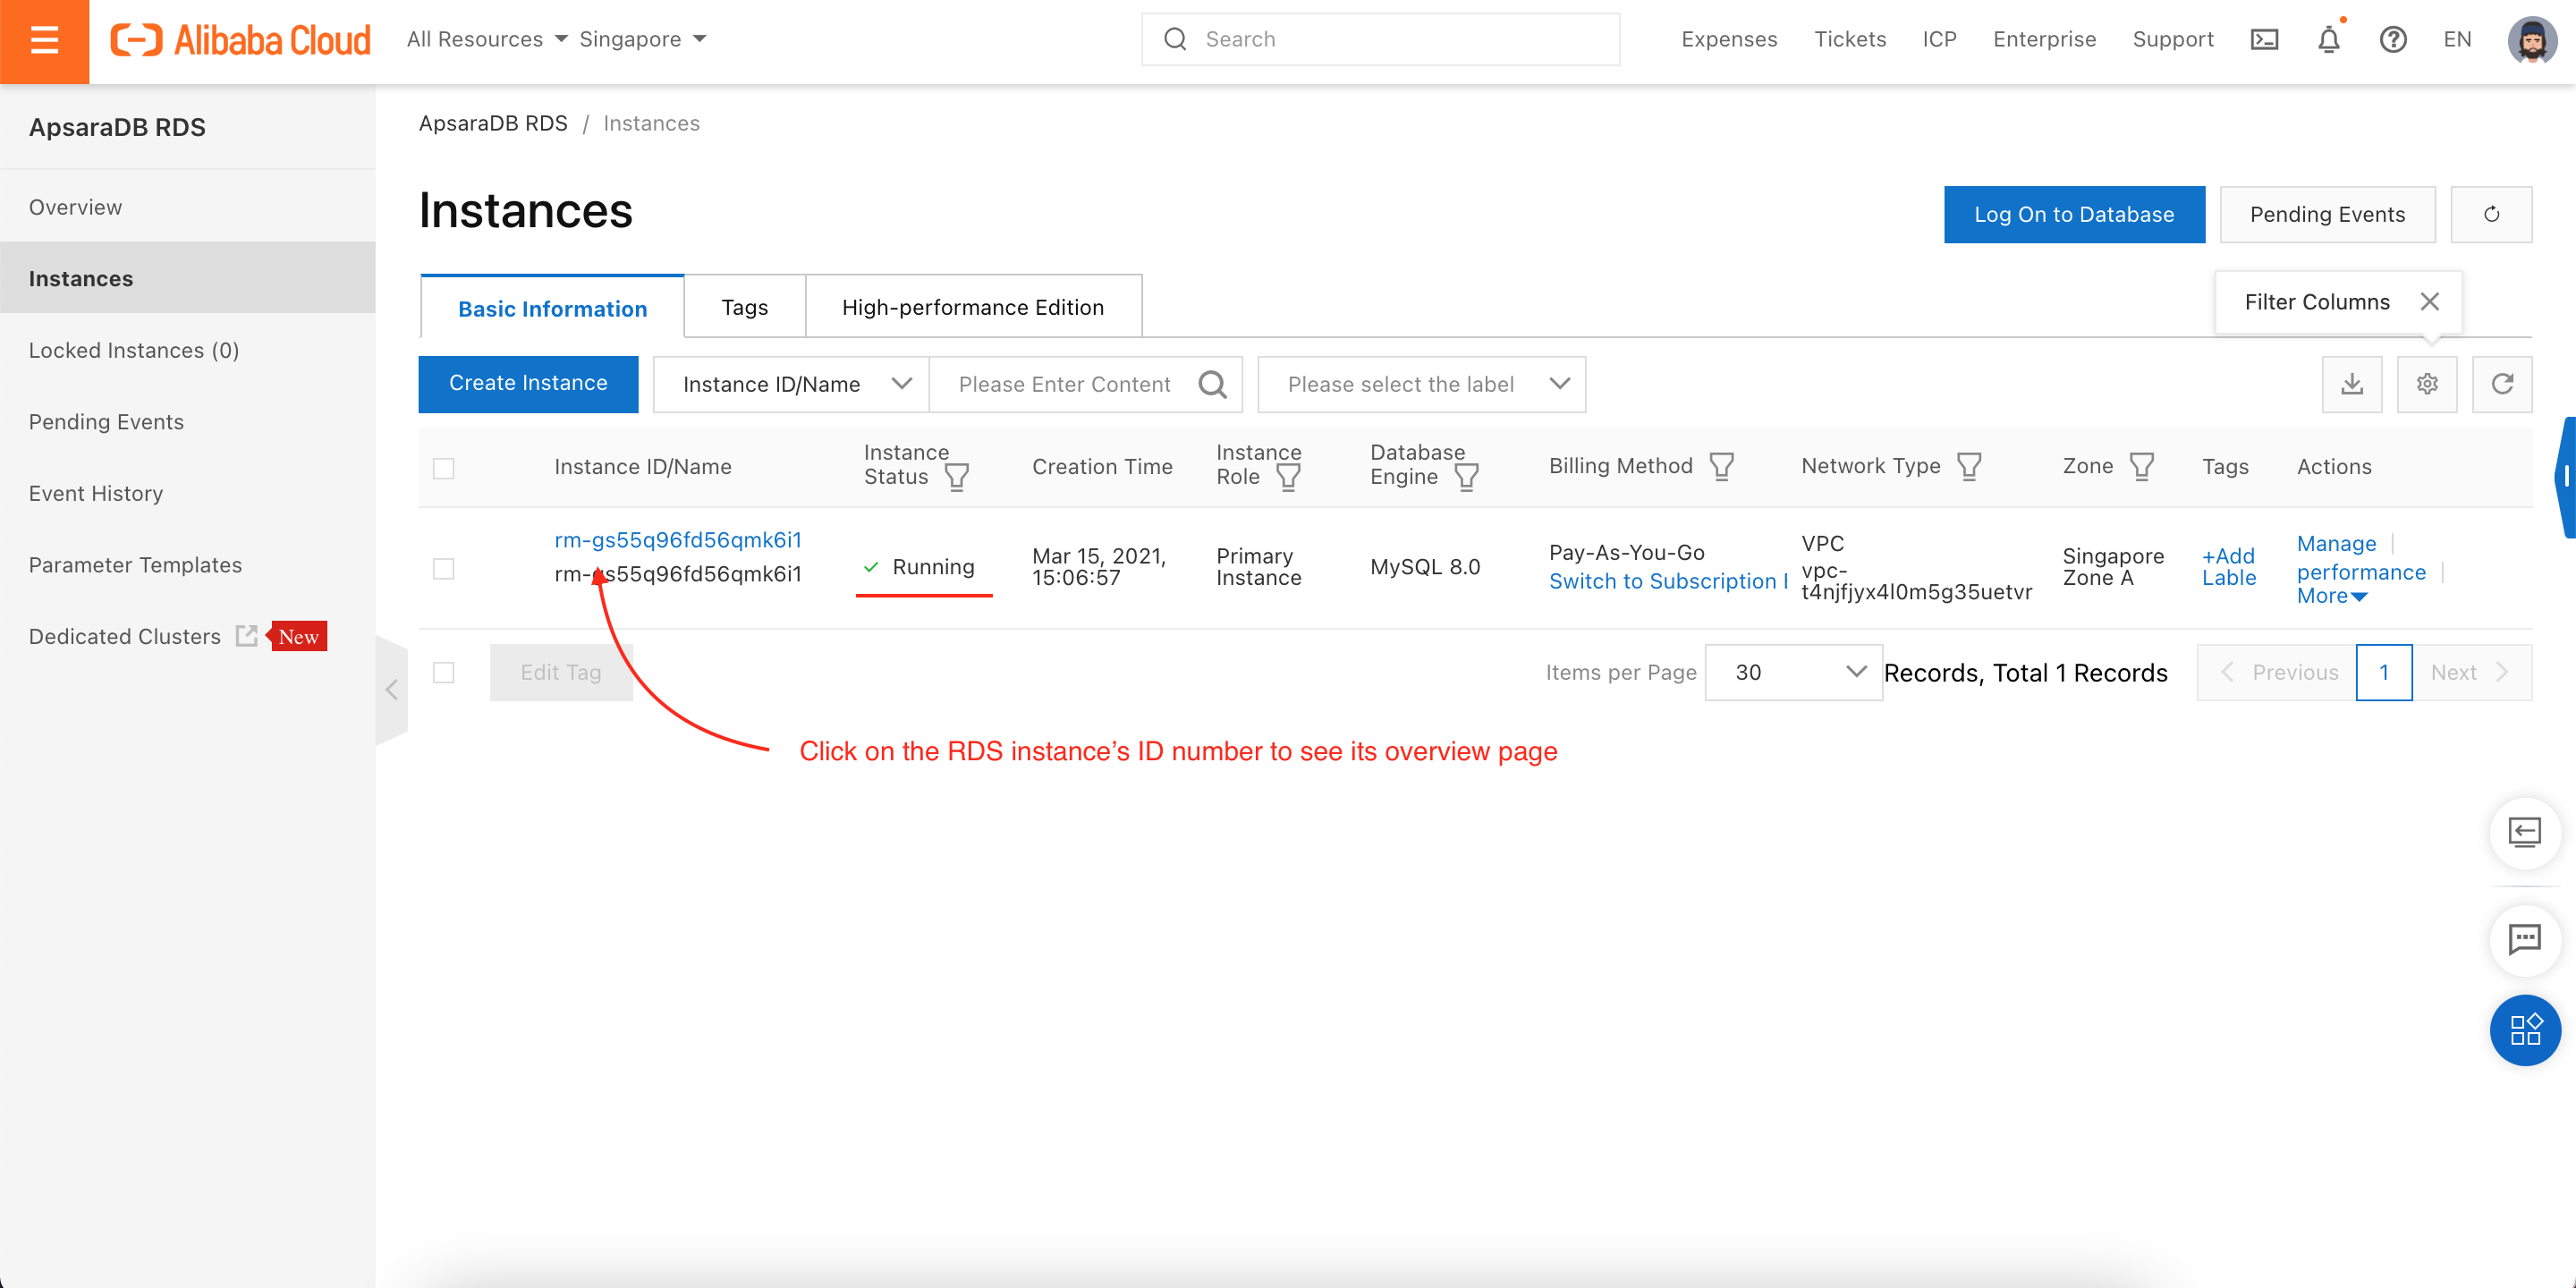
You can close that page and return to the RDS console. It might take a few minutes for the RDS instance to start up. Once it does, you should see something like this:
We're not (quite) done with our RDS instance, though. Before we move further, we need to create a database and create a user with permission to access that database and create, read, and write tables.
Note that each RDS instance can host multiple databases and can support multiple users.
Per the instructions in the screenshot above, click on the RDS instance's ID to navigate to the Basic Info page for the instance, which looks like this:
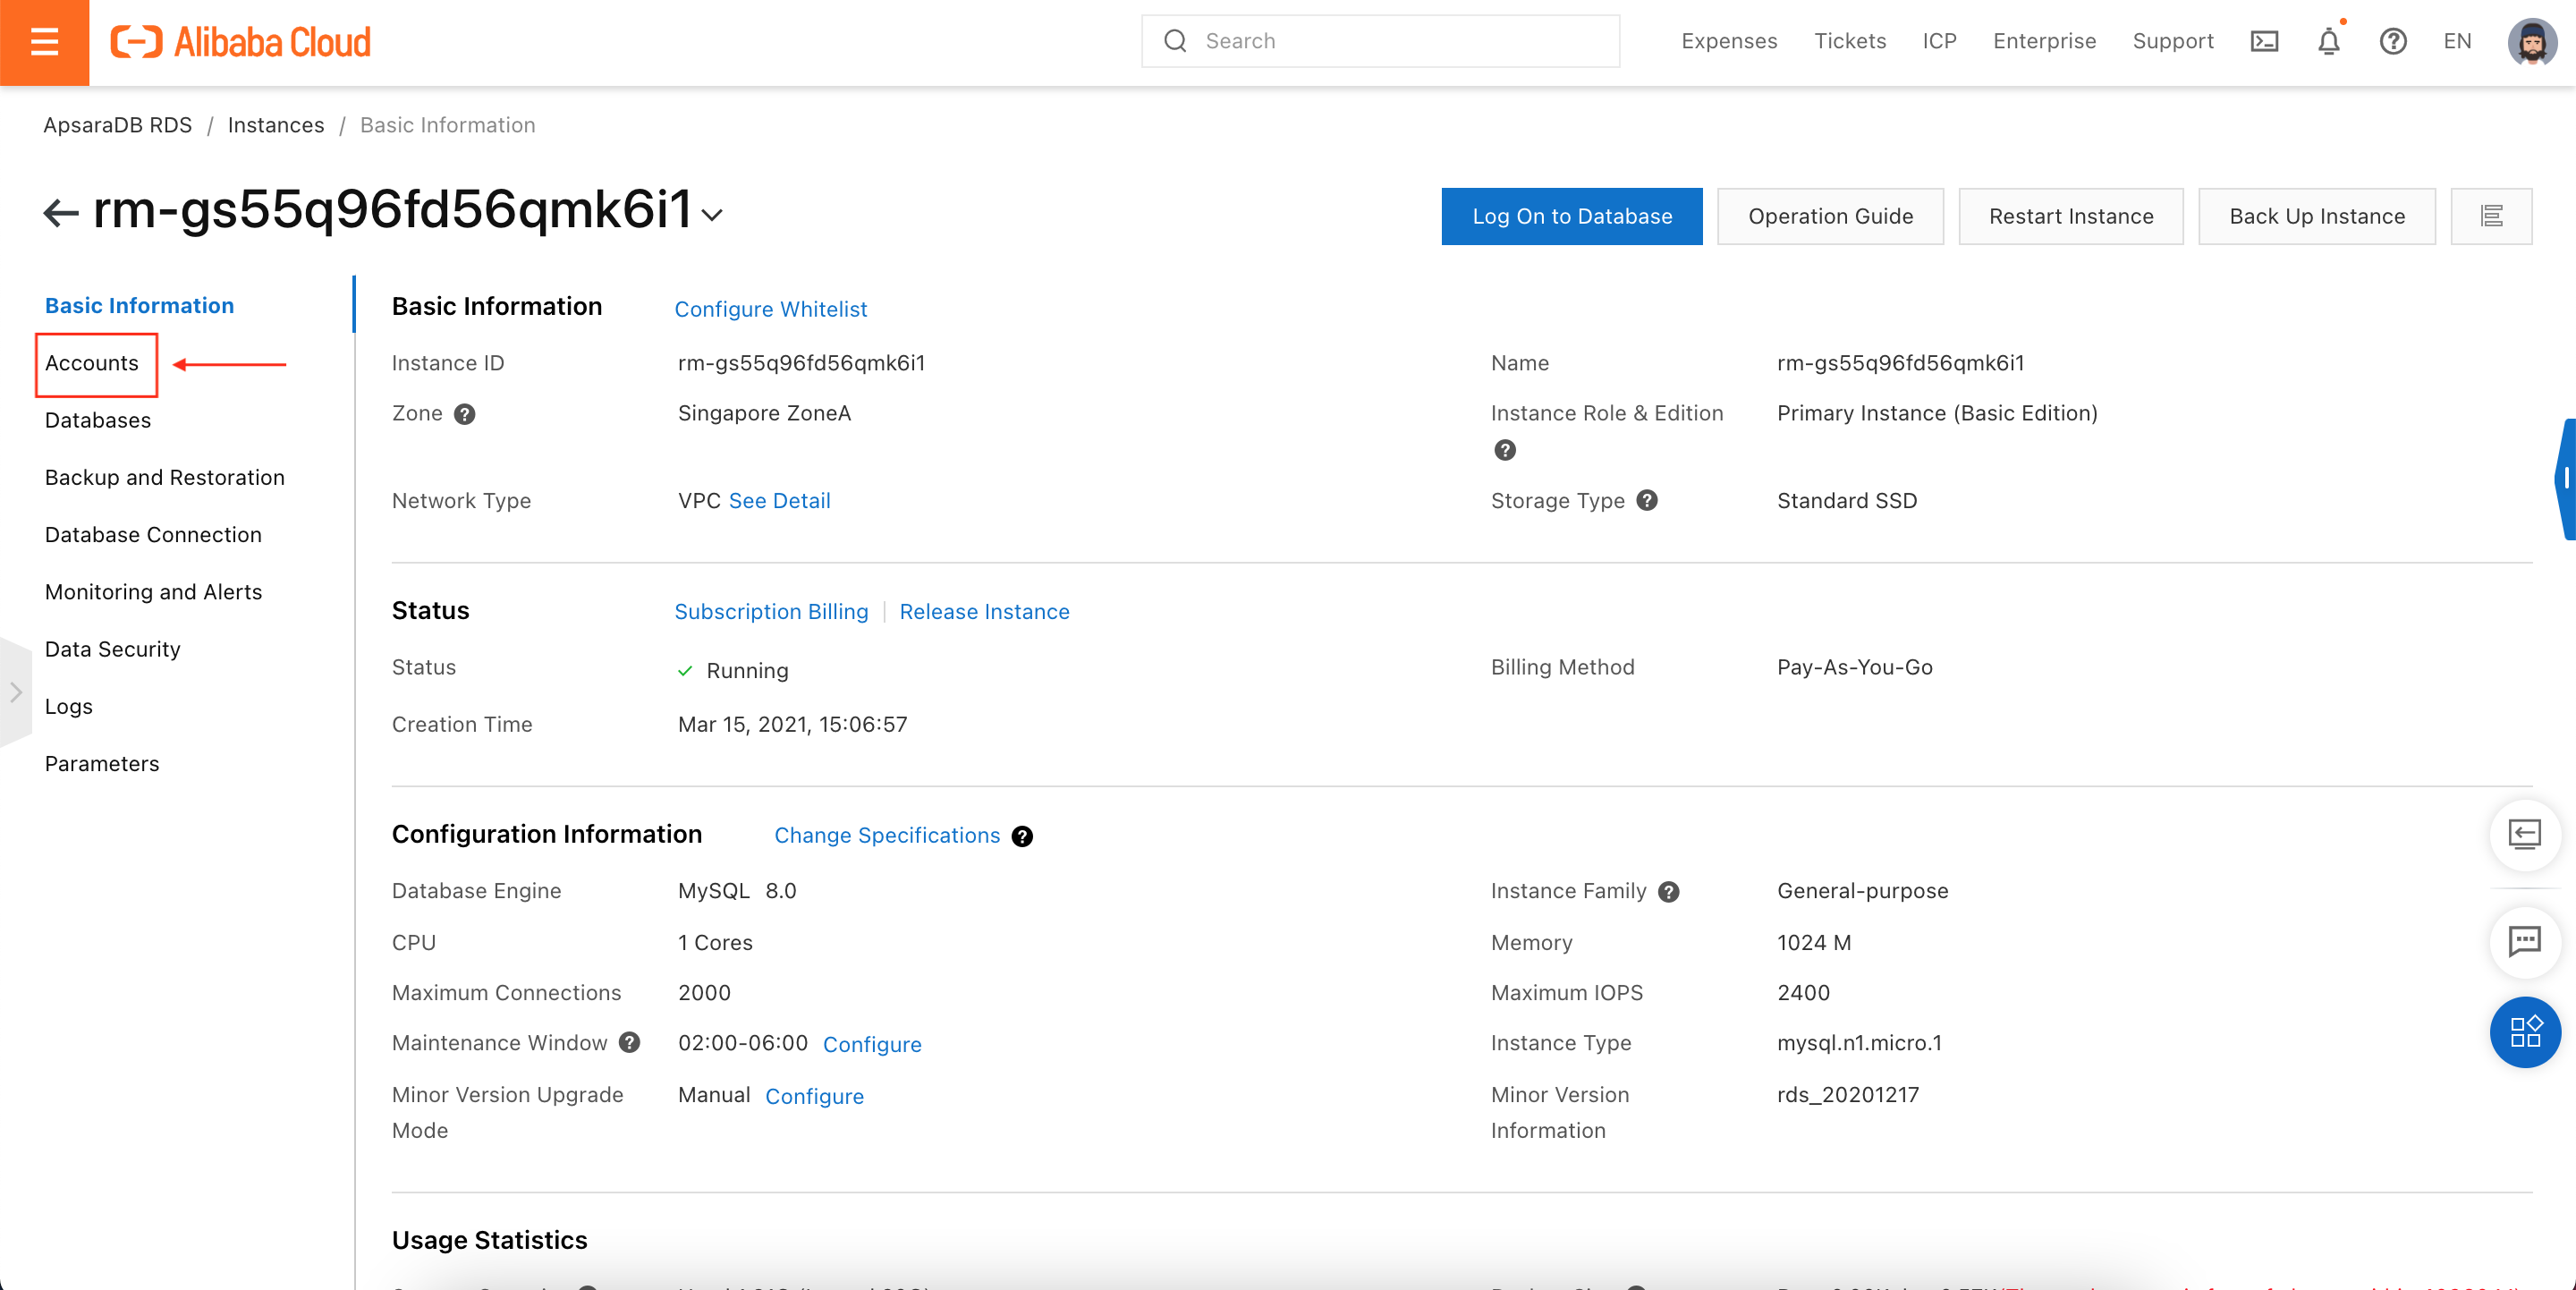
The first thing we want to do is create a new user, so click on Accounts, which should take you here:
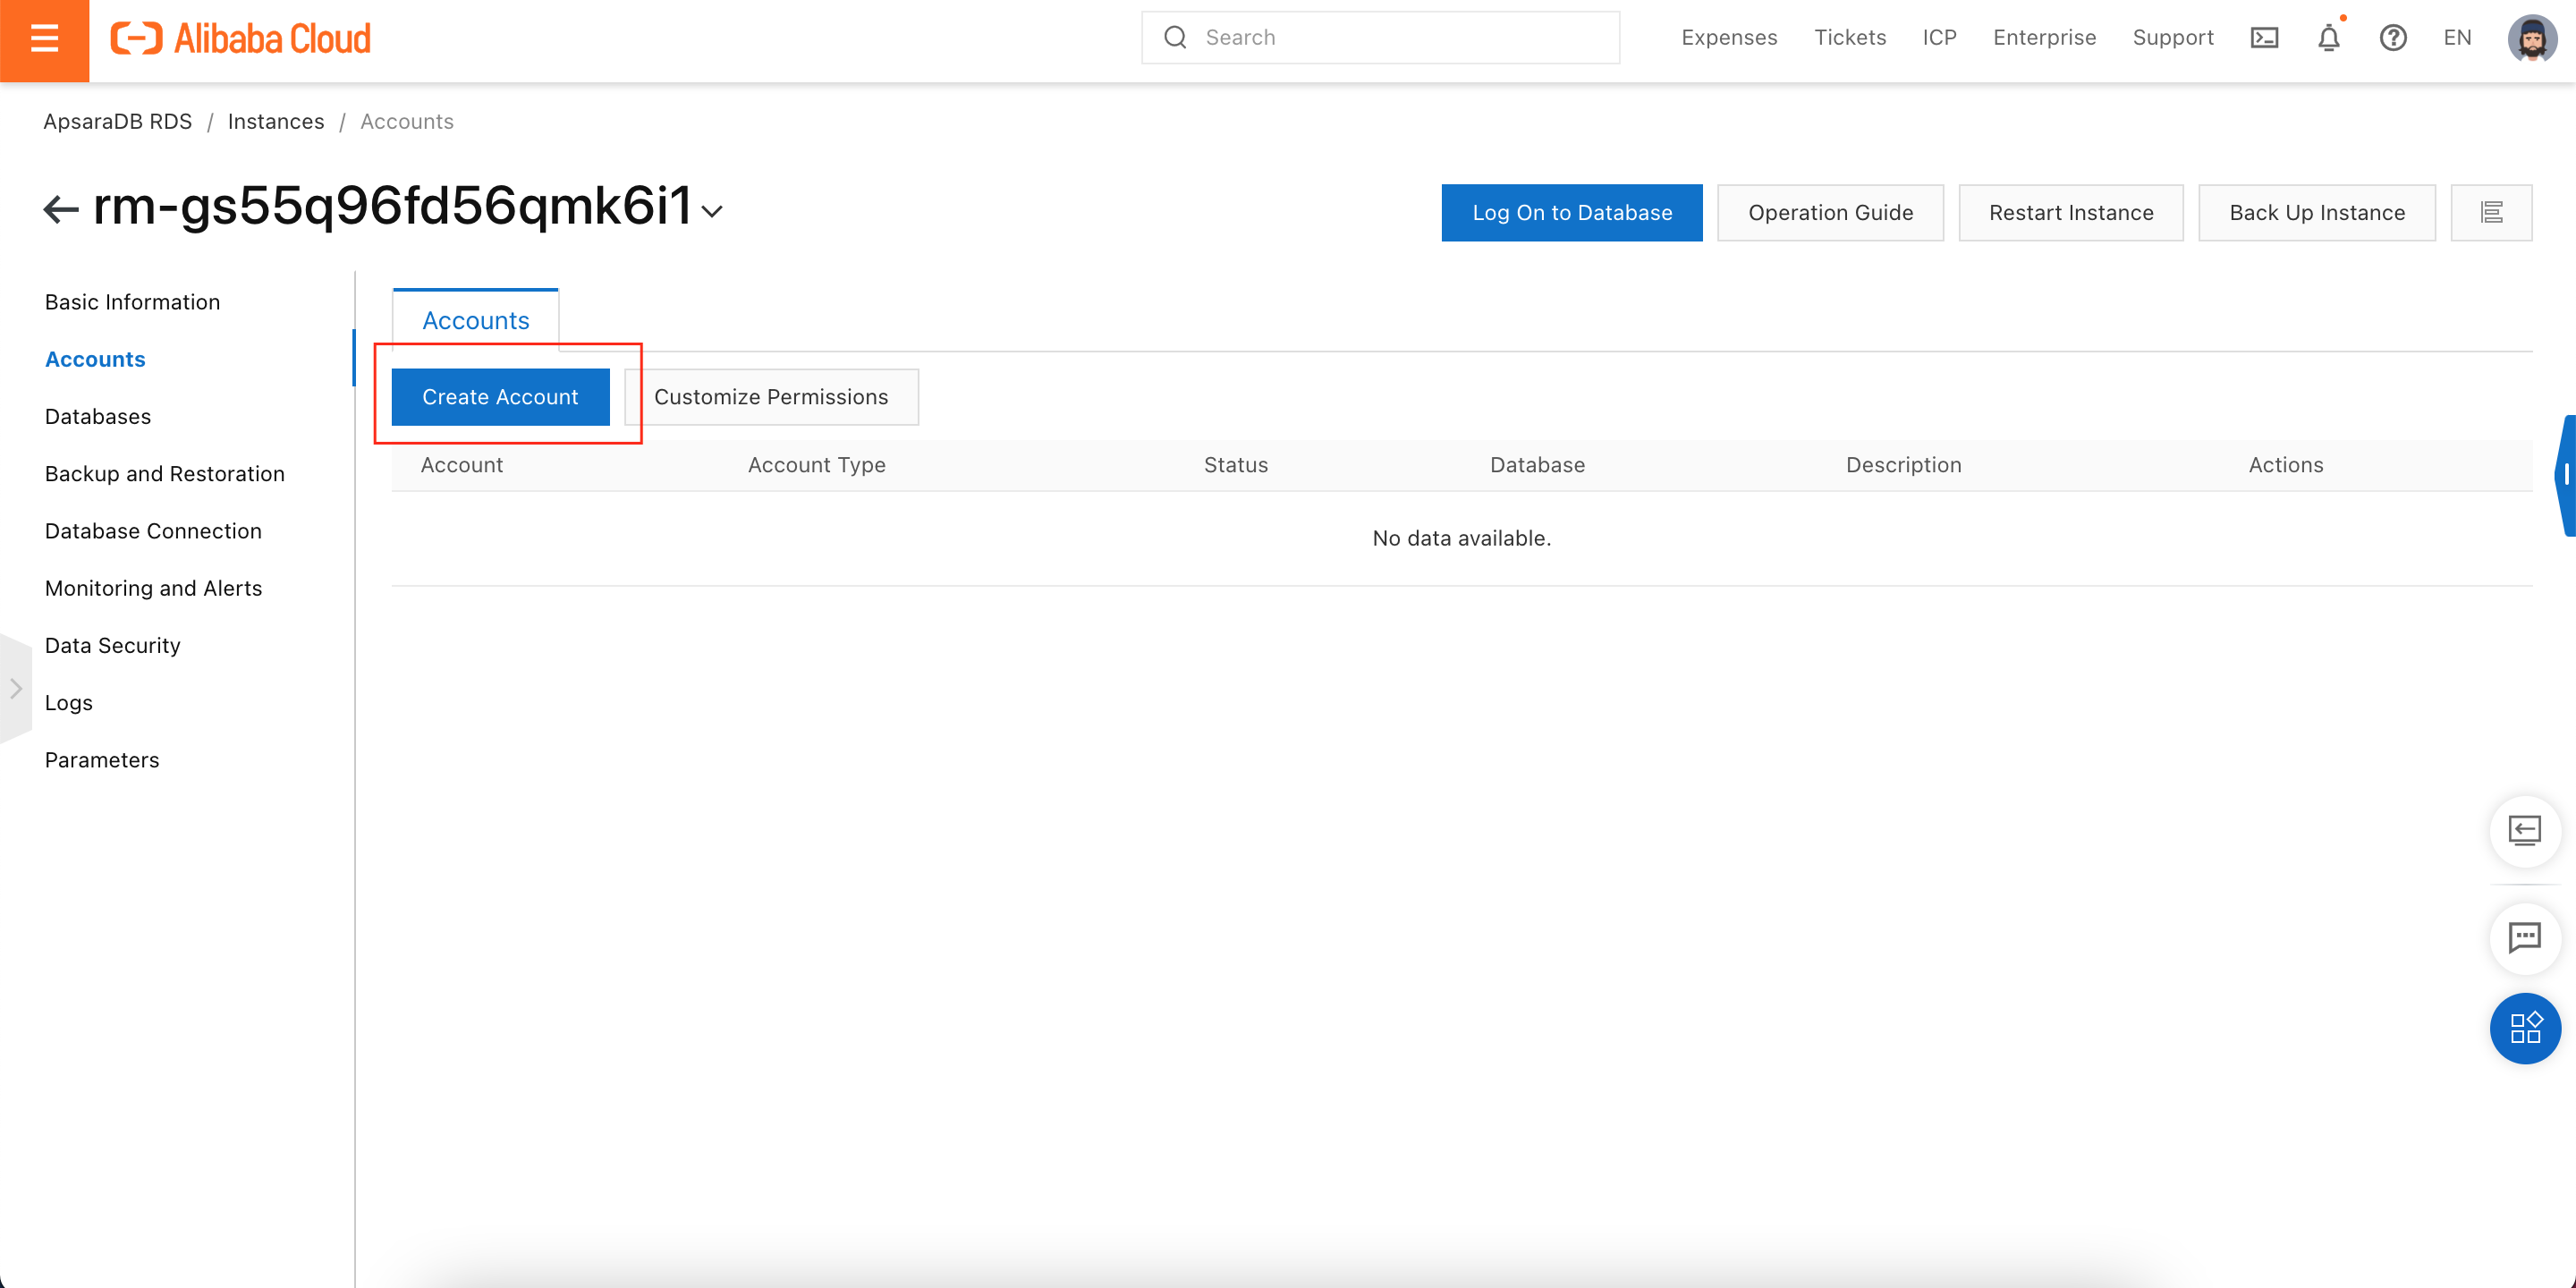
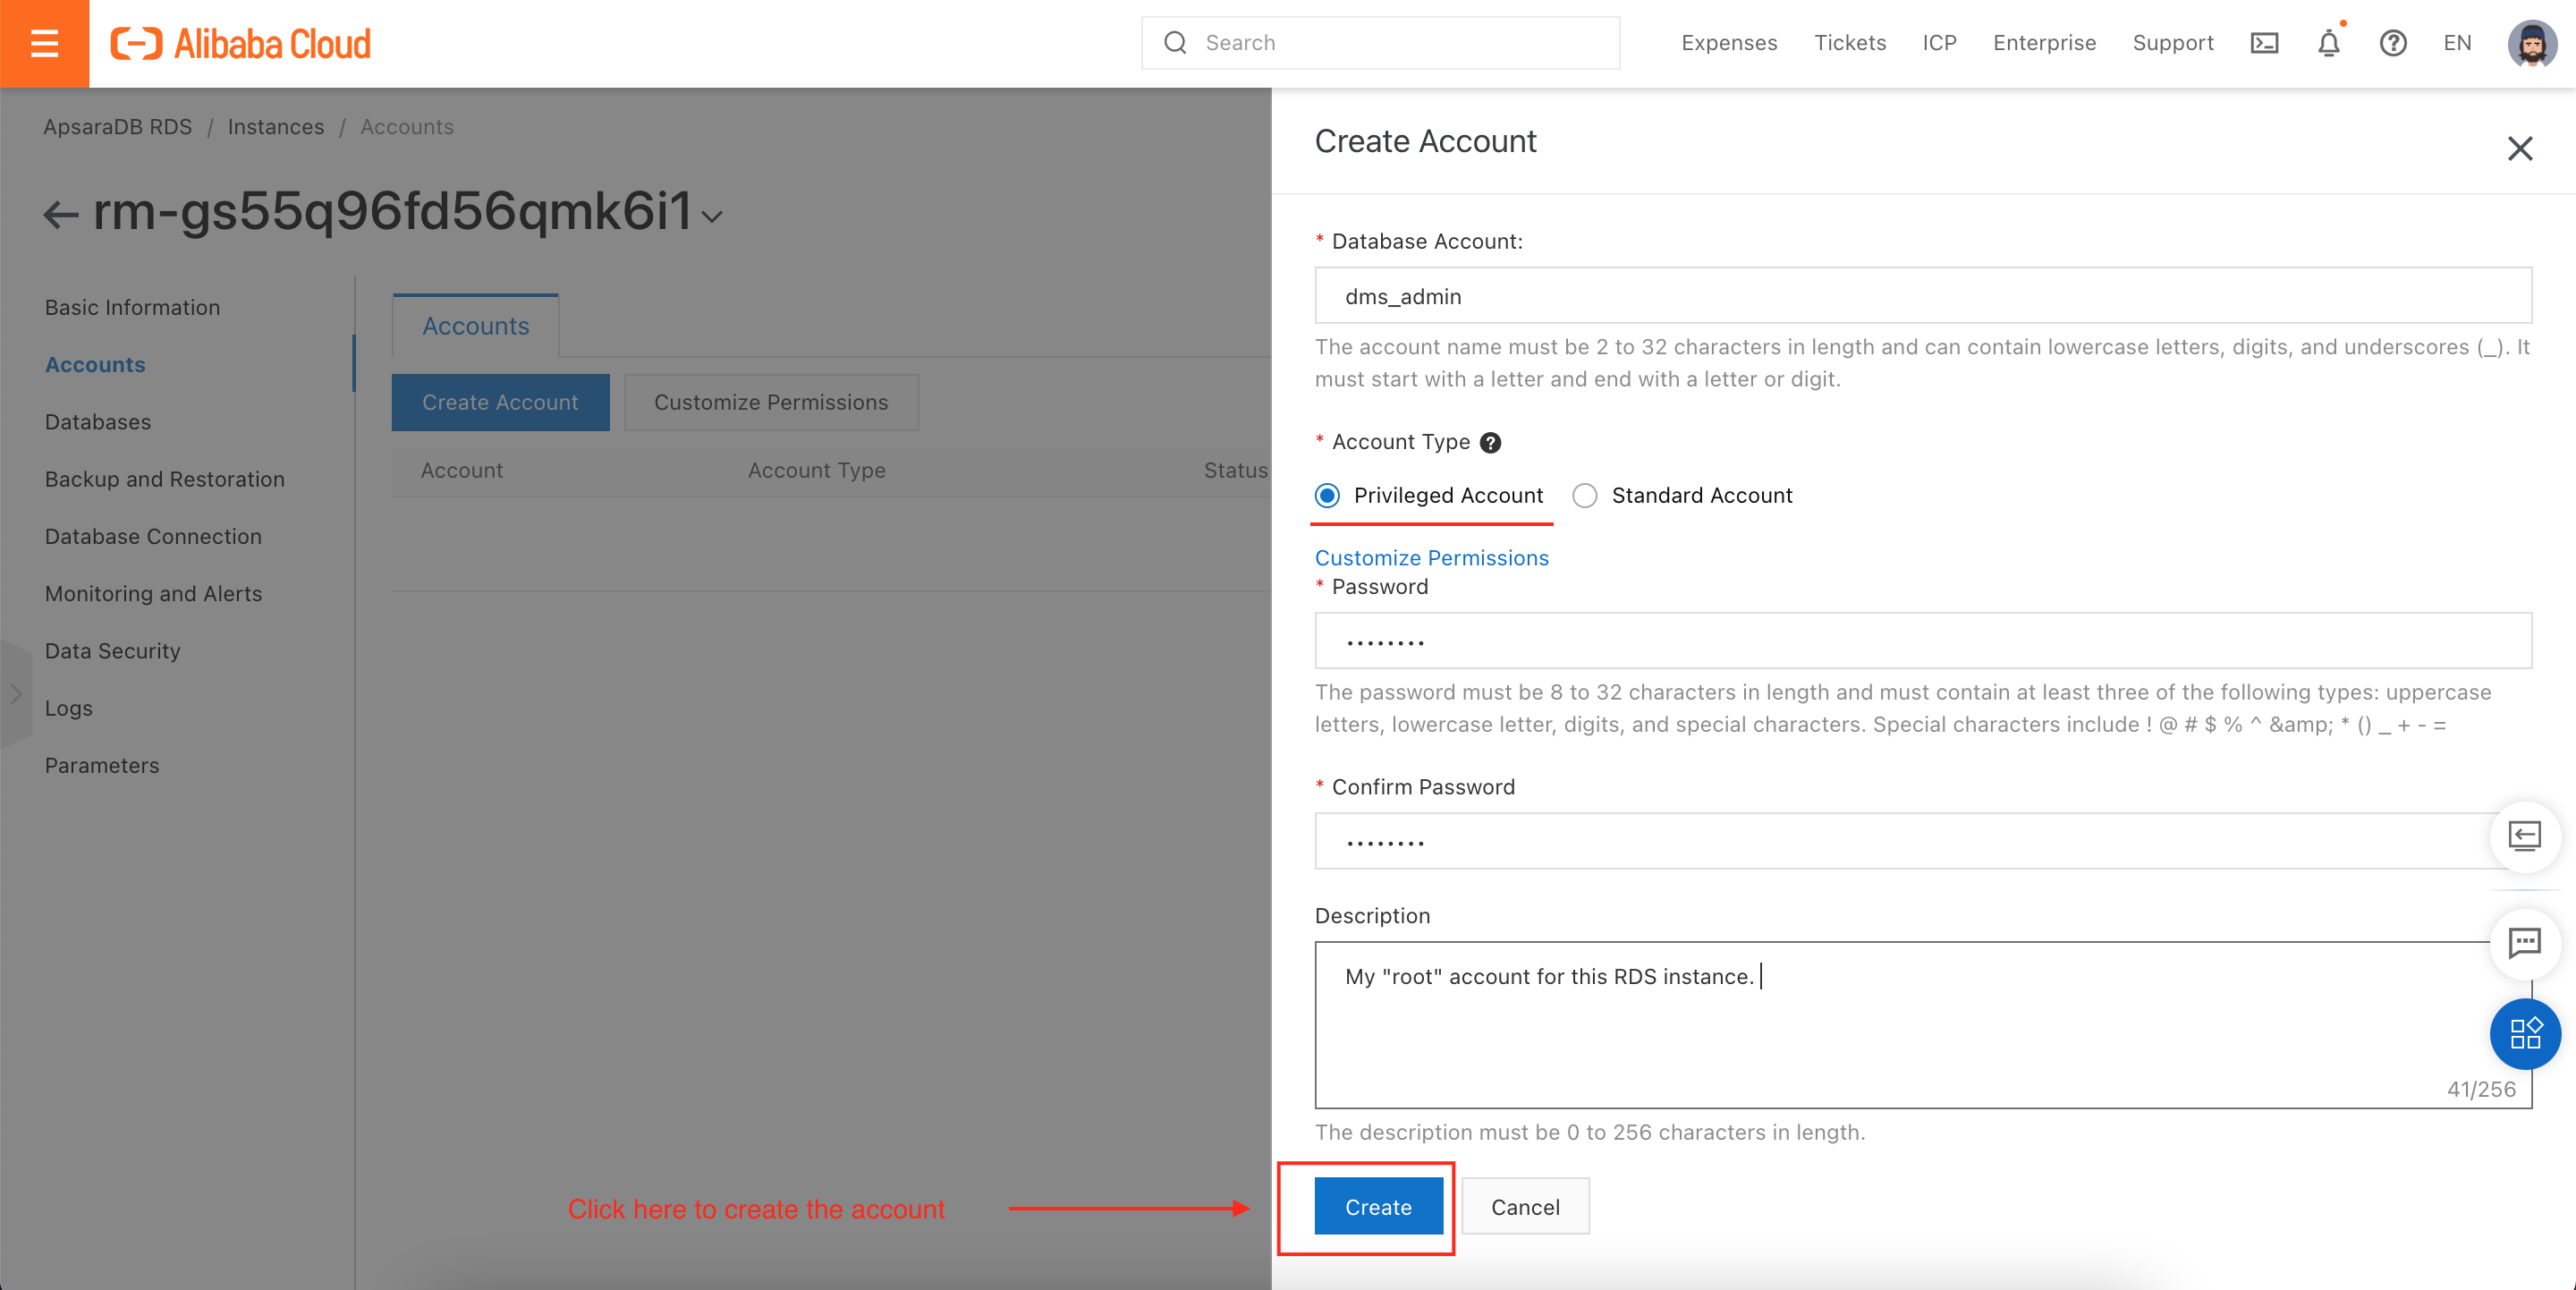
Click on Create Account to start the account creation process.
RDS allows us to create two different types of accounts. Privileged and Standard accounts. Privileged accounts are just that: they have super-user privileges. Standard accounts are given a more limited set of permissions, typically restricted to a single database.
We will create a Privileged account, like this:
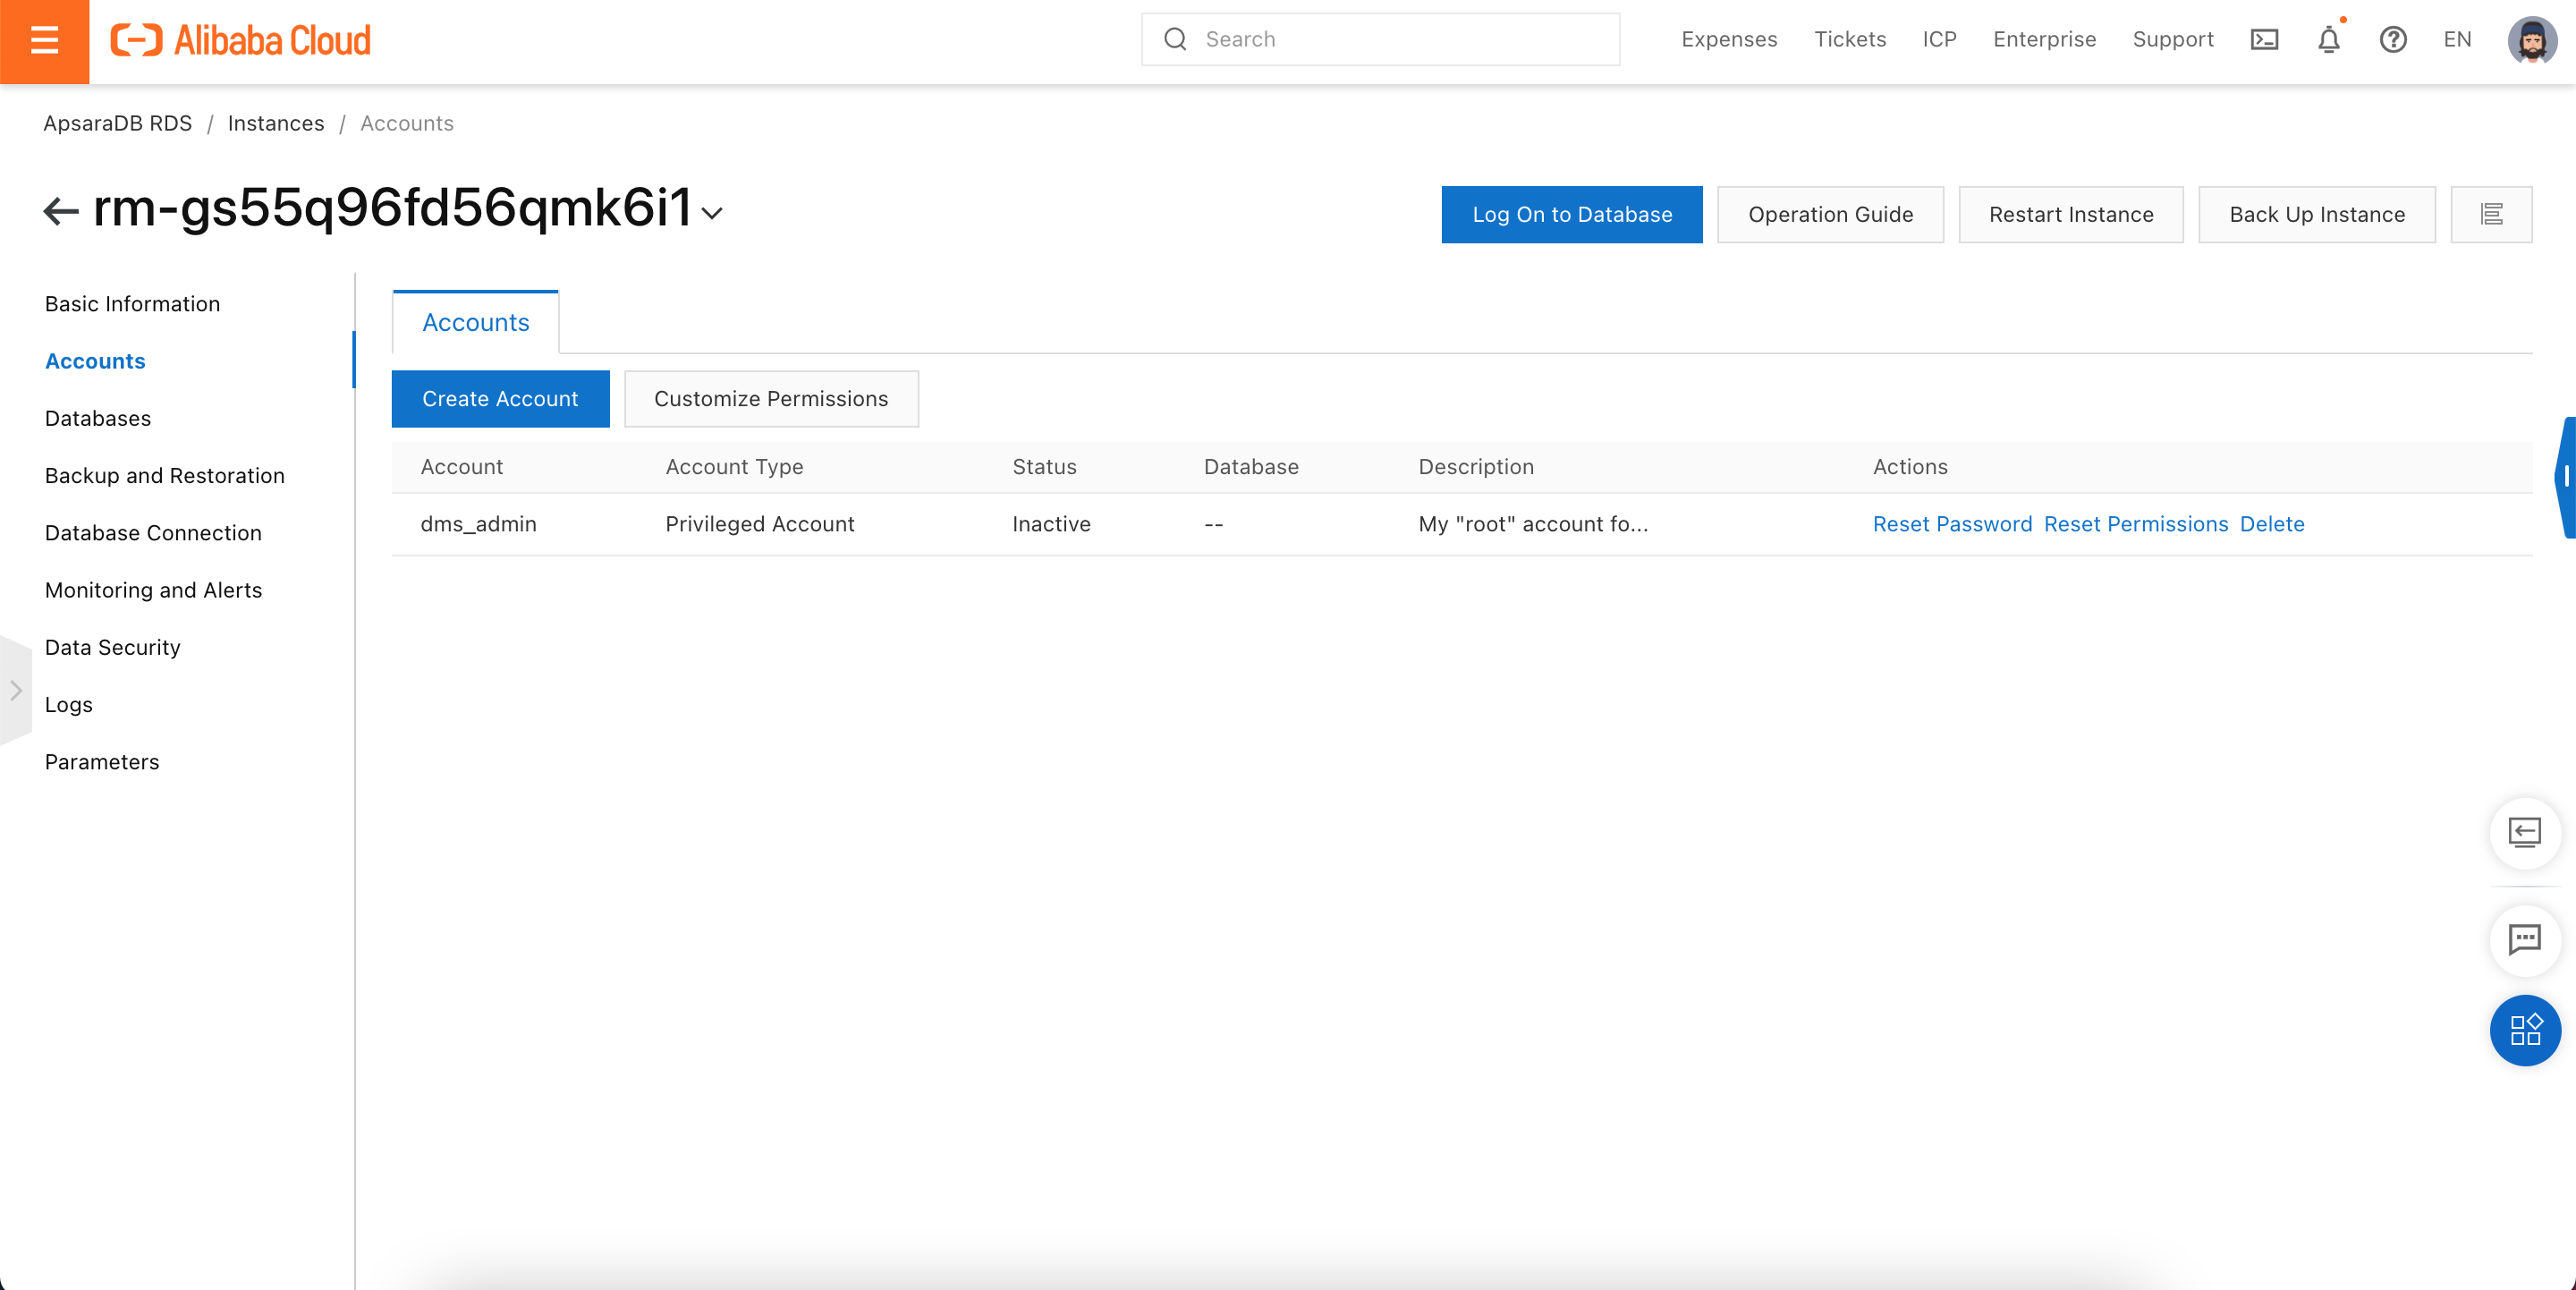
That's it! We should now see the account in the accounts list:
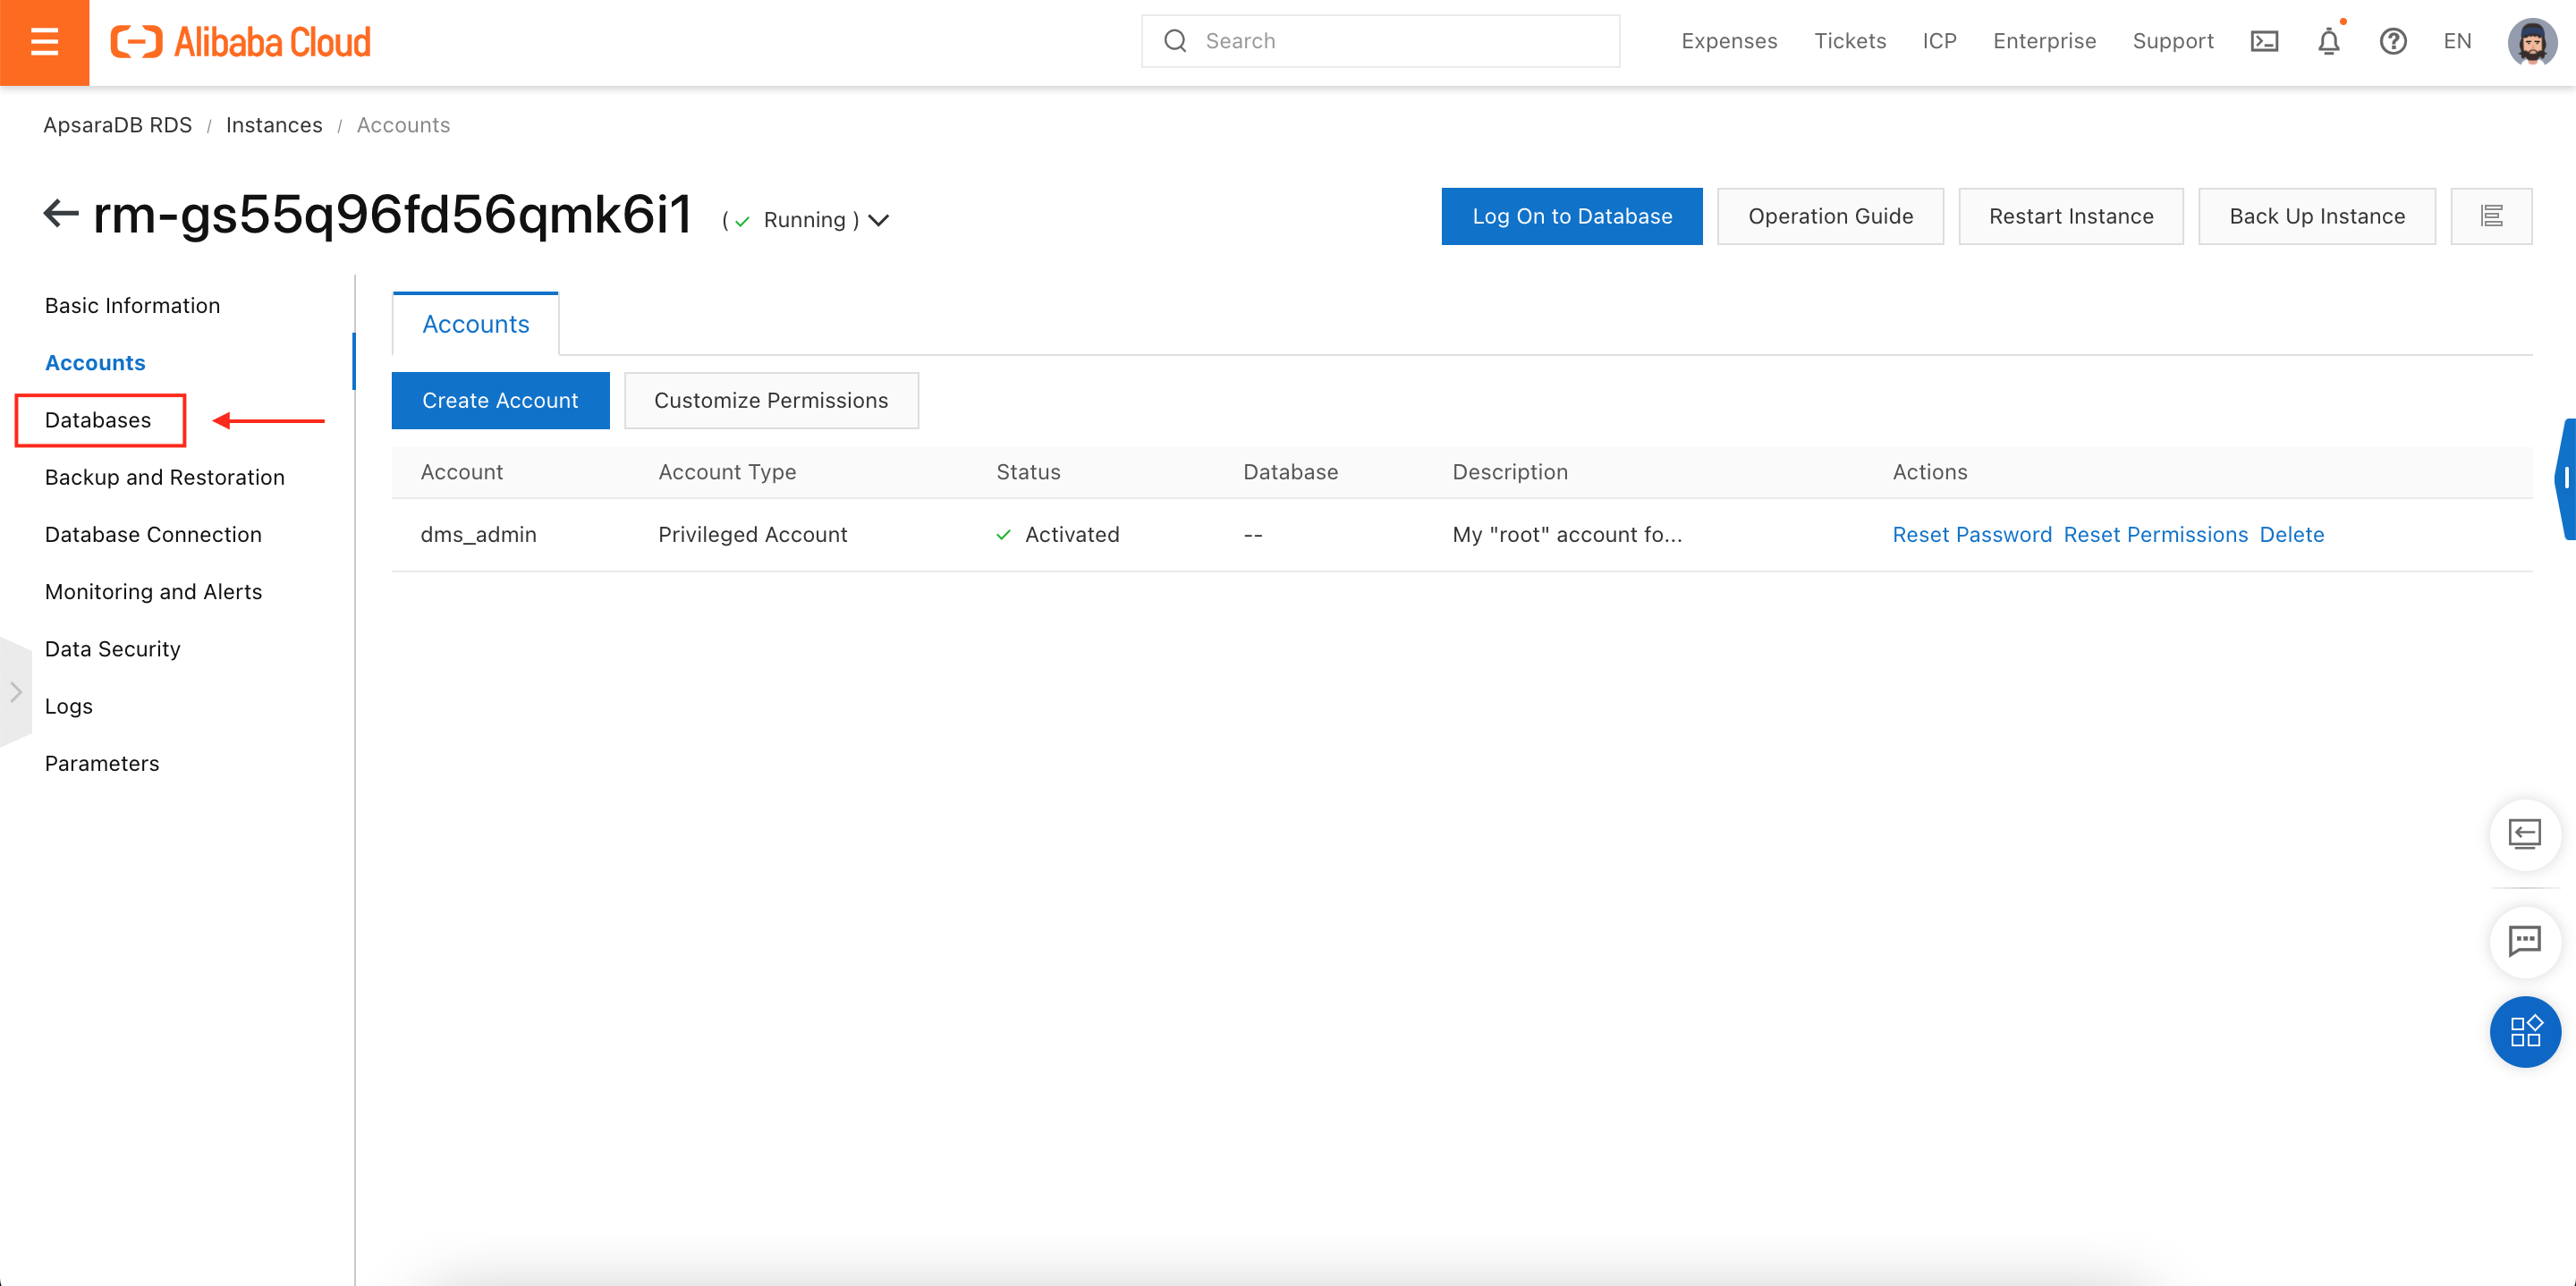
Next, we need to click on Databases, then Create Database, as shown here:
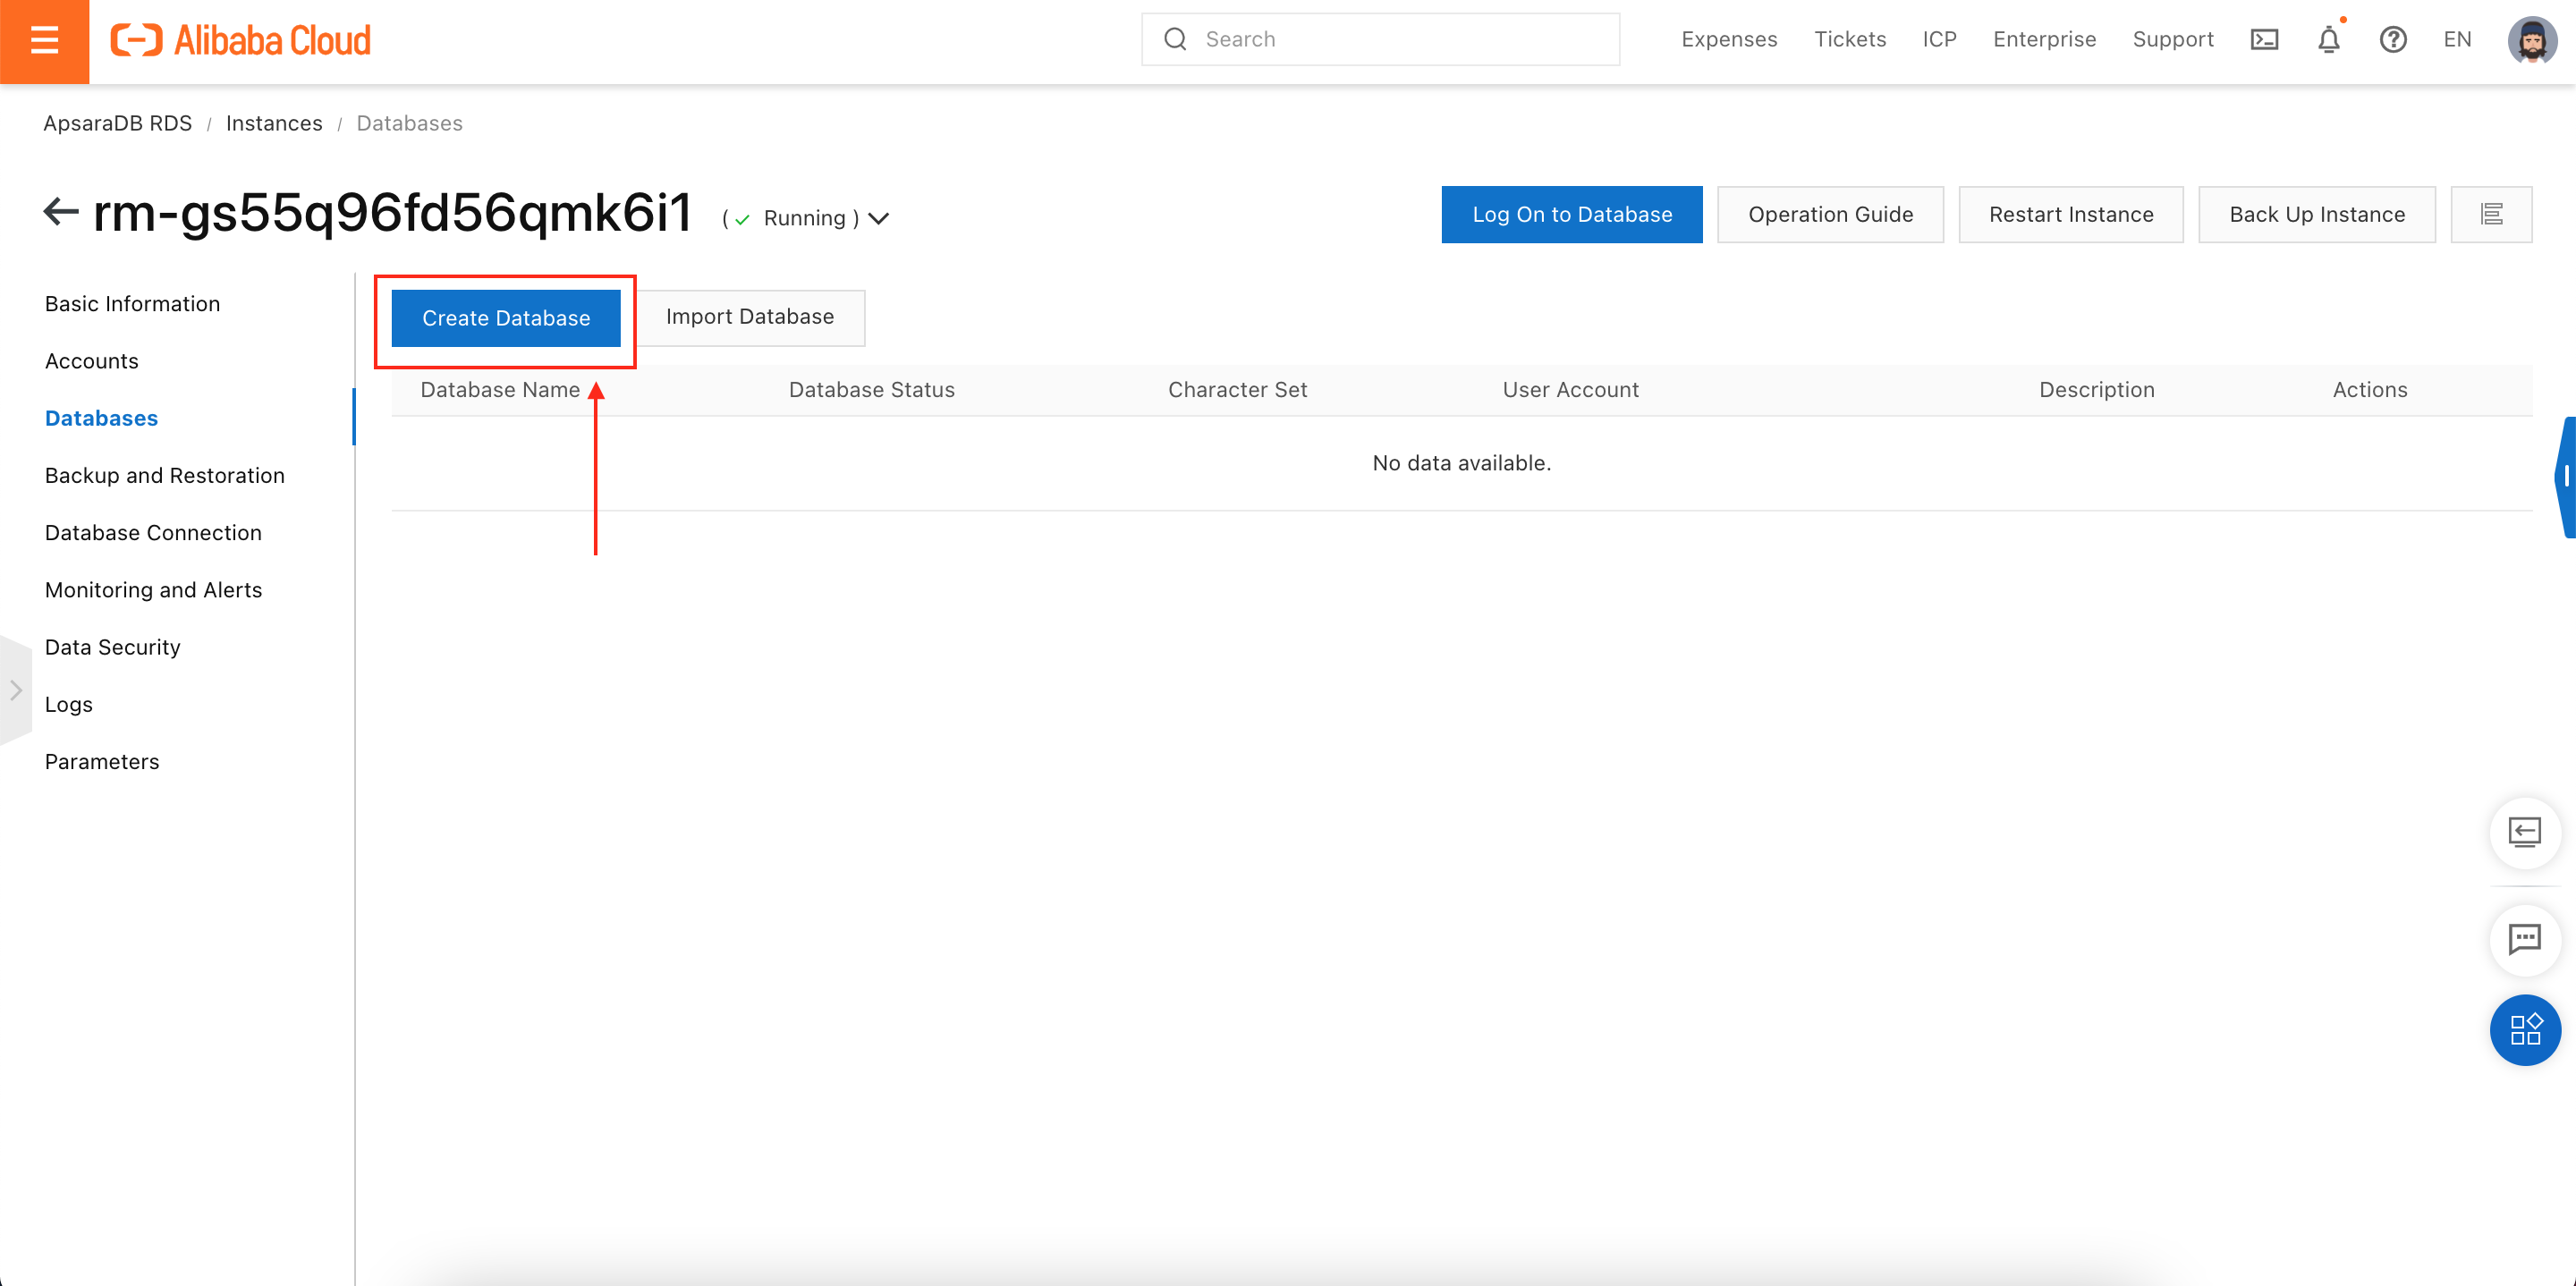
Give the database a name (I chose ecommerce_data), and choose the encoding utf-8, then click Create:
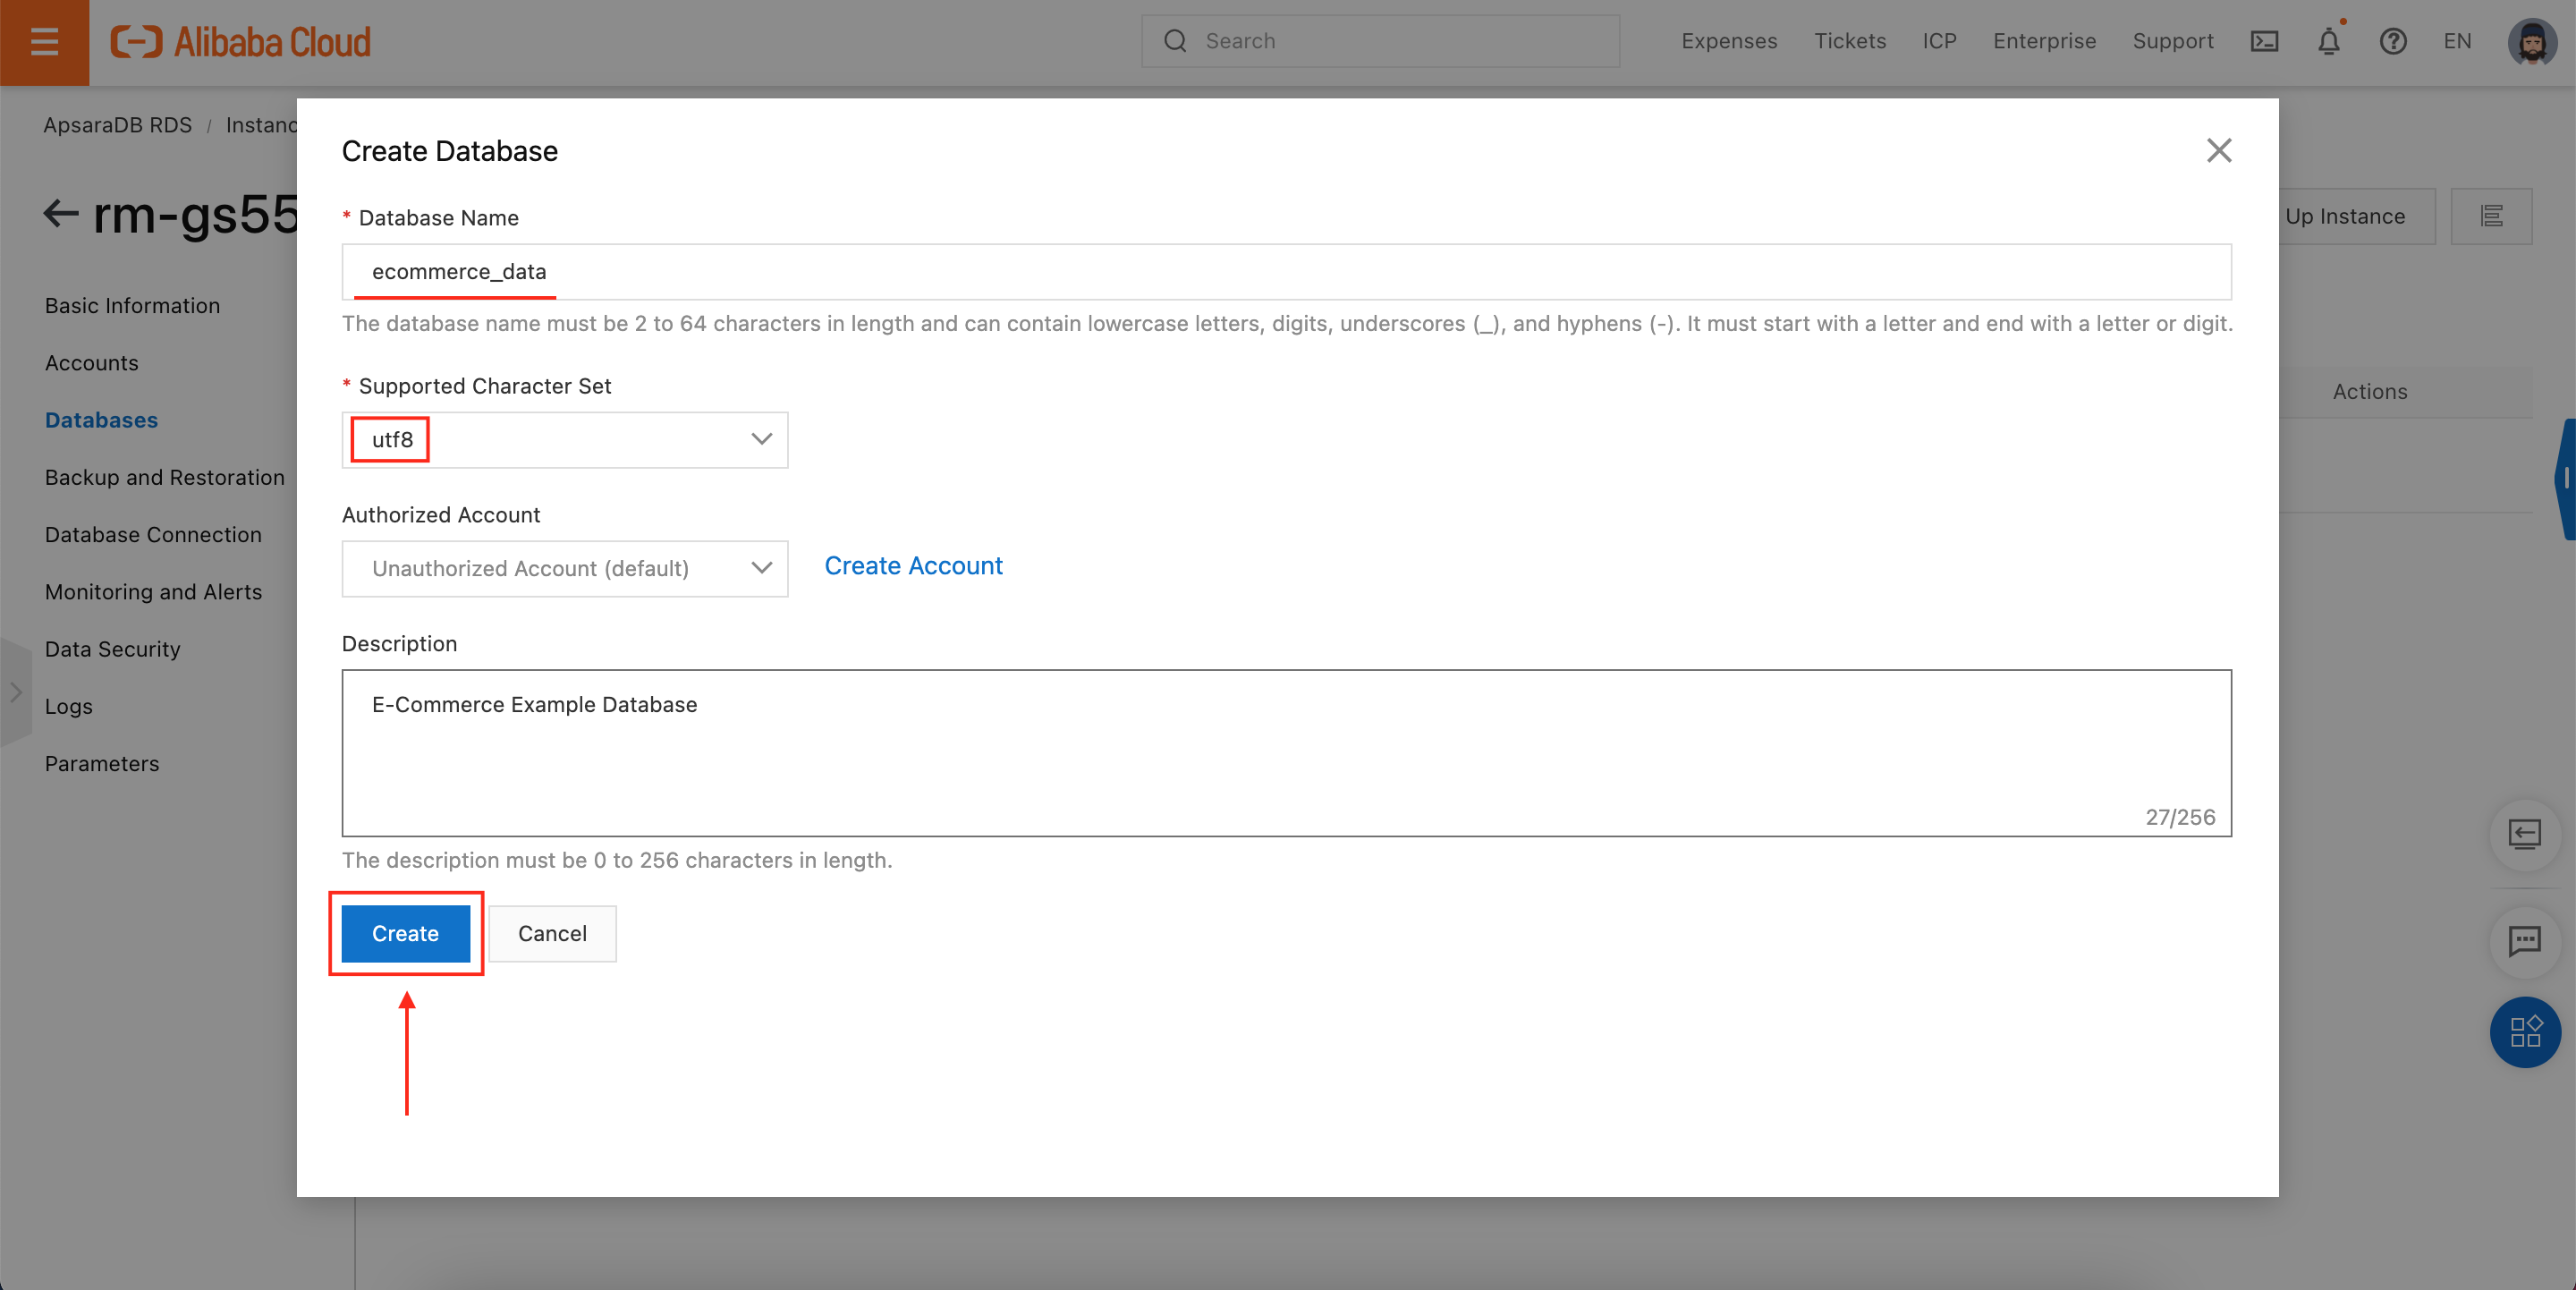
If the database has been created successfully, we should see our new database showing up on the Databases page:
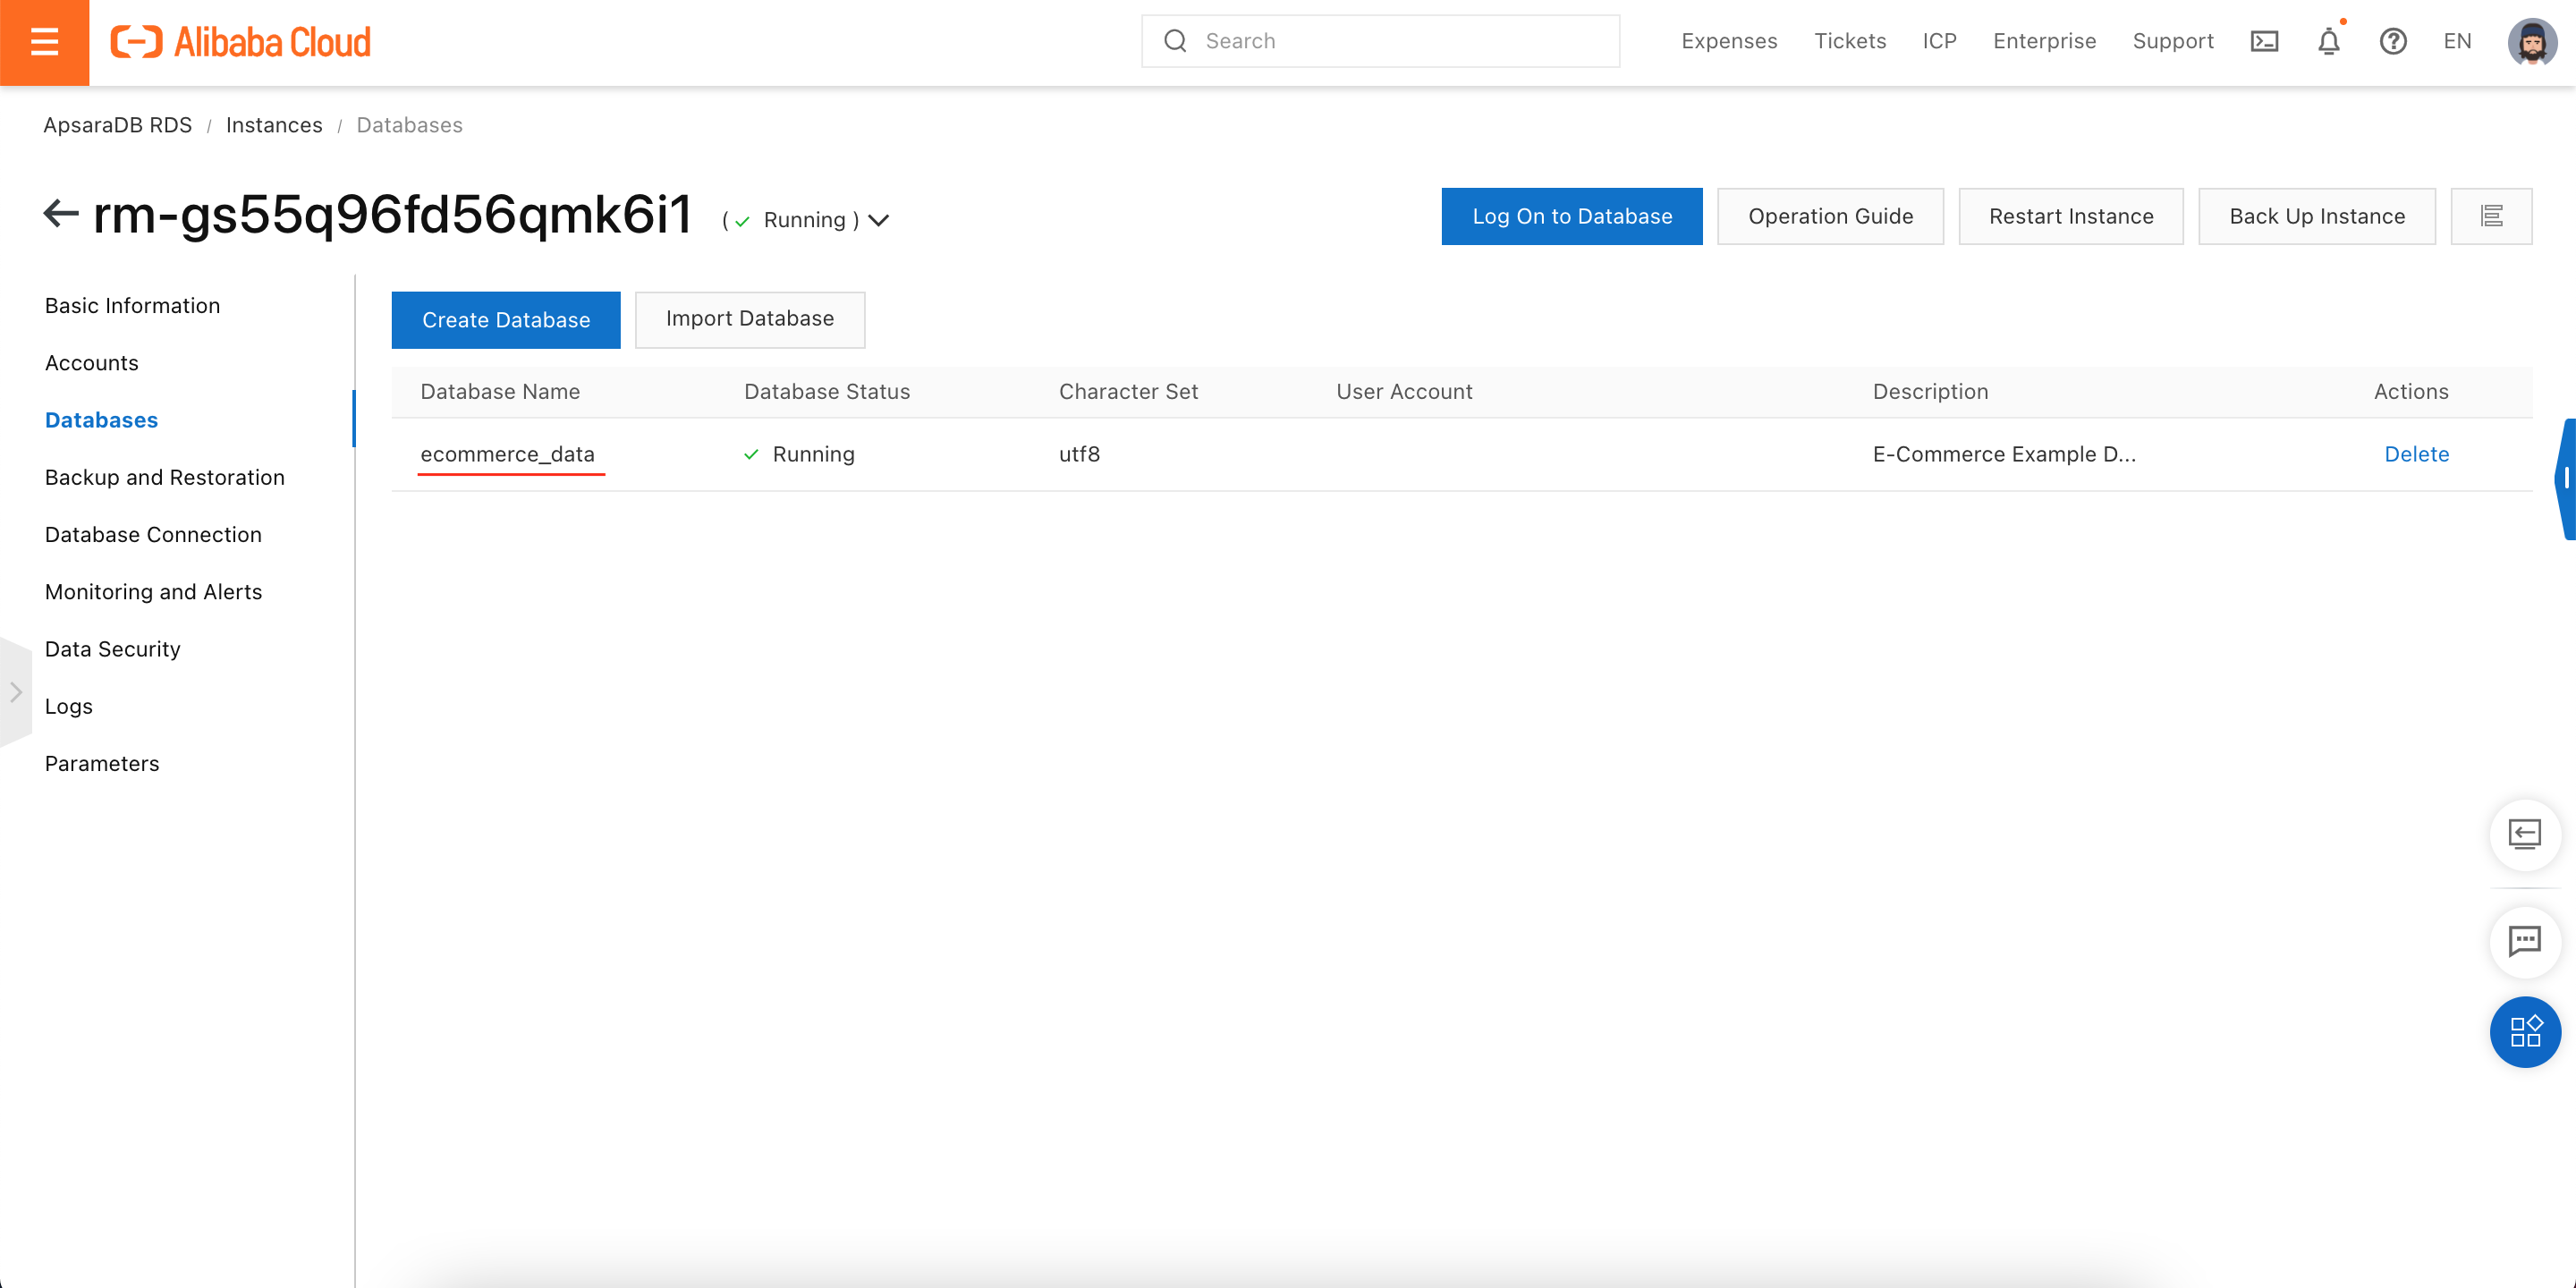
Now we're ready to log into the new database with DMS, and try uploading some data!
First, click on Log On to Database, at the top of the Databases page:
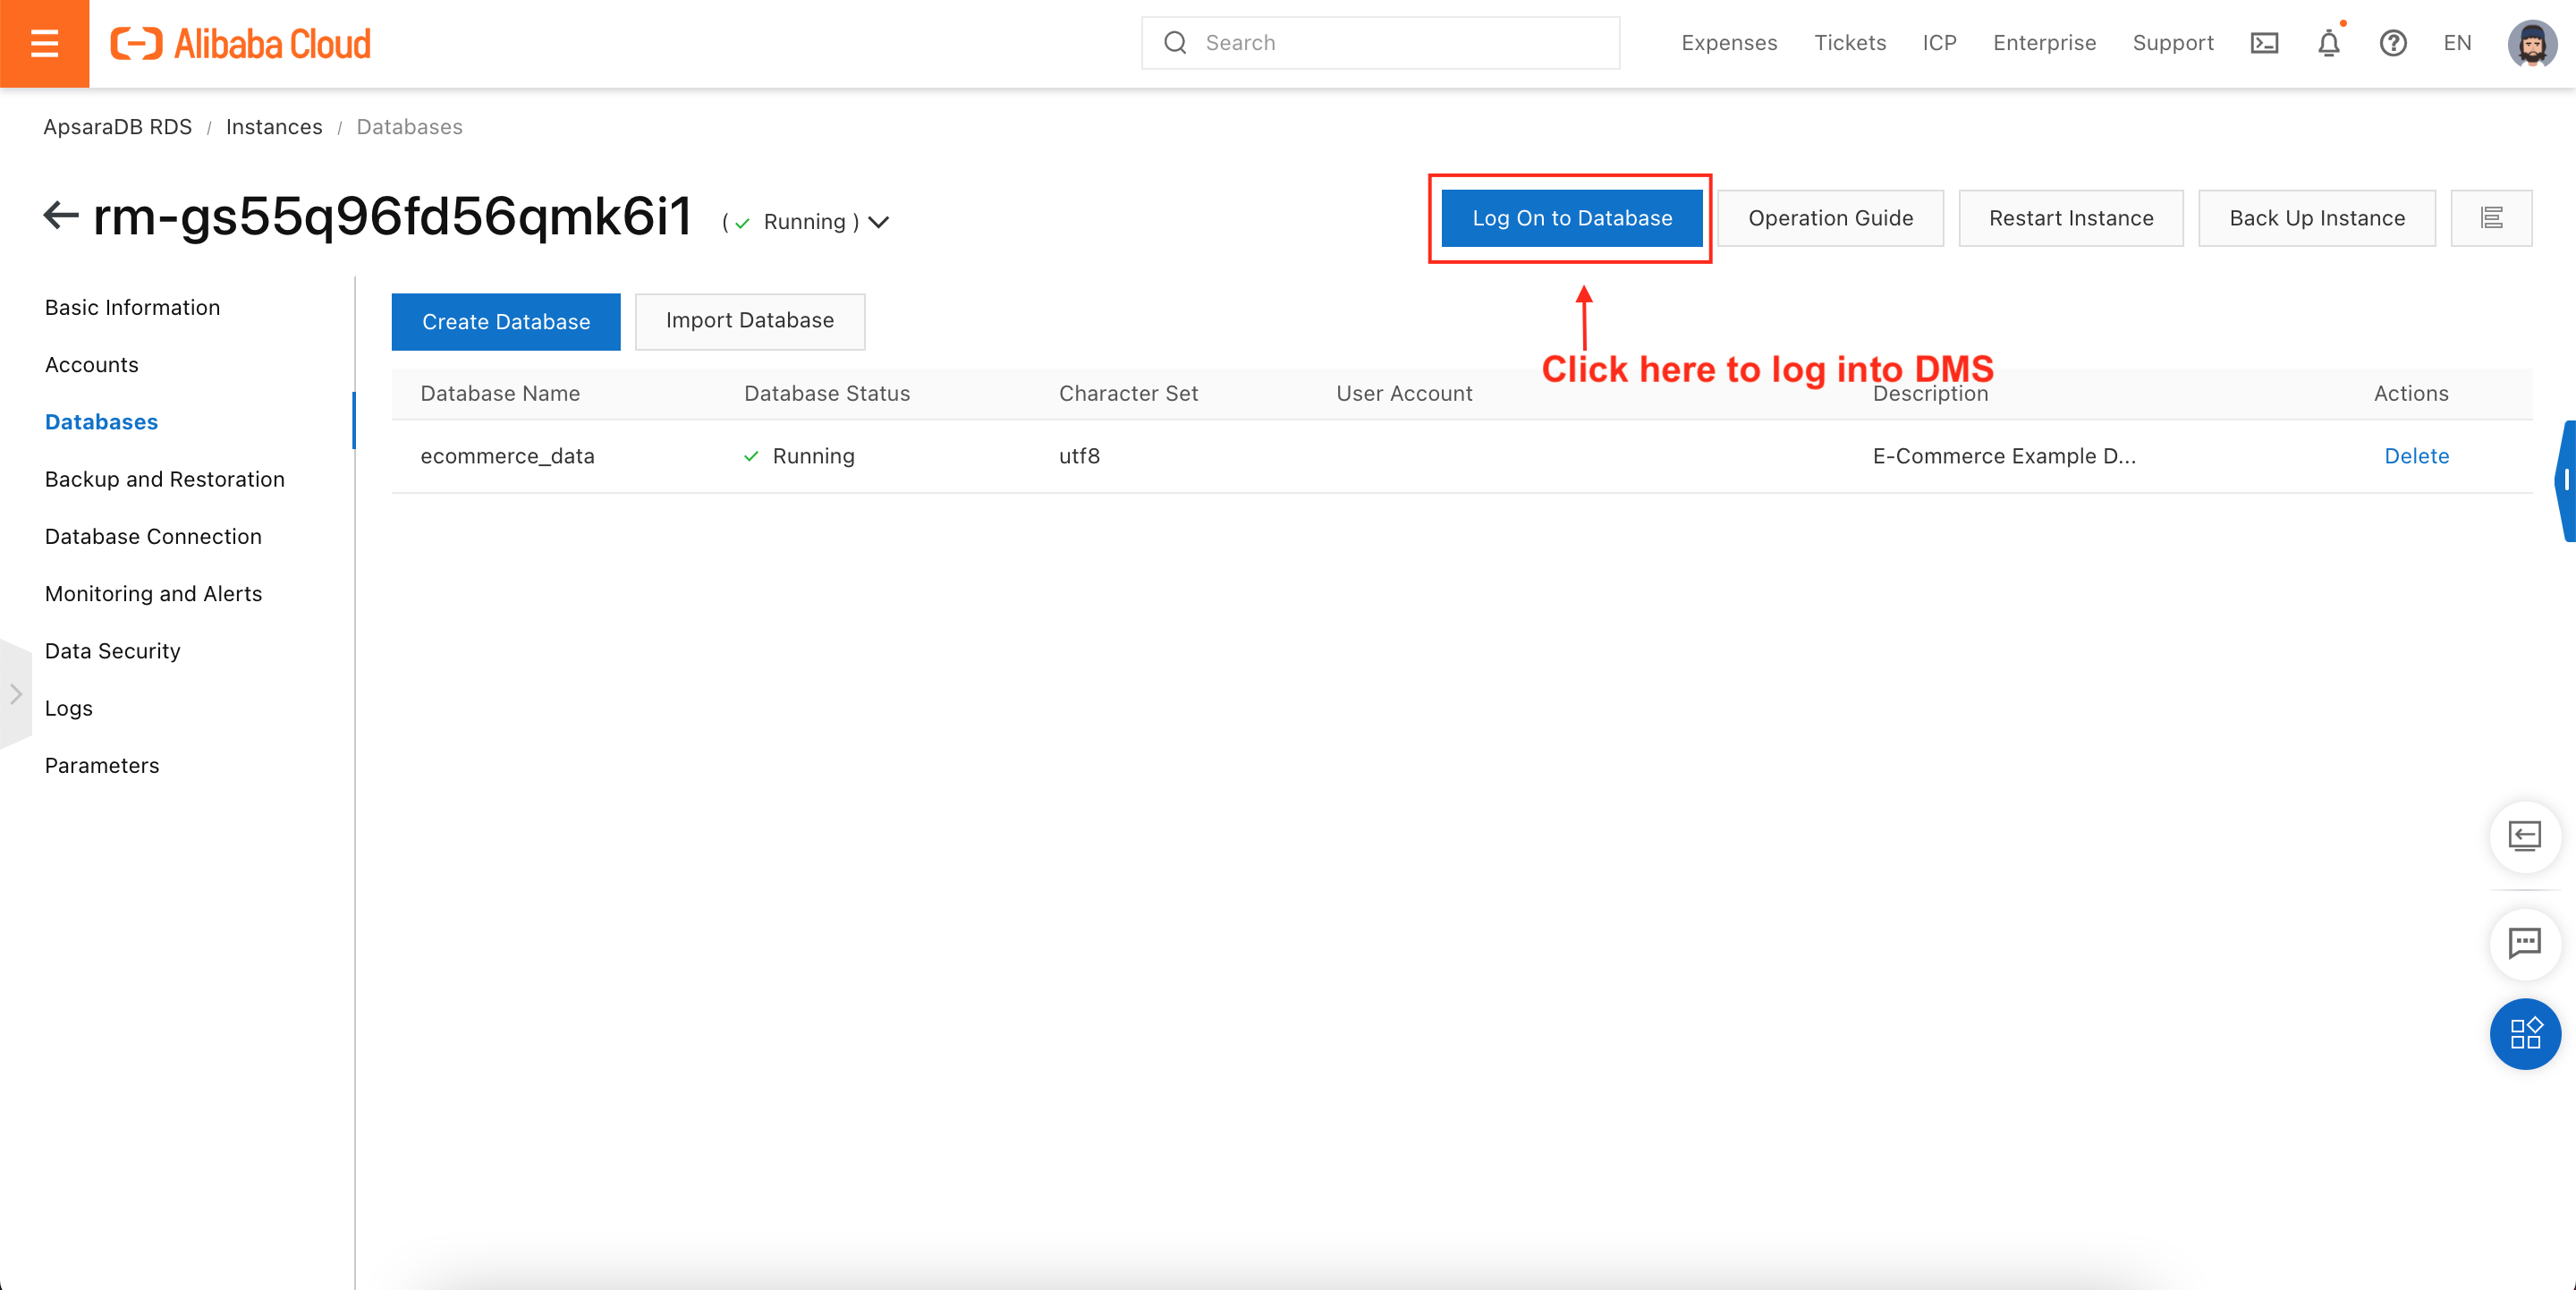
This will open up DMS in a new tab. If this is your first time using DMS, it will prompt you to choose a database type, select an Alibaba Cloud Region (Singapore, in my case), and enter an RDS username and password:
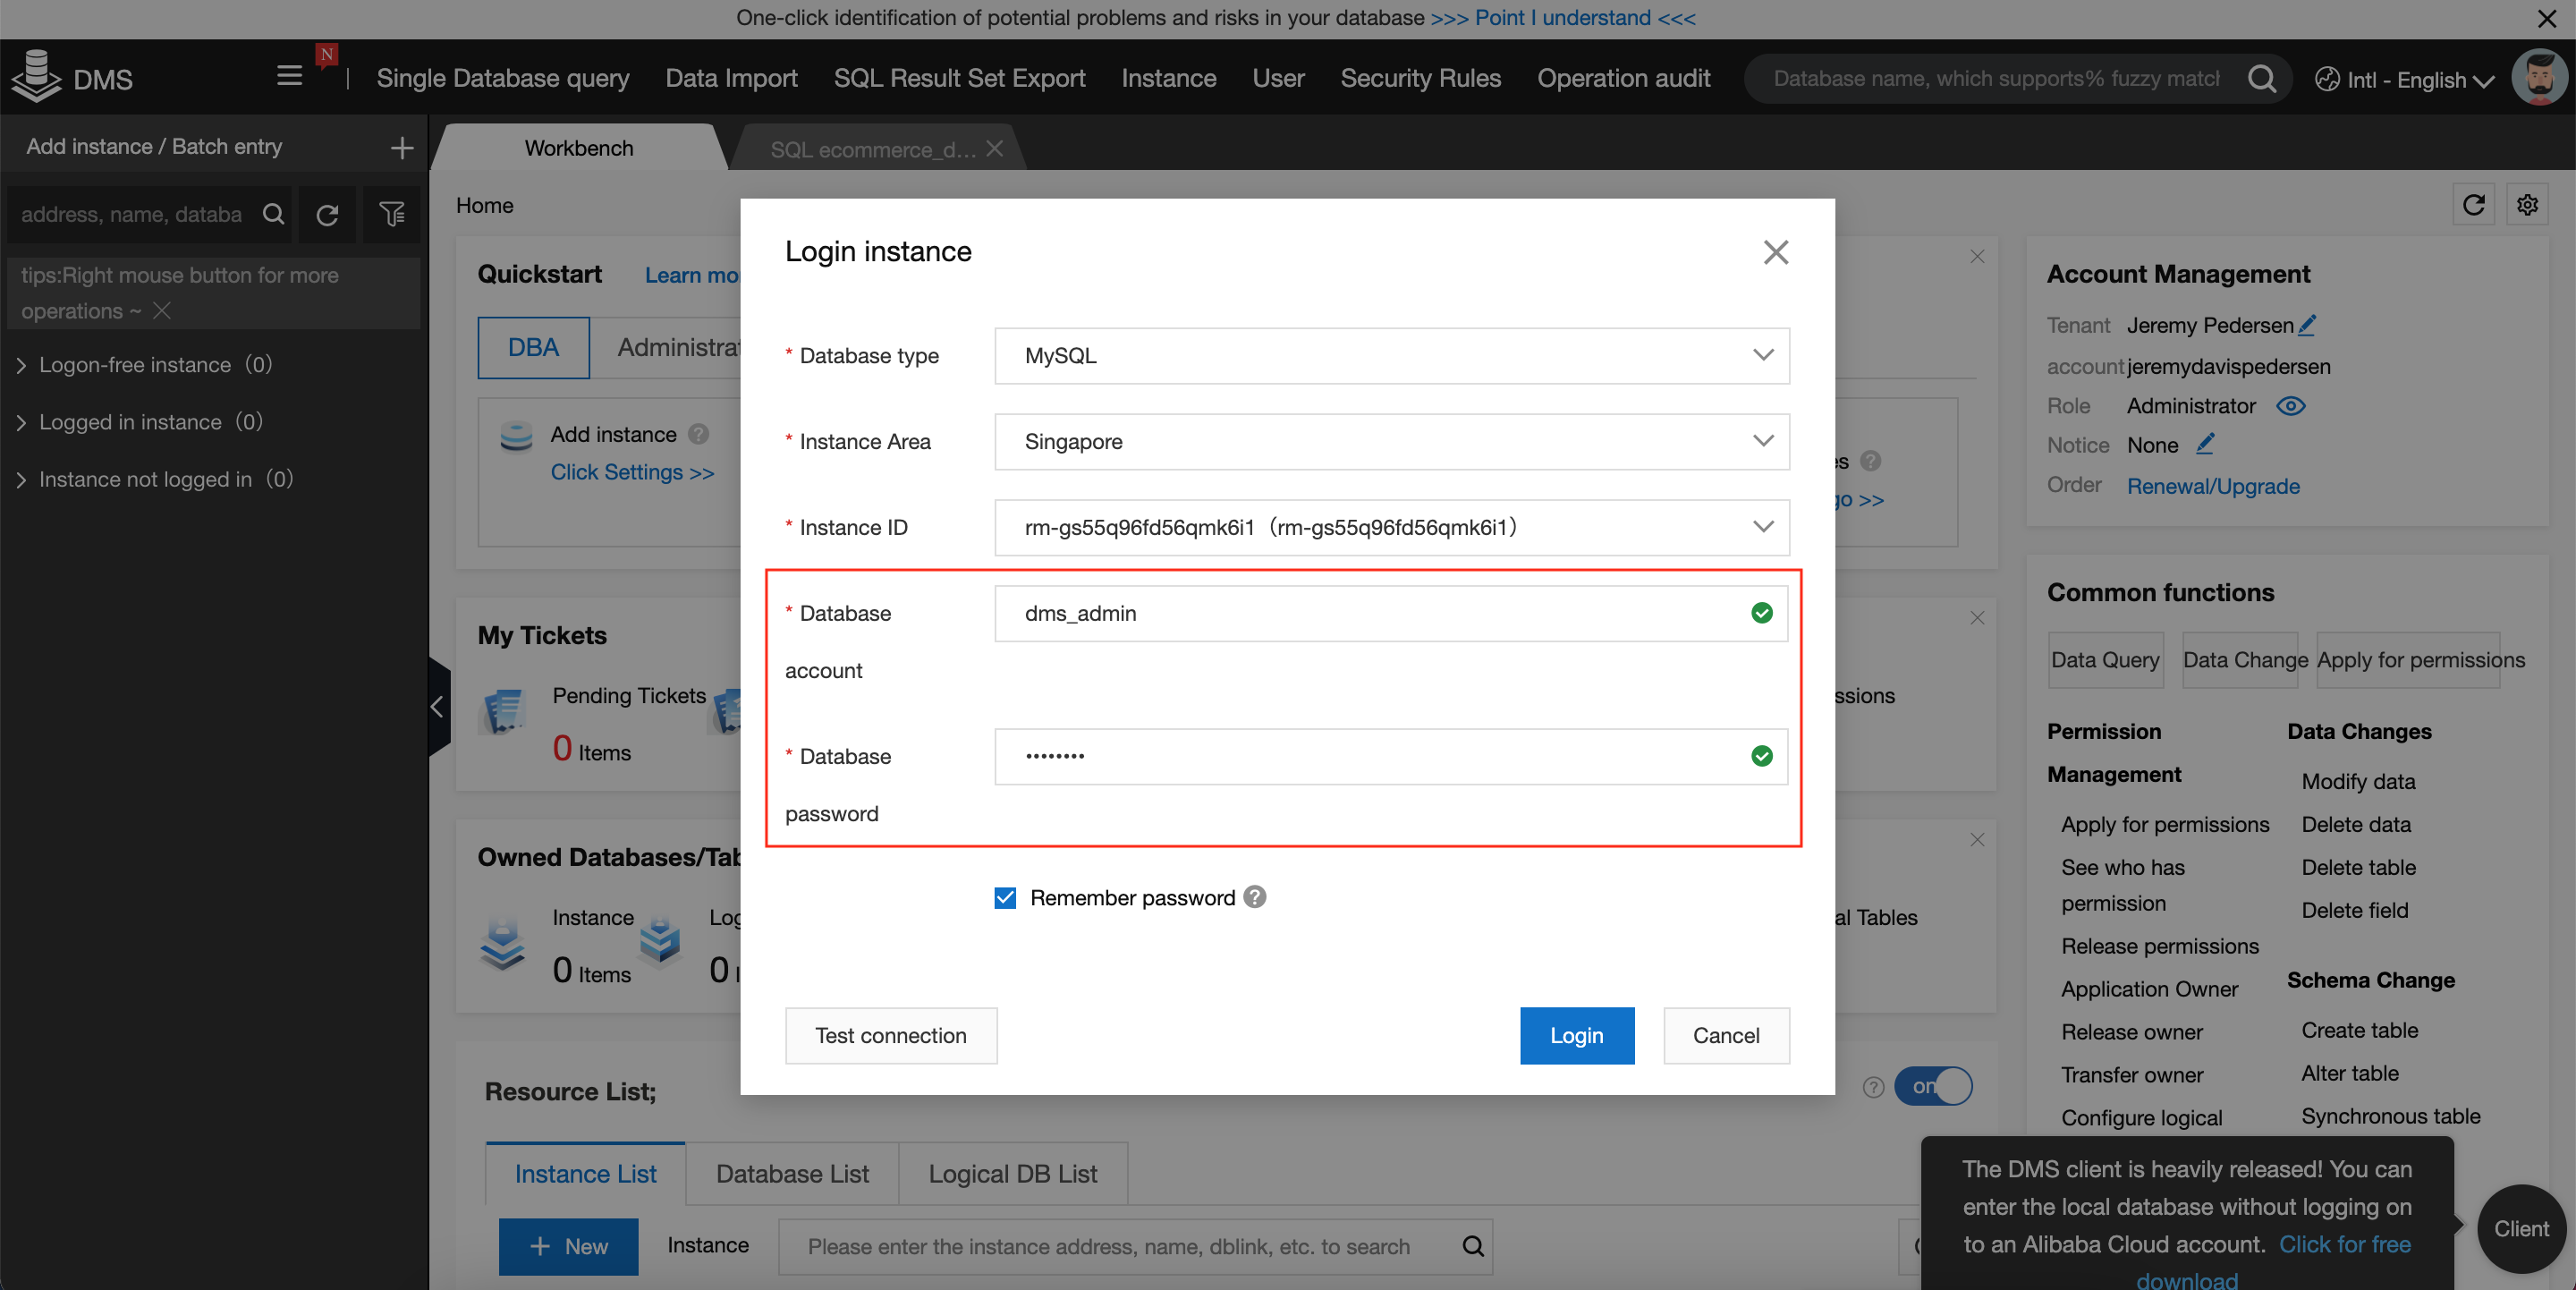
The username and password will be the ones we set earlier in this tutorial, when we created our database user. We can test that we've set everything correctly by clicking on Test Connection:
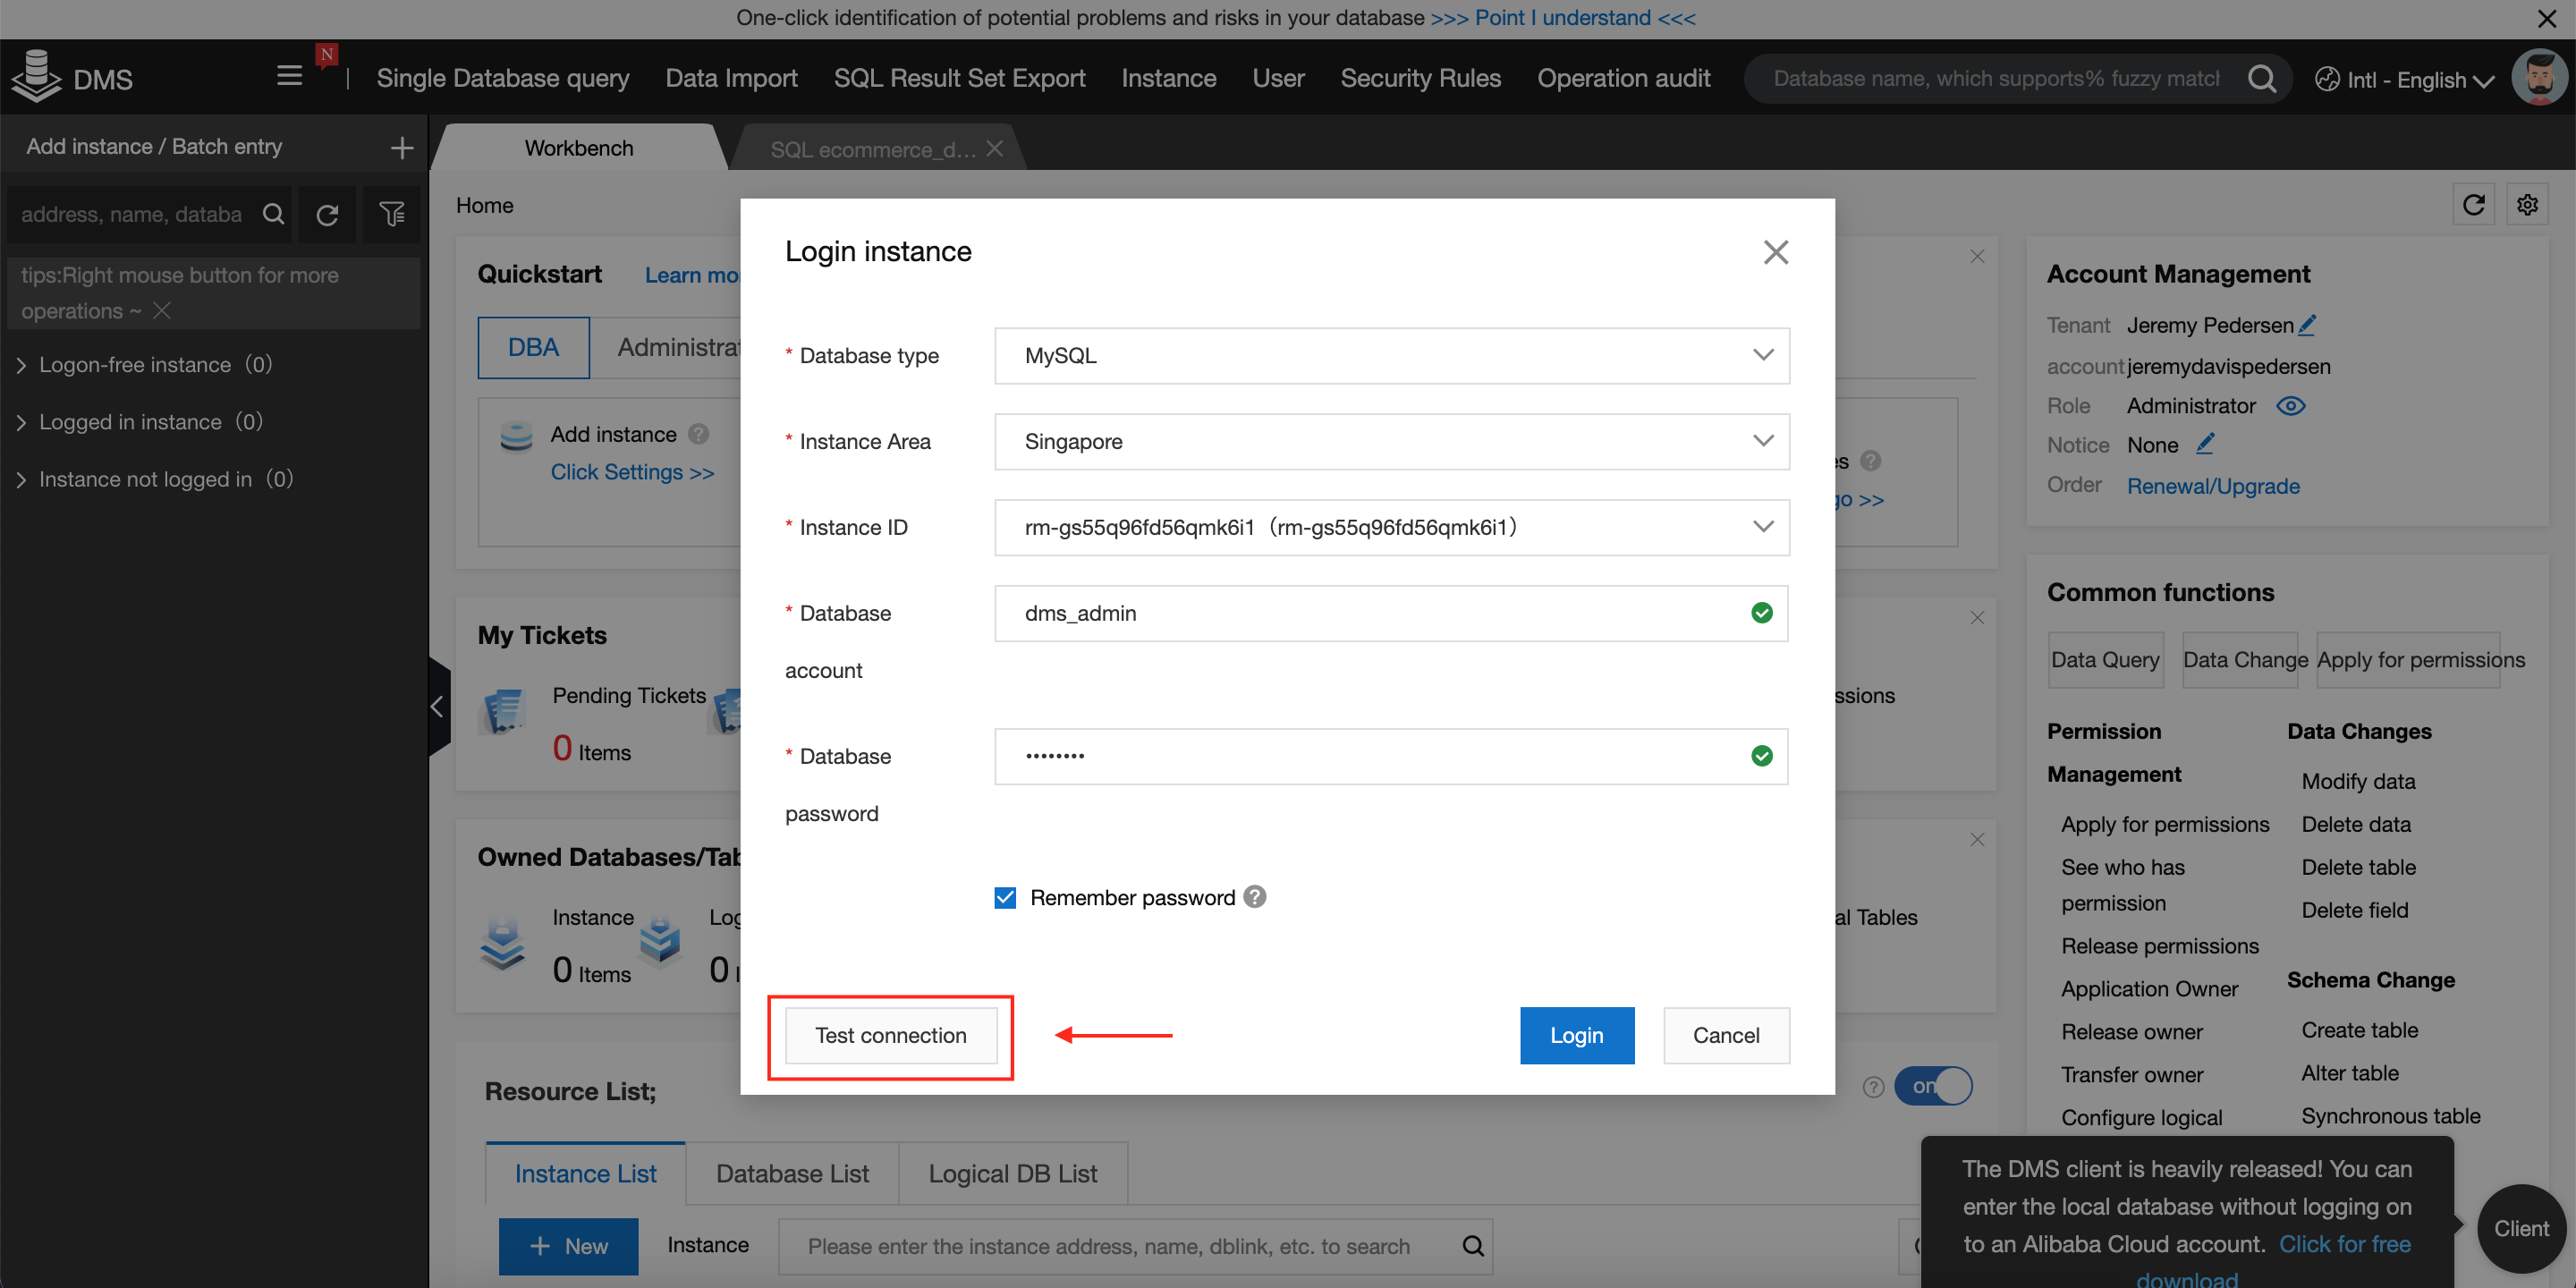
If all the provided information is correct, you should see a message like this one:
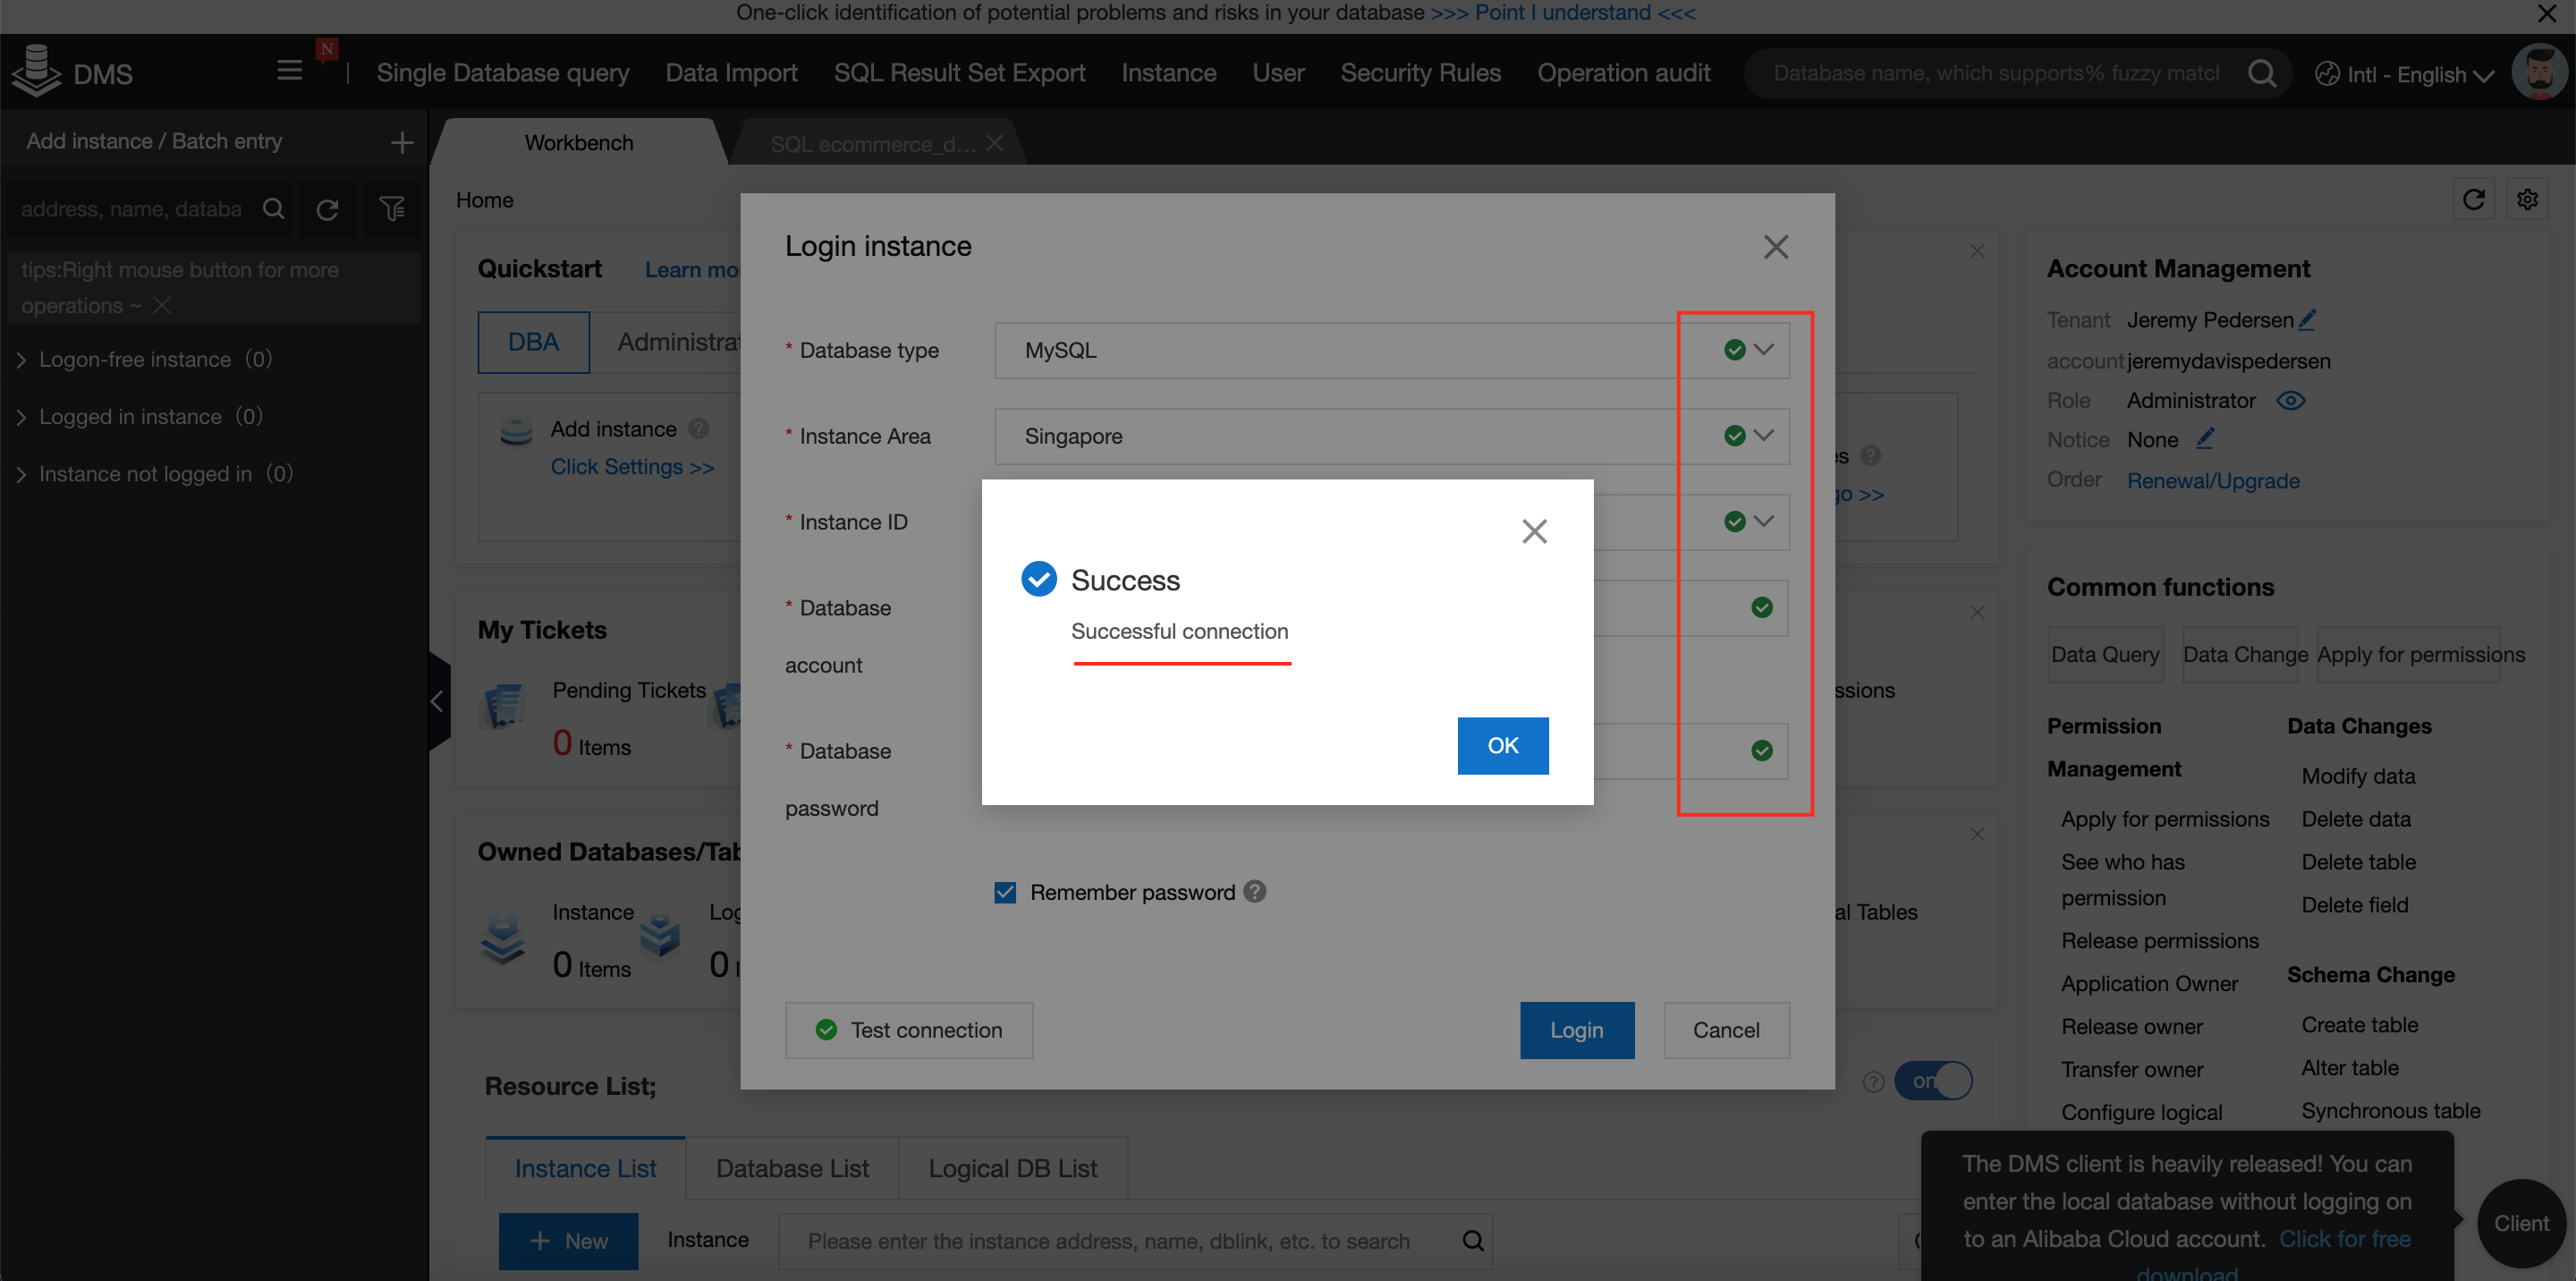
What do I do if the connection test fails, but my username and password are correct? This can happen if the DMS service IP address range hasn't been added to your RDS database's IP address whitelist. If this happens, don't panic: DMS will give you the option to add the IP address range to your RDS instance's whitelist automatically.
You'll notice there are also some green check marks next to each of the pieces of information we provided. If there is an issue with one of these fields, the green check mark will not appear, so we can identify the problem quickly.
Click on OK, then click on Login:
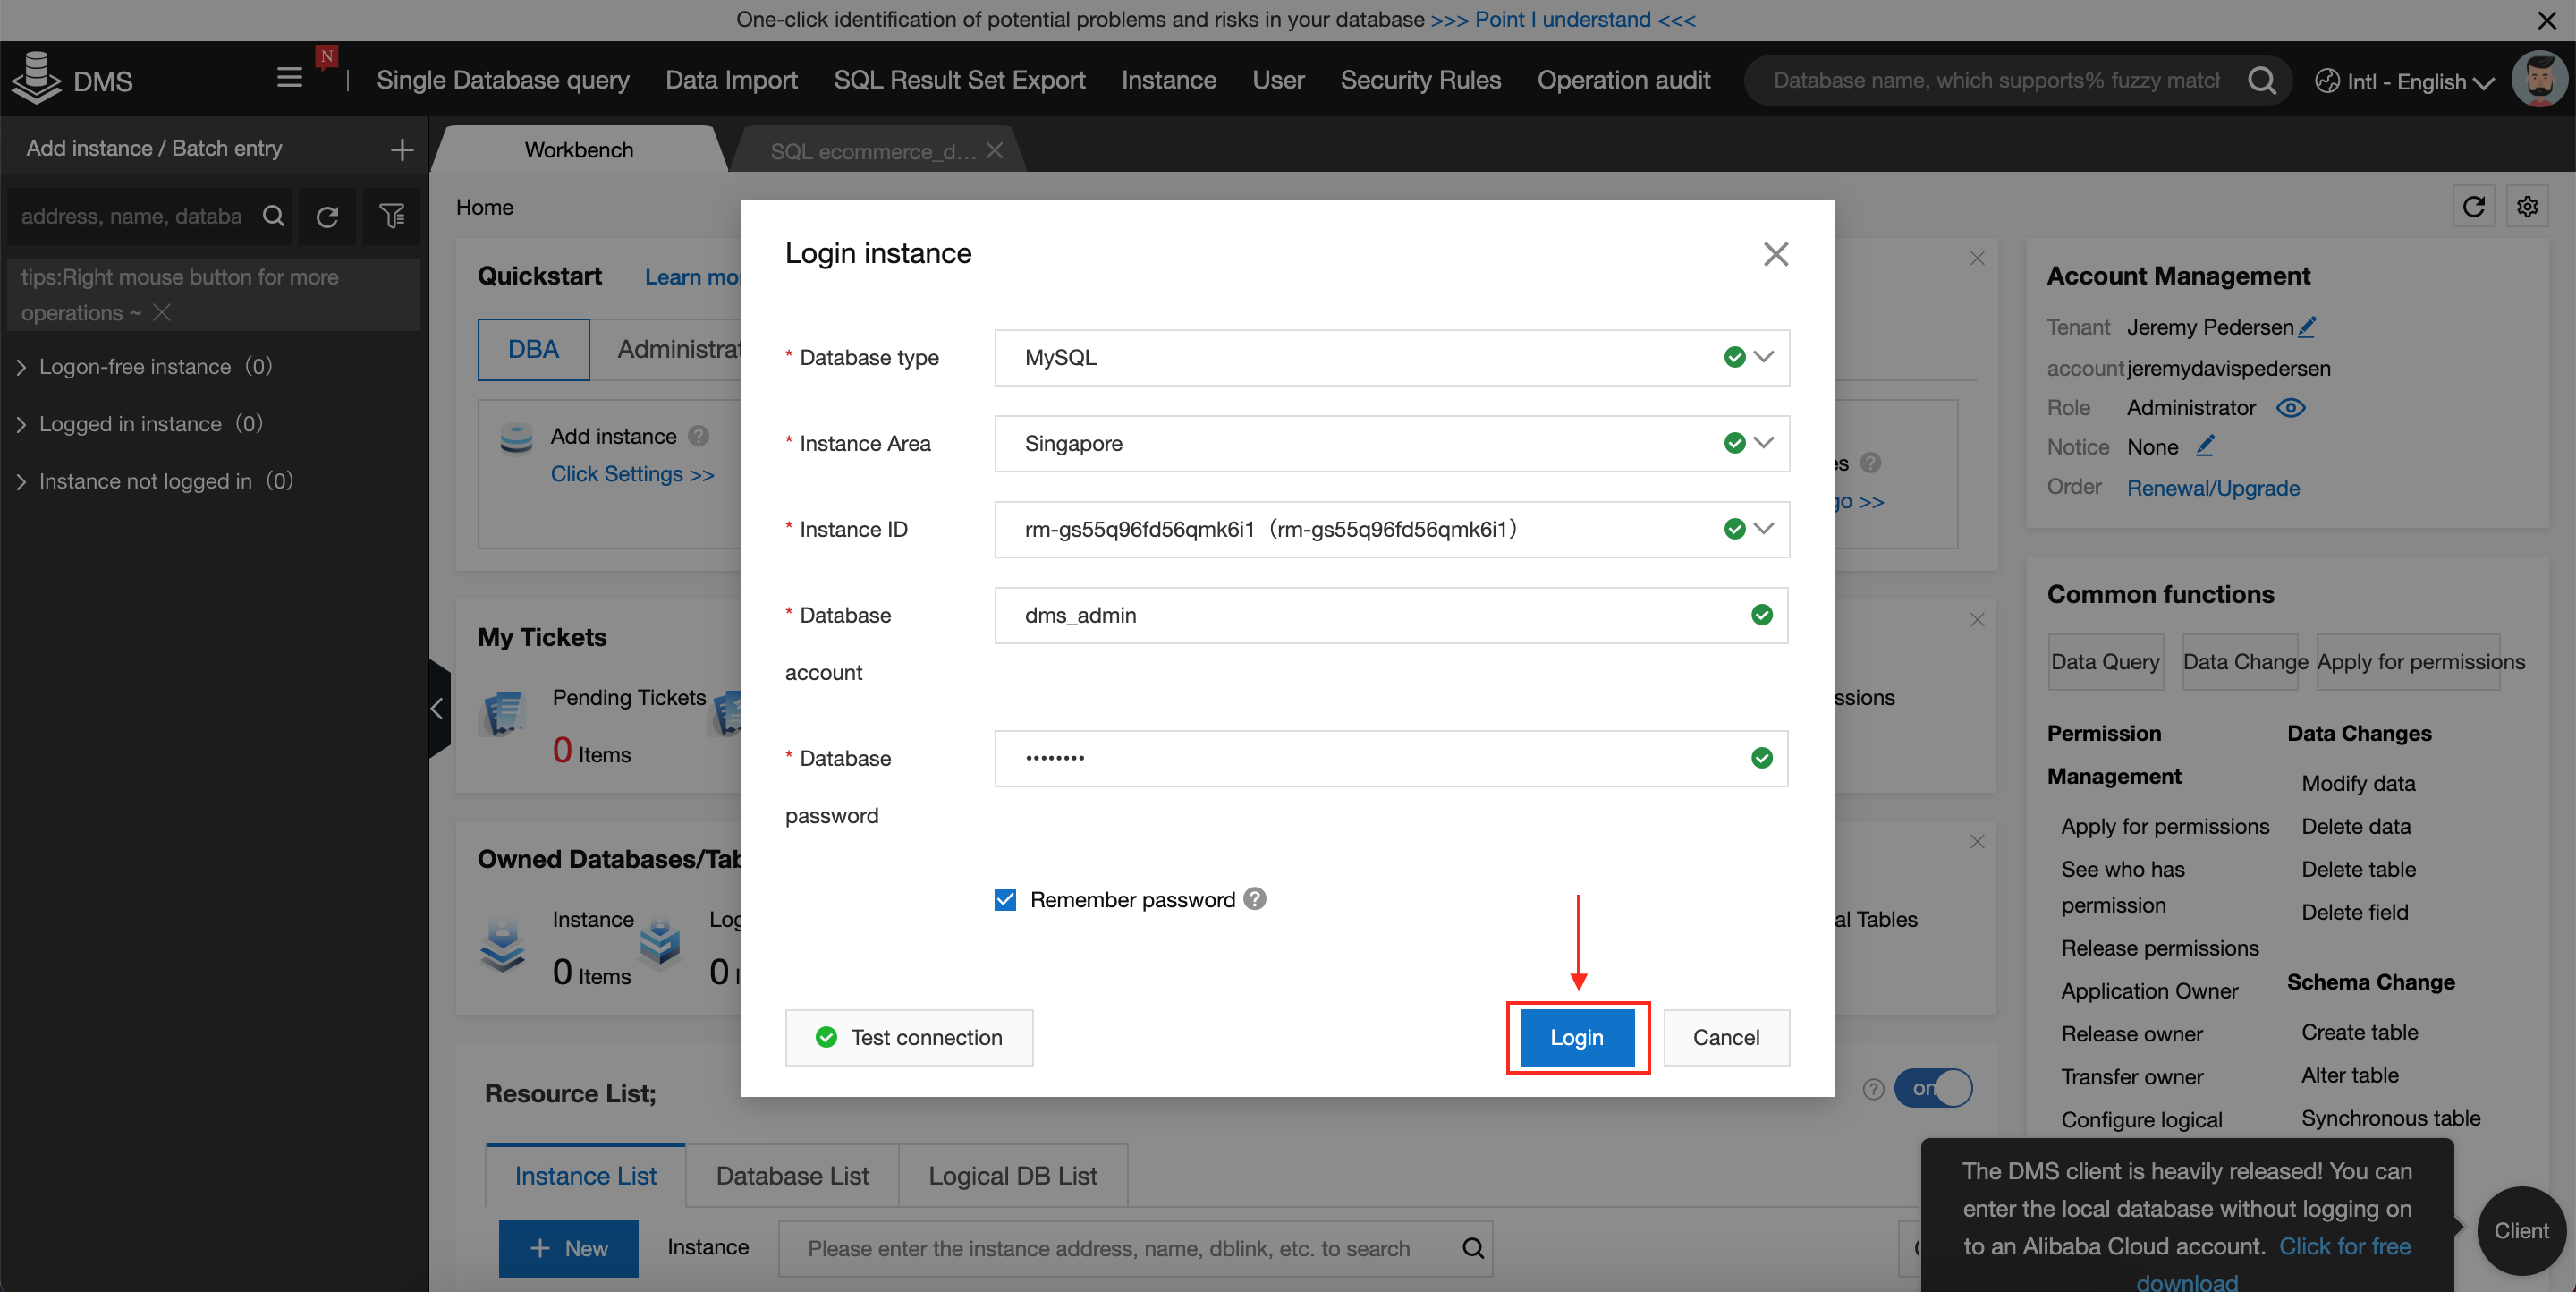
This takes us to the DMS homepage. By default, DMS will open up a SQL interface that allows us to run queries on our database. We don't have any tables yet, so the first thing we need to do is run some DDL statements to create a few new tables.
For the purposes of this article, we'll be using some pre-prepared E-Commerce example data from the Alibaba Cloud Academy GitHub page. We will create 3 tables: users, products, and orders, holding sample data from that repository (click the link above and take a look in the "data" folder, which contains the three .csv files we'll be uploading in the next section).
Copy-paste the following SQL code into the DMS SQL command window, replacing the SELECT statement that is there by default:
CREATE TABLE `users` (
    `user_id` bigint NOT NULL,
    `name` varchar(32) NULL,
    `age` bigint NULL,
    `sex` varchar(32) NULL,
    `country` varchar(32) NULL,
    `country_code` varchar(32) NULL,
    PRIMARY KEY (`user_id`)
) ENGINE=InnoDB
DEFAULT CHARACTER SET=utf8;

CREATE TABLE `products` (
    `product_id` bigint NOT NULL,
    `product_name` varchar(32) NULL,
    `price` float NULL,
    PRIMARY KEY (`product_id`)
) ENGINE=InnoDB
DEFAULT CHARACTER SET=utf8;

CREATE TABLE `orders` (
    `order_id` bigint NULL,
    `year` varchar(32) NULL,
    `month` varchar(32) NULL,
    `product_code` bigint NULL,
    `quantity` bigint NULL,
    `user_id` bigint NULL
) ENGINE=InnoDB
DEFAULT CHARACTER SET=utf8;
Finally, click on Execute:
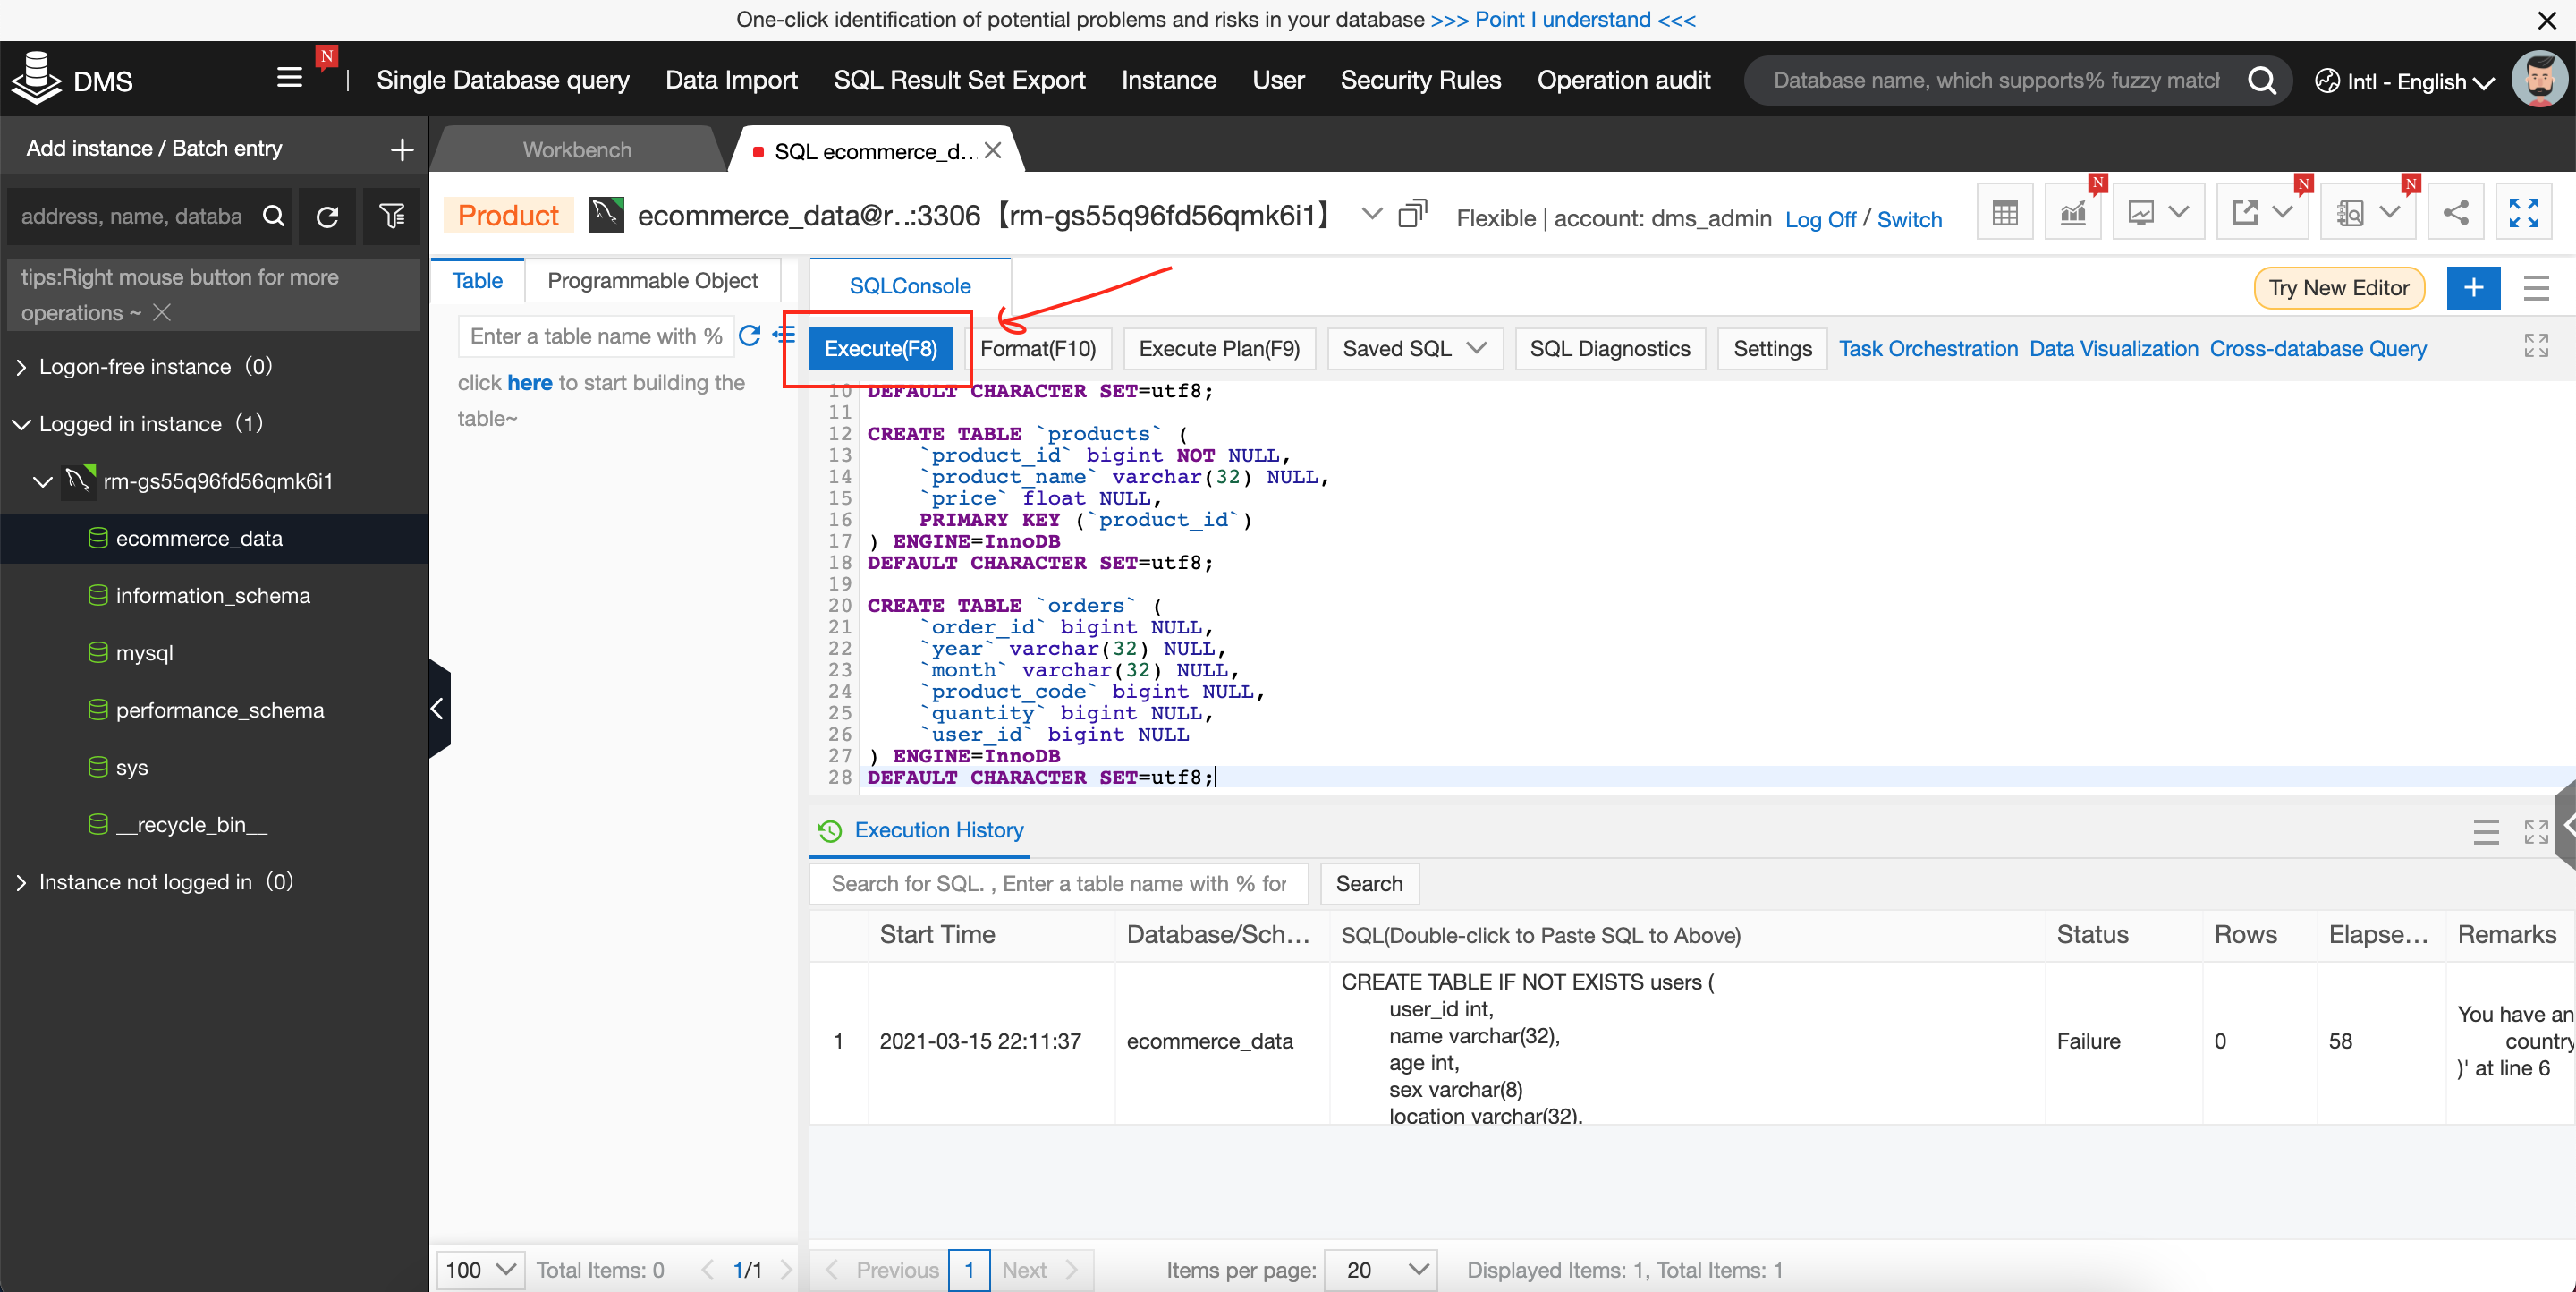
If all three create statements succeed, 3 new tabs should appear at the bottom of the window:
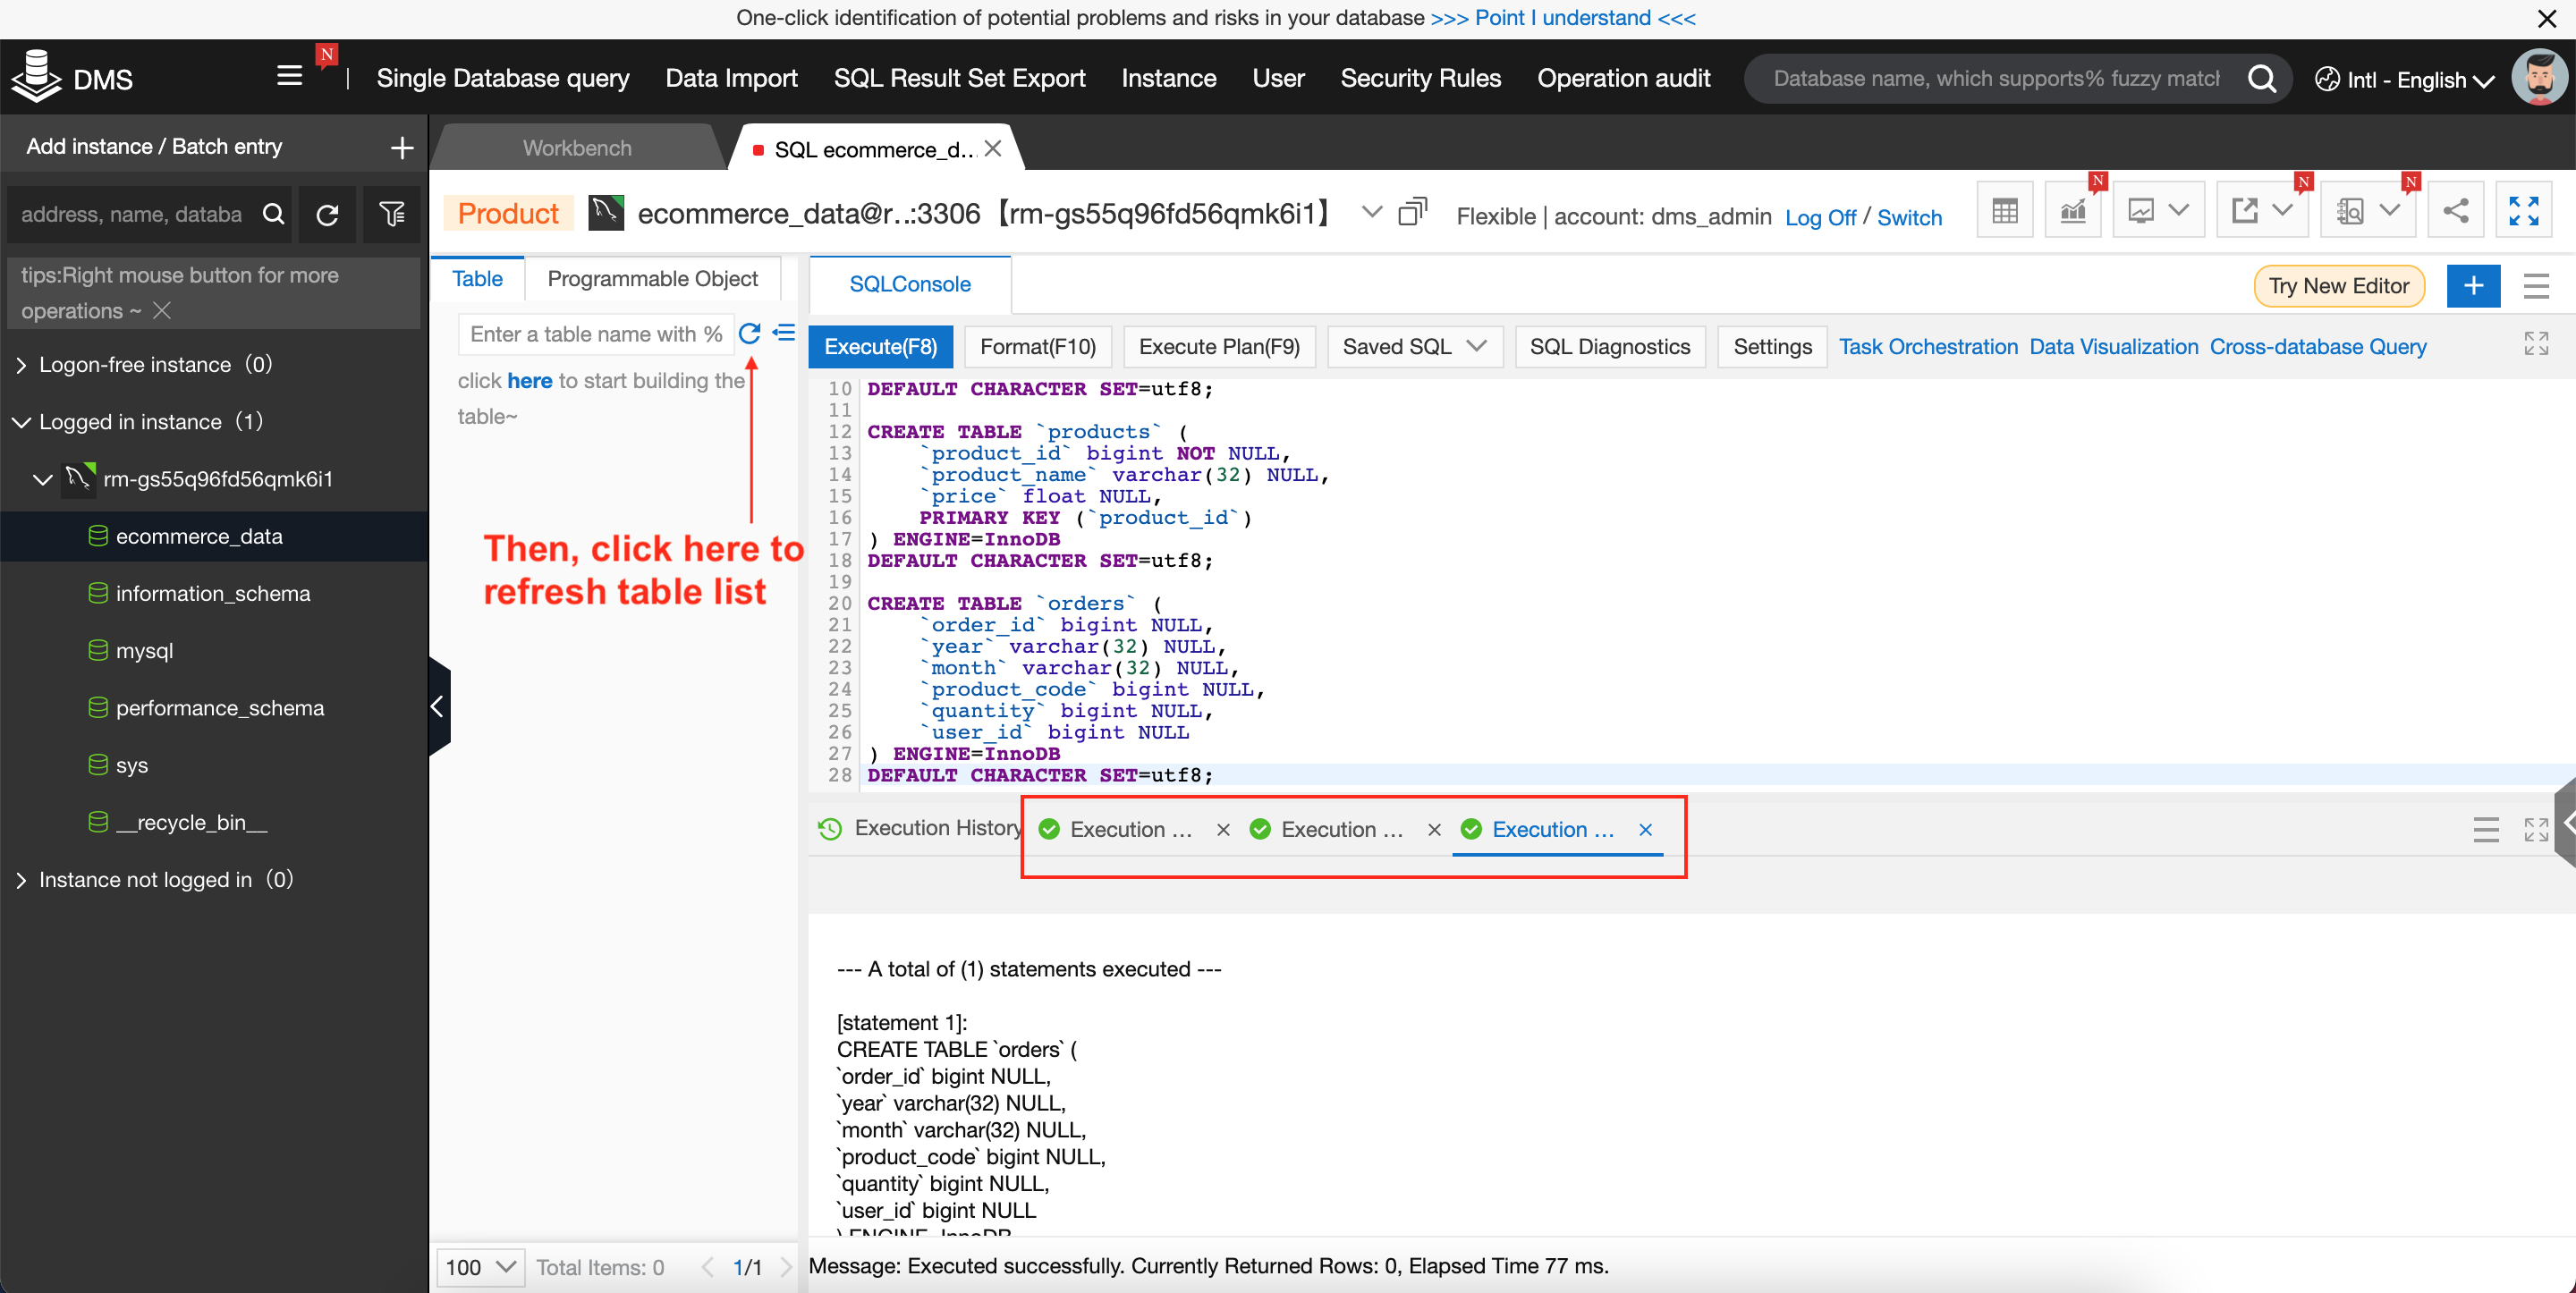
If we click on the Refresh icon as shown in the screenshot above, we should see our three new tables appear to the left of the SQL command window:
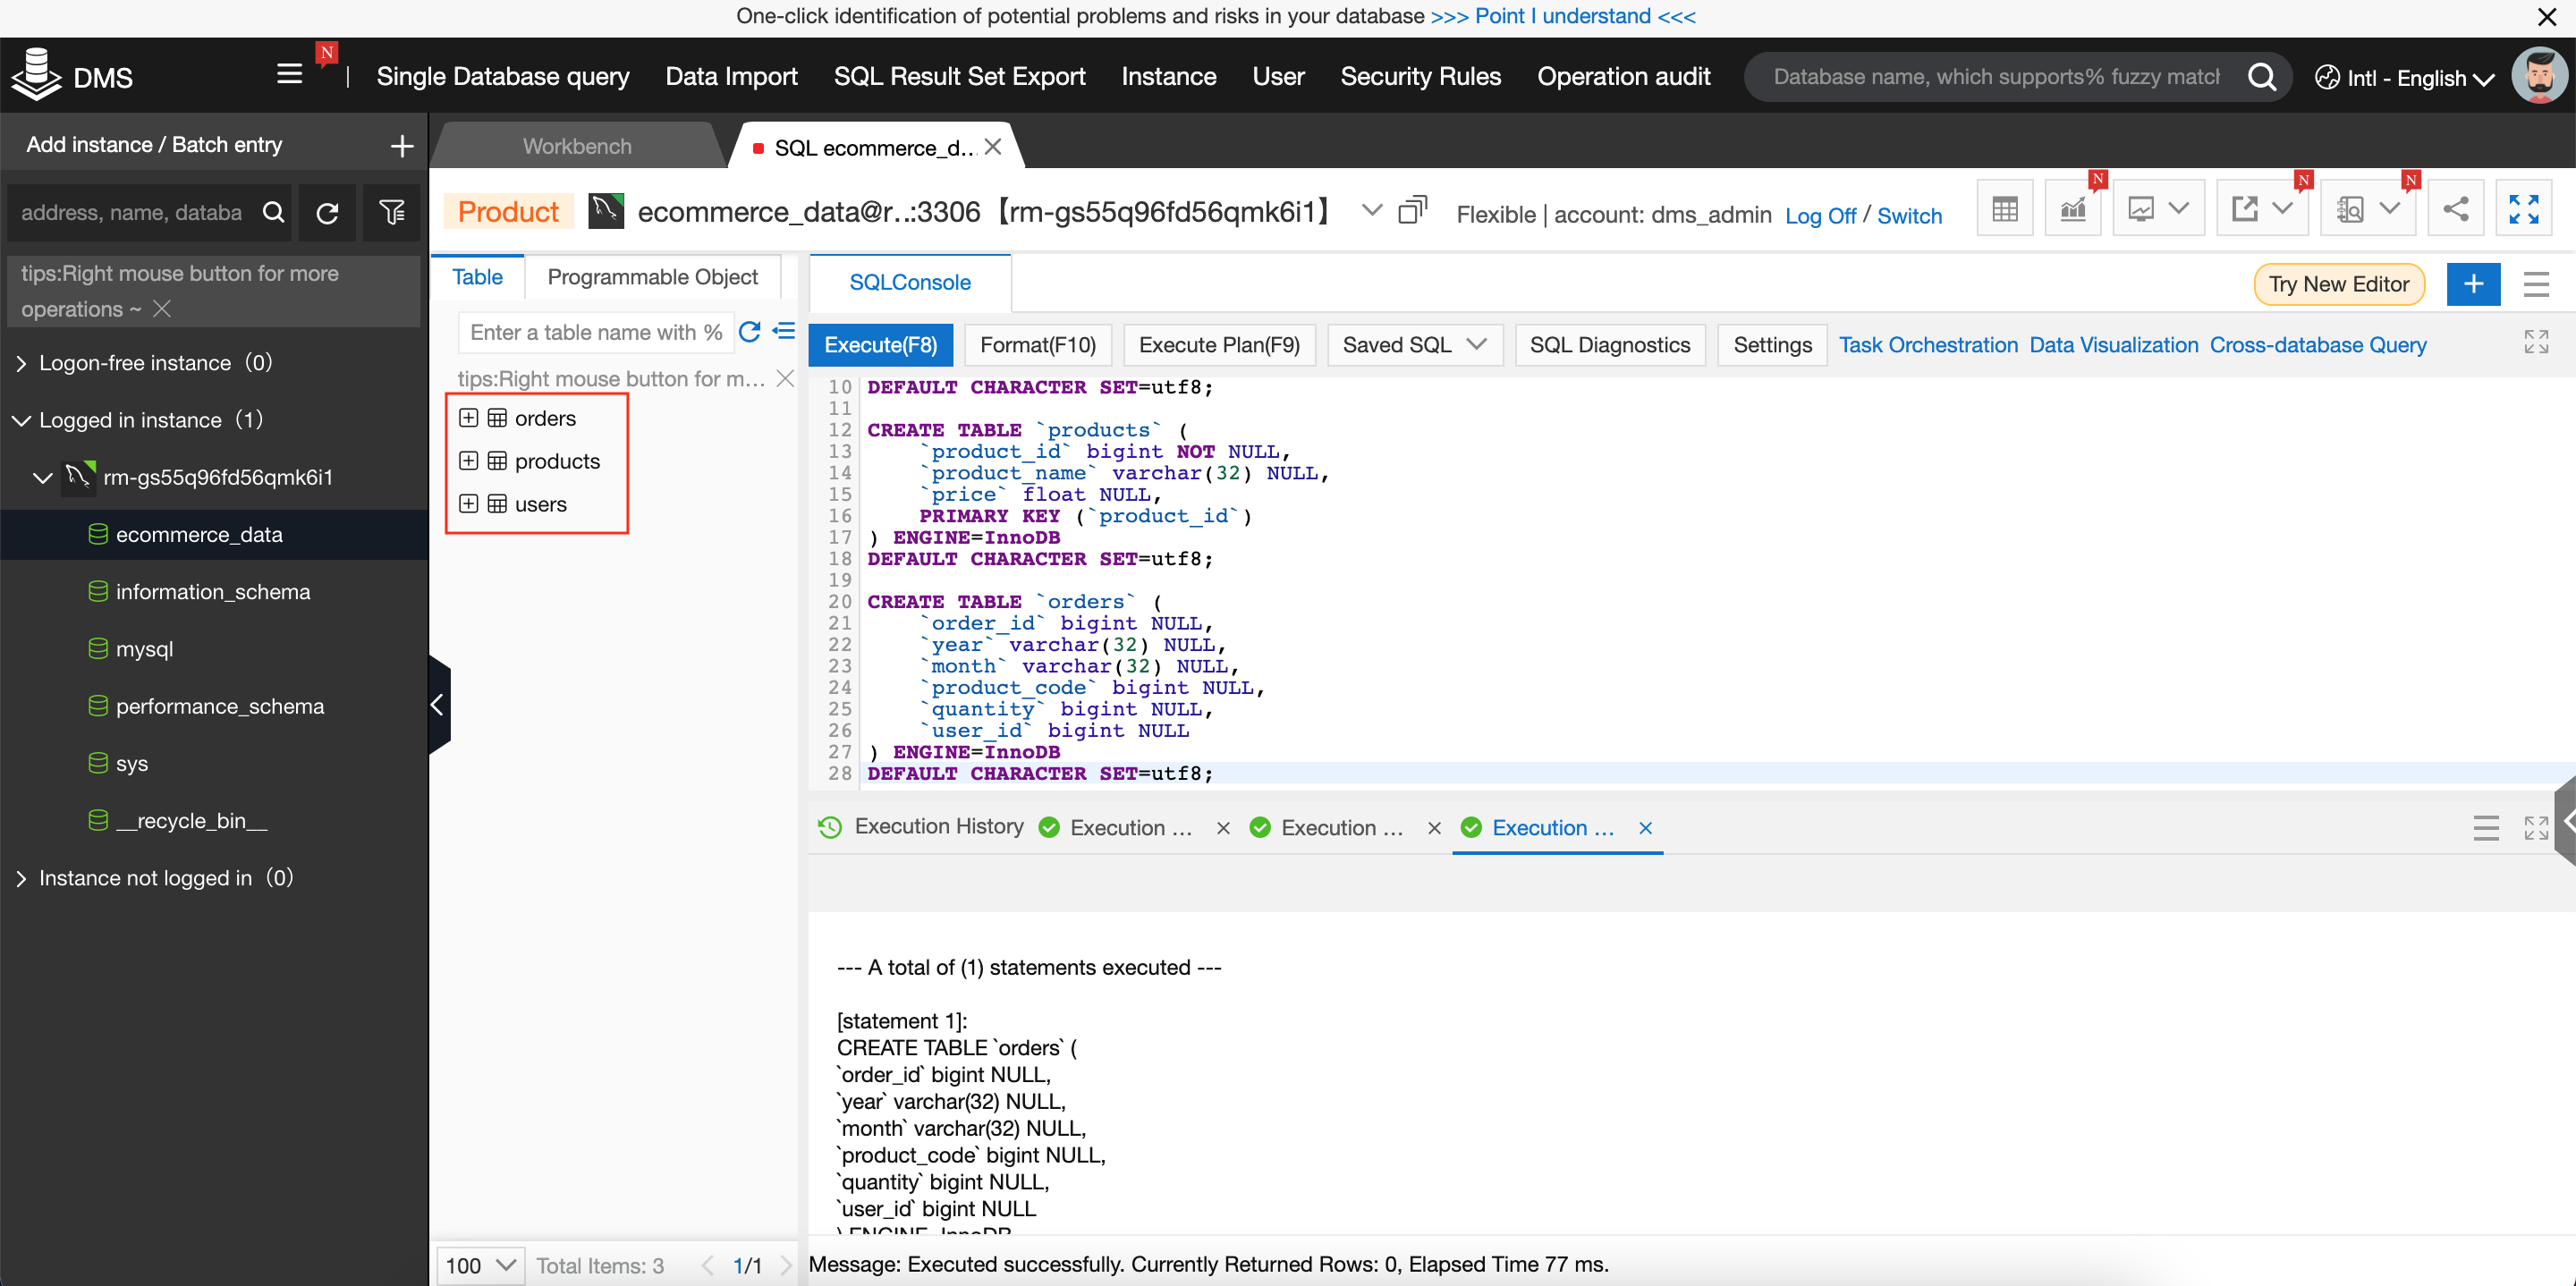
We can now start importing our data.
To save time, we can use this pre-prepared example E-Commerce dataset, from the Alibaba Cloud Academy GitHub page:
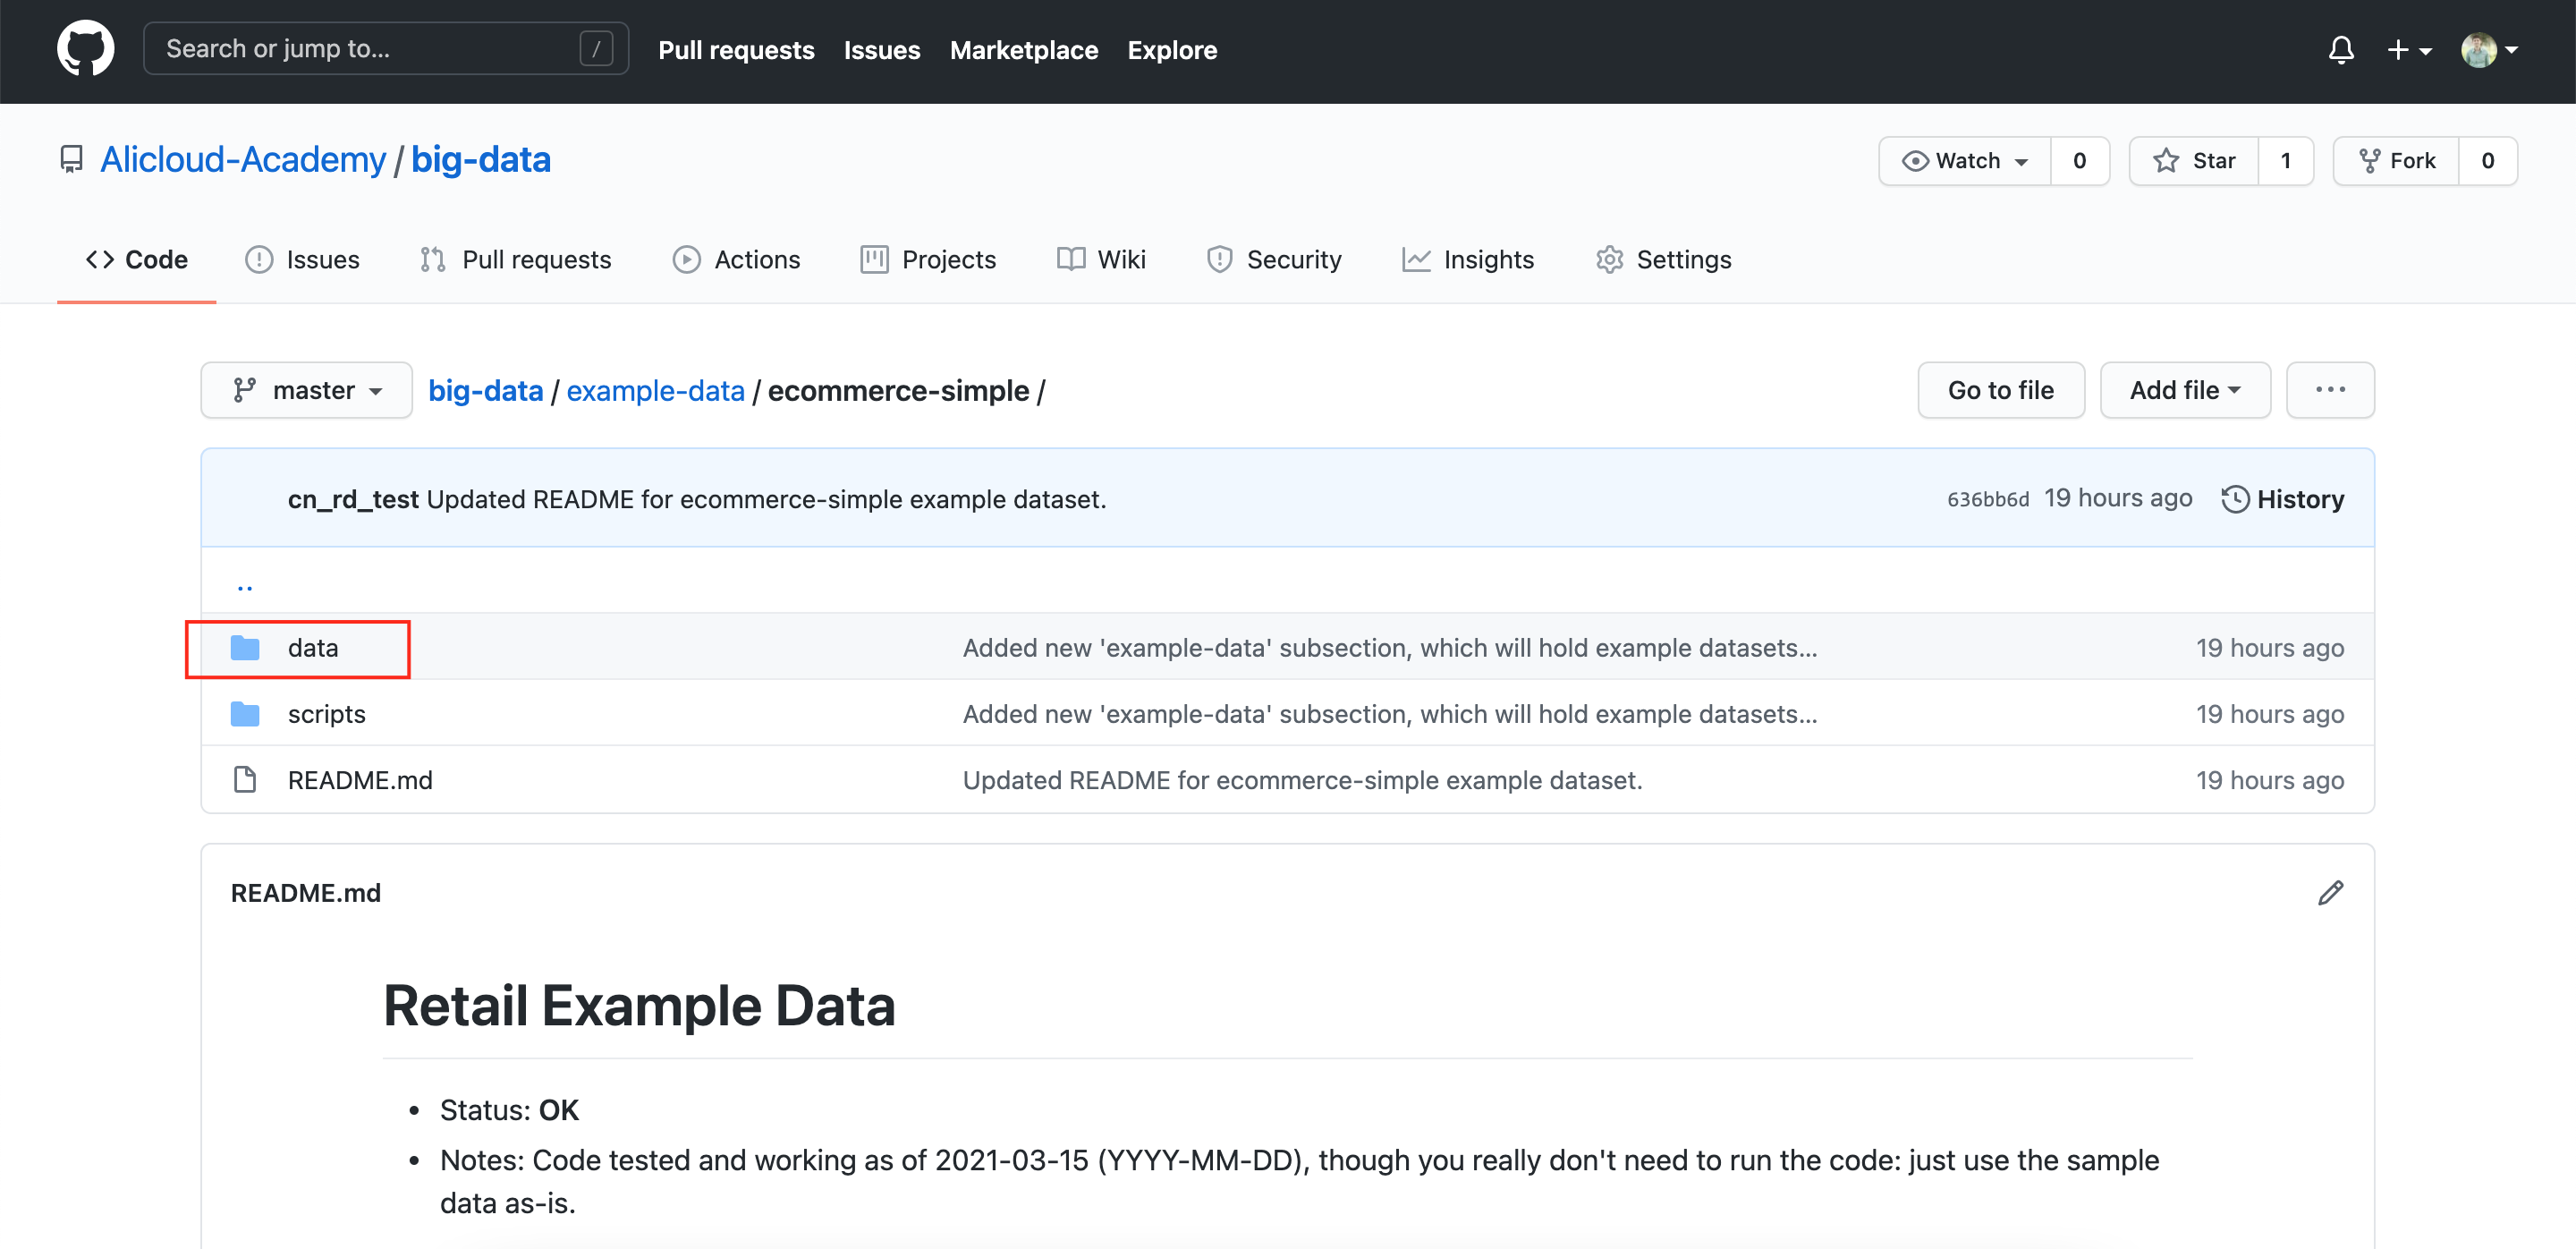
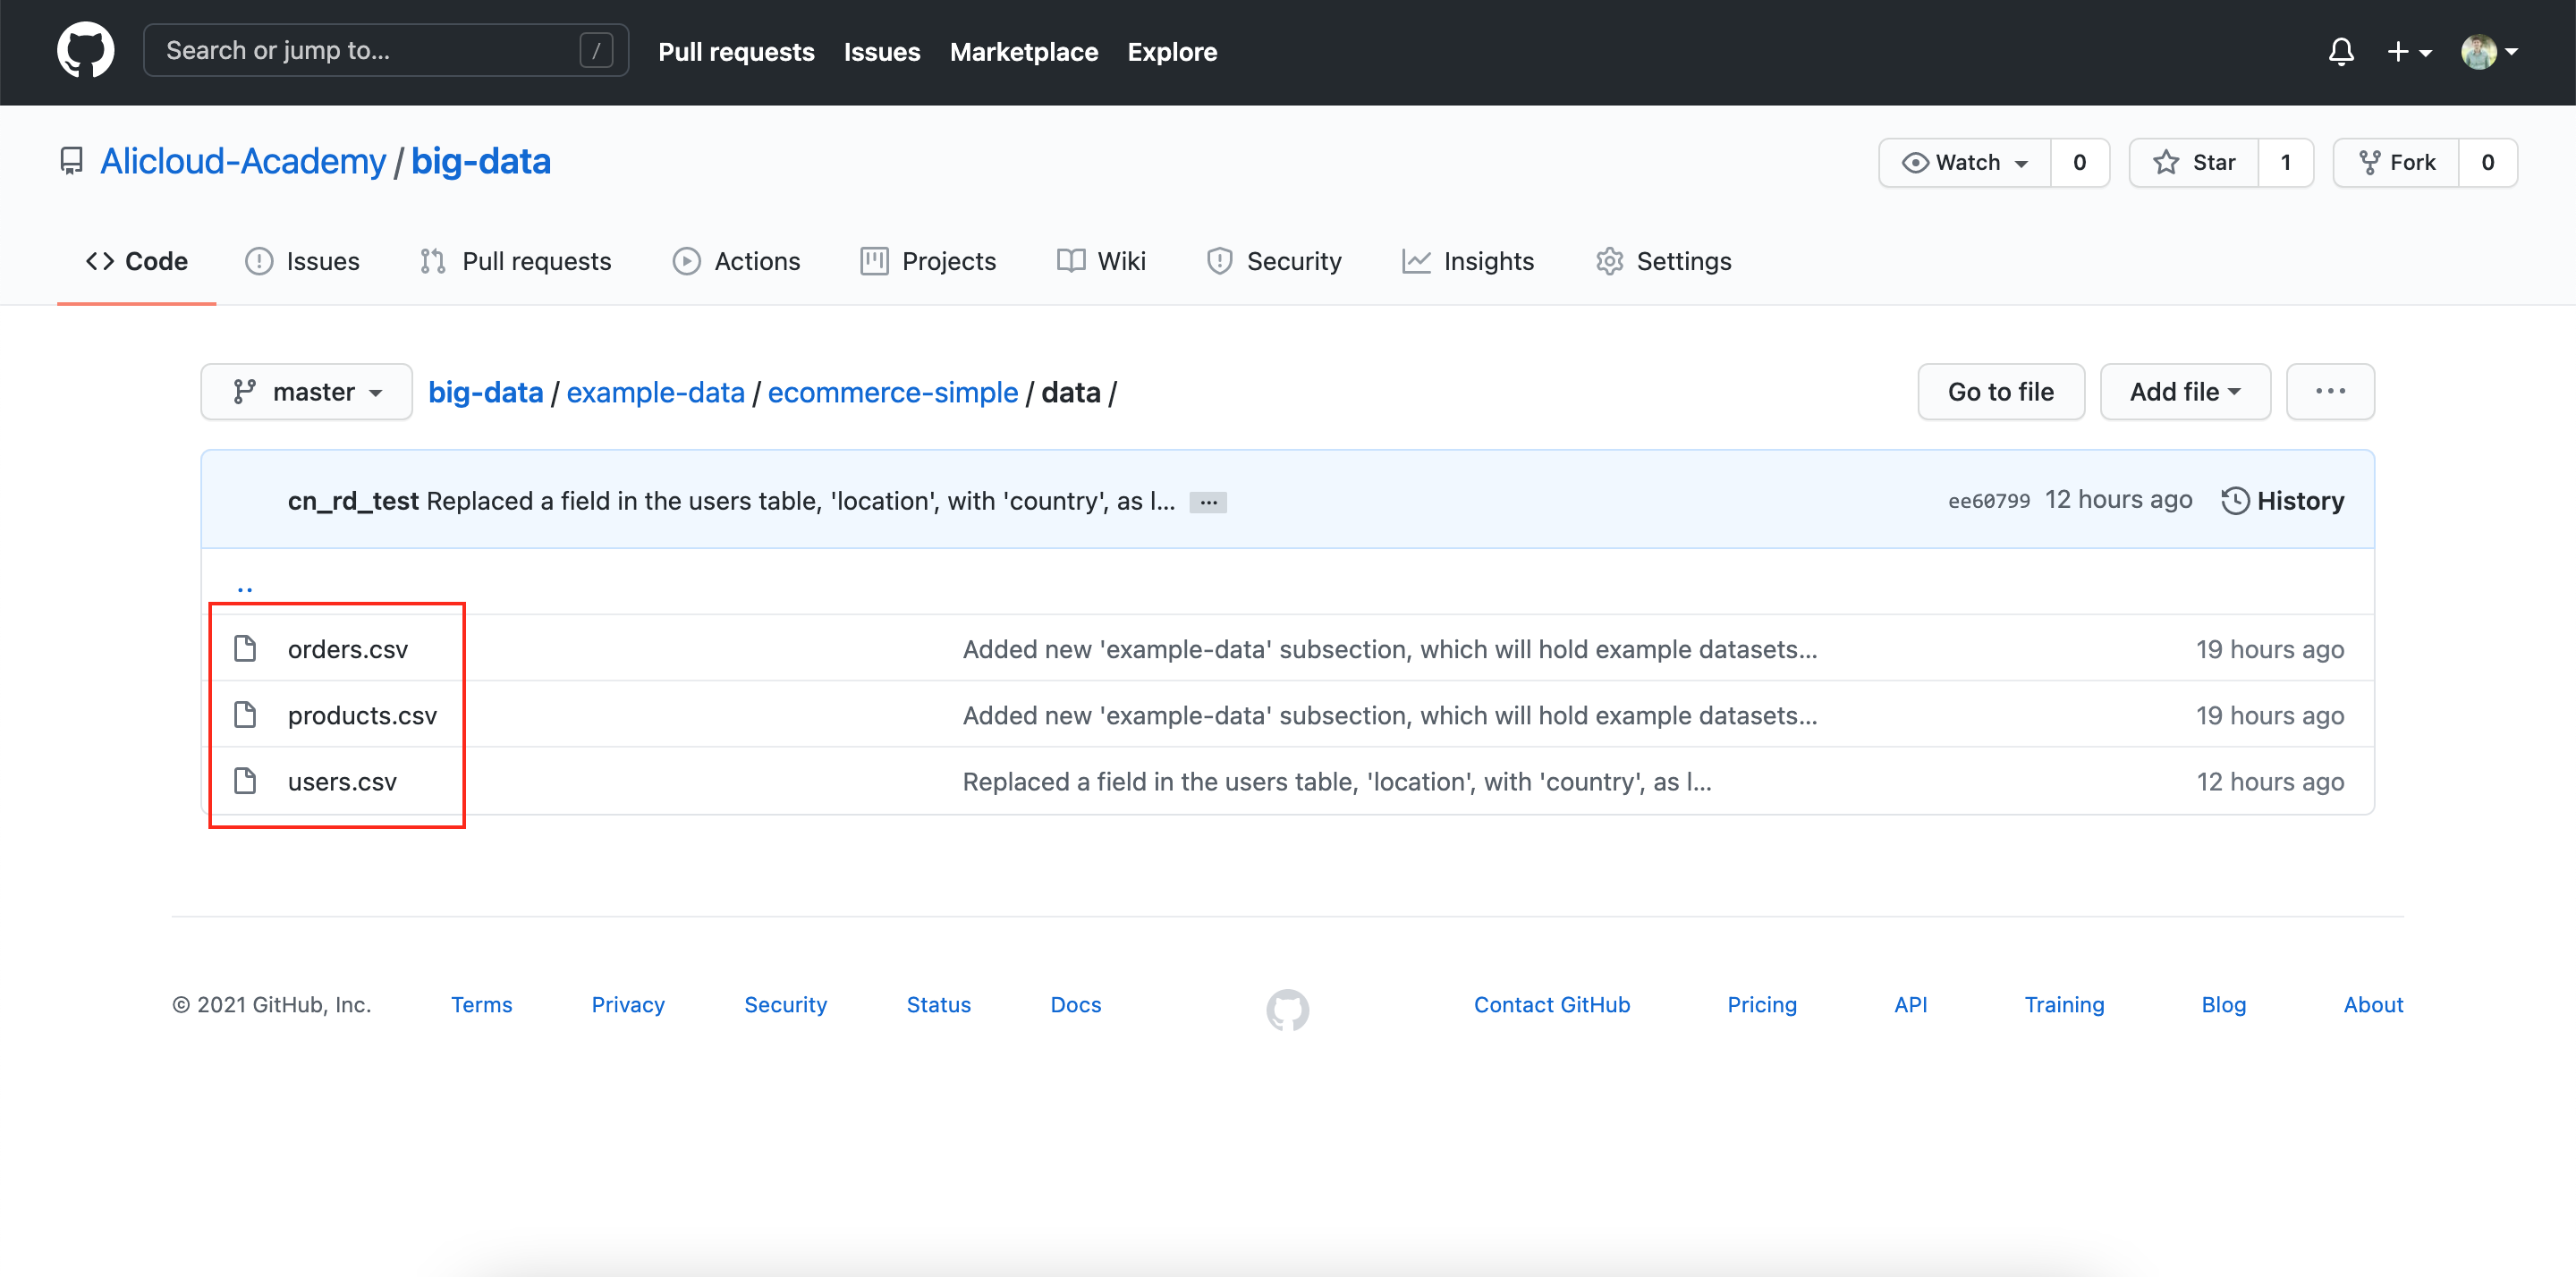
Download the 3 .csv files above and save them somewhere on your computer.
Next, click on Data Import at the top of the DMS console:
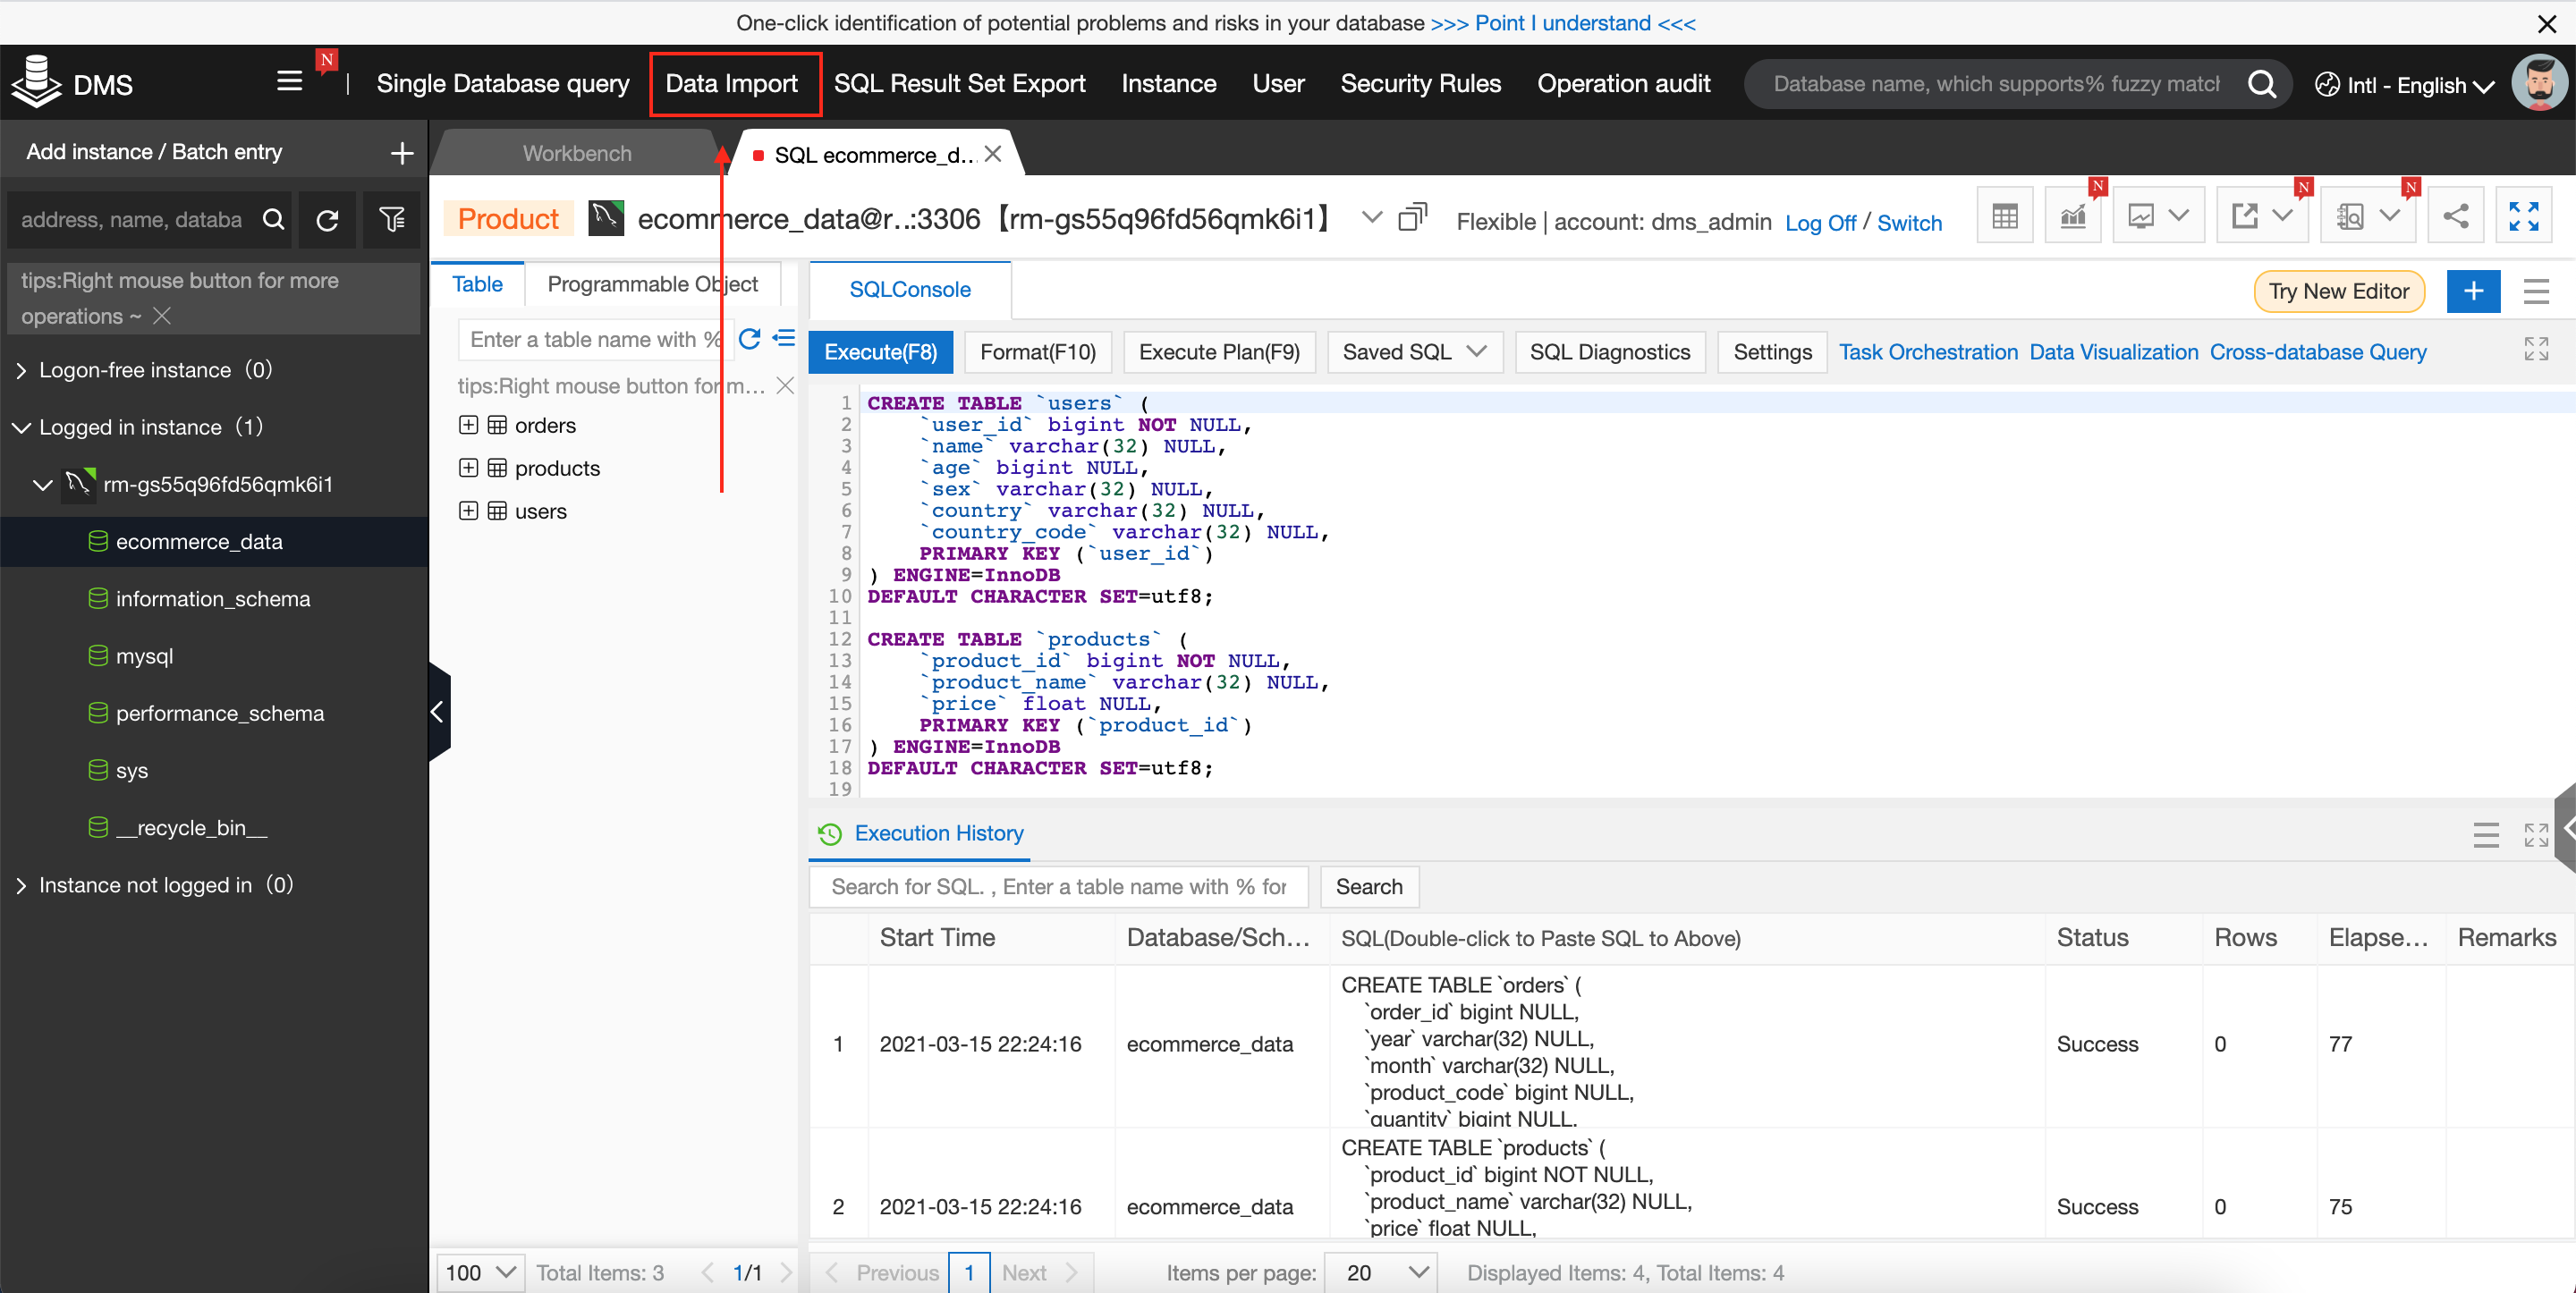
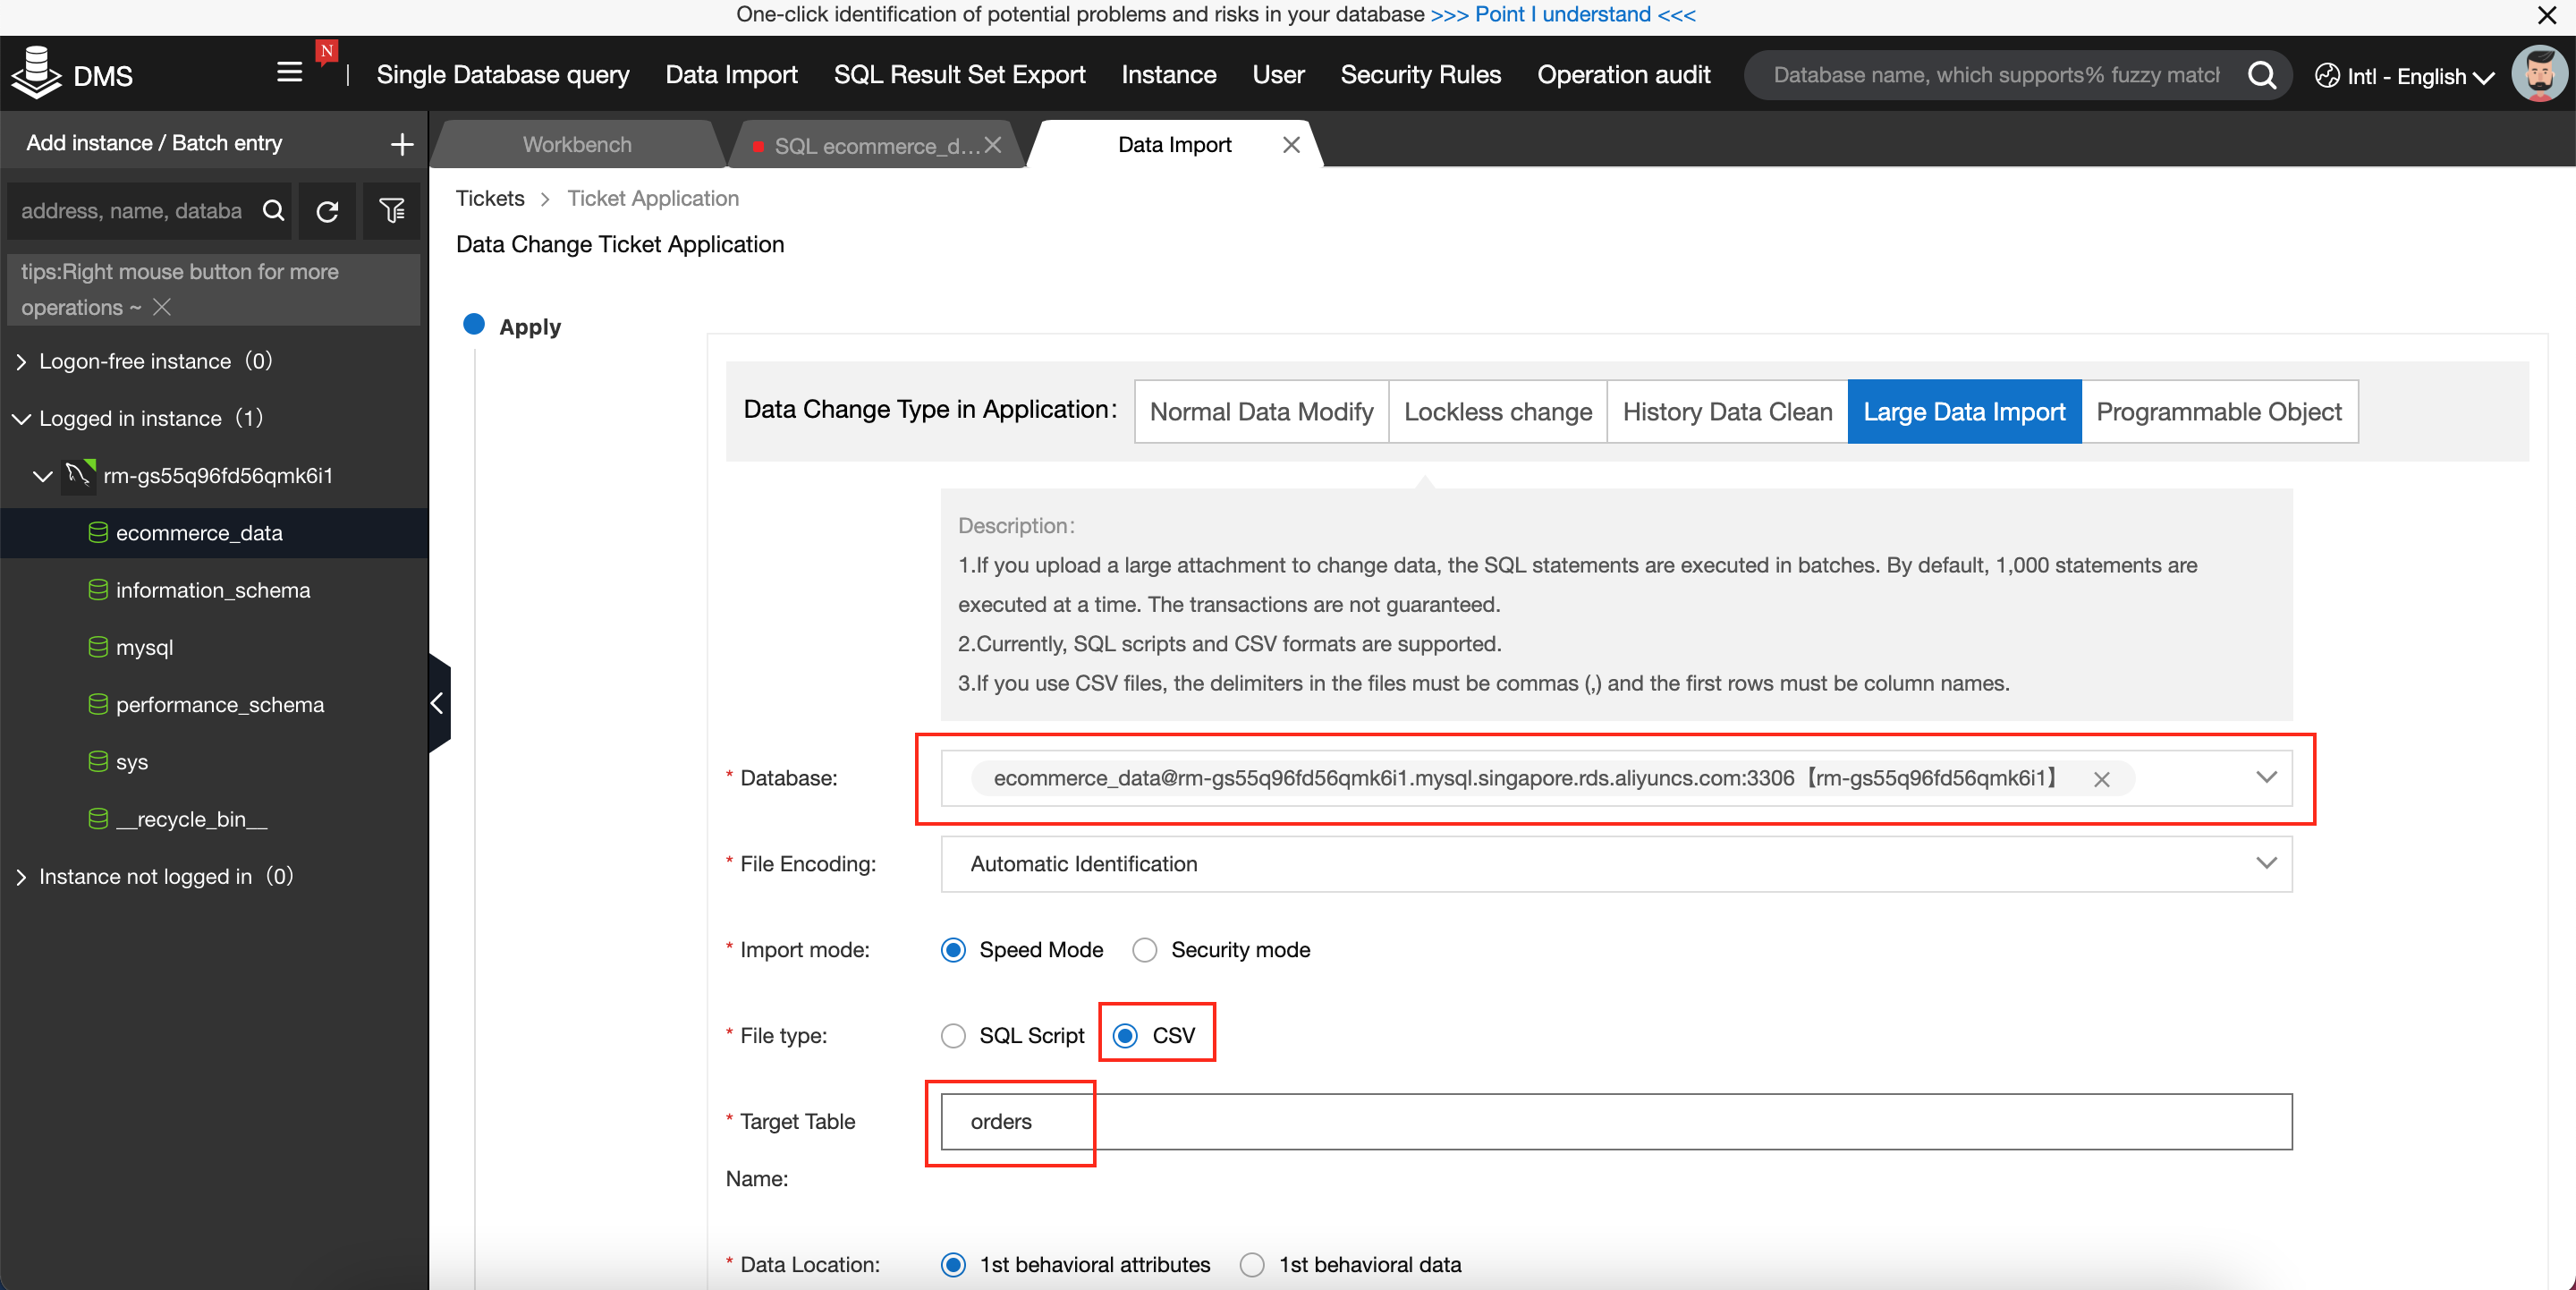
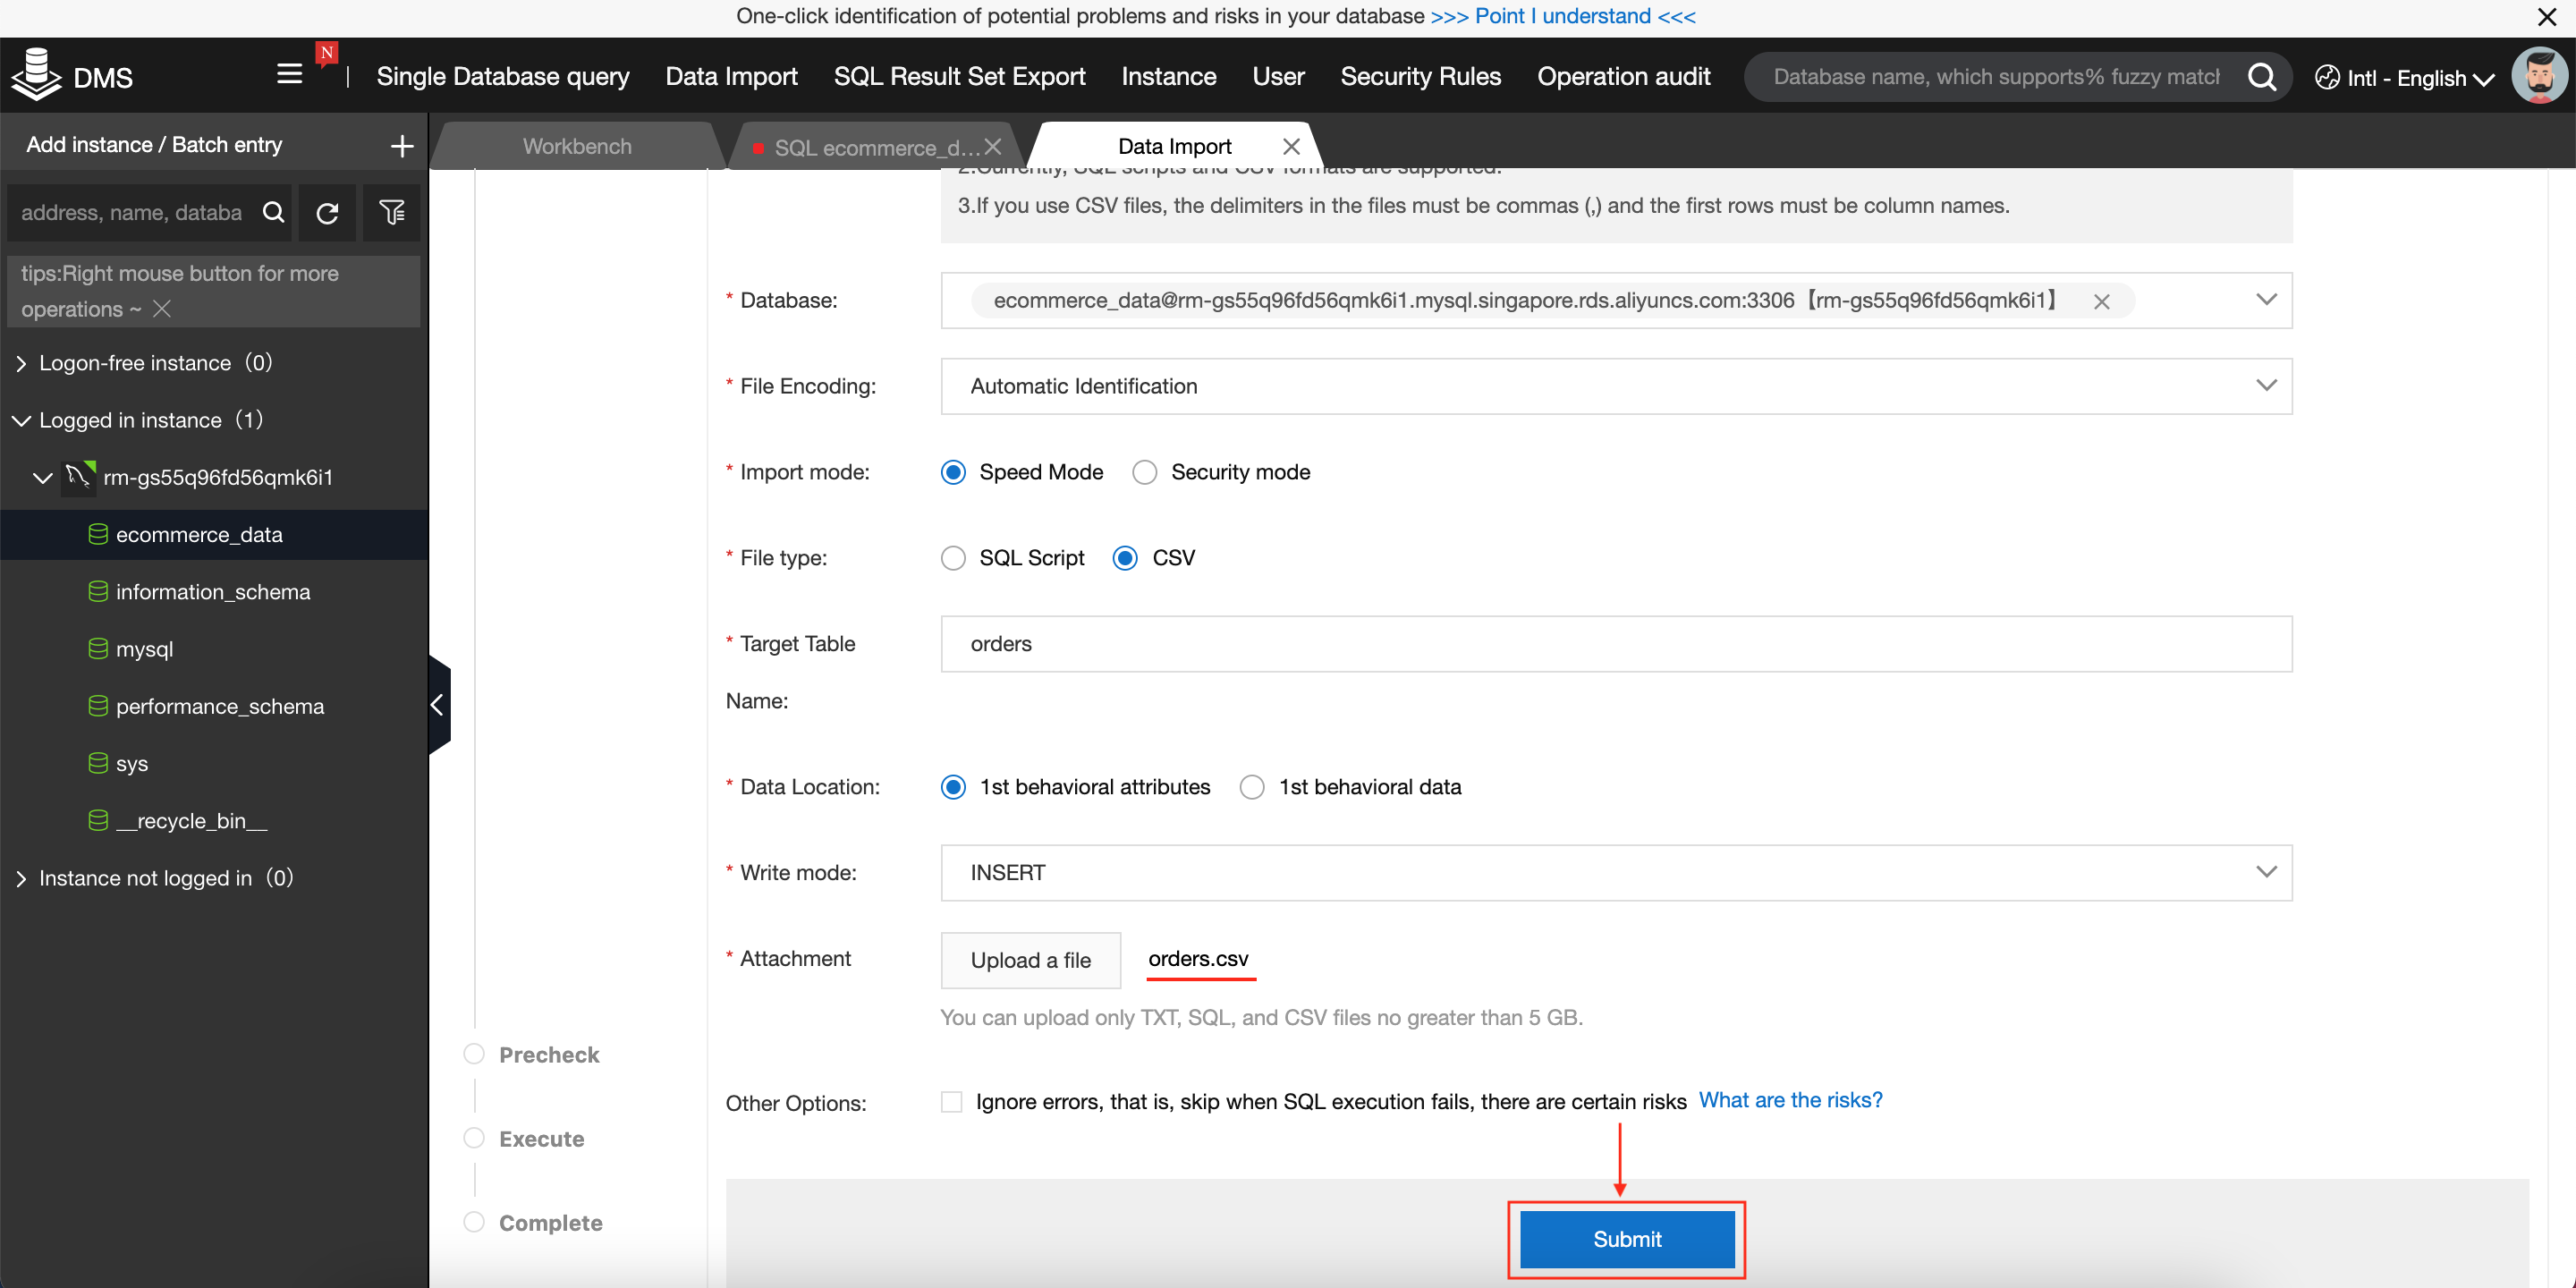
This will open up a new tab, where we specify the target database and target table:
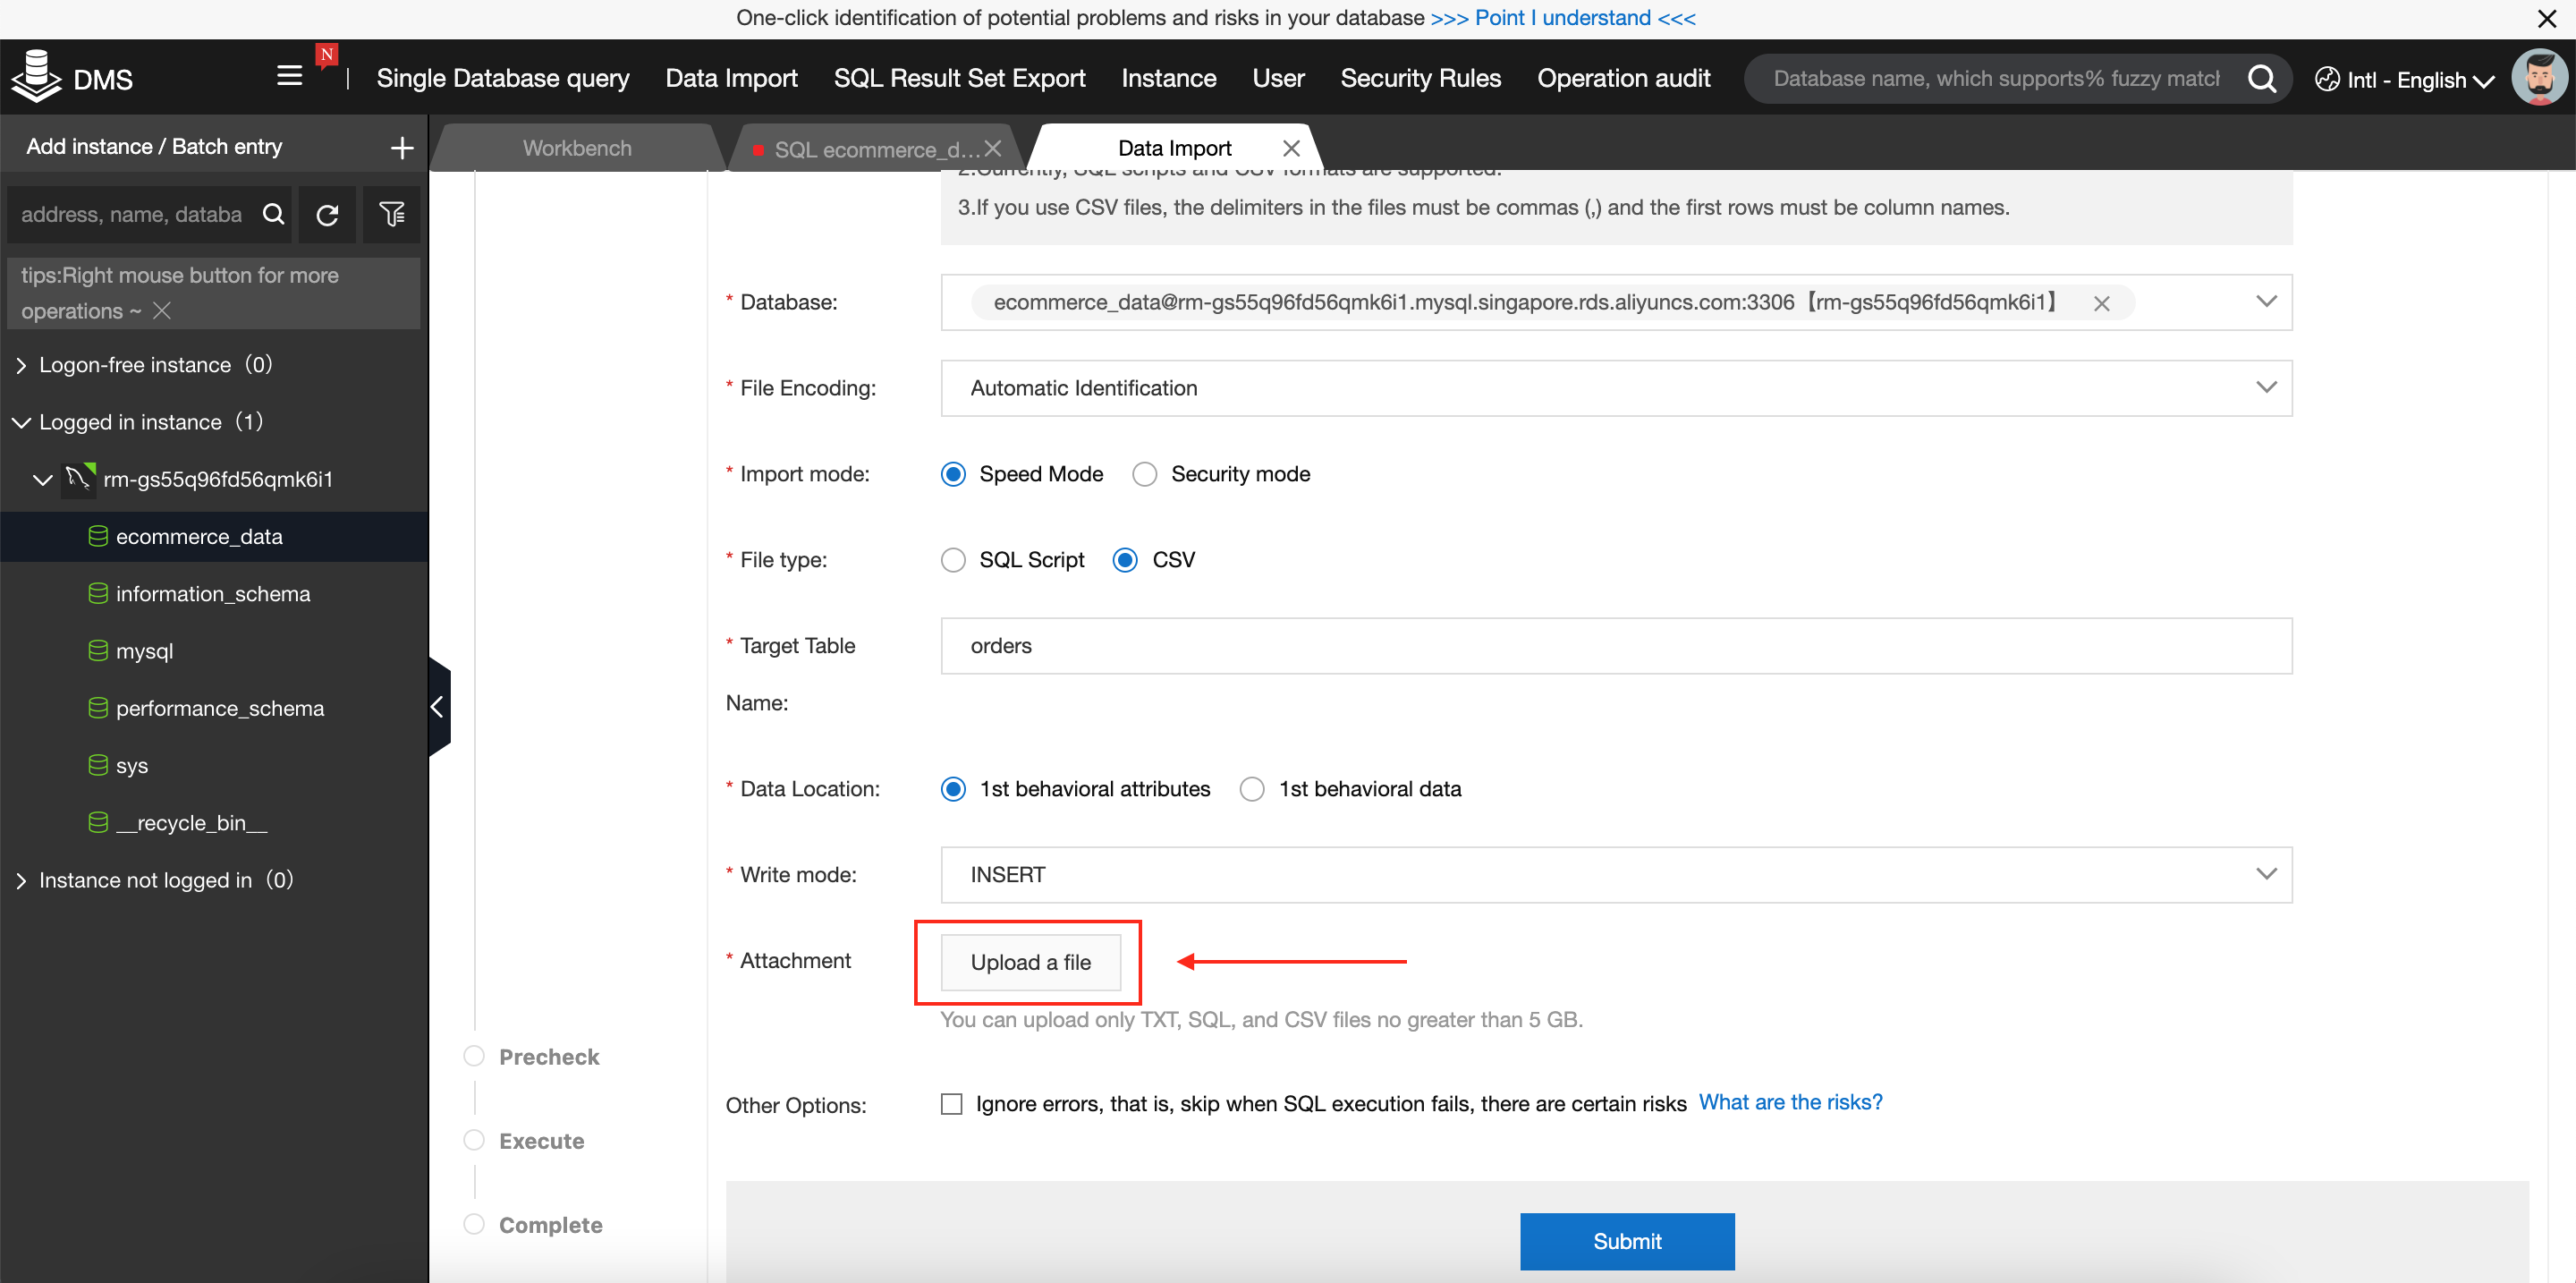
We then choose a CSV file to upload (we will start with orders.csv):
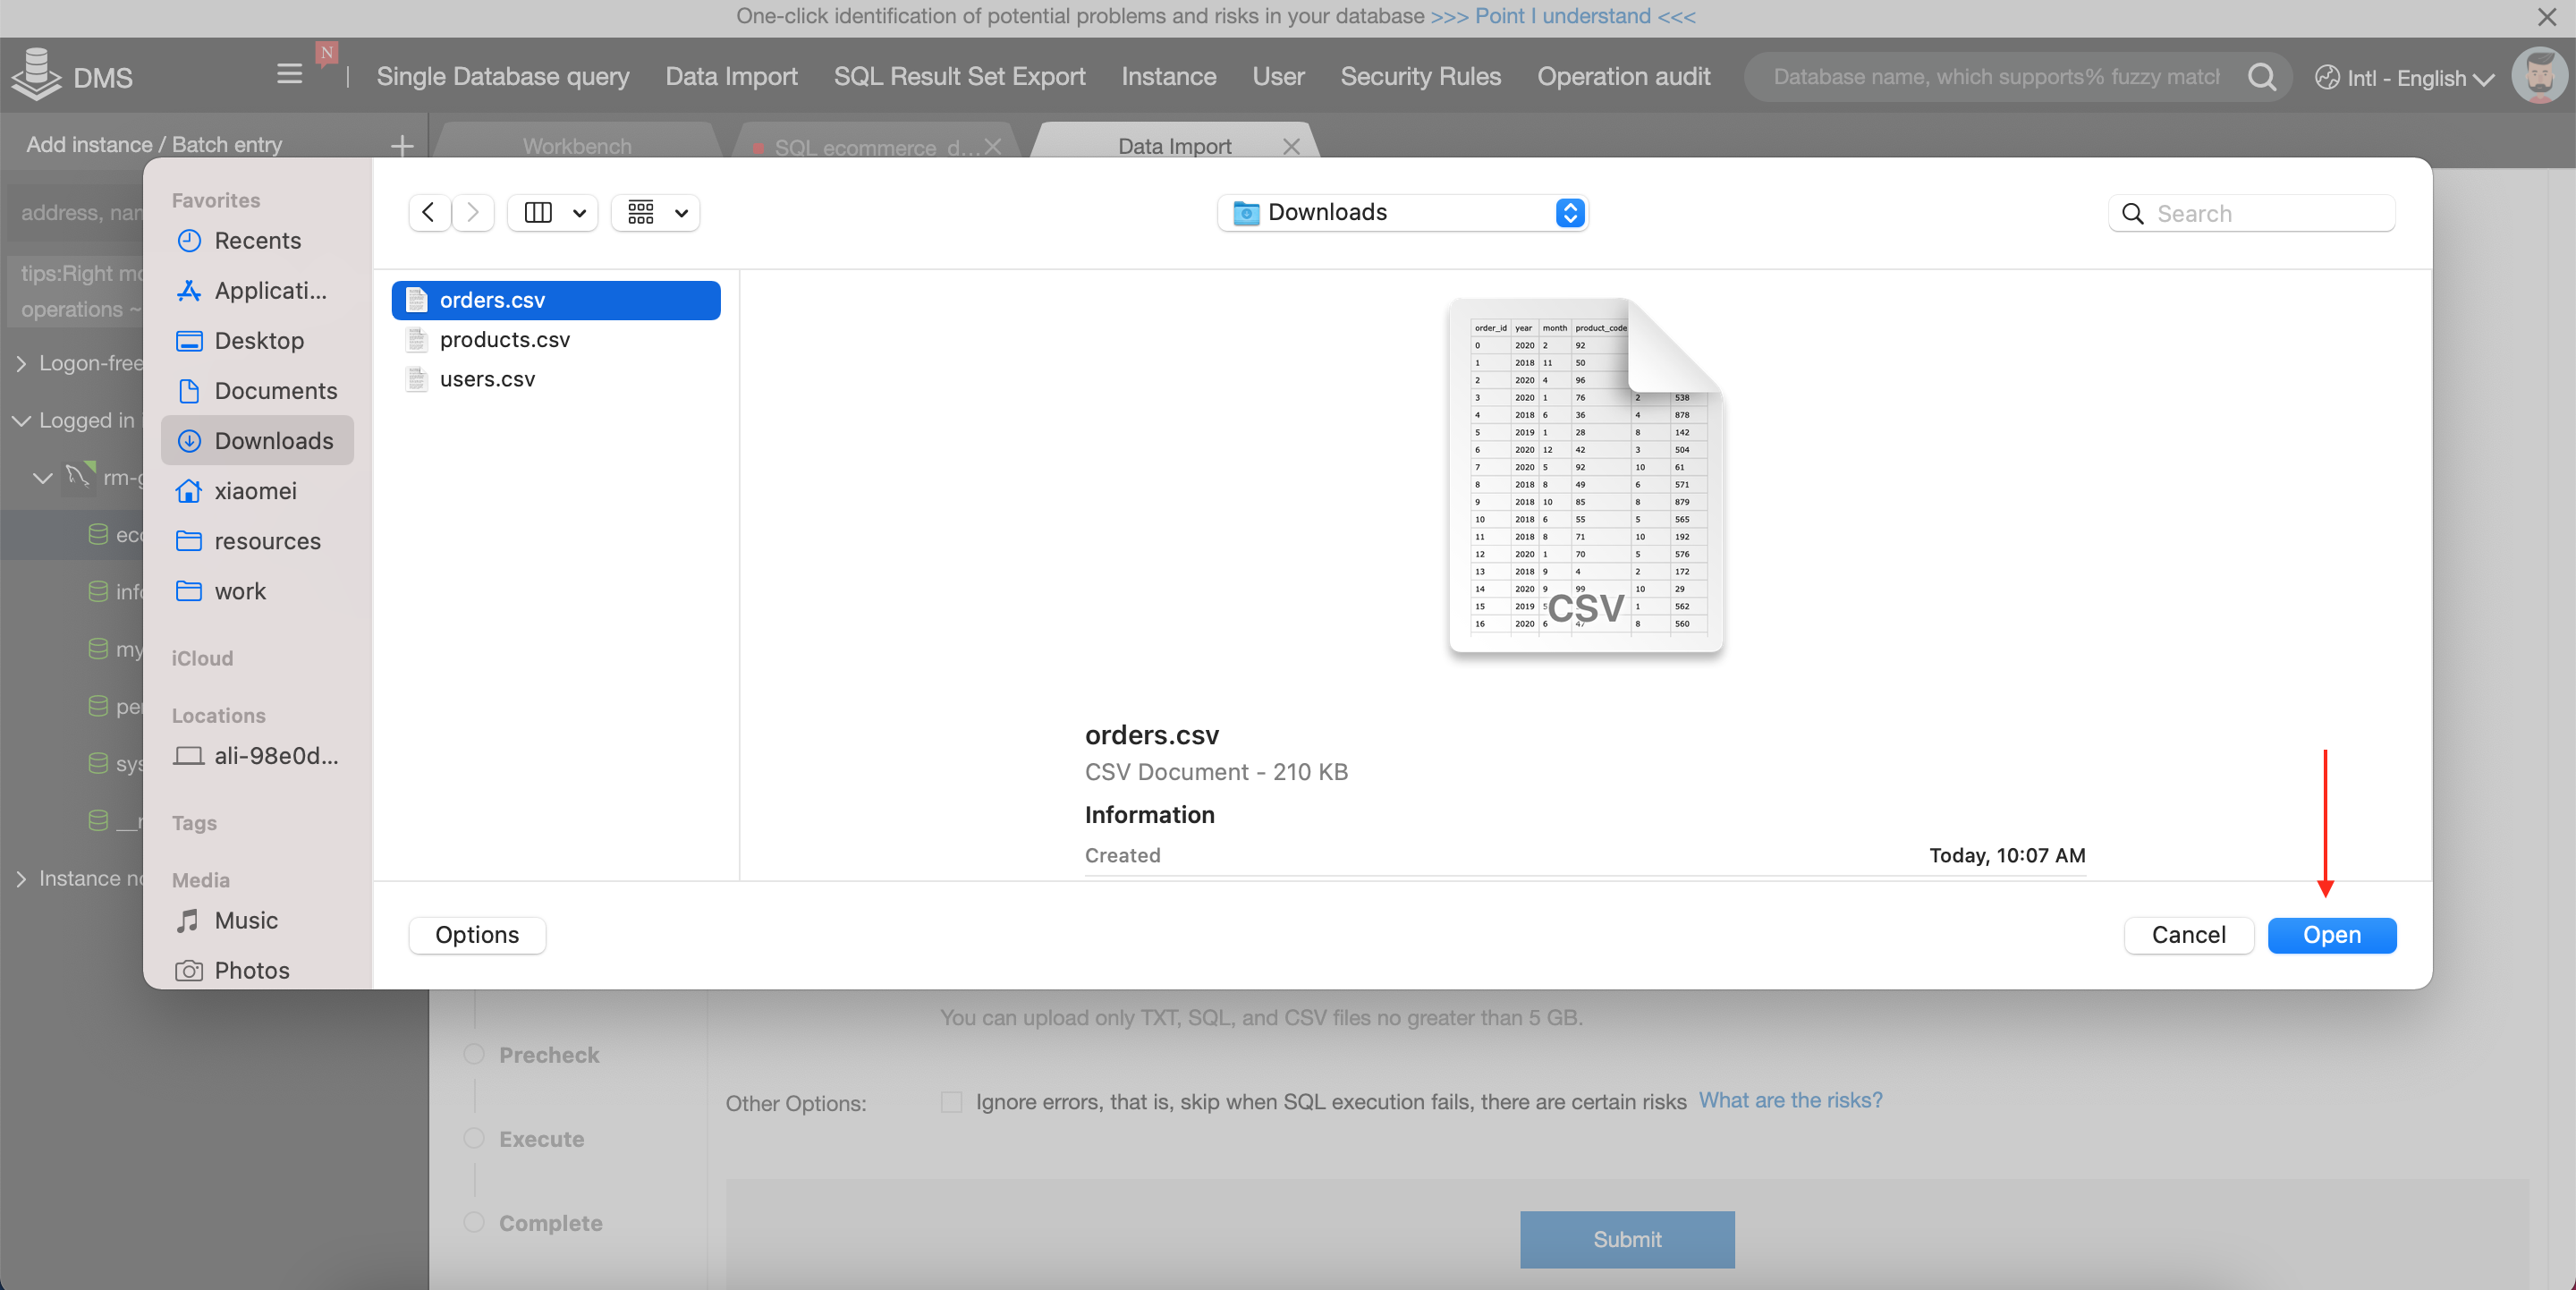
Next, we hit Submit to start the import job. Note that DMS is designed for multi-user scenarios, so typically after submitting a task, we need to set a schedule for the task and get approval from a DMS administrator. In this case, we are the administrator, so we can both submit and approve the task ourselves, like so:
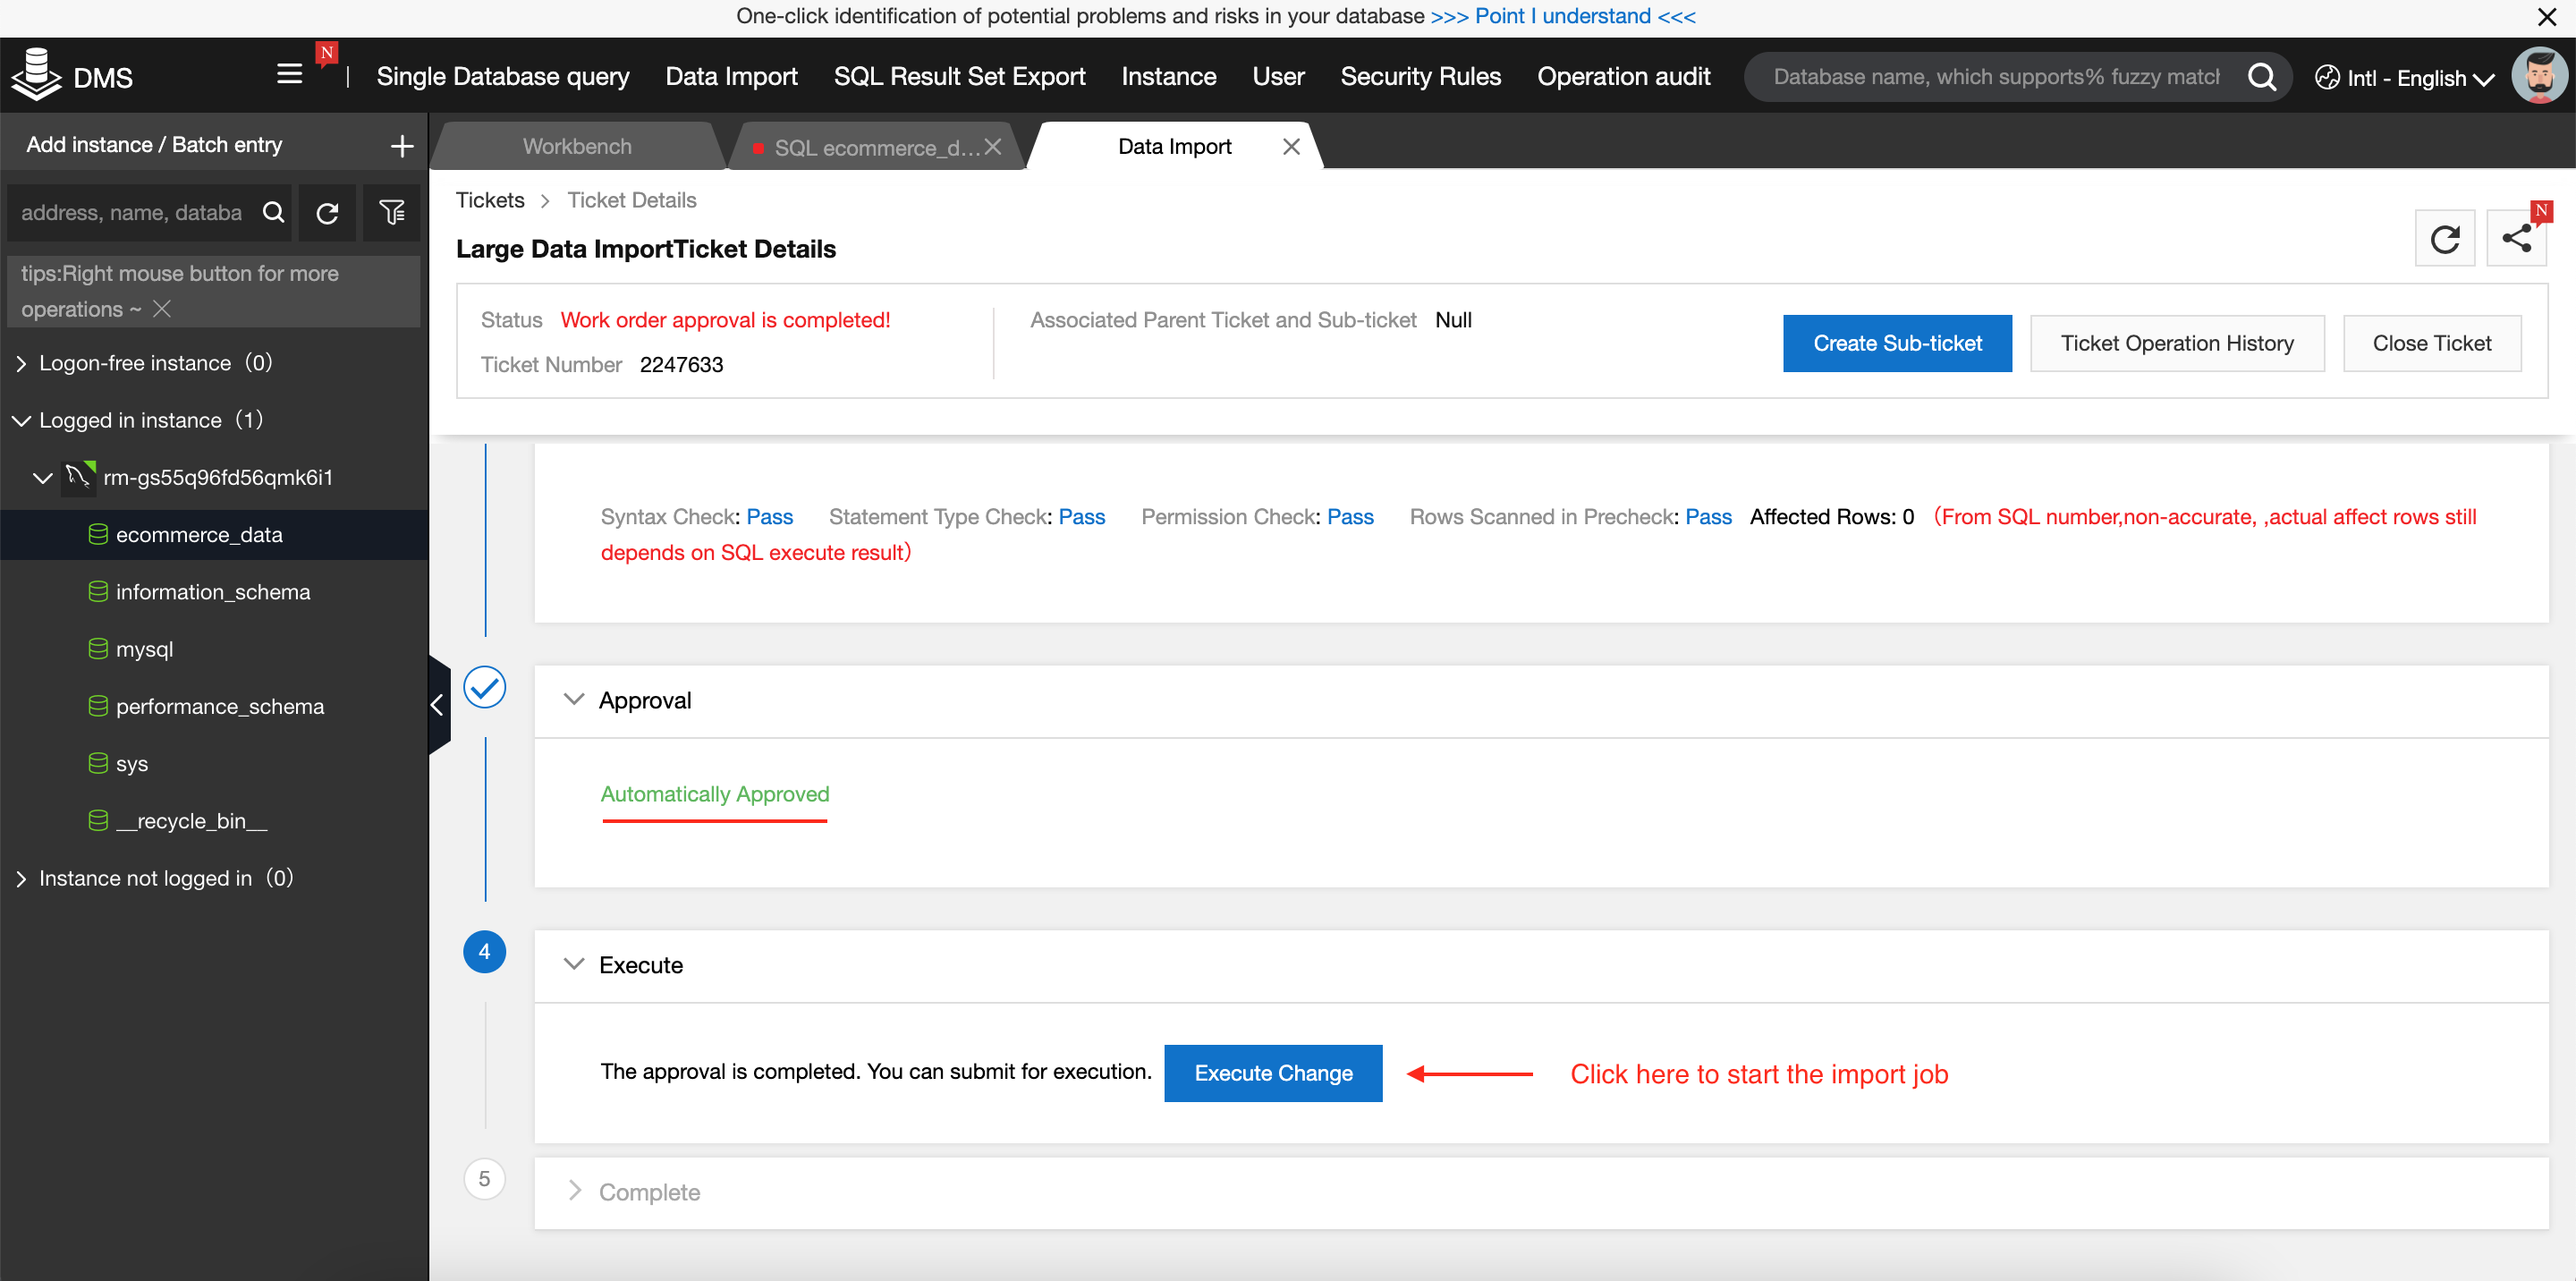
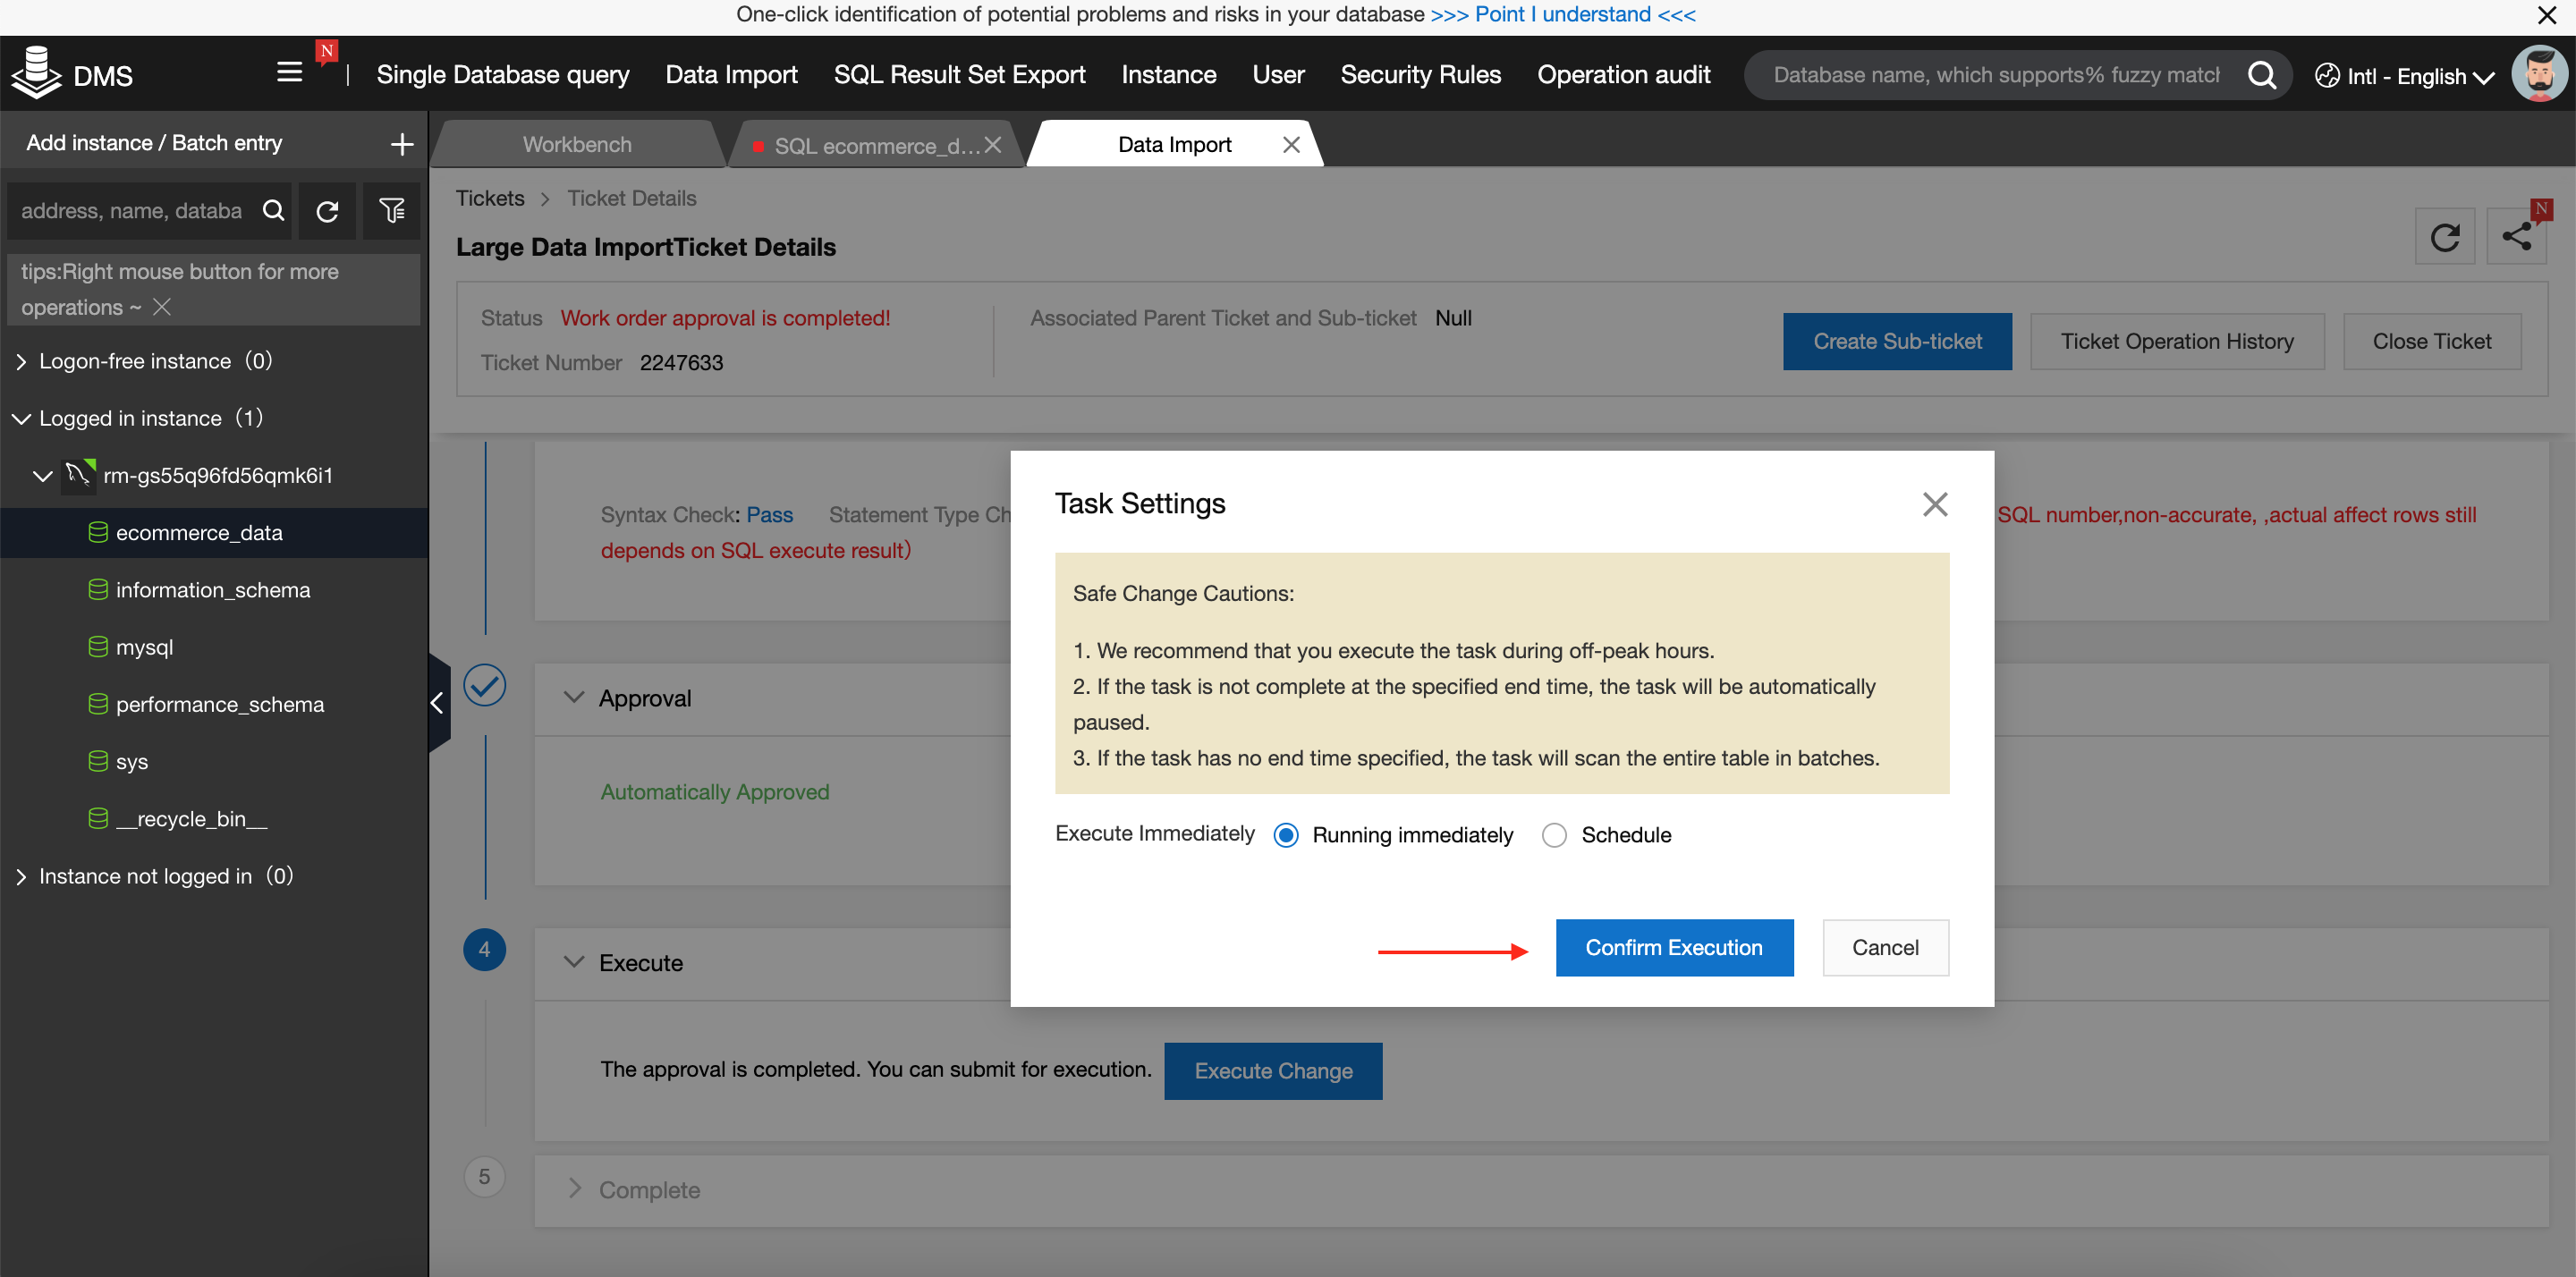
Clicking Execute Change will start the import job. We have the option to schedule the job to occur later, or run it right away. We will run it right now:
After the job is started, we can check its status here:
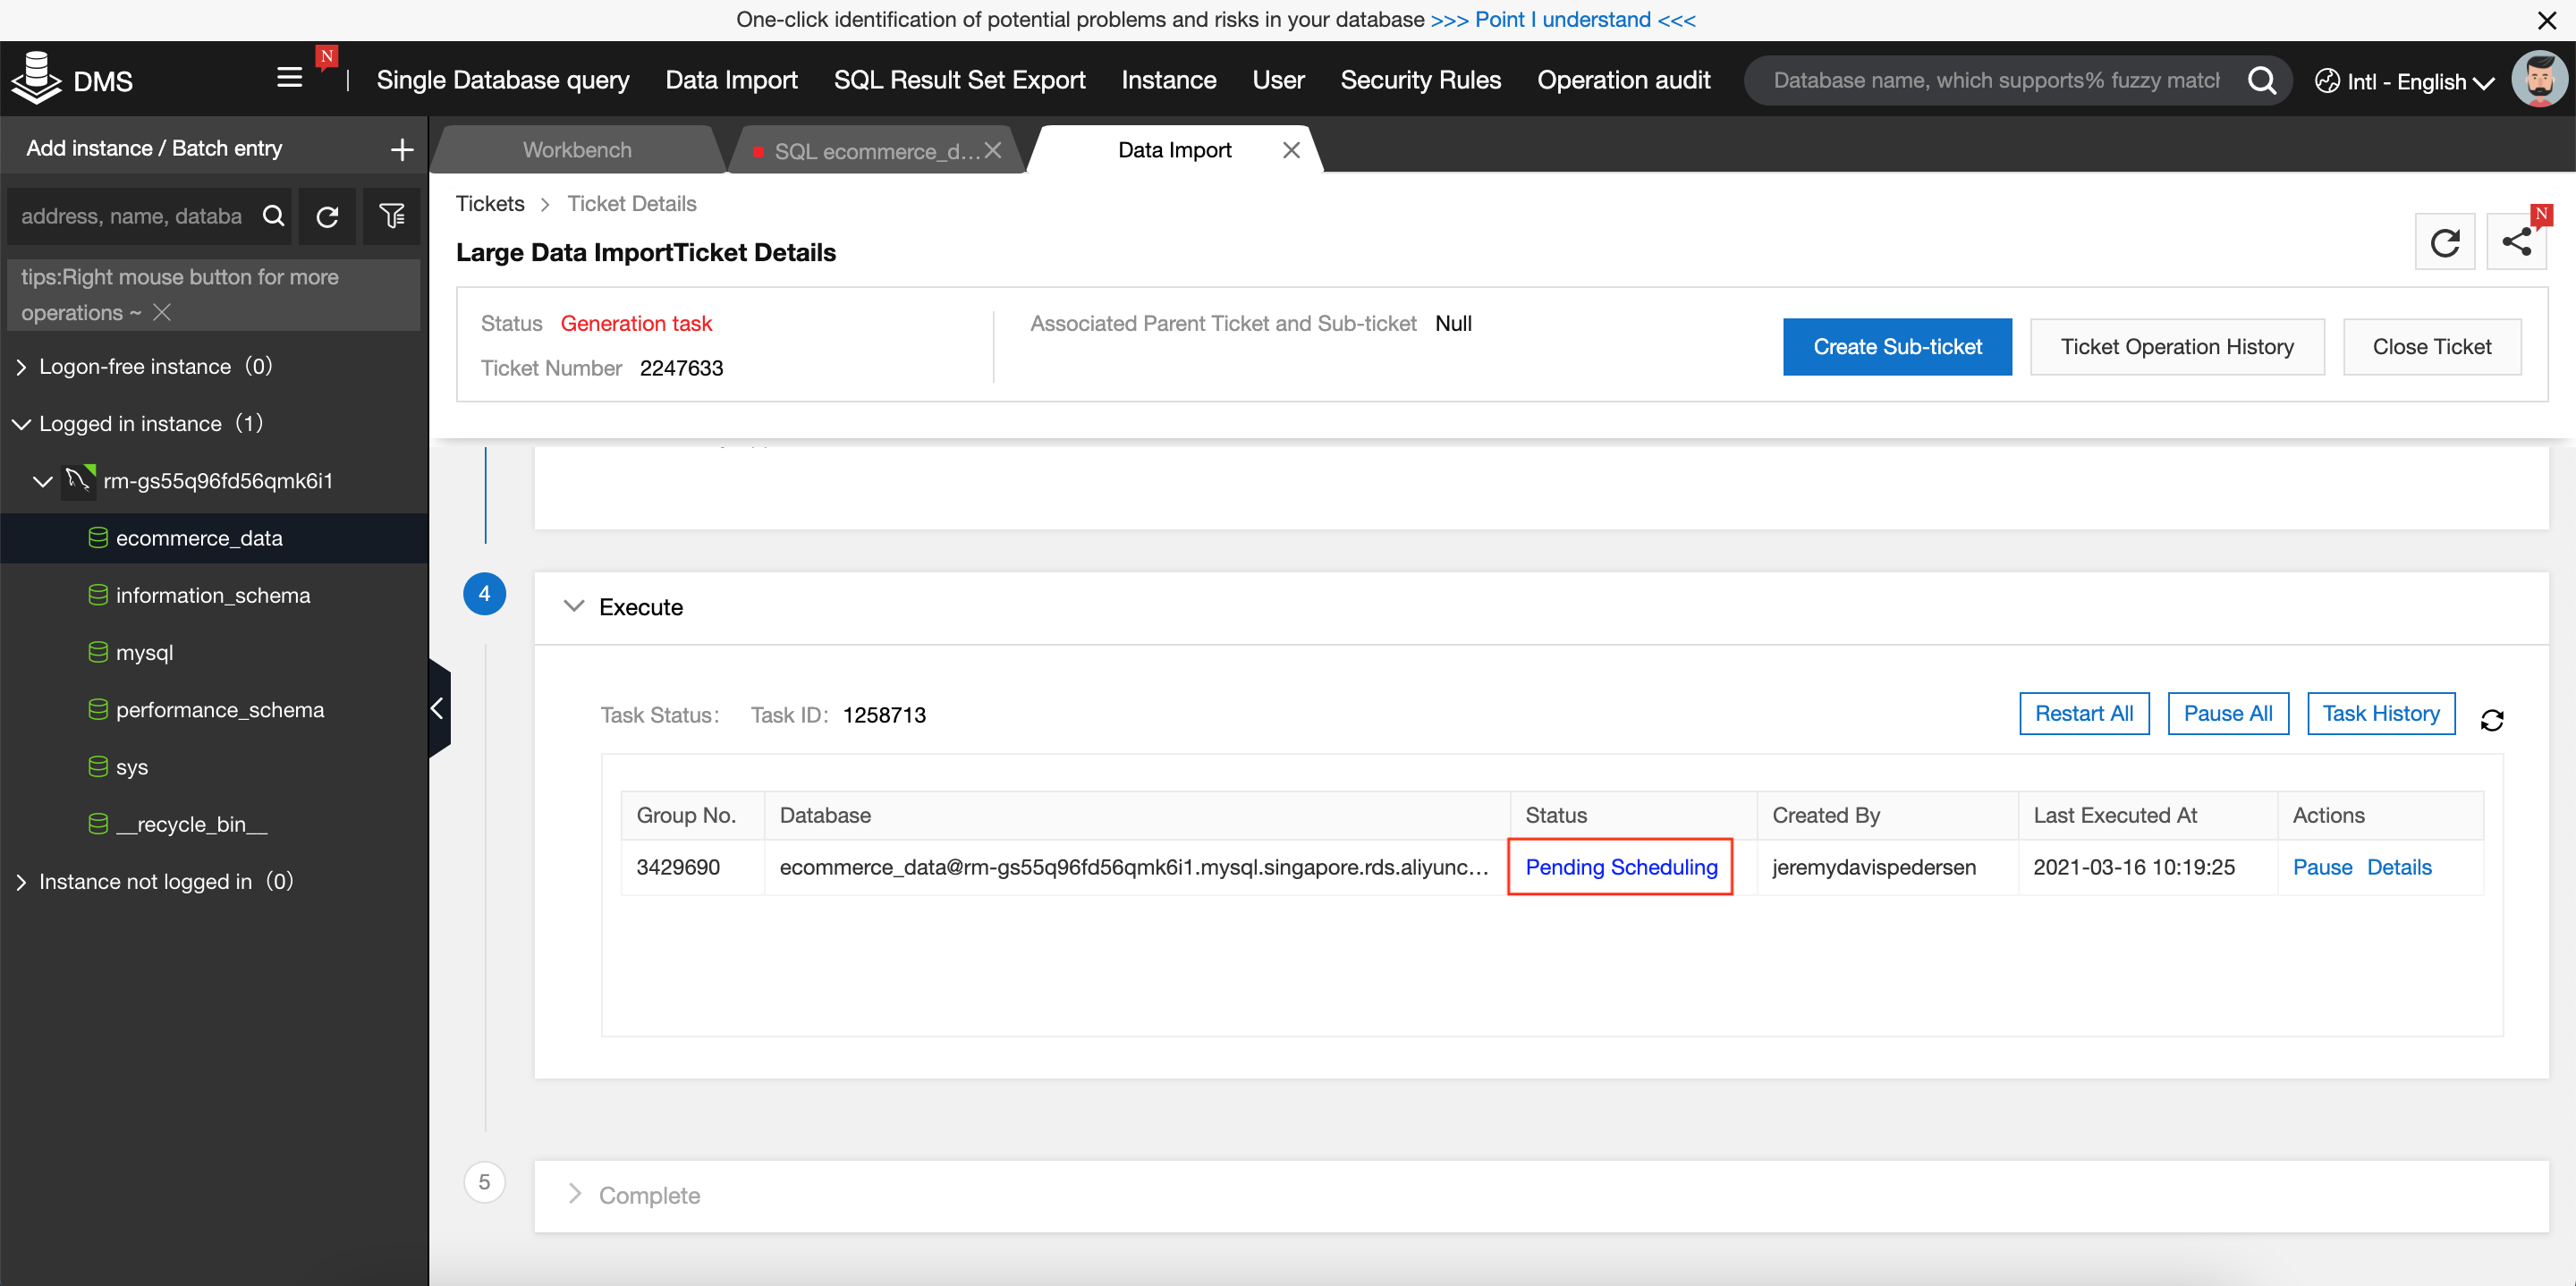
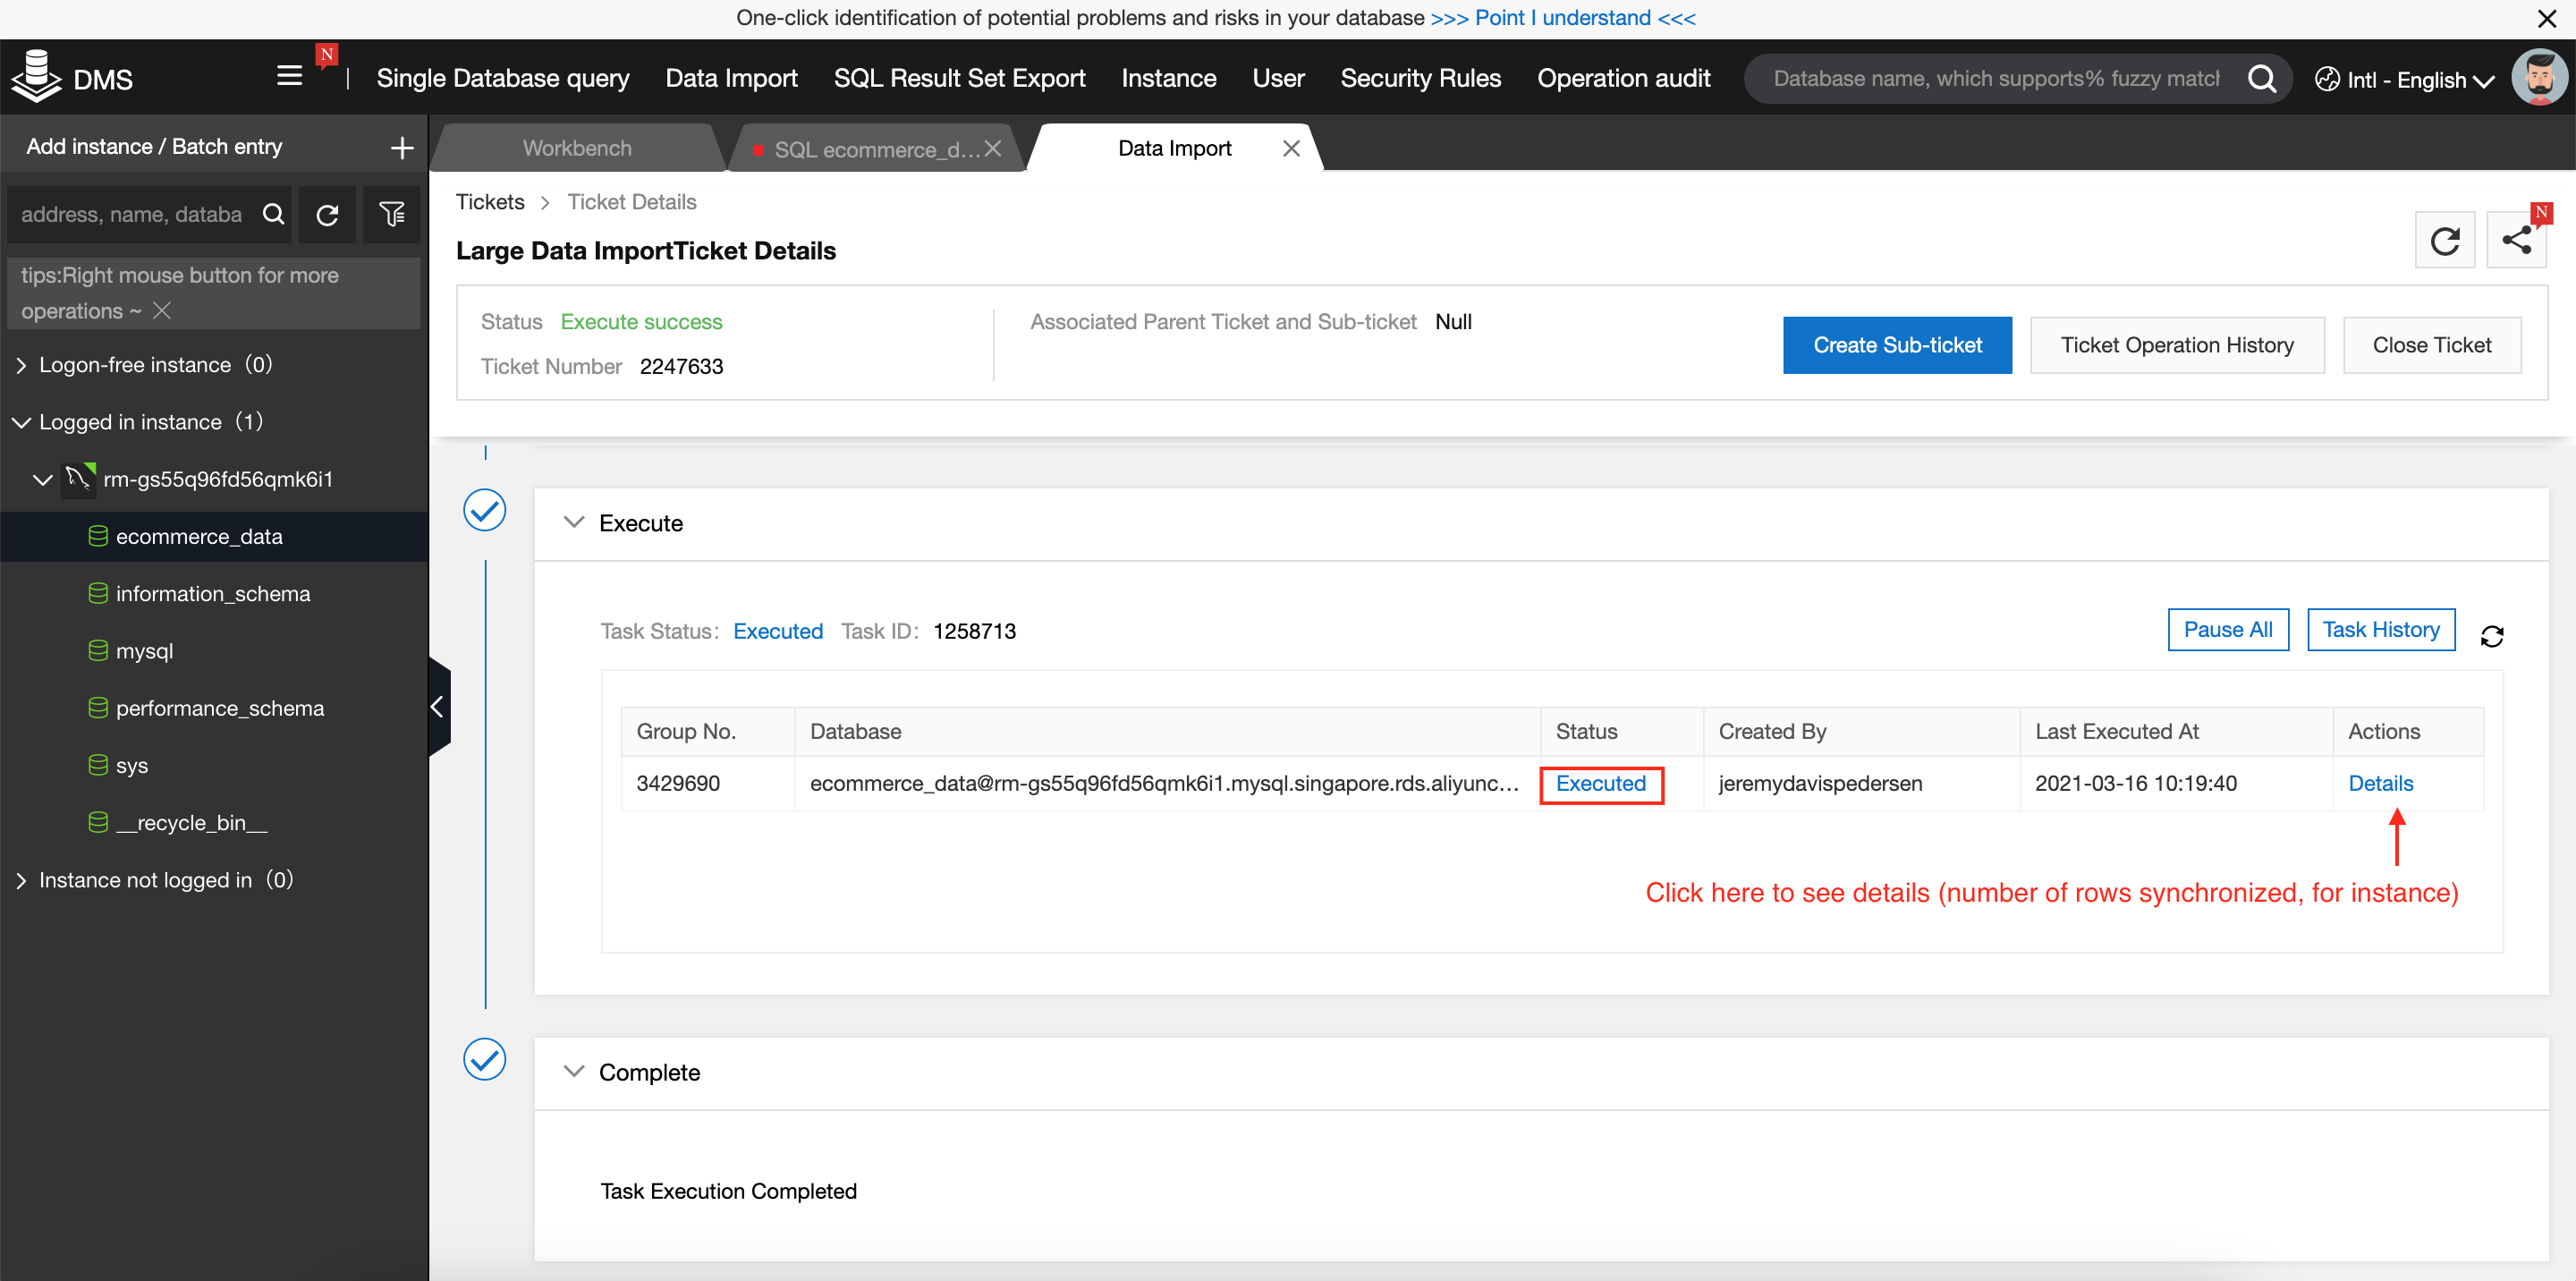
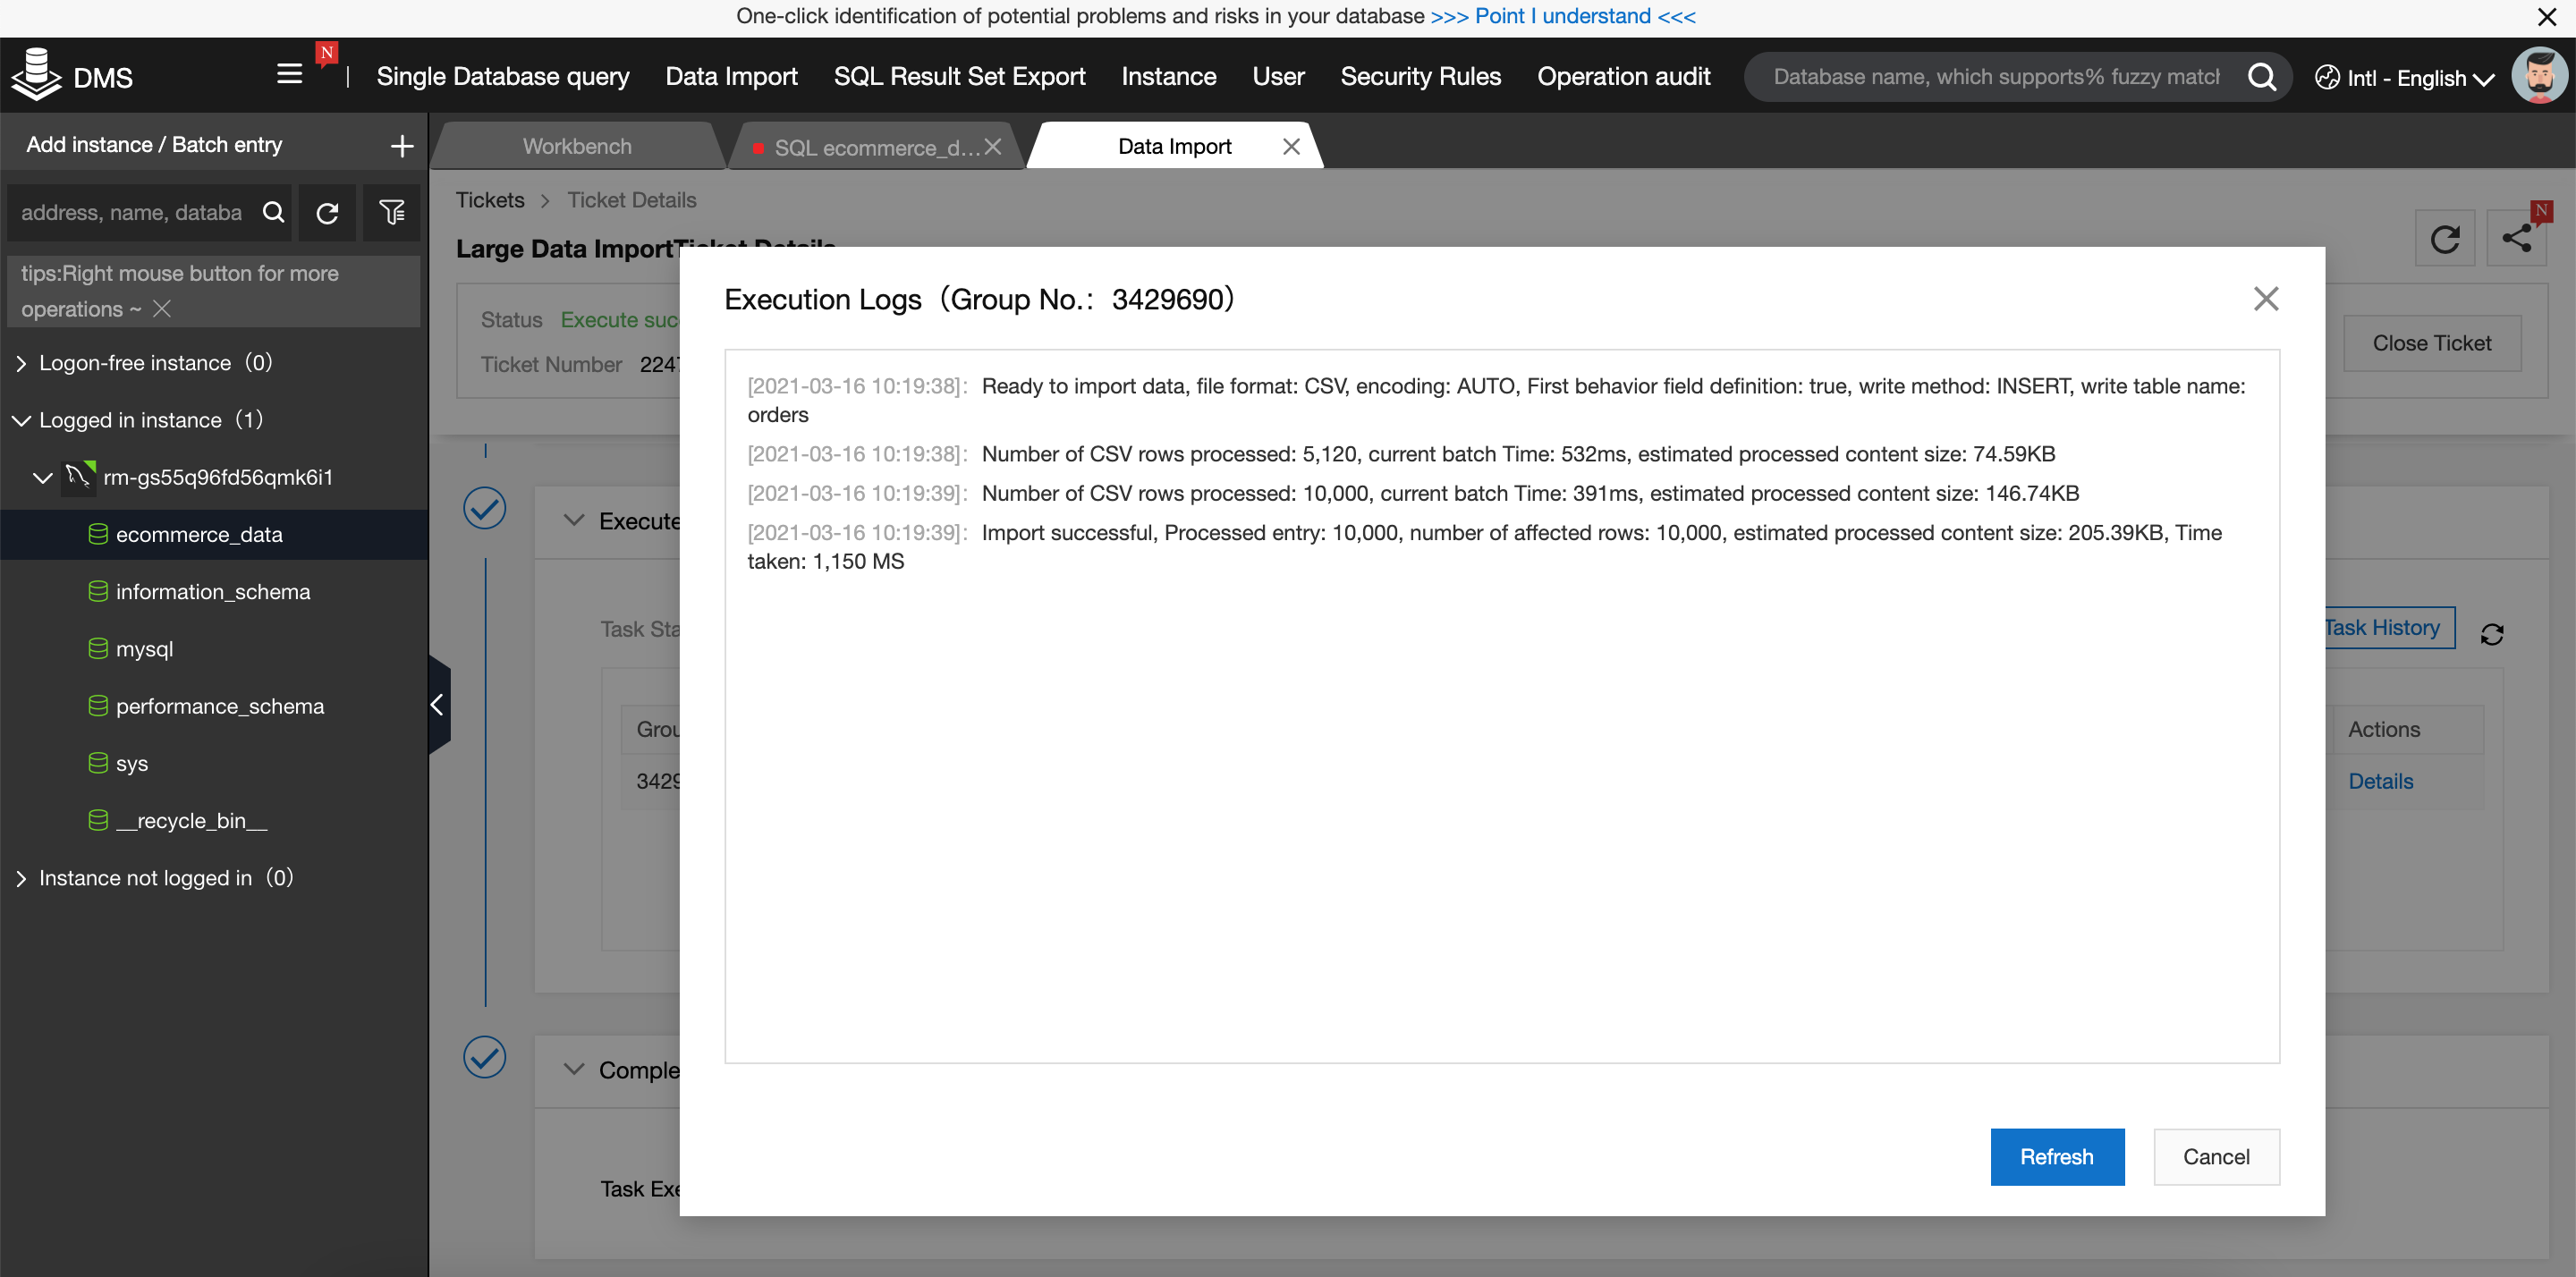
After a while, we can refresh the page, and we should now see the status of the task has changed to Executed. This indicates that the import job has succeeded. We can click on Details to see the logs generated by the import task:
Now we simply repeat this process for the other two tables, users and products.
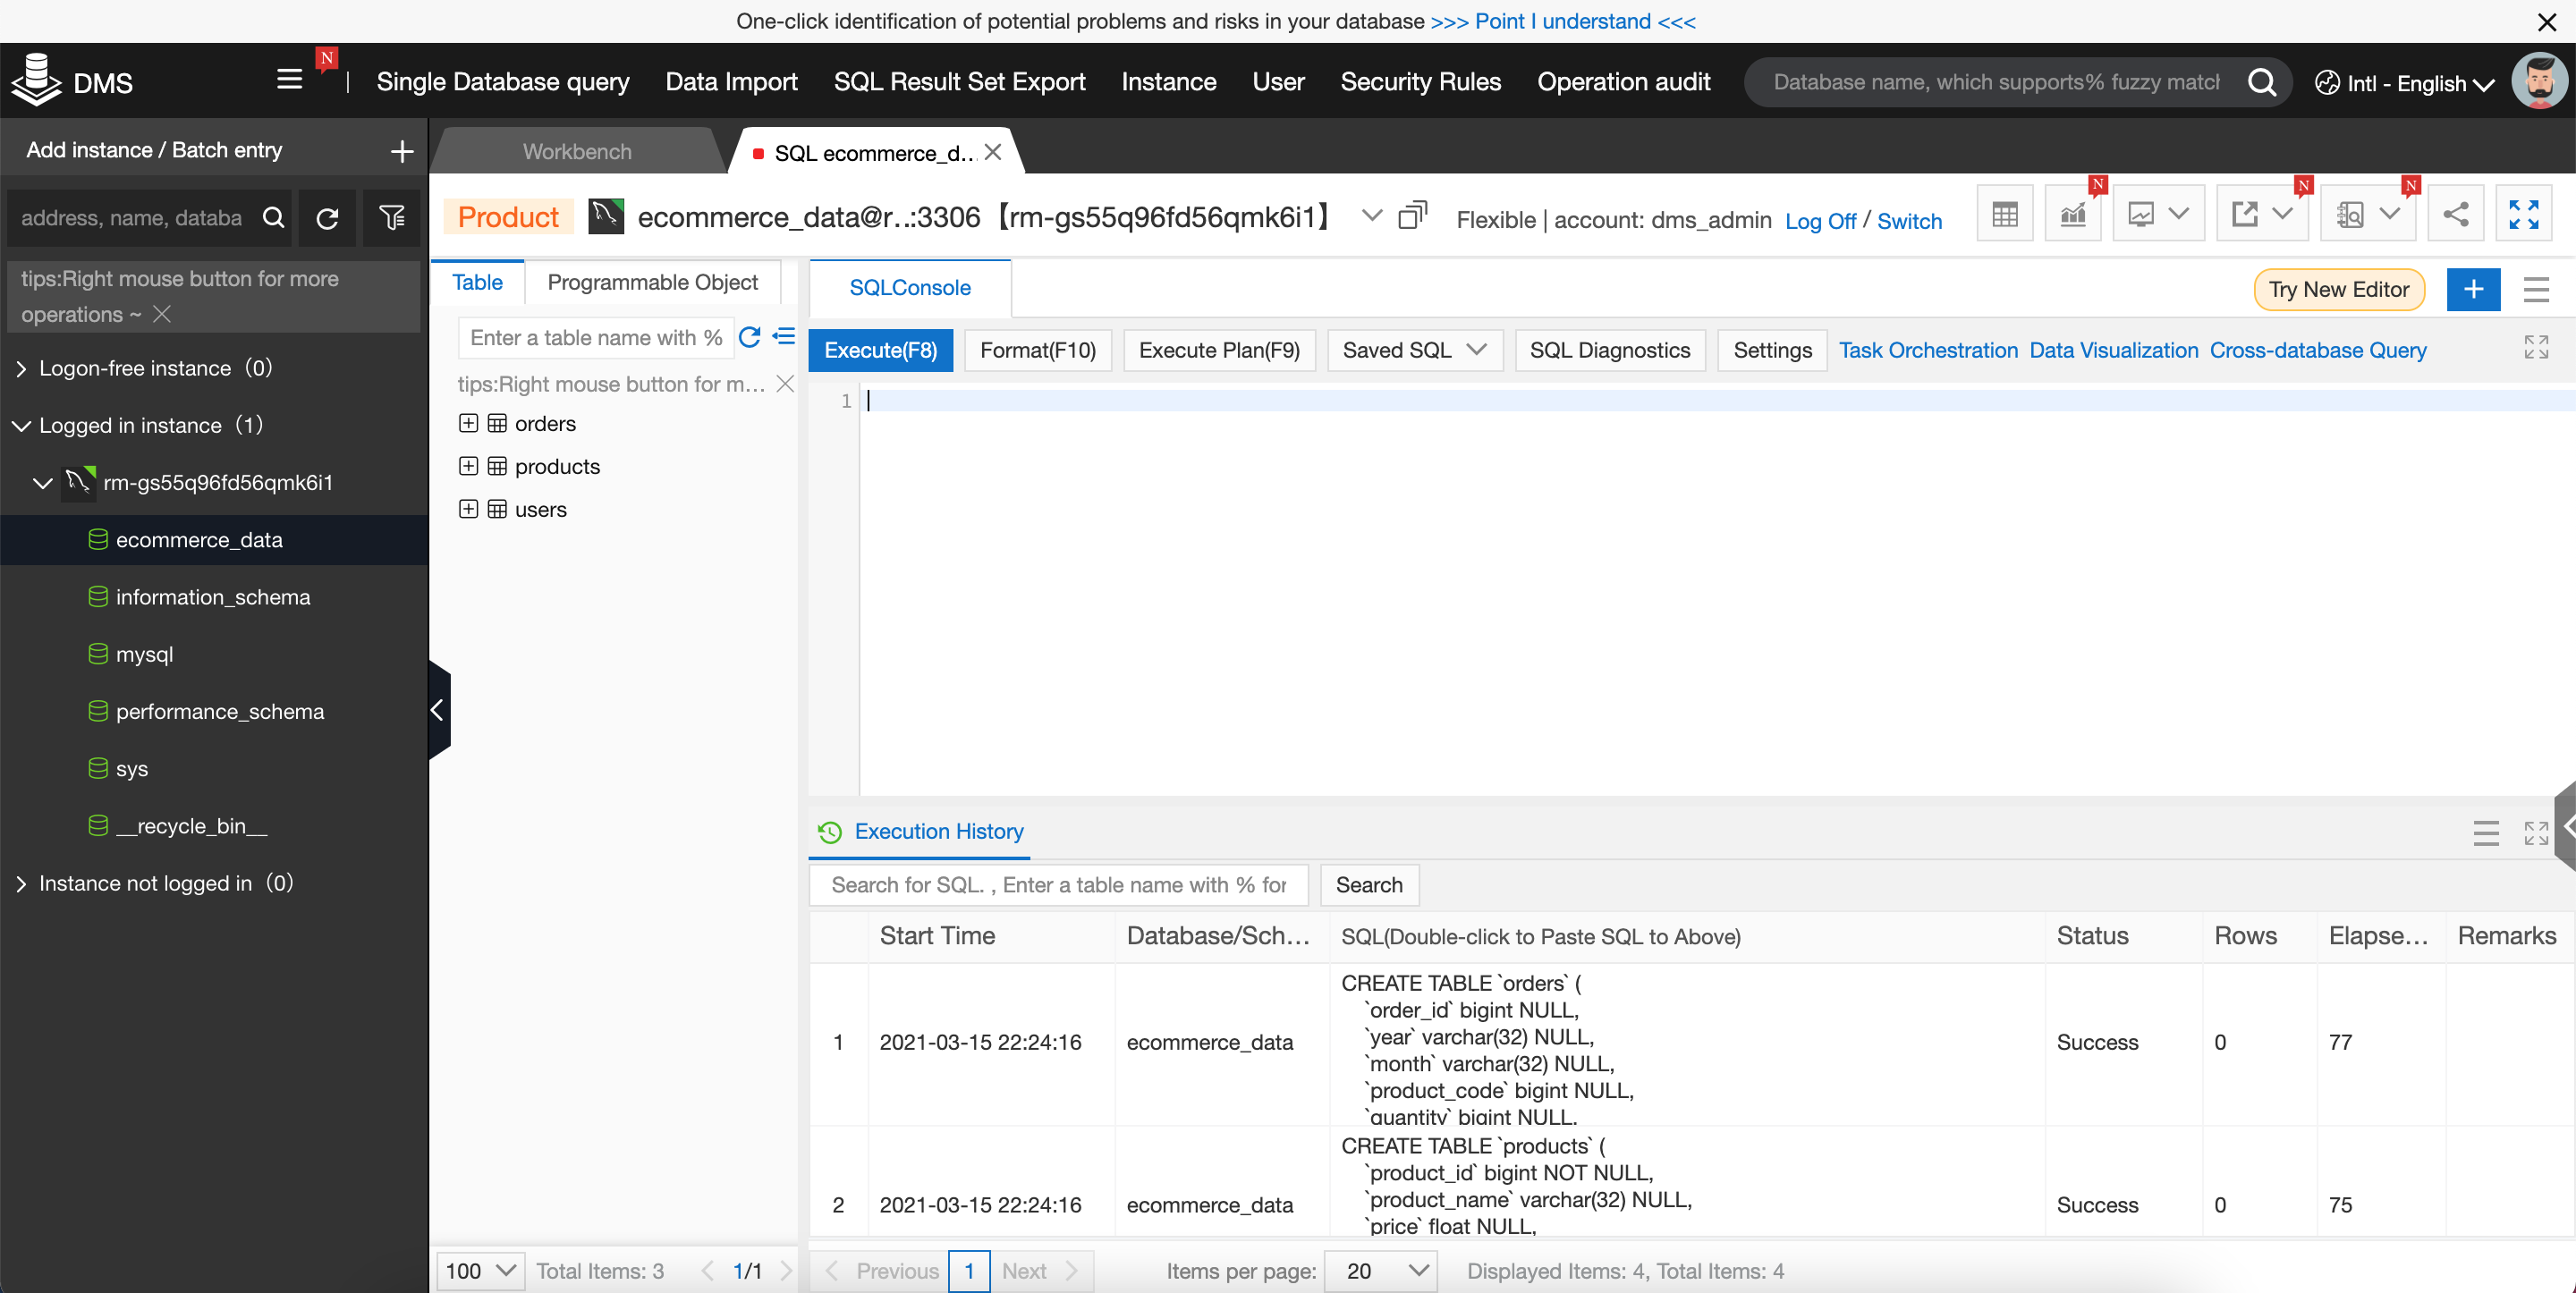
Got everything imported? Great! Let's try running some SQL queries. If you've closed the Data Import tabs and cleared out the CREATE TABLE SQL code, you should be looking at a nice, empty SQL query window, like this one:
Try executing the following SQL code:
SELECT * FROM users LIMIT 10;
SELECT * FROM products LIMIT 10;
SELECT * FROM orders LIMIT 10;
After clicking on Execute(F8) at the top of the window, you should have three new tabs appear at the bottom of the window, to the right of the Execution History tab:
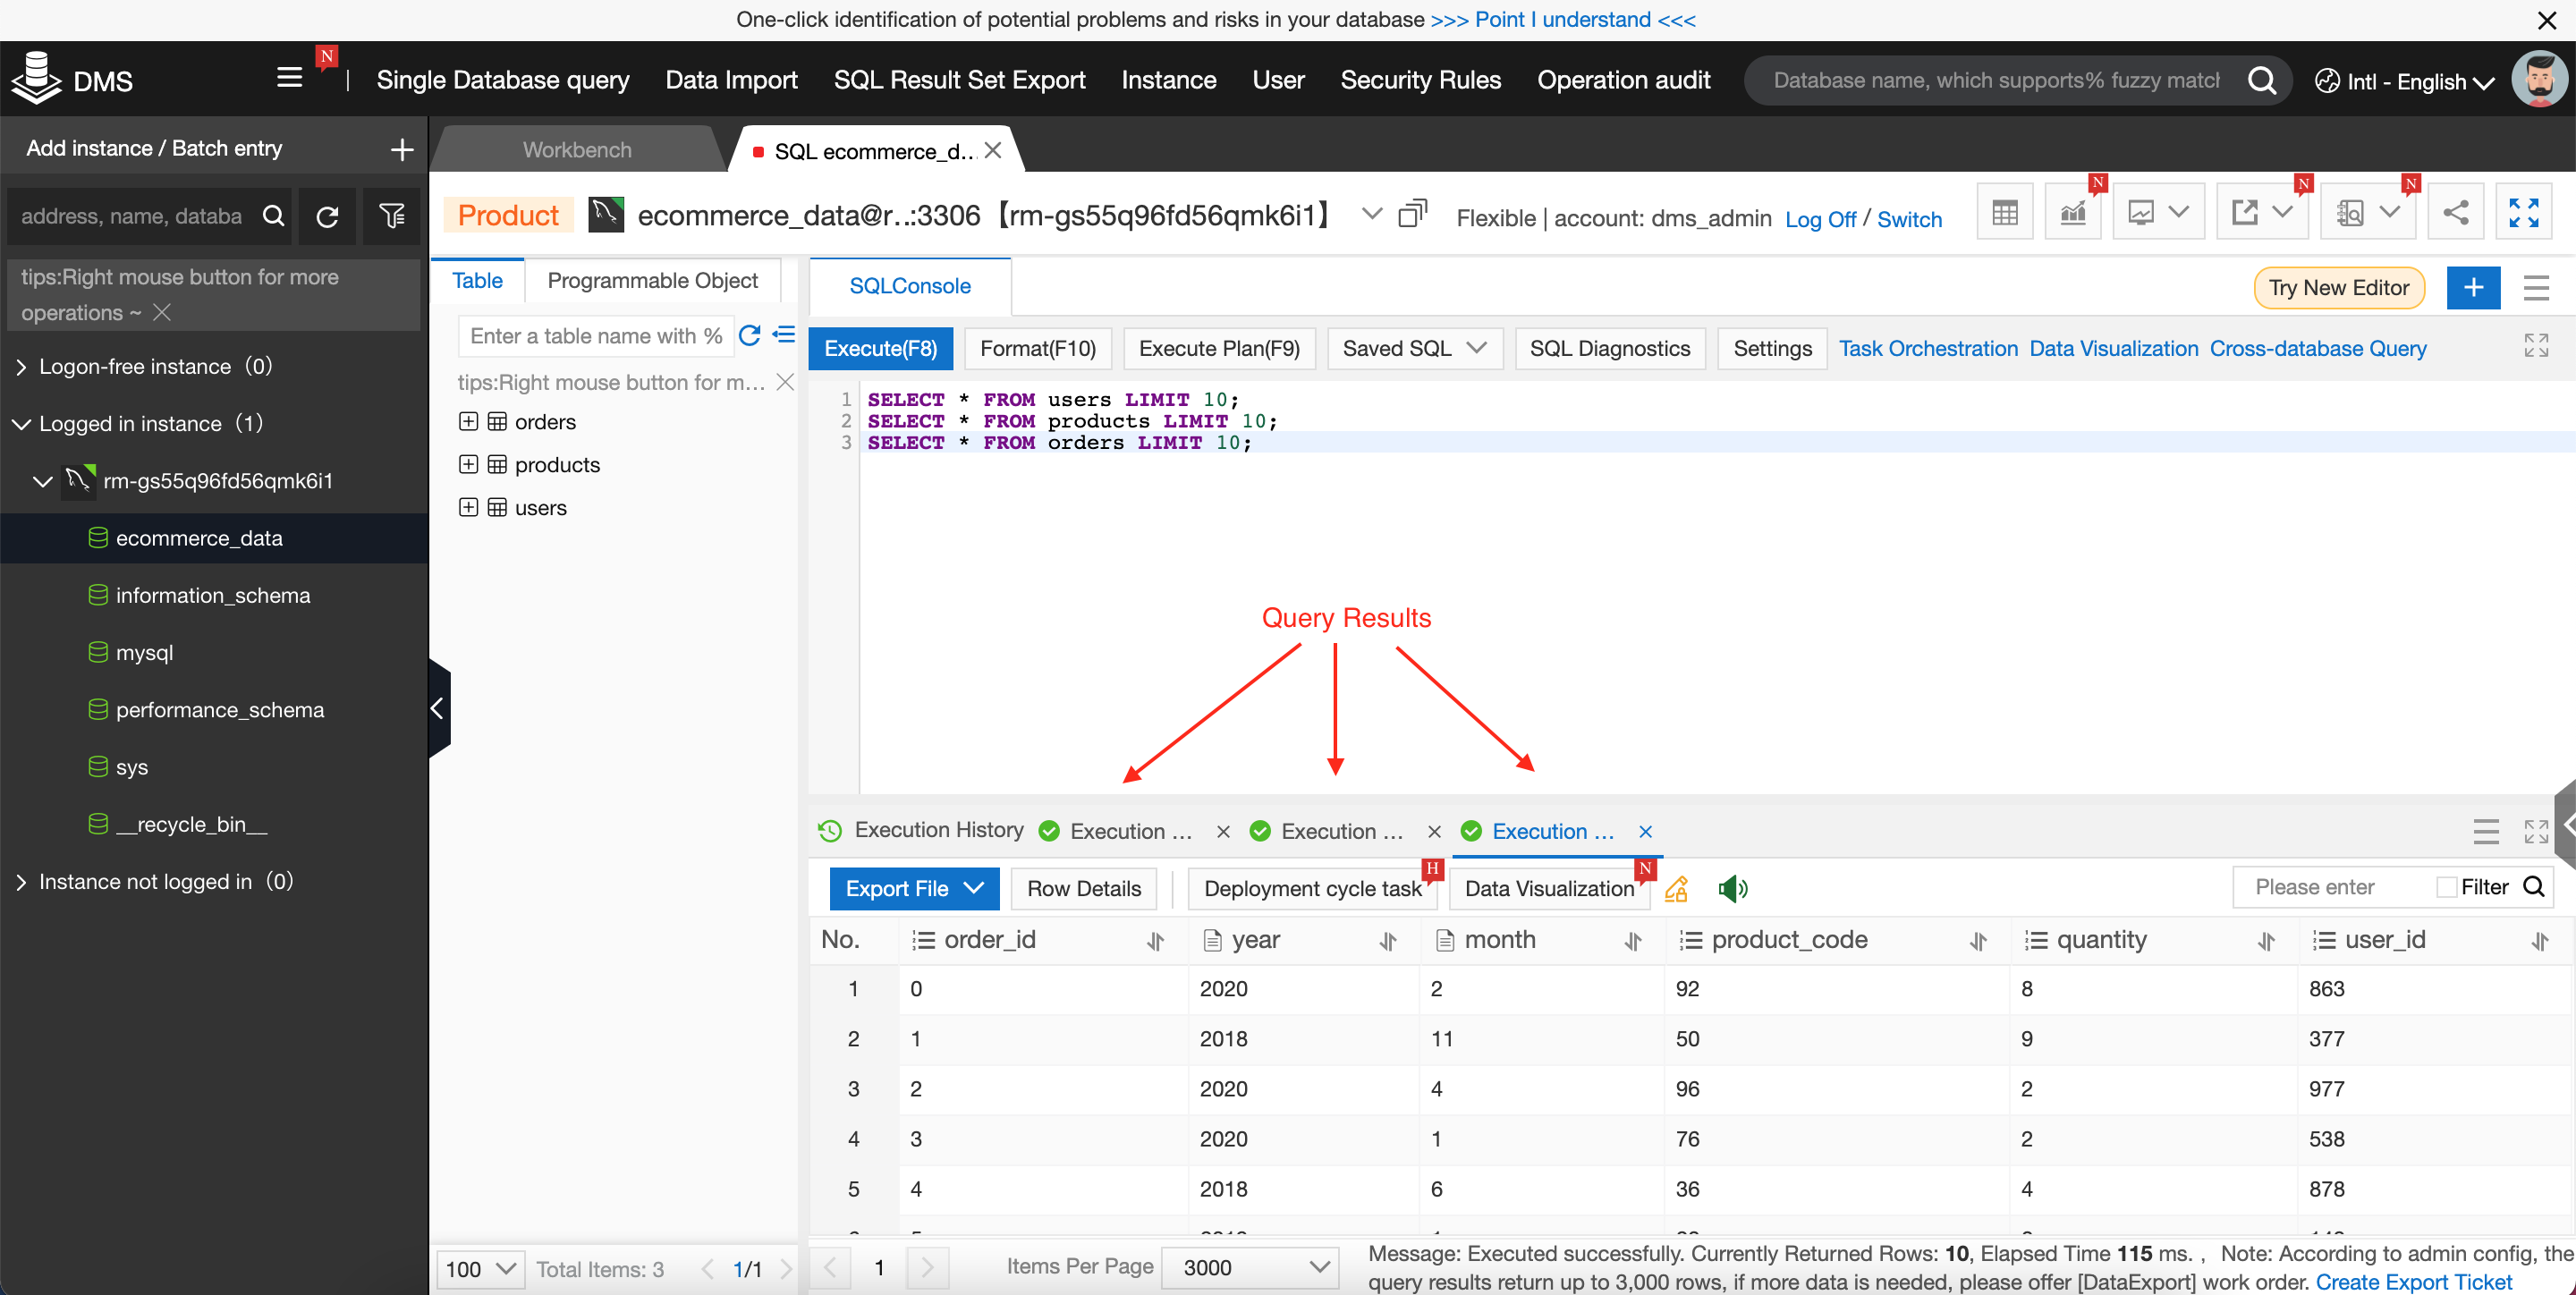
Take a look through these tabs, to confirm that the user, product, and order data has been imported successfully. In each tab you should see 10 rows of data from each of our three tables.
That's it! You now know how to use DMS to create tables, import data, and run queries.
Wondering what to try next? Here are a few suggestions:
For more helpful content, browse your way over to the Alibaba Cloud YouTube Channel or take a look at our blog on Medium
Your Friend in a need - July 16, 2020
Alibaba Cloud Community - March 28, 2022
JDP - December 23, 2021
ApsaraDB - November 17, 2020
ApsaraDB - June 18, 2021
Alibaba Clouder - July 16, 2020

Your article was thought-provoking and challenged me to reconsider my own beliefs on the topic.
 ApsaraDB RDS for MySQL
An on-demand database hosting service for MySQL with automated monitoring, backup and disaster recovery capabilities
Learn More ApsaraDB RDS for PostgreSQL
An on-demand database hosting service for PostgreSQL with automated monitoring, backup and disaster recovery capabilities
Learn More ApsaraDB RDS for MariaDB
ApsaraDB RDS for MariaDB supports multiple storage engines, including MySQL InnoDB to meet different user requirements.
Learn More ApsaraDB RDS for SQL Server
An on-demand database hosting service for SQL Server with automated monitoring, backup and disaster recovery capabilities
Learn MoreMore Posts by JDP
5792153054131074 May 31, 2022 at 2:57 pm
Awesone