The DesktopAssistant is a helpful tool for managing your cloud computer. It provides various management features and utilities. You can show or hide content on the DesktopAssistant and its menu panels. This topic describes how to configure these settings.
This topic uses the macOS client V7.13 and the Enterprise Edition as an example. If your experience differs from the description in this topic, you may be using a different client or an outdated version. Upgrade to the latest version.
Prerequisites
You have logged on to the desktop client. For more information, see Log on to a desktop client.
You have been assigned a cloud computer. If no cloud computer is available after you log on, contact your IT administrator to have one assigned to you. For more information, see Assign cloud computers to users.
Set the display content of the DesktopAssistant
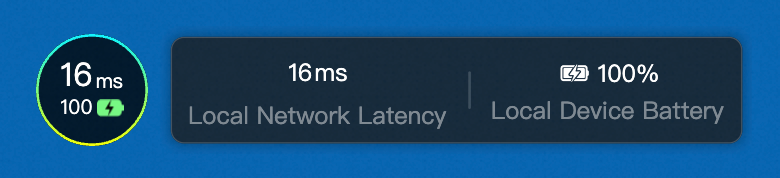
By default, the DesktopAssistant displays the current network latency. You can also choose to display the battery level of your local device.
Connect to the cloud computer.
Open the DesktopAssistant and click Manage.
Choose tab. In the DesktopAssistant Display area, enable the Local Device Battery.

If this feature is enabled, the DesktopAssistant displays the remaining battery percentage of your local laptop as a ring chart when you run the desktop client. When you hover over the DesktopAssistant, the pop-up panel also displays the battery level and charging status of your local laptop.
NoteThis feature requires the desktop client V7.8 or later.
Set the display content of the DesktopAssistant menu panel
Only administrators of the Elastic Desktop Service (EDS) Enterprise Edition can configure the visibility of features on the DesktopAssistant menu panel. End users cannot configure these settings.
Procedure
Log on to the Elastic Desktop Service Enterprise console.
In the left-side navigation pane, choose .
In the upper-left corner of the top navigation bar, select a region.
On the Policies page, find the policy that is associated with the cloud computer. In the Actions column, click Change Policy.
NoteIf the cloud computer is associated with the system policy
system-all-enabled-policy, you must create a custom policy in the EDS Enterprise console and associate it with the cloud computer. This is because system policies cannot be modified. For more information, see Create a custom policy and Change an associated policy.On the Modify Policy page, click DesktopAssistant Management in the navigation pane on the left. In the Desktop Client section, enable or disable the features.

Mapping between DesktopAssistant features and policy configuration items
DesktopAssistant first-level menu panel

The features marked in the above figure correspond to the following configuration items for cloud computer DesktopAssistant management:
Xiaoying AI Assistant (requires desktop client V7.7 or later)
Status Monitoring (requires desktop client V7.7 or later)
Cloud Computer Manager (requires desktop client V7.7 or later)
Screen Mirroring (requires desktop client V7.9 or later)
Windows Image Security Center Shortcut Key (requires desktop client V7.11 or later)
Metering Information (requires desktop client V7.13 or later)
File migration panel

The feature marked in the above figure corresponds to the Data Migration Tool configuration item (requires desktop client V7.10 or later).