Web applications have high security requirements, especially during critical events such as holidays and attack and defense drills. We recommend that you configure the core protection rule module and critical event protection feature to enhance protection for your web applications. This topic describes how to configure the critical event protection feature.
Prerequisites
A Web Application Firewall (WAF) 3.0 instance is purchased. For more information, see Purchase a WAF 3.0 subscription instance and Activate a pay-as-you-go WAF 3.0 instance.
The critical event protection feature is enabled. For more information, see Critical event protection.
Configuration process

Step 1: Make sure that all assets are added to WAF
Before you configure the critical event protection feature, make sure that all your web applications are added to WAF. You can check whether all your web applications are added to WAF on the Asset Center page in the WAF console. For more information, see Asset Center.
-
Log on to the Web Application Firewall 3.0 console. From the top menu bar, select the resource group and region (Chinese Mainland or Outside Chinese Mainland) for the WAF instance.
In the left-side navigation pane, click Asset Center.
On the Asset Center page, click the Overview tab. In the asset list, find your primary domain name and view the value in the Unprotected Subdomains column.
If the value in the Unprotected Subdomains column is 0, all subdomains of the primary domain name are added to WAF.
If the value in the Unprotected Subdomains column is not 0, specific subdomains of the primary domain name are not added to WAF.
Click the
 icon to the left of the primary domain name. Find the unprotected subdomains whose value in the Status column is Not Added and click Add in the Actions column.
 On the Onboarding page, add the unprotected subdomains to WAF. For more information, see Add a domain name.
Step 2: Configure protection rules for the origin server
After you add a website to WAF in CNAME record mode, WAF filters the requests that are destined for the website and forwards normal requests to the origin server of the website. You can configure access control rules for your website during critical events to prevent direct-to-origin attacks and allow inbound traffic only from the back-to-origin CIDR blocks of WAF.
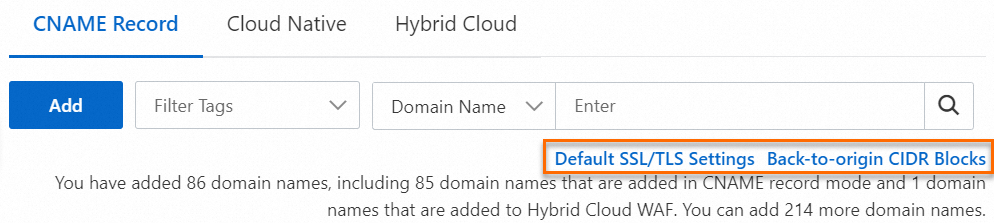
In the left-side navigation pane, click Onboarding.
On the CNAME Record tab, click Back-to-origin CIDR Blocks. In the Back-to-origin CIDR Block dialog box, click Copy.
Configure access control rules for the origin server and allow traffic from the CIDR blocks that you copied in Step 2. For more information, see Step 3: Configure security group rules for the ECS instance or Step 4: Configure access control policies for the SLB instance.
Step 3: Configure access sources for the original server
During critical events, you can configure blacklist rules to block requests from IP addresses in specific regions, data centers, or third-party cloud service providers. You can also configure whitelist rules to allow traffic from specific IP addresses based on your business requirements. For more information, see Configure whitelist rules to allow specific requests.
Region blacklist
-
In the navigation pane on the left, choose .
In the Geo-blocking section, click Create Template or click Edit in the Actions column for an existing template.
In the panel that appears, select the regions from which you want to block requests in the Select Regions to Block section and configure the Action parameter in the Rule Configuration section and the settings in the Apply To section. Then, click OK.
Data center blacklist
In the left-side navigation pane, choose .
Click the Scenario-specific Protection tab. On this tab, click Create Template or click the modify icon for an existing template.
In the Configure Scenarios step of the panel that appears, configure the basic information about the website that you want to protect and click Next.
In the Configure Protection Rules step, clear all check boxes. In the Bot Threat Intelligence section, select Data Center Blacklist and configure the IP Library and Action parameters. Then, click Next.
In the Configure Effective Scope step, select the protected objects and protected object groups to which you want to apply the template in the Apply To section. Then, click Next.
Step 4: Configure the core protection rule module
During critical events, we recommend that you set the Action parameter to Block in protection rules of the core protection rule module to automatically block malicious requests.
In the left-side navigation pane, choose .
In the Core Protection Rule section, click Create Template or click Edit in the Actions column for an existing template.
In the panel that appears, set the Action parameter in the Rule Configuration section to Block and select all protected objects and protected object groups in the Apply To section.
Step 5: Configure the scan protection module
During critical events, attackers may use scanners to identify vulnerabilities. To protect your website from vulnerability scanning attacks, we recommend that you turn on High-Frequency Scan Block, Directory Traversal Blocking, and Scanner Blocking. This way, you can prevent attackers from obtaining information about the origin server and block manual attacks.
In the left-side navigation pane, choose .
In the Scan Protection section, click Create Template or click Edit in the Actions column for an existing template.
In the panel that appears, turn on High-Frequency Scan Block, Directory Traversal Blocking, and Scanner Blocking. Then, configure the Action parameter in the Rule Configuration section and the settings in the Apply To section.
Step 6: Configure the critical event protection feature
The critical event protection feature provides scenario-based protection capabilities, including threat intelligence for critical event protection, rule groups for critical event protection, IP address blacklist for critical event protection, and Shiro deserialization vulnerability prevention. You can perform the following operations to configure the critical event protection feature.
-
In the navigation pane on the left, choose .
On the Protection Templates tab, click Create Template or click Edit in the Actions column for an existing template.
In the panel that appears, configure the parameters. The following table describes the parameters.
Configure the basic information and click Next.
Parameter
Description
Template Name
Specify a name for the template.
The name must be 1 to 255 characters in length and can contain Chinese characters, uppercase and lowercase letters, digits, periods (.), underscores (_), and hyphens (-).
Protection Features
Configure protection rules and configure protection actions.
Threat Intelligence for Protection for Critical Events: This feature can accurately identify attackers based on the Alibaba Cloud libraries of malicious IP addresses. By default, the feature is enabled and the protection action is set to Monitor.
Protection Rule Group for Critical Events: This feature provides precise protection rules for each user based on the intelligent protection model. By default, the feature is enabled and the protection action is set to Monitor.
IP Address Blacklist for Protection for Critical Events: This feature supports 50,000 custom IP addresses or CIDR blocks in the blacklist.
Shiro Deserialization Vulnerability Prevention: This feature defends against Apache Shiro Java deserialization vulnerabilities by using cookie encryption technologies.
Apply To
From the configured protected objects and protected object groups, select the ones to which you want to apply this template.
If you enable the IP Address Blacklist for Protection for Critical Events feature in the Basic Information step, you must configure the parameters in the Configure IP Address Blacklist step. Then, click Next. The following table describes the parameters.
Parameter
Operation
Add IP Address Blacklist
Click Add IP Address Blacklist to add IP addresses to the blacklist.
In the IP Address Blacklist field, enter the IP addresses that you want to add to the blacklist and press the Enter key.
NoteCIDR blocks and IPv6 addresses are supported. You can specify up to 500 CIDR blocks or IPv6 addresses. Separate multiple CIDR blocks or IPv6 addresses with line feeds or commas (,).
Configure the End At parameter to specify the date and time when you want the configuration to become invalid. Valid values:
Permanently Effective.
Custom. Click the date and time picker to specify a date and time.
In the Remarks field, enter a description and click OK.
After adding IP addresses to the blacklist, you can view the IP addresses that you added.
Import IP Address Blacklist
Click Import IP Address Blacklist to import a blacklist that contains multiple IP addresses.
Click Upload File and select the target IP address blacklist file.
ImportantCSV files are supported.
IPv4 addresses, IPv6 addresses, and CIDR blocks are supported.
You can import only one file at a time. Each file can contain up to 2,000 IP addresses or CIDR blocks. The size of the file cannot exceed 1 MB.
You can import a large number of IP addresses in batches.
Configure the End At parameter to specify the date and time when you want the configuration to become invalid. Valid values:
Permanently Effective.
Custom. Click the date and time picker to specify a date and time.
In the Remarks field, enter a description and click OK.
After adding IP addresses to the blacklist, you can view the IP addresses that you added.
Delete All IP Addresses
If you no longer need to block the IP addresses that you added to the blacklist, you can click Delete All IP Addresses to remove all IP addresses from the blacklist.
Delete Expired IP Addresses
After the validity period of the IP addresses ends, you can click Delete Expired IP Addresses to remove all expired IP addresses from the blacklist.
References
If you want to identify the source regions from which client requests are sent and block or allow requests from specific regions to prevent high-frequency malicious requests, you can configure protection rules for the region blacklist module. For more information, see Configure a Location Blacklist rule to block requests from specific regions.
If you want to mitigate the risks that are caused by bot traffic on web pages, HTML5 pages, or HTML5 apps, you can configure anti-crawler rules for websites. For more information, see Configure anti-crawler rules for websites.
If you want to prevent attackers or scanners from scanning websites on a large scale and help web applications reduce intrusion risks and spam traffic generated by scan tasks, you can configure protection rules for the scan protection module to identify scan behavior and scanner characteristics. For more information, see Scan protection.