Manually defining workflow steps, input/output mappings, and state transitions is time-consuming and error-prone. CloudFlow AI-assisted generation lets you describe your business requirements in natural language to produce a complete workflow definition -- including input/output setting examples, complete sample code, and a workflow description. Review the result and iterate until it meets your needs.
How it works
Describe your requirements -- Enter a natural language description of your business process in the AI generation dialog.
Review the output -- CloudFlow generates a complete workflow definition with input/output examples and sample code.
Refine or apply -- Apply the generated workflow directly, or provide additional instructions to iterate.
After you apply a generated workflow, edit it in CloudFlow Studio (drag-and-drop) or the YAML editor.
Prerequisites
Before you begin, make sure that you have:
An Alibaba Cloud account
The required permissions to create workflows
(Optional) An execution role with permissions for any cloud services that your workflow integrates with. For details, see Create execution roles
Generate a workflow
Log on to the CloudFlow console.
In the top navigation bar, select the region where you want to create the workflow.
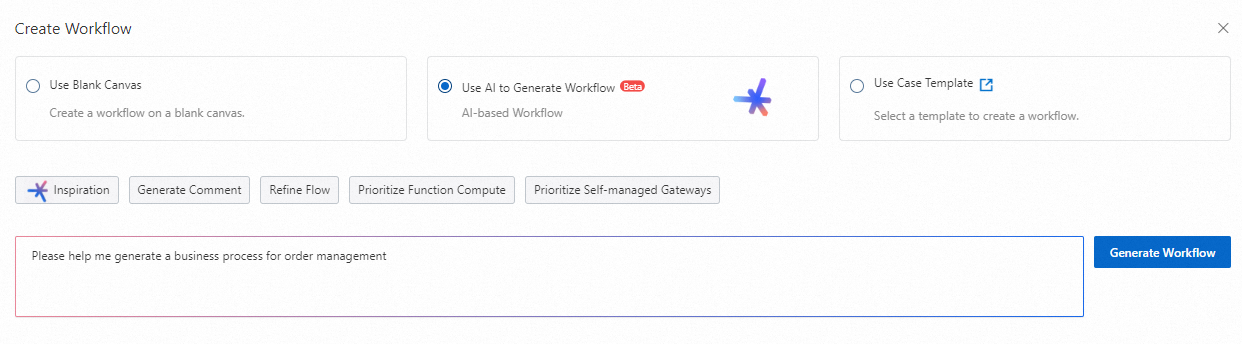
On the Workflows page, click Create Workflow.
In the Create Workflow dialog box, select Use AI to Generate Workflow, enter your requirements in the text box, and then click Generate Workflow.
Review the generated workflow in the Use AI to Generate Workflow dialog box:
To apply the workflow, click Use Scheme. The Edit Workflow page opens for further customization.
To refine the workflow, click Continue to Optimize, enter additional requirements in the text box, and then click Generate Workflow.
Edit the workflow
After you click Use Scheme, the Edit Workflow page opens. Choose either of the following methods to edit the workflow.
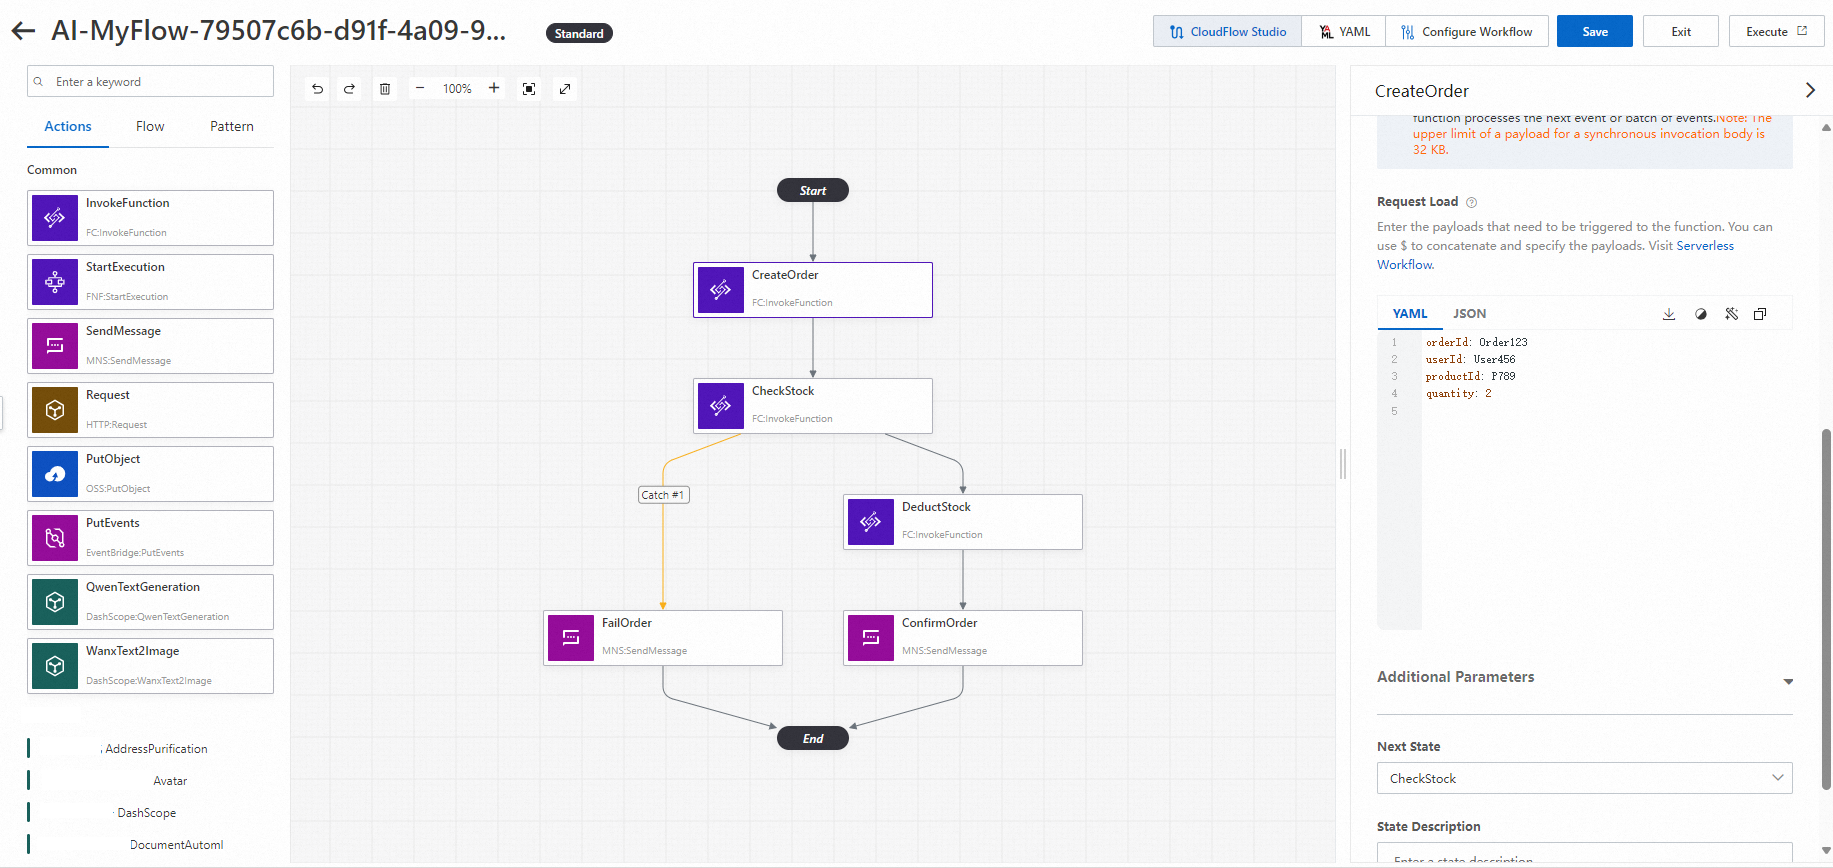
CloudFlow Studio
CloudFlow Studio provides a graphical interface for designing workflows through drag-and-drop. The following example shows how to modify an order management workflow.
On the CloudFlow Studio tab, review the generated steps and drag state nodes to the appropriate positions.
Select each state node and configure Basic Settings, Input Settings, Output Settings, and Troubleshooting for each node.
(Optional) On the Configure Workflow tab, configure the execution role for the workflow.
Click Save, and then click Exit.
NoteIf your workflow integrates with cloud services, configure an execution role that has the corresponding permissions. For details, see Create execution roles.
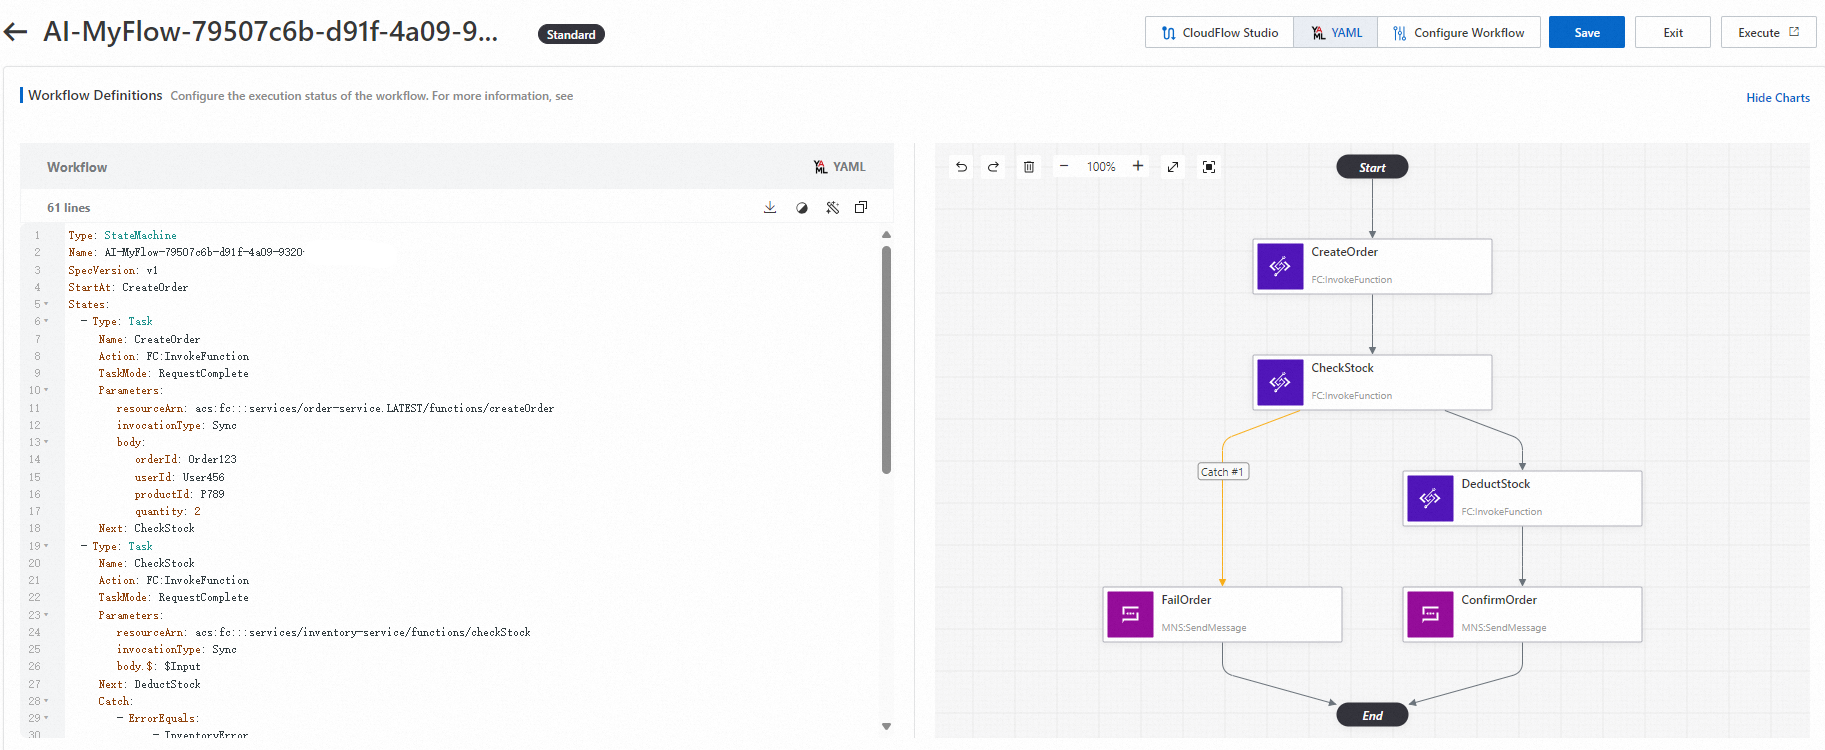
YAML editor
The YAML editor lets you define and edit workflows by writing YAML configuration directly. The following example shows how to modify an order management workflow.
On the Edit Workflow page, click the YAML tab.
Modify the YAML code to update the workflow definition.
(Optional) On the Configure Workflow tab, configure the execution role for the workflow.
Click Save, and then click Exit.
NoteIf your workflow integrates with cloud services, configure an execution role that has the corresponding permissions. For details, see Create execution roles.