This tutorial shows you how to use the console to create an ApsaraDB RDS for SQL Server instance, configure a database and account for the instance, and connect to it using various methods.
If you are new to Alibaba Cloud RDS, review the Alibaba Cloud RDS Usage Limits.
Prerequisites
If you use a Resource Access Management (RAM) user to create an RDS instance, the AliyunRDSFullAccess and AliyunBSSOrderAccess policies must be attached to the RAM user. For more information, see Use RAM for resource authorization.
Billing
Creating an RDS SQL Server instance incurs instance type and storage fees. These fees depend on parameters including the billing method, RDS edition, instance type, storage type, and storage capacity.
1. Create an RDS for SQL Server instance
-
Select a Billing Method.
Billing method
Recommendation
Benefits
Subscription
For long-term workloads, select Subscription and specify a Subscription Duration in the lower-left corner of the page.
The subscription billing method is more cost-effective than the pay-as-you-go billing method. The longer the subscription duration, the higher the discount.
Pay-as-you-go
For short-term or development workloads, select Pay-as-you-go. You are billed on an hourly basis.
You can release the instance at any time to stop billing.
NoteYou can create a Pay-as-you-go instance first. After verifying that the instance meets your requirements, you can change the billing method from pay-as-you-go to subscription.
-
Select the Region where you want to create the ApsaraDB RDS instance.
ImportantYou cannot change the region after the instance is created. Select the region with caution.
We recommend that you create your ApsaraDB RDS instance in the same region as your ECS instance. Otherwise, your ECS instance can connect to the ApsaraDB RDS instance only over the public network, which can degrade performance.
Note-
To allow your ECS instance to connect to your ApsaraDB RDS instance over the internal network, make sure they are in the same region and the same VPC.
-
If you want to connect to the ApsaraDB RDS instance from a device other than an ECS instance, such as an on-premises server or a personal computer, select a region that is geographically close to the device. You can then connect to the instance by using its public endpoint.
-
-
Select a database engine, edition, and Storage Type.
-
Select a database engine.
This topic uses SQL Server as an example. Select Microsoft SQL Server. The supported versions include 2012, 2016, 2017, 2019, and 2022.
-
Select an edition. The available editions depend on the region and database engine you select.
Edition
Description
Features
Basic edition
-
Uses a single-node architecture where compute and storage resources are separated.
-
Does not support read-only instances.
Cost-effective. Ideal for learning or testing.
NoteBasic edition instances take longer to recover from failures or restart.
High-availability edition (Recommended)
-
Uses a primary/standby architecture that supports automatic failover. The standby node is not accessible.
-
Does not support read-only instances.
Highly available. Suitable for production environments and over 80% of use cases.
Cluster edition (Recommended)
Uses a primary/standby architecture that supports automatic failover. The standby node is accessible for read operations, which improves read performance.
-
Supports adding one to seven read-only instances for linear read scaling. However, read-only instances do not participate in primary node election or failover.
-
Allows for flexible cost management.
-
Supports readable standby nodes.
-
-
Select a Storage Type.
ESSDs are supported. We recommend that you select Disk Encryption to improve data security. For more information, see Disk encryption. For more information, see Storage types.
-
-
Configure network settings for the instance. The Network Type is always VPC.
-
Select a VPC.
We recommend that you select the same VPC as your ECS instance. If the ECS and ApsaraDB RDS instances are in different VPCs, they cannot communicate over the internal network.
NoteECS instances can communicate with ApsaraDB RDS instances over the internal network even if they are connected to different vSwitches within the same VPC.
-
Specify whether to Add to Whitelist.
If you add the CIDR block to the whitelist, ECS instances in the same VPC can access the ApsaraDB RDS instance.
NoteIf you select No, you can manually configure a whitelist after the instance is created.
-
-
Select the availability zone, vSwitch, and Deployment Method for the instance.
-
Selecting an availability zone
An availability zone is an independent physical zone within a region. For example, the China (Hangzhou) region has Availability Zone H, I, and J.
-
There are no significant differences among availability zones in the same region.
-
Network latency is lower when an ECS instance accesses an ApsaraDB RDS instance in the same availability zone compared to one in a different availability zone within the same region, but the difference is minimal.
-
-
Selecting a vSwitch
A vSwitch is a fundamental network component of a VPC. It can connect different cloud resources. When you create a cloud resource in a VPC, you must specify the vSwitch to which the resource connects.
Select an existing vSwitch or click Create vSwitch to create a new one. For information about parameter configurations, see Create and manage a vSwitch.
-
Selecting a deployment method
-
Multi-zone Deployment (Recommended): The primary and standby nodes are located in different availability zones within the same region, which provides cross-zone disaster recovery.
If you set Deployment Method to Multi-zone Deployment, you must select the Zone and Network of Primary Node and the Zone and Network of Secondary Node for the instance.
-
Single-zone Deployment: The primary and standby nodes are located in the same availability zone.
If you select the basic edition, you can only choose Single-zone Deployment.
Note-
For instances with primary and standby nodes, we recommend that you select Multi-zone Deployment to enable cross-zone disaster recovery.
-
If the target availability zone is marked as Sold Out in the top-right corner, select a different availability zone.
-
-
-
Select an Instance Type.
-
Select a Category (general-purpose, dedicated, or shared). The available instance types vary depending on the instance edition and version. The options displayed in the console prevail.
Category
Description
Features
General-purpose
Dedicated: memory and I/O
Shared: CPU and storage
Cost-effective
Dedicated
Dedicated: CPU, memory, storage, and I/O
NoteThe dedicated-host type is the top-tier configuration of the dedicated category. It exclusively uses the CPU, memory, storage, and I/O resources of an entire physical server.
Provides superior and stable performance
NoteThe basic edition does not support dedicated instance types.
Shared
Dedicated: memory, storage
Shared: CPU
Cost-effective for workloads with lower stability requirements
-
Select a specific instance type based on parameters such as the number of CPU cores, memory size, and maximum number of connections.
NoteFor a list of specifications, see Primary ApsaraDB RDS for SQL Server instance types.
-
-
Select a Storage Capacity.
The storage capacity includes the space for data, system files, log files, and transaction files. The available range of storage capacity depends on the instance type and storage type that you select. You can adjust the storage capacity in 5 GB increments.
NoteThe storage capacity of some instances with local SSDs is coupled with their instance type. This limitation does not apply to ESSDs or SSD cloud disks.
-
(Optional) If you selected Billing Method as the Subscription , you must also set the Duration.
Discounts vary based on the purchase duration. You can hover over View Details to the right of Price to view the fee details.
-
Configure more custom parameters. Keep the default values unless you have specific requirements.
Parameter
Description
Port
You can set the port when you create an ApsaraDB RDS for SQL Server instance. The port number must be in the range of 1000 to 5999.
Release Protection
If the Billing Method is set to Pay-as-you-go, you can enable Release Protection for the instance to prevent accidental release. For more information, see Enable or disable release protection.
Resource Group
Select the default or a custom resource group for easier instance management.
Instance Name
Customize the instance name for easy identification.
Character Set Collation Rule
You can set the character set collation during instance creation or modify it later. The default value is Chinese_PRC_CI_AS. You can also modify the character set collation as needed after the instance is created.
Tags
If you have a large number of instances, you can add tags to them for easier organization and management. For more information, see Filter instances by tag.
-
In the upper-right corner of the page, select the number of instances to purchase.
The default value is 1. You can purchase up to 20 instances at a time. Select the quantity based on your business requirements.
-
Confirm the order information, quantity, and subscription duration (for subscription instances only), then click Pay Now and complete the payment.
Note-
For subscription instances, we recommend that you select Enable Auto-renewal to avoid service interruptions caused by an expired subscription.
-
For monthly purchases, the auto-renewal period is one month. For yearly purchases, the auto-renewal period is one year. The actual period depends on the order. You can cancel auto-renewal at any time. For more information, see Renew an expired resource and Enable auto-renewal.
-
-
View the instance.
Go to the Instances page, select the instance's region, and find the newly created instance based on its Creation Time.
NoteInstance creation takes about 1 to 10 minutes. You can view the creation progress on the Task Center page. After the instance is created, refresh the Instance List page.
2. Create a database
Go to the Instances page. In the top navigation bar, select the region where you created the instance in Step 1, and then click the instance ID.
In the left-side navigation pane, click Databases. Then, click Create Database.
In the panel that appears, configure the parameters.
Set Database Name to
dbtestand Supported Character Set to Chinese_PRC_CI_AS. Then, click Create.You can view the new database on the Databases page or after you connect to the SQL Server instance.
The dbtest database has a status of Running and uses the Chinese_PRC_CI_AS character set.
3. Create an account
On the instance details page, in the navigation pane on the left, click Accounts.
Click Account Password Policy to configure a password expiration policy.
NoteShared and serverless instances do not support setting a custom password policy. For these instance types, you can skip this step.
Click Create Account and configure the parameters in the panel that appears.
NoteAn error might occur if you use a duplicate account name or attempt to create accounts too frequently, for example, before the previous creation process is complete. If this happens, check if the account name is already in use, or wait for the previous creation process to finish before you try again.
Set the Database Account. For this tutorial, the Database Account is set to
testuser.Select an Account Type. RDS for SQL Server allows you to create a Privileged Account, a Standard Account, and a System Admin Account. This tutorial creates a Privileged Account. For more information, see Methods for creating other account types.
ImportantThe first account for an RDS for SQL Server instance must be a privileged account, and each instance can have only one privileged account. This account has read and write permissions on all databases in the instance. Account creation will fail if a privileged account already exists on your instance.
Enter a password in the New Password field and confirm it in the Confirm Password field.
Apply the password policy from step 2 to this privileged account.
Click OK to create the account.
Refresh the Accounts page to view the new privileged account.
The testuser account is a privileged account and is now active.
4. Configure secure access
If you plan to connect to the database using a command-line interface (CLI) or a client, first add the IP address of your ECS instance or on-premises device to an IP address whitelist for the RDS SQL Server instance. Then, obtain the appropriate internal or public endpoint based on your access type to connect to the instance. If you plan to connect using Alibaba Cloud Data Management (DMS), you can skip to Step 5.
4.1 Configure an IP whitelist
On the instance details page, in the left-side navigation pane, click Whitelist and SecGroup.
Click Create Whitelist, enter a Whitelist Name, and add the IP address of the application server to the IP address whitelist.
Click OK.
Refresh the Whitelist and SecGroup page to view the IP address whitelist that you added.
The IP address whitelist group db_whitelist is successfully added and contains the IP addresses that you configured.
4.2 Select a connection type
You can connect to an instance over an internal network or the public internet. If your setup meets the conditions for internal network access, use the instance's internal endpoint to connect. If the conditions are not met, or if you connect from an on-premises device, you must use the public endpoint. The conditions for internal network access and the methods for obtaining the endpoints are described below.
To connect to the instance over an internal network, your setup must meet the following conditions:
The connecting ECS instance must be in the same region and use the same network type as the RDS instance.
If both the ECS instance and the RDS instance use the virtual private cloud (VPC) network type, they must also be in the same VPC.
Scenario | Endpoint | Method |
For internal network access. | Internal endpoint | On the instance details page, click Database Connection in the left navigation pane to view the instance endpoint and port number. The page shows connection information, including the internal endpoint and internal port (1433 by default) of the instance. Note The public endpoint appears only after you click Apply for Public Endpoint. |
Connecting from an ECS instance without internal network access. | Public endpoint | |
Connecting from an on-premises device. |
5. Connect to an ApsaraDB SQL Server instance
You can connect to a SQL Server database by using Alibaba Cloud Data Management Service (DMS), a client, or a Java application.
Method 1: Use DMS
Data Management Service (DMS) is a one-stop data management platform that supports the entire data lifecycle. It provides features such as global data asset management, data governance, database design and development, data integration, data development, and data consumption. DMS helps enterprises efficiently and securely unlock the value of their data and accelerates their digital transformation.
You can use DMS to quickly and easily log on to an ApsaraDB for SQL Server instance to manage and use data. This method eliminates the need to configure an IP address whitelist or select a connection type for the instance.
Go to the Instances page. In the top navigation bar, select the region in which the RDS instance resides. Then, find the RDS instance and click the ID of the instance.
Click Log On to Database to open the DMS logon page.
In the Log on to Database Instance dialog box, enter the logon information and click Log In.
Select an Access Mode. This tutorial uses Account + password login as an example.
Enter the Database Account and Database Password. This tutorial uses the privileged account
testuserand a custom password.Select a Control Mode. This tutorial uses Flexible Management as an example.
NoteFlexible Management is free of charge. Stable Change and Security Collaboration incur fees.
Compared to the Flexible Management control mode, Stable Change and Security Collaboration offer more advanced database management features. If you are trying out ApsaraDB for SQL Server, we recommend selecting the Flexible Management mode.
After you log on, the newly created database appears under Instances Connected in the left navigation pane of the DMS page. This tutorial uses the
dbtestdatabase as an example. You can also double-click another database to switch to it.NoteIf the instance exists but the target database is not found in the list of connected instances in DMS, the cause may be one of the following:
The logon account does not have permissions to access the target database: Go to the Accounts page of the ApsaraDB RDS instance, find the target account, and click Change Permissions in the Actions column to grant the required permissions.
The directory is not displayed because the metadata is not synchronized: Hover the pointer over the instance that contains the target database and click the
 icon to the right of the instance name. This refreshes the list to display the target database.
After logging on to the database in DMS, use the SQL Console tab to create databases and tables, and to query and modify data.
Method 2: Use SSMS
Microsoft SQL Server Management Studio (SSMS) is a graphical user interface (GUI) tool for managing and administering SQL Server. You can use it to connect to different SQL Server databases, such as ApsaraDB for SQL Server instances, on-premises SQL Server instances, or SQL Server instances hosted on other clouds.
This tutorial demonstrates how to connect to an ApsaraDB for SQL Server instance by using Microsoft SQL Server Management Studio 19.0 (SSMS).
We recommend that you download the latest version of SSMS to ensure compatibility with all SQL Server versions.
To connect by using a client, you must first configure an IP address whitelist and obtain the instance endpoint.
Open your local Microsoft SQL Server Management Studio (SSMS) 19.0 client.
Select Connection > Database Engine.
In the Connect to Server dialog box, enter the logon information.
Parameter
Value
Description
Server name
rm-2ze****.rds.aliyuncs.com,1433
The endpoint and port number of the ApsaraDB RDS instance. Enter the Public Address and Outside the network port that you obtained when you applied for a public endpoint. Separate the endpoint and port number with a comma (,).
Authentication
SQL Server Authentication
The authentication method for SQL Server.
Username
testuser
The username for the ApsaraDB RDS instance account.
Password
Test_pw123
The password for the ApsaraDB RDS instance account.
Click Connection.
After a successful connection, SSMS displays the connection information on the left.
Method 3: Use a Java application
This section describes how to use JDBC to connect to an ApsaraDB for SQL Server instance from a Java application.
Before you connect, add the IP address of the environment where the application runs, such as the IP address of an ECS instance or an on-premises device, to the IP address whitelist of the ApsaraDB for SQL Server instance. For more information, see Configure an IP address whitelist.
Add the Microsoft JDBC driver to your Maven project to access a SQL Server database.
NoteWe recommend that you select a dependency version that corresponds to your Java version. For example, the
mssql-jdbc-12.2.0.jre8.jarfile in the 12.2.0 package is for Java 8 or later.To view previous versions of the dependency, see the official tutorial.
<dependency>
  <groupId>com.microsoft.sqlserver</groupId>
  <artifactId>mssql-jdbc</artifactId>
  <version>12.2.0.jre8</version> <!-- Check for the latest version number -->
</dependency>
After you add the dependency, click
 . The dependencies in the
 pom.xmlfile are downloaded automatically.Write sample code to connect to a SQL Server database from Java:
Replace the endpoint, database name, username, password, and SQL statement in the sample code with your actual values. For more information, see View or modify an endpoint and port number.
import java.sql.Connection;
import java.sql.DriverManager;
import java.sql.SQLException;
import java.sql.Statement;
import java.sql.ResultSet;

public class testMSSQLJDBC {

    public static void main(String[] args) {
        // Enter the database endpoint. Use the internal endpoint if your application runs on an ECS instance, or the public endpoint if it runs on-premises or in other environments.
        String url = "jdbc:sqlserver://rm-2vc367d081200******.mssql.cn-chengdu.rds.aliyuncs.com:1433;"
                + "database=YourDatabaseName;"
                + "encrypt=true;"
                + "trustServerCertificate=true;"
                + "loginTimeout=30;";
        // Specify the username and password if you do not use Windows Authentication.
        String username = "usernametest";
        String password = "Passwordtest!";

        // Create a connection object.
        Connection connection = null;

        try {
            // Load the JDBC driver.
            Class.forName("com.microsoft.sqlserver.jdbc.SQLServerDriver");
            // Connect to the SQL Server database.
            connection = DriverManager.getConnection(url, username, password);
            System.out.println("Connection succeeded!");

            // Create a Statement object to run SQL statements.
            Statement statement = connection.createStatement();
            // Run a SQL query. Replace the table and column names as needed.
            String sql = "SELECT TOP 10 * FROM YourTableName";
            ResultSet resultSet = statement.executeQuery(sql);

            // Process the result set.
            while (resultSet.next()) {
                System.out.println("Column 1: " + resultSet.getString("YourColumnName1"));
                System.out.println("Column 2: " + resultSet.getString("YourColumnName2"));
            }

            // Close the result set.
            resultSet.close();
            // Close the Statement object.
            statement.close();
        } catch (ClassNotFoundException e) {
            e.printStackTrace();
        } catch (SQLException e) {
            e.printStackTrace();
        } finally {
            // Close the connection.
            if (connection != null) {
                try {
                    connection.close();
                } catch (SQLException e) {
                    e.printStackTrace();
                }
            }
        }
    }
}
Test the connection.
Save the code as a
SqlServerConnection.javafile, and compile and run it from the command line or in an IDE. If the configuration is correct, the program prints the following output, which indicates a successful connection to the SQL Server database.Connection succeeded!
Next steps
Appendix: Getting started video
FAQ
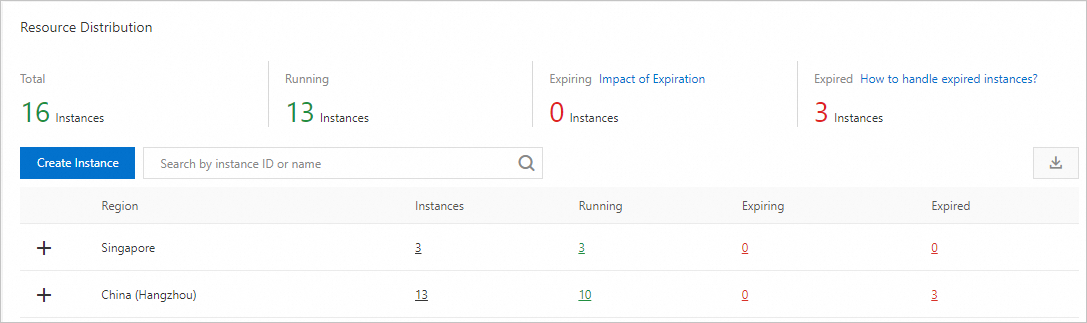
Log on to the RDS overview page to view all ApsaraDB RDS instances under your account, including total count, regional distribution, and running instances per region.