As an organization administrator, you can configure global settings for reports. These settings include font styles, default auto-linkage behavior, and permissions for copying preview links in edit mode. You can also configure query controls and the features available in view mode. This topic guides you through configuring these report settings.
Procedure
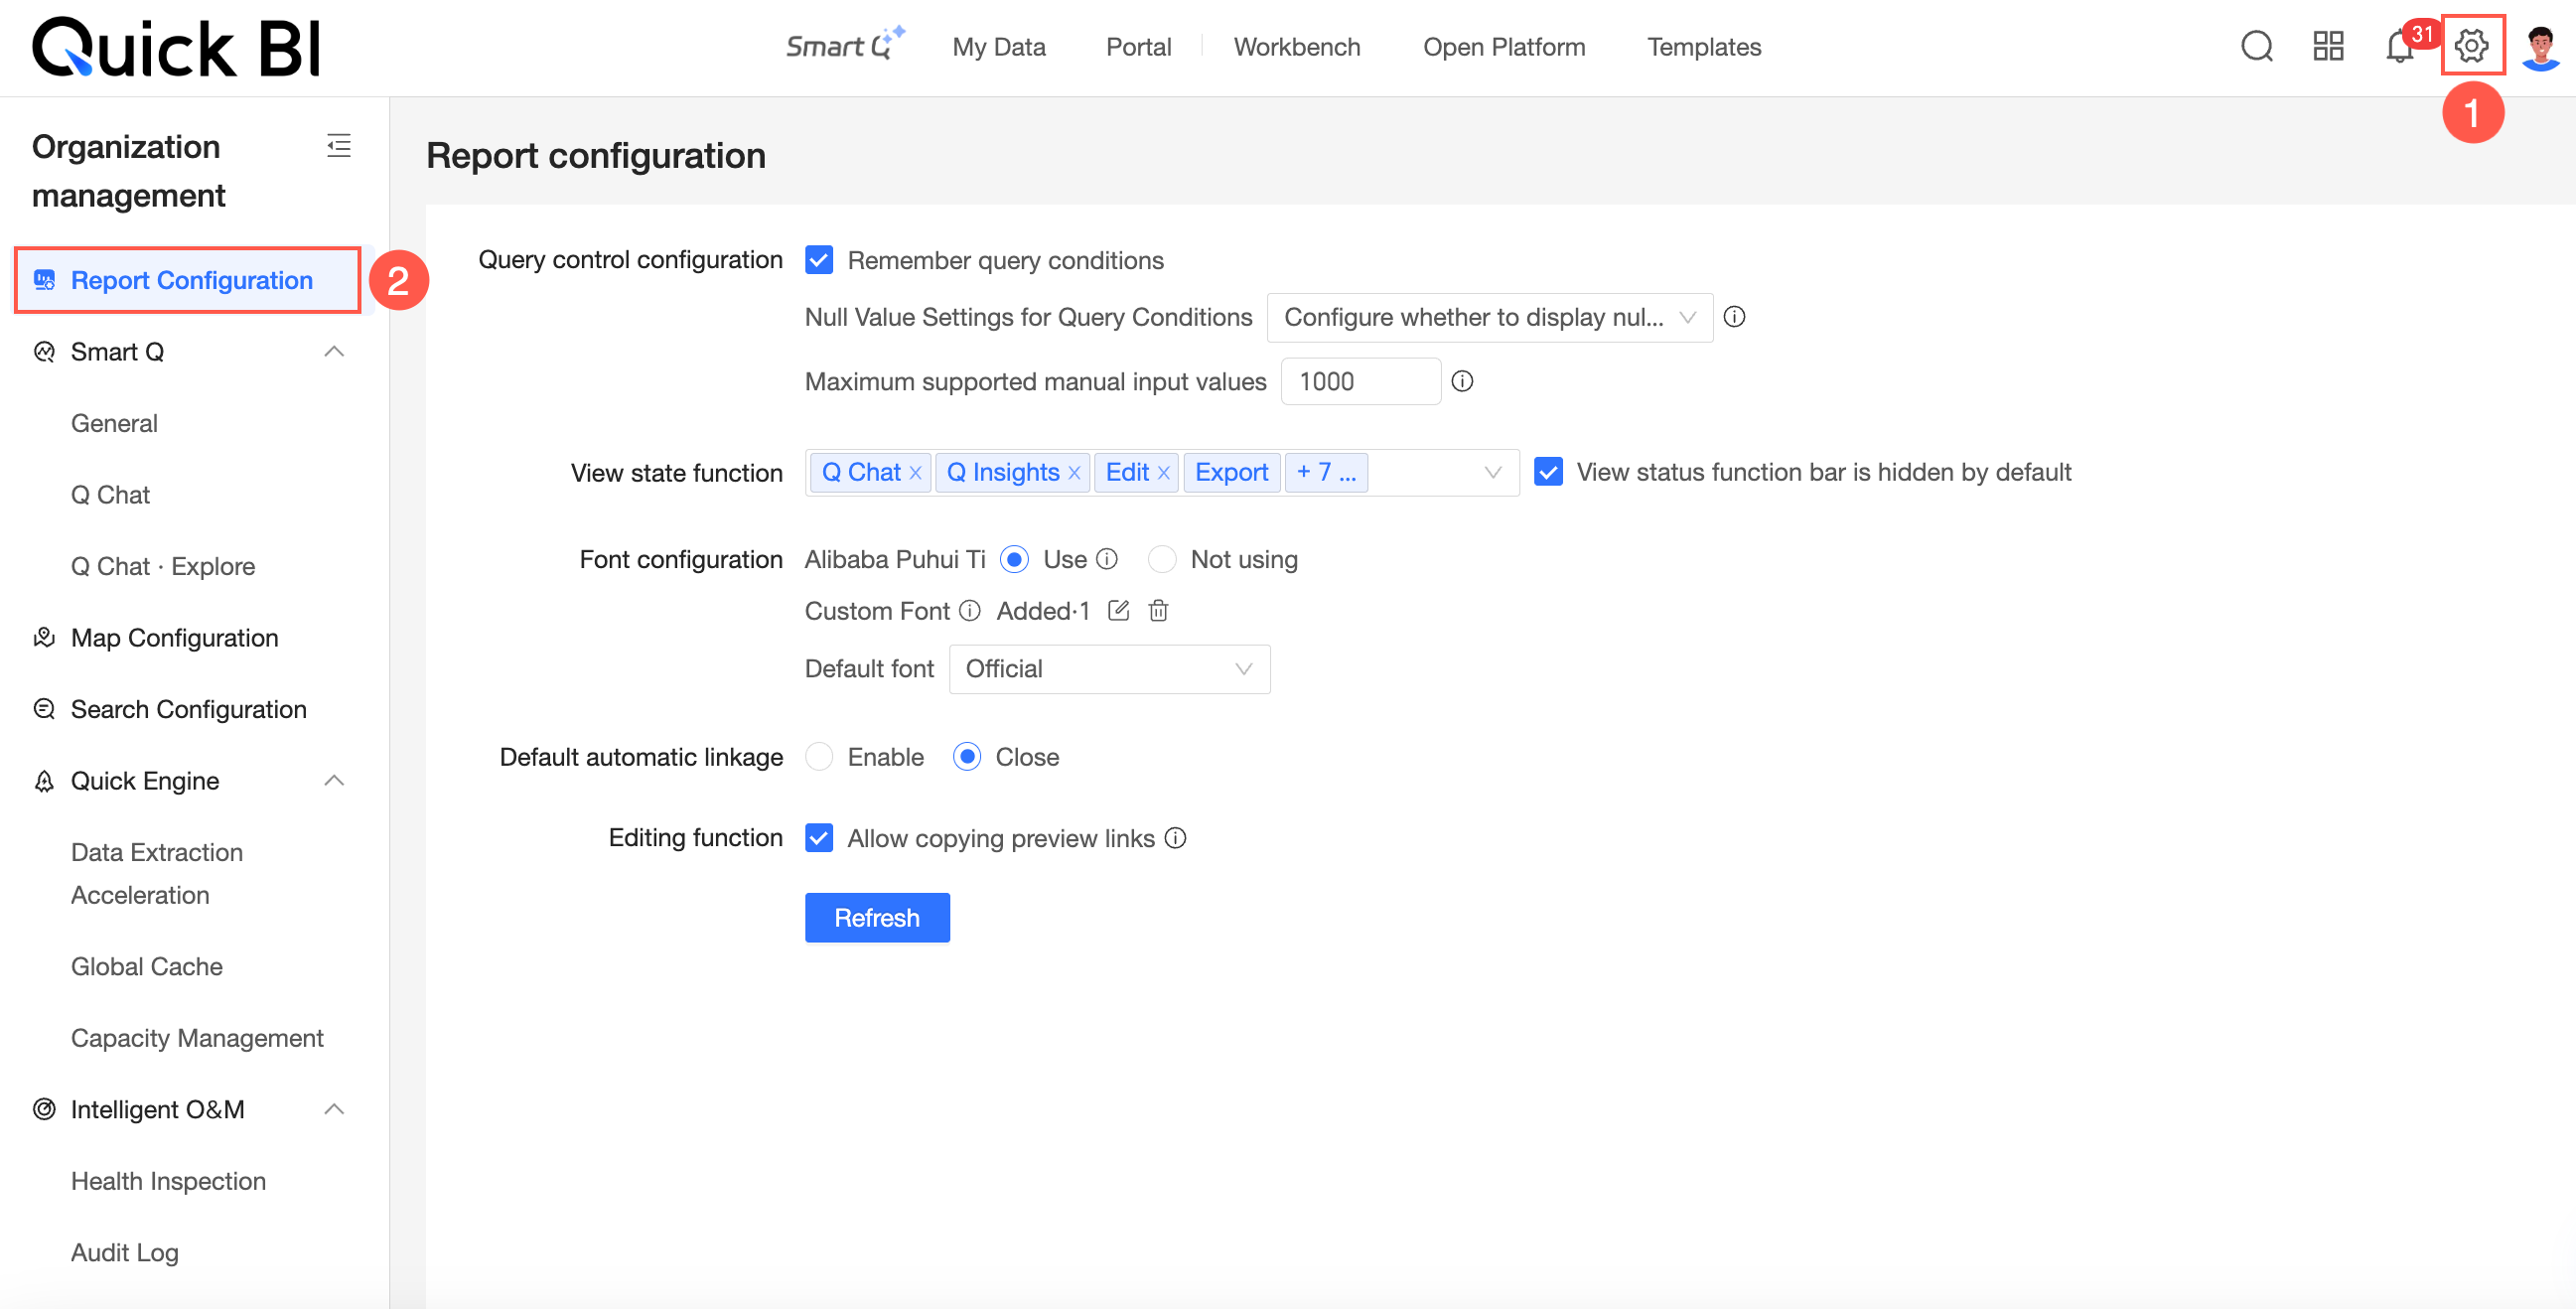
From the product homepage, follow the instructions in the image below to open the Report Configuration page.
Query control configuration
Parameters

In the Query control configuration section, select Remember Query Conditions.
When this option is selected, the system saves a user's query criteria. The next time the user opens the report, these criteria are automatically loaded in the query control.
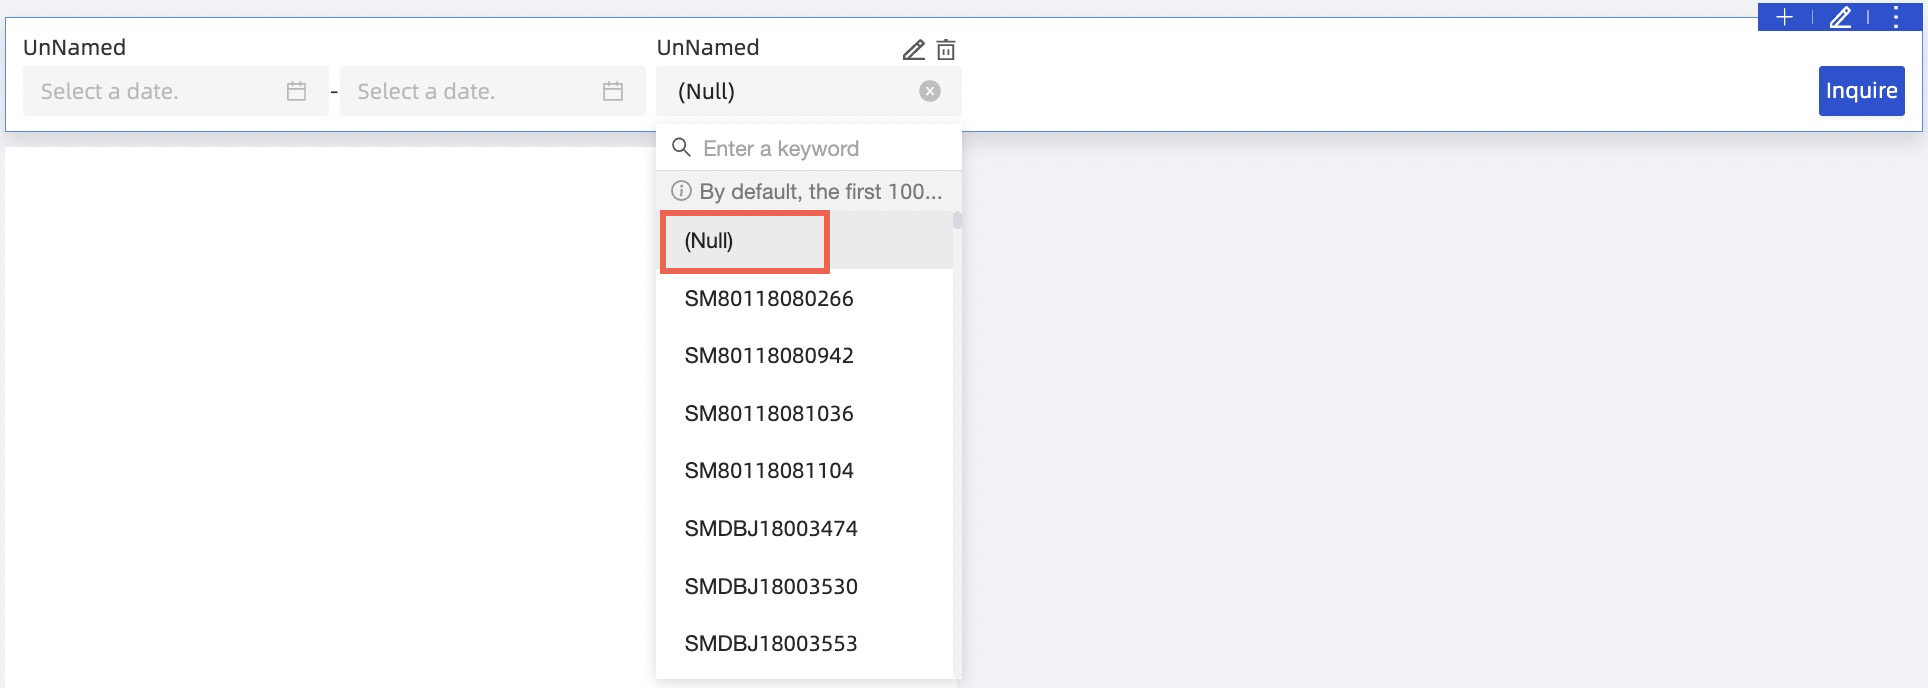
In the Query control configuration section, you can select Show null values, Do not show null values, or Configure null value display in each query condition.
If you select Show null values, null values appear in the query control's drop-down list for users viewing the report.
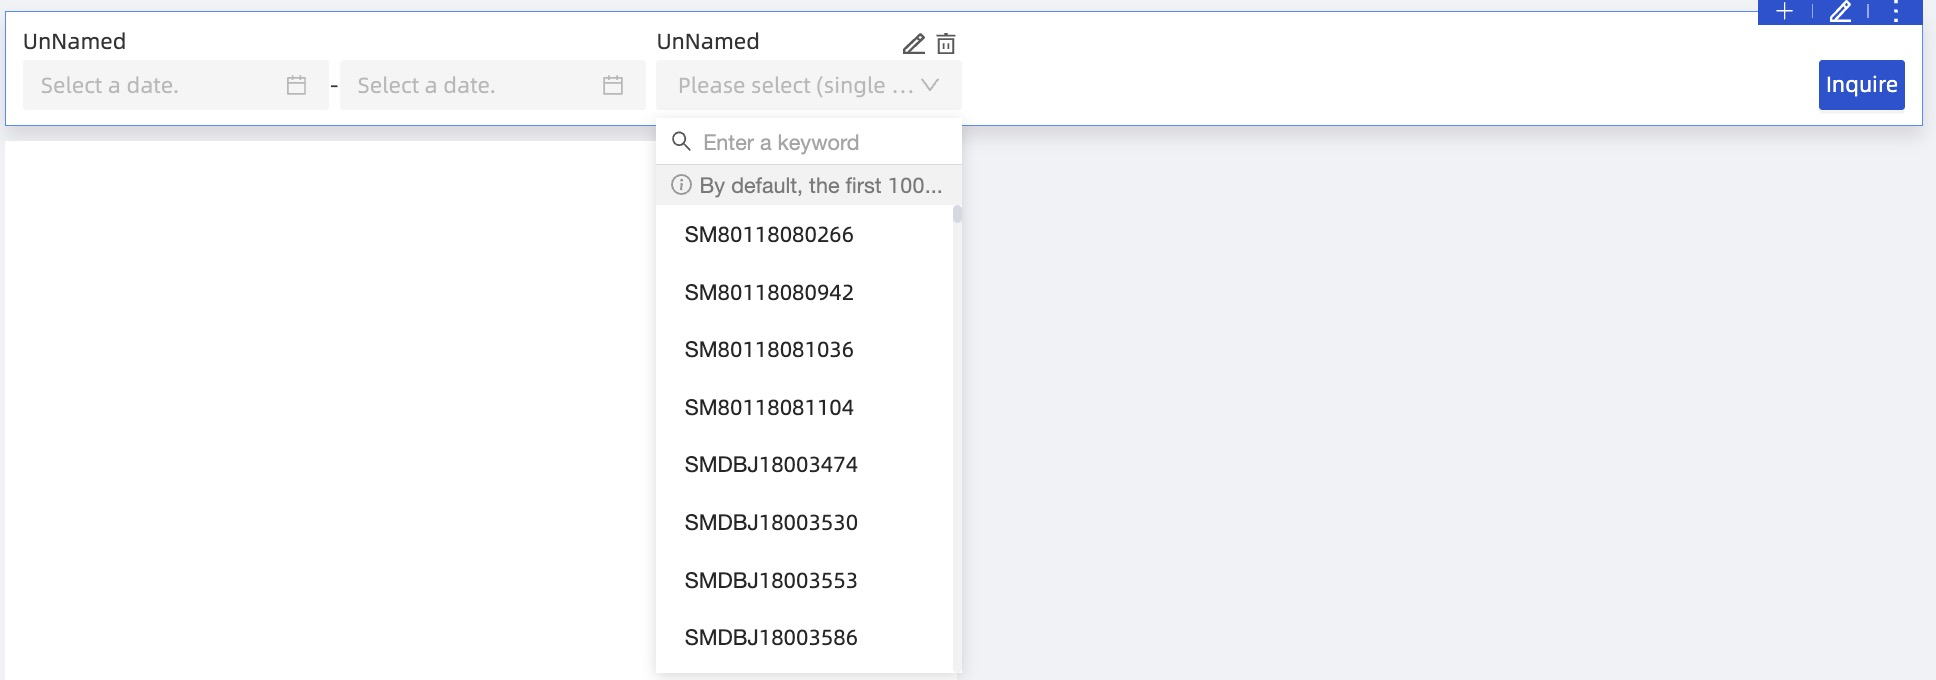
If you select Do not show null values, null values are hidden from the drop-down lists of all query controls.
If you select Configure null value display in each query condition, the Show null values for query condition enumerations option appears in the settings for each query control.
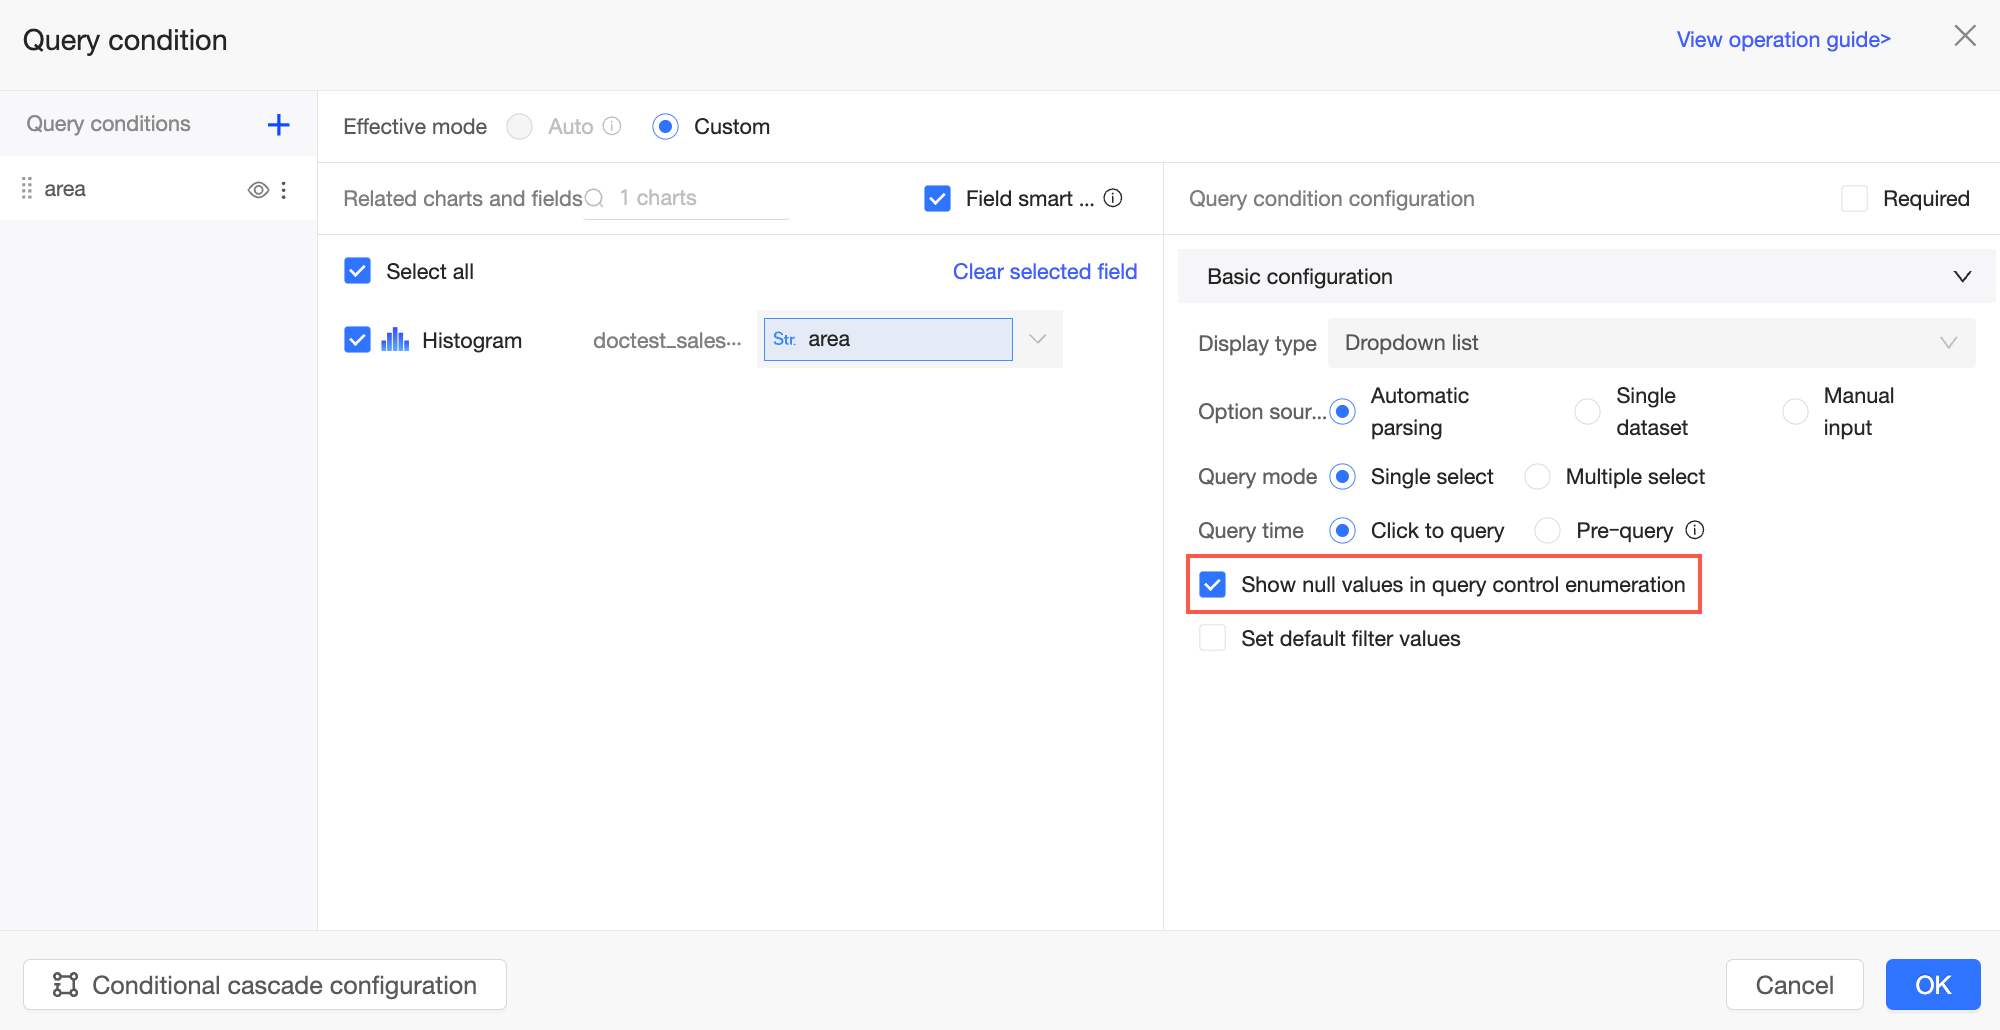
If Show null values for query condition enumerations is checked for a query control, null values appear in its drop-down list. If unchecked, null values are hidden.
In the Query control configuration section, you can set the Maximum number of manually entered values.
 Note
NoteThe value must be an integer from 1,000 to 10,000. The default is 1,000.
Setting a high limit is discouraged, as it can cause query failures for some databases.
View mode features
Parameters
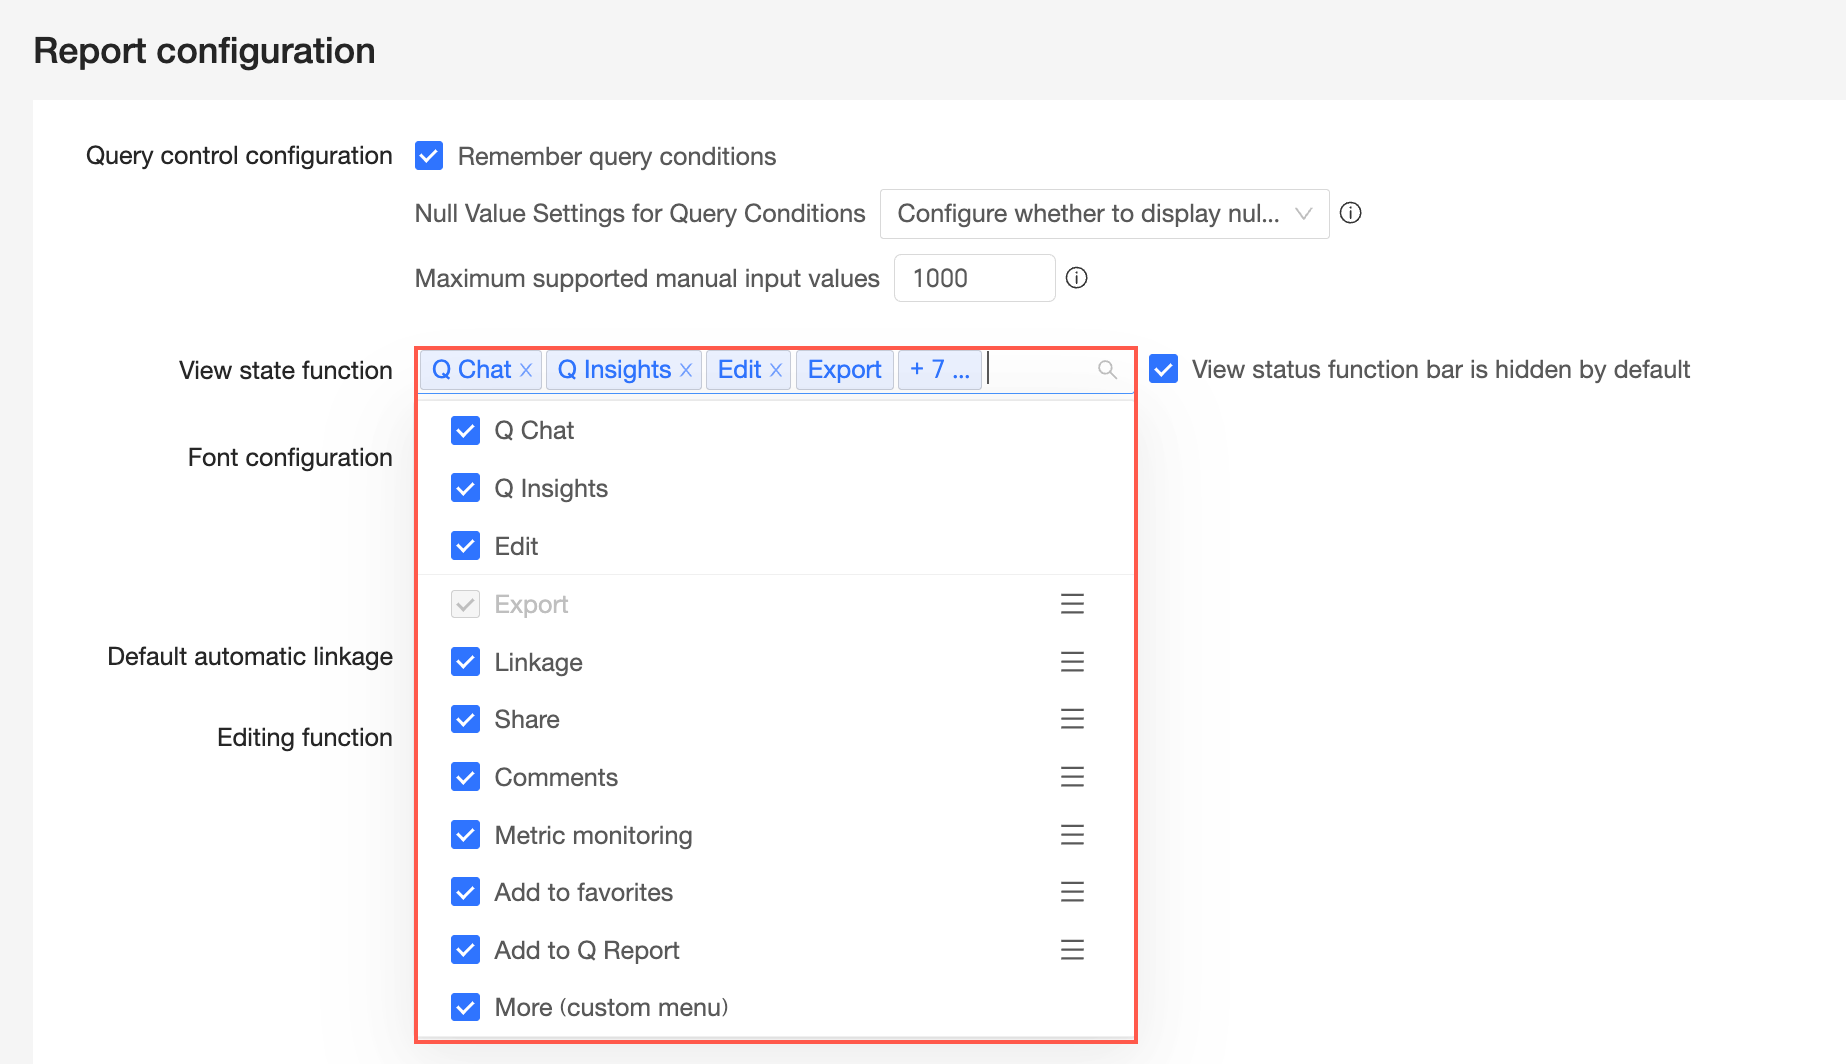
The options you select under View mode features enable the corresponding actions for users viewing a dashboard. Deselect any features that are not required for your organization.
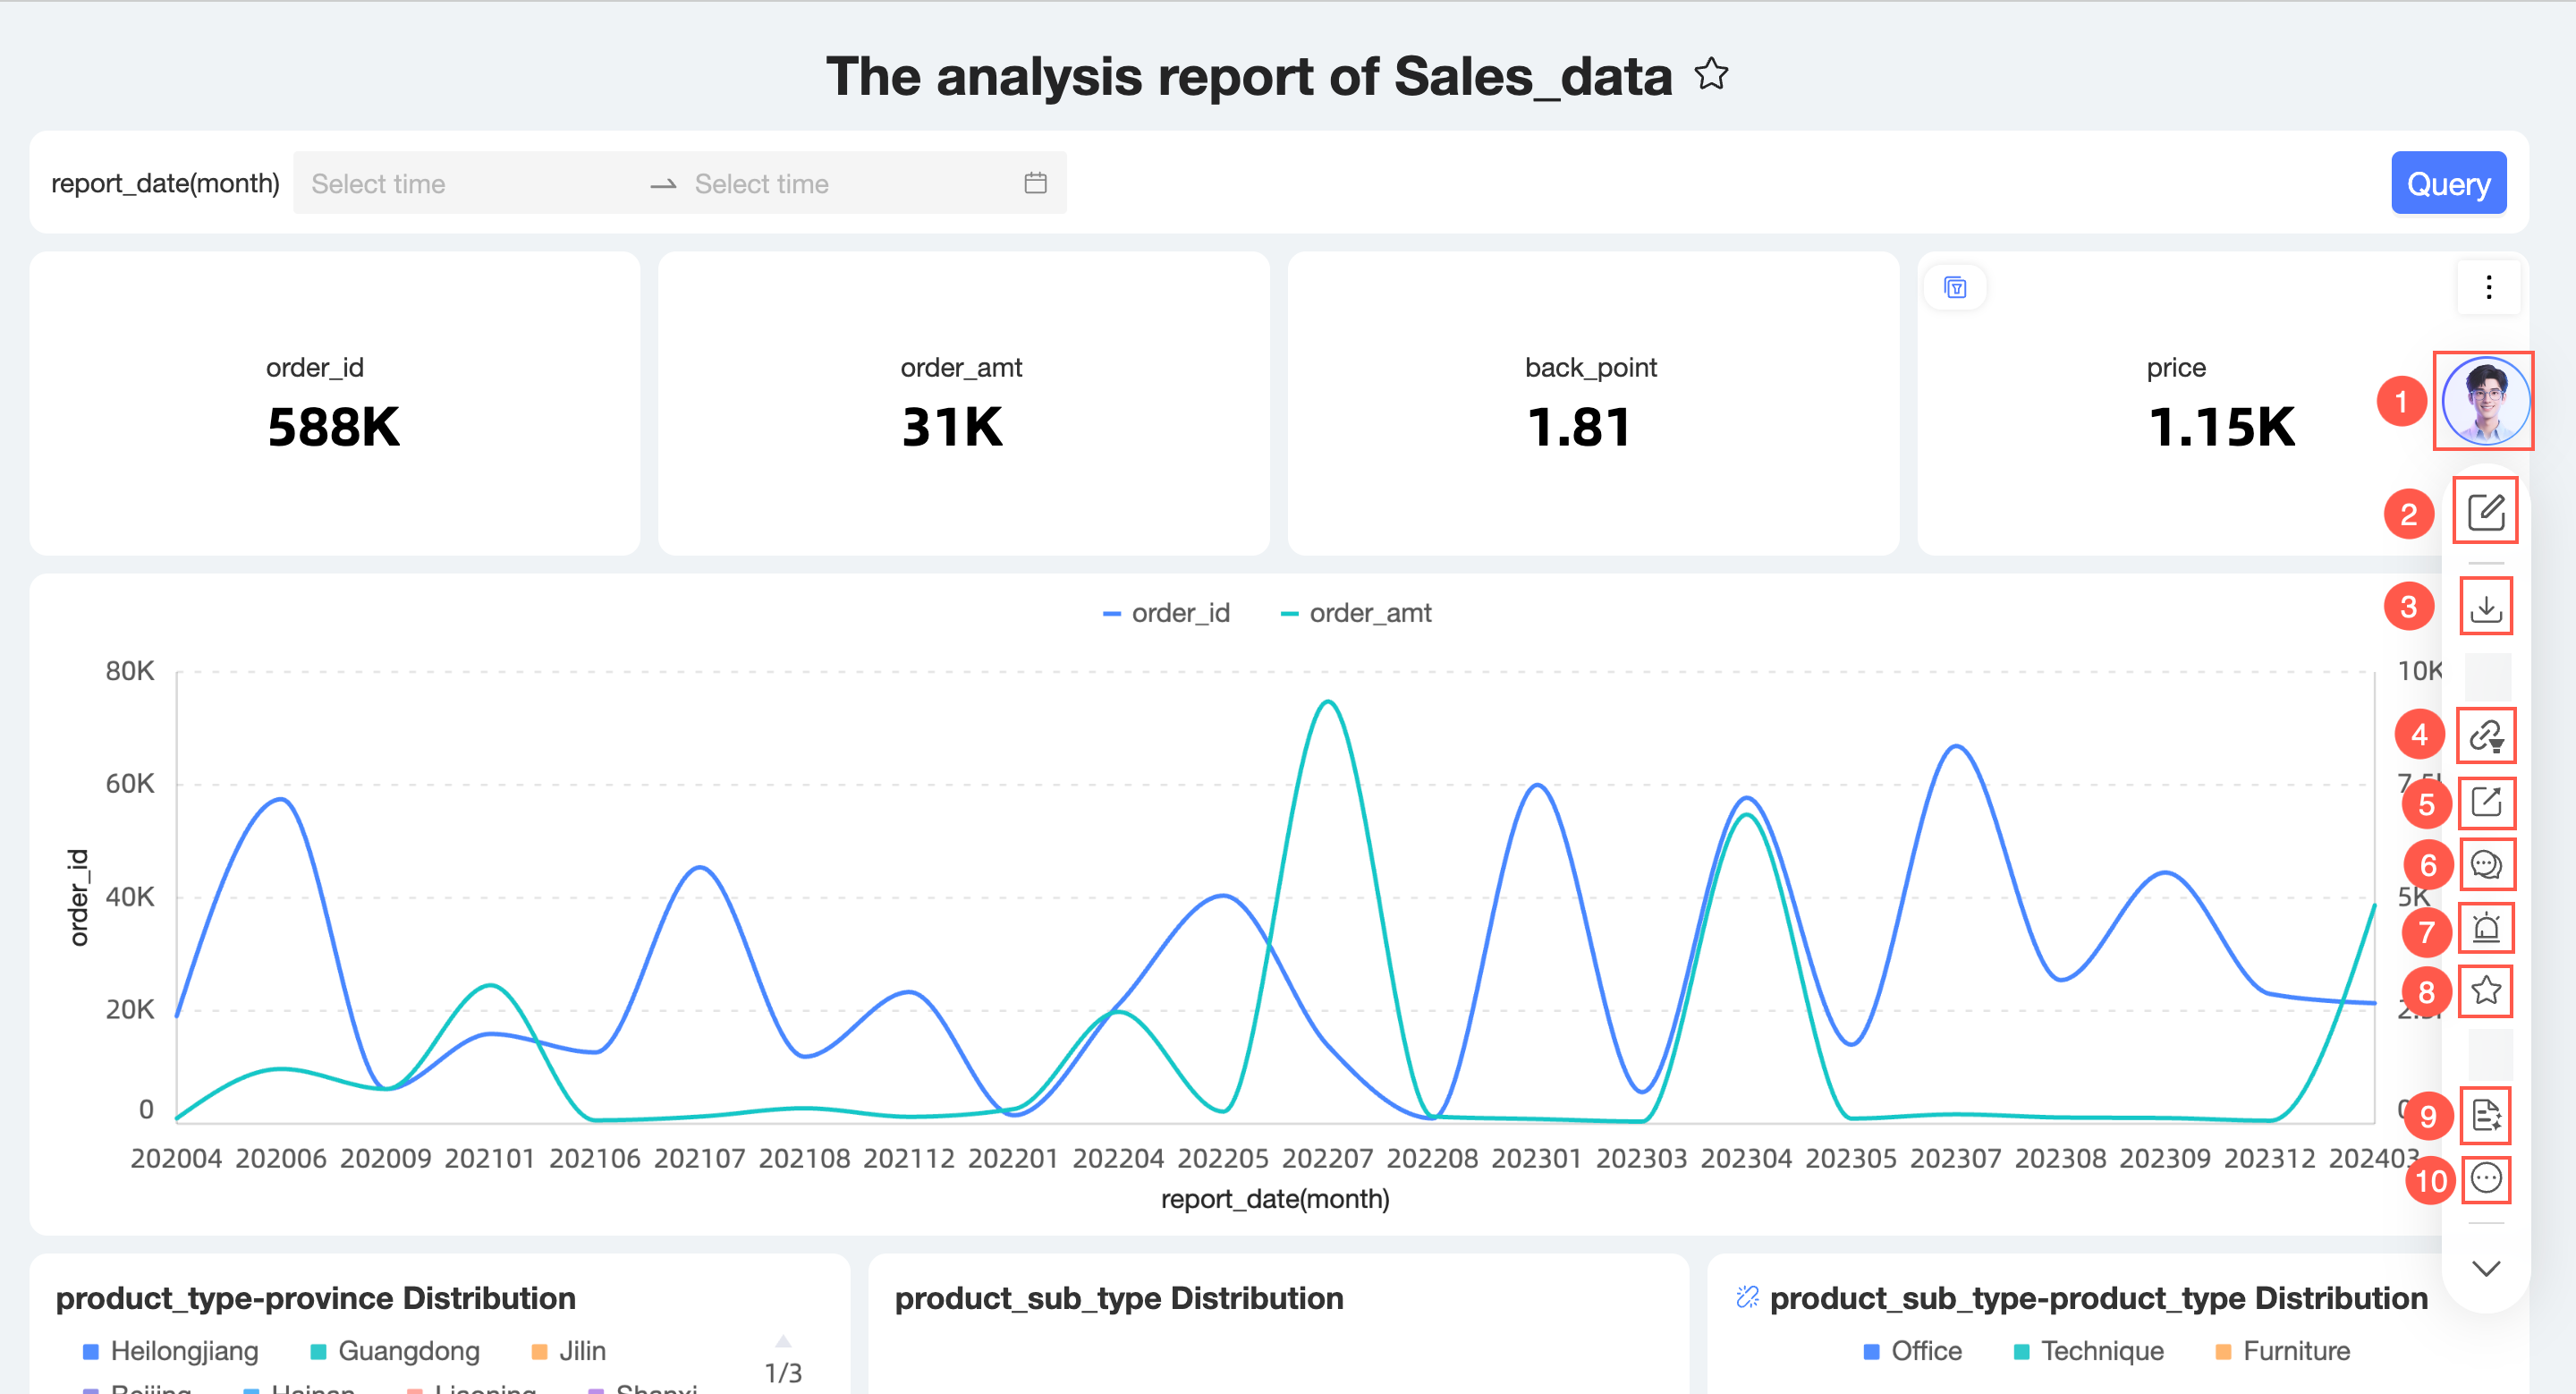
① Intelligent Caddie (Ask Caddie, Caddie Analysis)
NoteIf neither Caddie Analysis nor Ask Caddie is selected, the Intelligent Caddie
 icon is hidden.
If both Caddie Analysis and Ask Caddie are selected, clicking the Intelligent Caddie icon opens Caddie Analysis by default, with an option to switch to Ask Caddie.

If Ask Caddie is selected but Caddie Analysis is not, clicking the Intelligent Caddie icon opens Ask Caddie by default.
To use Ask Caddie, you must enable the Enable Q&A option in the dashboard's Q&A settings. You must also grant users Q&A permissions for the relevant dashboard under Configuration Panel > Ask Caddie > Permission Management. The Ask Caddie entry point is visible only to users with the required permissions. For more information, see Dashboard Q&A.
If Caddie Analysis is selected but Ask Caddie is not, clicking the Intelligent Caddie icon opens Caddie Analysis by default.
You can also enable or disable Caddie Analysis in Configuration Panel > Intelligent Caddie > Ask Caddie > Global Settings.

② Edit
③ Export
NoteThe Export feature must be enabled or disabled in Configuration Panel > Enterprise Security > Data Security > Export Control. This setting cannot be modified here.
④ Linkage
NoteThe Linkage button is only visible in view mode when a linkage is active on the page.
⑤ Share
⑥ Comment
⑦ Metric Monitoring (Alerts)
⑧ Favorite
⑨ Add to Caddie Report
⑩ More (Custom Menu)
The following image shows the interface with all features enabled:
You can drag to reorder the features.
If you select Hide view mode features by default, the feature toolbar is collapsed by default on the dashboard preview page.

Click the
 icon to expand the toolbar and show more features.
Font configuration
Parameters
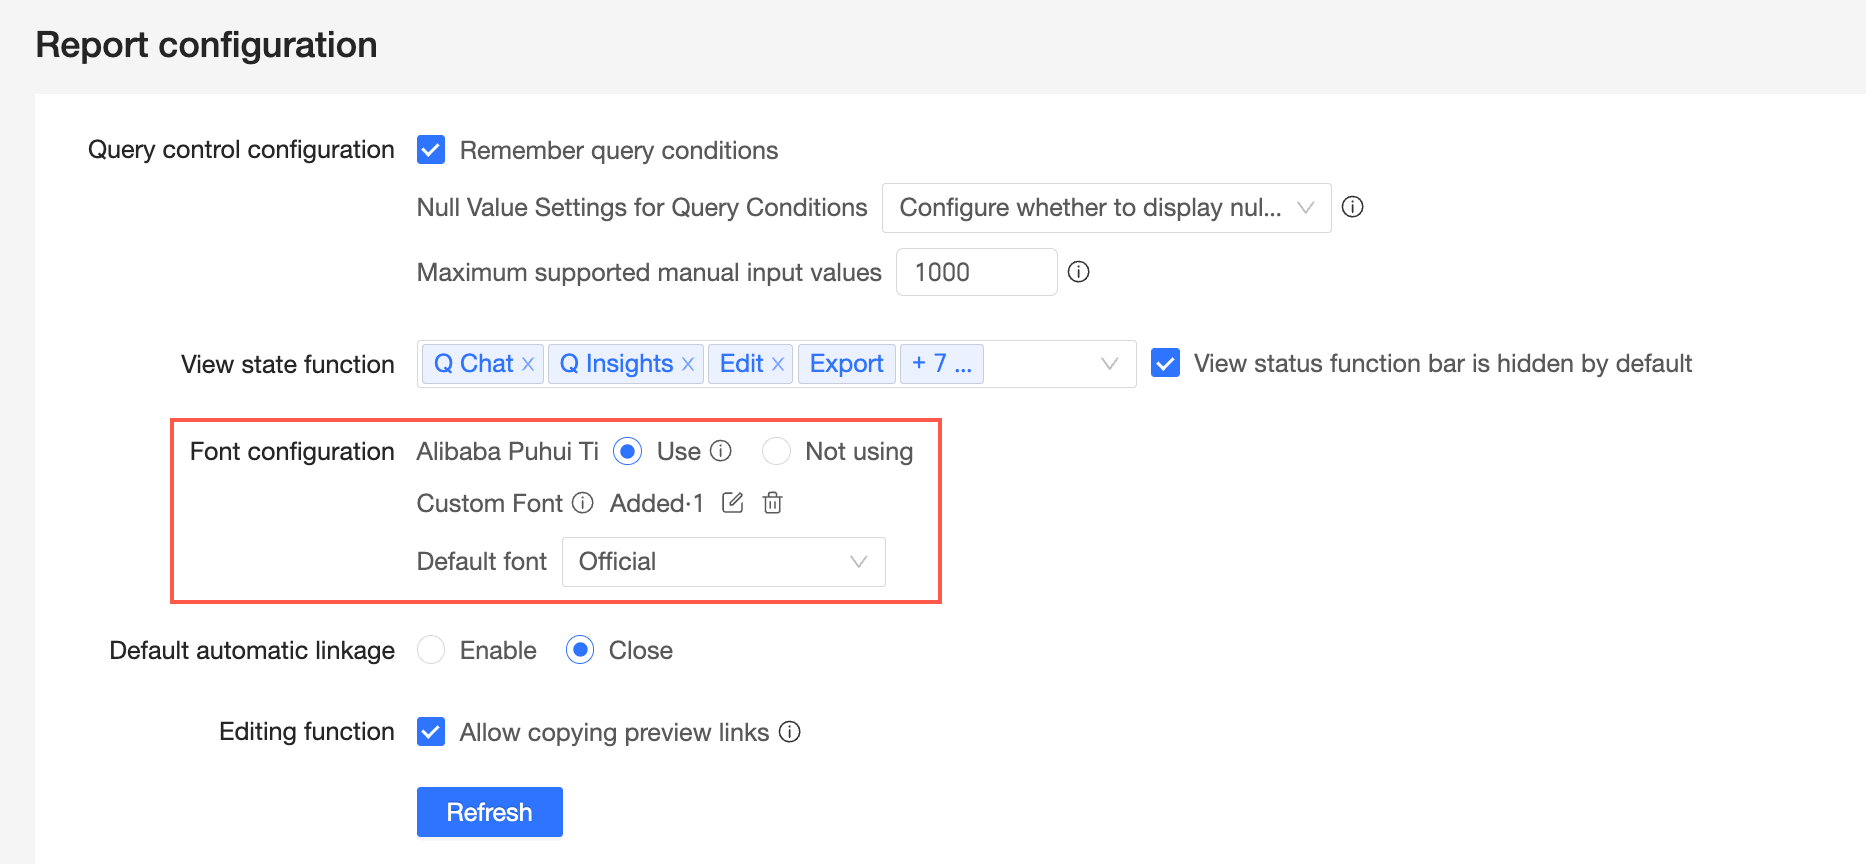
Alibaba PuHuiTi
To use the Alibaba PuHuiTi font, select Use. Once enabled, Alibaba PuHuiTi appears as an option in the page font style settings.
NoteEnabling this font can affect report performance.
Custom fonts
Follow these steps to add and manage local font packages in Quick BI.
If you have not added any custom fonts, click Click to add to open the Custom Font Management window.

If you have already added custom fonts, click the
 icon next to Added to open the Custom Font Management window.
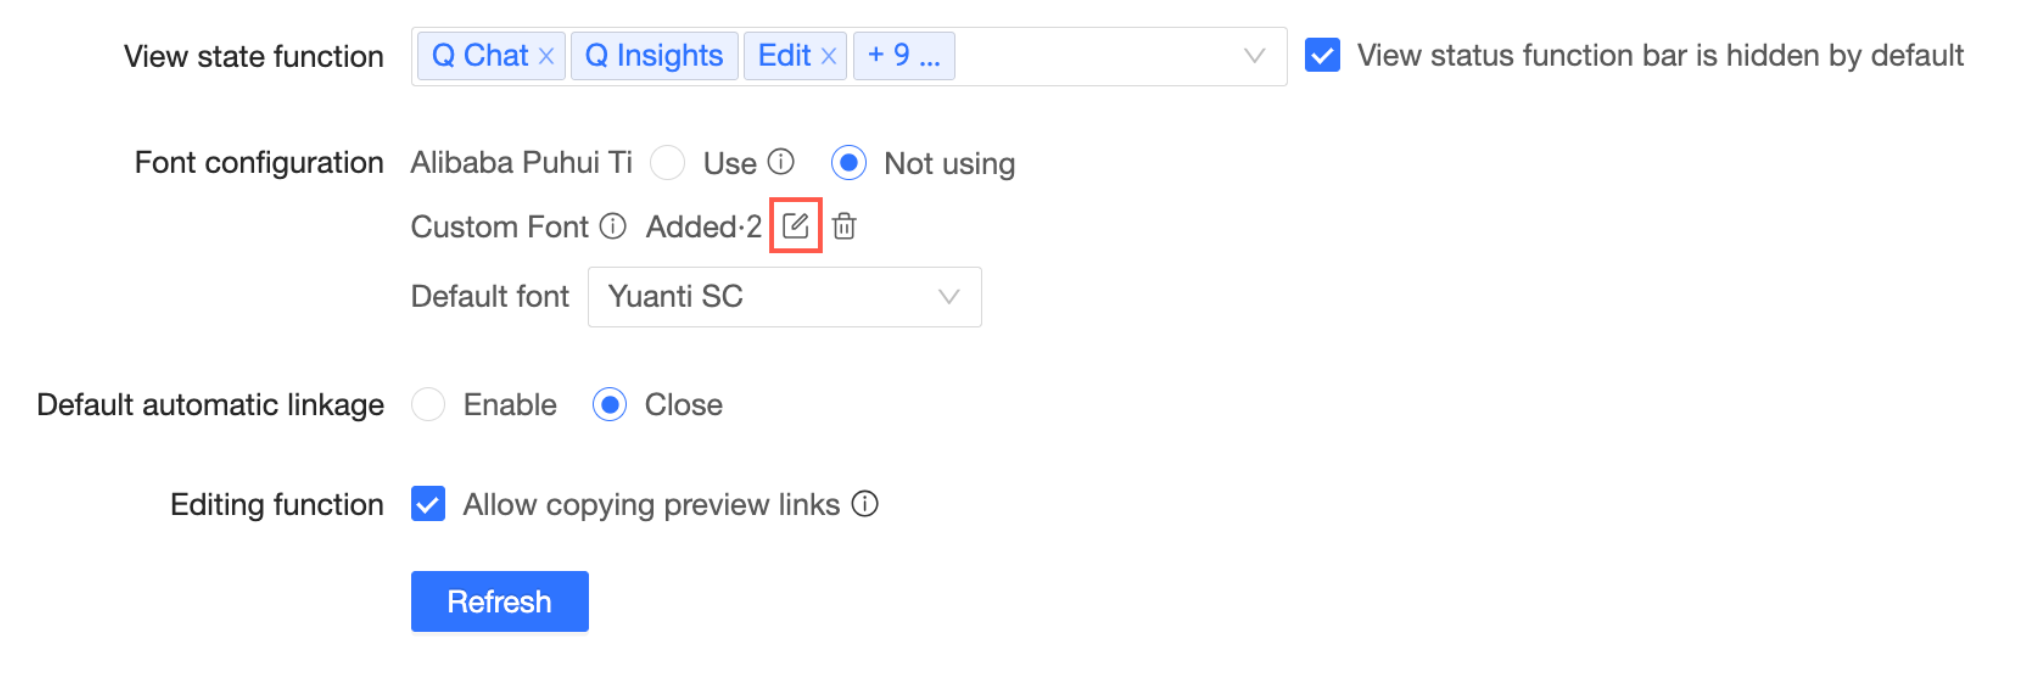
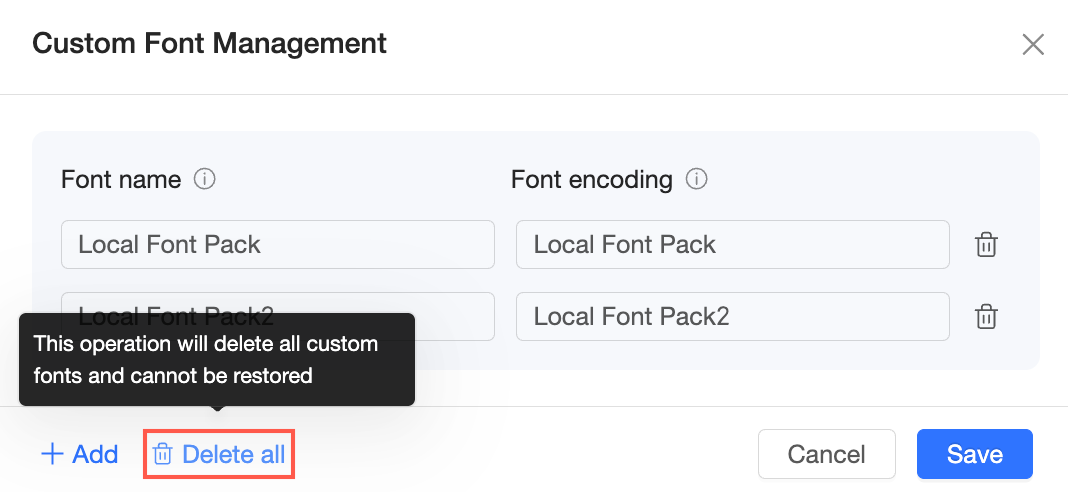
In the Custom Font Management window, enter the Font Name and Font Encoding.
NoteThe custom font name will appear in the font selection list in your report settings.
The Font Encoding must match the font package on the user's client. If the client is missing the font, or if the encoding does not match, the font will not render. Instead, Quick BI displays its default font.
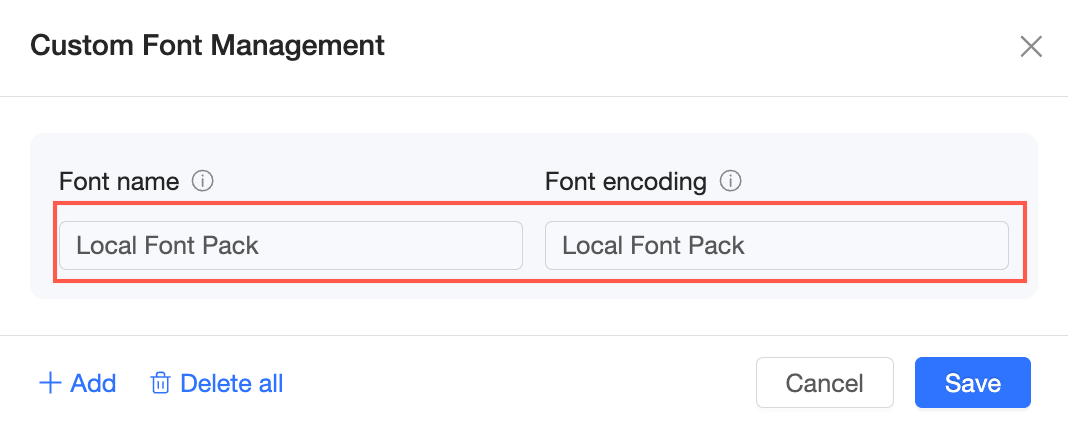
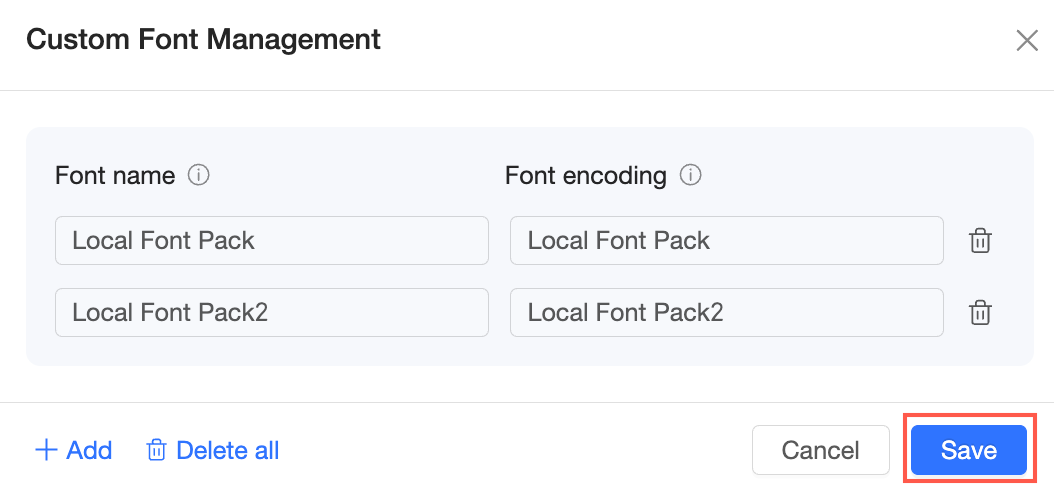
To add more fonts, click Add.
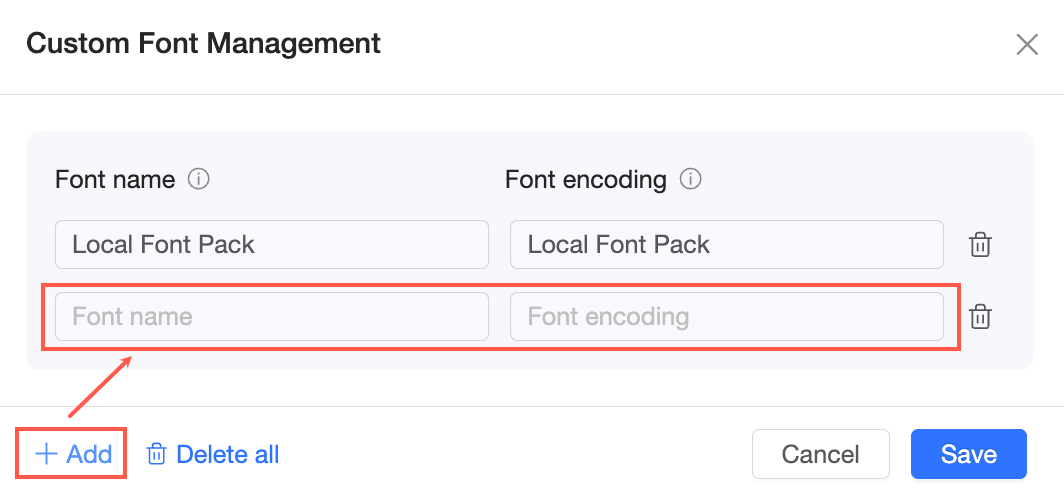
When finished, click Save.
To delete all custom fonts, click the
 icon next to Added on the report configuration page, then click OK in the confirmation dialog box.
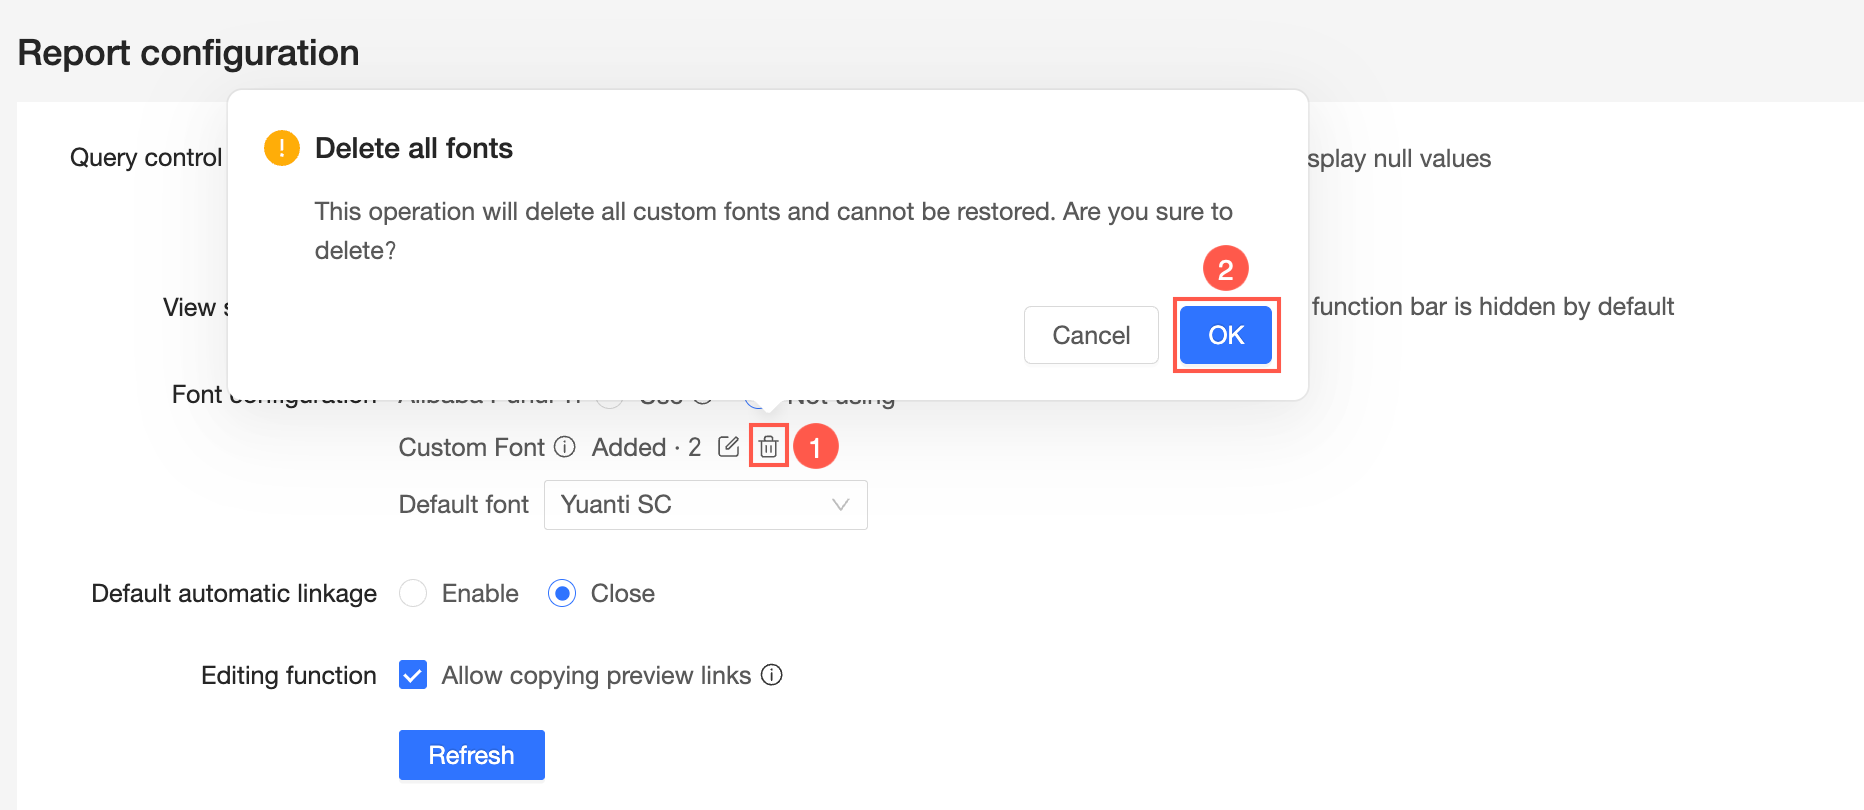
Alternatively, you can click Delete All in the Custom Font Management window.
NoteThis action deletes all custom fonts and cannot be undone.
To delete a single custom font, open the Custom Font Management window, click the
icon next to the font you want to remove, click OK in the confirmation dialog box, and then click Save.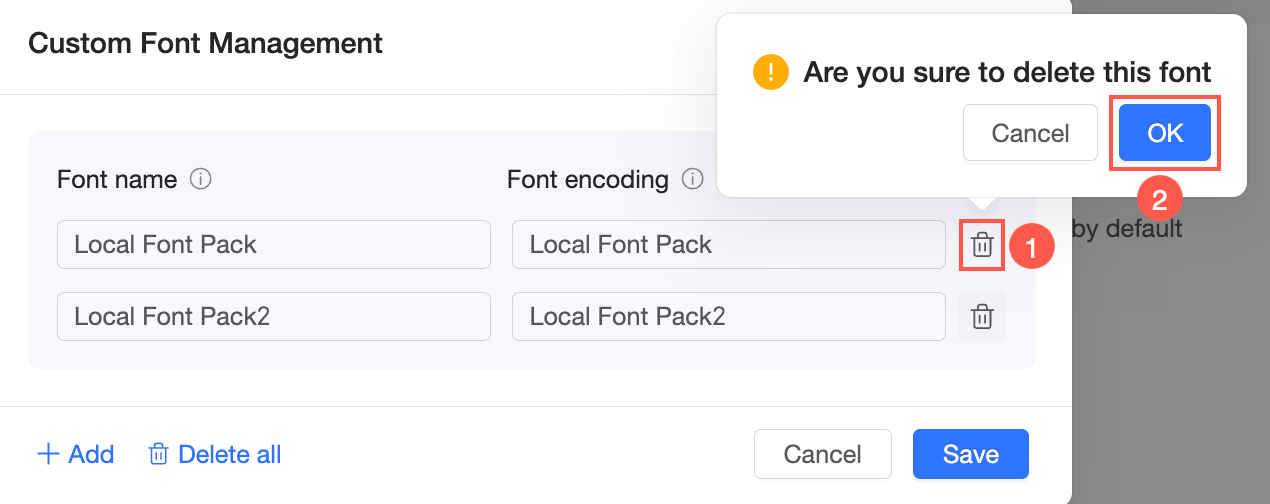
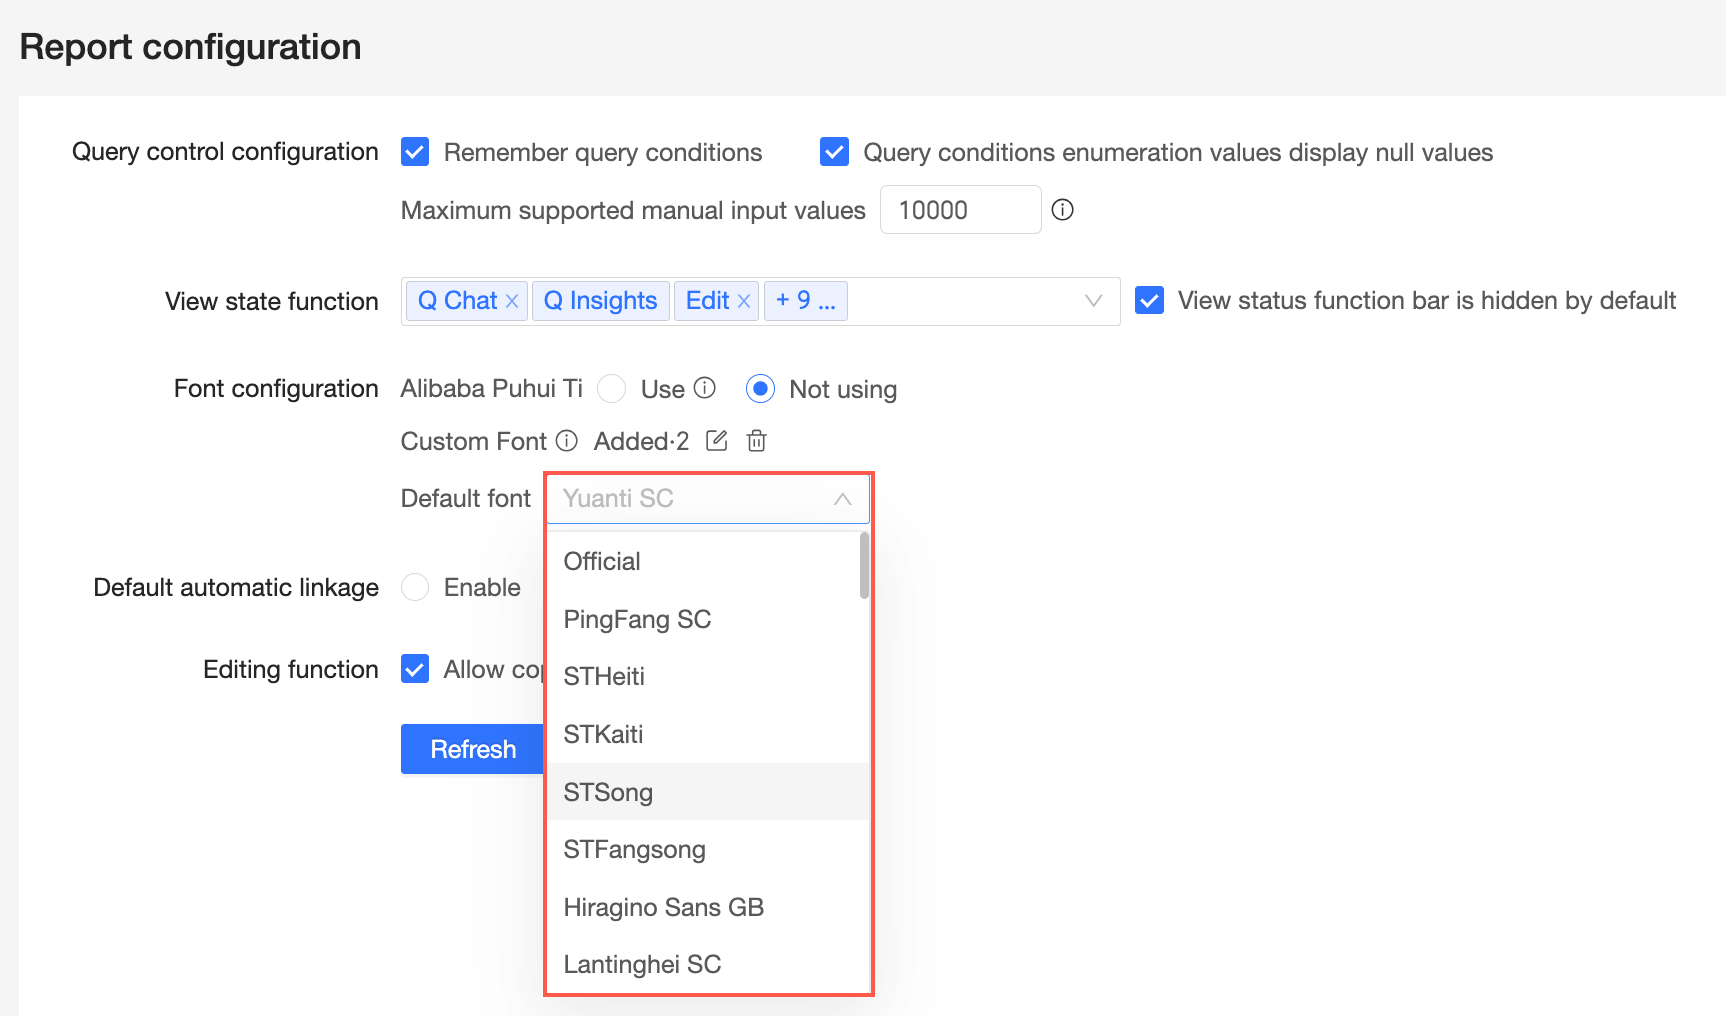
Default font
You can set a Default font style. This font then becomes the default for all report pages.
Default auto-linkage
Parameters
You can enable or disable default auto-linkage. Enabling this setting at the organization level also enables auto-linkage by default for all dashboards.

For more information about how to configure auto-linkage, see Configure auto-linkage.
Edit mode features
Parameters
You can select Allow copying preview links.
A preview link lets you share saved, unpublished content for review. The copy button is in the top-right corner of Preview mode on the dashboard edit page.

For more information about how to copy a preview link, see Copy a preview link.