Create an Azure Database for SQL Server data source in Quick BI to connect to and analyze your SQL Server data hosted on Microsoft Azure.
Prerequisites
-
A SQL Server database is created in Microsoft Azure.
-
The username and password for the SQL Server database are obtained.
Limitations
SQL Server versions 2008 to 2022 are supported.
Procedure
-
Add IP addresses to the allowlist.
Before connecting to your SQL Server database on Azure, add the IP addresses of Quick BI to the server's allowlist. For instructions, see the Microsoft Azure documentation Security considerations for SQL Server on Azure Virtual Machines.
-
Verify the connection and create the data source.
-
Log in to the Quick BI console.
-
Add a data source:
-
From a data source creation entry point, navigate to the Create Data Source page.
-
On the Microsoft Cloud Databases tab, select Azure Database for SQL Server.

-
-
-
In the Configure Connection dialog box, configure the following parameters.
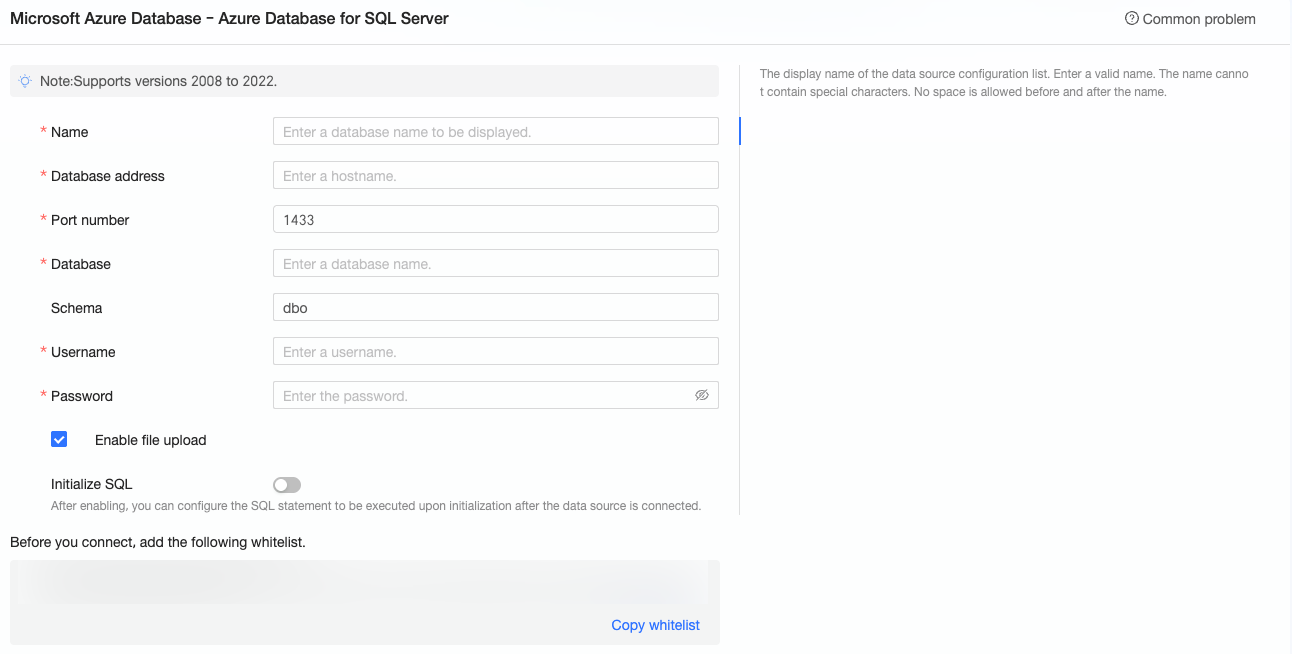
Parameter
Description
Display name
The display name for the data source in the Quick BI console.
The name must not contain special characters or leading or trailing spaces.
Database address
The public endpoint of your SQL Server database, which you can obtain from the Azure portal.
For more information, see Connect to a SQL Server virtual machine on Azure.
Port
The port used to connect to the database. Default value: 1433.
Database
The name of the database to connect to.
Schema
The schema to connect to. Default value: dbo.
Username
The username for your database account.
Password
The password for your database account.
Enable file upload
Specifies whether to allow file uploads to this data source.
Initialization SQL
Specifies SQL statements that run automatically after a connection is established.
Only SET statements are allowed. Separate multiple statements with semicolons (;).
-
Click Test Connection to verify the connection.

-
After the connection test succeeds, click OK to add the data source.
Next steps
After the data source is created, you can create a dataset and start analyzing your data.
-
To add tables or custom SQL queries from your SQL Server data source to Quick BI, see Create a dataset.
-
To create charts and analyze data, see Create a dashboard and Overview of charts.
-
To drill down and perform in-depth data analysis, see Step 3: Configure and view a drill-down.