Quick BI supports single-table and multi-table models. You can join or merge multiple tables to build a physical model.
Prerequisites
You have created a dataset. For more information, see Create a dataset.
Background information
Canvas layers
Quick BI data modeling uses a two-layer canvas architecture. The first layer, the relational model canvas, is for building a logical relationship model. The second layer, the physical model canvas, is for building the physical data structure. This layered approach separates the logical semantic layer from the physical modeling layer, improving data model clarity and enabling flexible, complex data modeling.
|
Relational model canvas |
Physical model canvas |
|
|
|
Joins
Quick BI supports left joins, right joins, inner joins, and full joins. The following examples use a student table and a course grade table to illustrate the four join types.

These diagrams illustrate the concepts. In an actual join, the original columns of the joined tables are retained.
Merges
Quick BI supports merging data tables. The following examples use provincial sales data to illustrate three scenarios.

Limitations
-
Joining and merging tables from different data sources is available only in the Professional Edition.
-
Cross-source joins and merges require enabling extraction acceleration with the Quick Engine. For a list of data sources that support this feature, see Data source feature list.
-
MySQL data sources do not support full joins.
-
A model supports up to five levels of joins (five join nodes). There is no limit on the number of joins at each level.
-
You can merge a maximum of five tables.
-
For API data sources, joins and merges are supported only for data sources in extraction mode. The direct connection mode supports only single-table modeling.
Create a physical model
To use a physical model, do not build the model directly on the relational model canvas. After you drag the first table onto the canvas, click the ![]() icon next to the logical table and select Enter Physical Canvas, or double-click the logical table to enter the physical model canvas. Then, configure multi-table joins and merges.
icon next to the logical table and select Enter Physical Canvas, or double-click the logical table to enter the physical model canvas. Then, configure multi-table joins and merges.
-
Click the
 icon next to the logical table and select Enter Physical Canvas, or double-click the logical table to enter the physical model canvas.
-
The data source of the current logical table is selected by default, but you can change it manually.
-
In the data table list on the left, you can hover over a target data table and click the
 icon to view the table details.
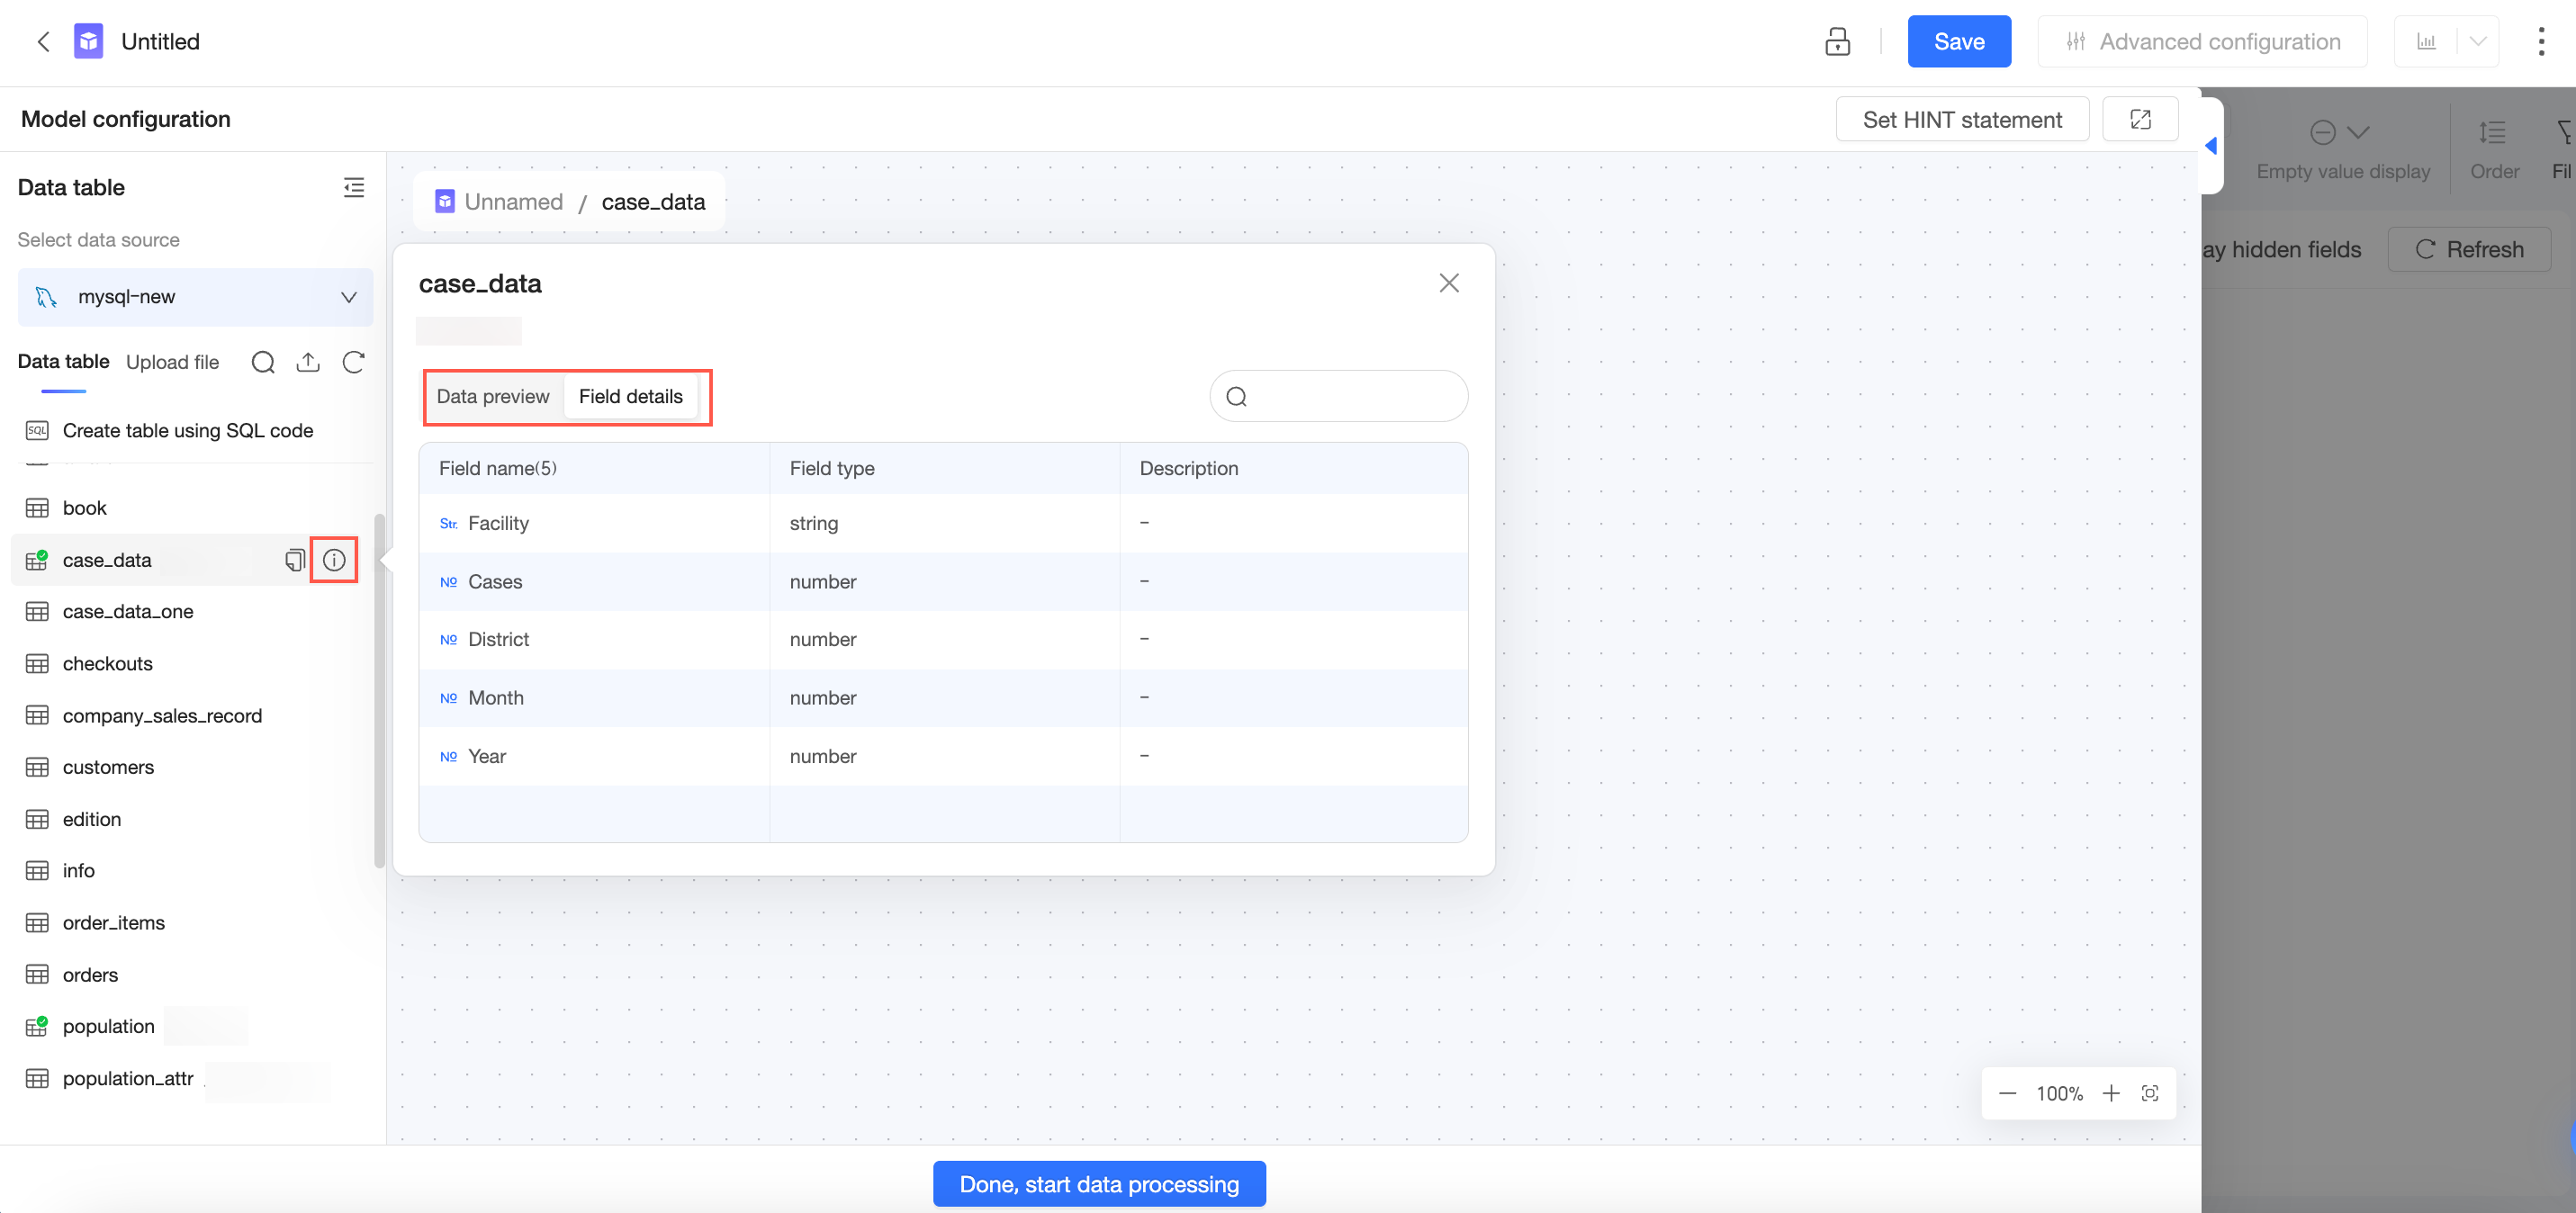
Hover over a target data table and click the
 icon to copy the table name.
 -
Drag a second data table to the canvas to join or merge it. You can also create a table using custom SQL.
-
You can view the Table Details.
-
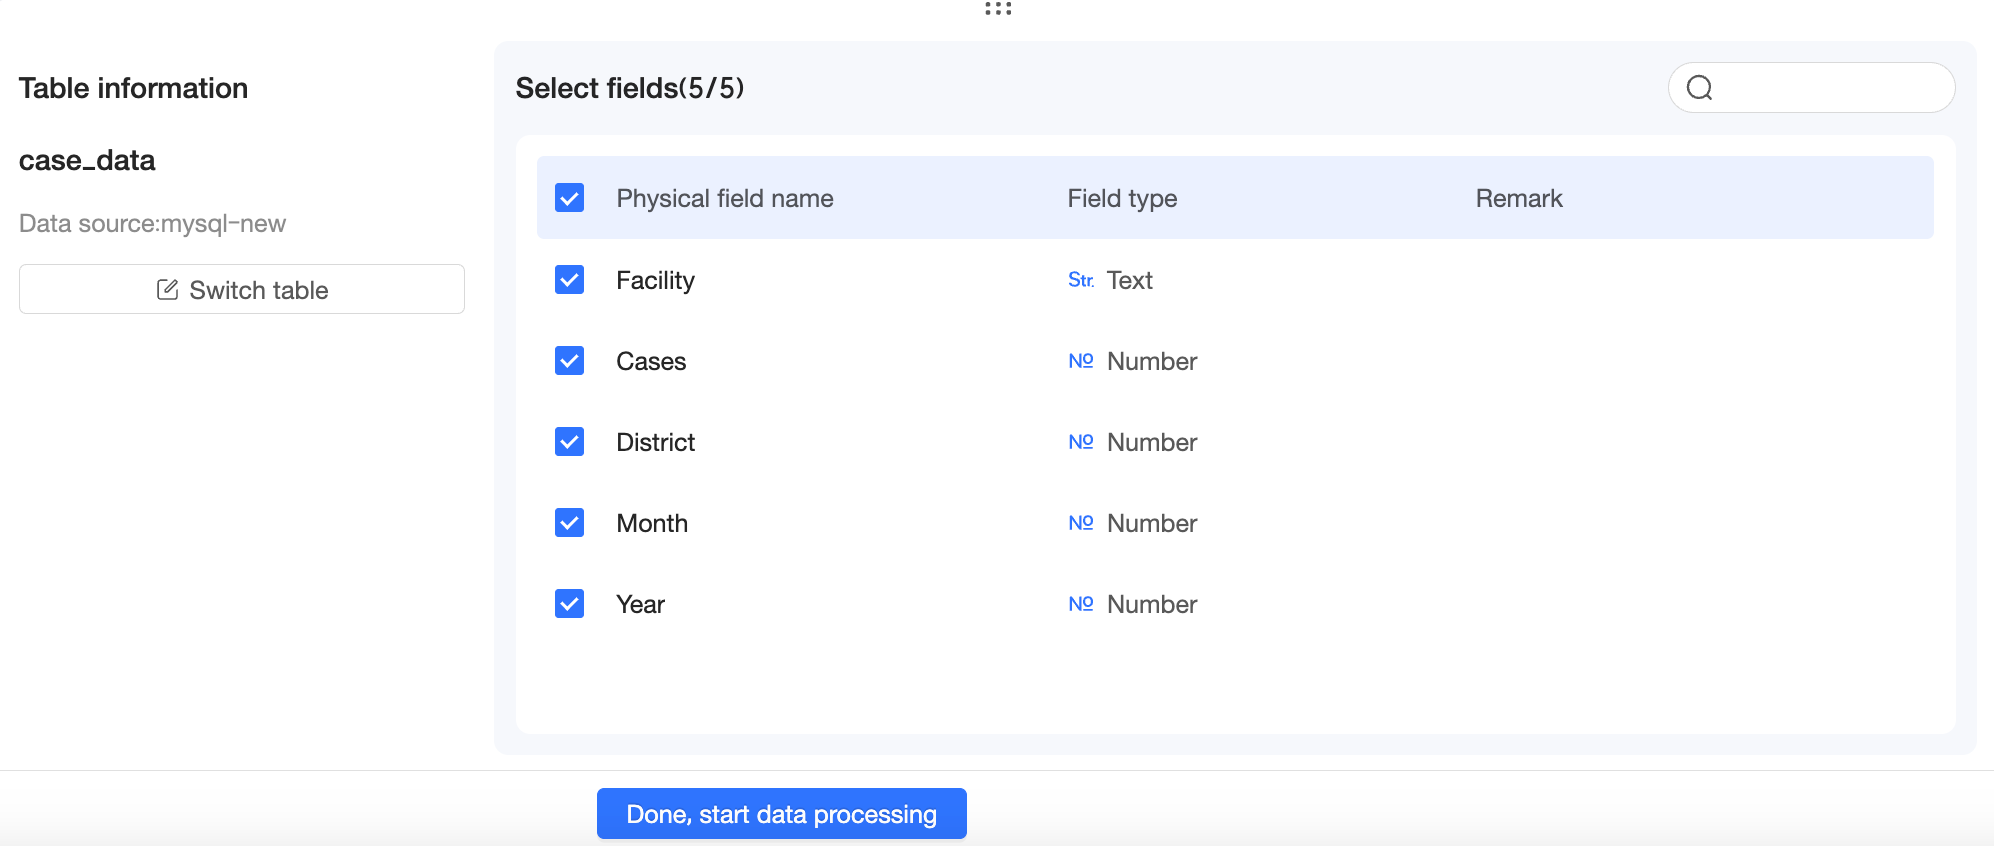
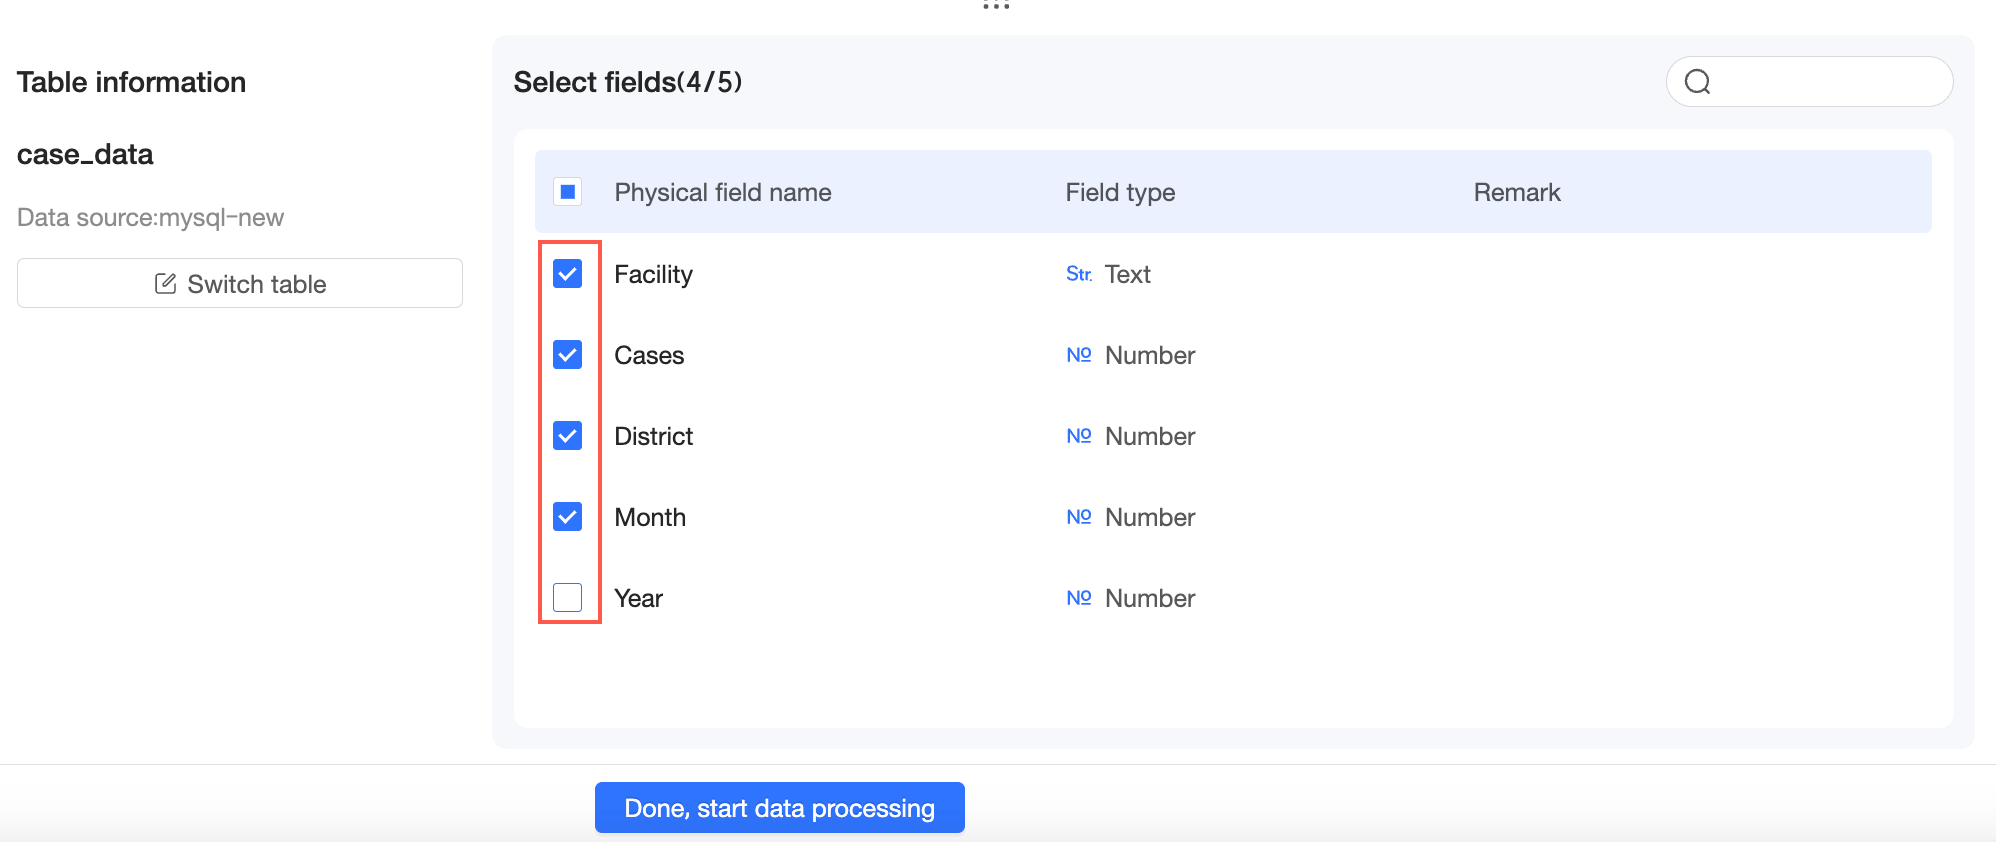
On the Table Details page, you can select the fields that you want to include.
-
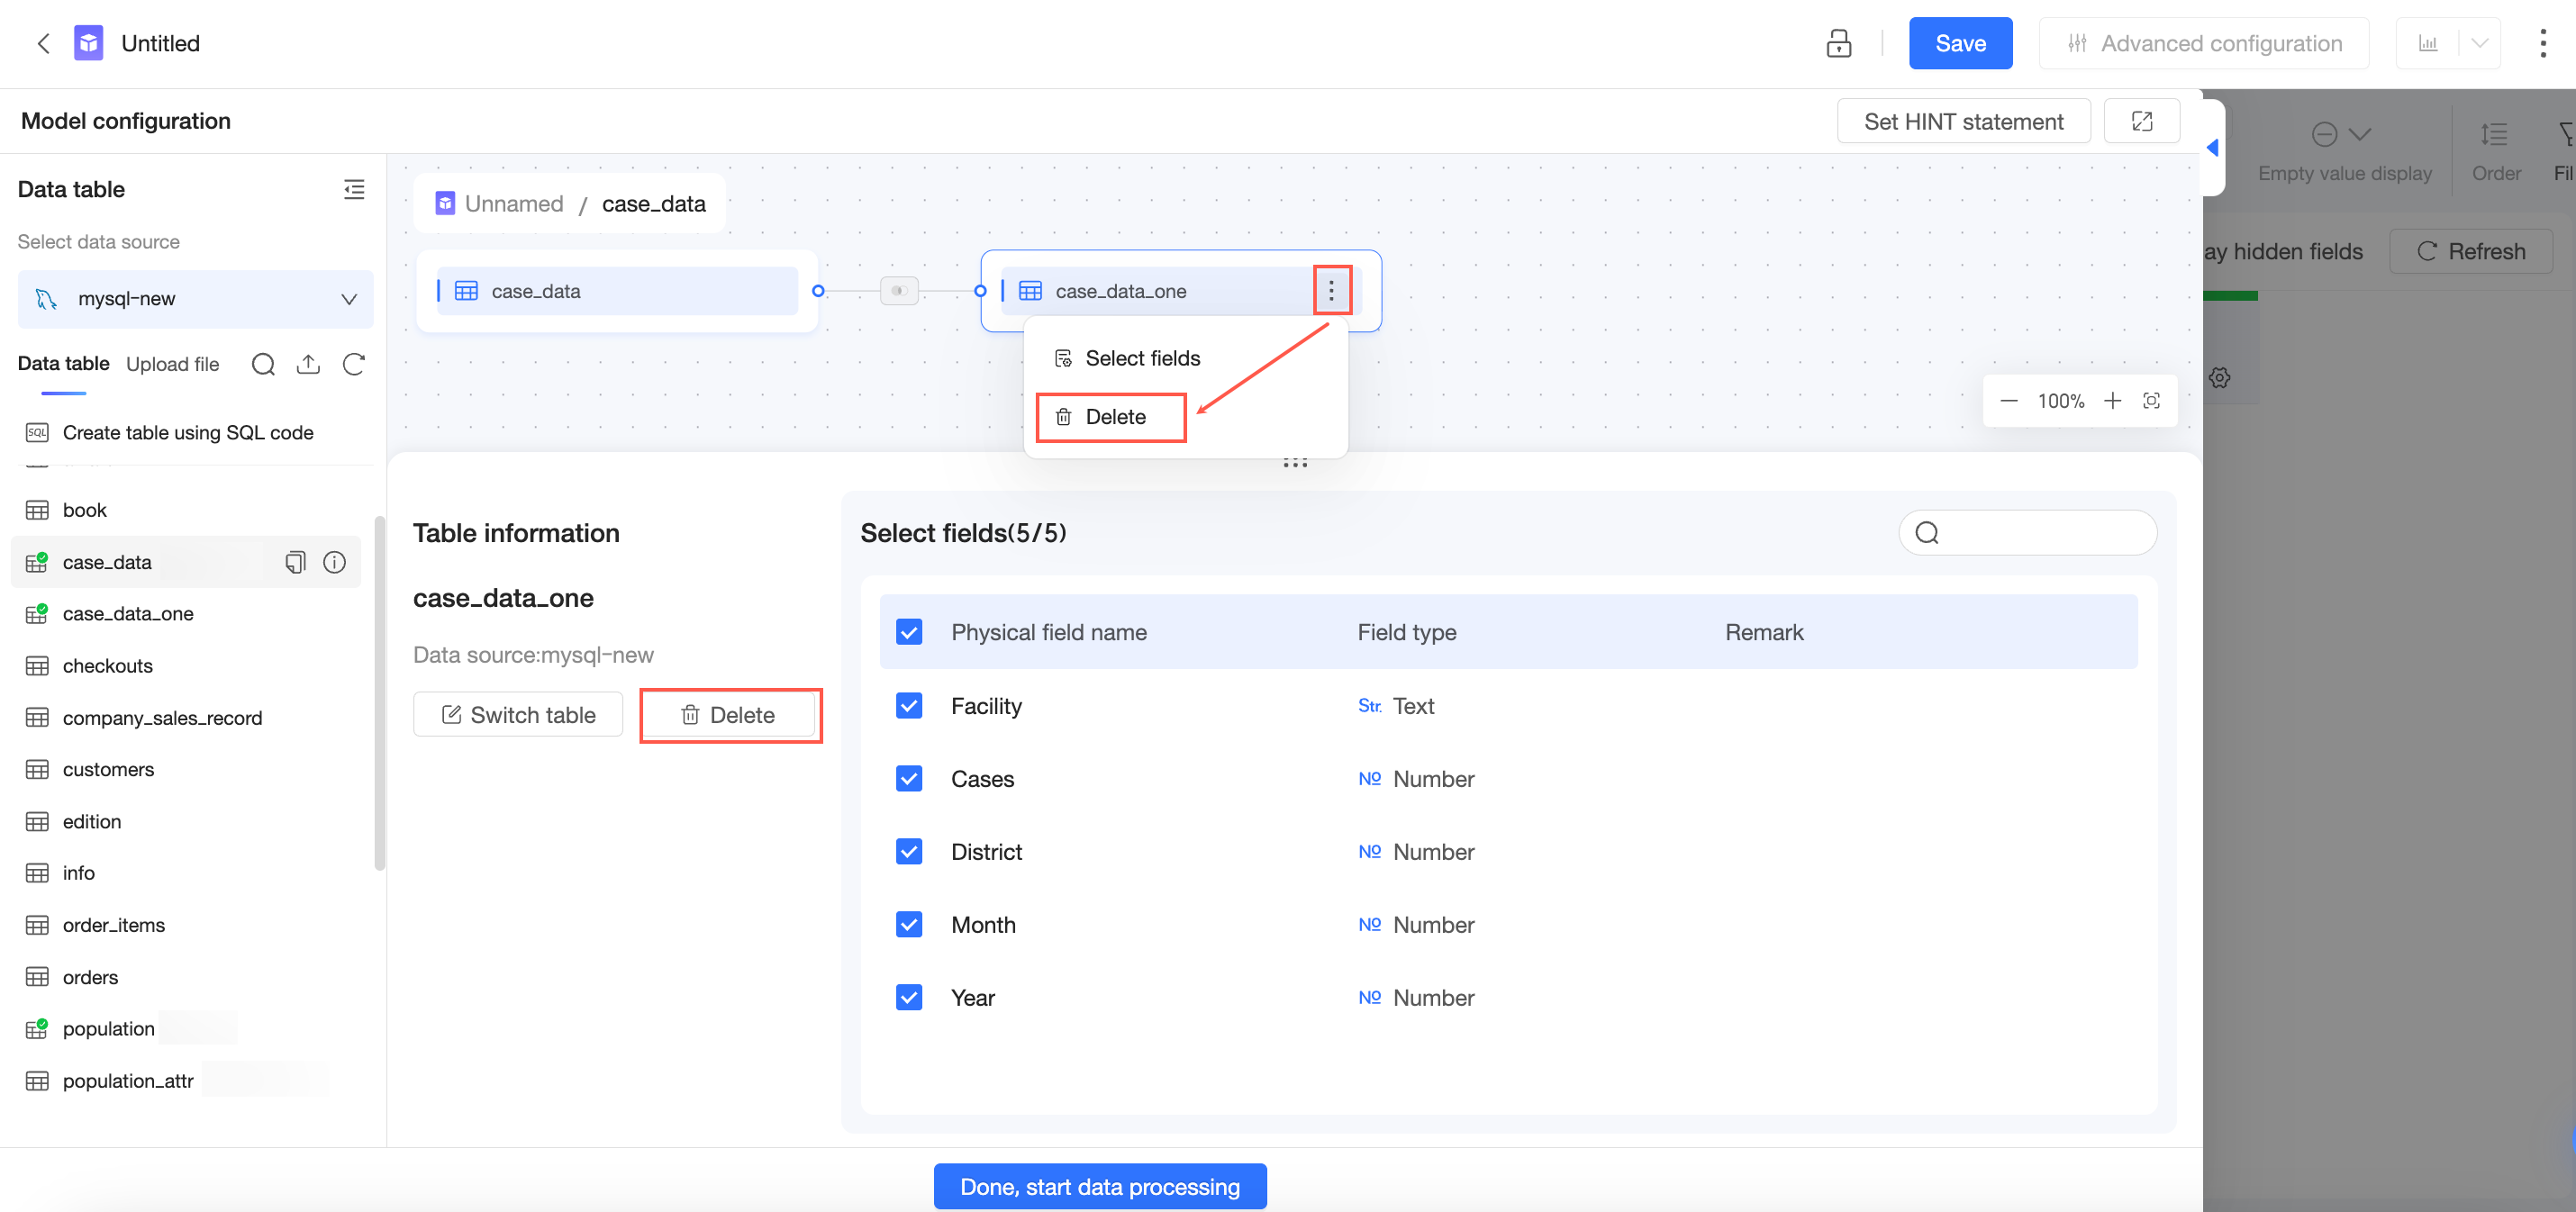
If you no longer need the data table, you can Delete it.
Join tables
Procedure
-
Enter the physical model canvas.
-
Select or create the tables to join.
You can join a data table with another data table, a data table with a table created from SQL, or two tables created from SQL.
NoteFor more information about editing SQL statements, see Use custom SQL.
-
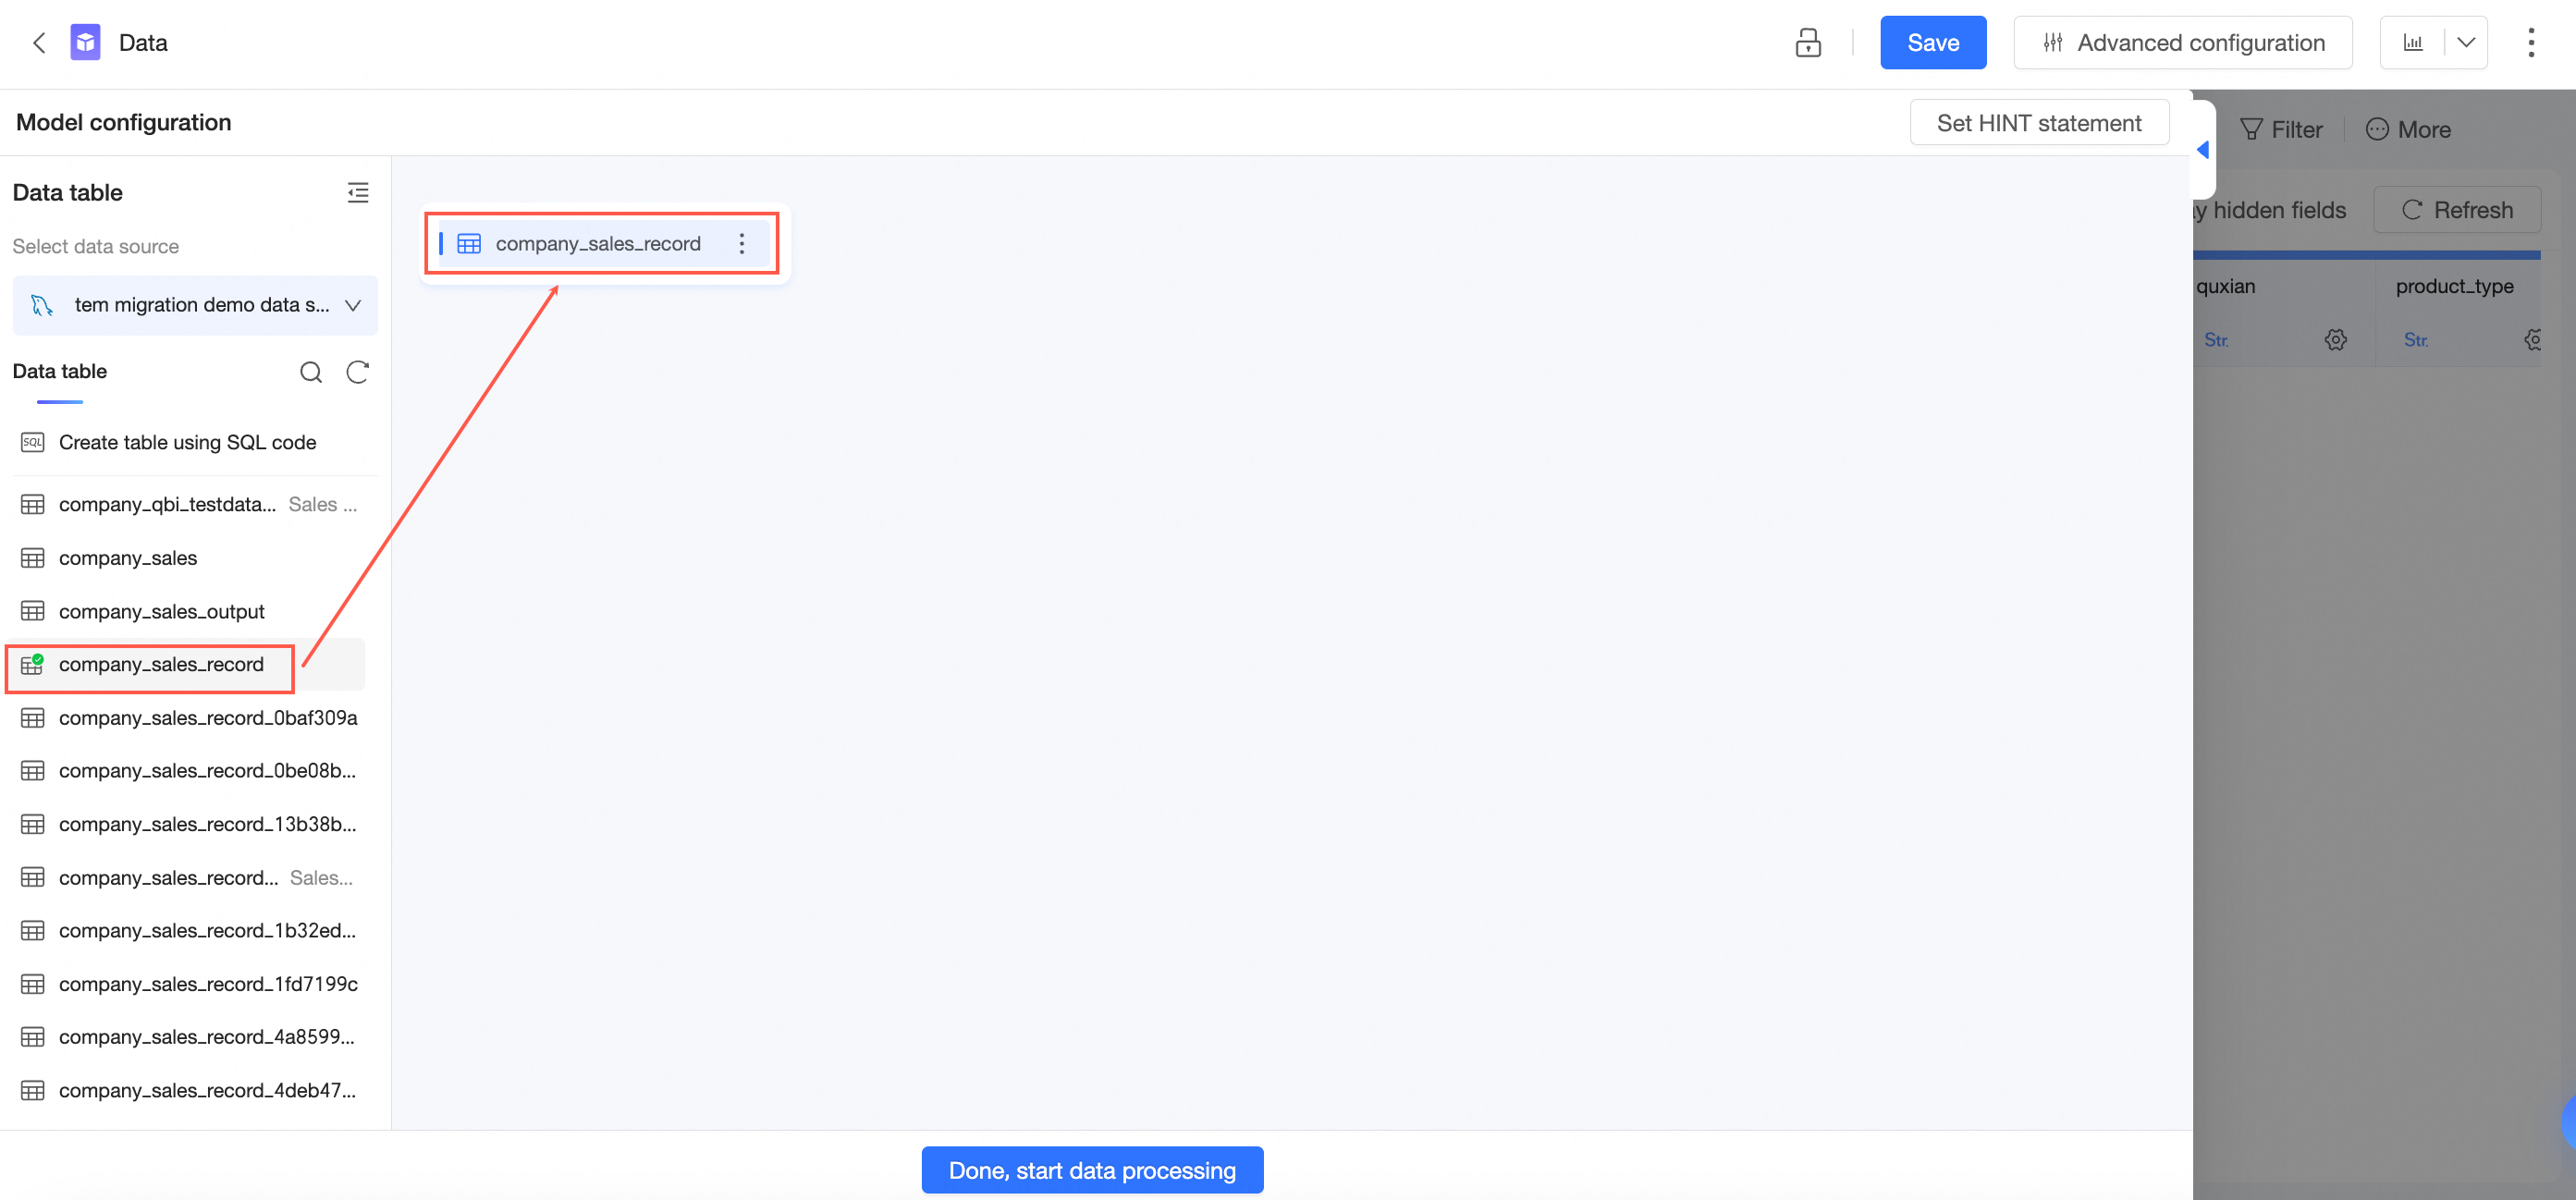
Join two data tables
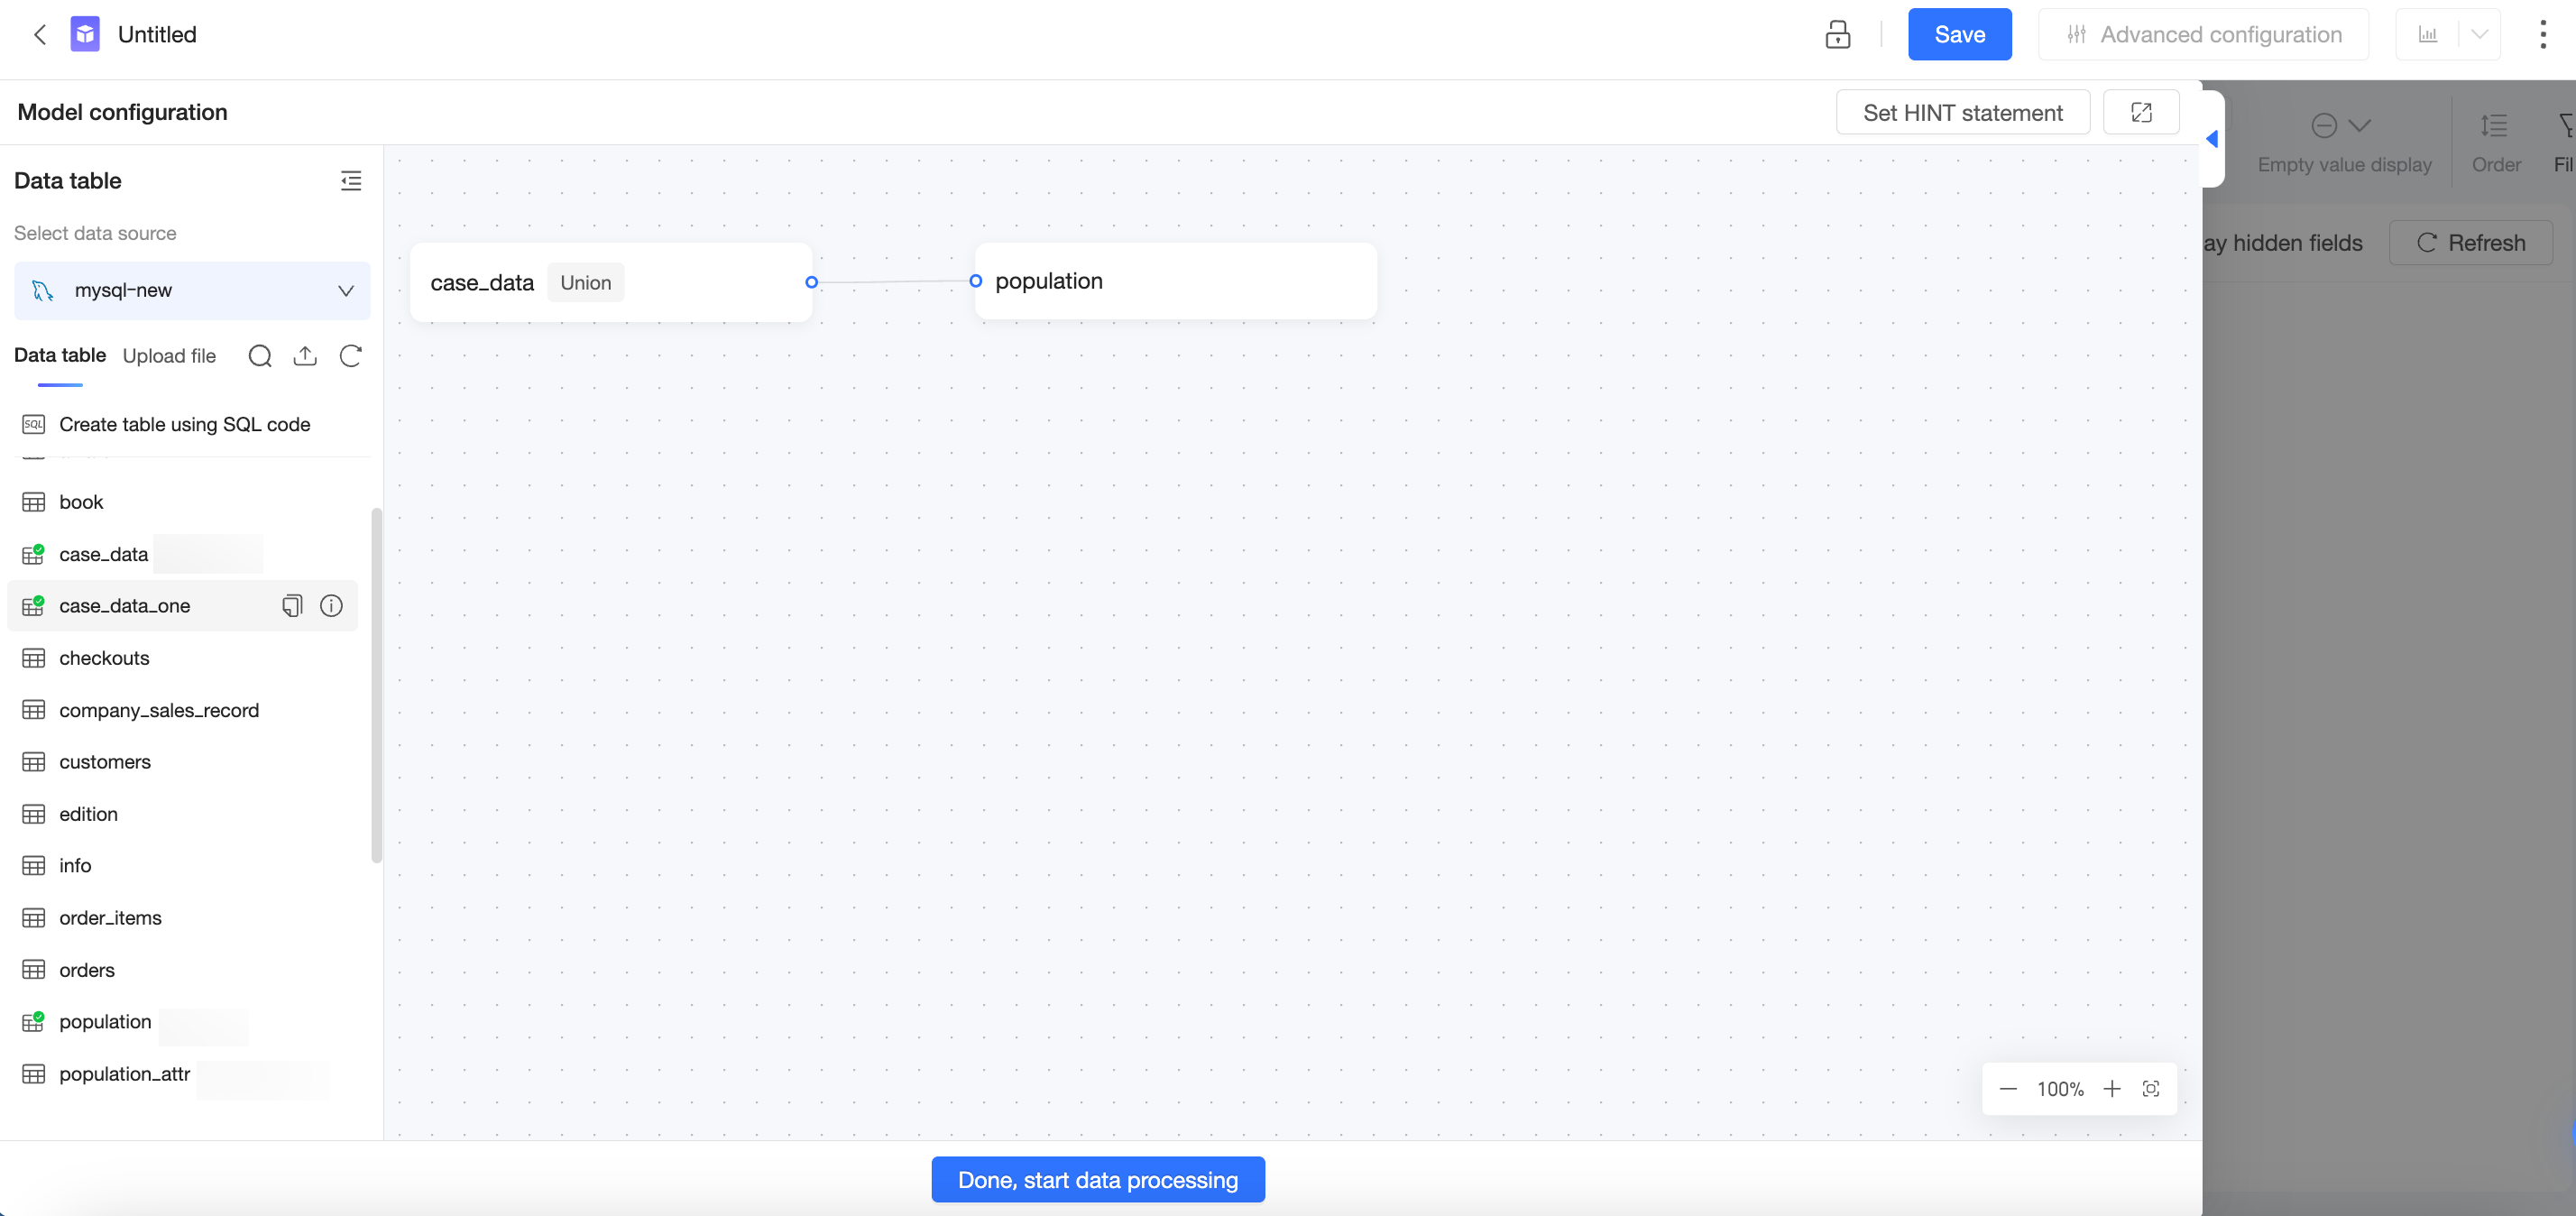
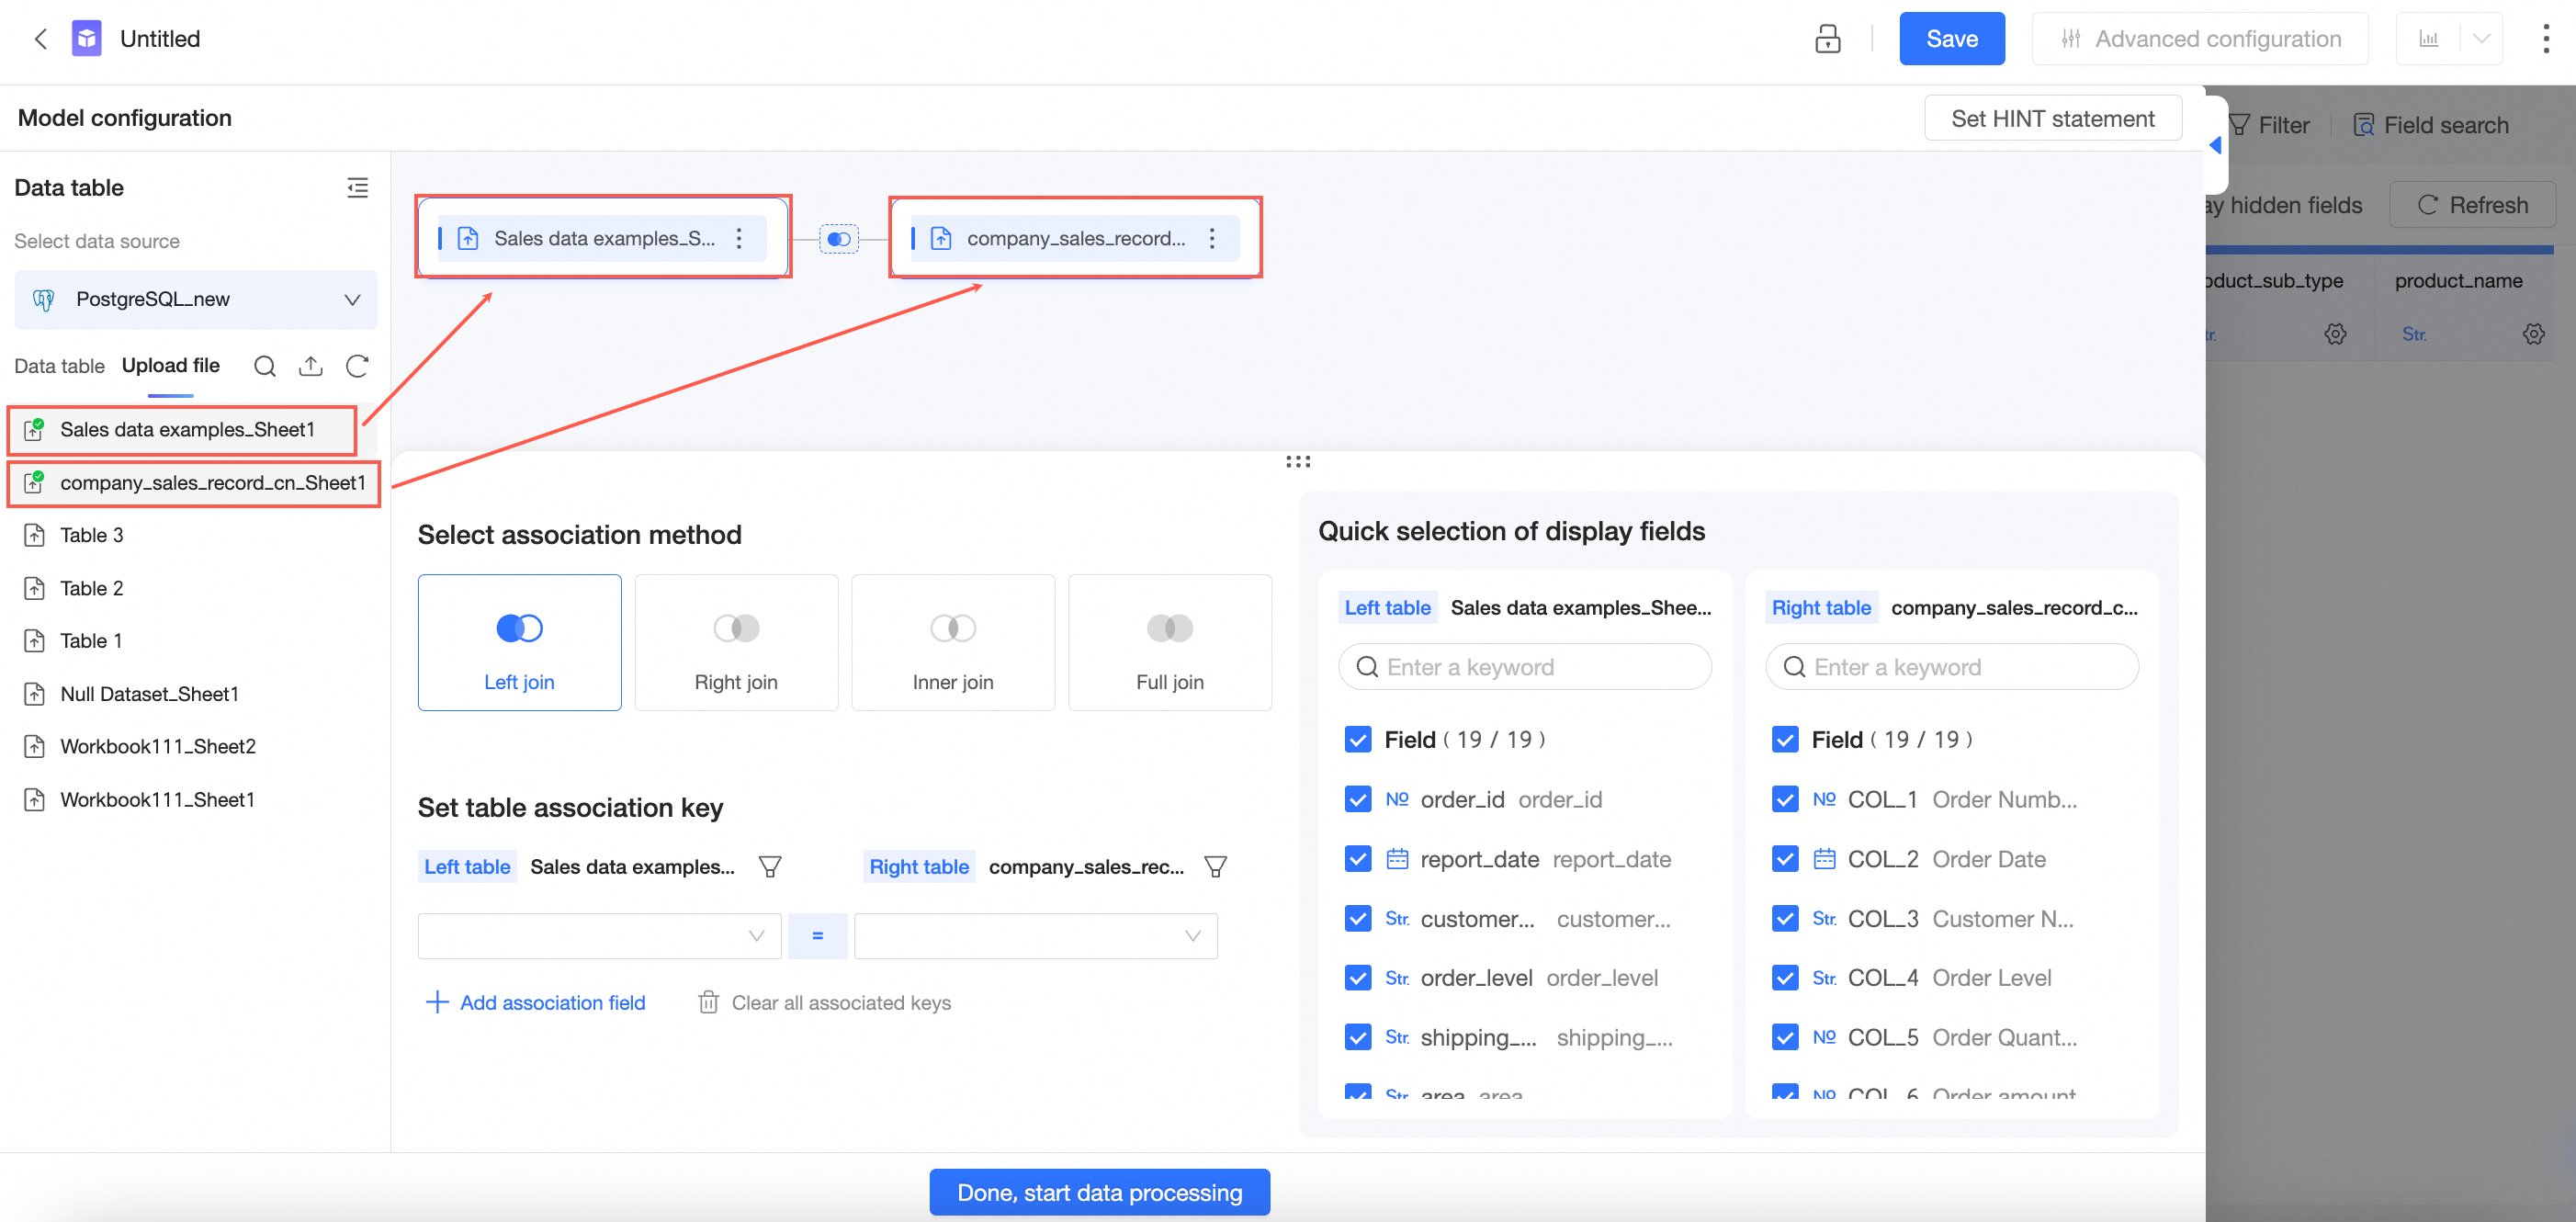
On the dataset edit page, drag the data tables to the canvas as shown in the following figure.
-
Join a data table with a table created from SQL
-
Double-click or drag a data table to the canvas.
-
Double-click or drag Create Table with SQL to the canvas.
-
In the SQL editor, enter the SQL statement, click Run, and then click Confirm Edit to create the table.
-
-
Join a table created from SQL with a data table

-
Click Create Dataset with SQL, enter the SQL statement, click Run, and then click Confirm Edit to create the table.
-
Double-click or drag a data table to the canvas.
-
-
Join two tables created from SQL

-
Click Create Dataset with SQL, enter the SQL statement, click Run, and then click Confirm Edit to create the table.
-
Double-click or drag Create Table with SQL to the canvas.
-
In the SQL editor, enter the SQL statement, click Run, and then click Confirm Edit to create the table.
-
-
-
Select the fields you want to include based on your business needs.

-
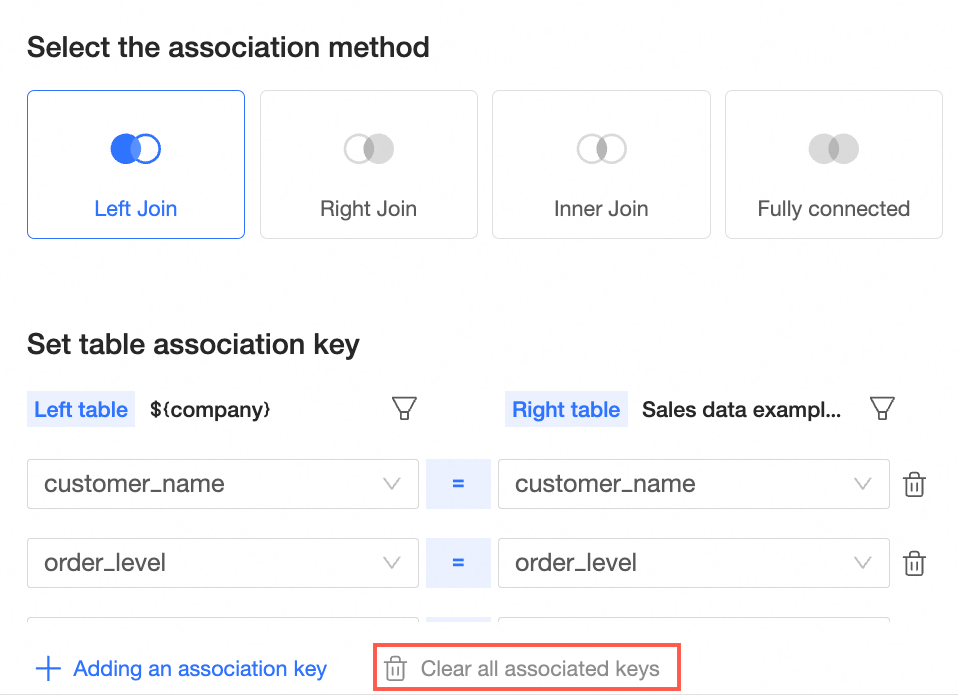
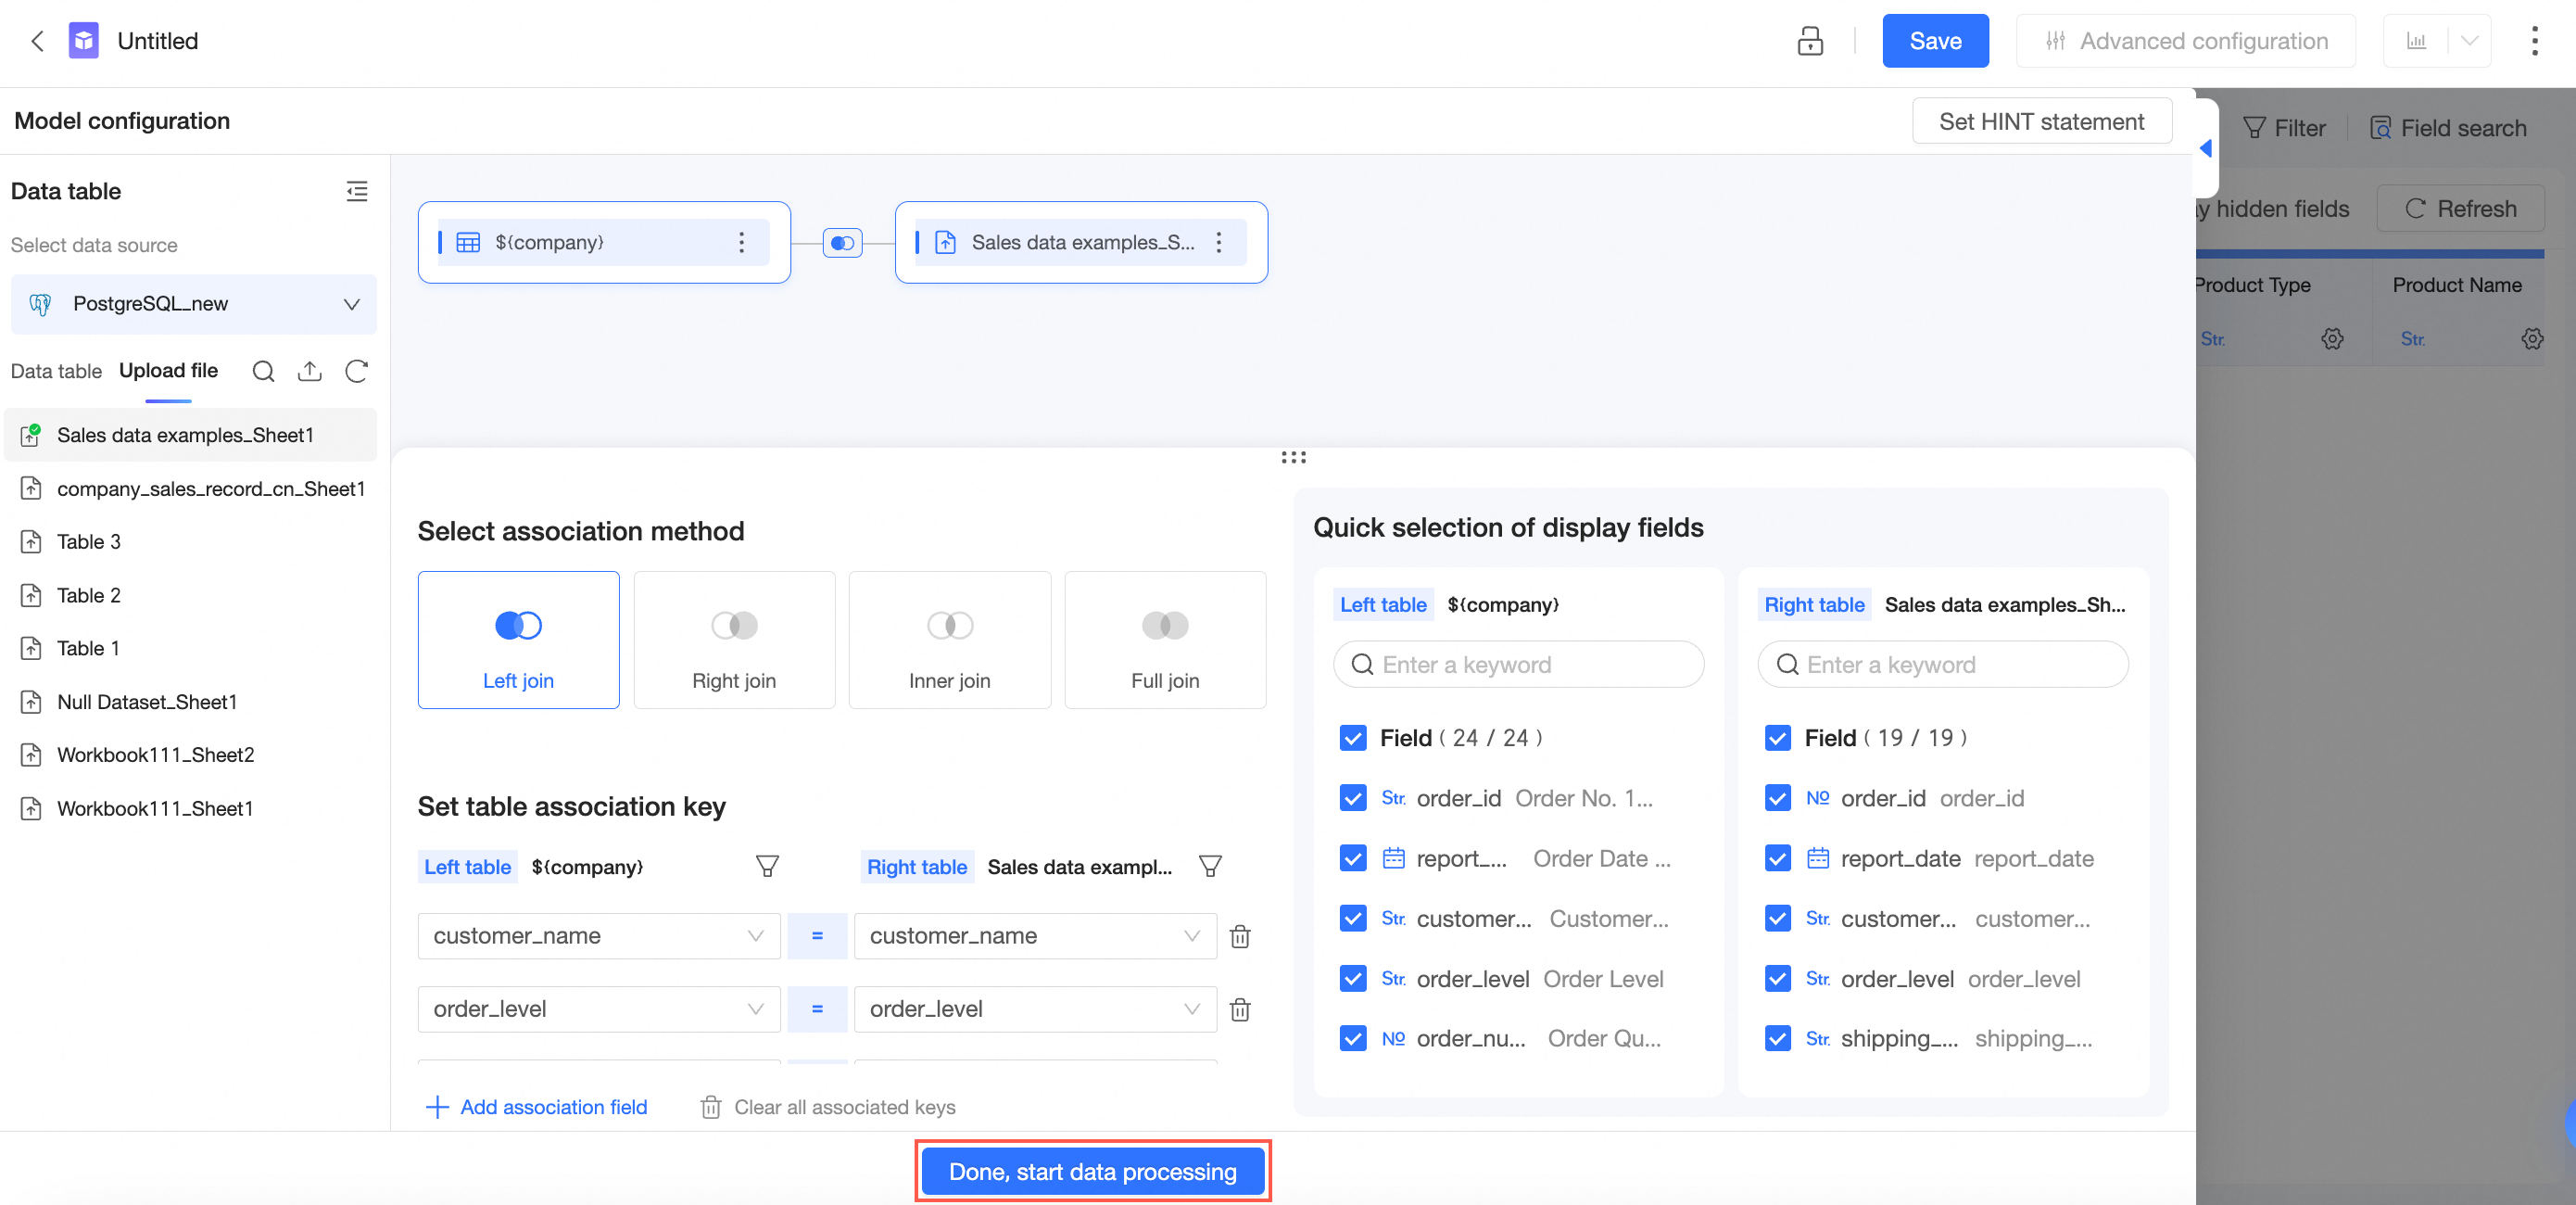
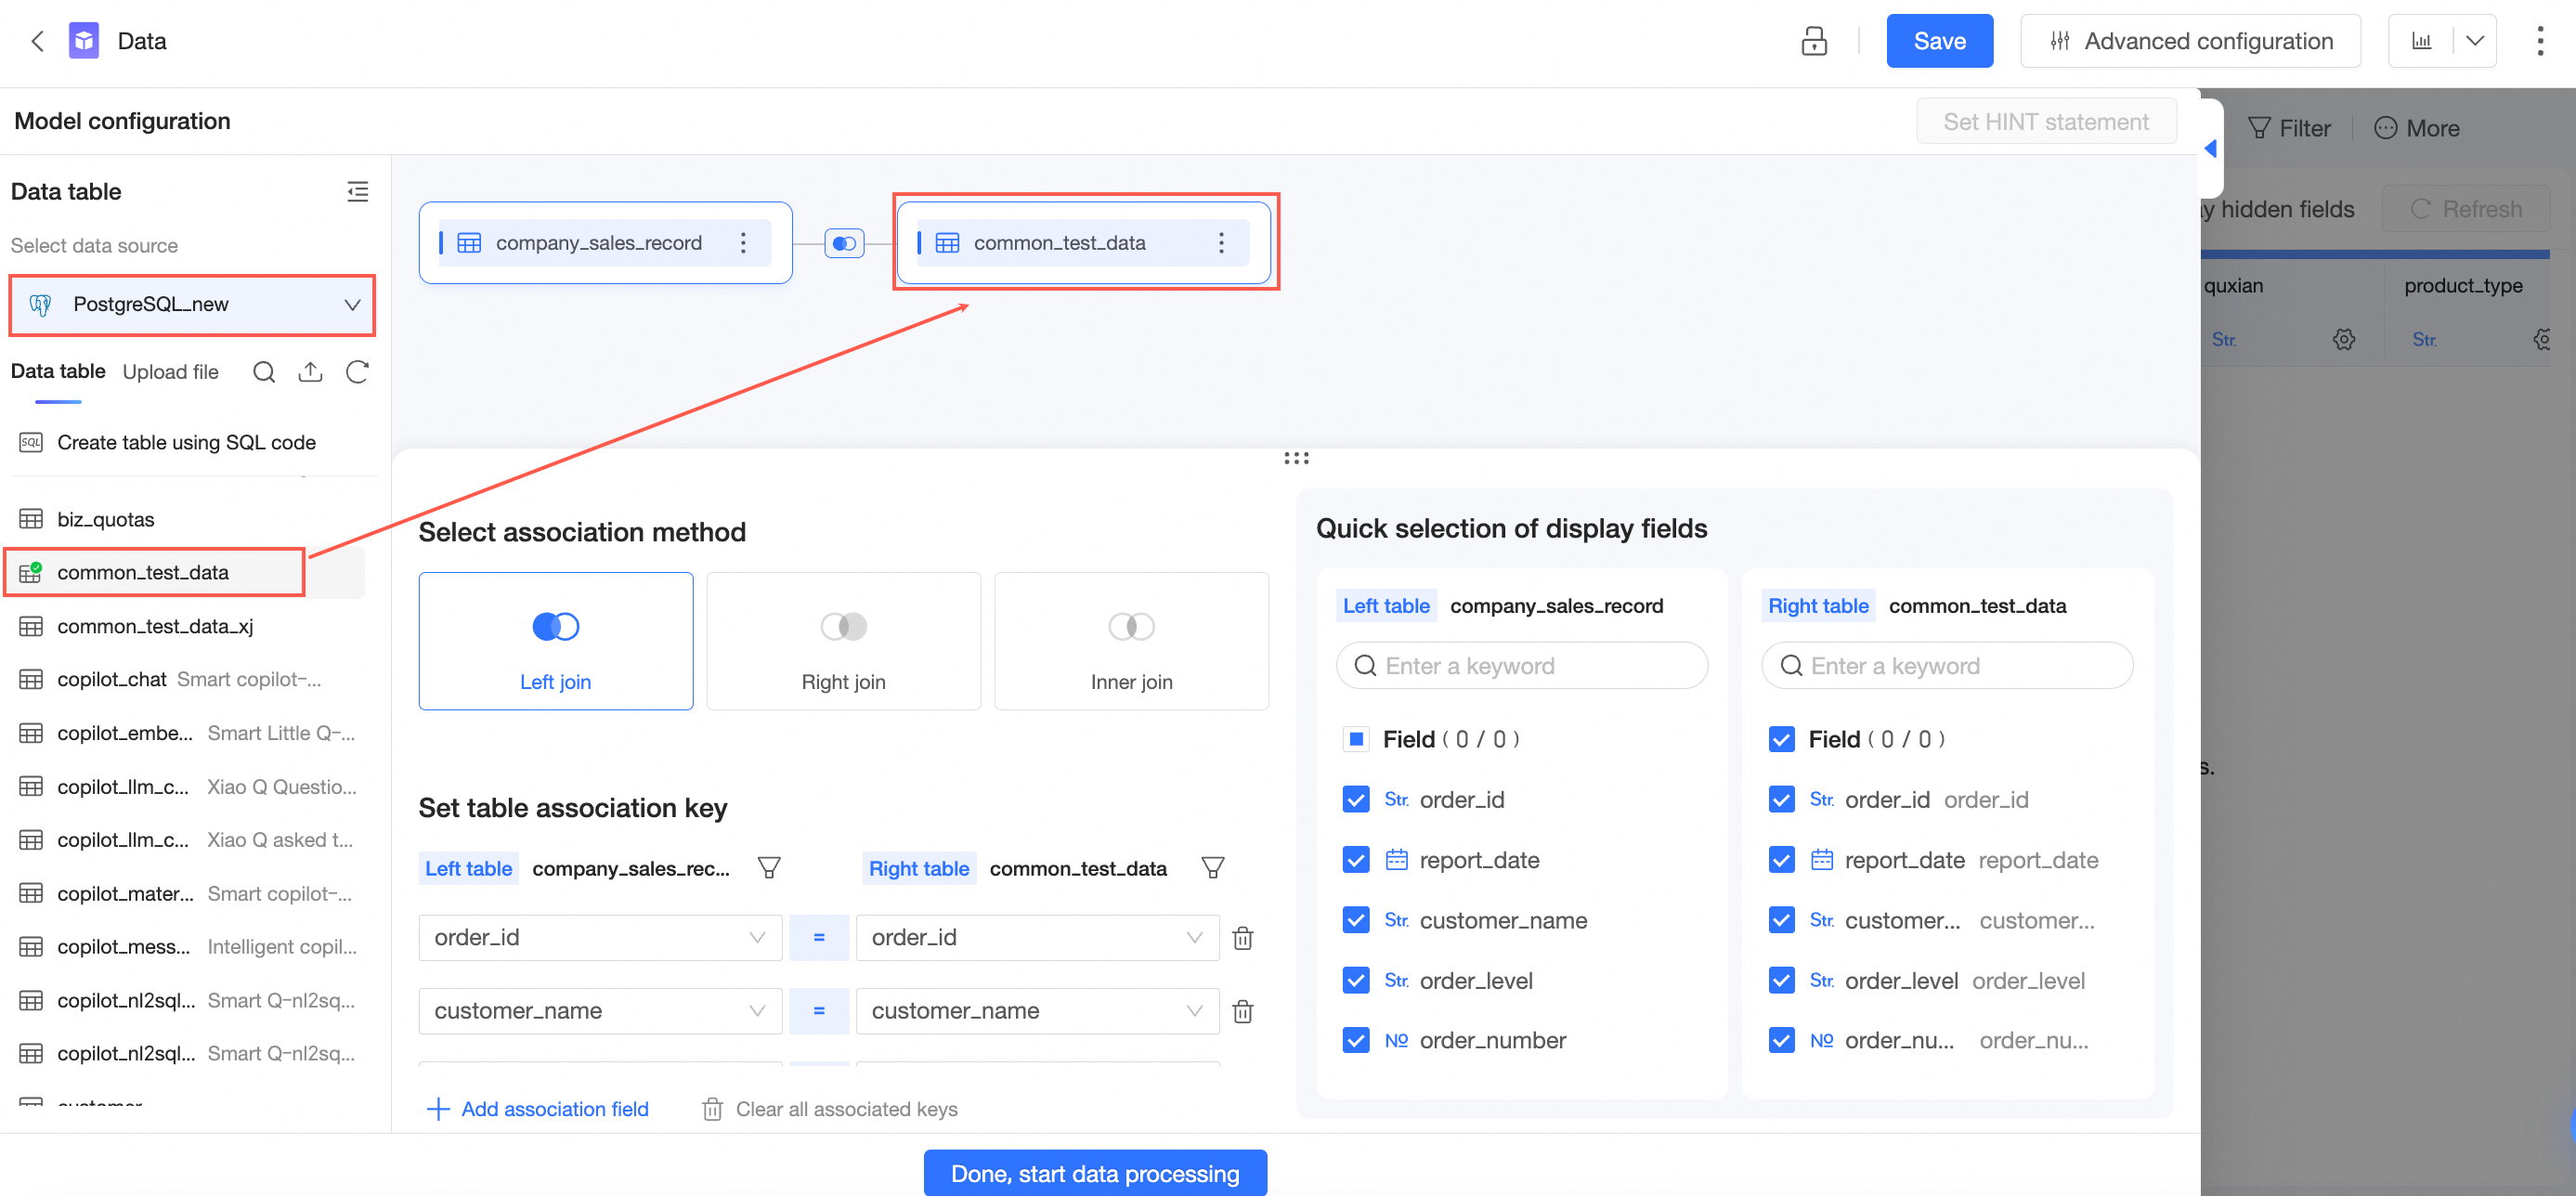
In the New Join panel, configure the data join.
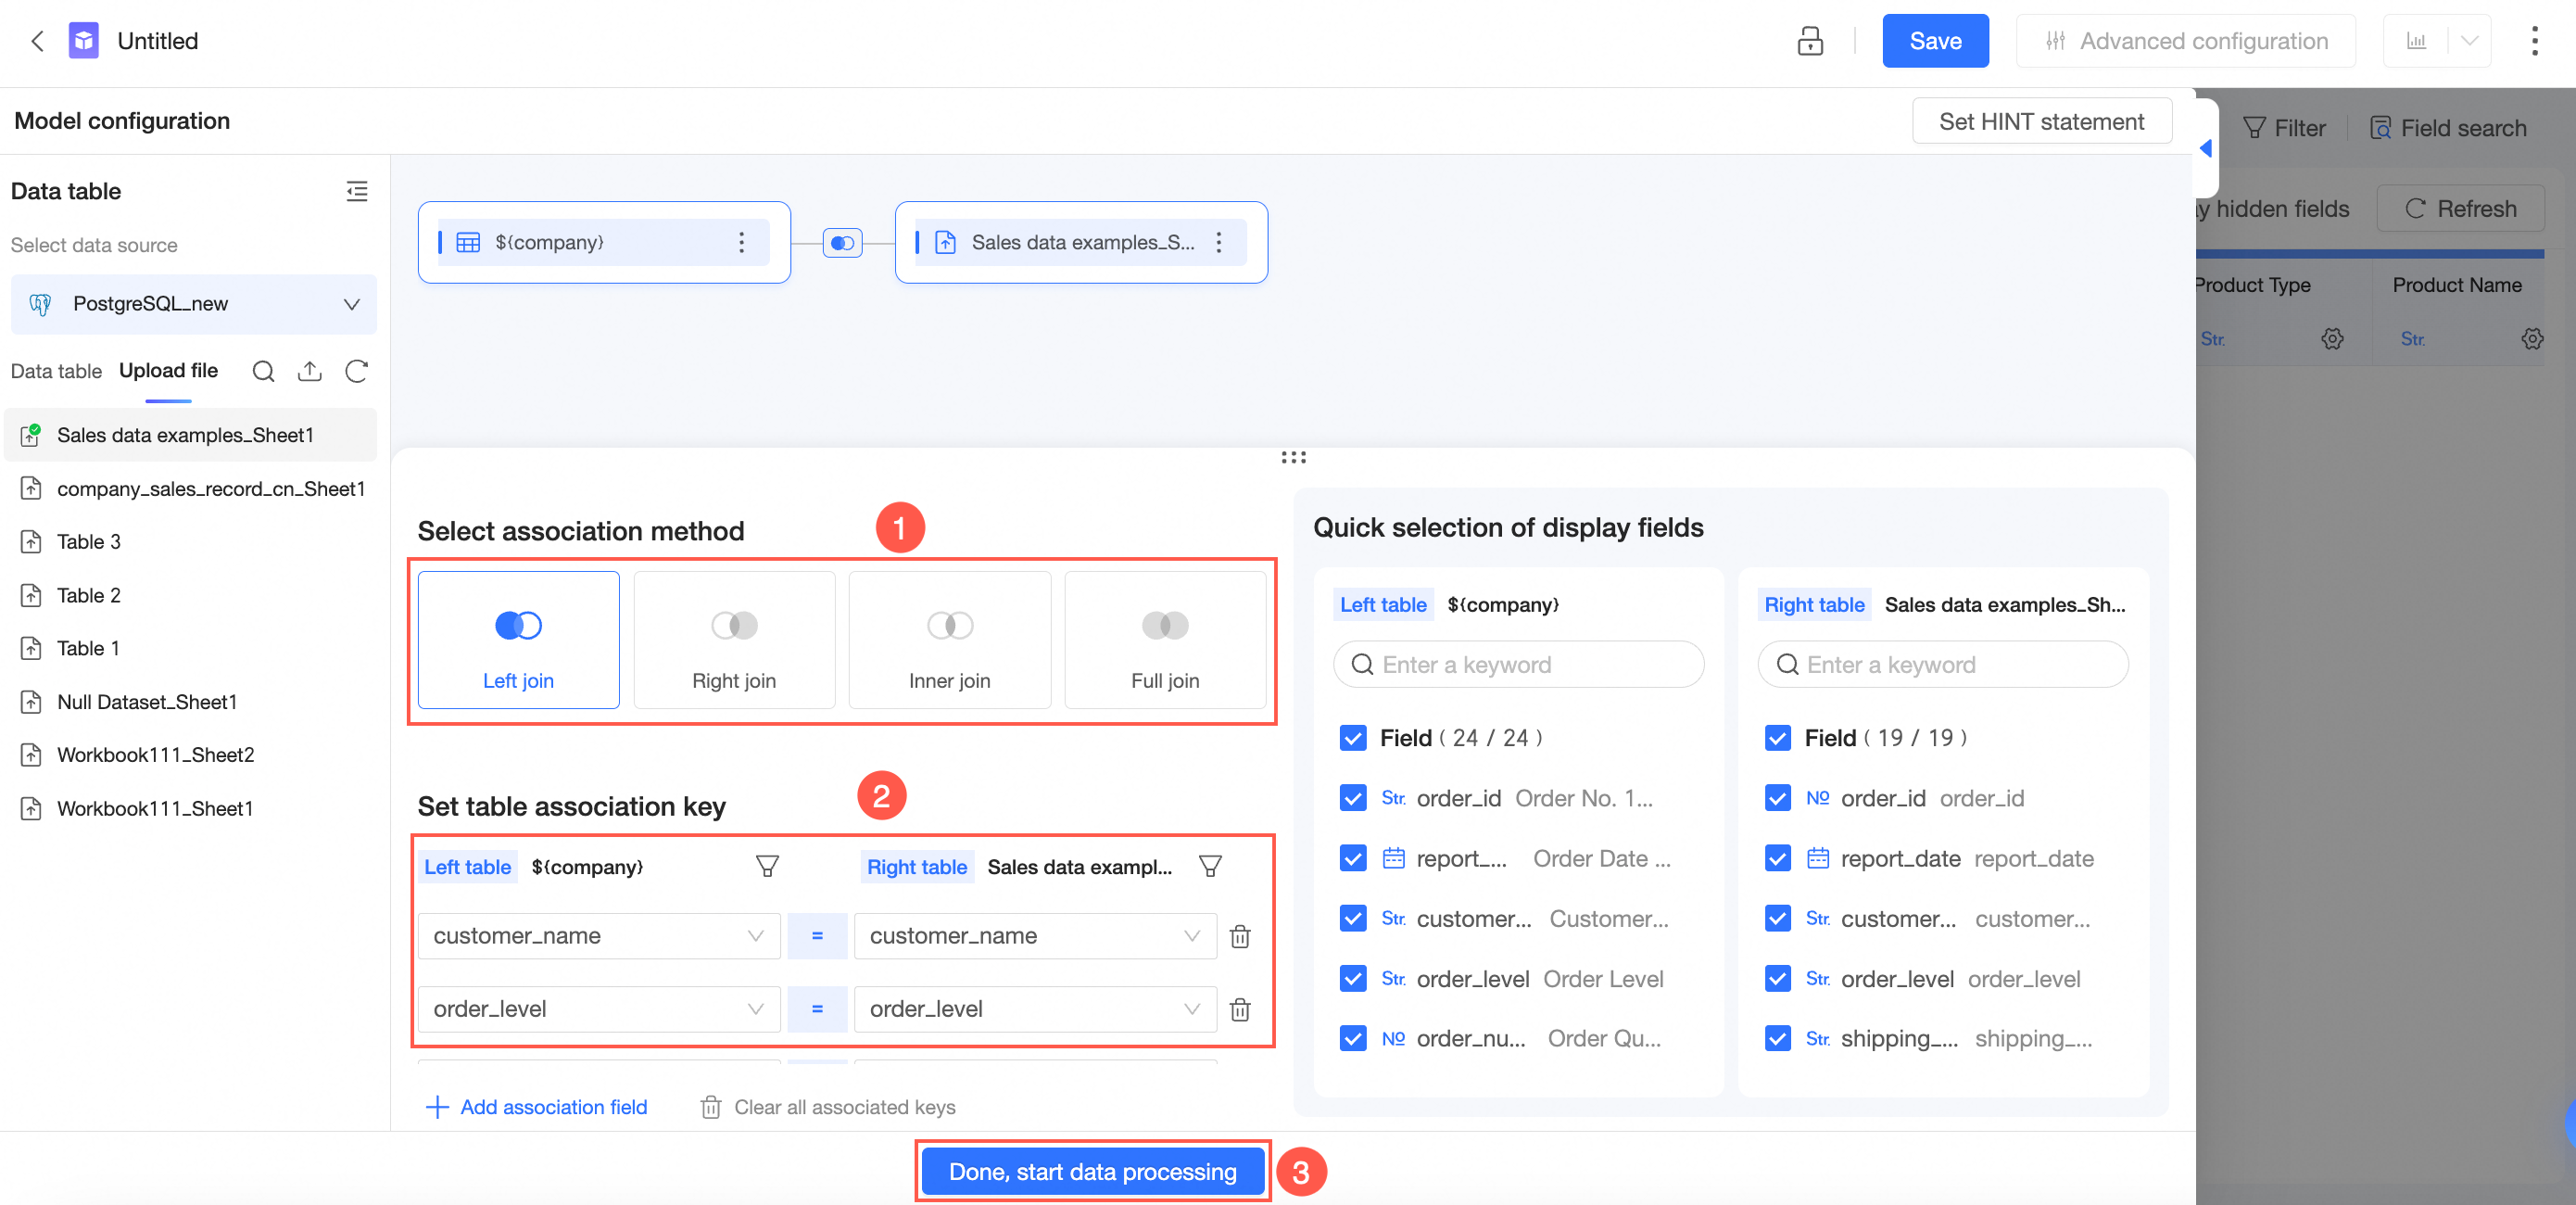
-
Select a join type: left join, right join, inner join, or full join.
NoteMySQL data sources do not support full joins.
-
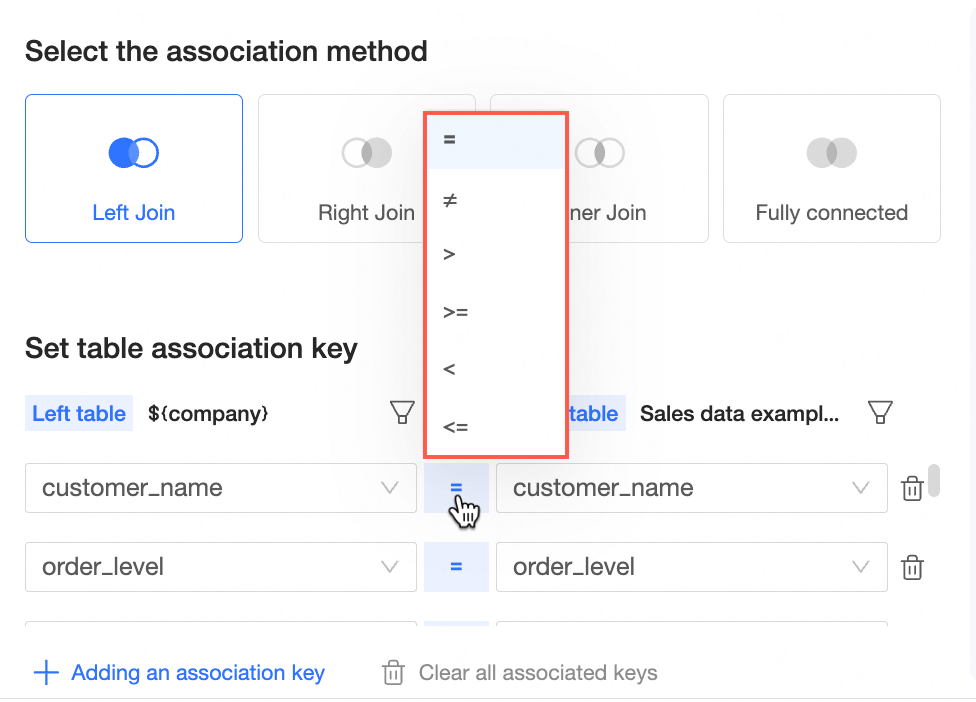
Set the join keys.
-
The join operator is = by default. You can also set it to ≠, >, >=, <, or <=.
-
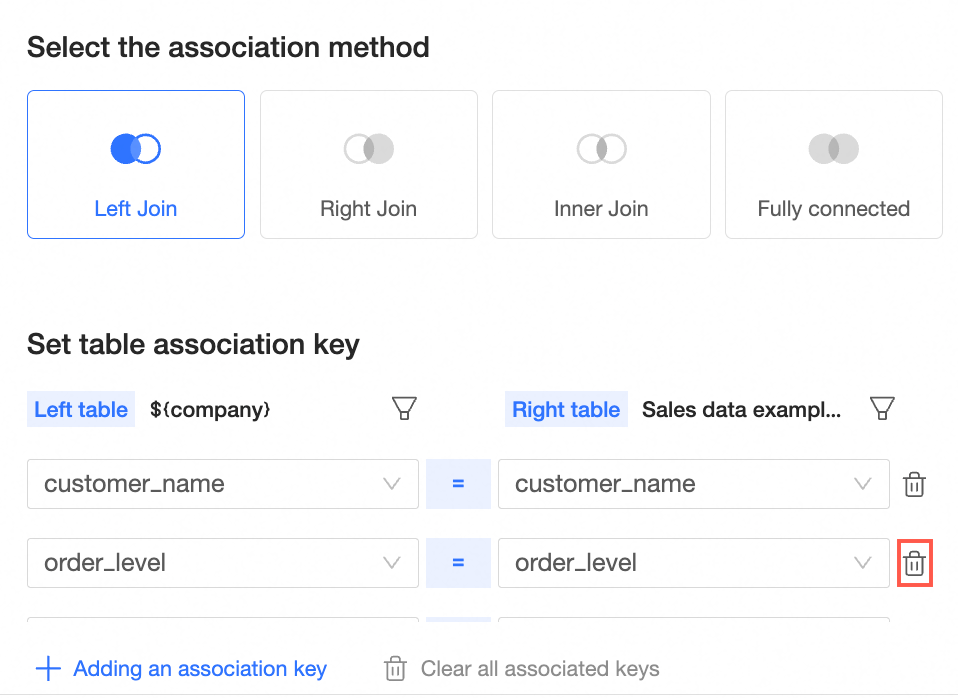
You can click Add Join Key to add multiple join keys.

-
You can Delete a join key.
-
You can Clear All Join Keys.
-
-
-
Click Complete and Go to Data Processing to go to the data processing page.
 On the data processing page, you can click Model Configuration in the left-side navigation pane or click Source Table -> Model Details to return to the Model Configuration page. For more information about operations on the data processing page, see Create a dataset.
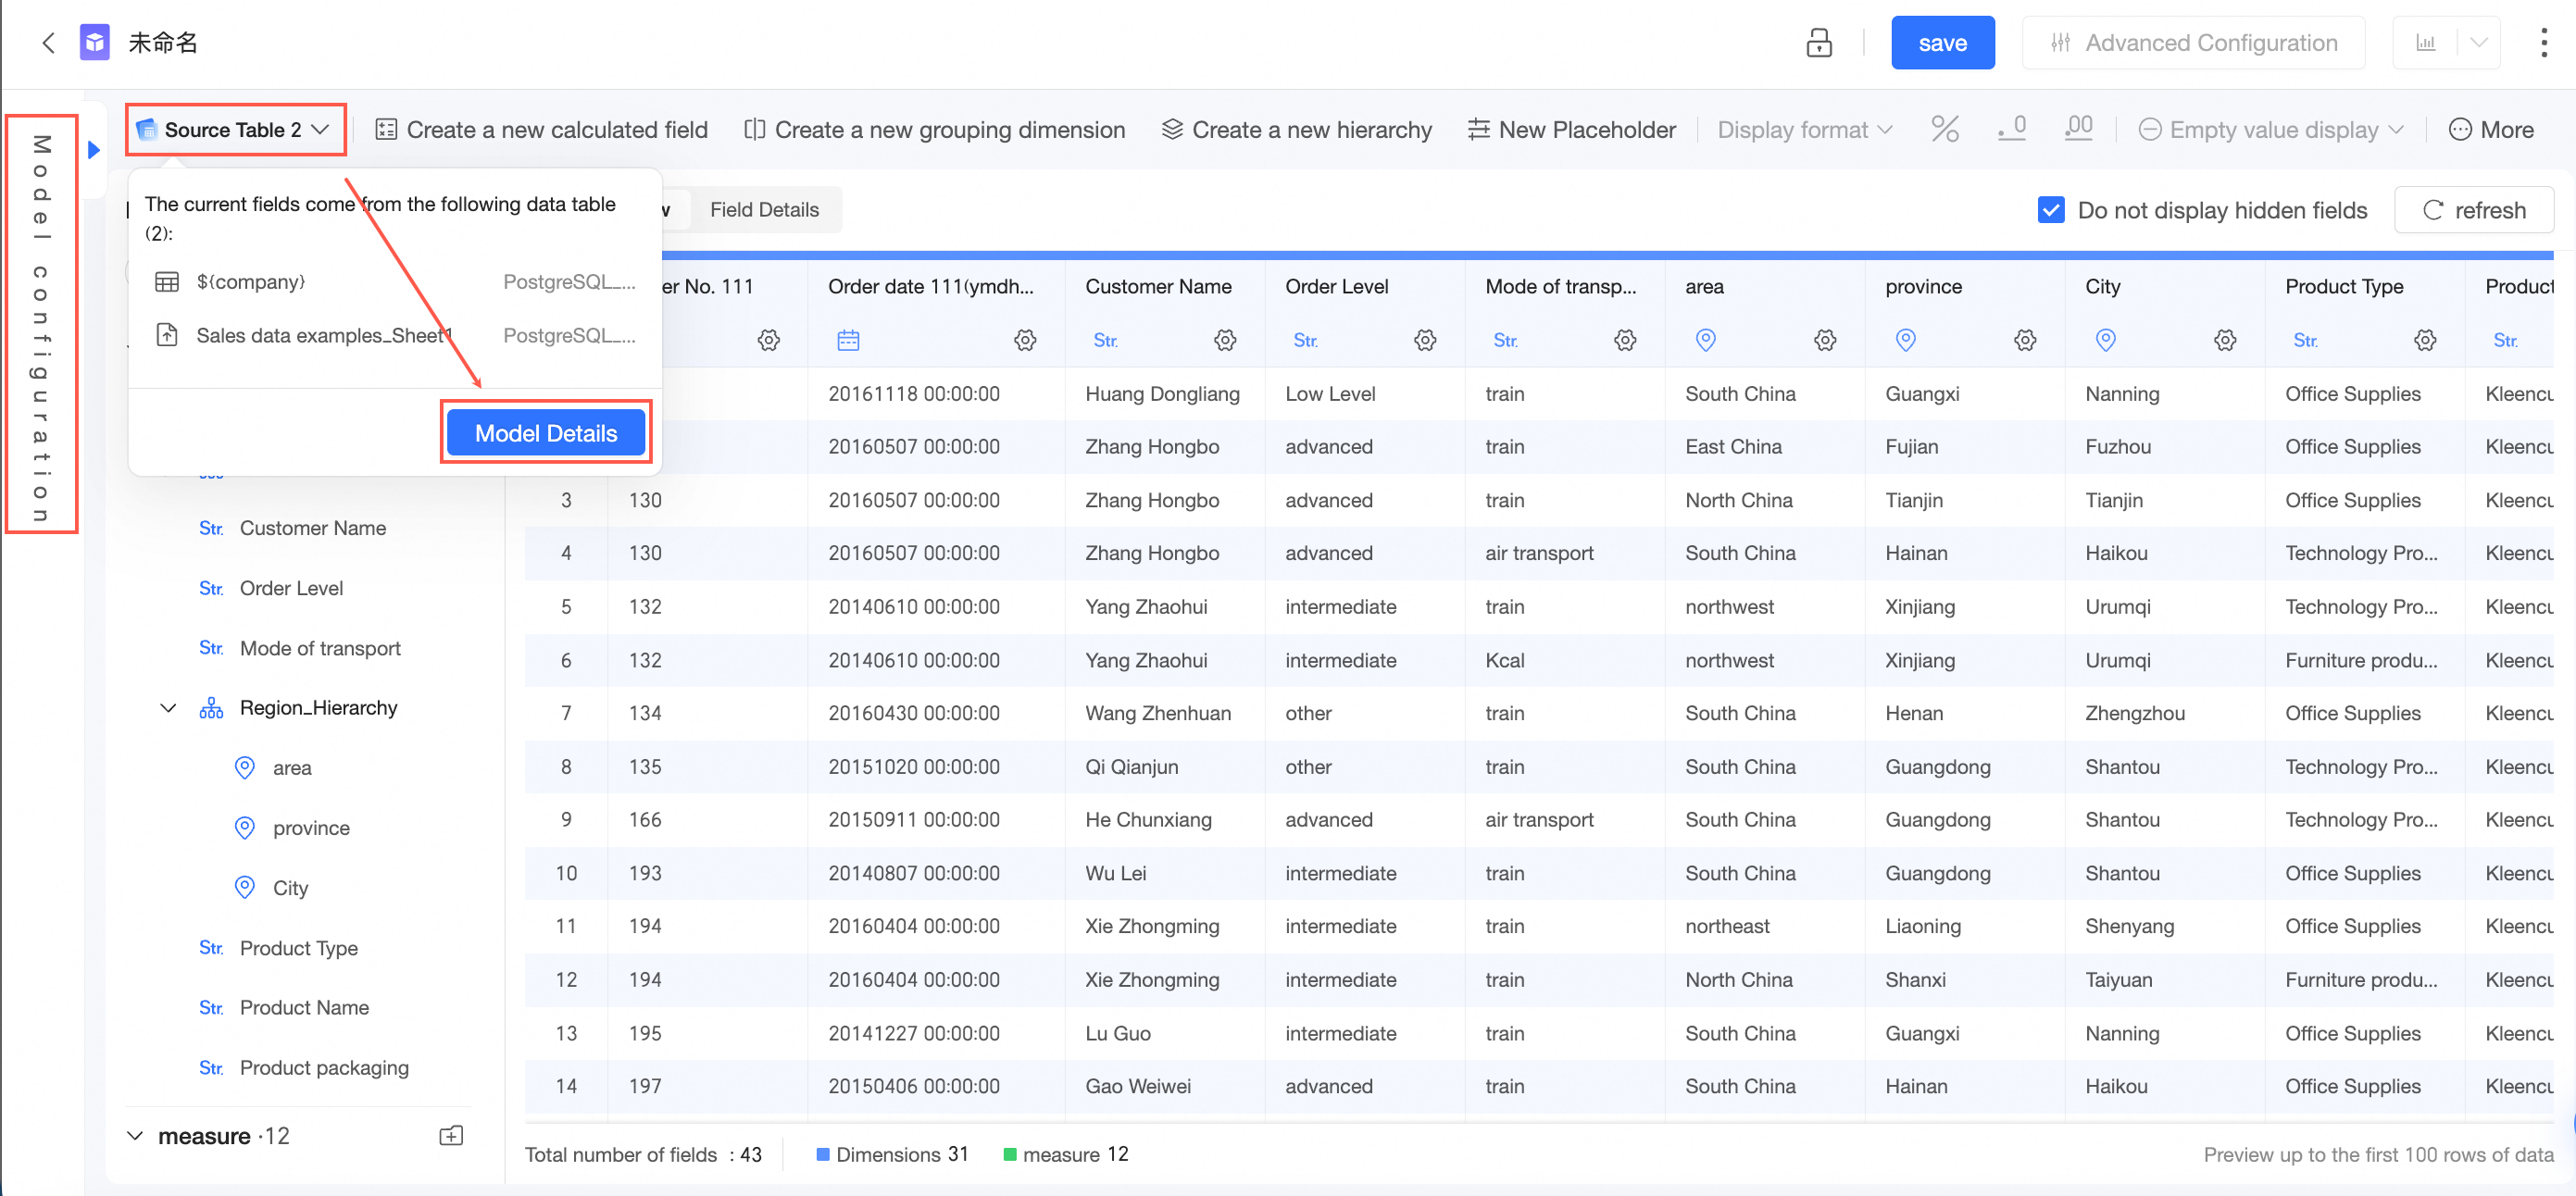 You can click the join icon on the canvas to view the join relationship.
 If a node is no longer needed, click the
  icon on the right side of the node and select Delete.
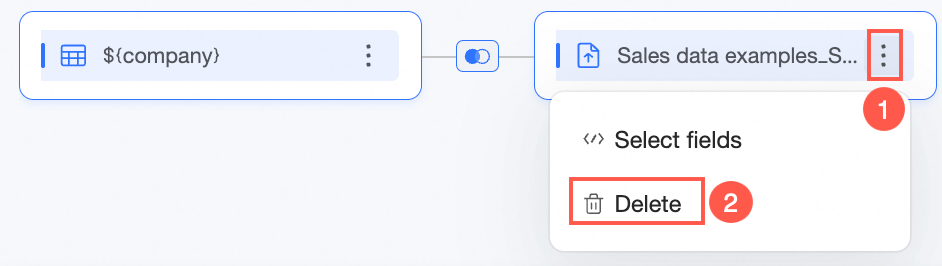 Note
NoteYou can delete only the last node in the model.
Customize join conditions
When you configure join conditions, you can create a calculated field to use as a join key.
-
When selecting a join key, choose Create custom calculation from the drop-down list.
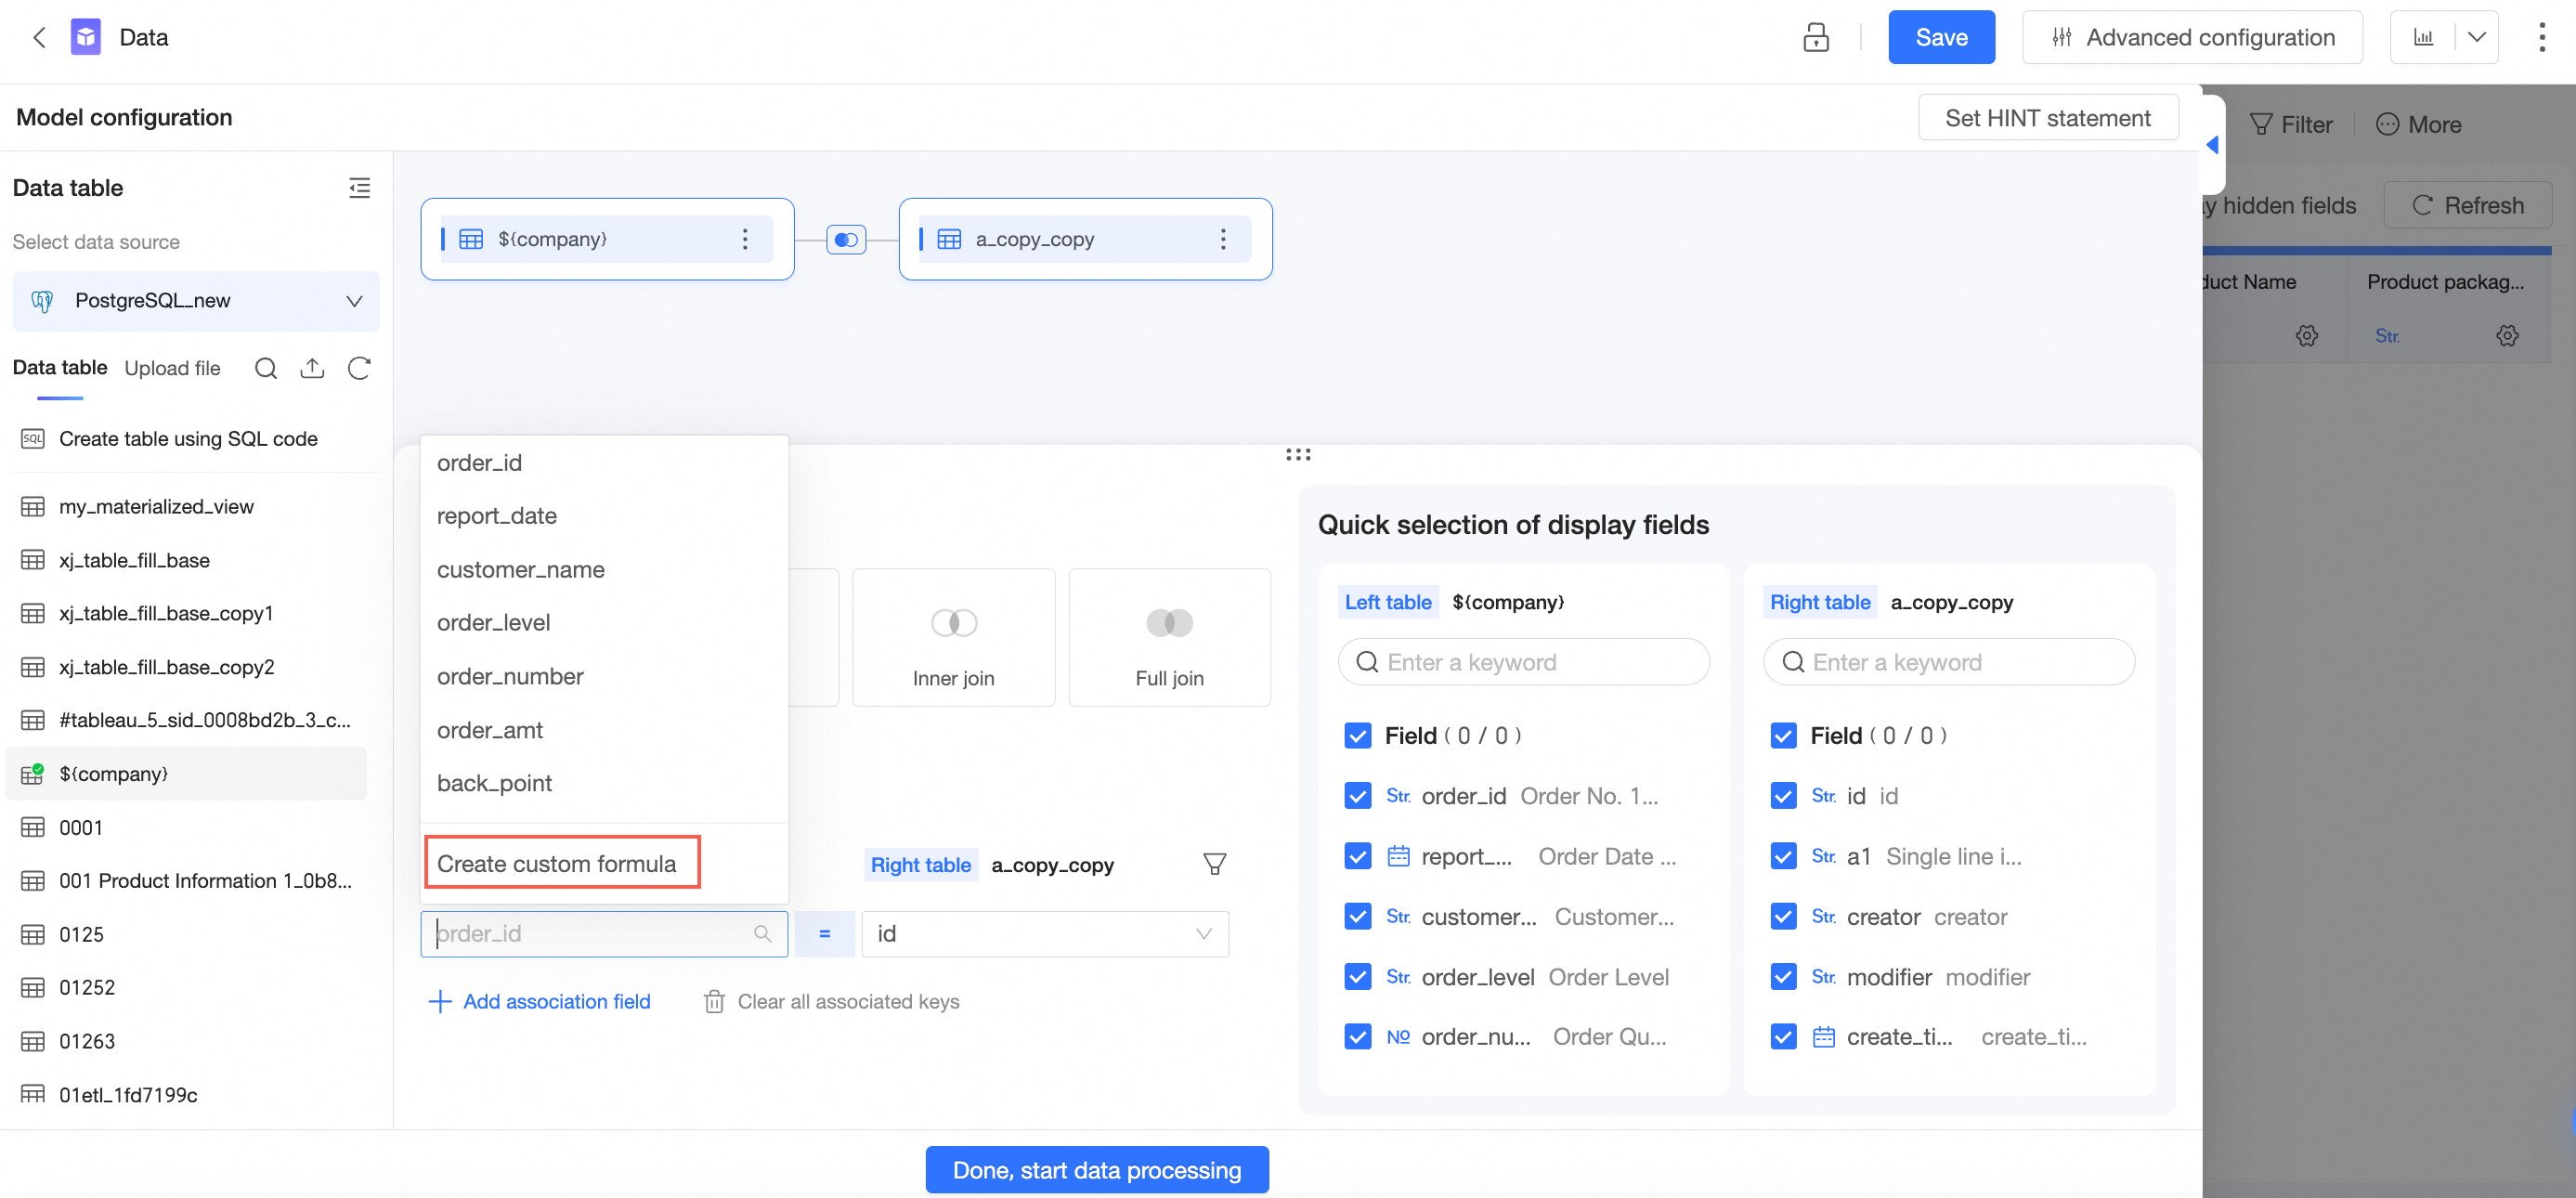
-
Enter the field expression and click OK.
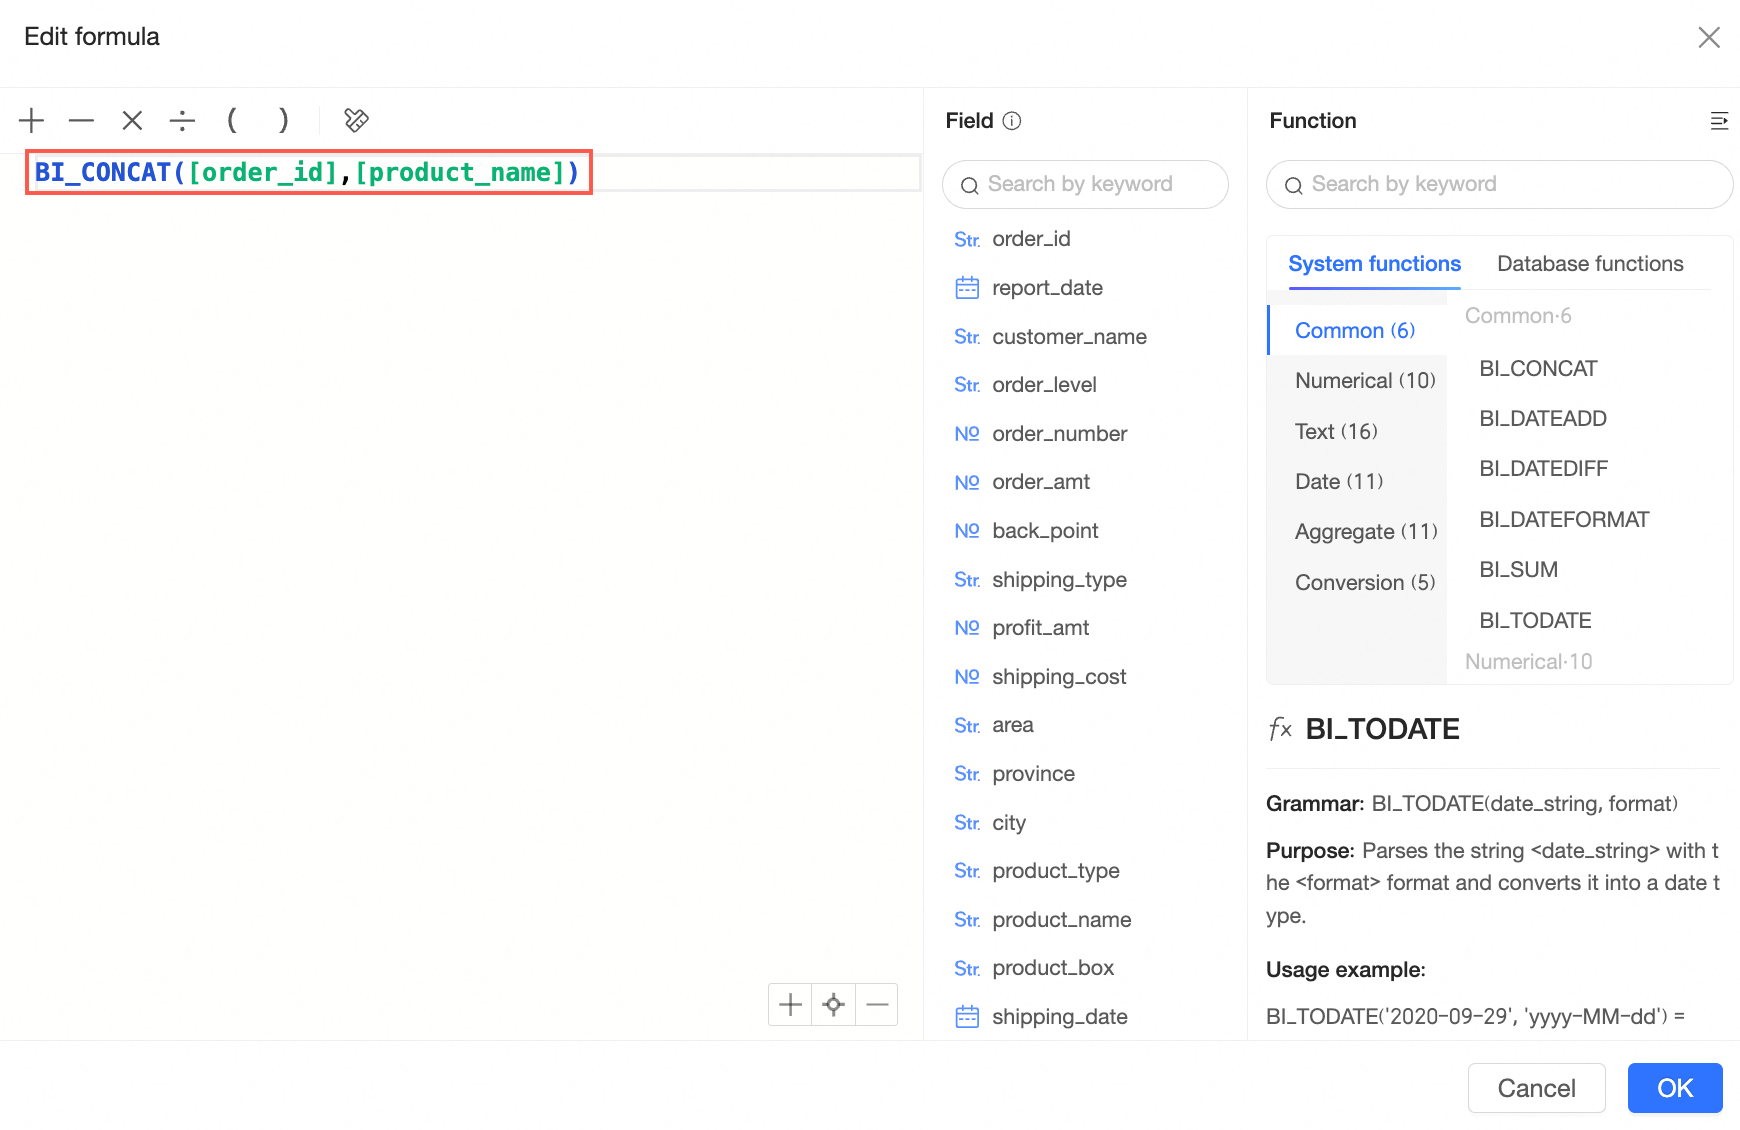
-
After you click OK, the new field expression appears as a join key.

-
You can also edit the custom calculation.

Pre-join filtering
When creating a join, you can apply separate filter conditions to each table. The filtering is performed before the join operation.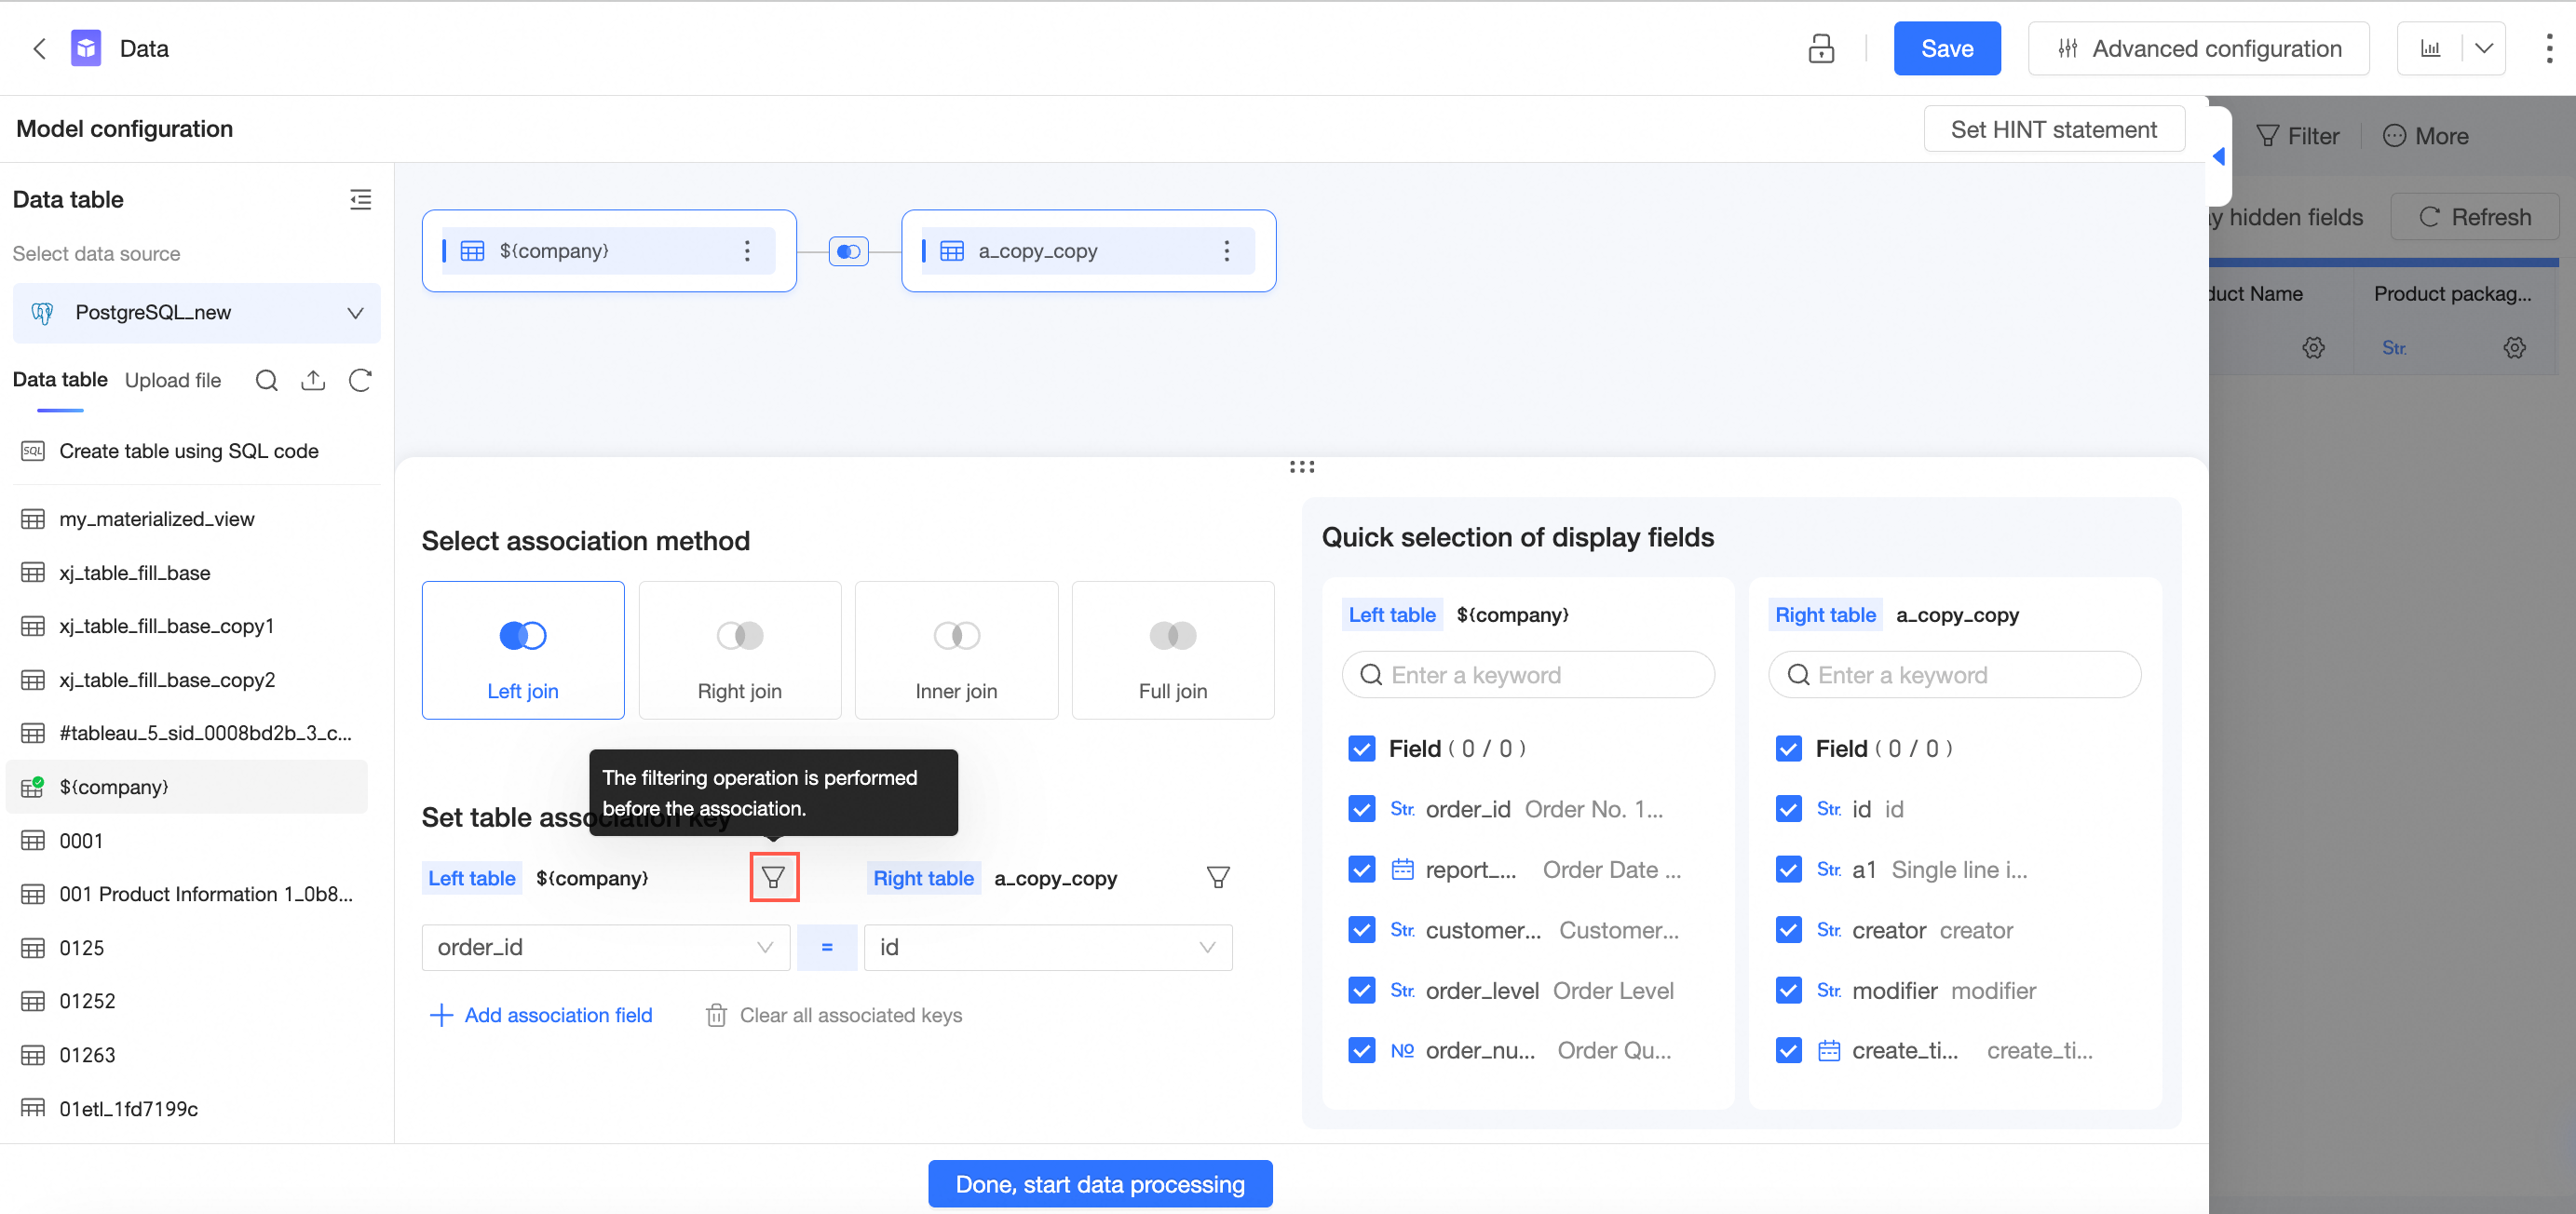
-
Click the
 icon to the right of the table you want to filter.
 -
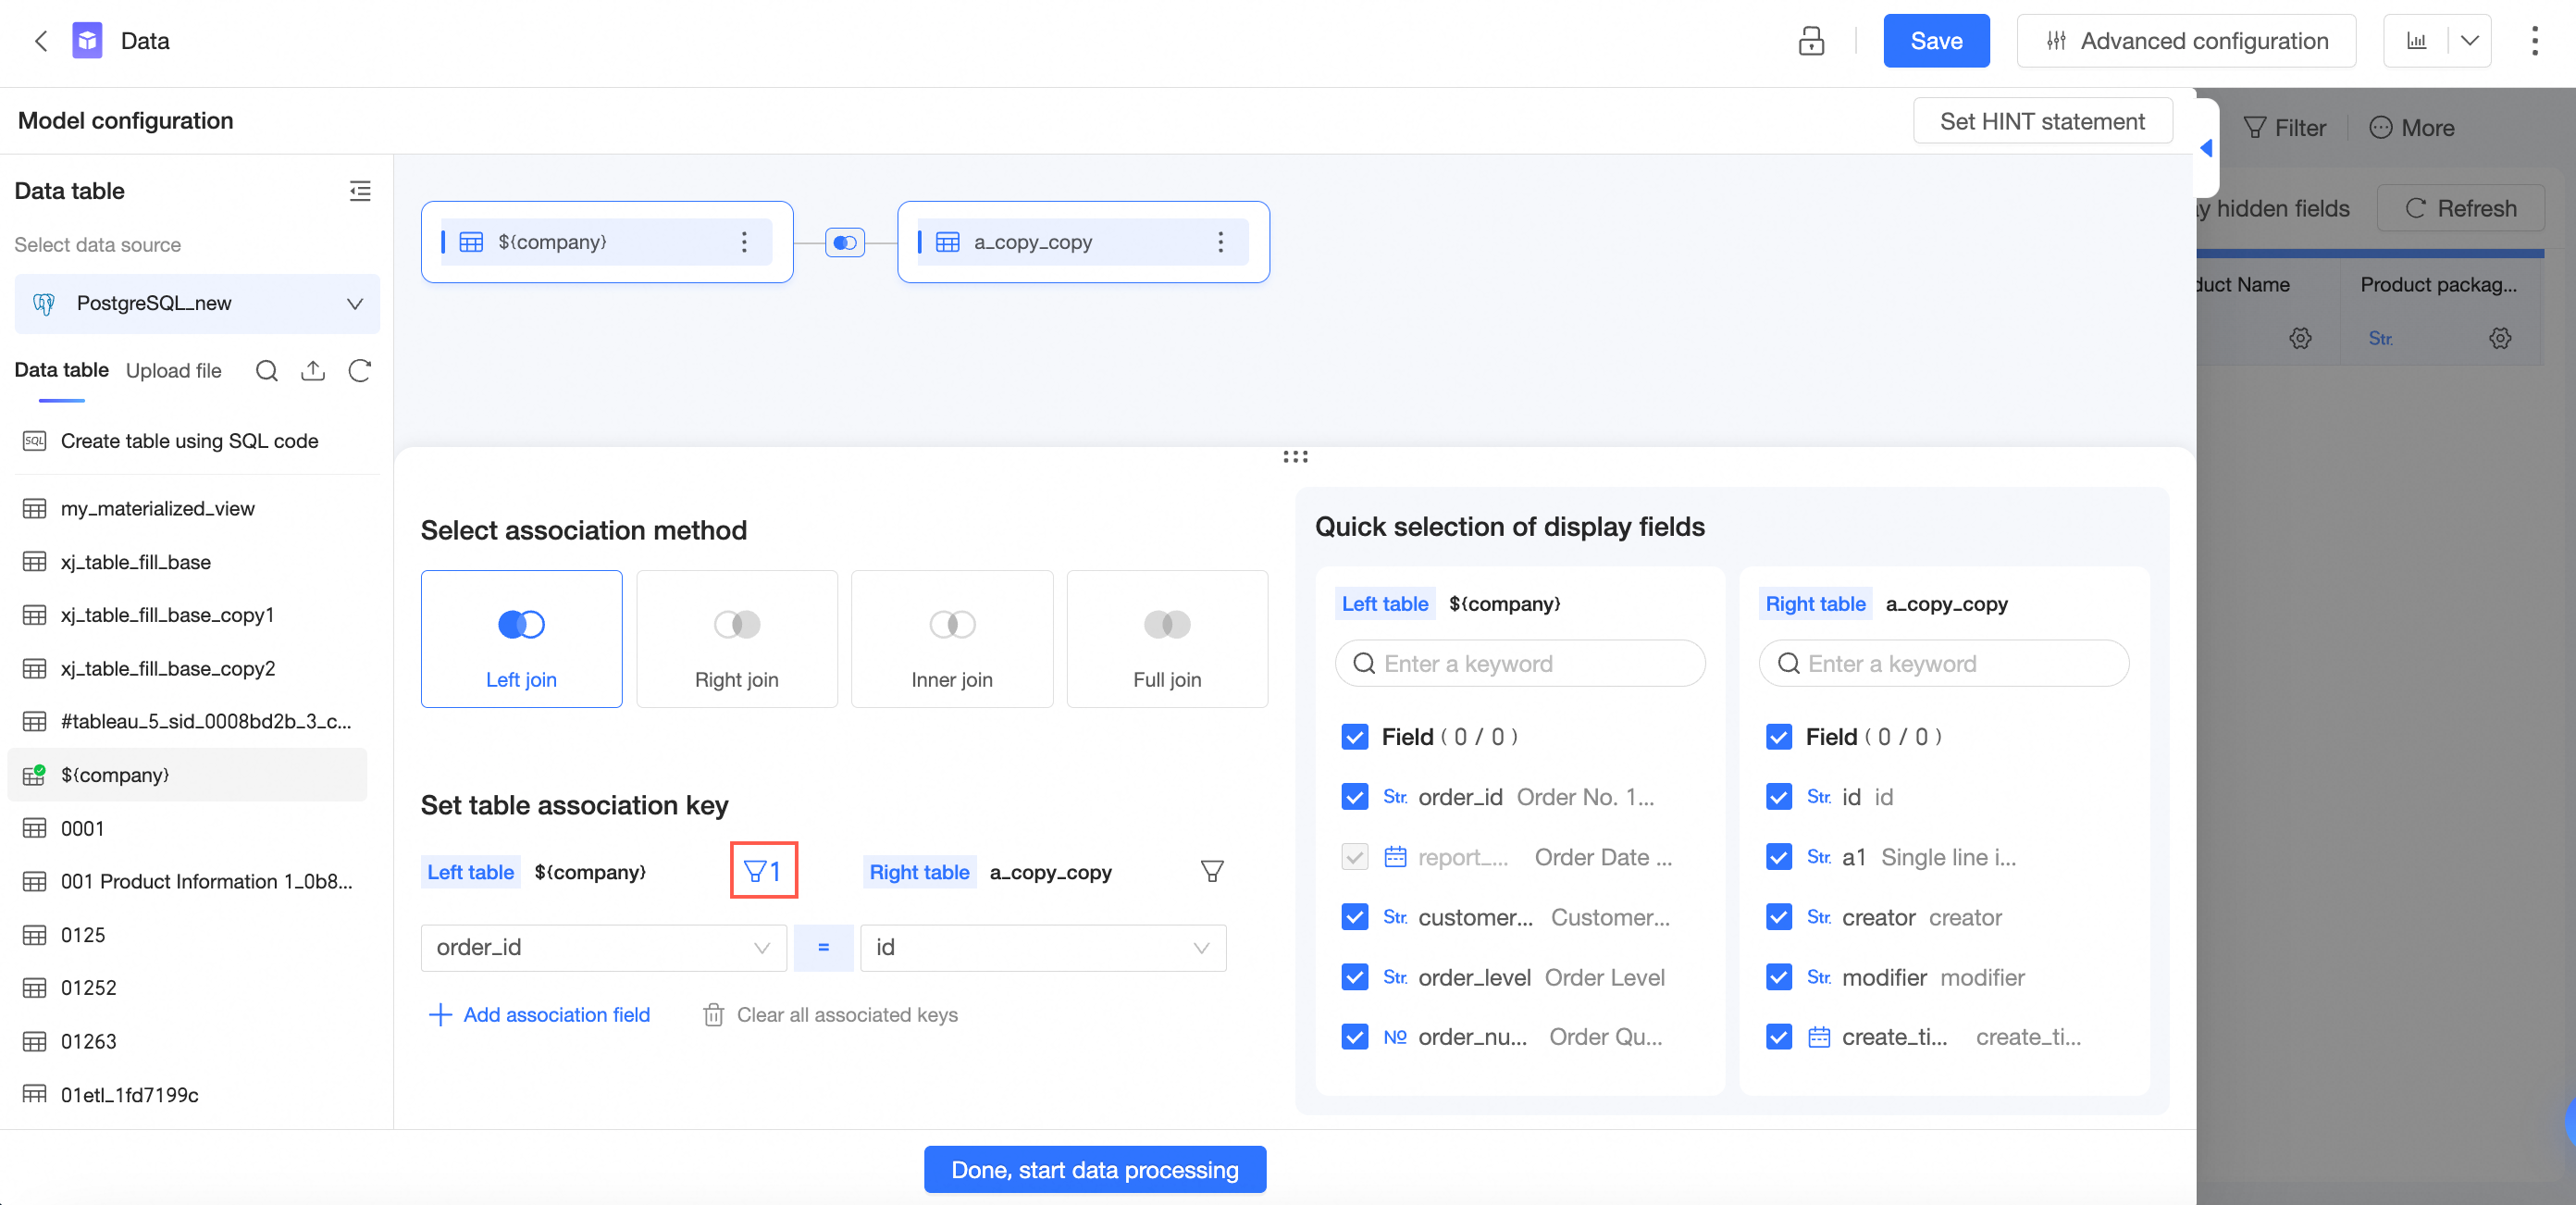
Set the filter conditions.

-
Click OK to finish setting the pre-join filter conditions.
Cross-source join
If your required data tables are in different data sources, you can use a cross-source join to connect them into a single model for analysis.
-
Joining tables from different data sources is available only in the Professional Edition.
-
Cross-source joins require you to enable extraction acceleration with the Quick Engine. For a list of data sources that support this feature, see Data source feature list.
-
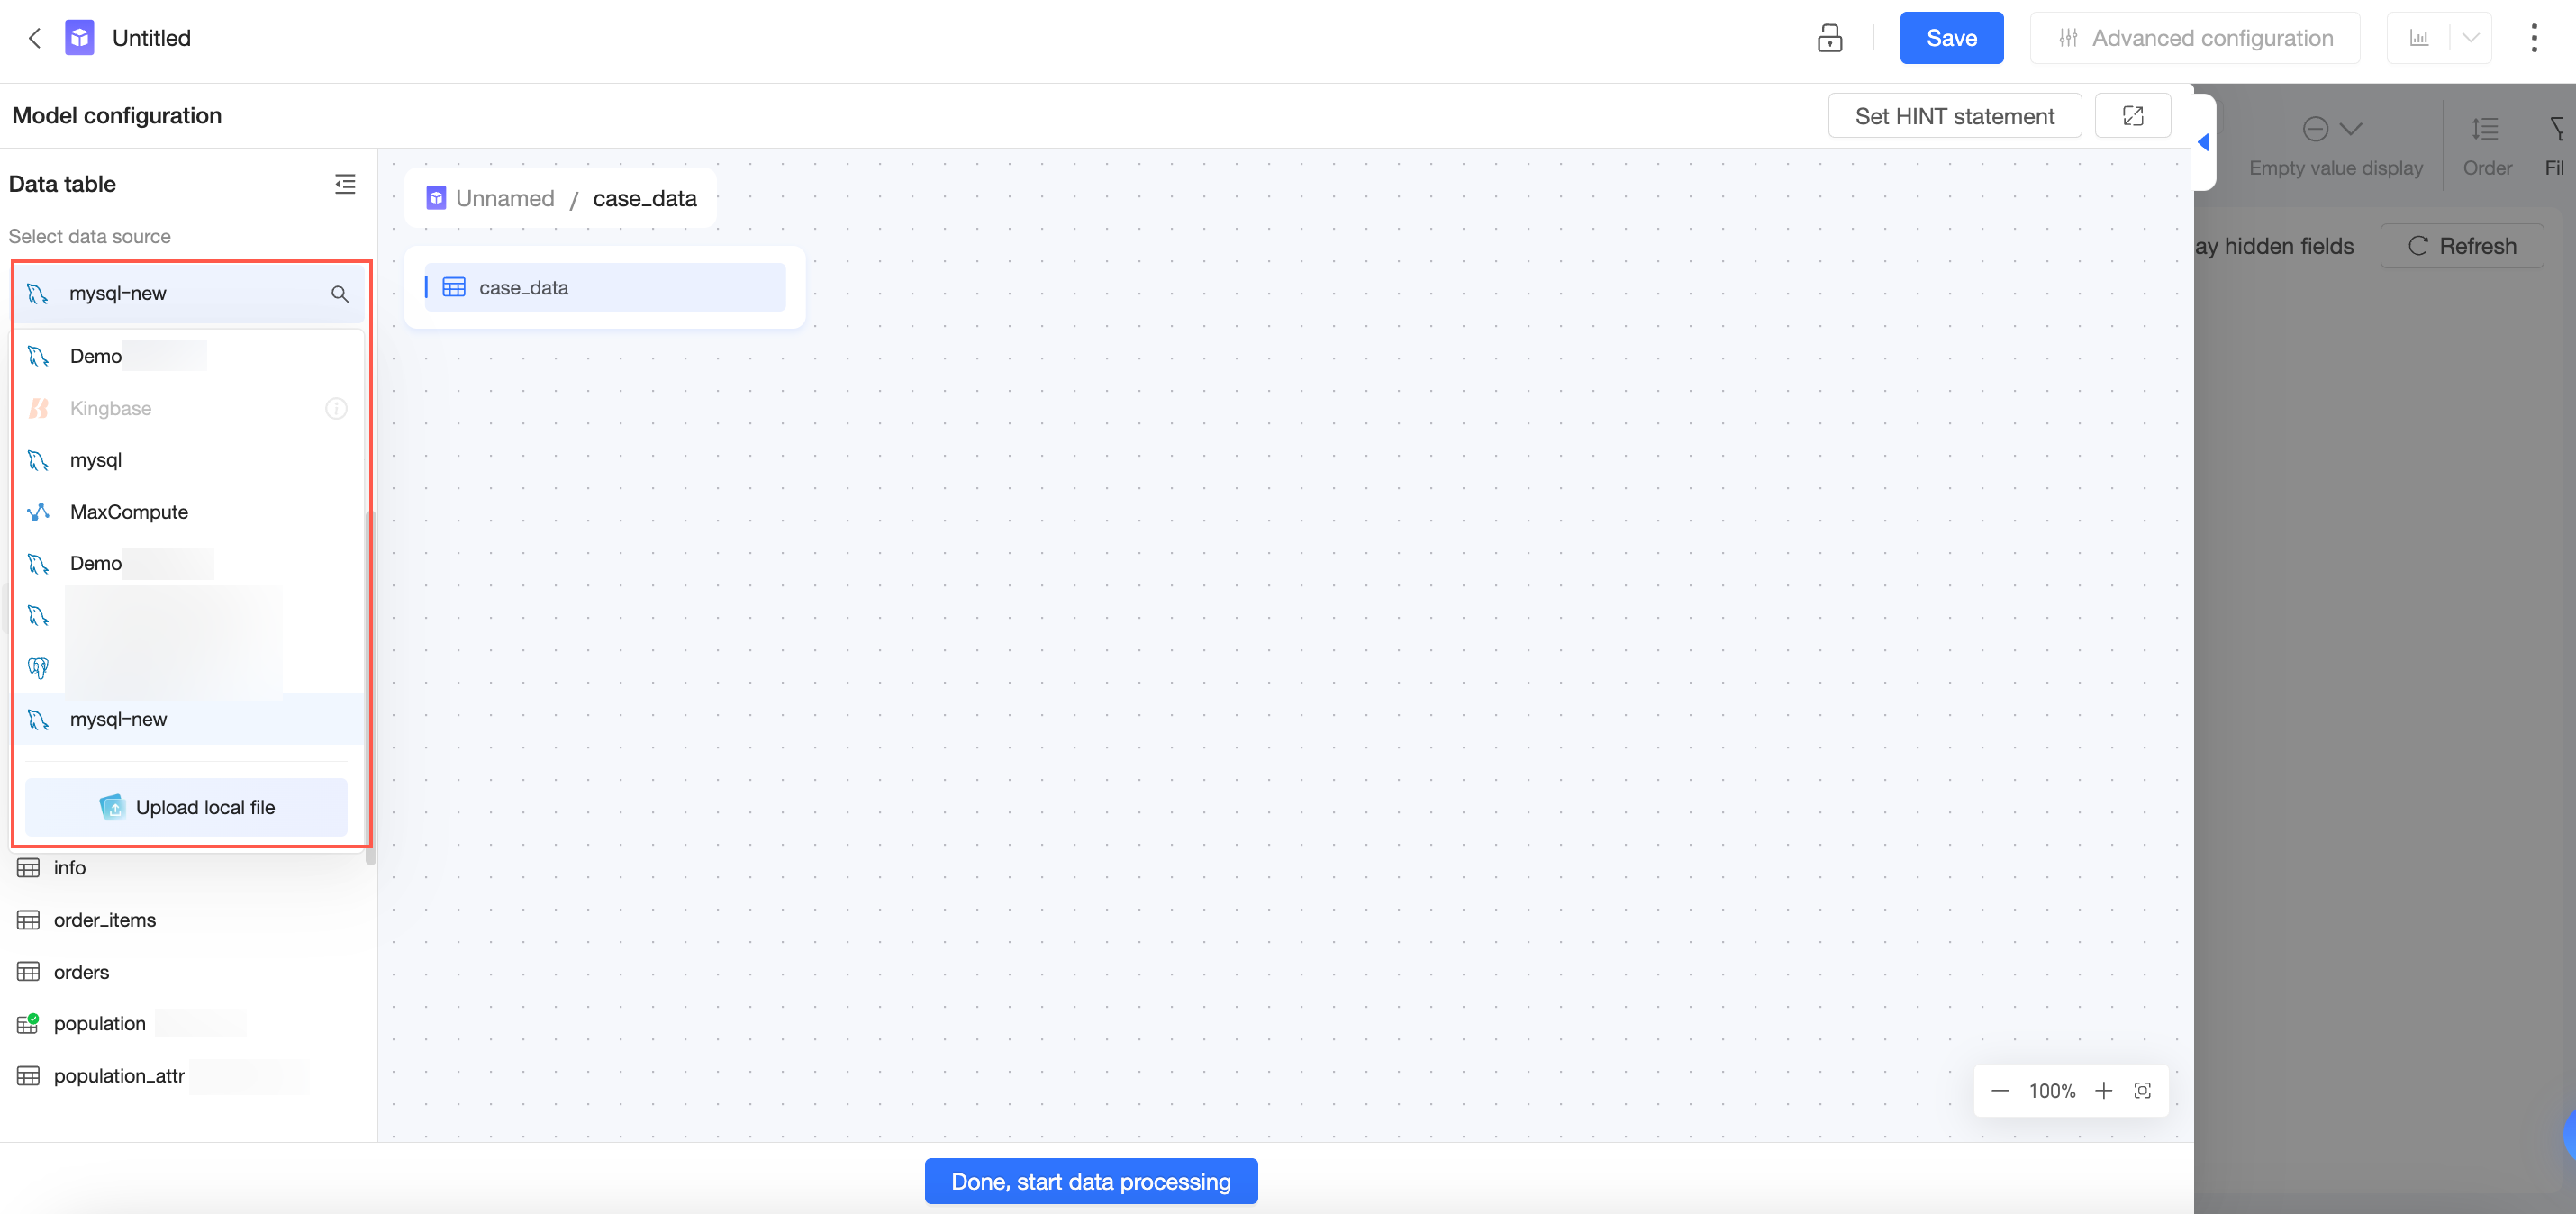
On the dataset edit page, find the data table in the target database from the data table list and drag it to the canvas.
-
Switch the data table list to another target database, find the required data table, and drag it to the canvas.
-
Configure the join relationship between the data tables. For detailed instructions, see Procedure in this topic. After you finish, save the dataset.
-
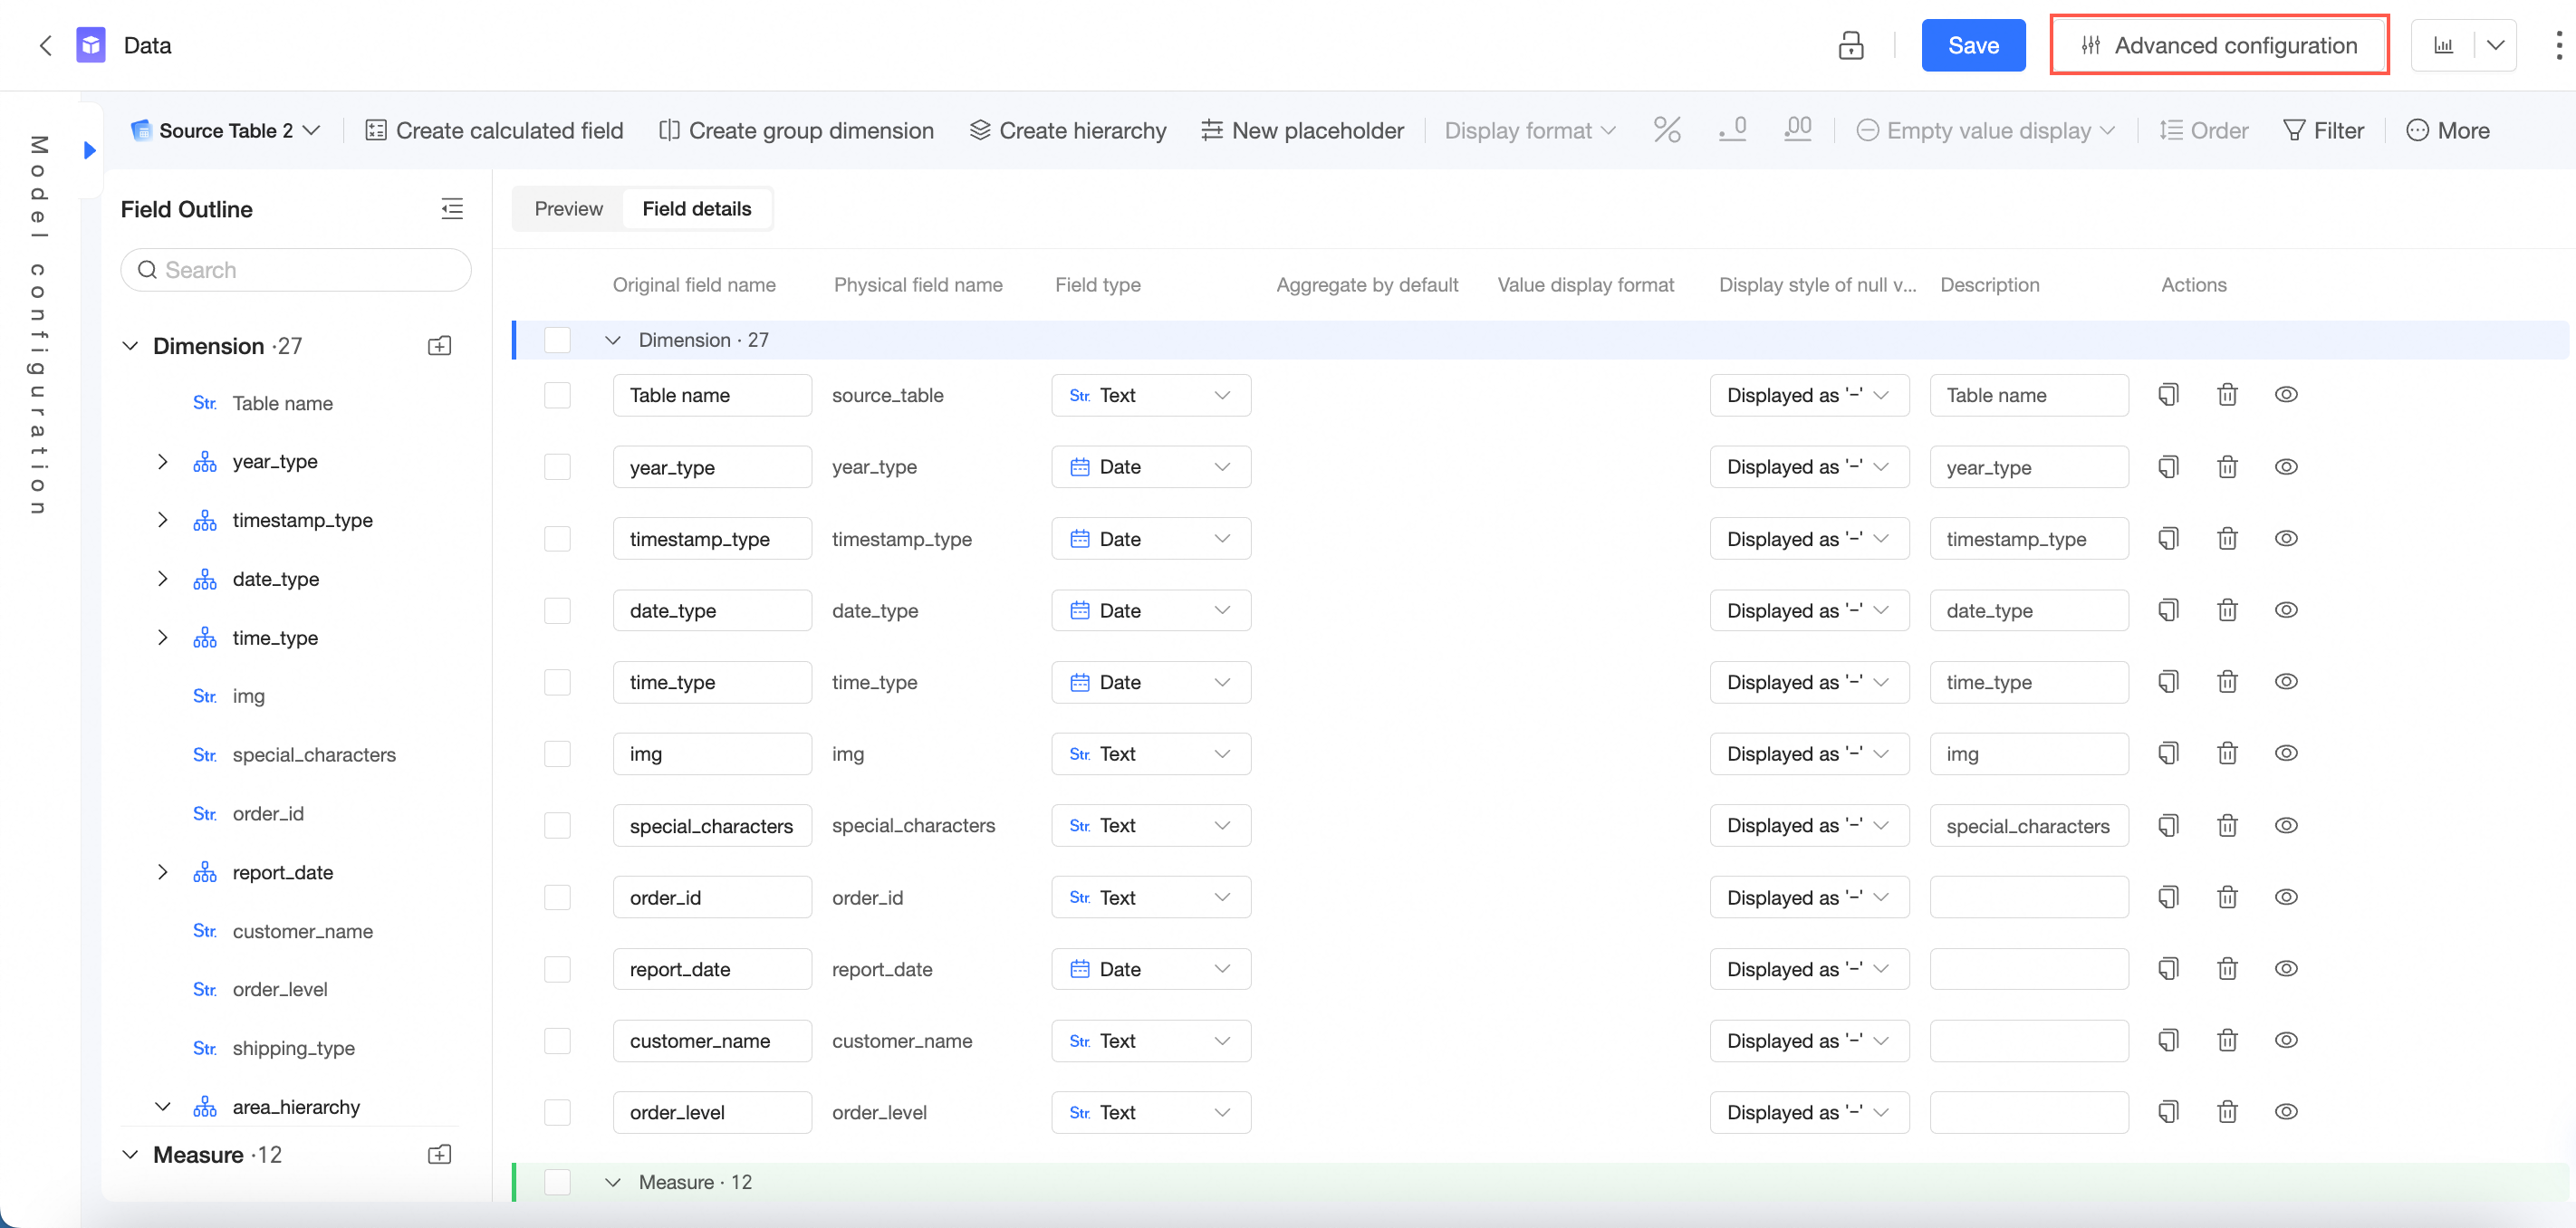
Click Advanced settings in the top toolbar.
-
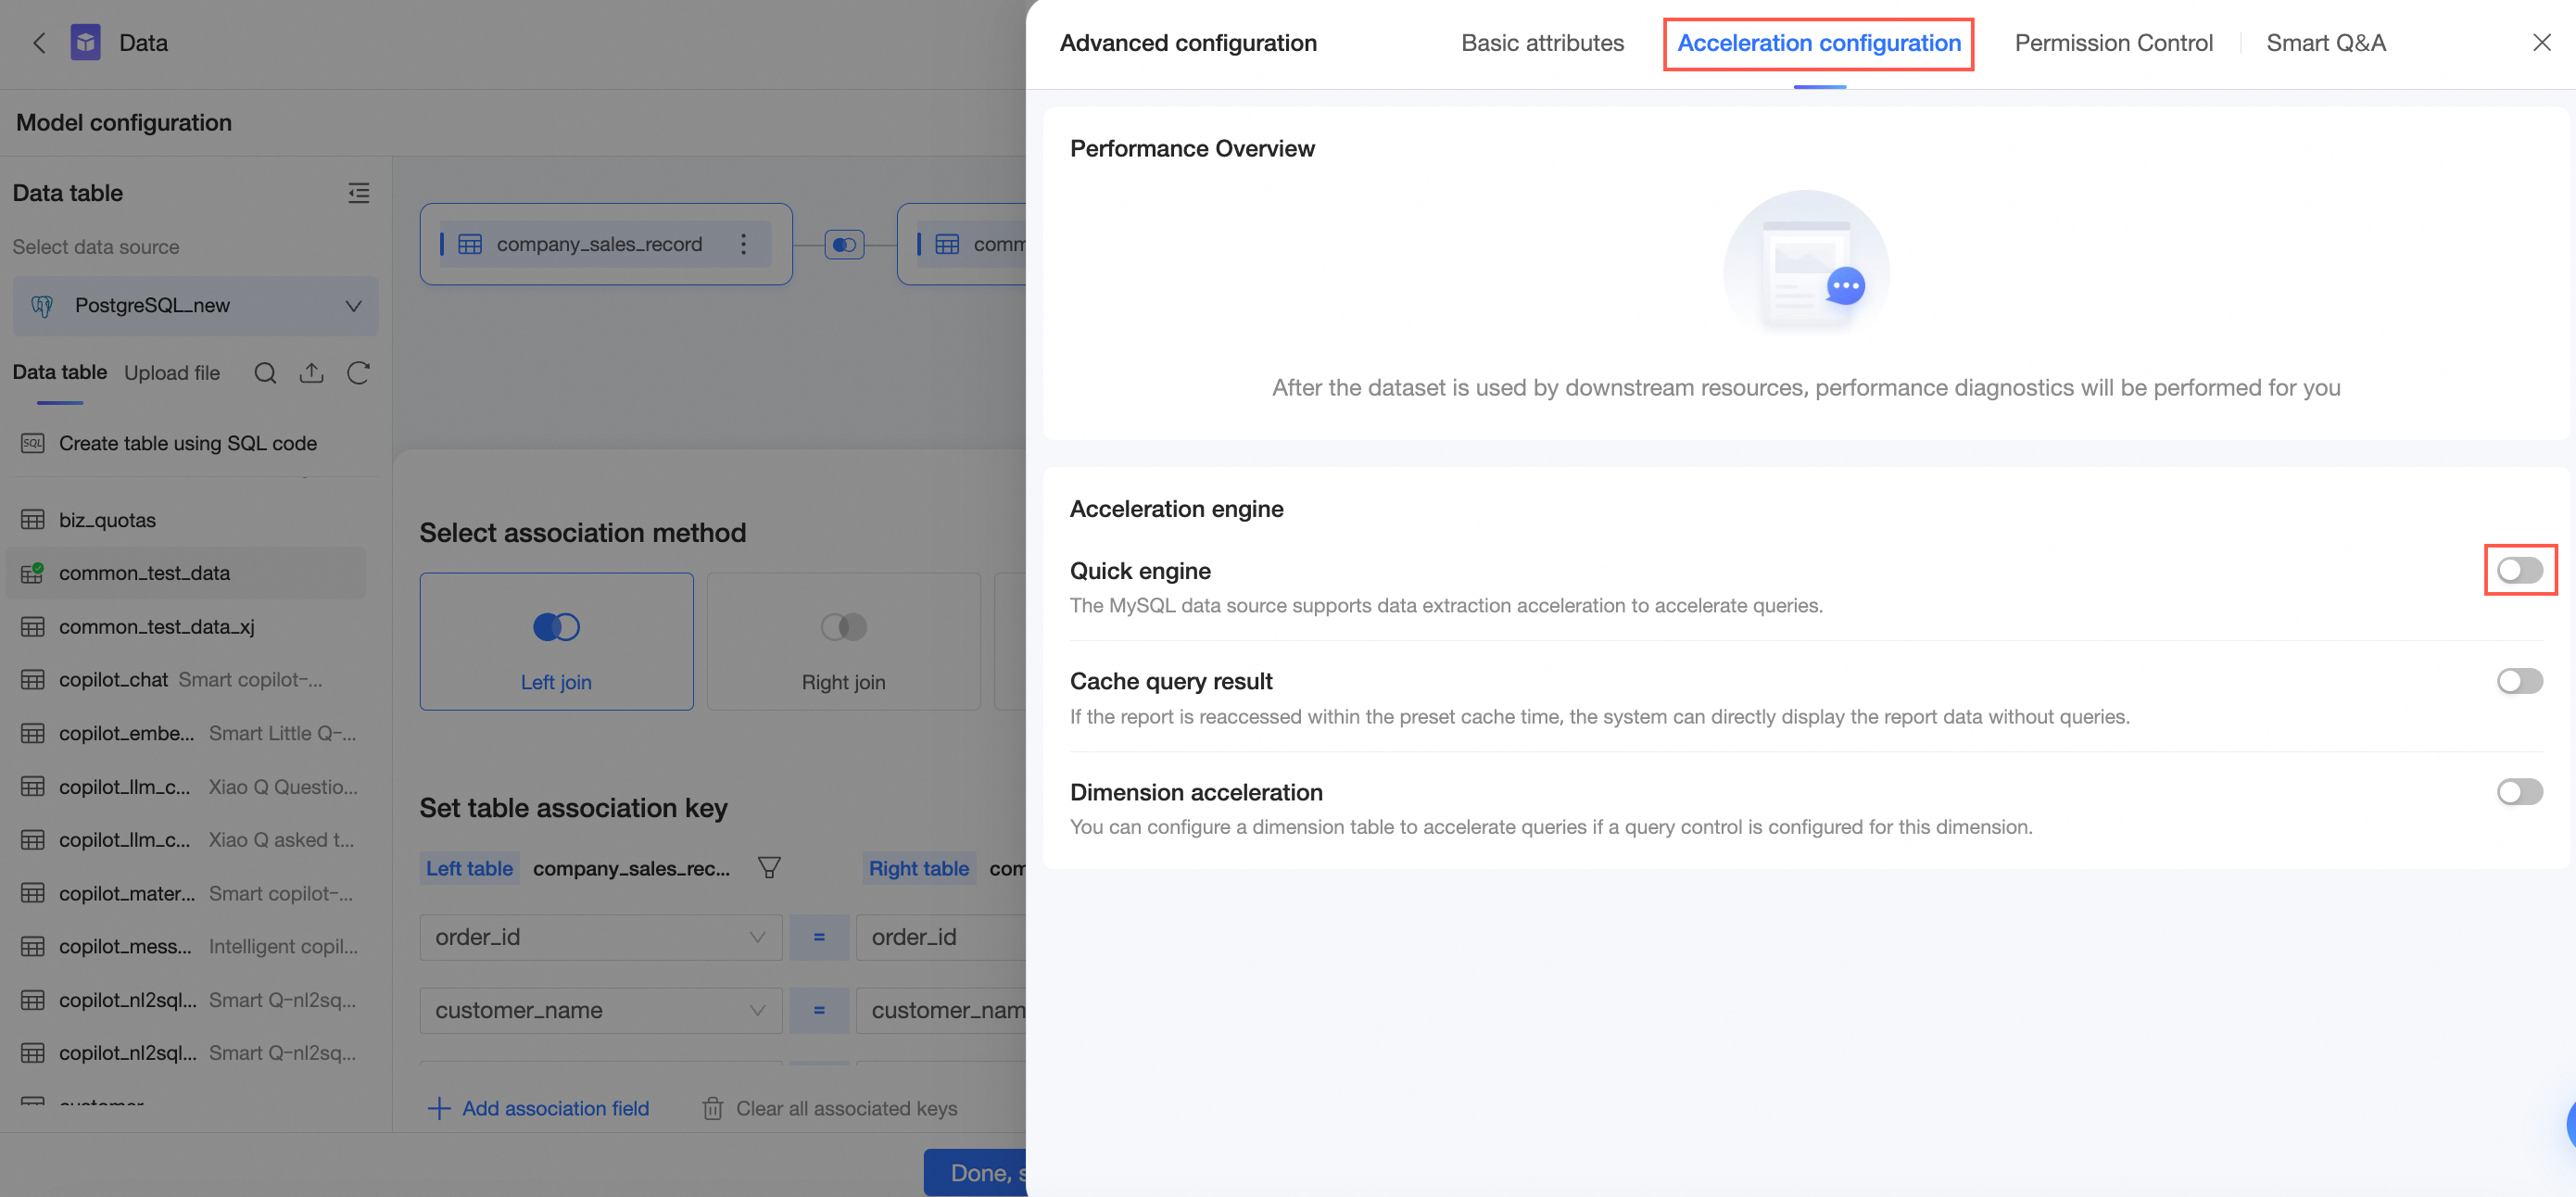
Click Acceleration settings and enable Quick Engine.
-
After you enable the Quick Engine, you must configure its parameters. For configuration details, see Use extraction acceleration.
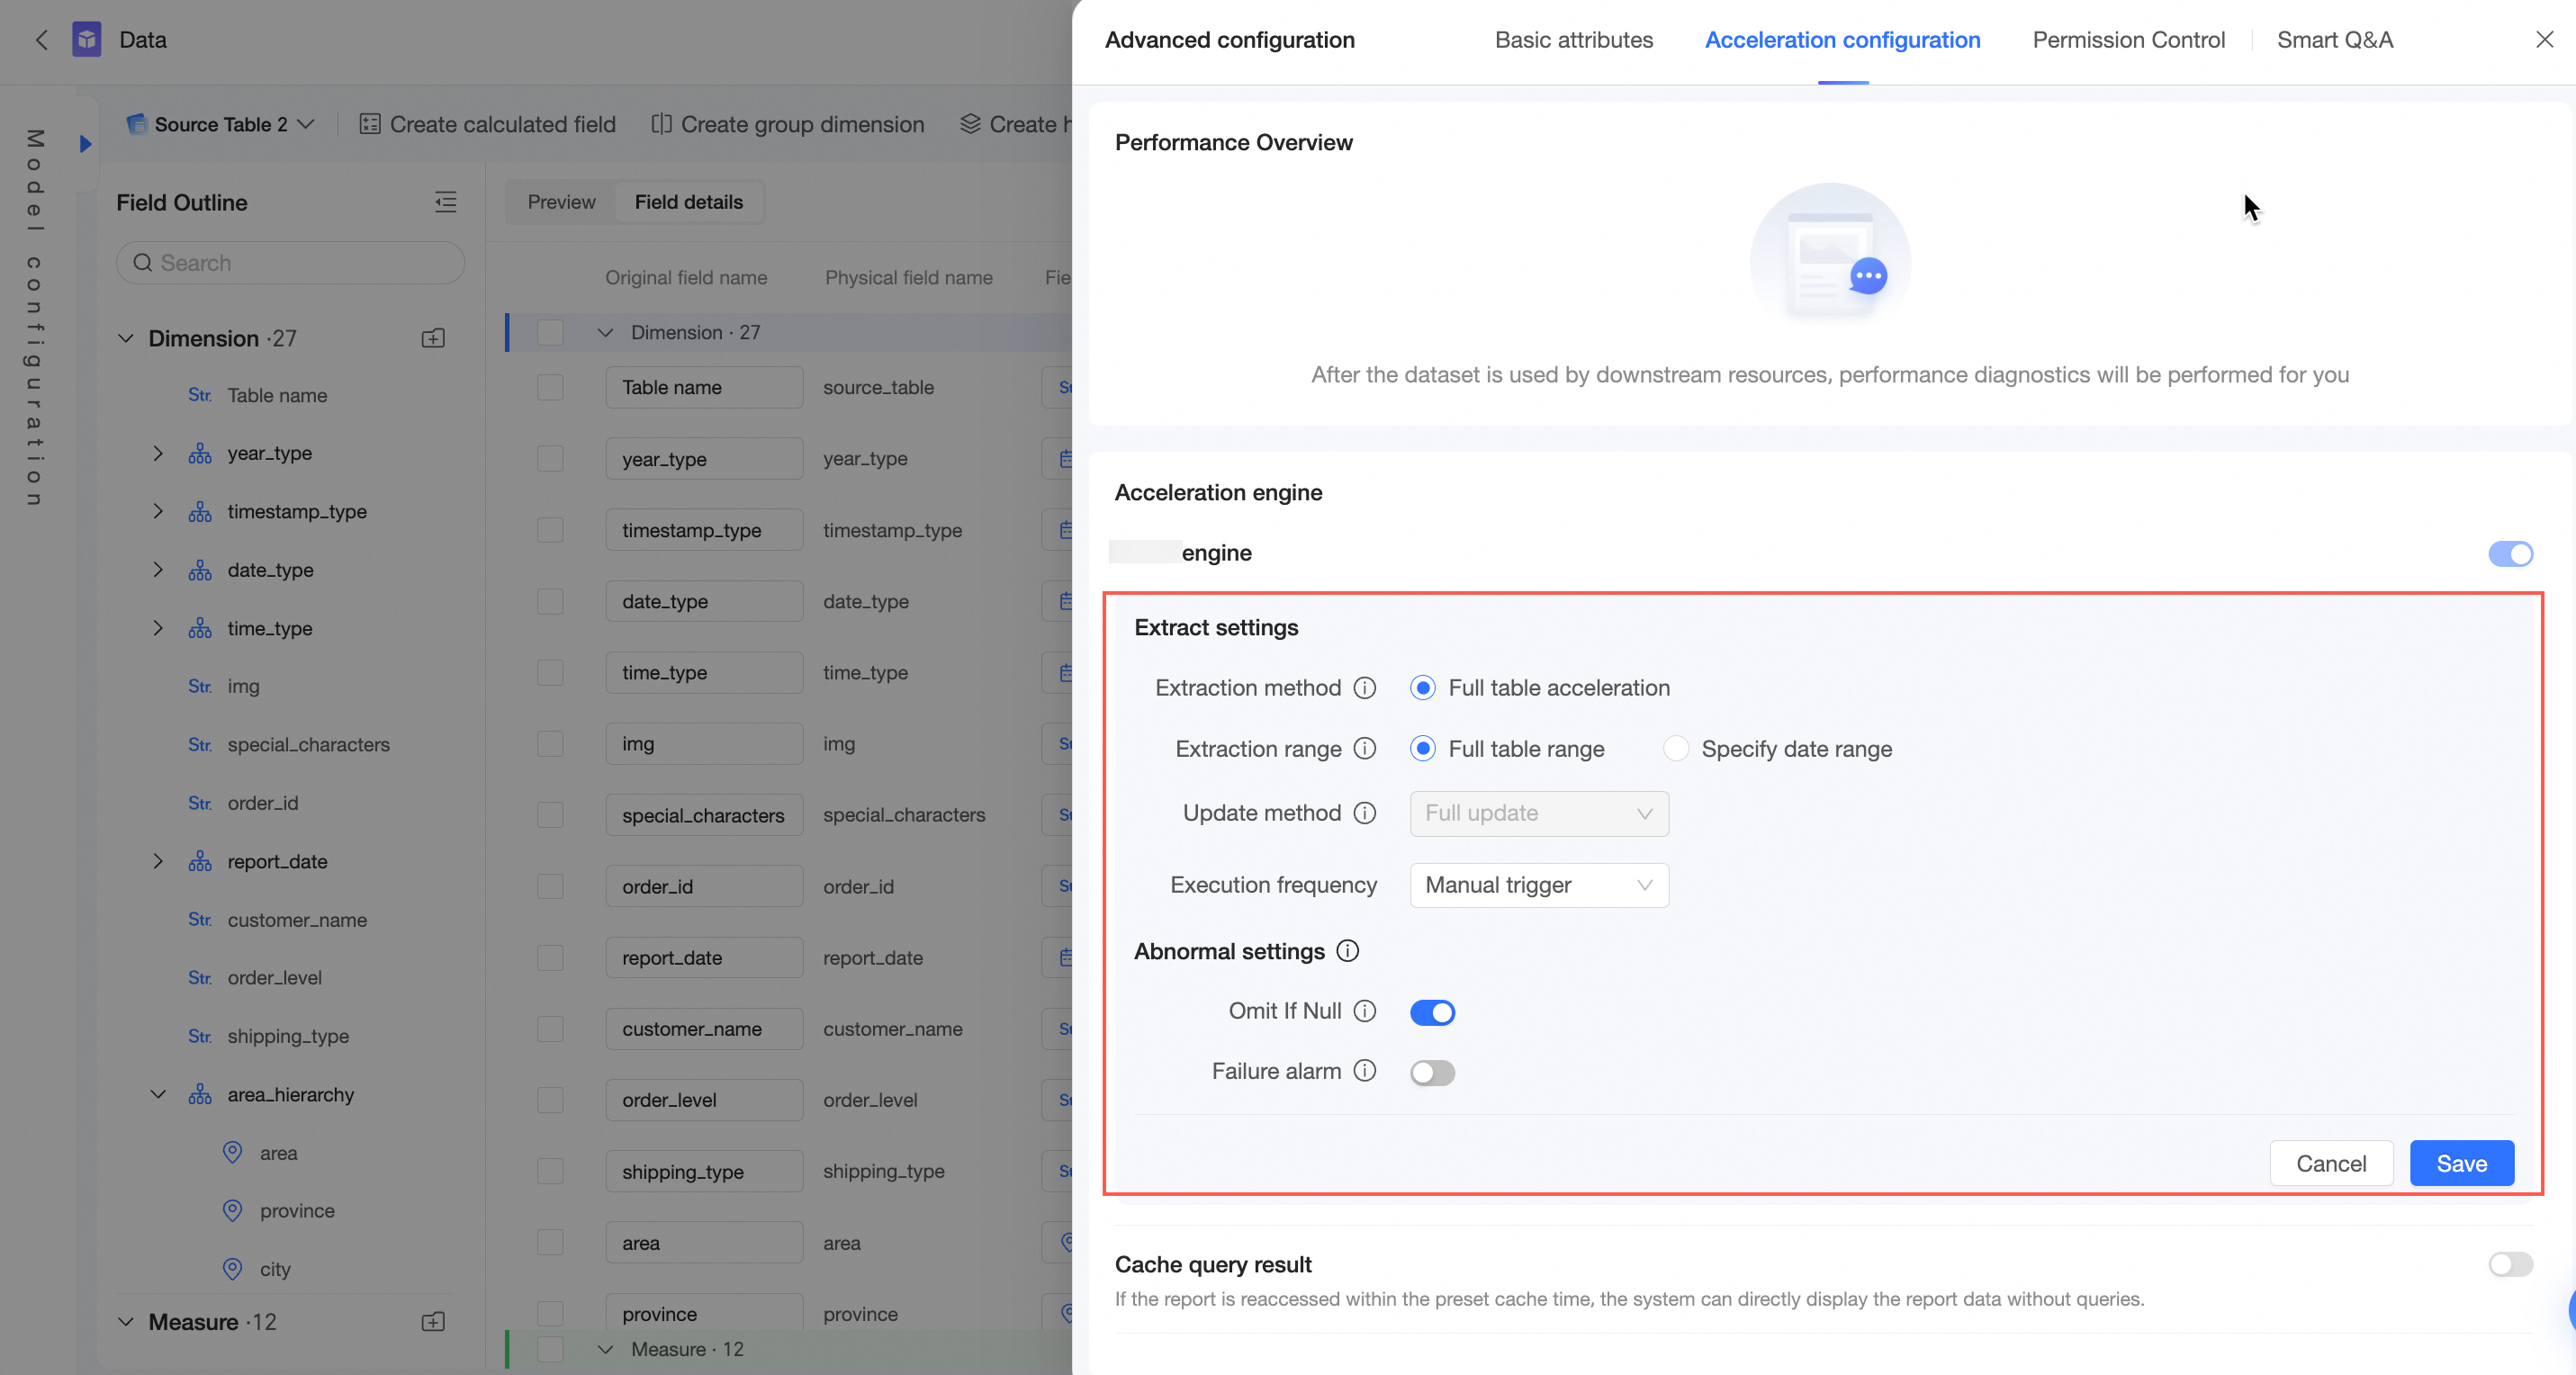
-
Click Save to complete the extraction acceleration configuration.
Merge tables
Merging combines data from different sources or tables into a single dataset, simplifying analysis, processing, and reporting.
After tables are merged, they can be treated as a single entity and joined with other tables. When you join a merged result, calculated field and pre-join filtering are not supported.
Procedure
-
Enter the physical model canvas and perform the merge operation.
If a logical table contains only a single table, you can also merge tables directly on the relational model canvas.
-
Select or create the tables to merge.
You can merge a data table with another data table, a data table with a table created from SQL, or two tables created from SQL.
Note-
For more information about editing SQL statements, see Use custom SQL.
-
You can merge a maximum of five tables.
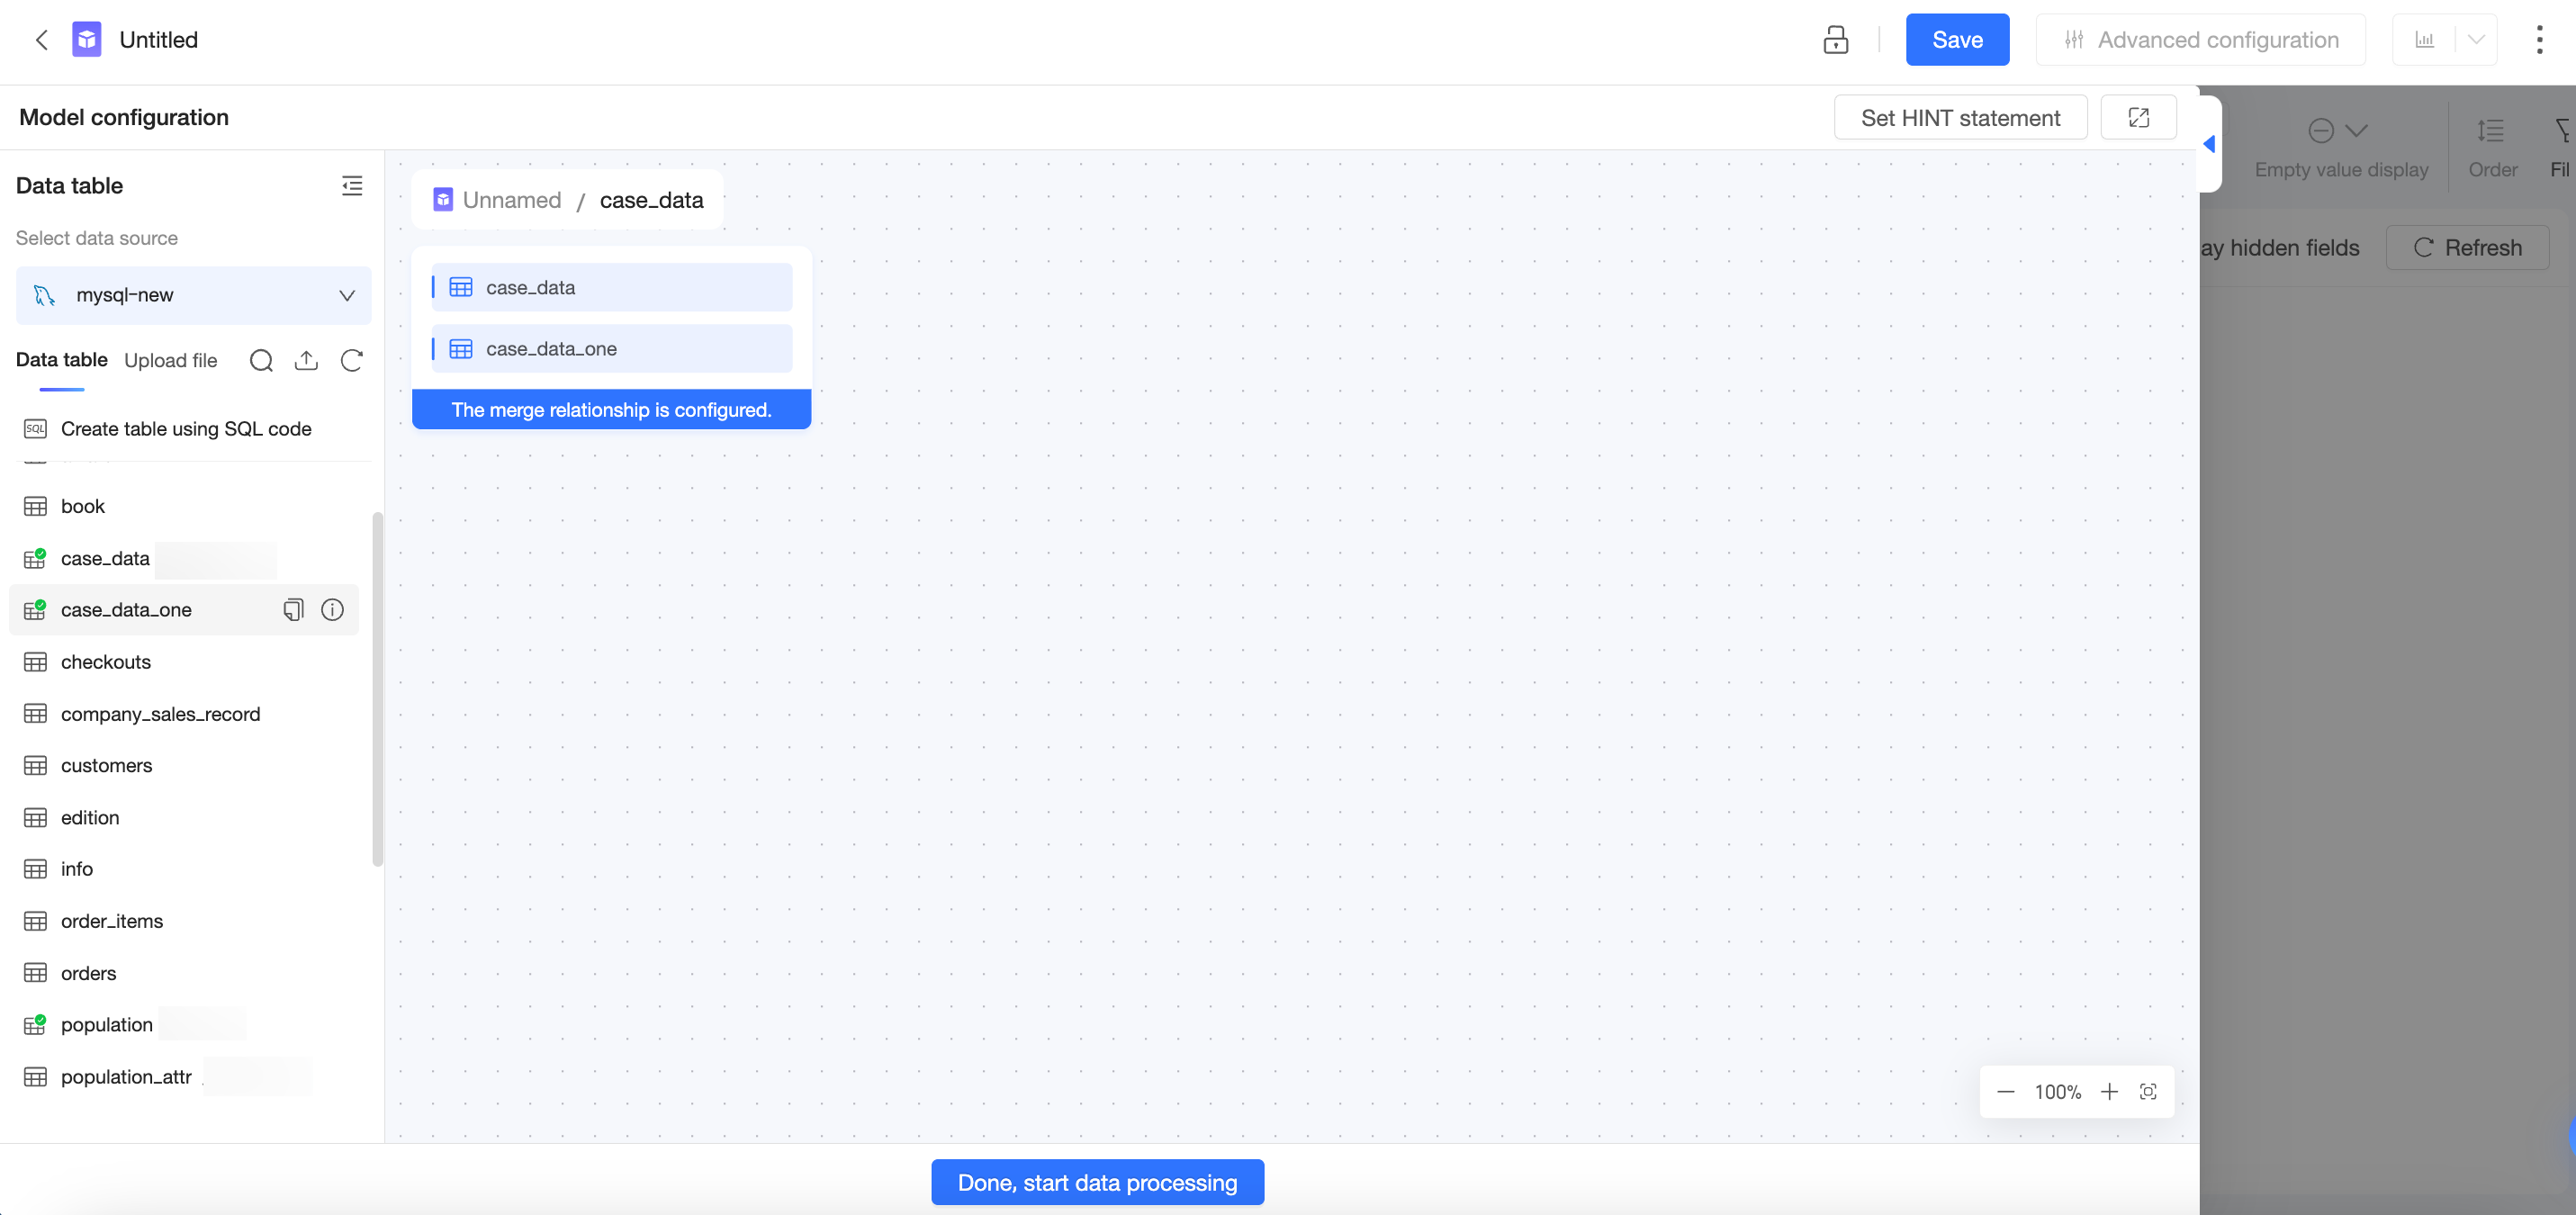
The following example shows how to merge a data table with a table created from SQL:
-
Double-click or drag a data table to the canvas.
-
Drag Create Table with SQL below the table you want to merge it with.
-
In the SQL editor, enter the SQL statement, click Run, and then click Confirm Edit to create the table.
-
-
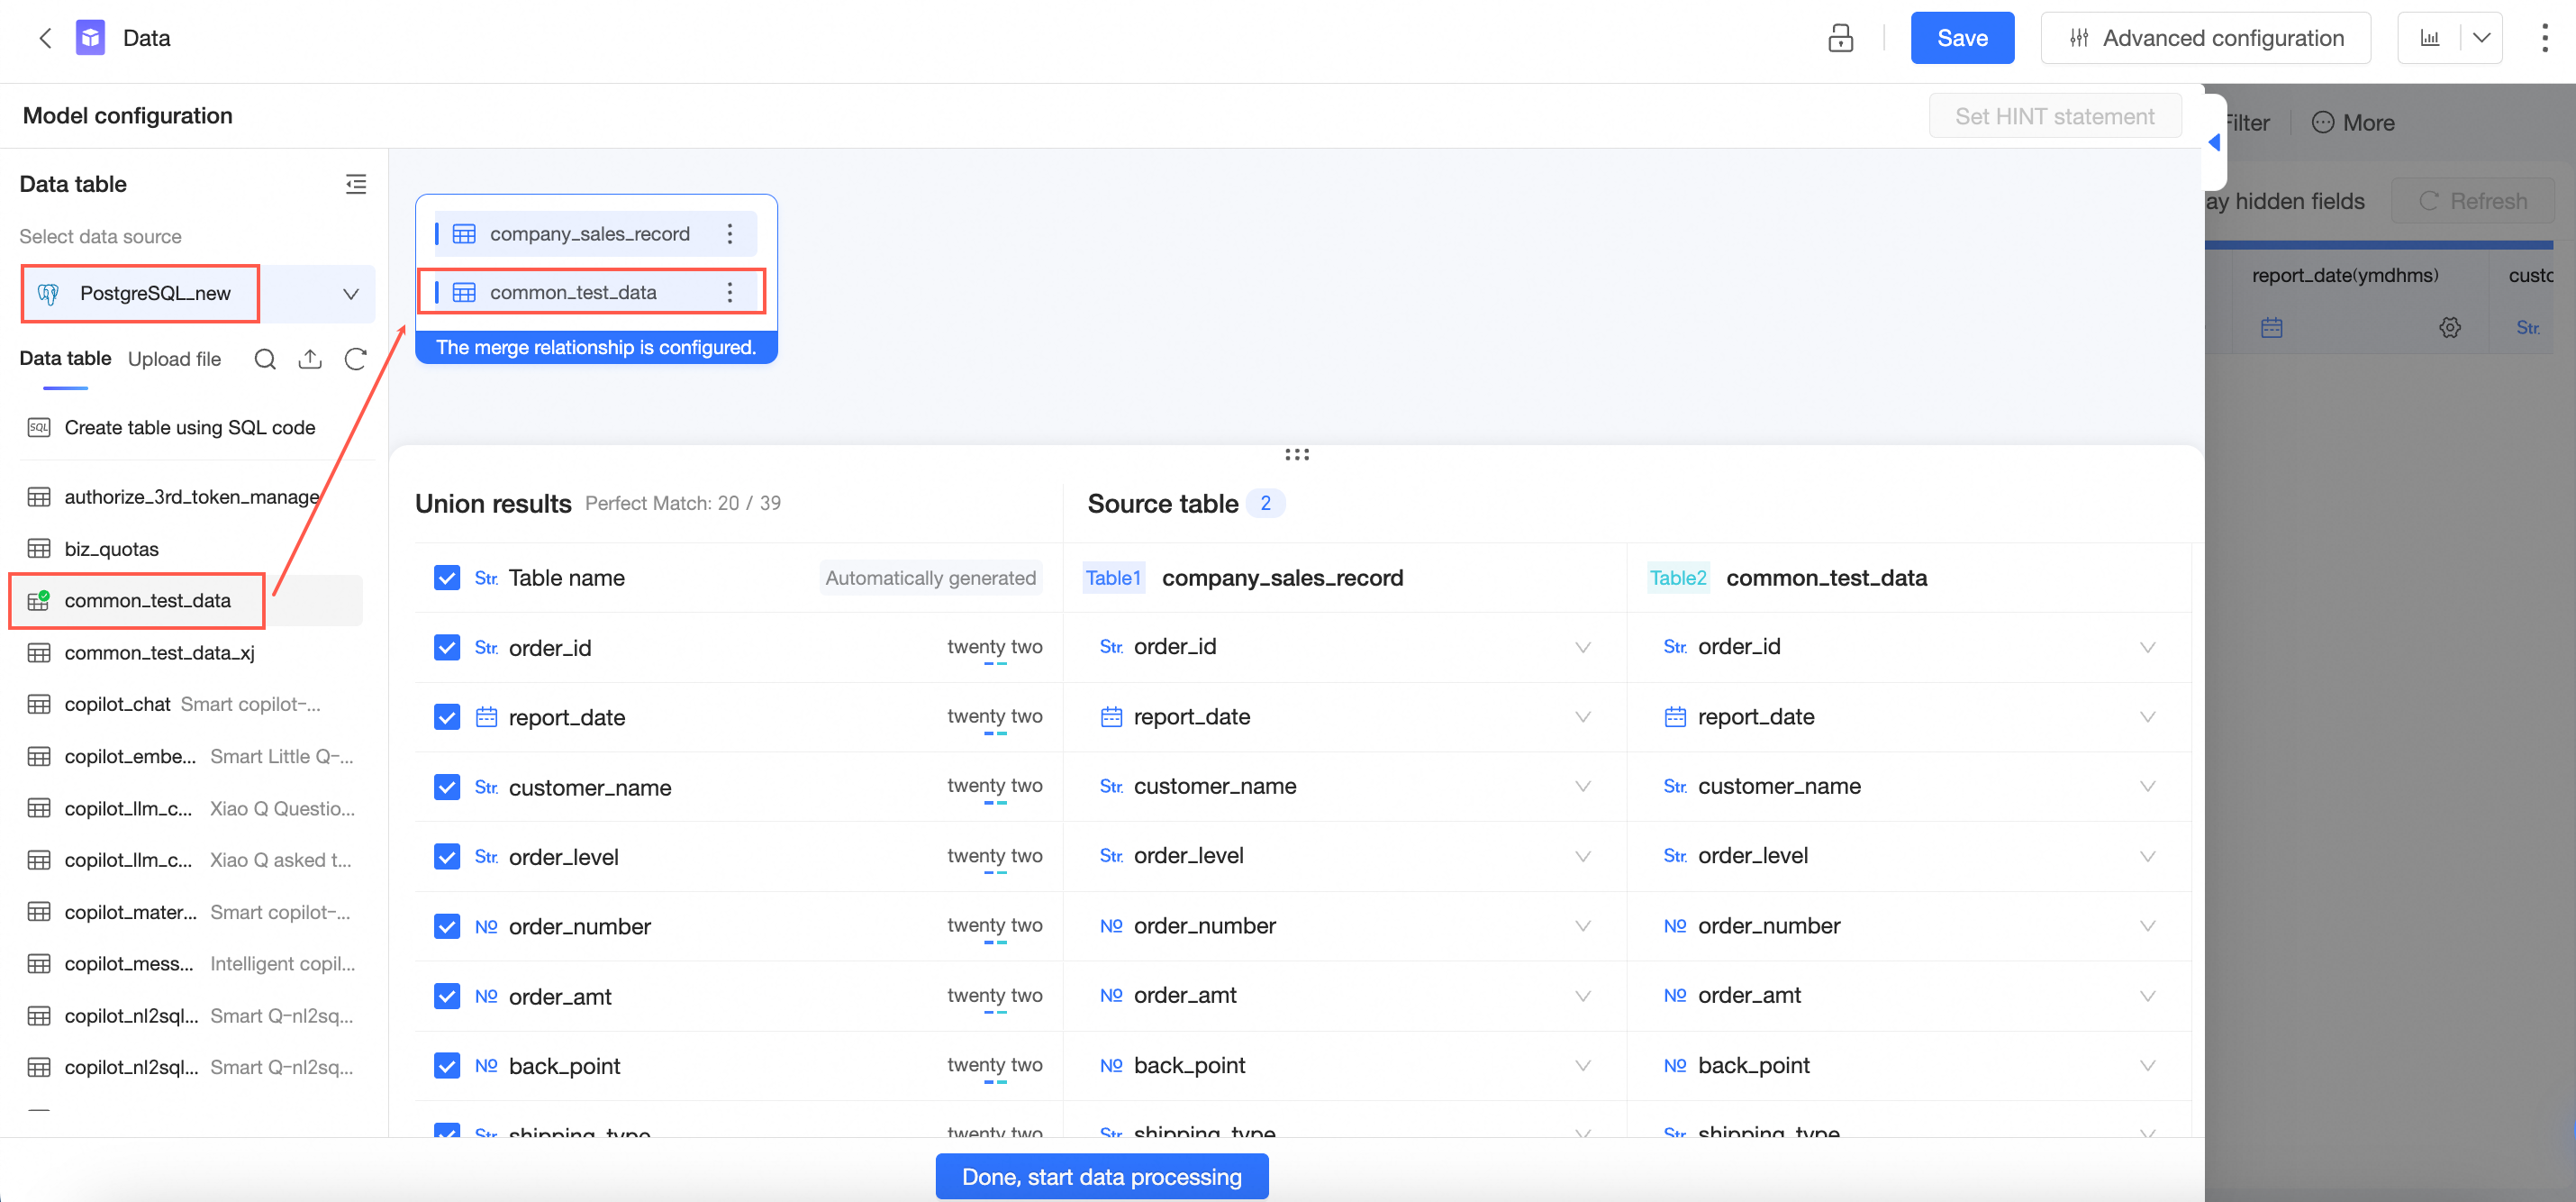
Configure the table merge.
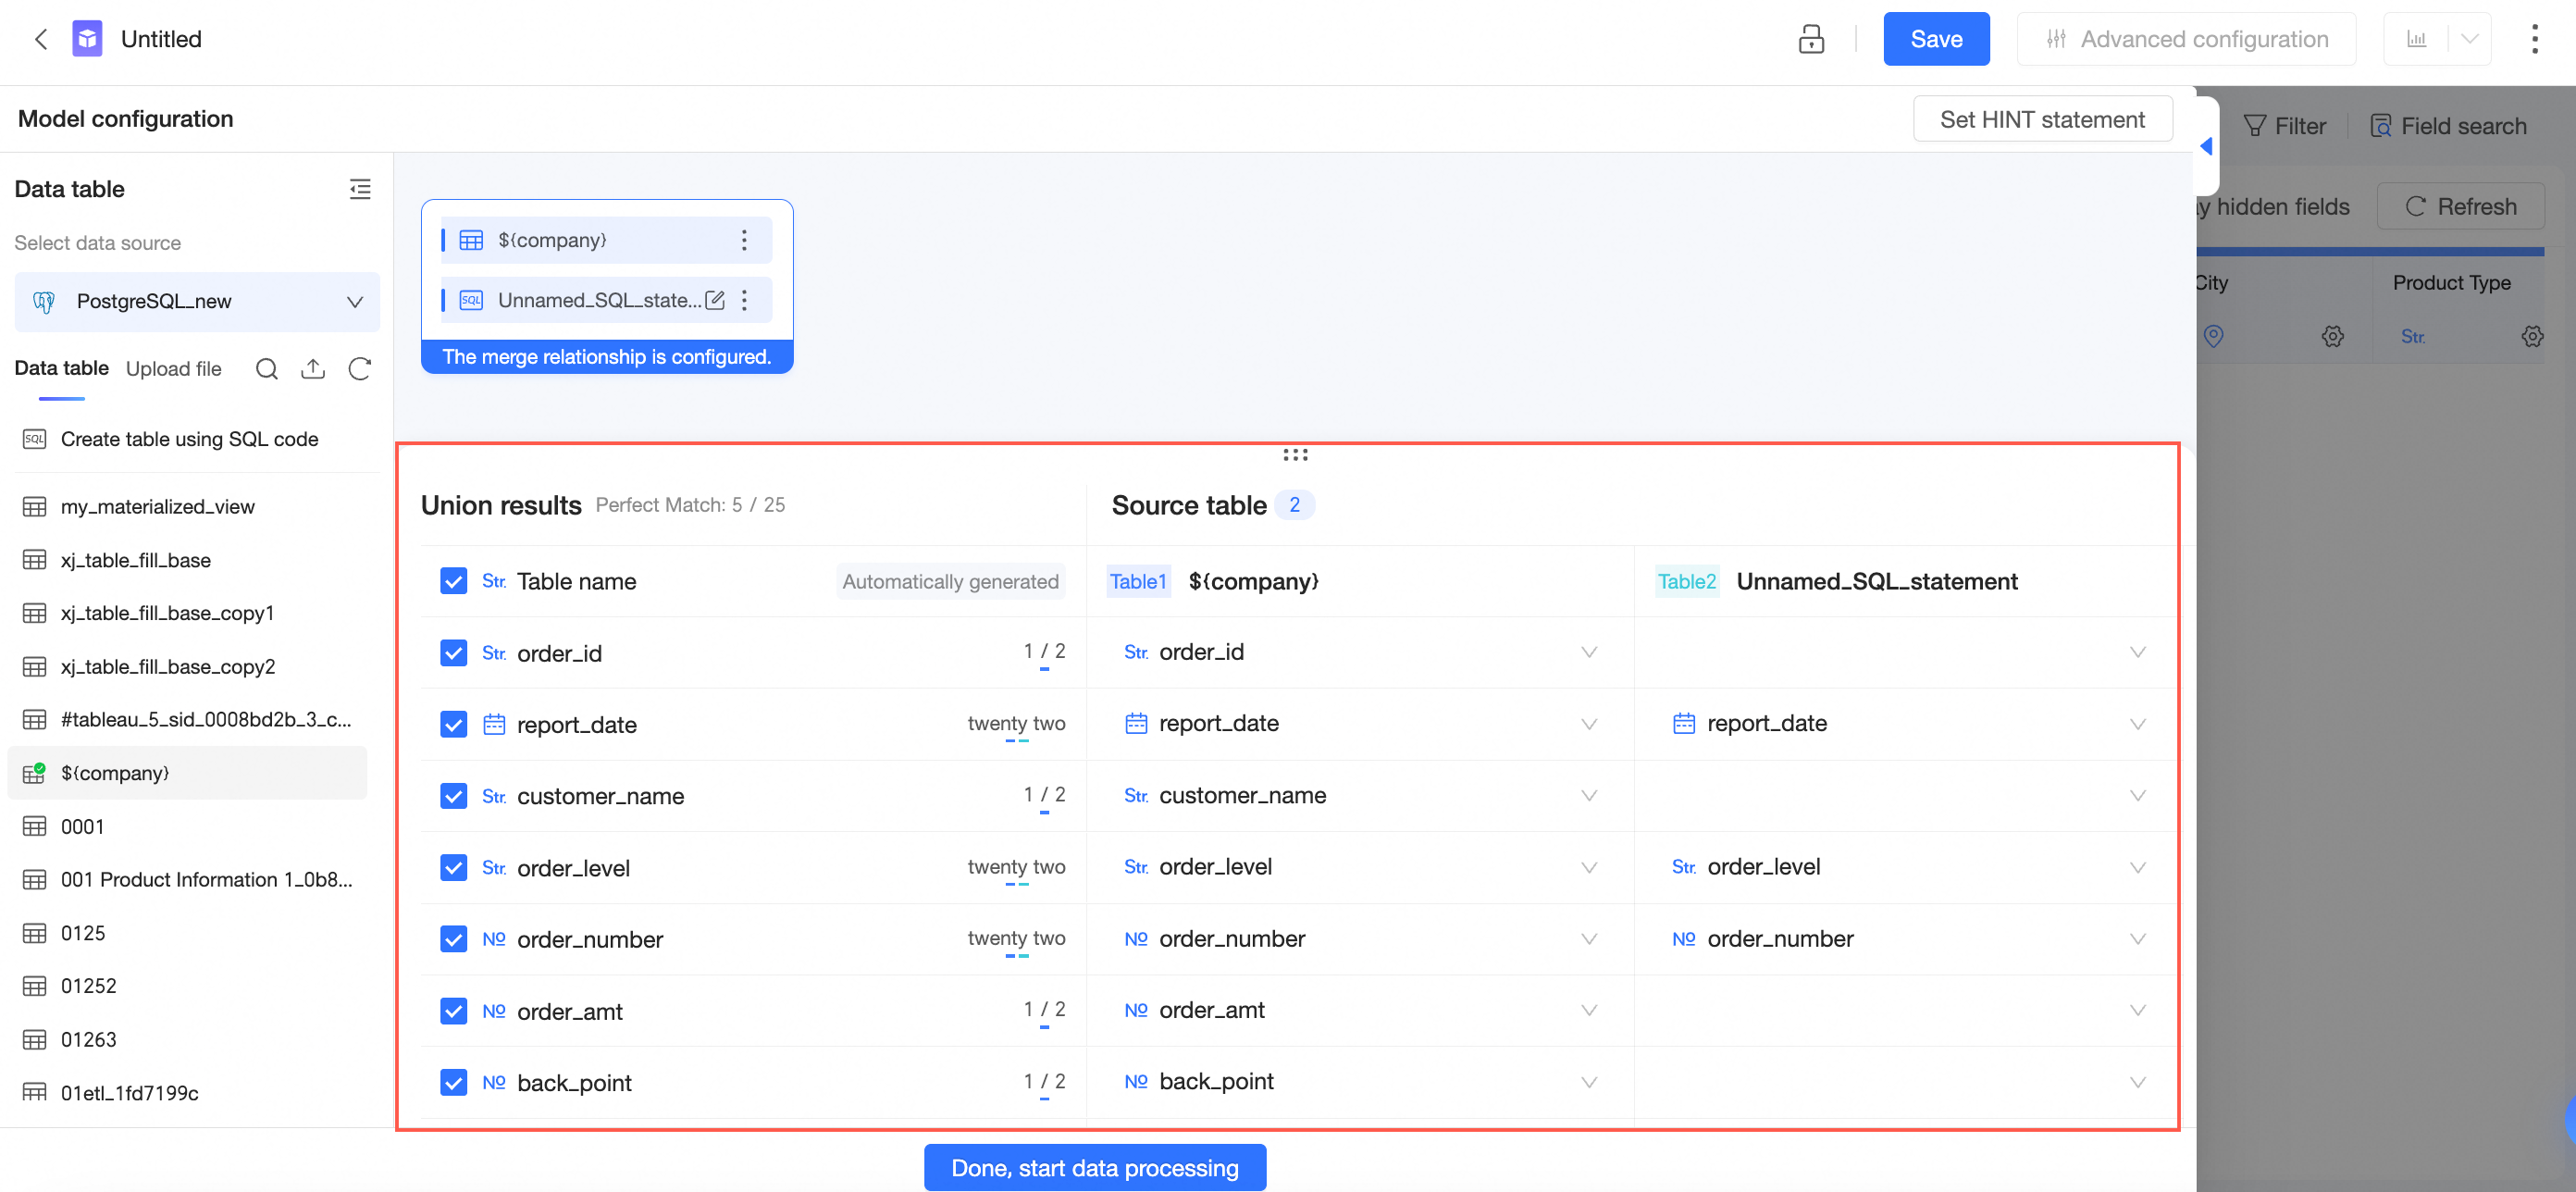
-
Fields with the same name and data type are automatically matched.
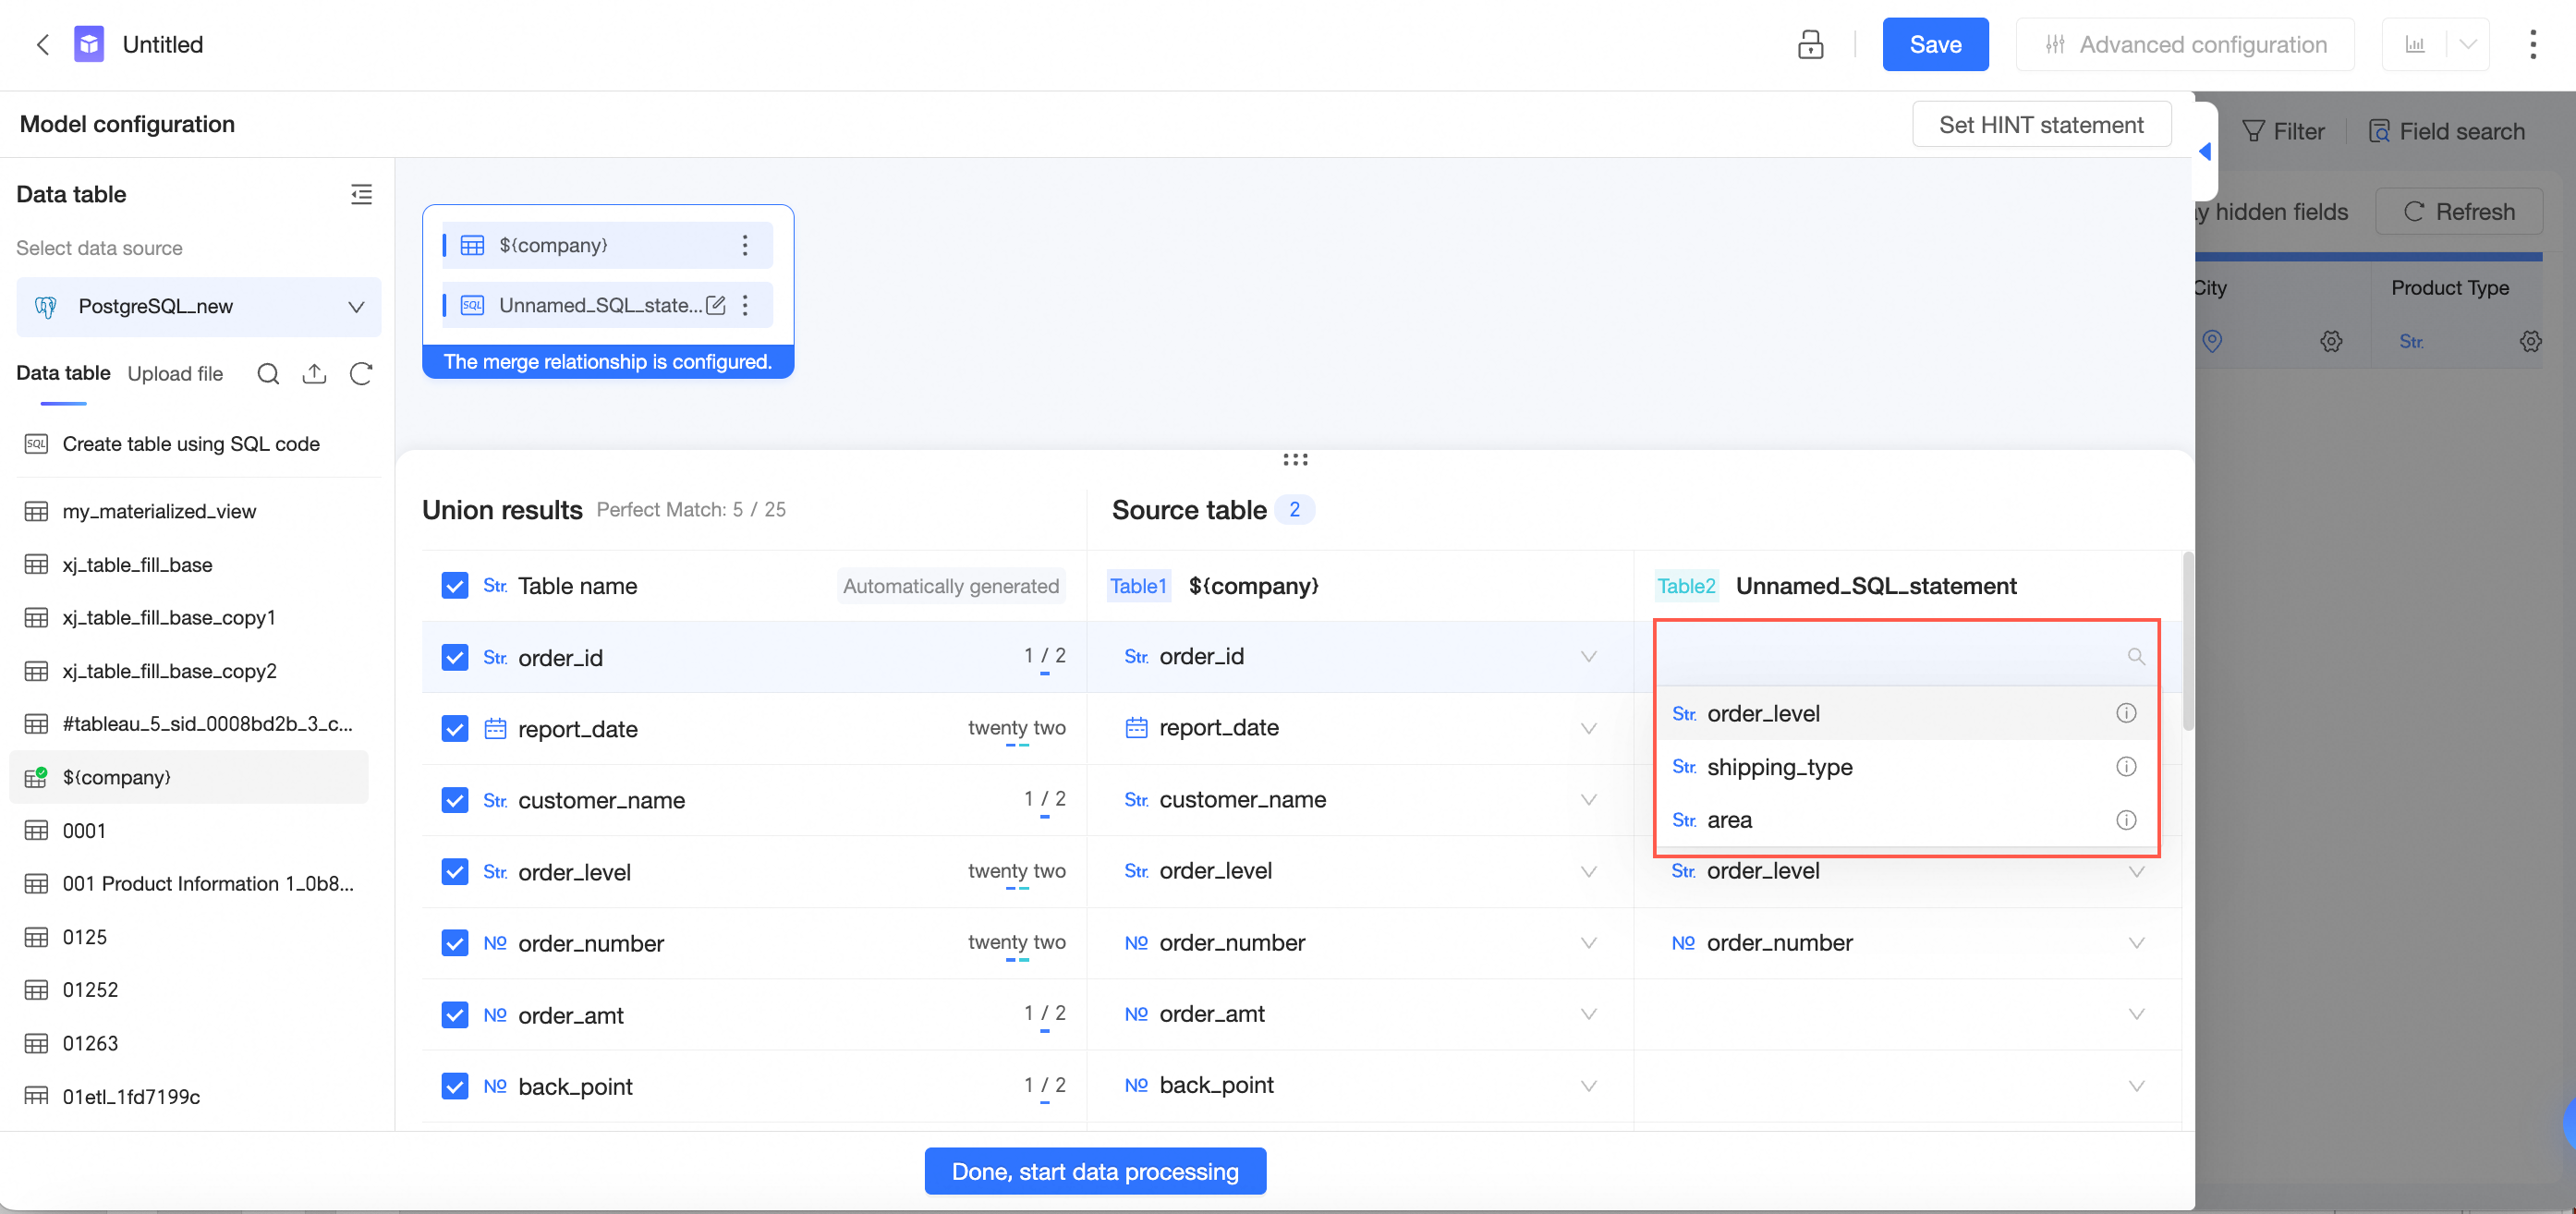
-
You can click a field box and select a different field from the drop-down list to manually adjust the matching.
NoteThe drop-down list shows only fields of the same data type.
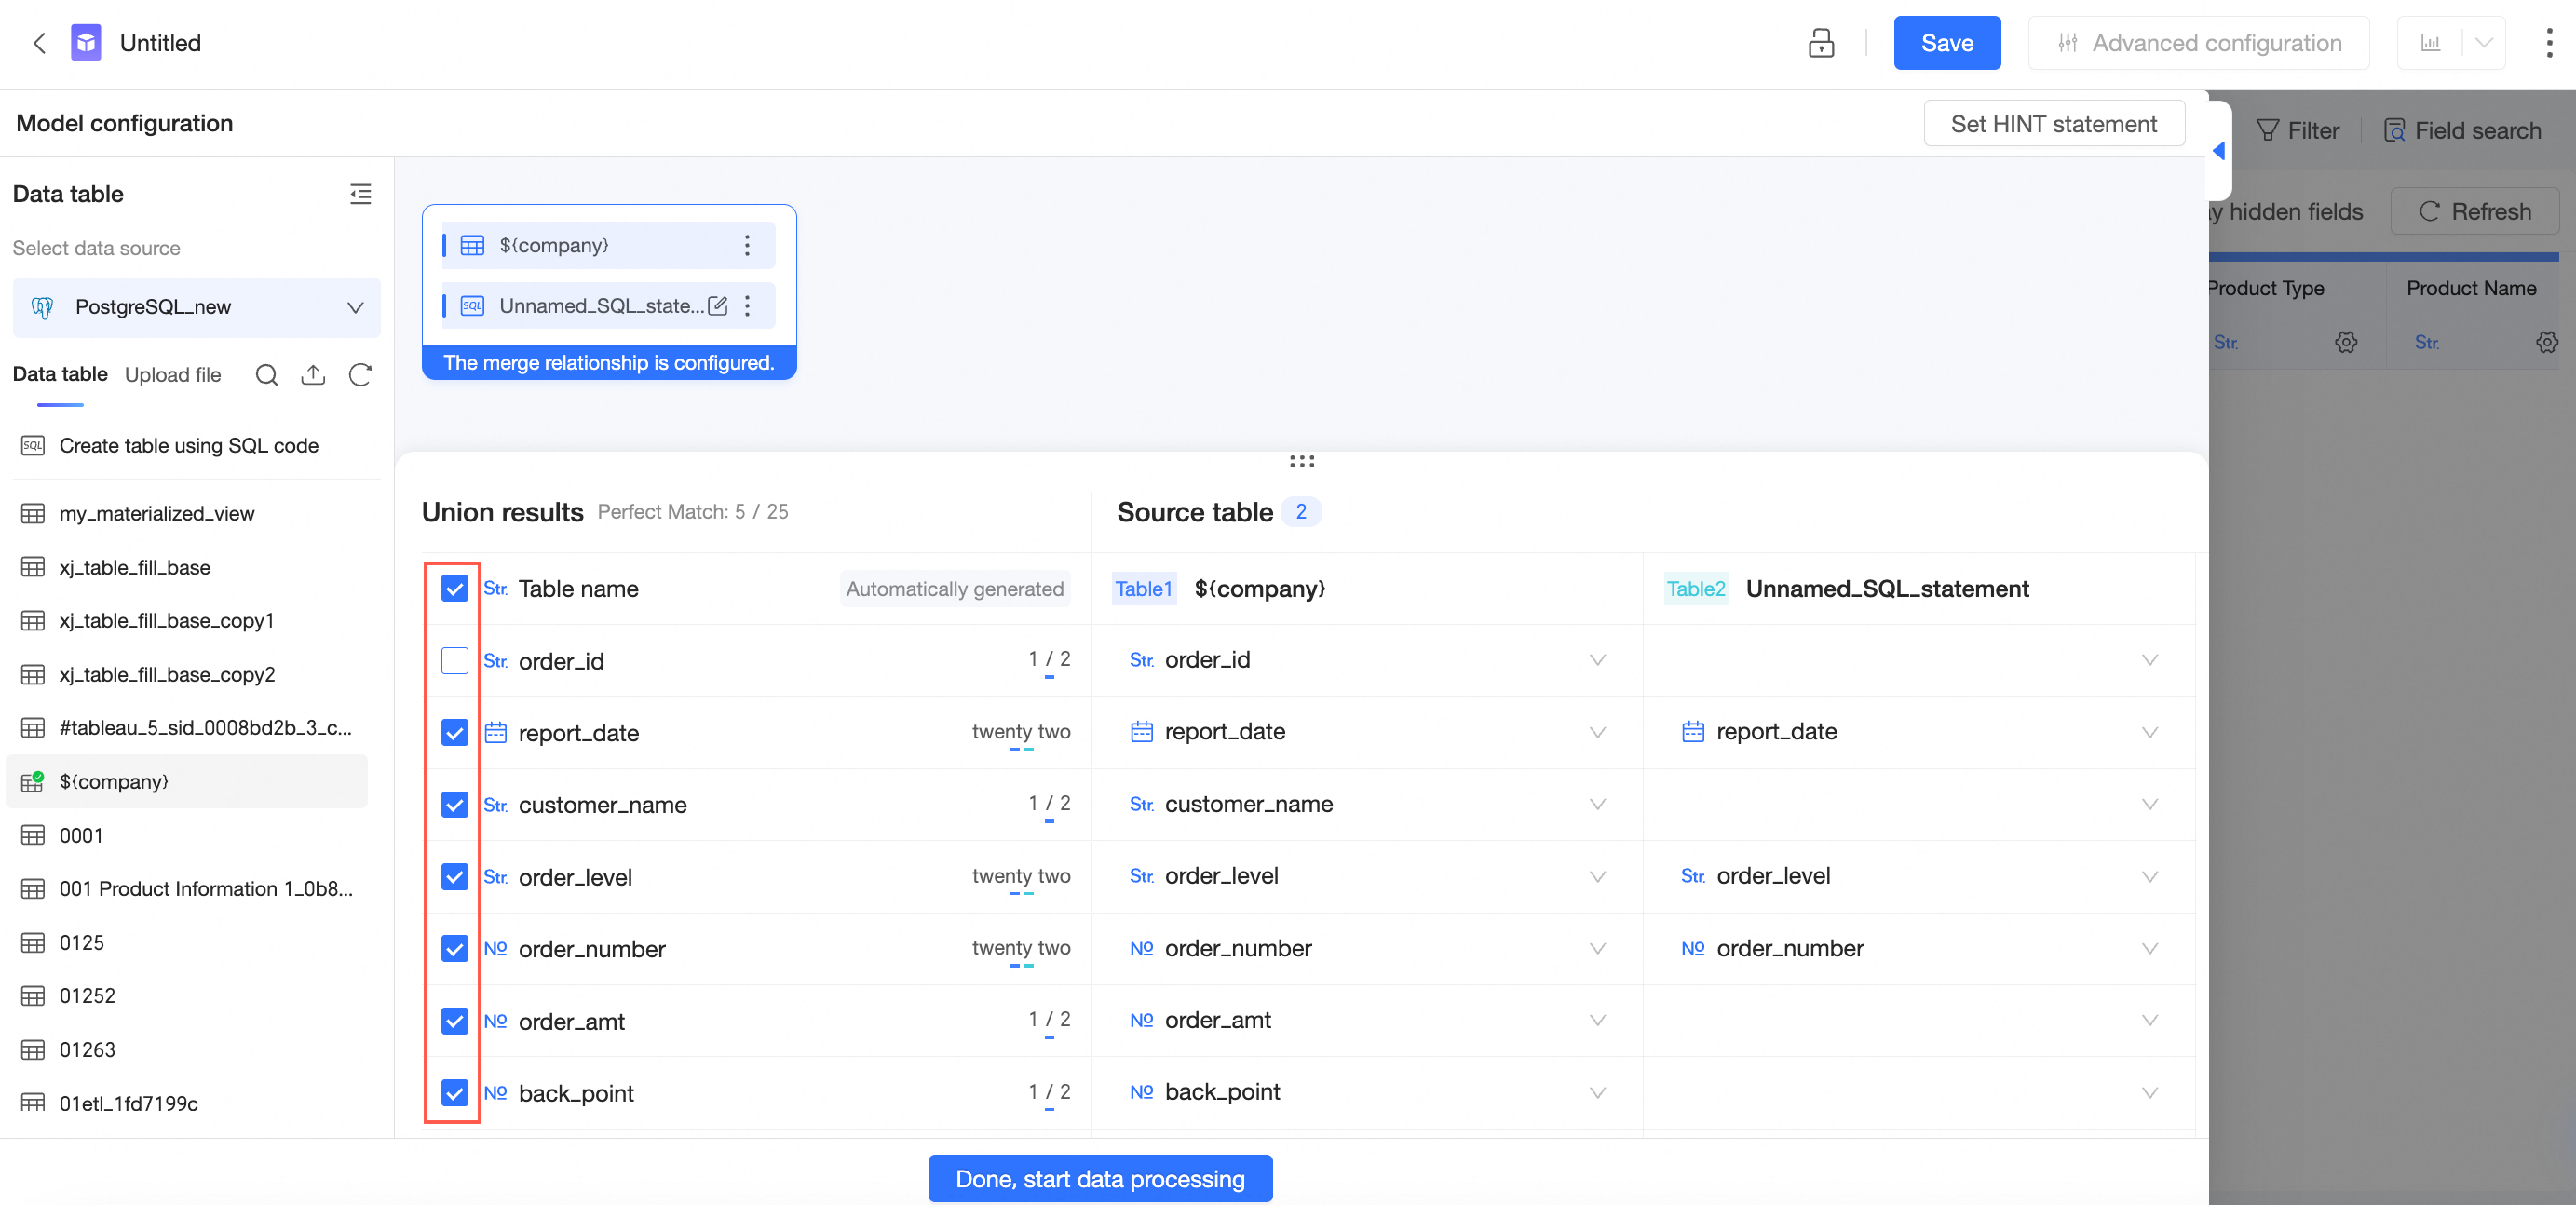
-
Select the fields you want to include based on your business needs.
-
-
After you configure the table merge, click Complete and Go to Data Processing to finish the configuration and go to the data processing page.
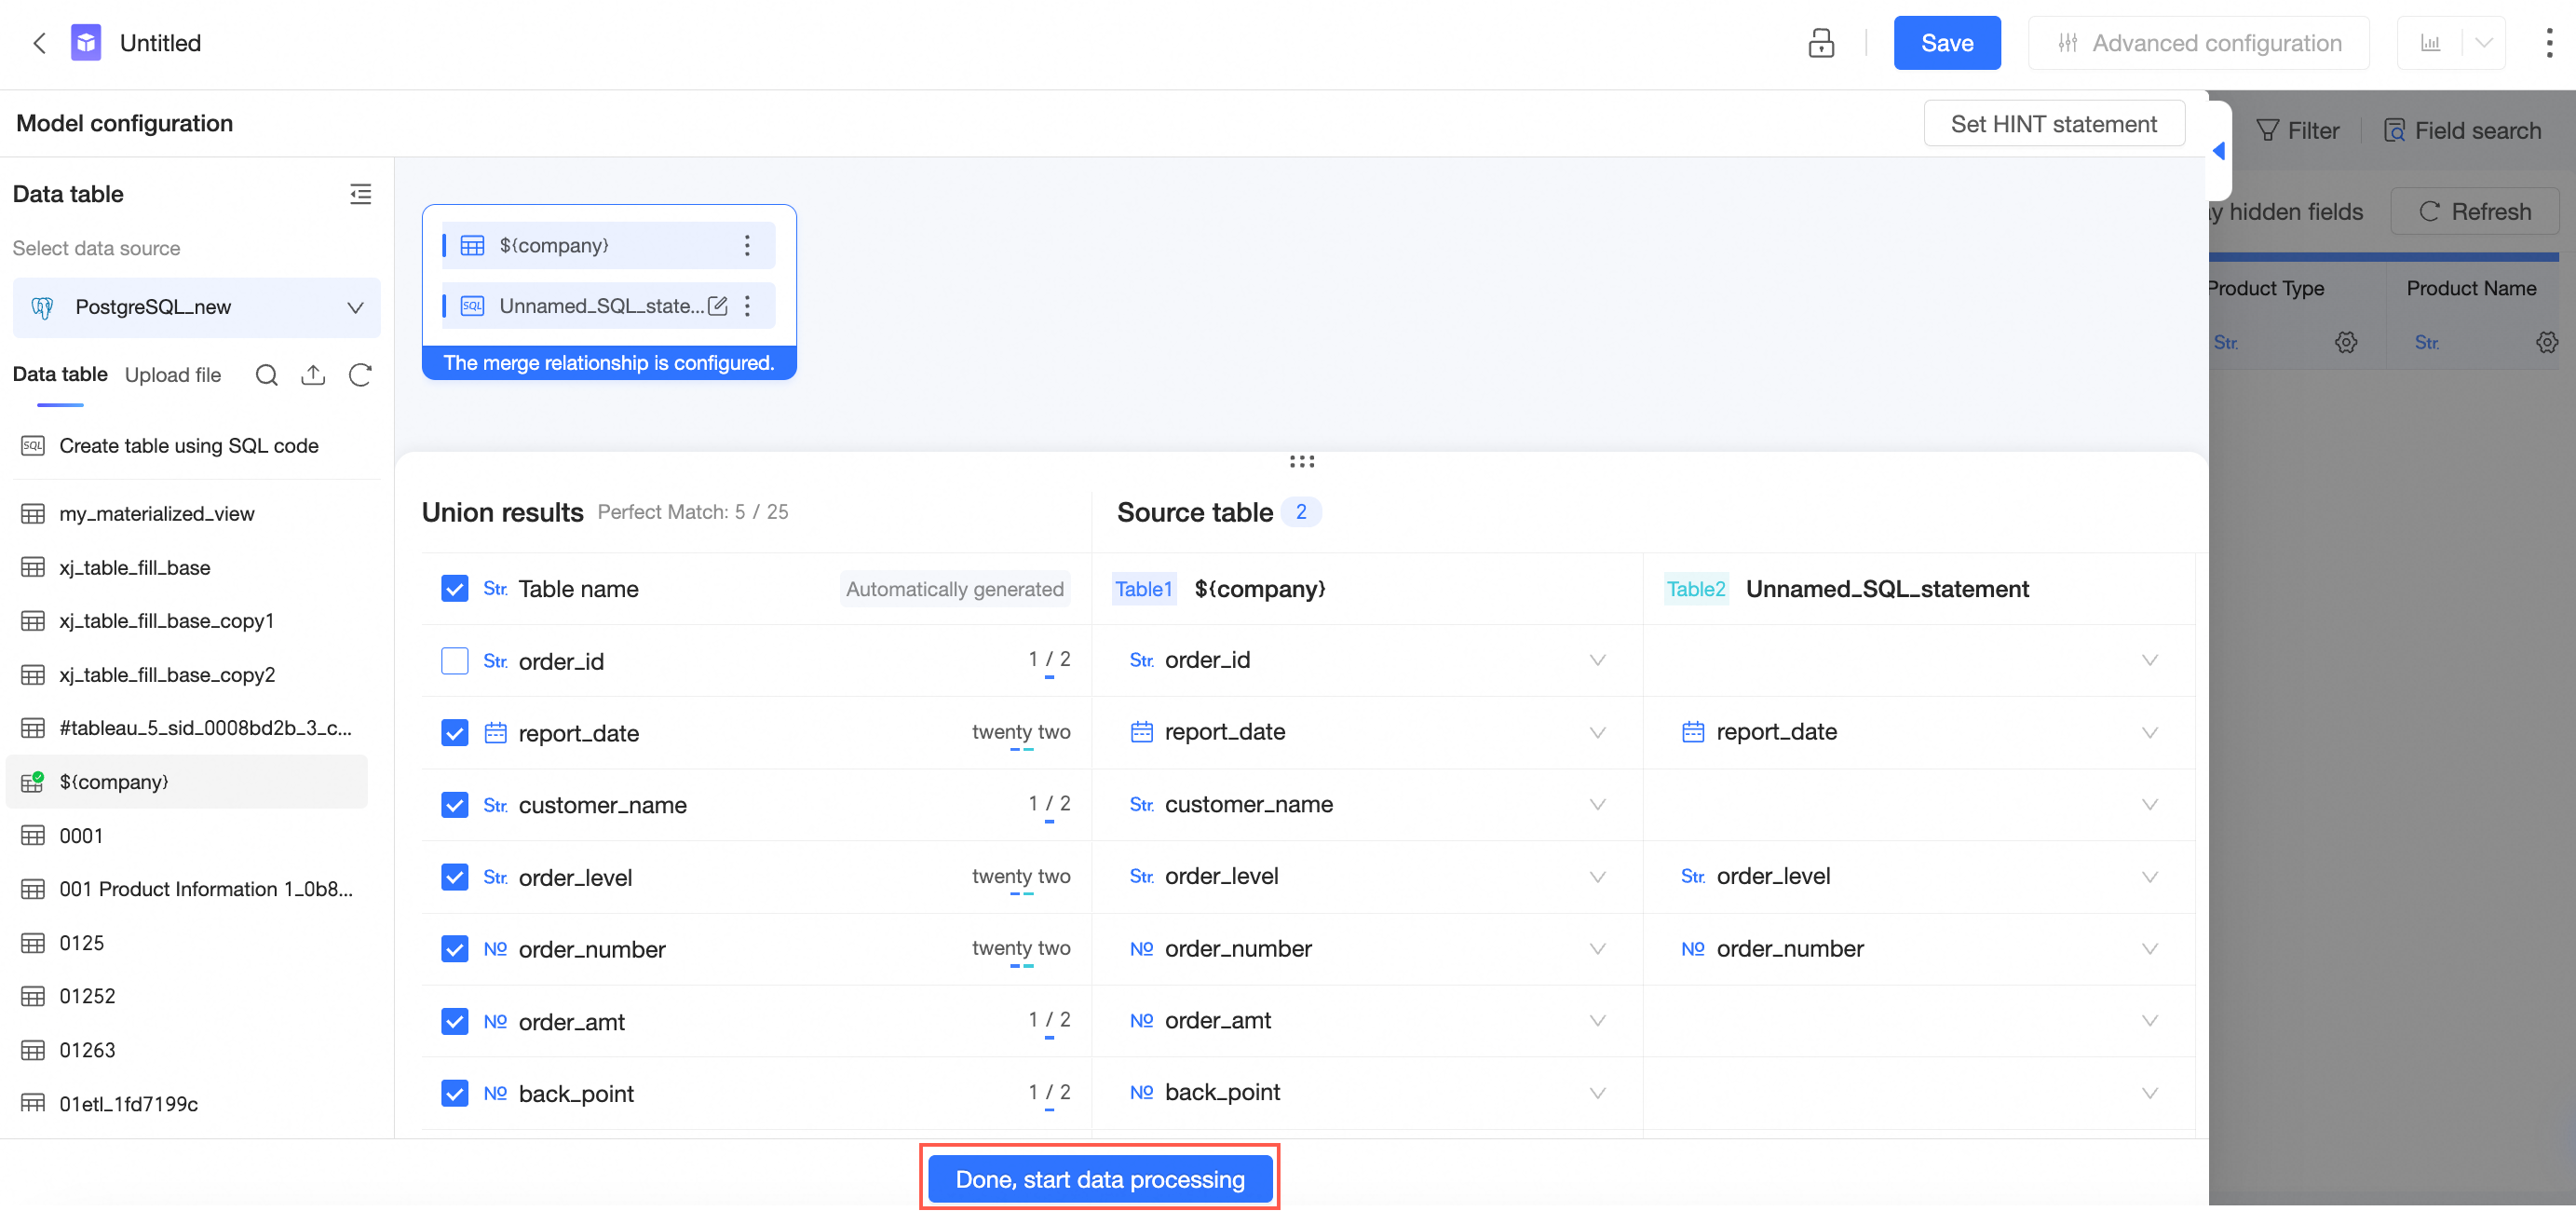
For more information about operations on the data processing page, see Create a dataset.
Cross-source merge
If the data tables you need are in different data sources, you can use a cross-source merge to combine them into a single model for analysis.
-
Merging tables from different data sources is available only in the Professional Edition.
-
Cross-source merges require you to enable extraction acceleration with the Quick Engine. For a list of data sources that support this feature, see Data source feature list.
-
On the dataset edit page, find the data table in the target database from the data table list and drag it to the canvas.
-
Switch the data table list to another target database, find the required data table, and drag it to the canvas.
-
Configure the merge relationship between the data tables as needed. For detailed instructions, see Configure the table merge in this topic. When finished, click Complete and Go to Data Processing to go to the data processing page, and then Save the dataset.
-
Click Advanced settings in the top toolbar.
-
Click Acceleration settings and enable Quick Engine.
-
After you enable the Quick Engine, you must configure its parameters. For configuration details, see Use extraction acceleration.
-
Click Save to complete the extraction acceleration configuration.
Switch data tables
You can switch to a different data table on the Table Details page, whether from the same data source or a different one.
Usage notes
-
You cannot switch data tables for the following data source types:
-
Data sources created with custom SQL
-
File data sources in an exploration space
-
API data sources
-
DingTalk Sheets data sources
-
Lark Sheets data sources
-
Lark Bitable data sources
-
-
When you switch a data table, fields with the same name are automatically matched. Ensure that the fields in the target table are consistent with those in the original table.
-
If the data source type of the target table is different from that of the original table, check your calculated fields after switching. If extraction acceleration is configured, you must reset it.
Procedure
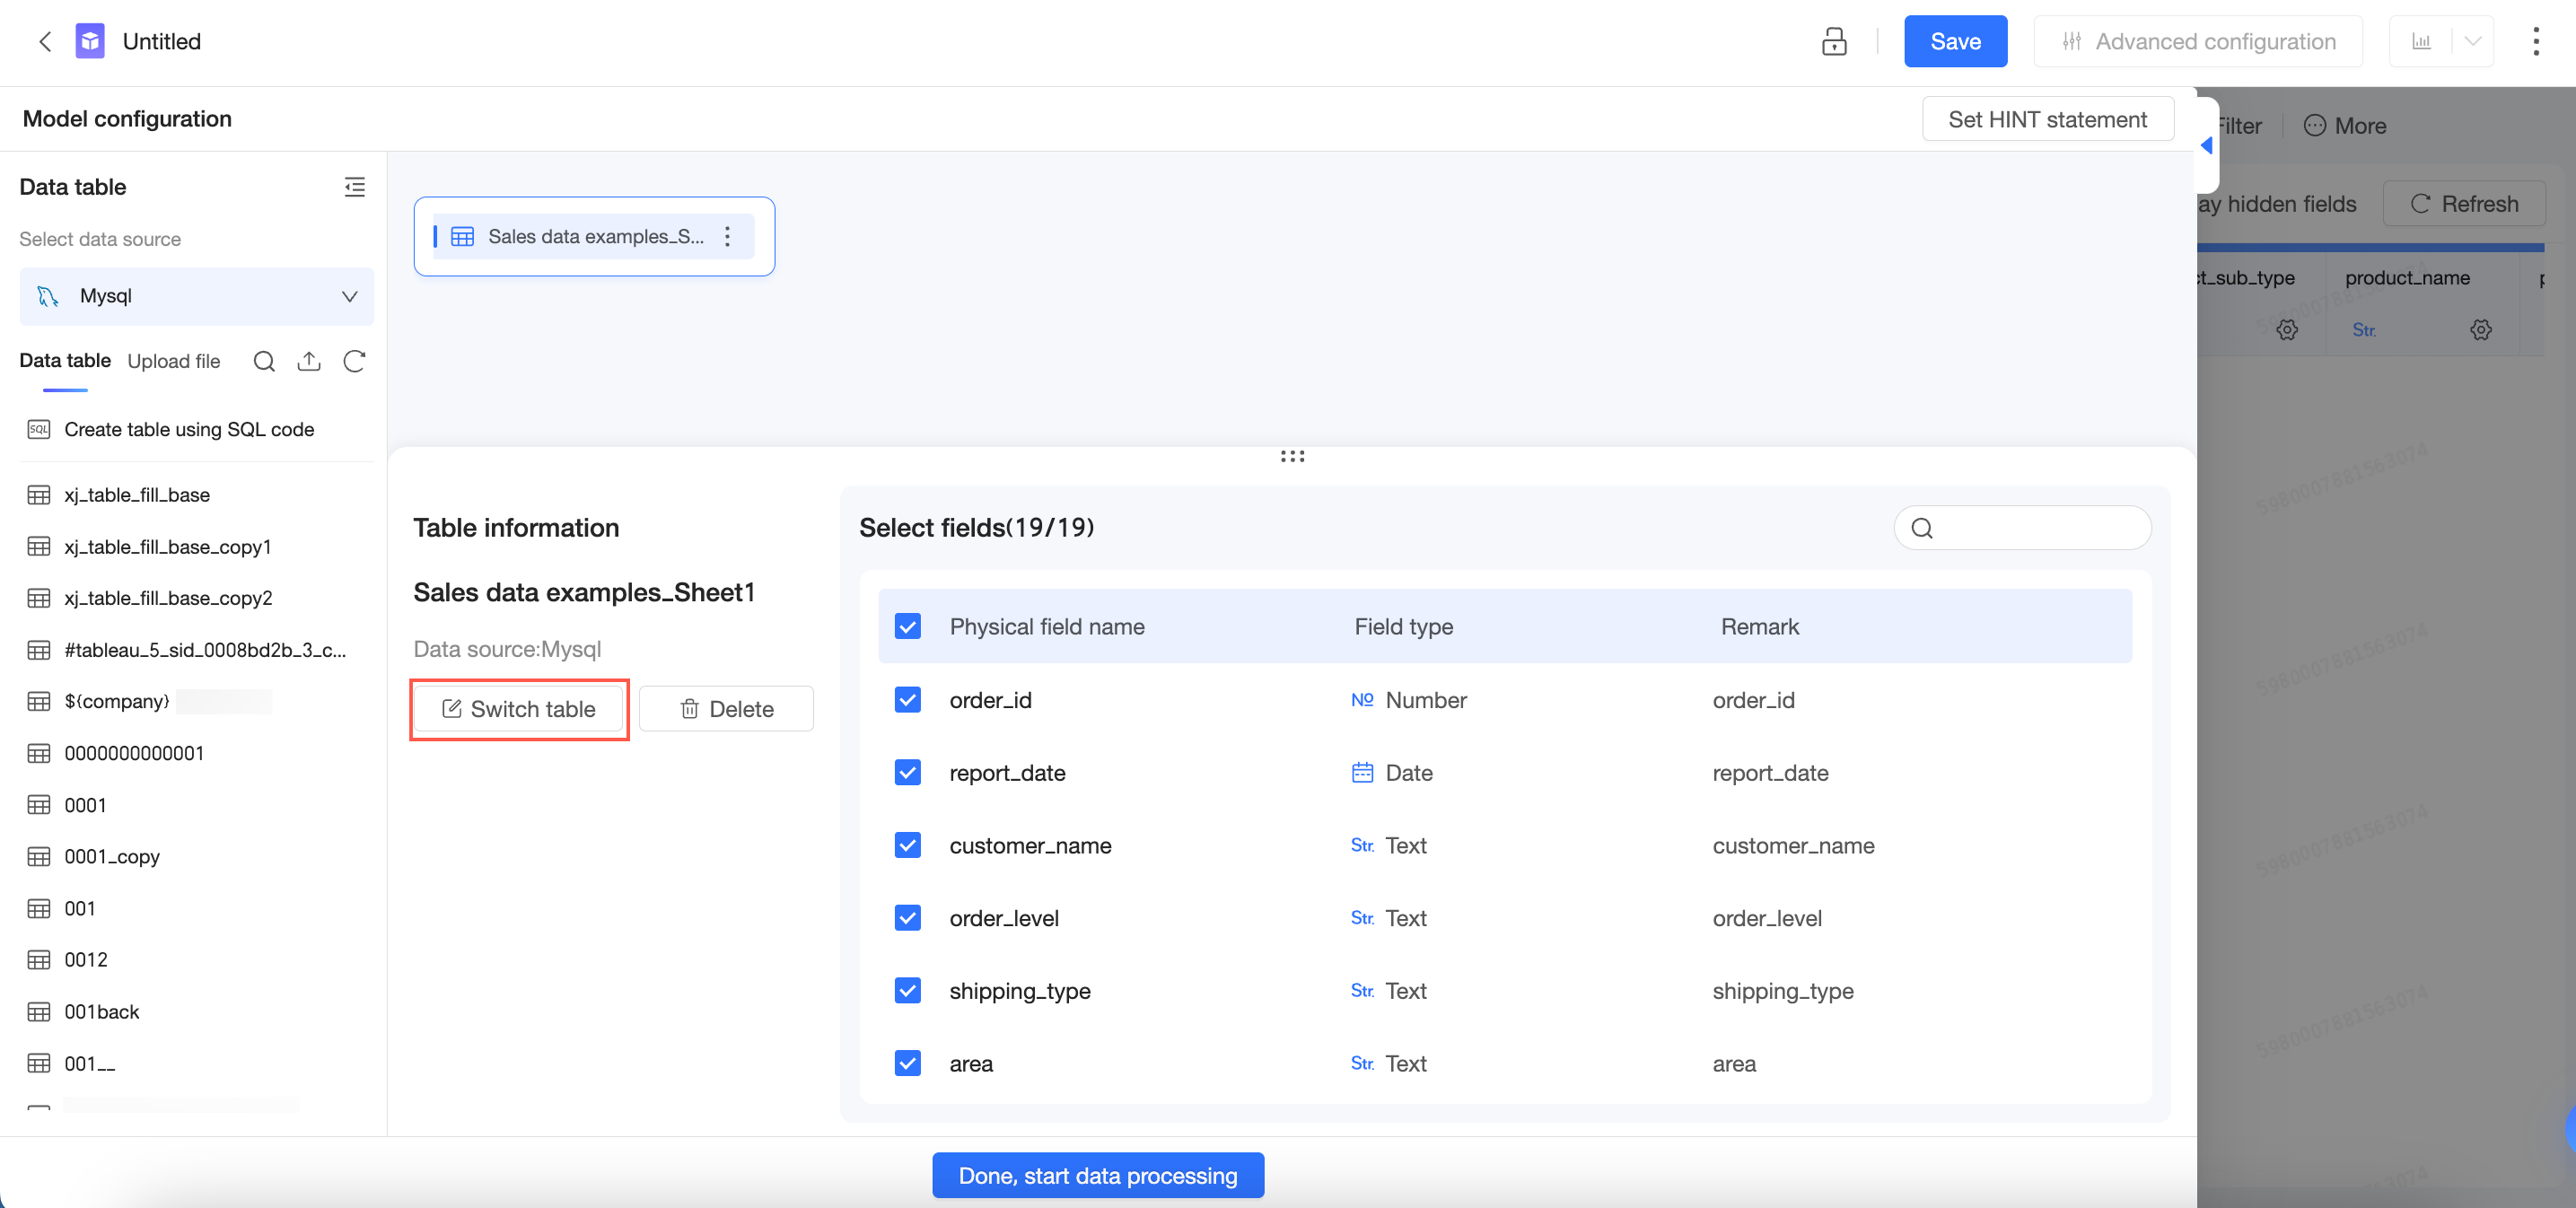
-
On the Table Details page, click Switch Data Table.
-
On the Switch Data Table page, select a data source and a data table.
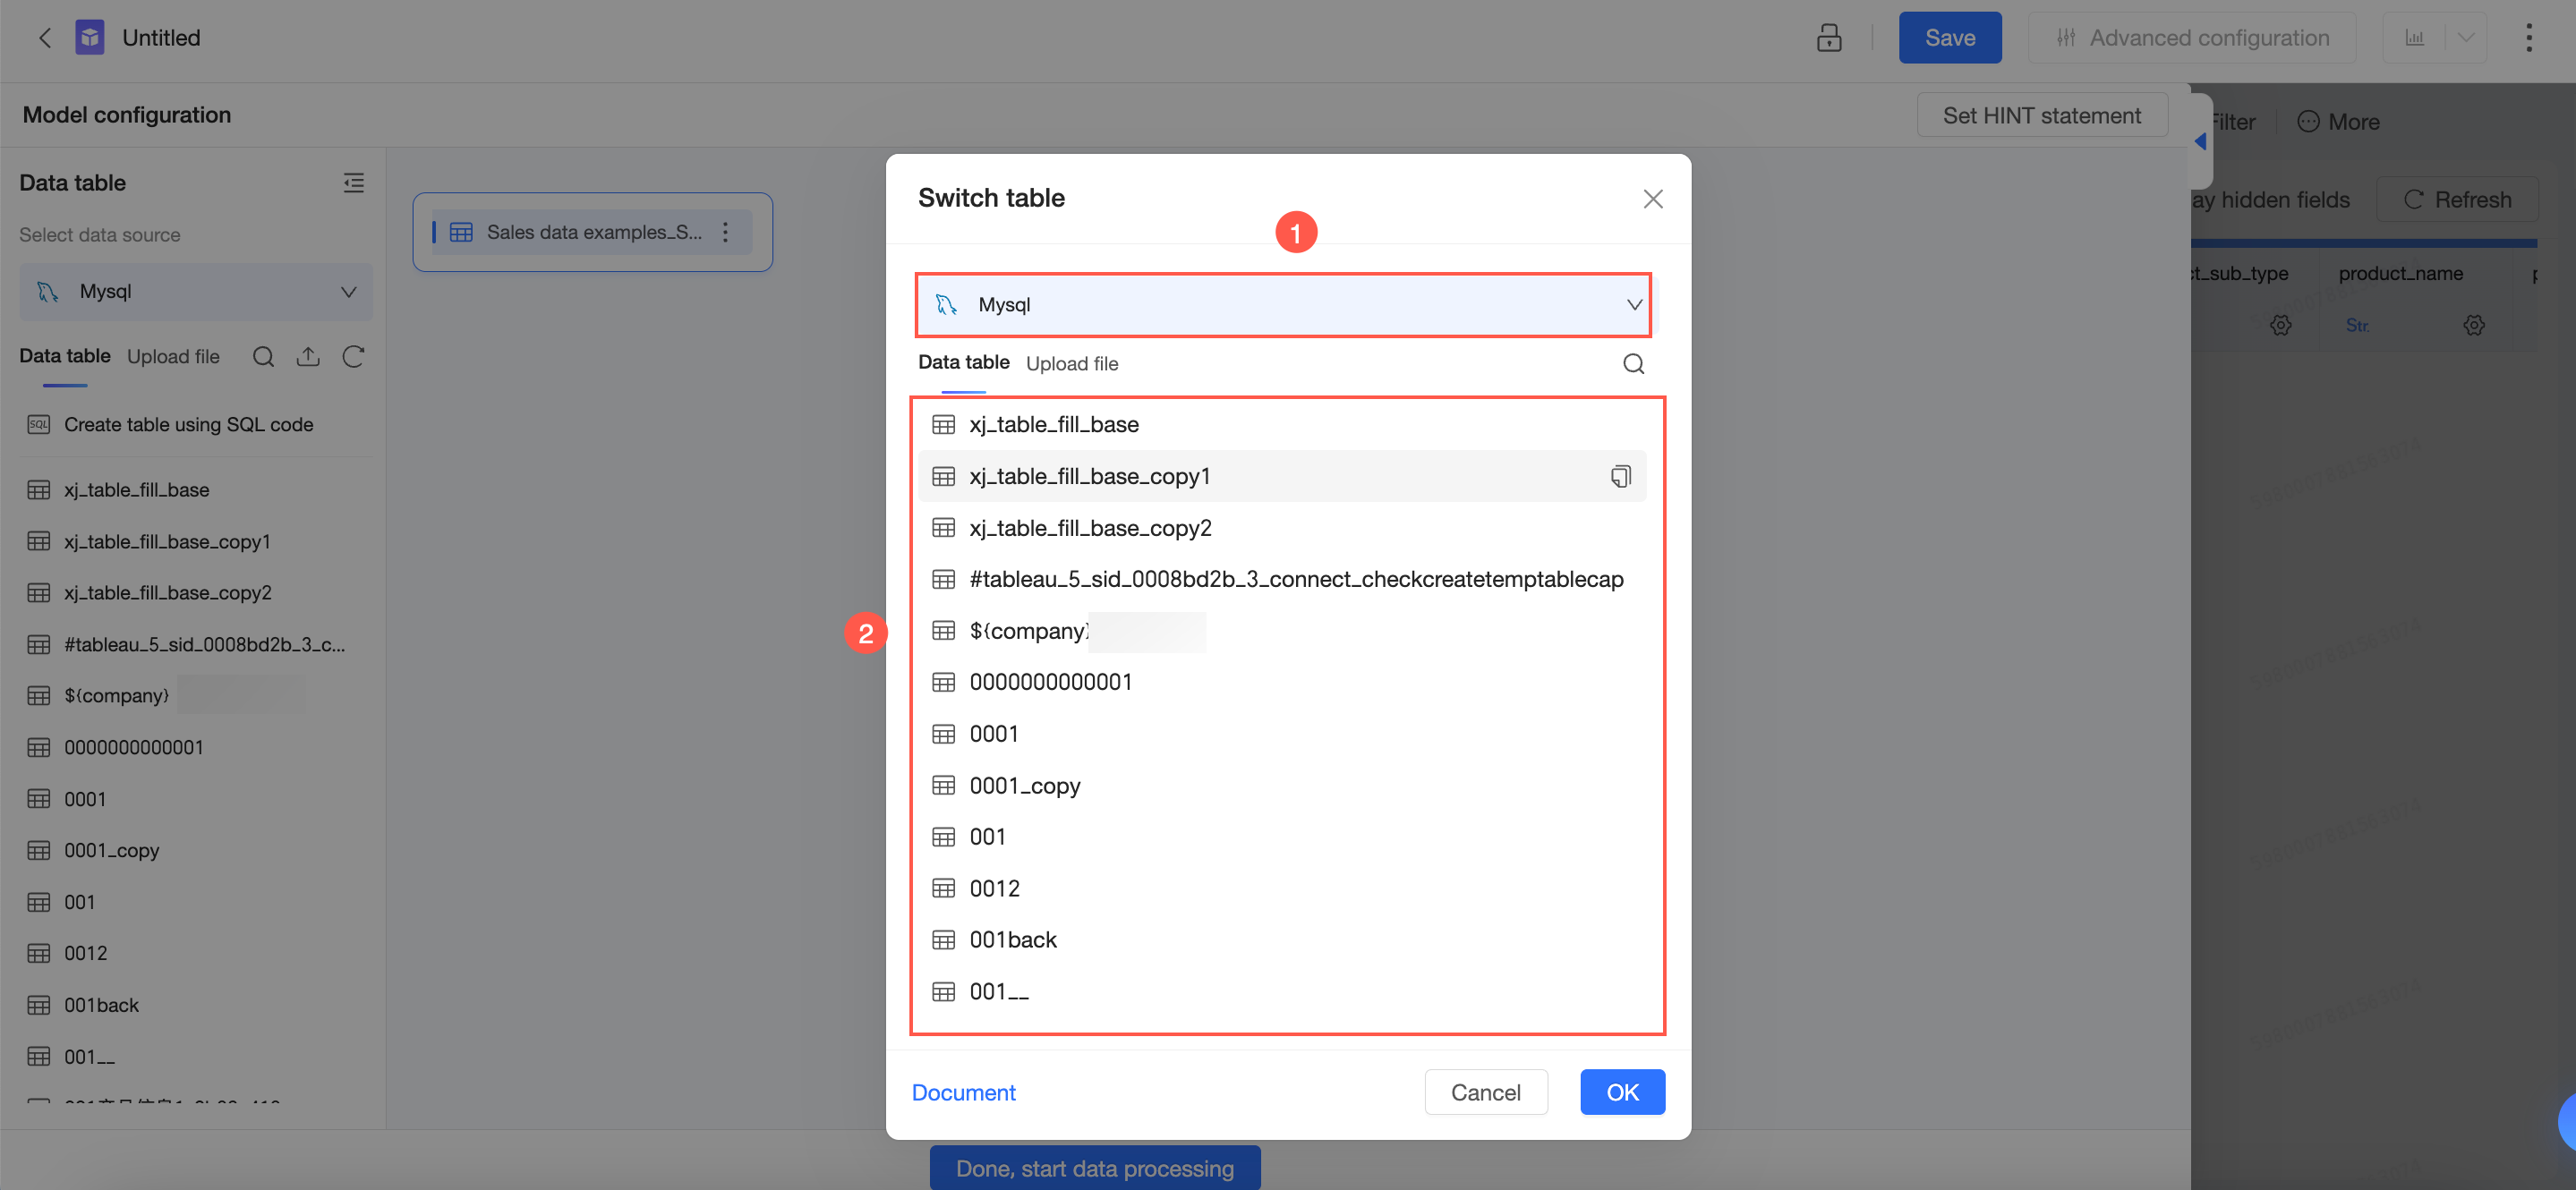
-
Click OK.
-
In the confirmation dialog that appears, click OK.
