By adding a MongoDB data source in Quick BI, you can connect to a MongoDB database and analyze data within the Quick BI console. Quick BI supports connections to MongoDB databases over the Internet or through a Virtual Private Cloud (VPC). This topic guides you through the process of adding a user-created MongoDB data source.
Ensure your network is connected:
To connect Quick BI to a MongoDB database over the Internet, add the IP address of Quick BI to the database's whitelist. For more information, see Security groups.
To connect Quick BI to a MongoDB database over a VPC, ensure connectivity using one of the following methods:
If the MongoDB database is hosted on an Elastic Compute Service (ECS) instance, Quick BI can connect to it over a VPC.
Deploy a jump server and establish an SSH tunnel to access the database.
Obtain the username and password for the user-created MongoDB database.
Limits
Only workspace and organization administrators can add data sources.
Version 5.0 is supported.
Step 1: Install MongoDB Connector for BI
This section explains how to install the MongoDB Connector for BI on a Linux operating system.
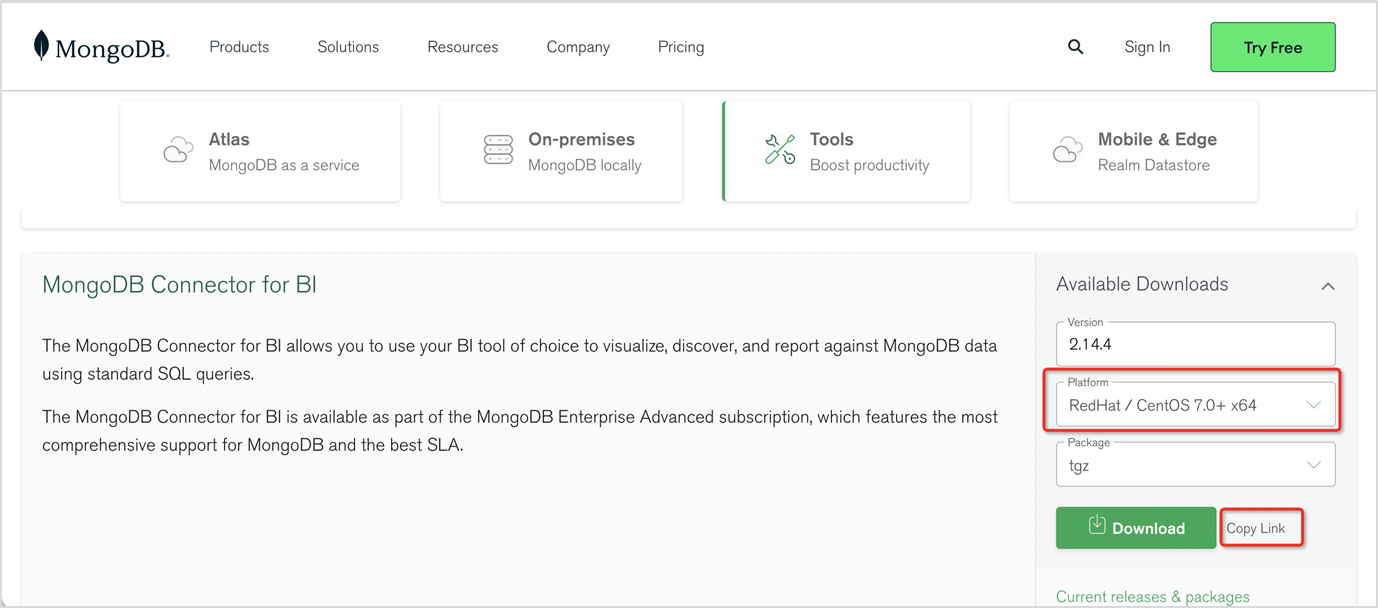
Download the MongoDB Connector for BI.
Select the Platform corresponding to your operating system.
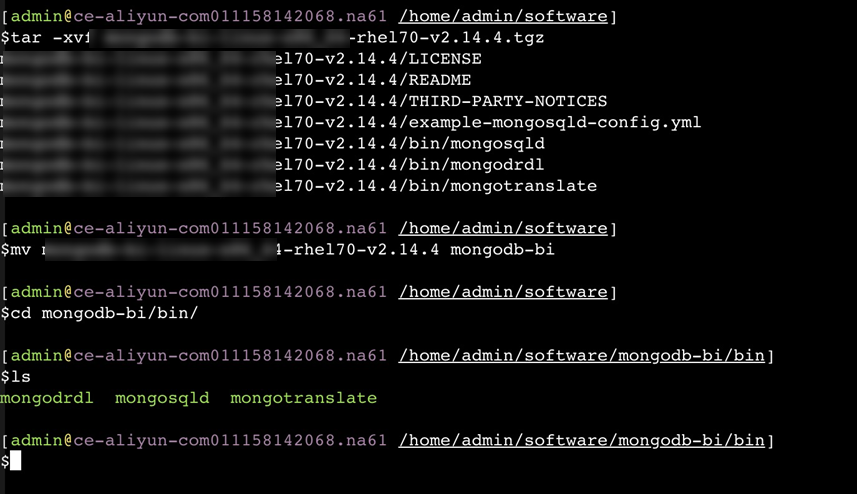
Decompress the downloaded package.
Start the mongosqld service.
NoteAdd the IP address of the ECS instance running the mongosqld service to the MongoDB database's whitelist.
./mongosqld --mongo-uri <Mongo_address> --auth -u <Username> -p <Password> --schemaRefreshIntervalSecs <Schema_refresh> --addr <Binding_address>Parameter
Description
Mongo_addressThe endpoint of the MongoDB database.
UsernameThe username of the account that has the root permissions.
PasswordThe password of the account that has the root permissions.
Schema_refreshThe interval at which the information about the database and collections in MongoDB is synchronized to the memory.
Unit: seconds.
Recommended value: 86400. This value is equal to one day.
Binding_addressThe port number. In most cases, this parameter is set to the internal or public endpoint of the machine.
For example,
0.0.0.0:3307NoteYou can set different port numbers by starting multiple processes to connect multiple instances on a single machine.
Sample code for accessing a standard instance:
./mongosqld --mongo-uri mongodb://xxxx1.mongodb.rds.aliyuncs.com:3717 --addr 0.0.0.0:3307 -u root -p xxxx --auth --schemaRefreshIntervalSecs 86400Sample code for accessing a replica set instance:
./mongosqld --mongo-uri mongodb://xxxx1.mongodb.rds.aliyuncs.com:3717,xxxx2.mongodb.rds.aliyuncs.com:3717/?replicaSet=mgset-xxxx --addr 0.0.0.0:3307 -u root -p xxxx --auth --schemaRefreshIntervalSecs 86400
If you encounter the error ./mongodrdl: error while loading shared libraries: libssl.so.1.1: cannot open shared object file: No such file or directory after execution, it indicates that libssl is not installed. You need to perform the following operations.
# Download from the official website
wget https://www.openssl.org/source/openssl-1.1.1e.tar.gz
# Compile and install
tar -xvf openssl-1.1.1e.tar.gz
cd openssl-1.1.1e
./config shared --openssldir=/usr/local/openssl --prefix=/usr/local/openssl
make && make install
# Configuration
echo "/usr/local/lib64/" >> /etc/ld.so.conf
ldconfig
# Verification
openssl version
Step 2: Add a user-created data source MongoDB
Log on to the Quick BI console.
Follow the steps illustrated below to add a user-created data source.
Navigate to the data source creation page via the data source creation entry.
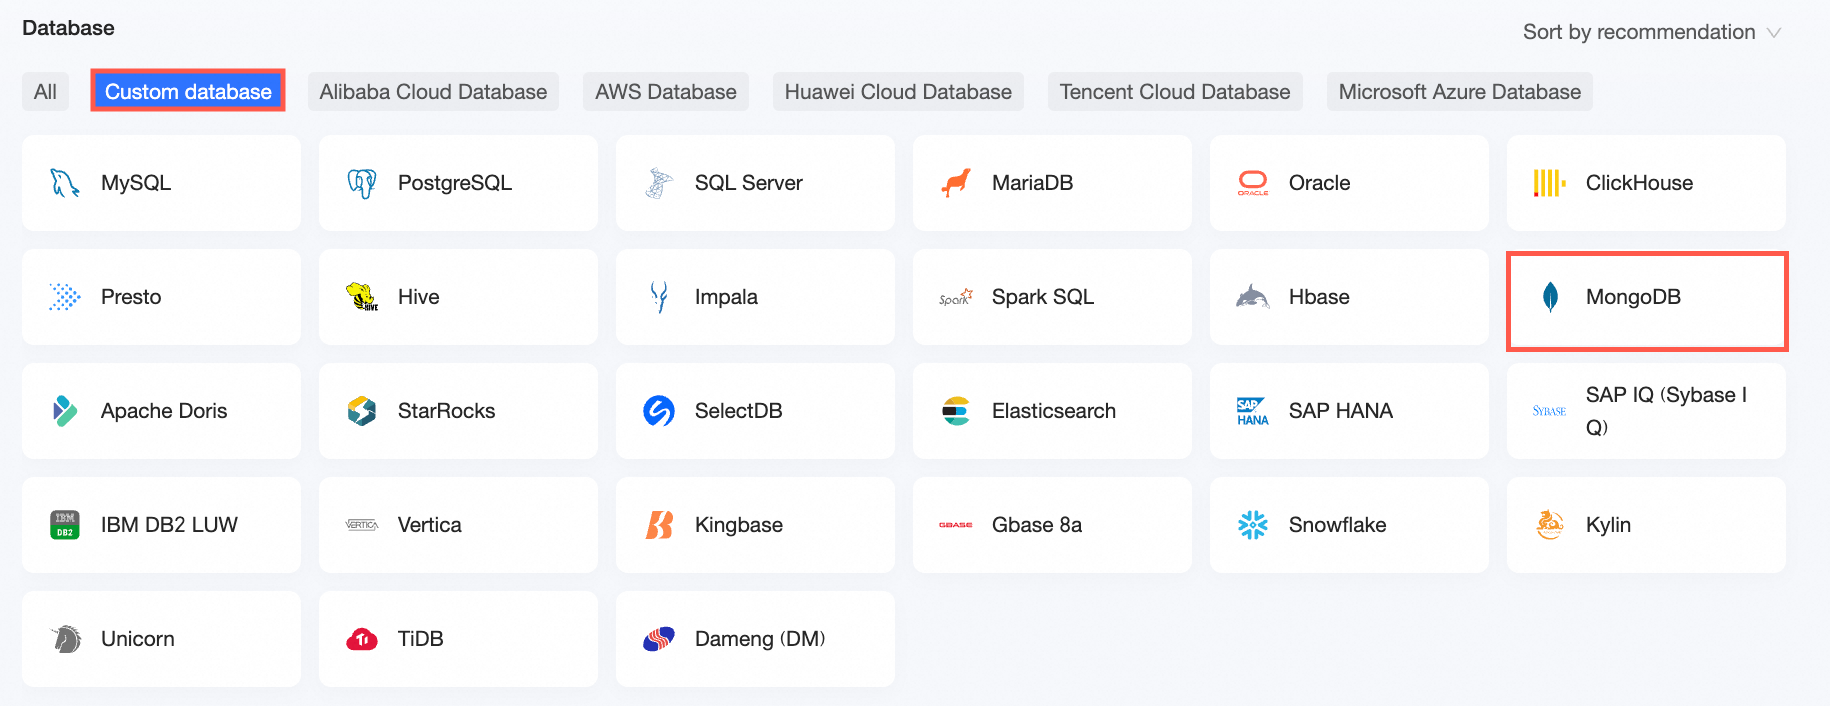
On the User-created Data Source tab, select MongoDB data source.
In the Configure Connection dialog box, configure the connection according to your business needs.

Name
Description
Display Name
The display name in the datasource config list.
The name cannot contain special characters or start or end with spaces.
Database Address
The database address where the MongoDB Connector for BI service is deployed, including the IP address or domain name. You must install the MongoDB Connector for BI before you connect to the database.
Port
The port of the Mongosqld service.
Database
The name of the MongoDB database that is customized when you deploy the database.
Username and Password
The username and password that are used to access the database.
Make sure that the username has the create, insert, update, and delete permissions on the tables in the database.
VPC Data Source
Select VPC Data Source and configure the following parameters only if the connector is deployed on an Alibaba Cloud ECS instance and the network type is Alibaba Cloud VPC:
Purchaser Accessid: The AccessKey ID of the purchaser of the instance.
For more information, see Create an AccessKey.
NoteMake sure that the AccessKey ID has the Read permission on the destination instance. If the AccessKey ID has the Write permission on the corresponding security group, the whitelist is automatically added. Otherwise, you must manually add the whitelist. For more information, see create a custom policy.
Purchaser Accesskey: The AccessKey Secret of the purchaser of the instance.
For more information, see Create an AccessKey.
Instance ID: The ID of the ECS instance. Log on to the ECS console and obtain the instance ID on the Instances tab.
For more information, see view instance information.
Area: The area where the ECS instance is located.
For more information, see view instance information.
SSH
If you select SSH, you must configure the following parameters:
You can deploy a jump server and access the database over an SSH tunnel. To obtain the jump server information, contact O&M personnel or system administrators.
SSH Host: Enter the IP address of the jump server.
SSH Username: The username that is used to log on to the jump server.
SSH Password: The password that corresponds to the username that is used to log on to the jump server.
SSH Port: The port number of the jump server. Default value: 22.
For more information, see Use OpenSSH or Xshell.
Click Connection Test to verify the data source connectivity.

Once the test is successful, click OK to finalize the data source addition.
What to Do next
After creating a data source, you can proceed to create datasets and analyze data.
To add data tables from the MongoDB database or create custom SQL in Quick BI, refer to create and manage datasets.
For adding visualization charts and data analysis, see create a dashboard and visualization chart overview.
To delve deeper into data analysis, consult drill settings and display.
FAQ
Why is the MongoDB data source in Quick BI not synchronizing in real time?
Cause
The MongoDB data source has a default delay of 1 day.
Solution
The data will automatically synchronize after 1 day.