Organization administrators can add one or more Lark accounts to a Quick BI organization at a time.
Prerequisites
You must complete Lark API authorization. For more information, see Lark API authorization.
Background Information
Quick BI defines the following user types and roles at the organization level:
User Types
At the organization level, there are three user types:
developer: Includes corporate IT staff, data analysts, and data operations personnel.
analyst: A business user who analyzes data without needing deep technical skills.
Analysts analyze data by creating assets such as dashboards and spreadsheets.
viewer: A user who only views reports, such as an executive or a frontline business employee. Viewers can access dashboards, spreadsheets, and BI portals through URLs or subscriptions.
User Roles
Organization roles
At the organization level, Quick BI provides three pre-defined organization roles and supports the creation of custom organization roles.
organization administrator: Manages organization information, status, and members. They can also assign this role to other users.
We recommend assigning this role to 1 to 3 individuals, typically a project manager (PM) or BI platform administrators.
permission administrator: Manages permissions for resources within the organization. We recommend assigning this role to 1 to 3 individuals, typically BI platform administrators.
standard user: A user who is not an organization administrator or permission administrator.
custom organization role: Create custom roles based on your business needs. For more information, see Role Management.
Workspace roles
At the workspace level, Quick BI provides four pre-defined workspace roles and supports the creation of custom workspace roles.
workspace administrator: Has create (edit), use, and view permissions for all modules. This is the most privileged role in a workspace. Workspace administrators can also manage permissions and assets for other members in the workspace.
workspace developer: Has create (edit), use, and view permissions for all modules.
workspace analyst: Has create (edit) and view permissions for BI portals, dashboards, large-screen dashboards, spreadsheets, ad hoc analysis, self-service data retrieval, and data preparation modules. This role also has view permissions for data entry and data sources, and use and view permissions for datasets.
workspace viewer: Has view permissions for all modules.
custom workspace role: Create custom roles based on your business needs. For more information, see Role Management.
Limitations
-
Only an organization administrator can add accounts from third-party systems as organization users.
-
This feature is available only to Quick BI Pro Edition users.
Add Lark Accounts
Log on to the Quick BI console.
-
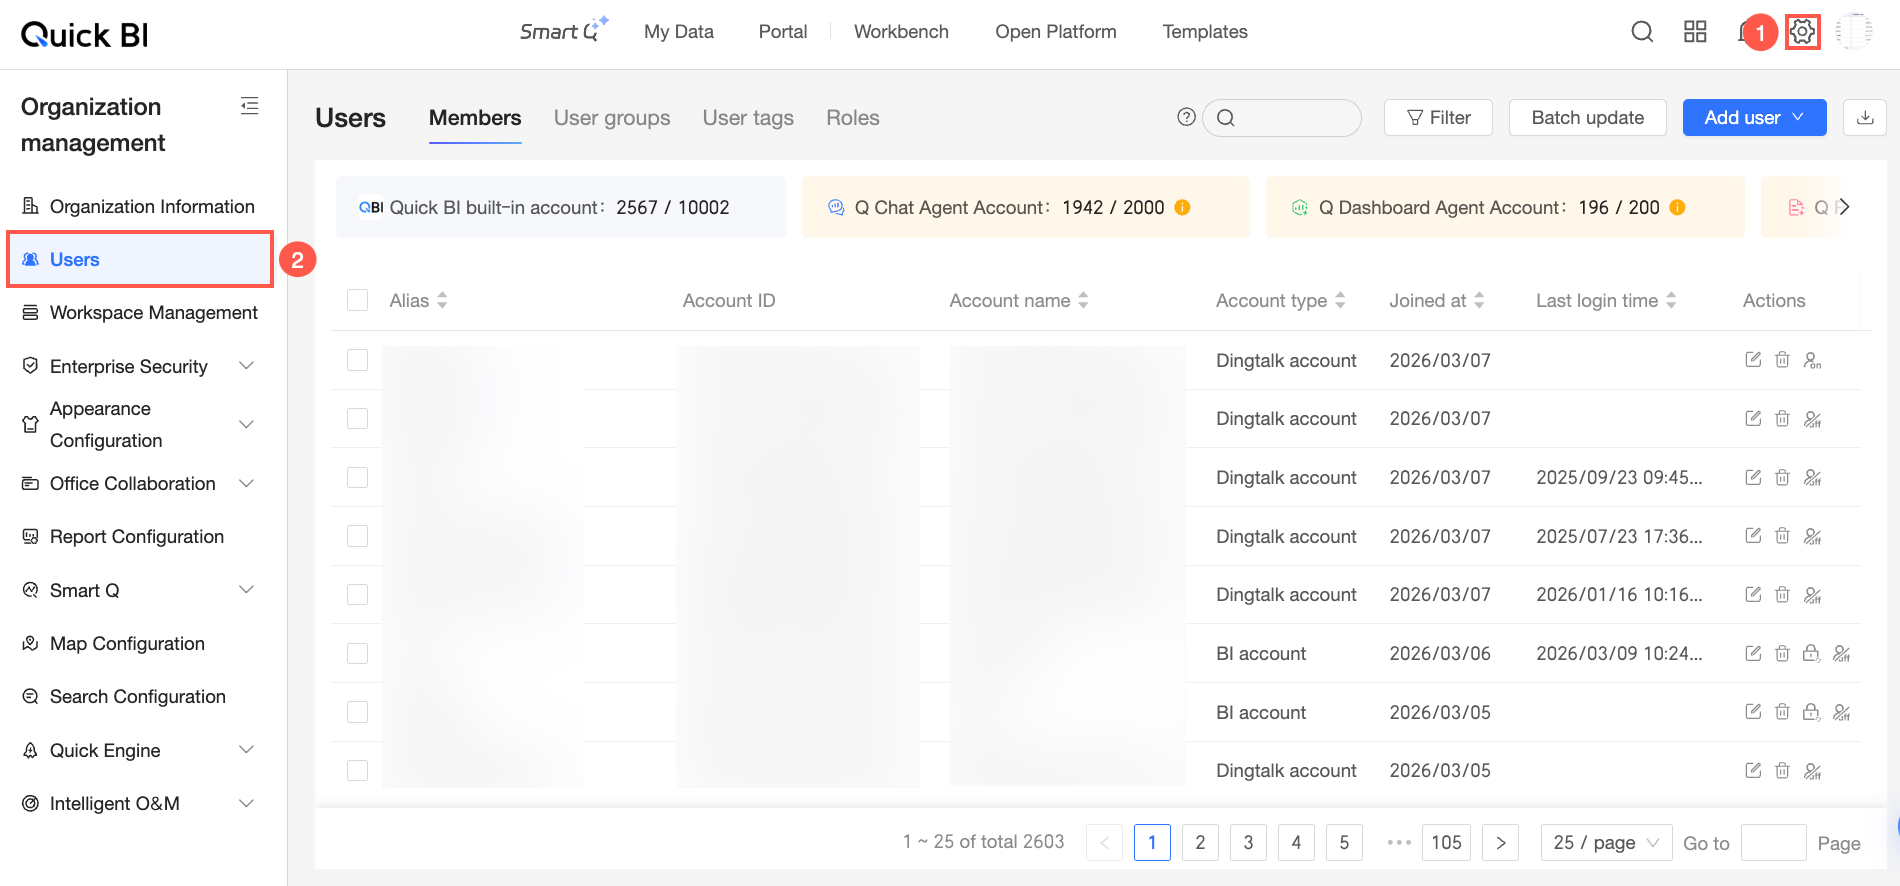
On the Quick BI homepage, navigate to the User Management page.
-
In the upper-right corner of the Member Management tab, select .

-
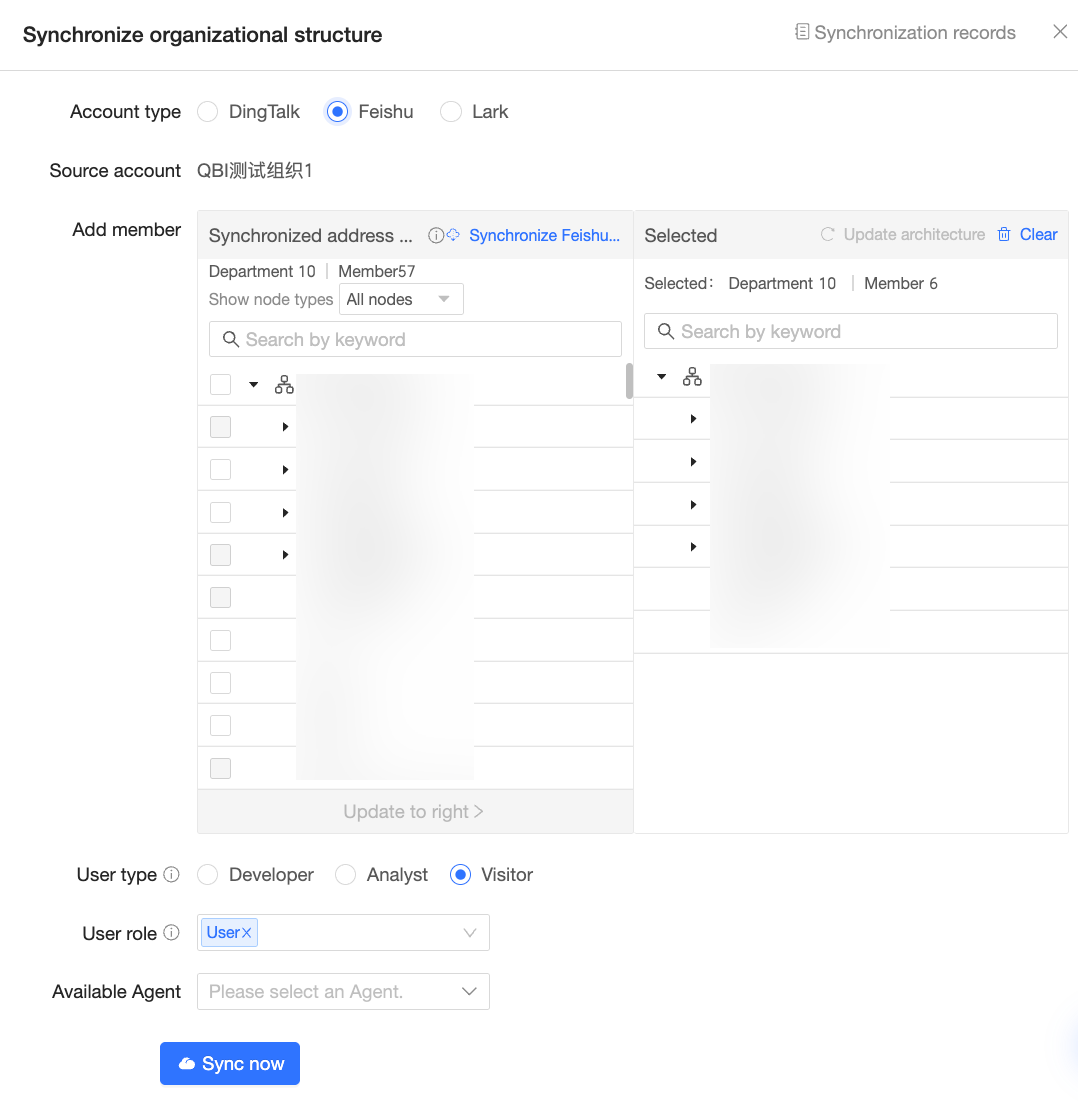
In the Sync Organizational Structure dialog box, set Account Type to Lark Account and configure other settings as needed.
-
Account Type: Select Lark.
-
Account Source: Select the Lark organization to which the accounts belong. If you have connected only one enterprise in Office Software > Lark API Authorization, it is selected by default. If you have connected multiple enterprises, click the
 icon and select the desired Lark organization from the drop-down list.
 -
Add Members: Select the members you want to sync, and then click Update to the right.
-
User type: Select Developer, Analyst, or Viewer.
-
User role: Select organization administrator, permission administrator, regular user, or custom user role. Only developer and analyst user types can be assigned the organization administrator or permission administrator role.
-
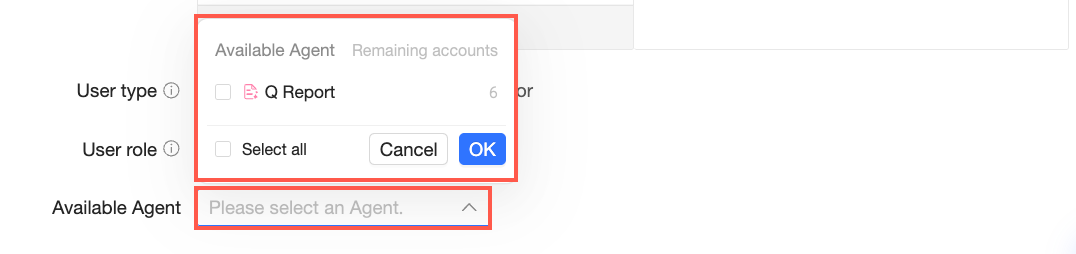
Available agents: If your organization has purchased agent capabilities for the intelligent Q-bot, you can assign agent seats to the synced users.
Click Select Agent. The list shows all available agents in your organization and their remaining quota. Select the agent to assign and click OK.
 Note
Note-
If a user's User Type is viewer, they cannot use the intelligent Q-bot to build agents.
-
Ensure that:
-
The remaining agent quota is sufficient for this synchronization task.
-
The organization role you assign to the users has the necessary permissions to use the agent. Otherwise, the users cannot use the agent capabilities even if a seat is assigned. For more information about organization role permissions, see Organization roles.
-
-
For more information about purchasing agent capabilities, see Quick BI pricing - international site.
-
-
-
Click Start Sync.
Note-
If the organizational structure has changed, we recommend that you update the structure before you start the synchronization.
-
If a Lark user belongs to multiple enterprises, Quick BI automatically recognizes the user account and adds it as a single user. The user's information is based on the enterprise from their most recent synchronization.
-
-
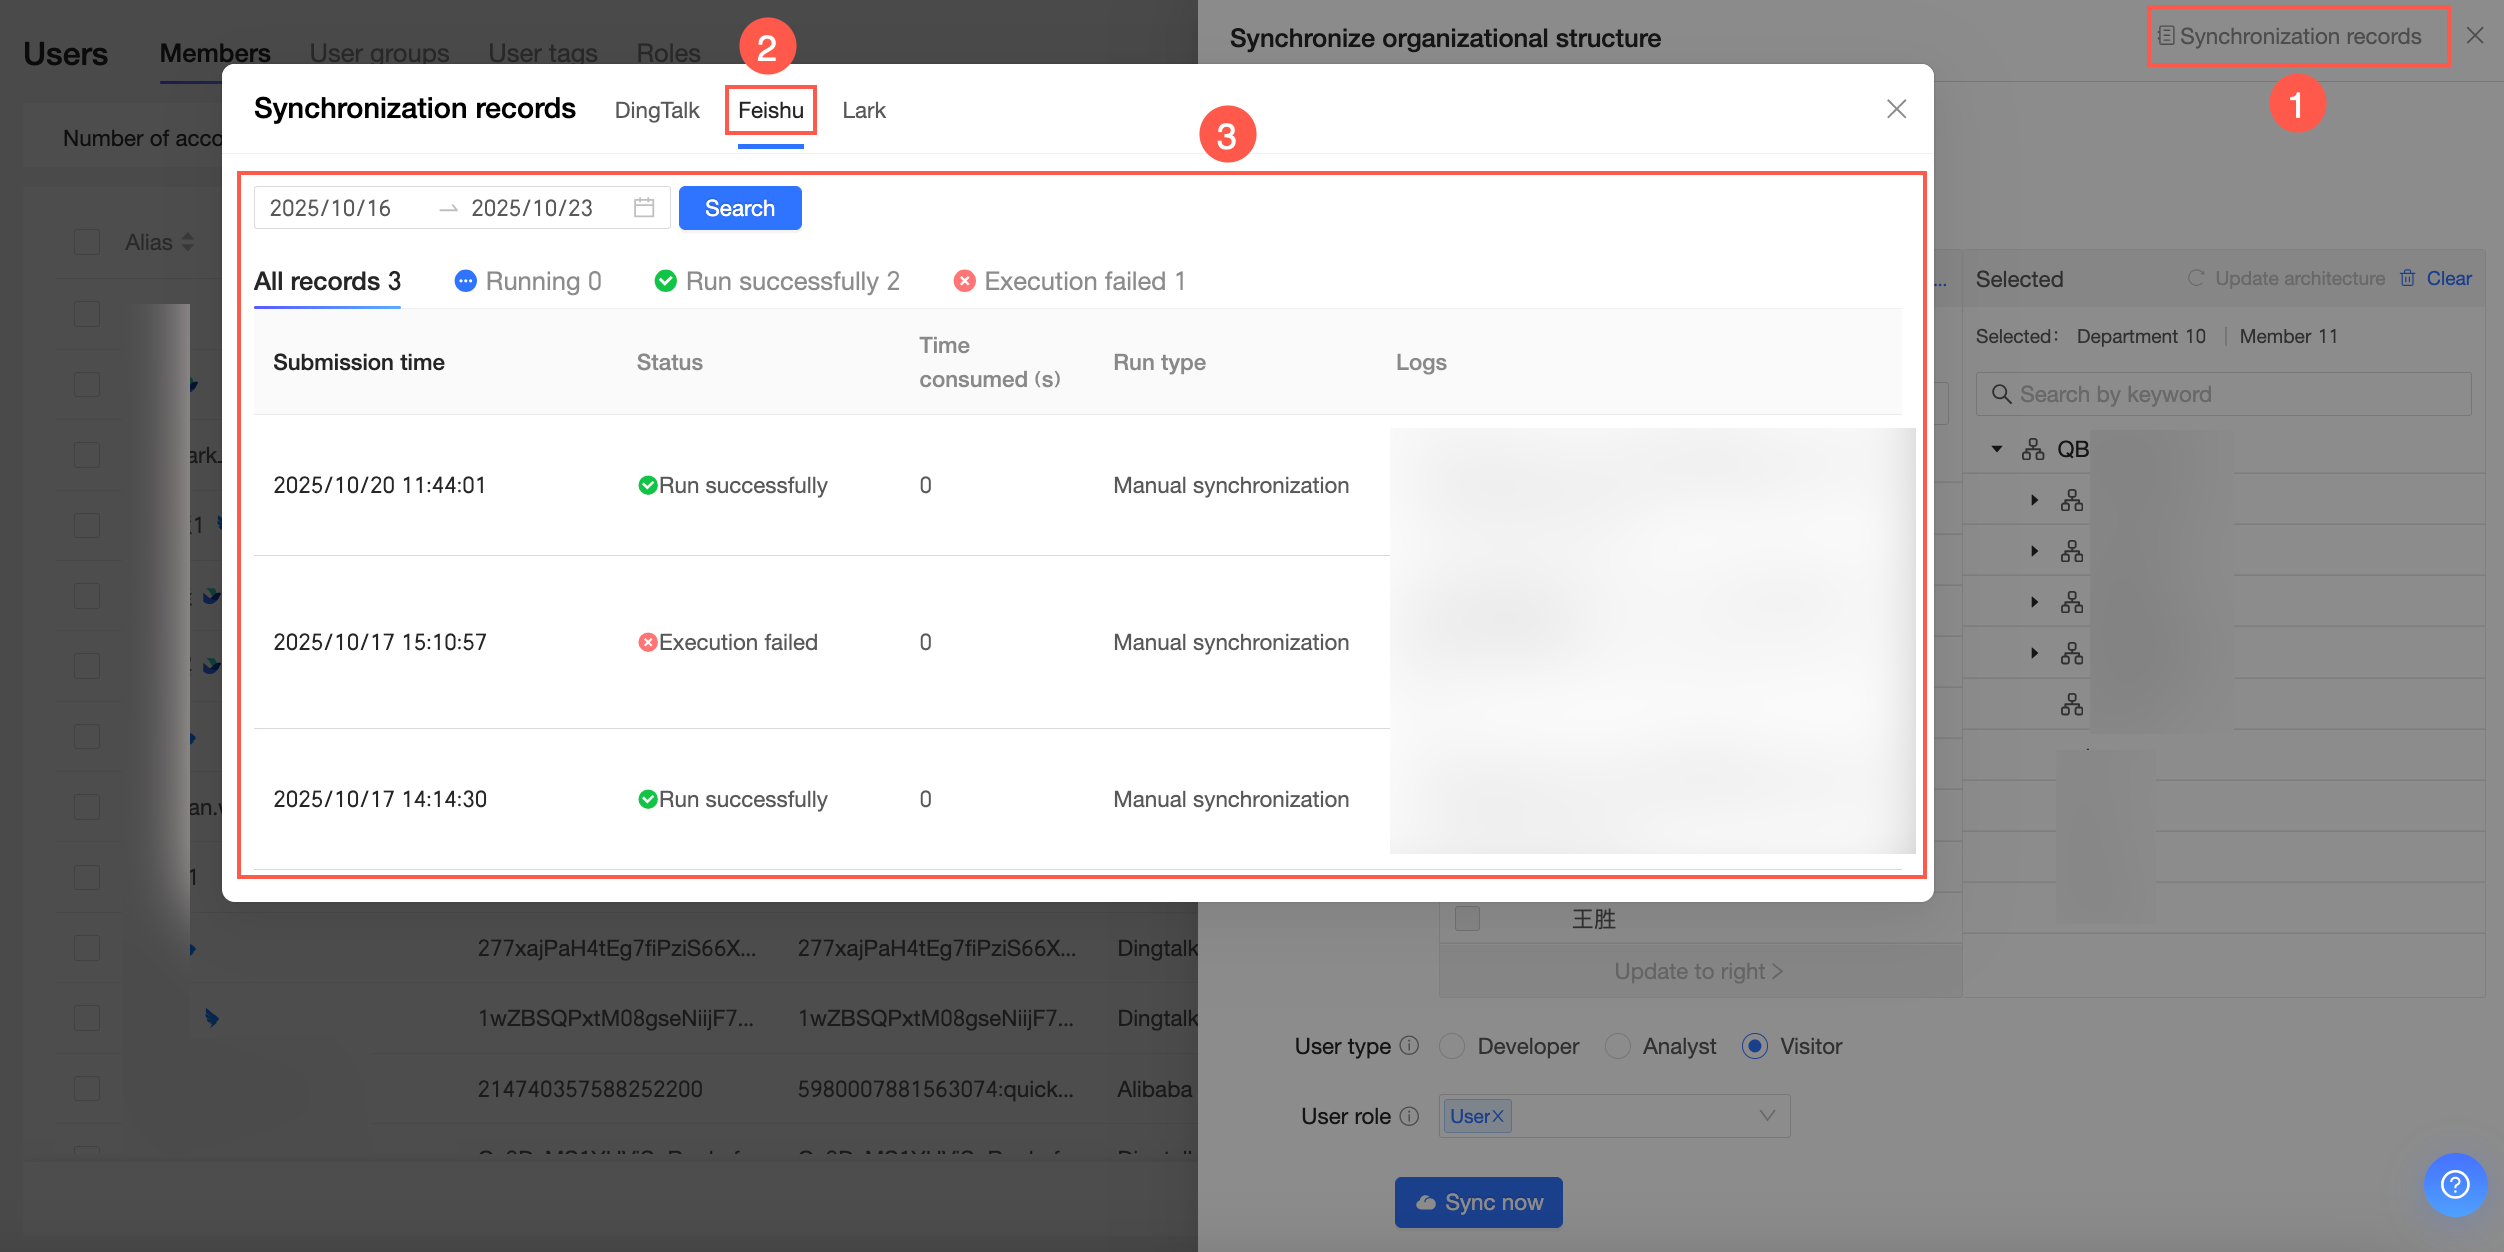
You can click Sync Records in the upper-right corner to view the synchronization history.
Update Structure
If your organizational structure changes, use the Update Structure feature. Name changes do not affect synchronization.
-
If a username changes, a Name Changed tag appears after the username.
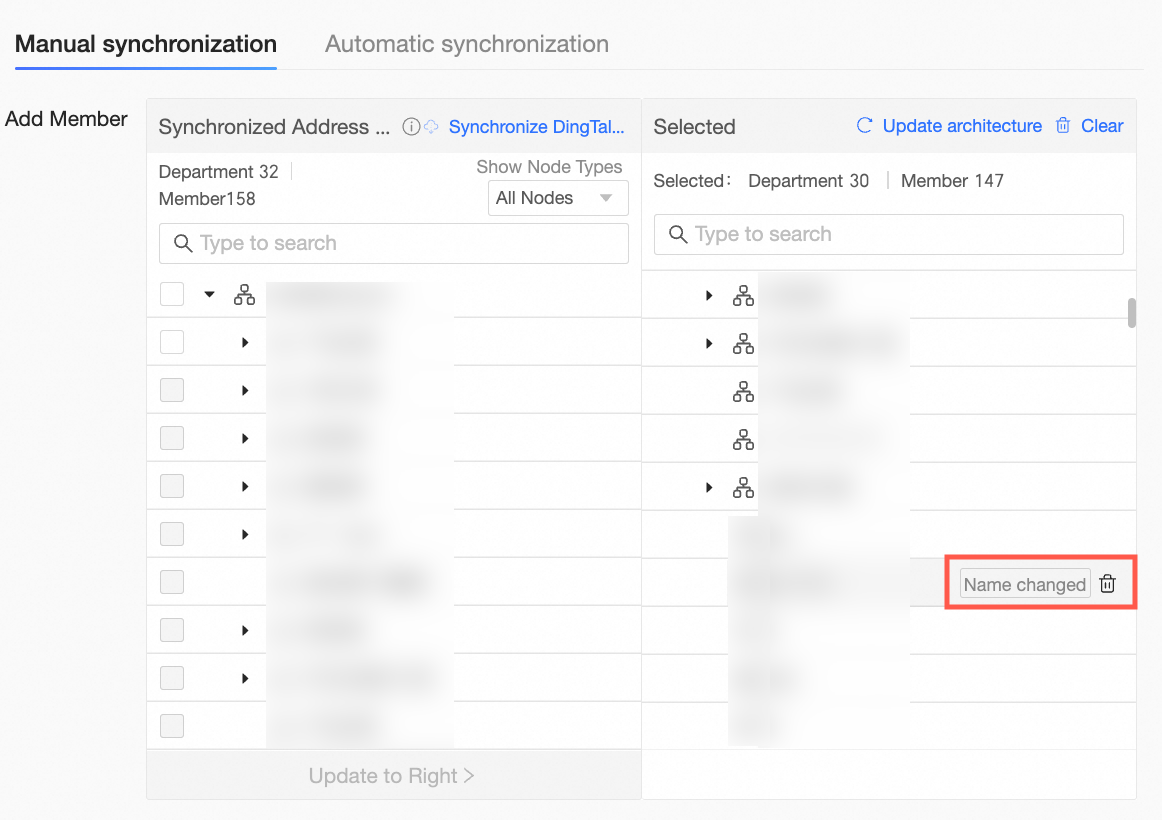 You can then click the
  icon to delete the user if needed.
 -
If a department name changes, a Name Changed tag appears after the department name. You can then click the
icon and click OK in the confirmation dialog box to delete the department.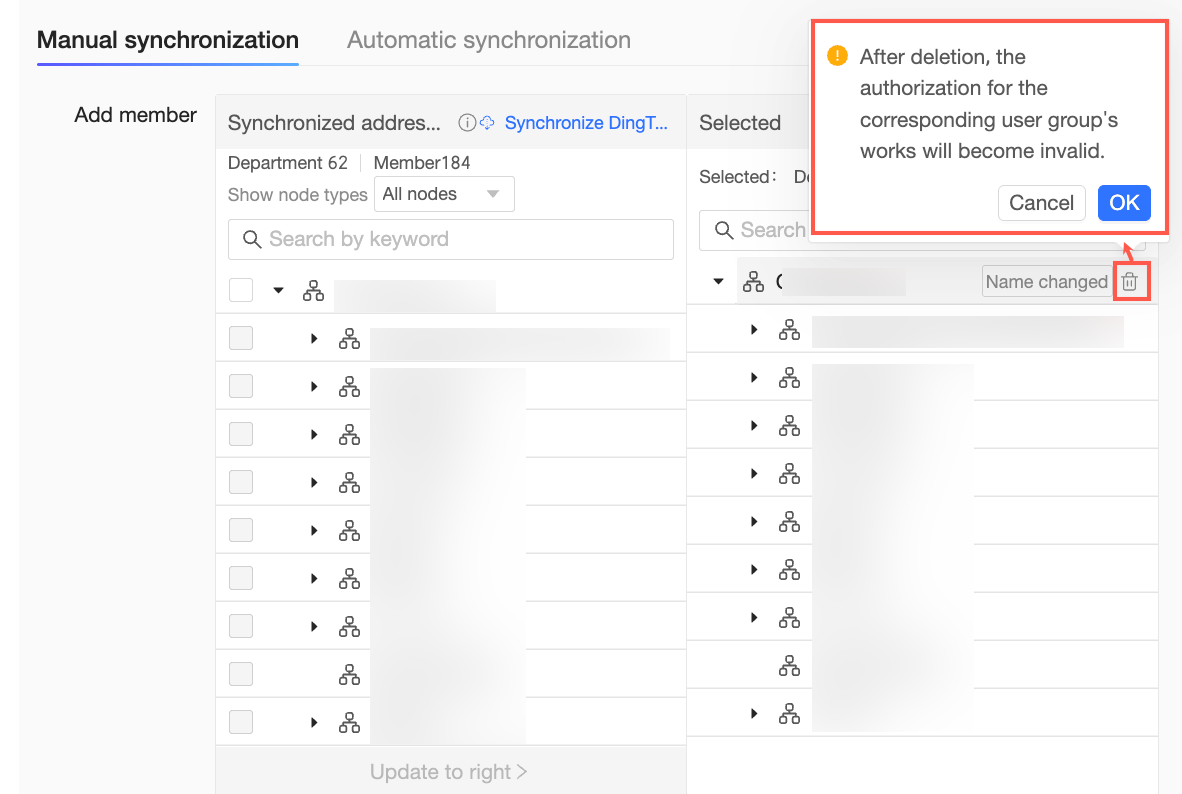 Note
NoteAfter the department is deleted, any content creation permissions for the corresponding user groups are invalidated.
-
If a user is no longer in the organization, a To be deleted tag appears after the username.
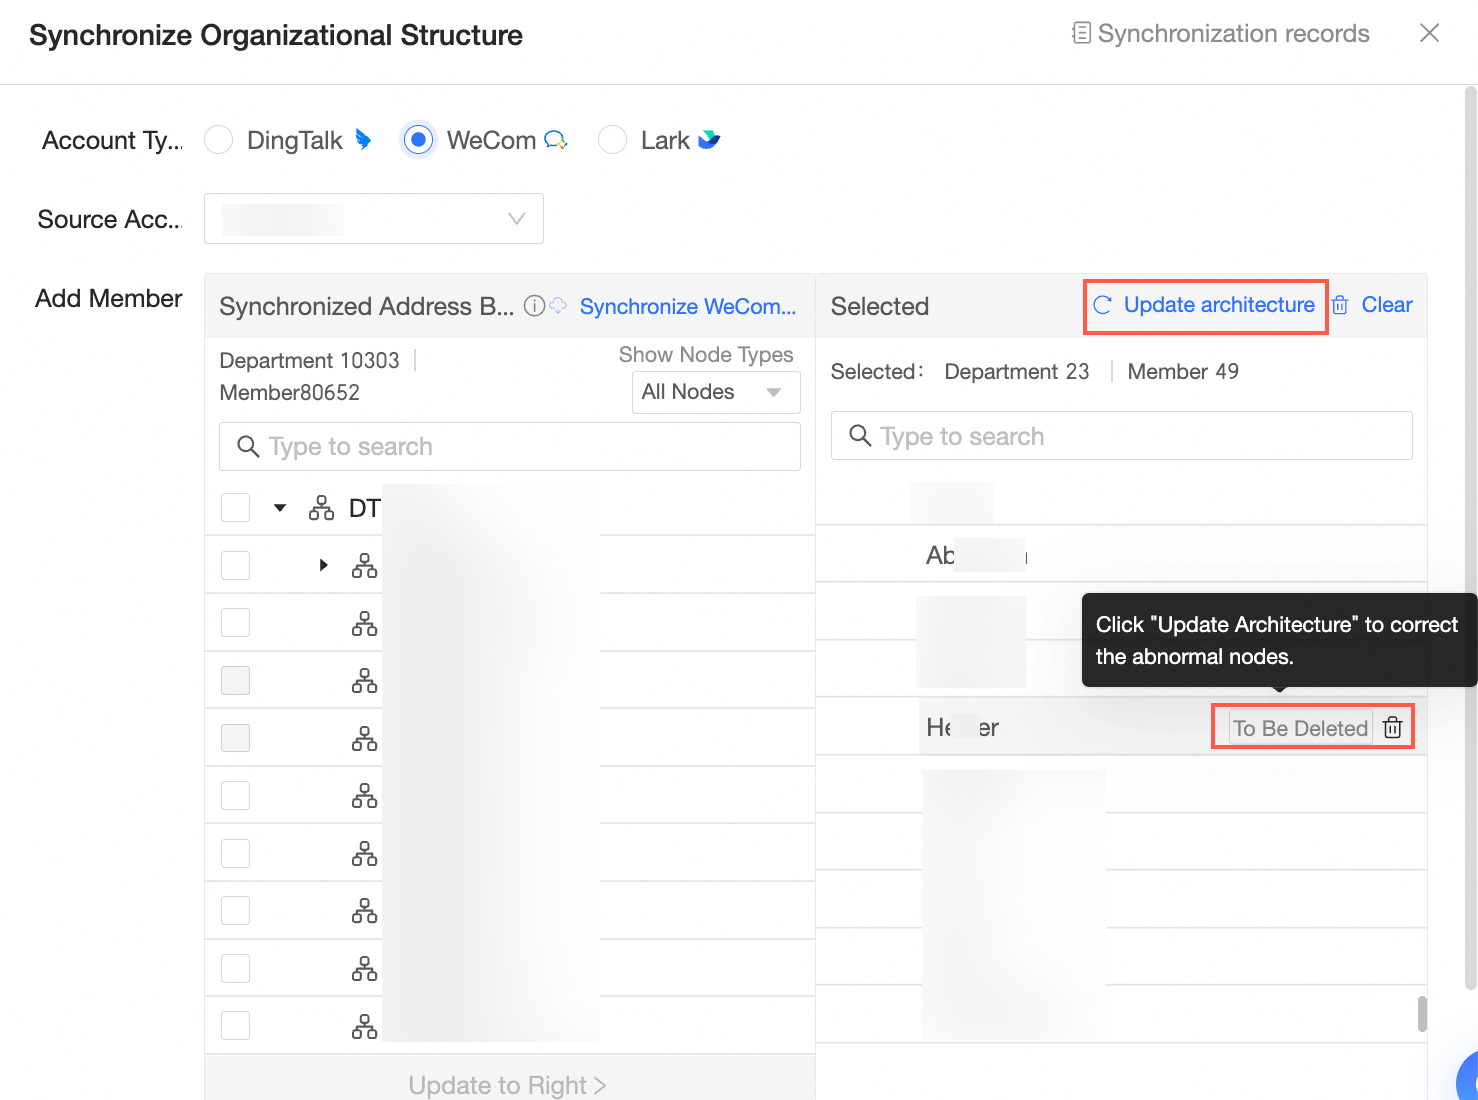
Click the
icon to delete the user or click Update Structure to resolve the issue.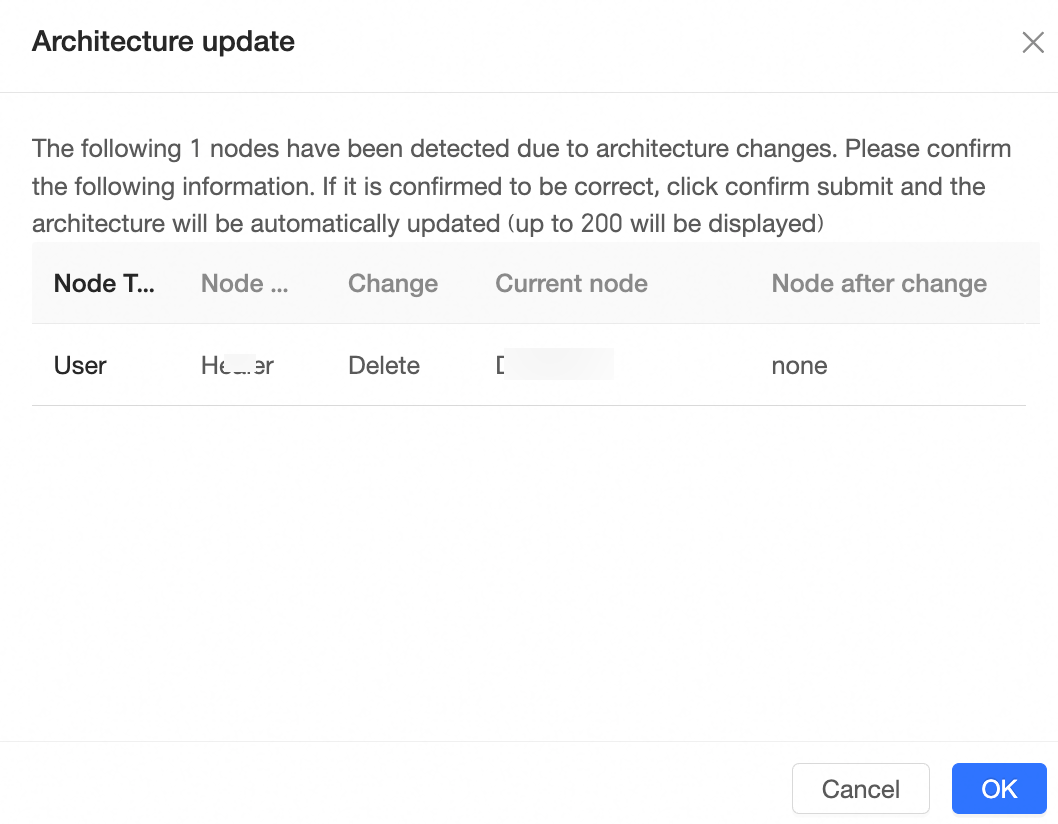
-
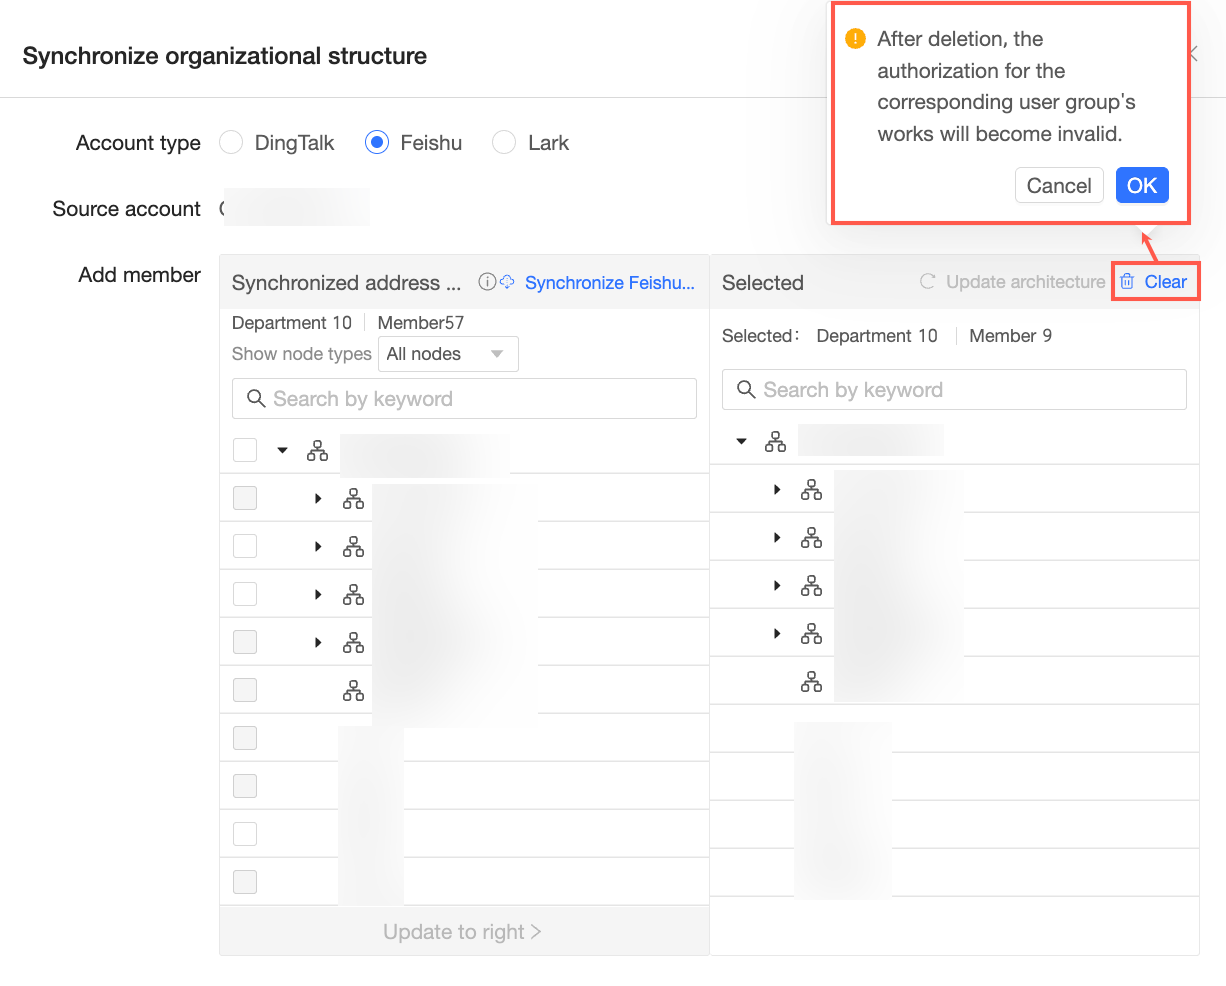
To clear the current organizational structure, click the Clear button and then click OK in the confirmation dialog box.
 Note
NoteAfter the structure is cleared, any content creation permissions for the corresponding user groups are invalidated.
FAQ
Problem 1: Users not visible after sync
Cause: The app's visibility scope does not include the user.
Solution: Go to the Lark admin console. In the Workbench > App Management section, search for Quick BI and configure the app's visibility scope:
-
In the App Permissions > Contacts settings, select Same as availability scope.
-
Configure the App Visibility Scope. Select all members or add specific members to the scope.