After the Lingyang SuperSMS Signature and Lingyang SuperSMS Templates are approved, you can use the templates to create tasks and reach users on an instant or regular basis.
Create a card SMS task
Procedure
In the workspace, choose User Marketing > Reach Marketing > Lingyang SuperSMS > SMS Broadcast.
Click New Sending Task in the upper-right corner.
On the Create Task page, configure the task information.
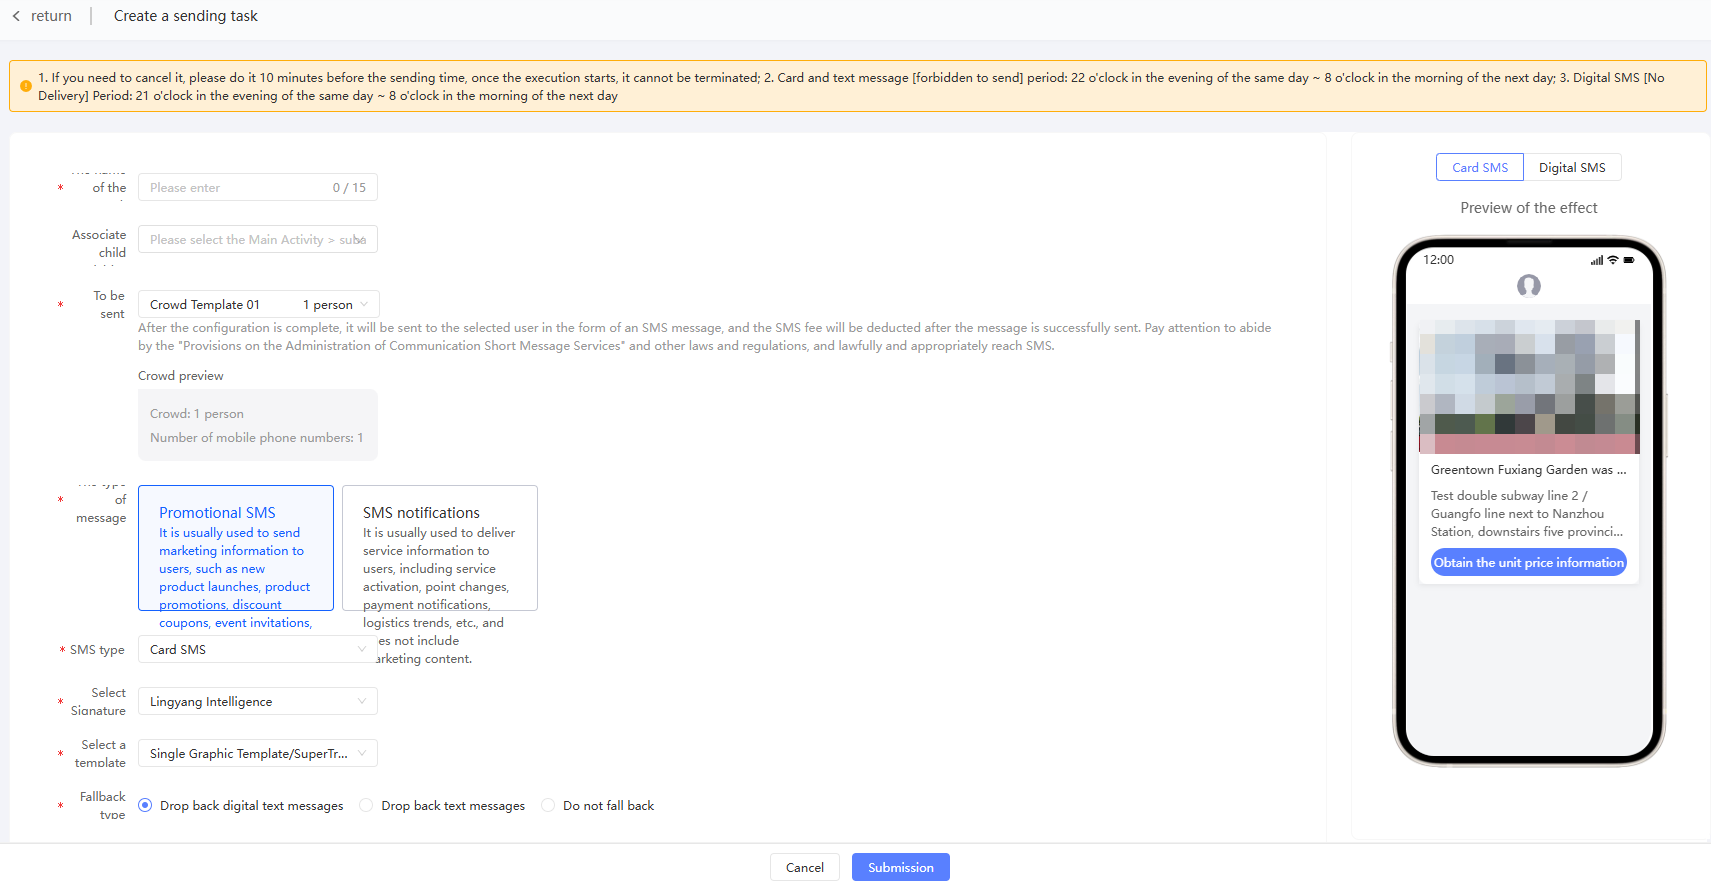
Item | Example value |
Name | Enter a task name. |
Associate sub-activities | Select a primary campaign and select a sub-campaign under the primary campaign. Separate sub-campaigns are displayed under-at the end of the primary campaign list. You can associate a marketing task with a sub-campaign. For more information about marketing activities, see Marketing Campaign Documentation. |
Send object | Select the sending target audience. The number of audience and the number of mobile phone numbers are displayed below. The system will send all mobile phone numbers contained in the audience. |
Message Type | Select Card SMS. |
The message type. | Select the message type of the template you want to use:
|
Message Type | Select the SMS type:
|
Select Signature | Select the signature that you want to use. Only approved signatures can be selected. |
Select a template | Select the template that you want to use. You can select only approved or partially approved templates under the selected message type. Note
|
Falling back type | Select a fallback type:
|
Falling down template | Select a fallback template. |
Default Link | Enter the default link. Only HTTPS links are supported. If the card text message fails to be rendered, the link will be opened by default after the user clicks it. |
Campaign | You can specify the push time when the feature is enabled. |
Click Submit.
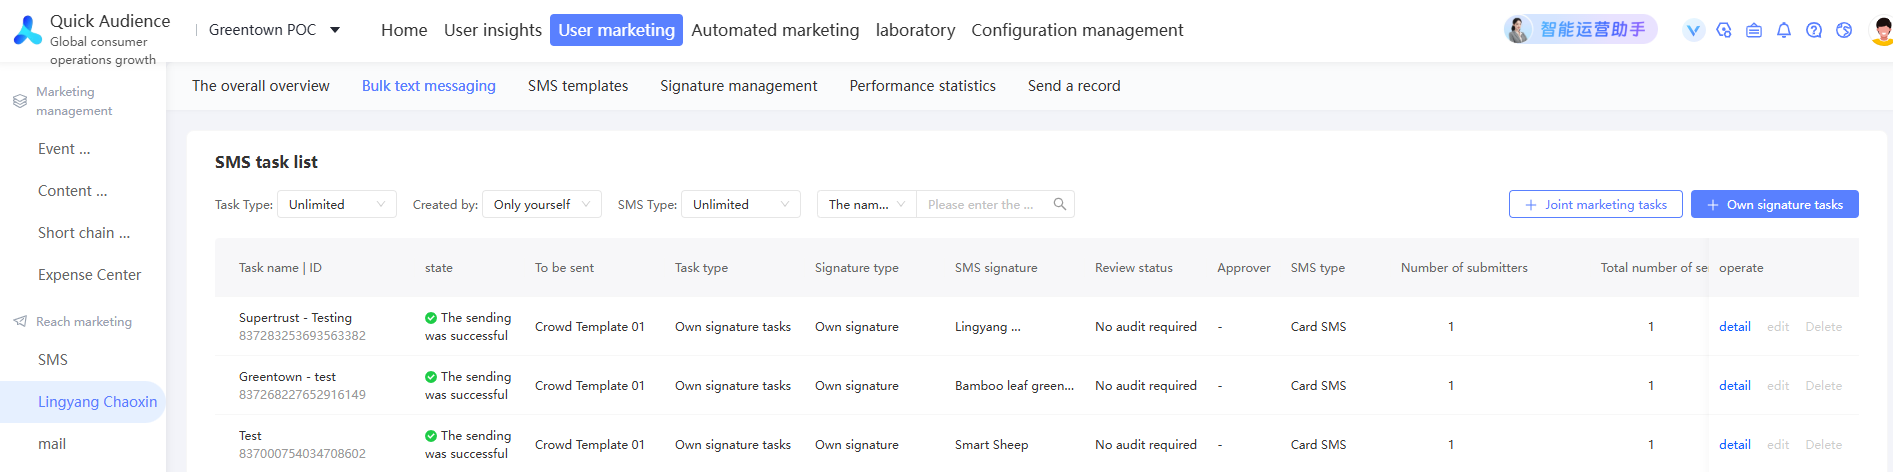
Manage card SMS tasks
As shown in the following figure, the list displays the created card SMS tasks, including the status, sending object, actual sending number, number of successes, number of failures, number of unreturned responses, and associated sub-activities (if a number is displayed, all associated sub-activities will be displayed when you move the pointer over).
Move the pointer over the text in the Failed to Send state to view the cause of the failure.
You can perform the following operations:
Details: View the task sending status. For more information, see View Details.
Edit: You can edit only the scheduled task to be sent. After you edit the task, the task is submitted again.
NotePlease edit at least 10 minutes before the specified sending time so that the original task can be canceled smoothly.
Delete: You can delete only the task that you want to send.
View details
Click View Details in the Actions column of a task. The task details page appears, as shown in the following figure.
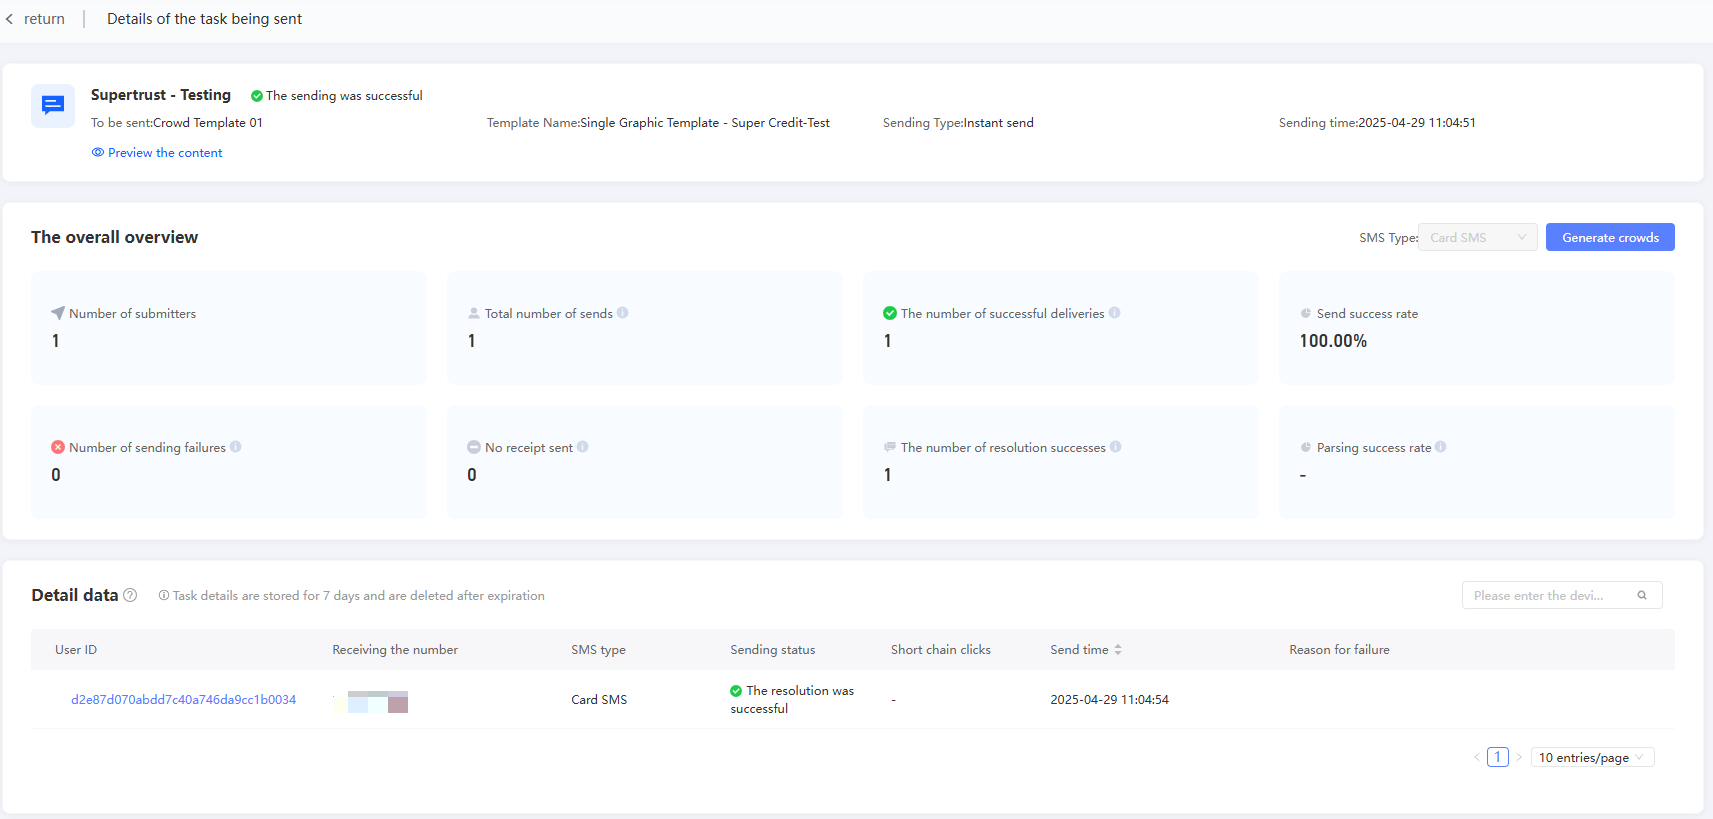
The page displays:
Basic information about the comparison task.
The actual number of messages sent, the number of successes, the number of failures, and the number of no responses.
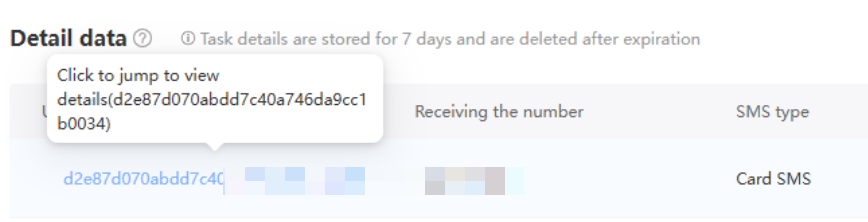
User ID, receiving number, sending status, sending time, and failure reason (if any).
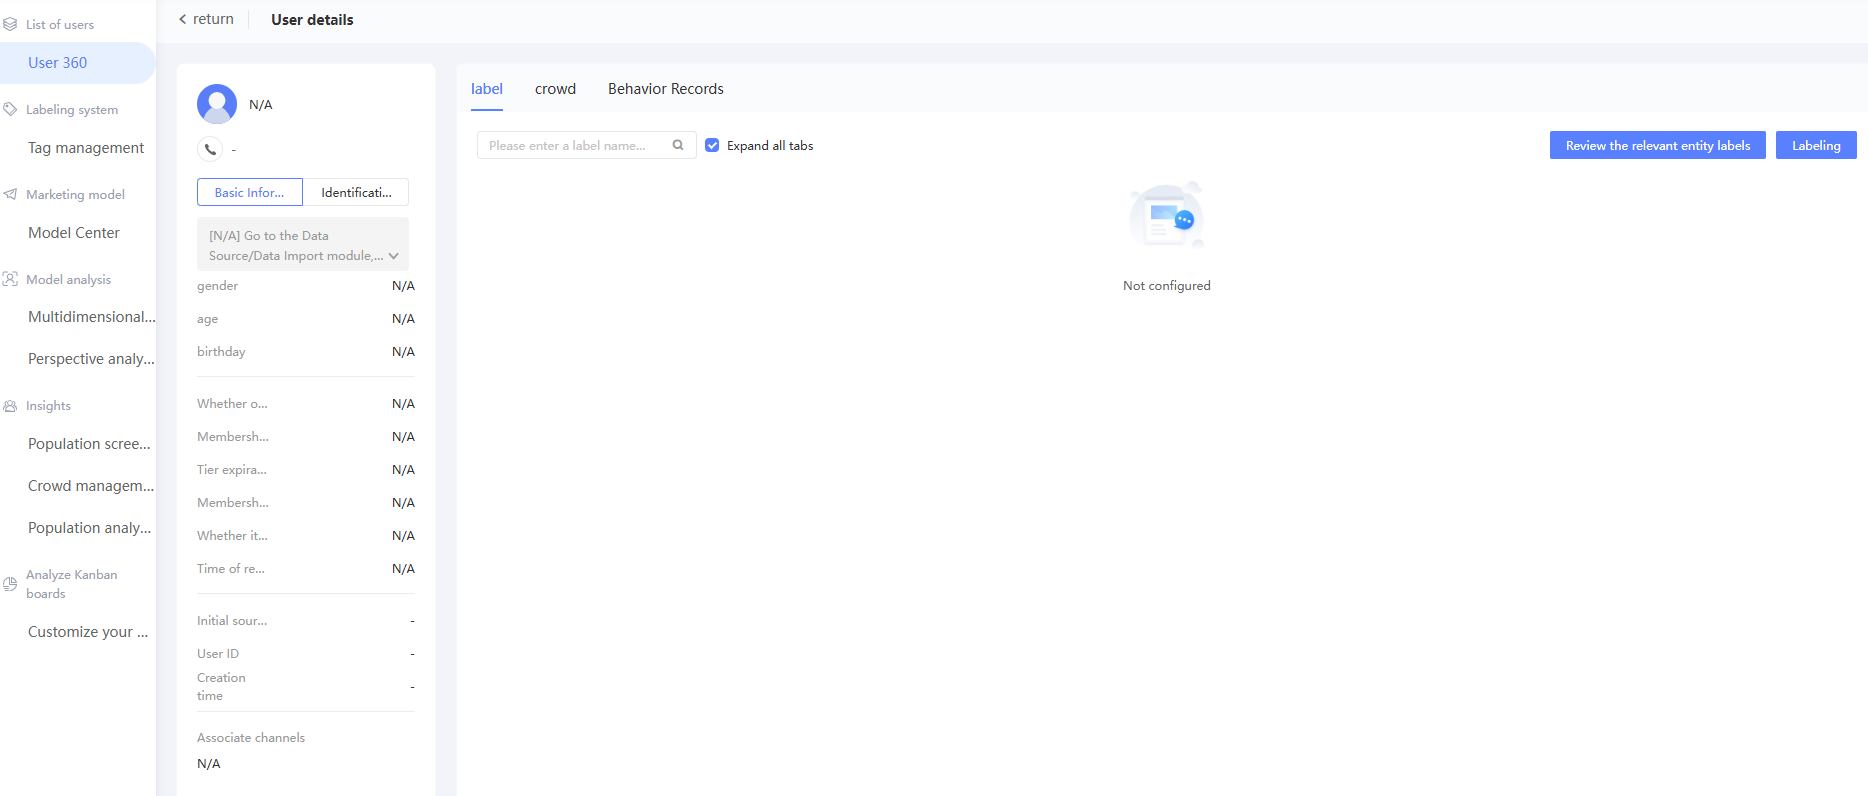
Click the user ID of the receipt to go to the user 360 details page corresponding to the ID and view the 360 profile of the user.
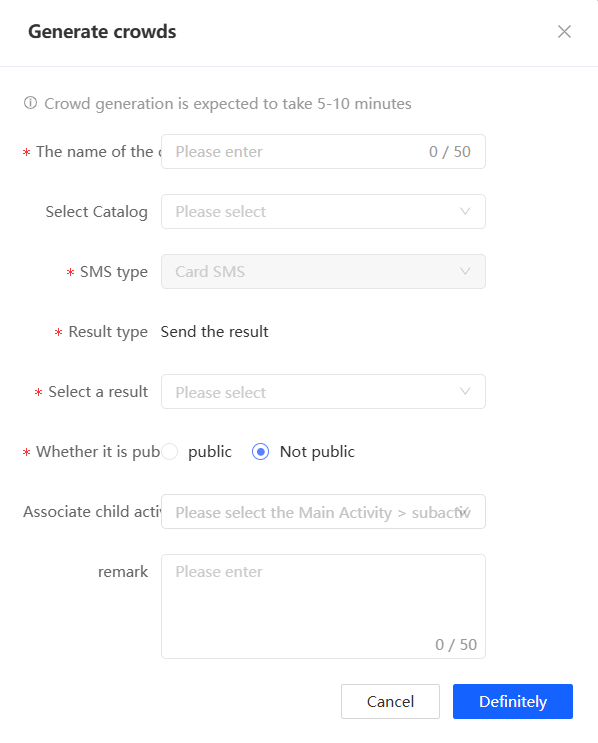
Click Generate Crowd to create a new group of users.
The detailed data is stored for seven days and will be deleted after it expires. Crowds cannot be generated.