After you create a marketing campaign, it appears in the campaign calendar and campaign list. From there, you can view campaign details, edit or remove campaigns, associate audiences and marketing tasks with sub-campaigns, embed Quick BI reports on the campaign page for data analysis, and grant management or use permissions to other members.
Campaign calendar
In the left-side navigation pane, choose User Marketing > Marketing Management > Event Management. On the Event Management page, click the  icon to open the campaign calendar. The calendar supports monthly and annual views.
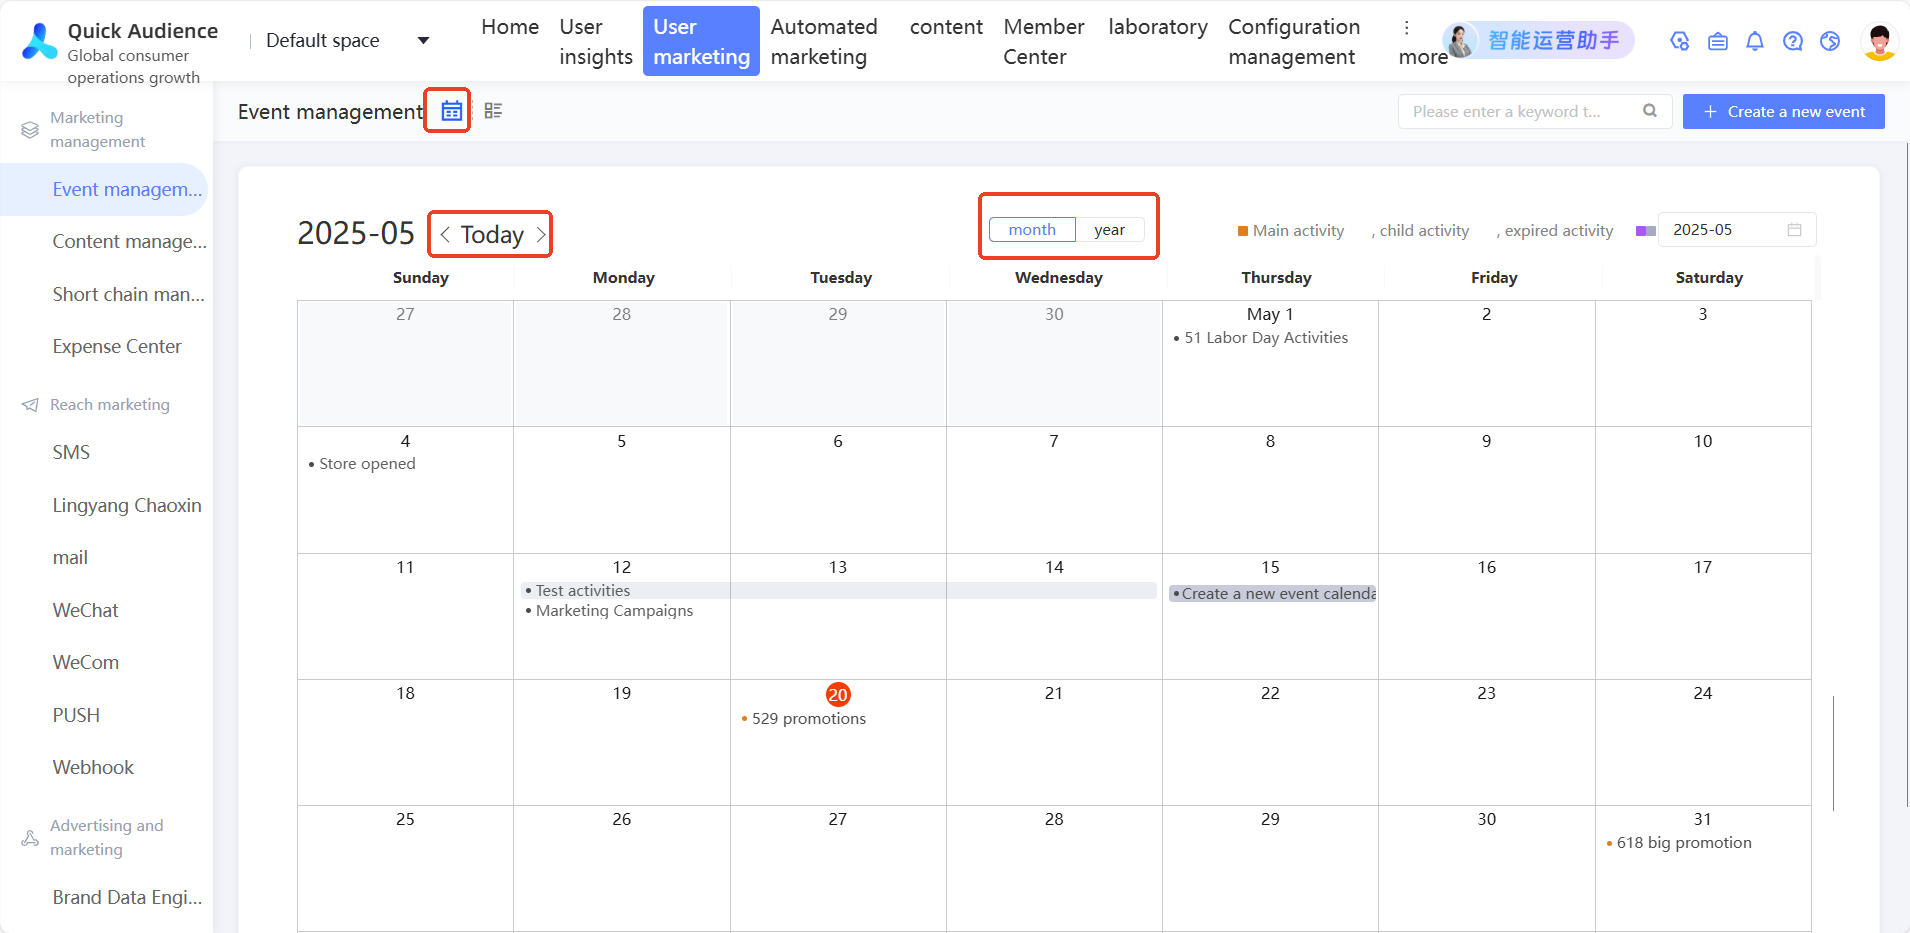
Click Month or Year to switch views. Use the  and
and  icons in the upper-left corner to navigate between pages. Click Today to return to the current date.
Monthly view: shows primary campaigns and independent sub-campaigns scheduled for each day.
Annual view: shows primary campaigns and independent sub-campaigns scheduled for each month.
Colors indicate campaign category and status:
Orange: primary campaigns that have not started or are in progress.
Purple: independent sub-campaigns that have not started or are in progress.
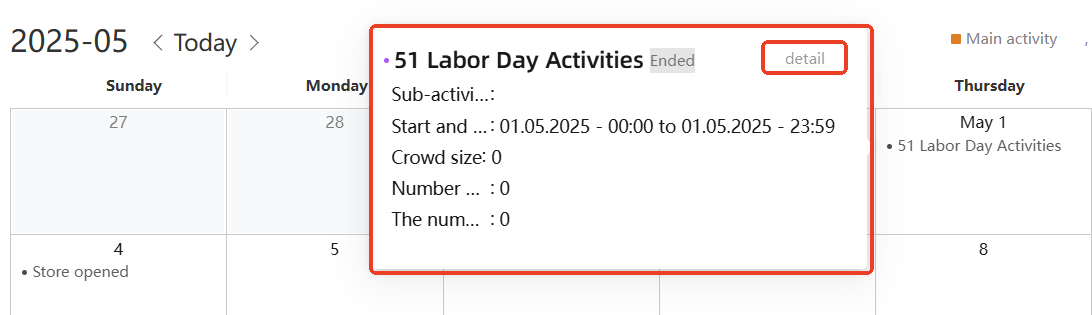
Gray: primary campaigns and independent sub-campaigns that have ended.
If a time slot contains more than 5 campaigns, the calendar shows and... campaigns. Hover over the text to see all items in a pop-up window.
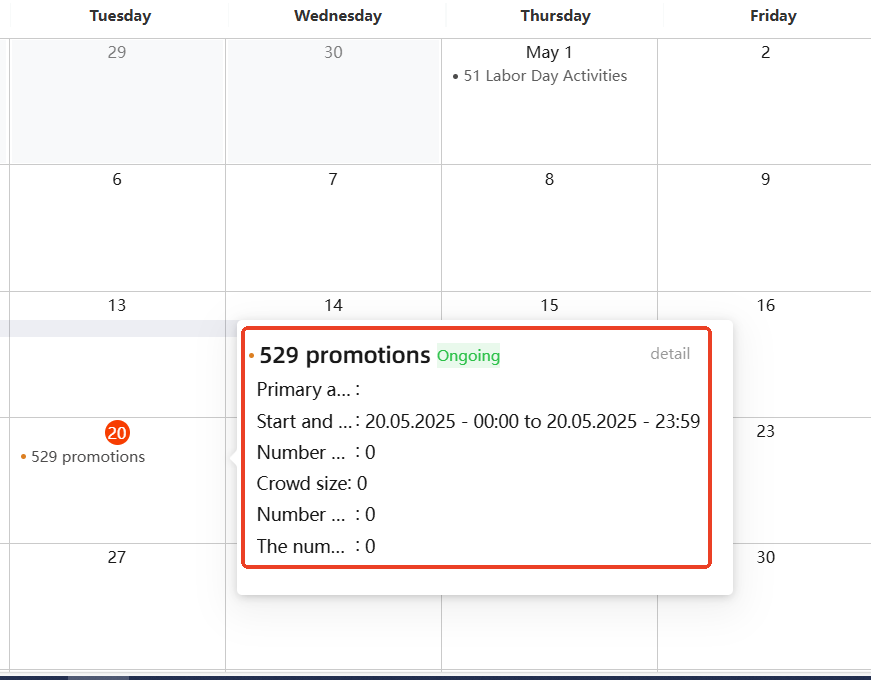
Click a campaign to view its details in a pop-up window. Click Details in the upper-right corner of the dialog box to go to the campaign details page. For more information, see Campaign details.
Campaign list
In the left-side navigation pane, choose User Marketing > Marketing Management > Campaign Management. On the Campaign Management page, click the  icon to open the campaign list.
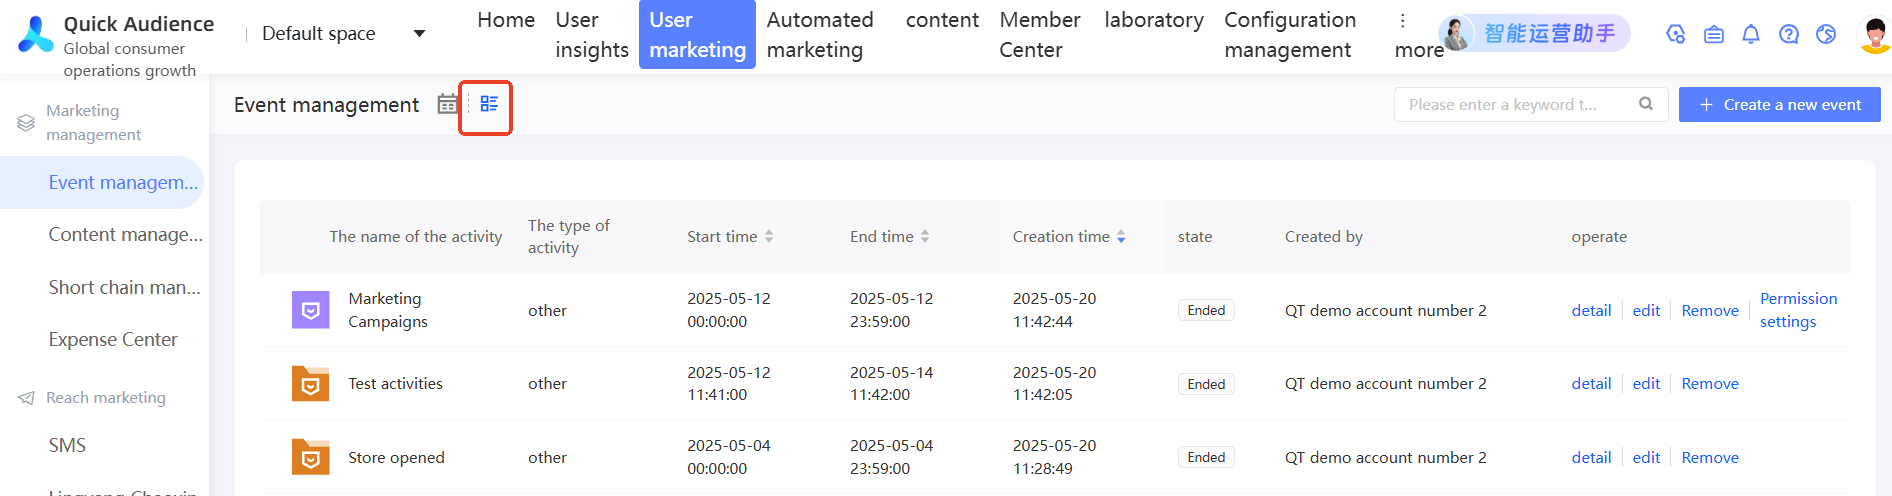
The  icon marks a primary campaign and the
  icon marks a sub-campaign. Click the
  icon next to a primary campaign to expand its sub-campaigns.
Campaign details
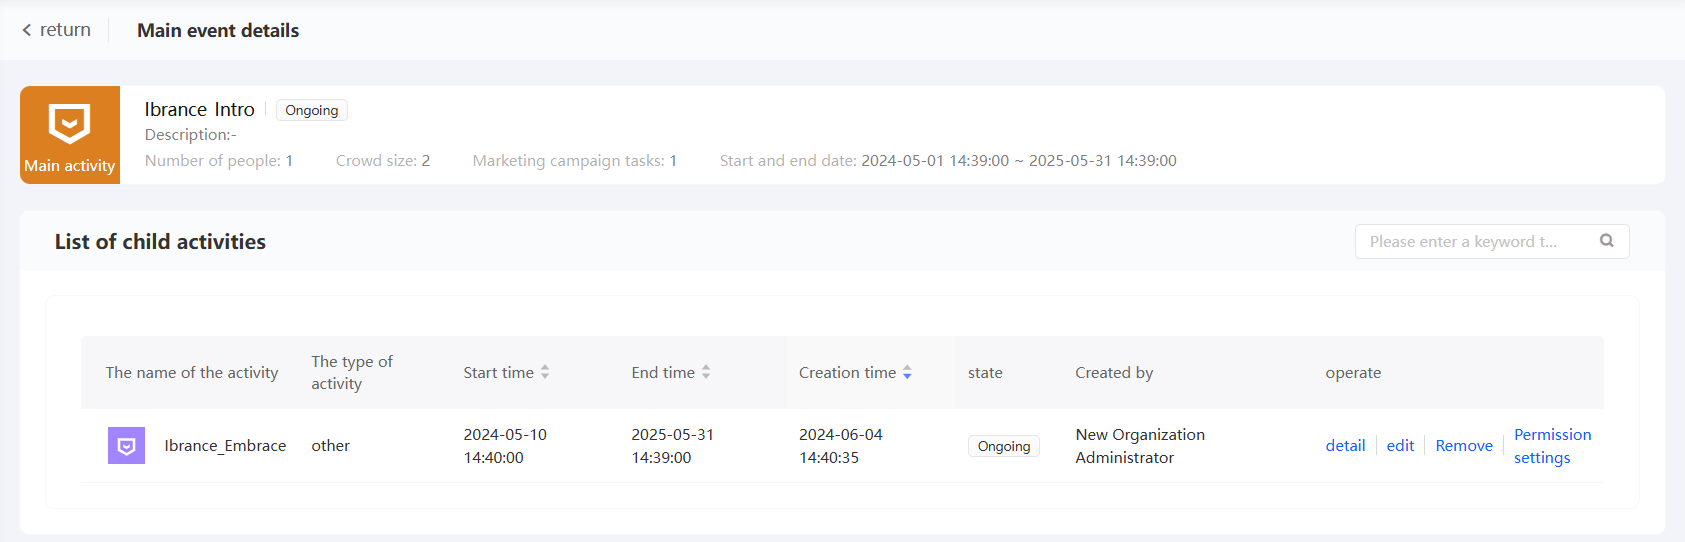
Primary campaign details
In the campaign list, click the name of a primary campaign to open its details page. The page shows the campaign's properties and a list of its sub-campaigns.
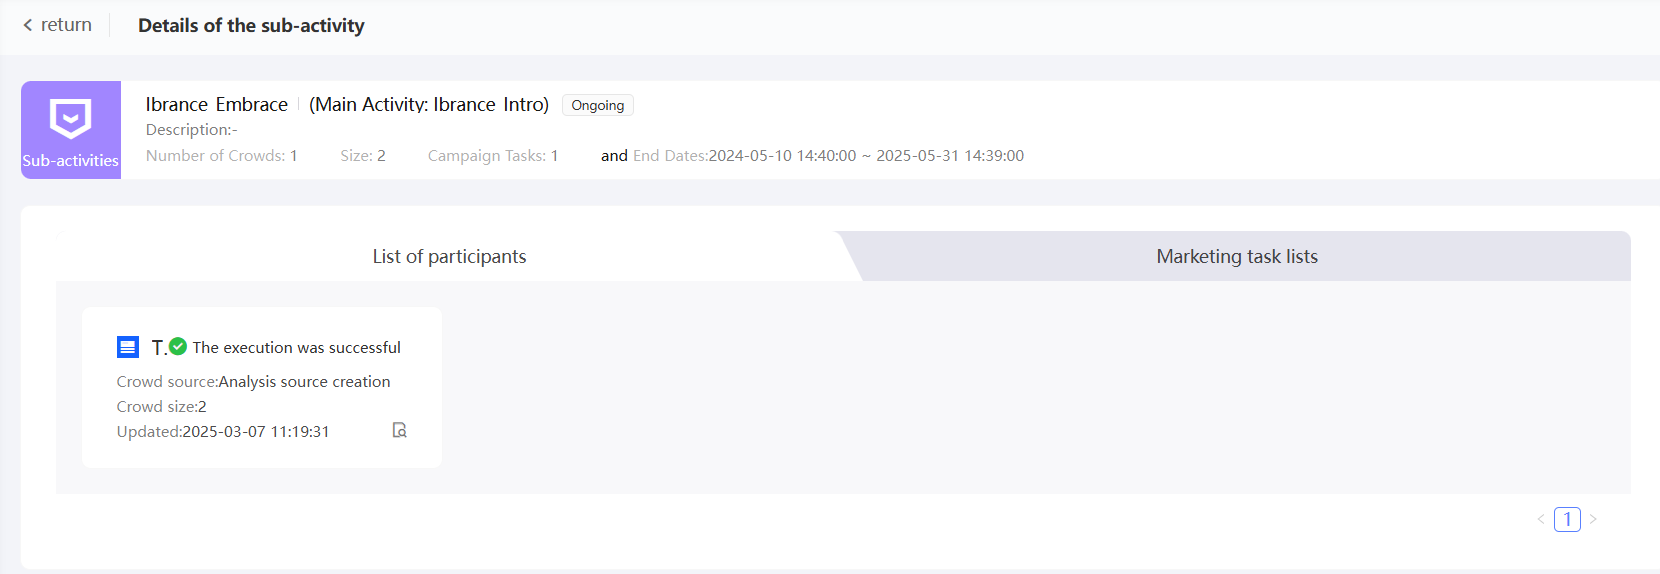
Sub-campaign details
In the campaign list, click a sub-campaign name to open its details page. The page shows the sub-campaign's properties, its associated audience, and the list of marketing tasks.
The following figure shows the audience list. Click the  icon to go to the audience editing page.
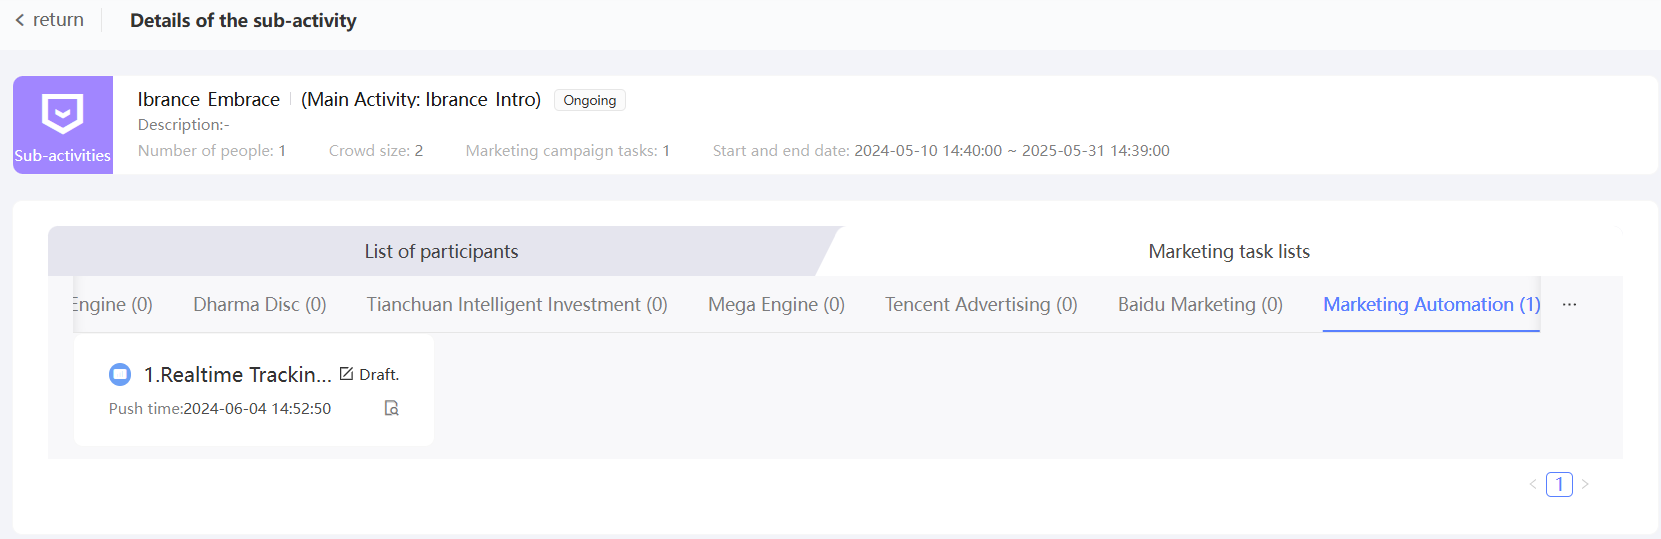
The following figure shows the marketing task list. Click the icon to go to the details page or list page of the marketing task.
Associate audiences and marketing tasks with sub-campaigns
Sub-campaigns represent the campaigns that are actually executed, so they can be linked to audiences and marketing tasks:
Associate an audience with a sub-campaign when you create or edit the audience. For more information, see Audience Management Documentation.
Associate a marketing task with a sub-campaign when you create or edit the task (excluding WeChat marketing, Douyin marketing, and Kafka push). For more information, see User Marketing Documentation and Automatic Marketing Documentation.
Edit a campaign
You cannot change a primary campaign to a sub-campaign, or a sub-campaign to a primary campaign.
Click the
icon to open the campaign list.In the Actions column, click Edit.
Modify the parameters in the pop-up window. For more information, see Create Marketing Campaign.
Click OK.
Sub-campaign permissions
The administrator and campaign creator can grant use or manage permissions on a sub-campaign to other members:
Use permission: view and use sub-campaigns, configure associated audiences, and associate marketing tasks.
Manage permission: edit, remove, and use permissions for sub-campaigns.
When a sub-campaign is authorized with use or manage permission, the authorized member can also view the corresponding primary campaign.
The steps for granting manage and use permissions are the same:
Click the
icon to open the campaign list.Click Permission Settings for the sub-campaign.
-
In the dialog box, select Manage Permissions or Use Permissions.
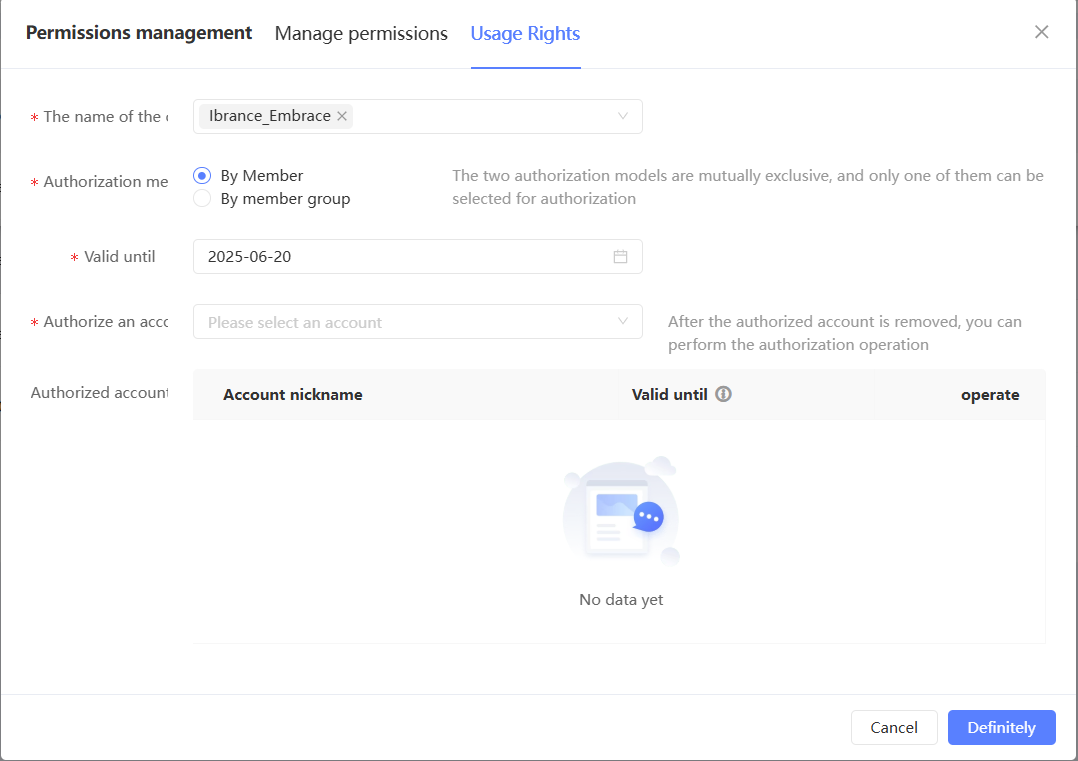
The sub-campaign you opened is selected by default. Select additional sub-campaigns as needed. All sub-campaigns are supported.
-
Set Authorization Method to By Member or By Member Group.
The authorized accounts for the selected sub-campaigns and their validity periods are shown in the lower section of the dialog box.
NoteIf multiple sub-campaigns are selected, the accounts authorized across all selected sub-campaigns are displayed. An empty validity period means the validity periods differ across sub-campaigns — check each sub-campaign individually for the exact period.
To revoke authorization, click Remove in the Actions column next to the account. The change takes effect immediately.
To grant authorization, select the accounts, specify a validity period, and click OK.
Embed a Quick BI report
Use campaign data to build reports in Quick BI, then embed those reports on the campaign page. When configured correctly, embedded reports automatically filter to show data for the current campaign.
Quick BI Professional Edition is required. Purchase Quick BI and create and publish reports before starting. See the Quick BI User Guide for purchase and usage instructions.
Reports can be embedded in Quick Audience only when the Quick BI Report Data Source is AnalyticDB for MySQL 3.0.
Automatic campaign-level filtering requires that the Quick BI Report Data Source and the Analysis Source used by the Quick Audience workspace point to the same AnalyticDB for MySQL 3.0 database.
The Quick Audience administrator configures Quick BI authorization. For more information, see Quick BI Authorization Configuration.
-
In the Quick BI Console, complete the following steps:
The Quick BI administrator adds Quick Audience as an embedding channel in Embedding Channel Configuration.
-
Quick BI workspace members create and save reports.
When building reports, sync campaign data to the AnalyticDB for MySQL 3.0 analytics source.
-
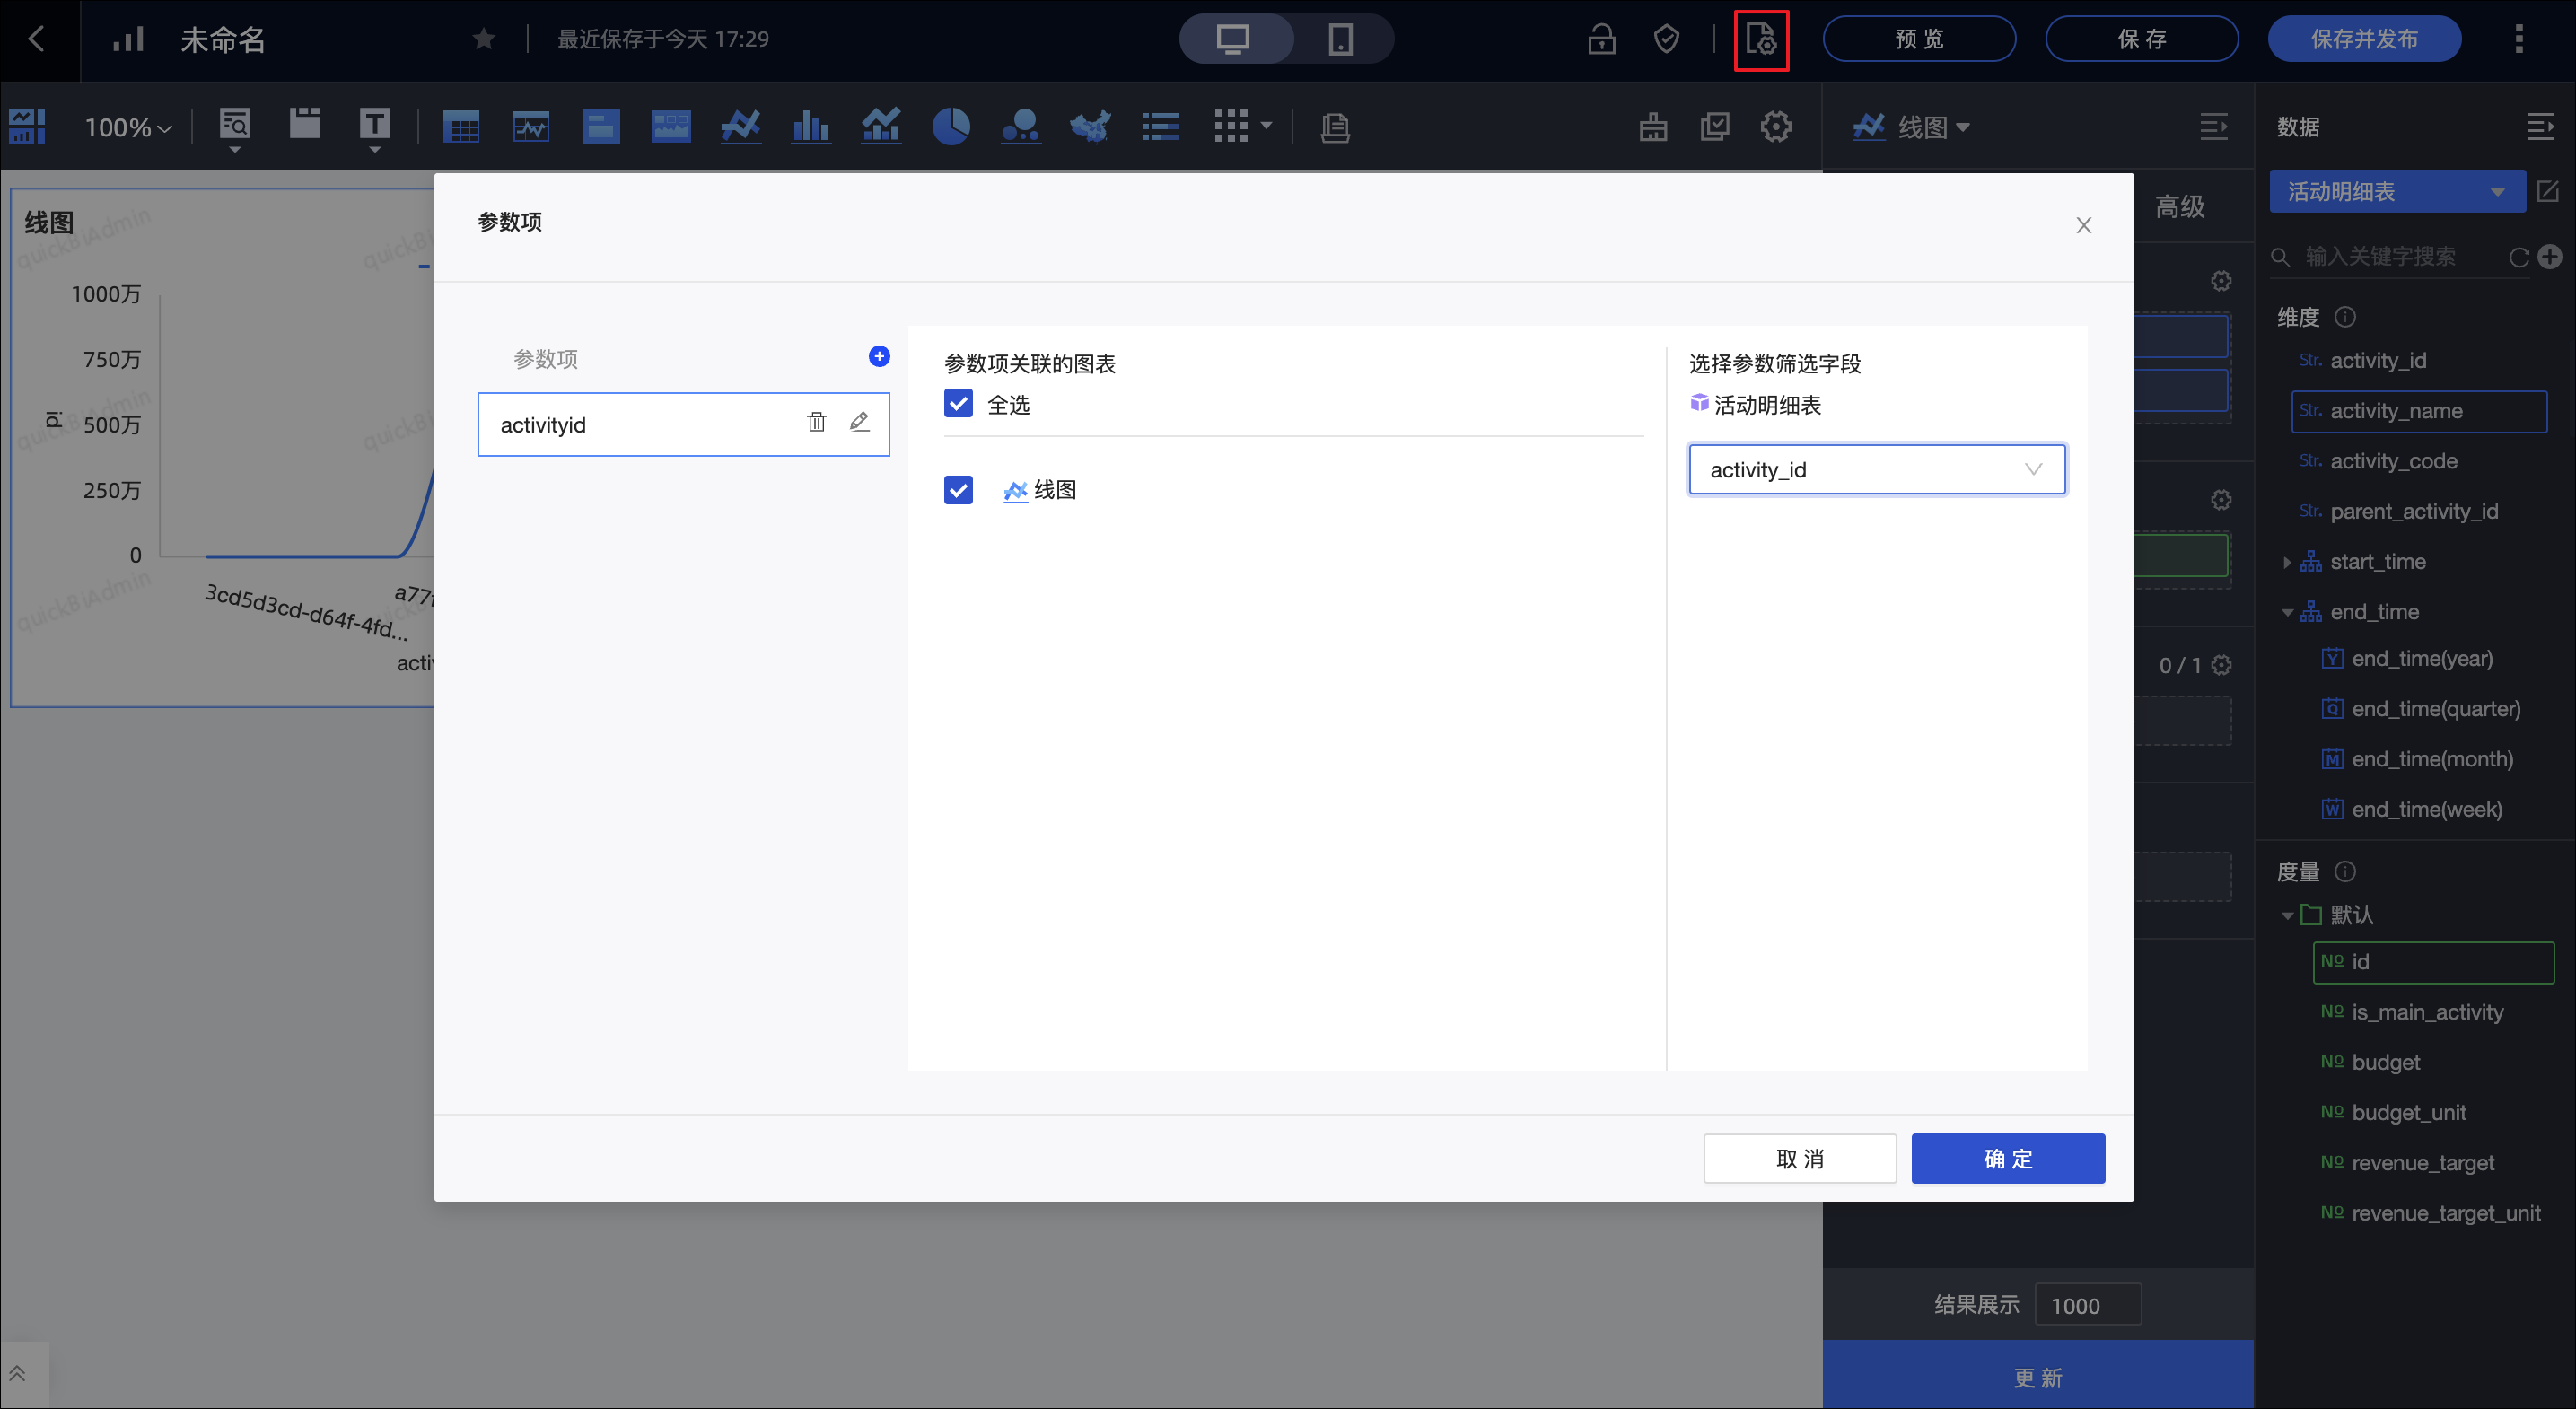
To enable automatic campaign-level filtering, set campaign_id as a Global Parameters in Quick BI in addition to syncing campaign data to AnalyticDB for MySQL 3.0. Set the parameter name to campaignid, as shown in the following figure.
Publish the report.
Enable embedding for the report. For more information, see Report Enable Embedding.
(Optional) Configure the space where the report is embedded in Quick Audience. For more information, see Report Embedding Configuration.
-
The Quick Audience organization administrator grants the workspace permission for the embedded report. For more information, see Report Authorization.
If Report Embedding Configuration was completed in the previous step, skip this step.
-
The Quick Audience organization administrator or workspace administrator embeds the report:
Choose Workspace > Configuration Management > Marketing Configuration > Report Configuration.
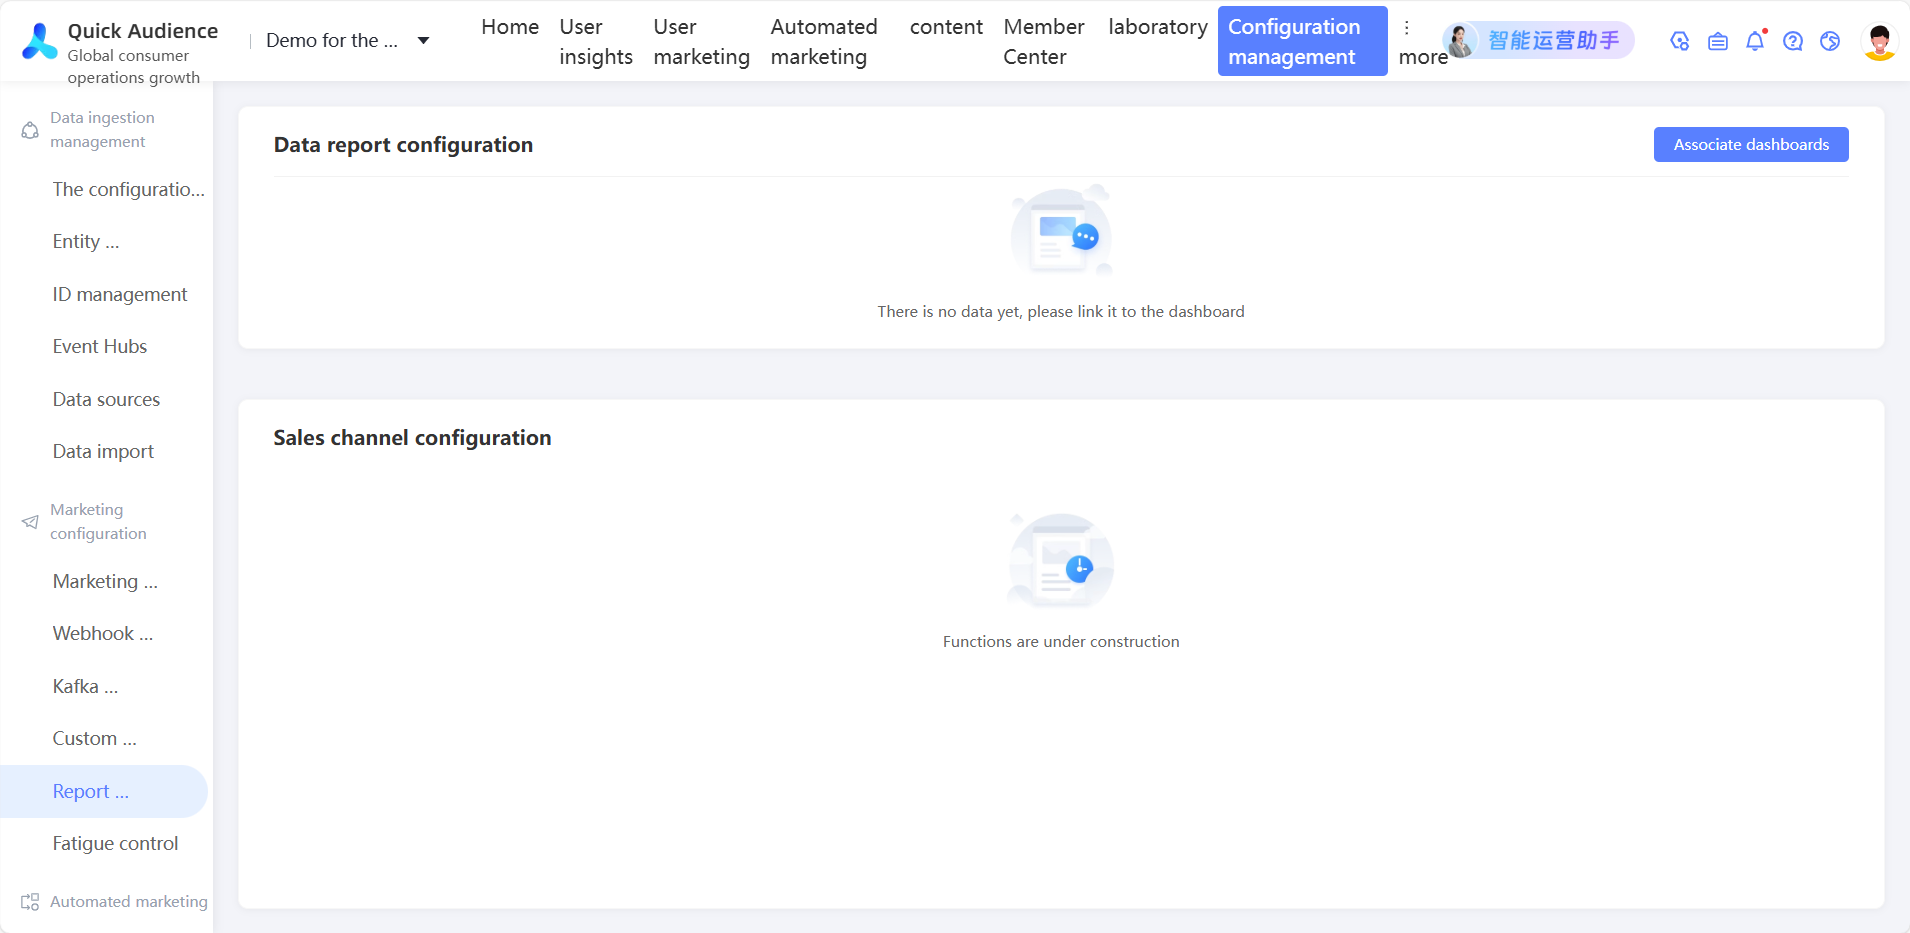
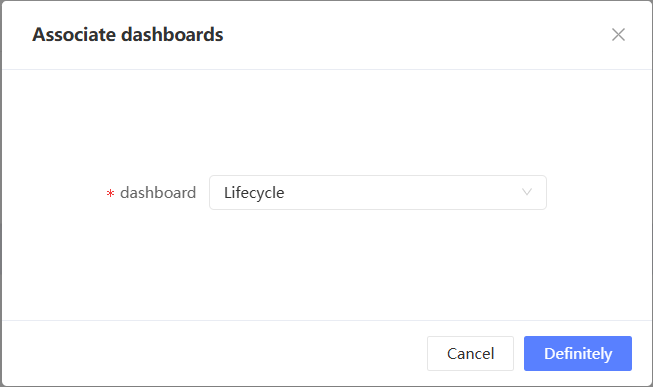
b. In the upper-right corner, click Associated Dashboard.
c. In the dialog box, select a report and click OK.
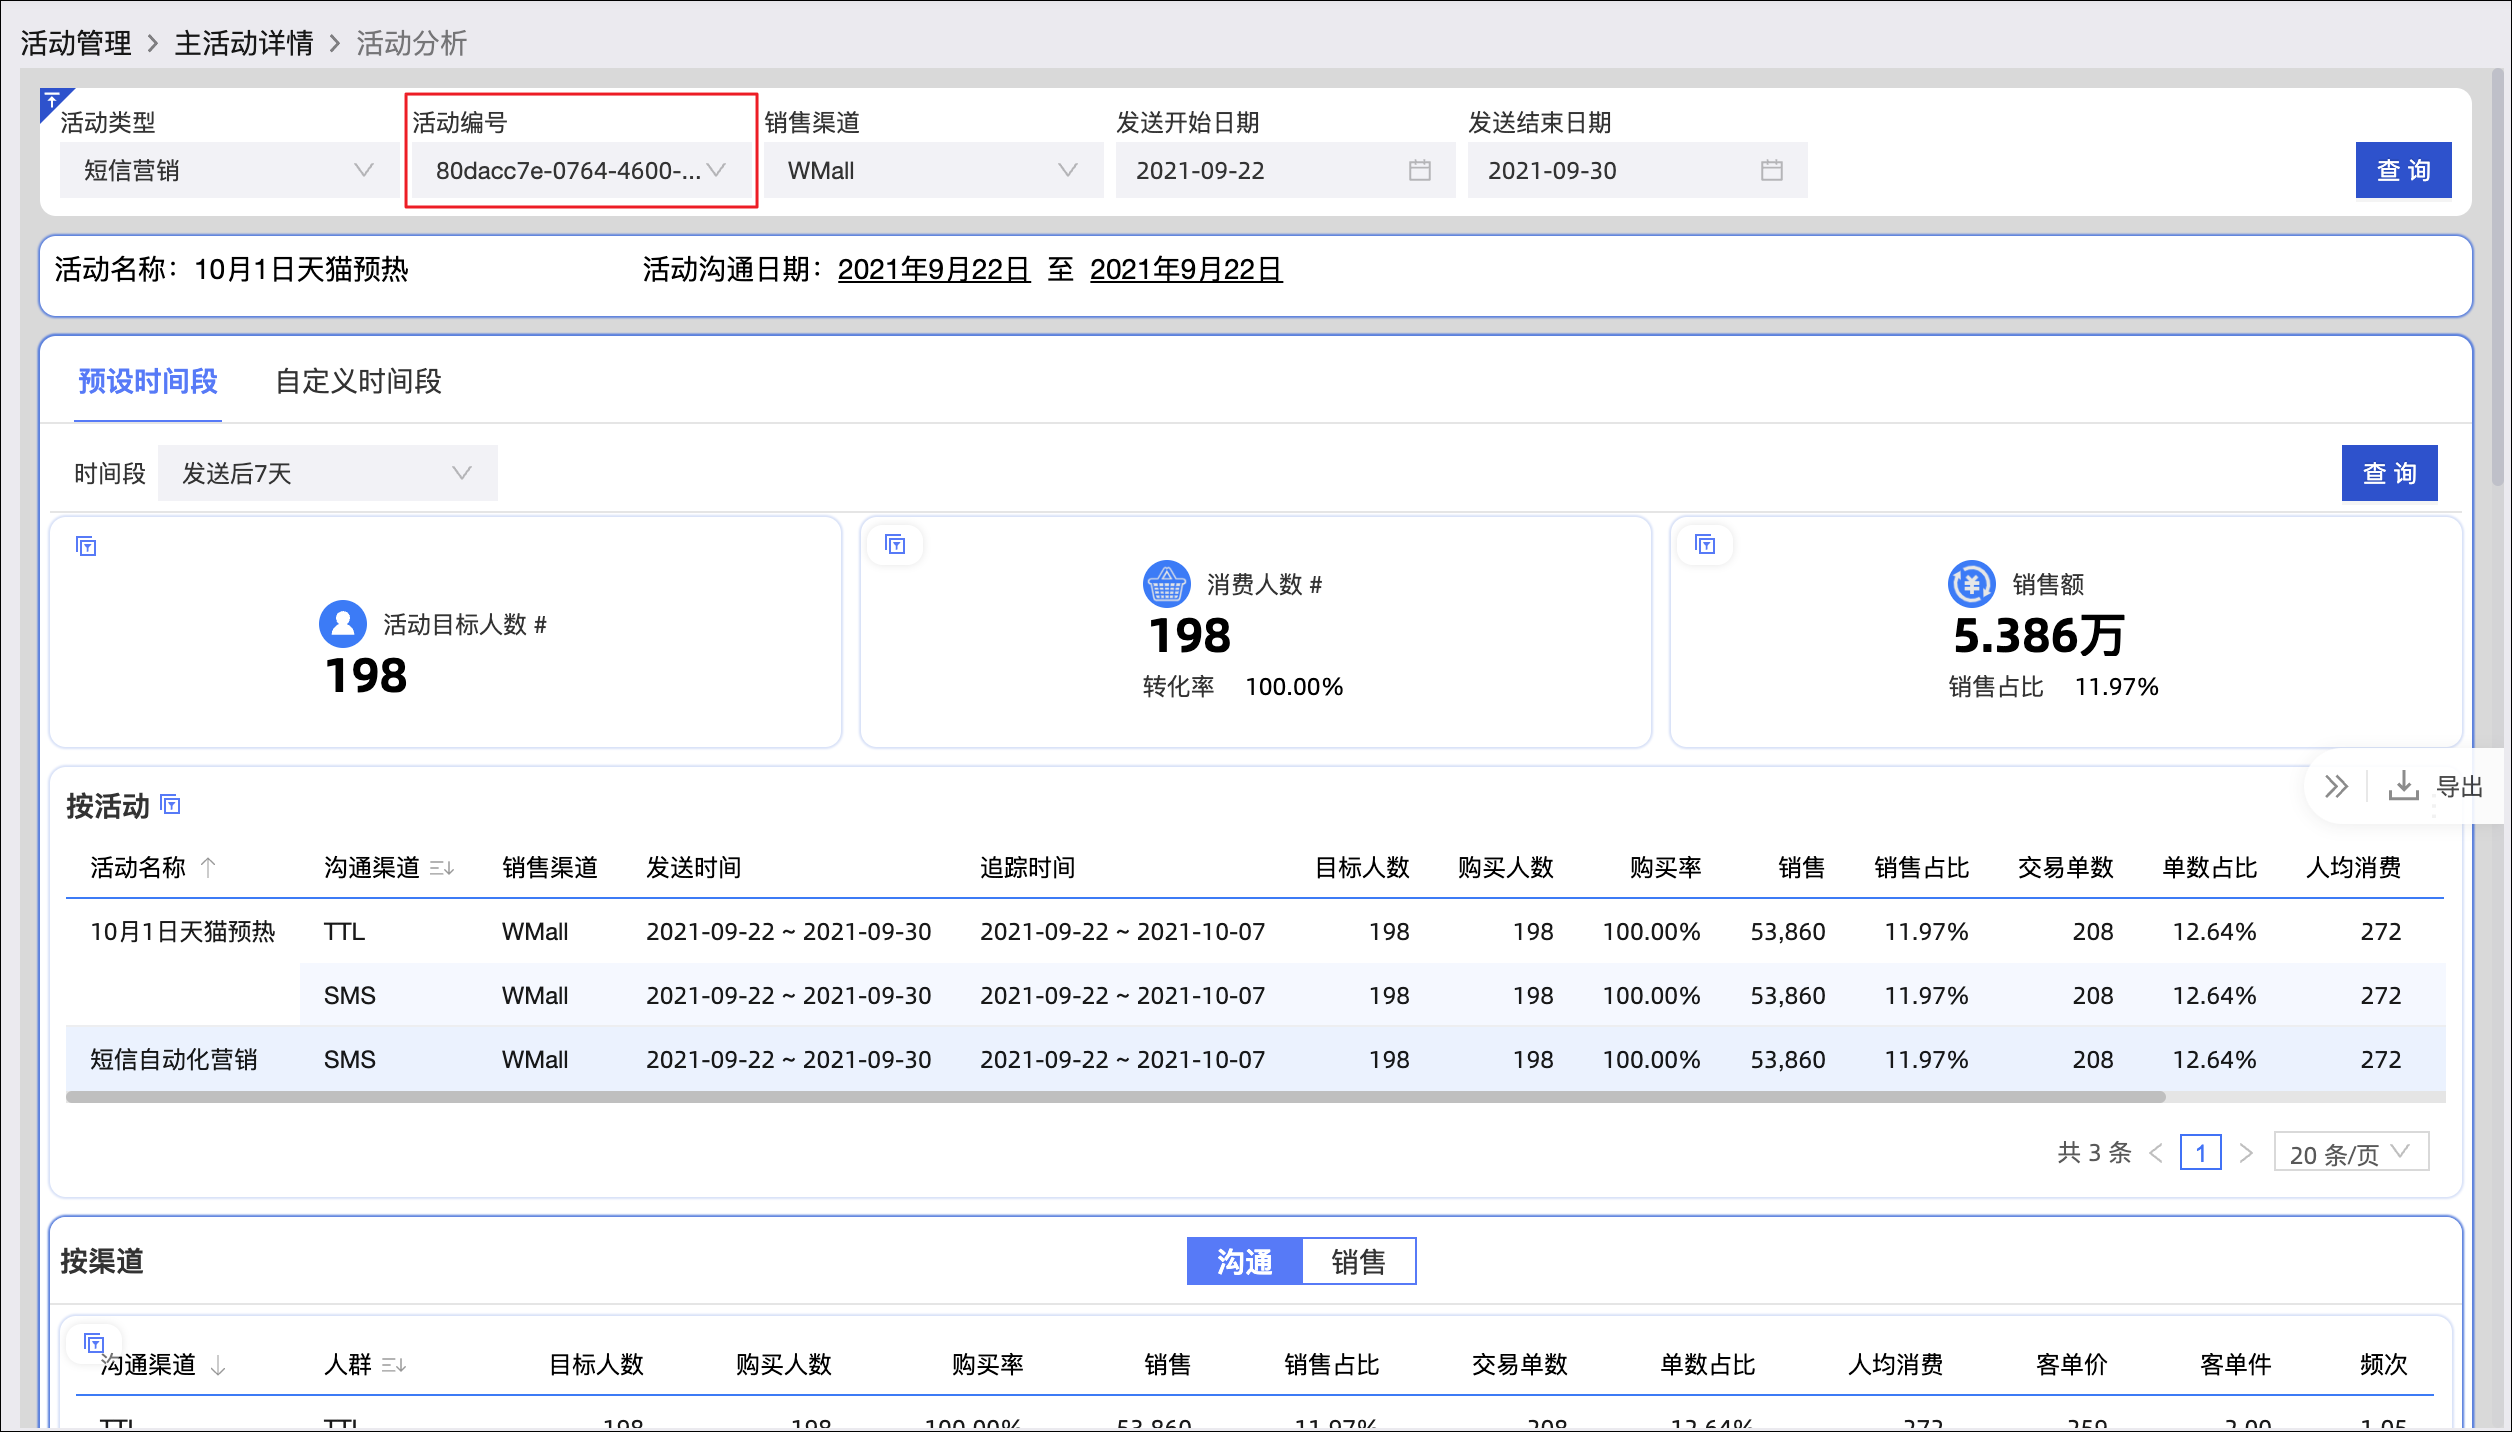
If you have the User Marketing-Marketing Management-Campaign-Campaign Dashboard permission (as an administrator or a member of a custom role with this permission), click Data Analysis in the upper-right corner of a primary campaign or sub-campaign details page to open the analysis page. The report loads on the page.
If campaign_id is configured as a global parameter in the AnalyticDB for MySQL 3.0 data synced from marketing campaigns, the report automatically filters and displays data for the current campaign. In the following example, only the number of the current campaign appears in the "Campaign number" section.
For information about analyzing data using reports, see Quick BI User Guide.
Remove a campaign
Removing a primary campaign detaches its sub-campaigns, which then become independent sub-campaigns.
Removing a sub-campaign does not affect its associated audiences or marketing tasks — those are retained.
Click the
icon to open the campaign list.Click Remove for the campaign.
Confirm the deletion.