After you purchase an enterprise drive, the system automatically creates a drive instance and a root team named after your enterprise. This root team serves as the default enterprise space. All members can access it by default.
Prerequisites
Before you begin, make sure that you have:
Purchased an enterprise drive
A super administrator or drive administrator account
Role permissions
The following table lists the actions each role can perform in the enterprise drive and enterprise space.
| Action | Super administrator | Drive administrator | Team administrator | Regular user |
|---|---|---|---|---|
| View and manage teams | Yes | Yes | No | No |
| Modify space size | Yes | Yes | No | No |
| Modify permissions | Yes | Yes | No | No |
| Upload files | Yes | Yes | No | No |
| Create files | Yes | Yes | No | No |
| Download files | Yes | Yes | No | No |
| Share files | Yes | Yes | No | No |
| Copy files | Yes | Yes | No | No |
| Delete files | Yes | Yes | No | No |
| Preview files | Yes | Yes | Yes (default) | Yes (default) |
To grant additional permissions to team administrators and regular users, see Permission description.
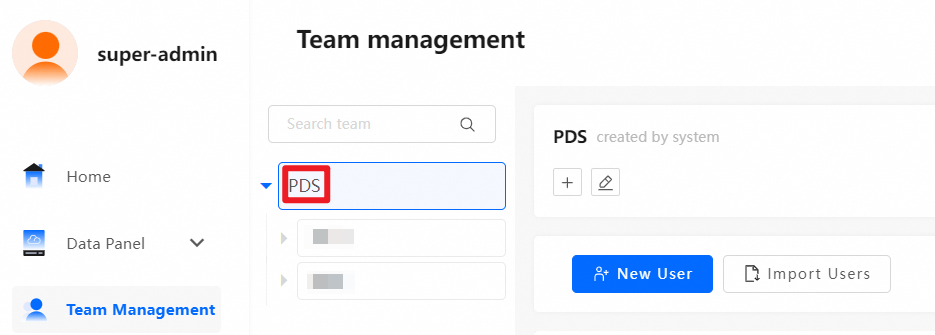
View the root team
After purchase, log on to Enterprise Drive and go to Management Console > Team Management to view the root team. The root team is named after your enterprise and is created automatically without manual configuration.
Modify space size or permissions
Only a super administrator or drive administrator can modify the space size or access permissions of an enterprise space.
The space size cannot exceed the remaining available space.
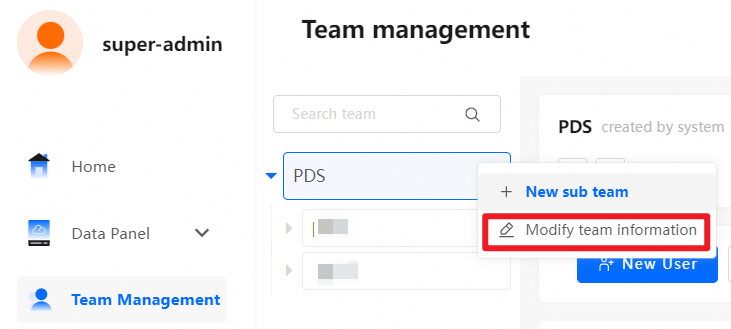
Method 1: From Team Management
Log on to Enterprise Drive.
Go to Management Console > Team Management.
Select the target enterprise drive.
Click Modify team information to adjust the space size or permissions.
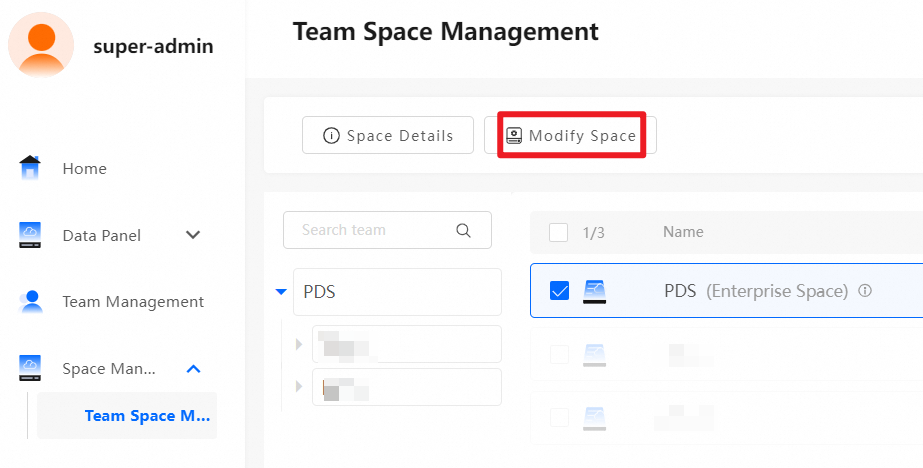
Method 2: From Space Management
Log on to Enterprise Drive.
Go to Management Console > Space Management > Team Space Management.
Select the target enterprise space.
Click Modify Space to adjust the space size or permissions.
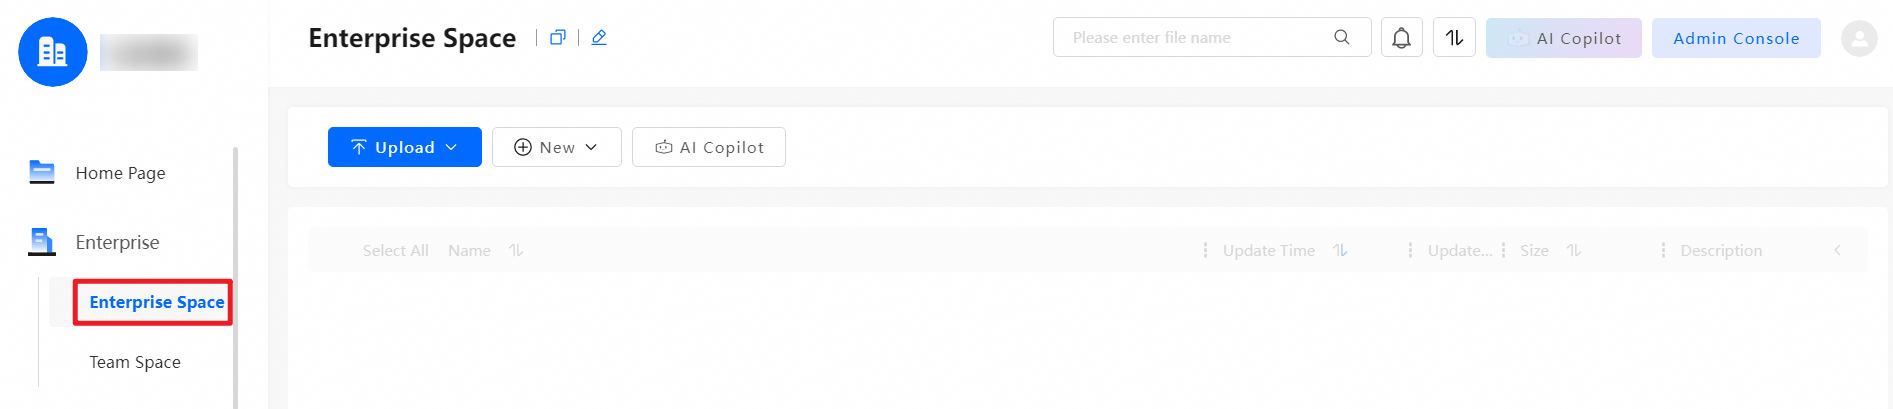
Manage files in the enterprise space
Before you use the enterprise space, allocate storage and grant access permissions for the enterprise drive.
To manage files, go to Enterprise > Enterprise Space.
A super administrator or drive administrator can upload, create, download, share, copy, delete, and perform other operations on files.
A team administrator or regular user has preview permissions by default. To grant additional permissions, see Permission description.