Deploy a Retrieval-Augmented Generation (RAG) chat system on PAI-EAS with your choice of LLM and vector database.
Applicable version
This topic applies to RAG v0.4.x. For earlier versions, see PAI-RAG (v0.3.x).
Step 1: Deploy the RAG service
-
Log on to the PAI console. Select a region on the top of the page. Then, select the desired workspace and click Elastic Algorithm Service (EAS).
On the Inference Service tab, click Deploy Service. In the Scenario-based Model Deployment section, click RAG-based Smart Dialogue Deployment.
On the RAG-based LLM Chatbot Deployment page, configure the following key parameters:
Version: Select LLM Decoupled Deployment to deploy only the RAG service. Canary Release
NoteCo-deploying the RAG service and LLM in the same instance is recommended only for smaller models. Larger models require more resources.
RAG Version:
pai-rag:0.4.3.Resource Information:
Resource Type: Select Public Resources.
Deployment: The RAG service consumes minimal resources. Select a specification with at least 8 vCPUs and 16 GB memory, such as
ecs.c7.2xlargeorecs.c7.4xlarge.
Vector database settings:
Vector Database Type: Select FAISS for a local vector database to get started quickly. For production environments, use a production-grade vector database. For details, see Use an Alibaba Cloud vector database.
OSS Path: Existing OSS storage directory in the current region for knowledge base files. To create one, see Quick start in the console.
VPC: To access Alibaba Cloud Model Studio over the public internet, configure a VPC with a public NAT gateway and SNAT entry. For details, see Allow an EAS service to access the public internet.
Click Deploy. Deployment takes about 5 minutes. When Service Status changes to Running, the deployment is complete.
Step 2: Test knowledge base Q&A
On the Inference Services tab, find your deployed RAG service and open its details page. Click Web applications in the upper-right corner to open the web UI.

2.1 Configure an LLM
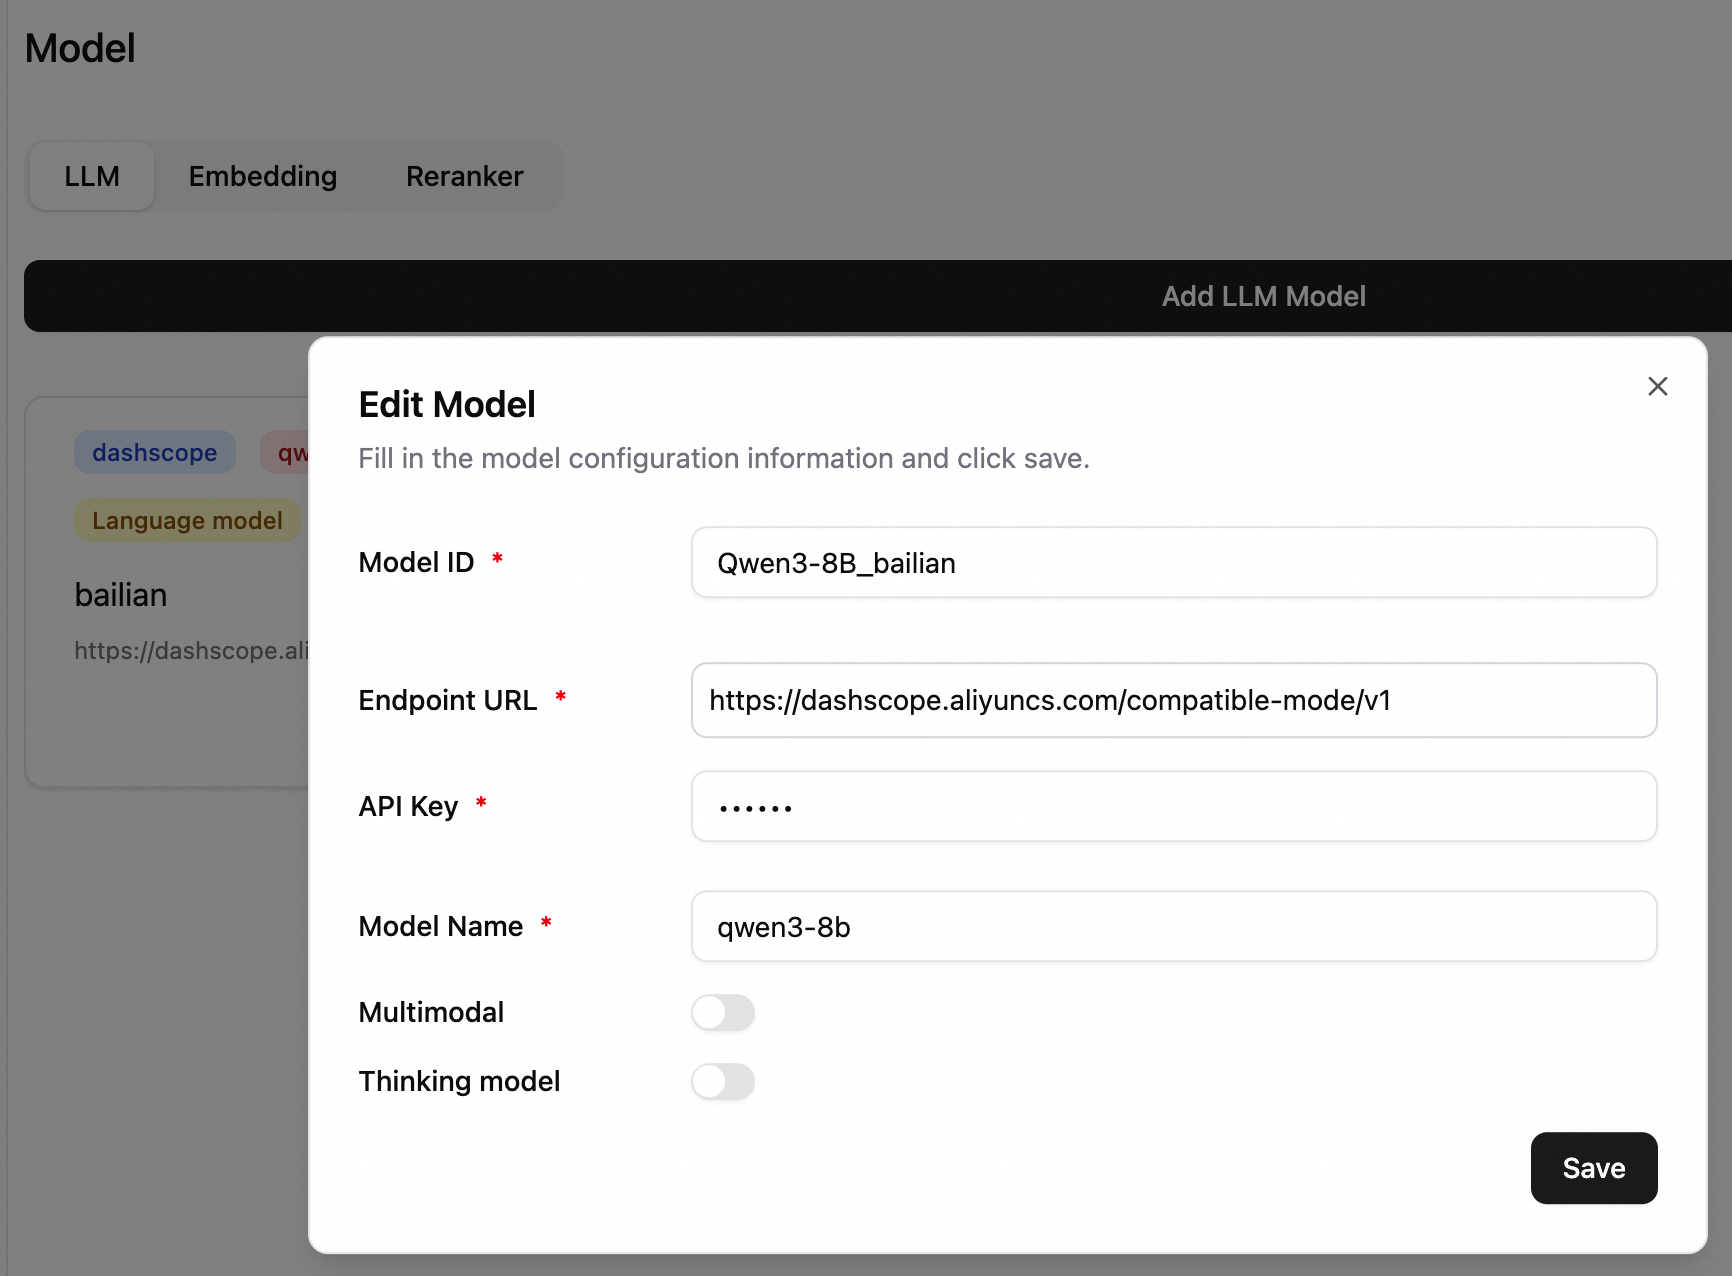
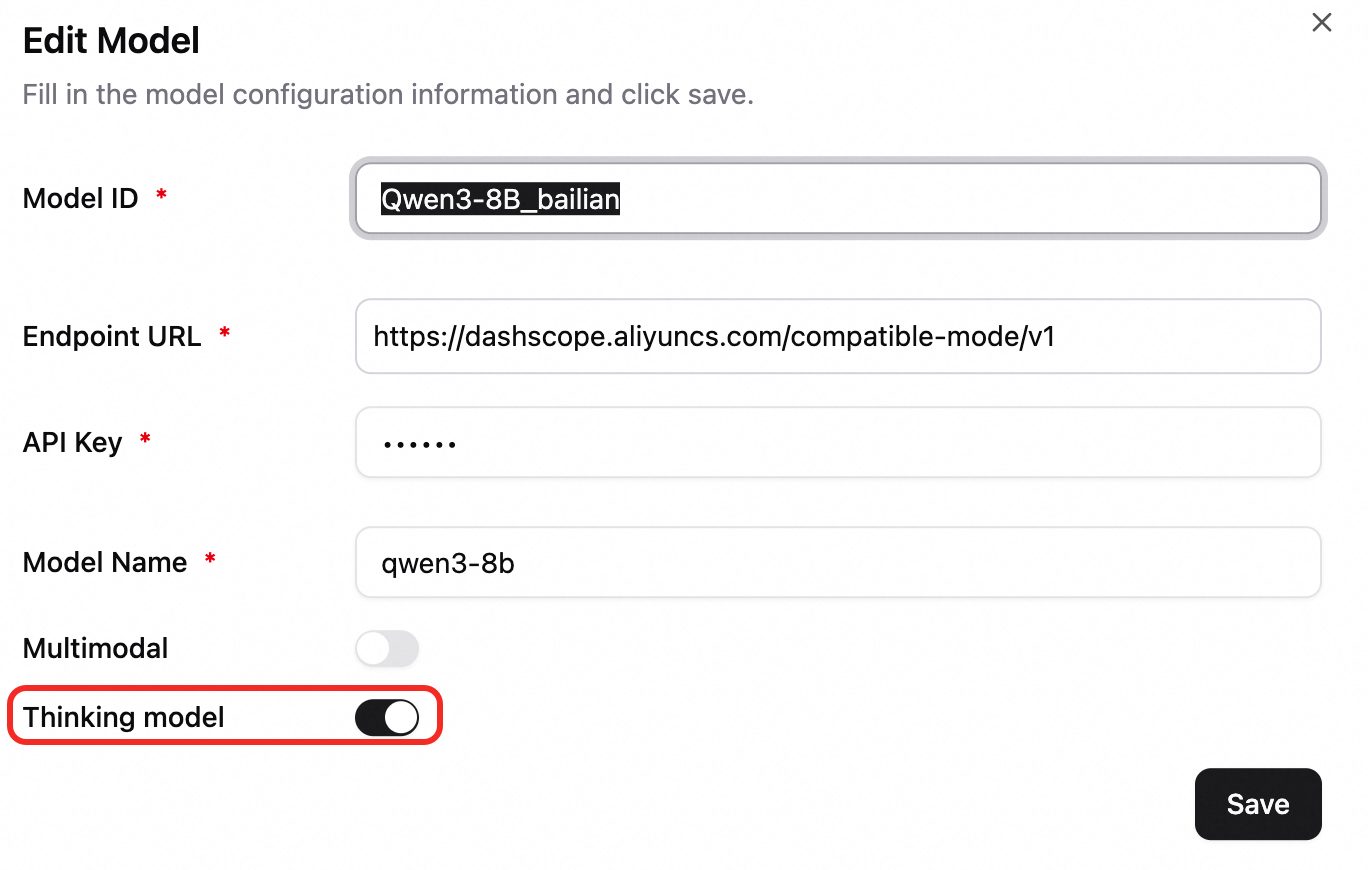
In the lower-left corner, click Settings > Model to open the model configuration page. The following example uses qwen3-8b from Alibaba Cloud Model Studio. For details, see Configure models.
Alibaba Cloud Model Studio models are billed separately. For billing details, see Billing of Alibaba Cloud Model Studio.
To call Alibaba Cloud Model Studio models, configure a VPC with public internet access for your RAG service.
Model ID: Identifier for selecting models in chats. Example: Qwen3-8B_bailian.
Endpoint URL: Model service address. Example for Alibaba Cloud Model Studio in the China (Beijing) region: https://dashscope.aliyuncs.com/compatible-mode/v1.
ImportantThe URL must end with
/v1or/v2. For an EAS service, append/v1to the service endpoint.API key: See Obtain an API key.
Model name: Enter qwen3-8b.
2.2 Add a knowledge base
A default embedding model is pre-configured. You can directly create a knowledge base and upload documents.
Create a knowledge base. In the left-side navigation pane, click Knowledge Base, and then click Create Knowledge Base.
 For example, to create a knowledge base about iPhone 16 technical specifications, set the name to iPhone16 and keep defaults for other parameters.
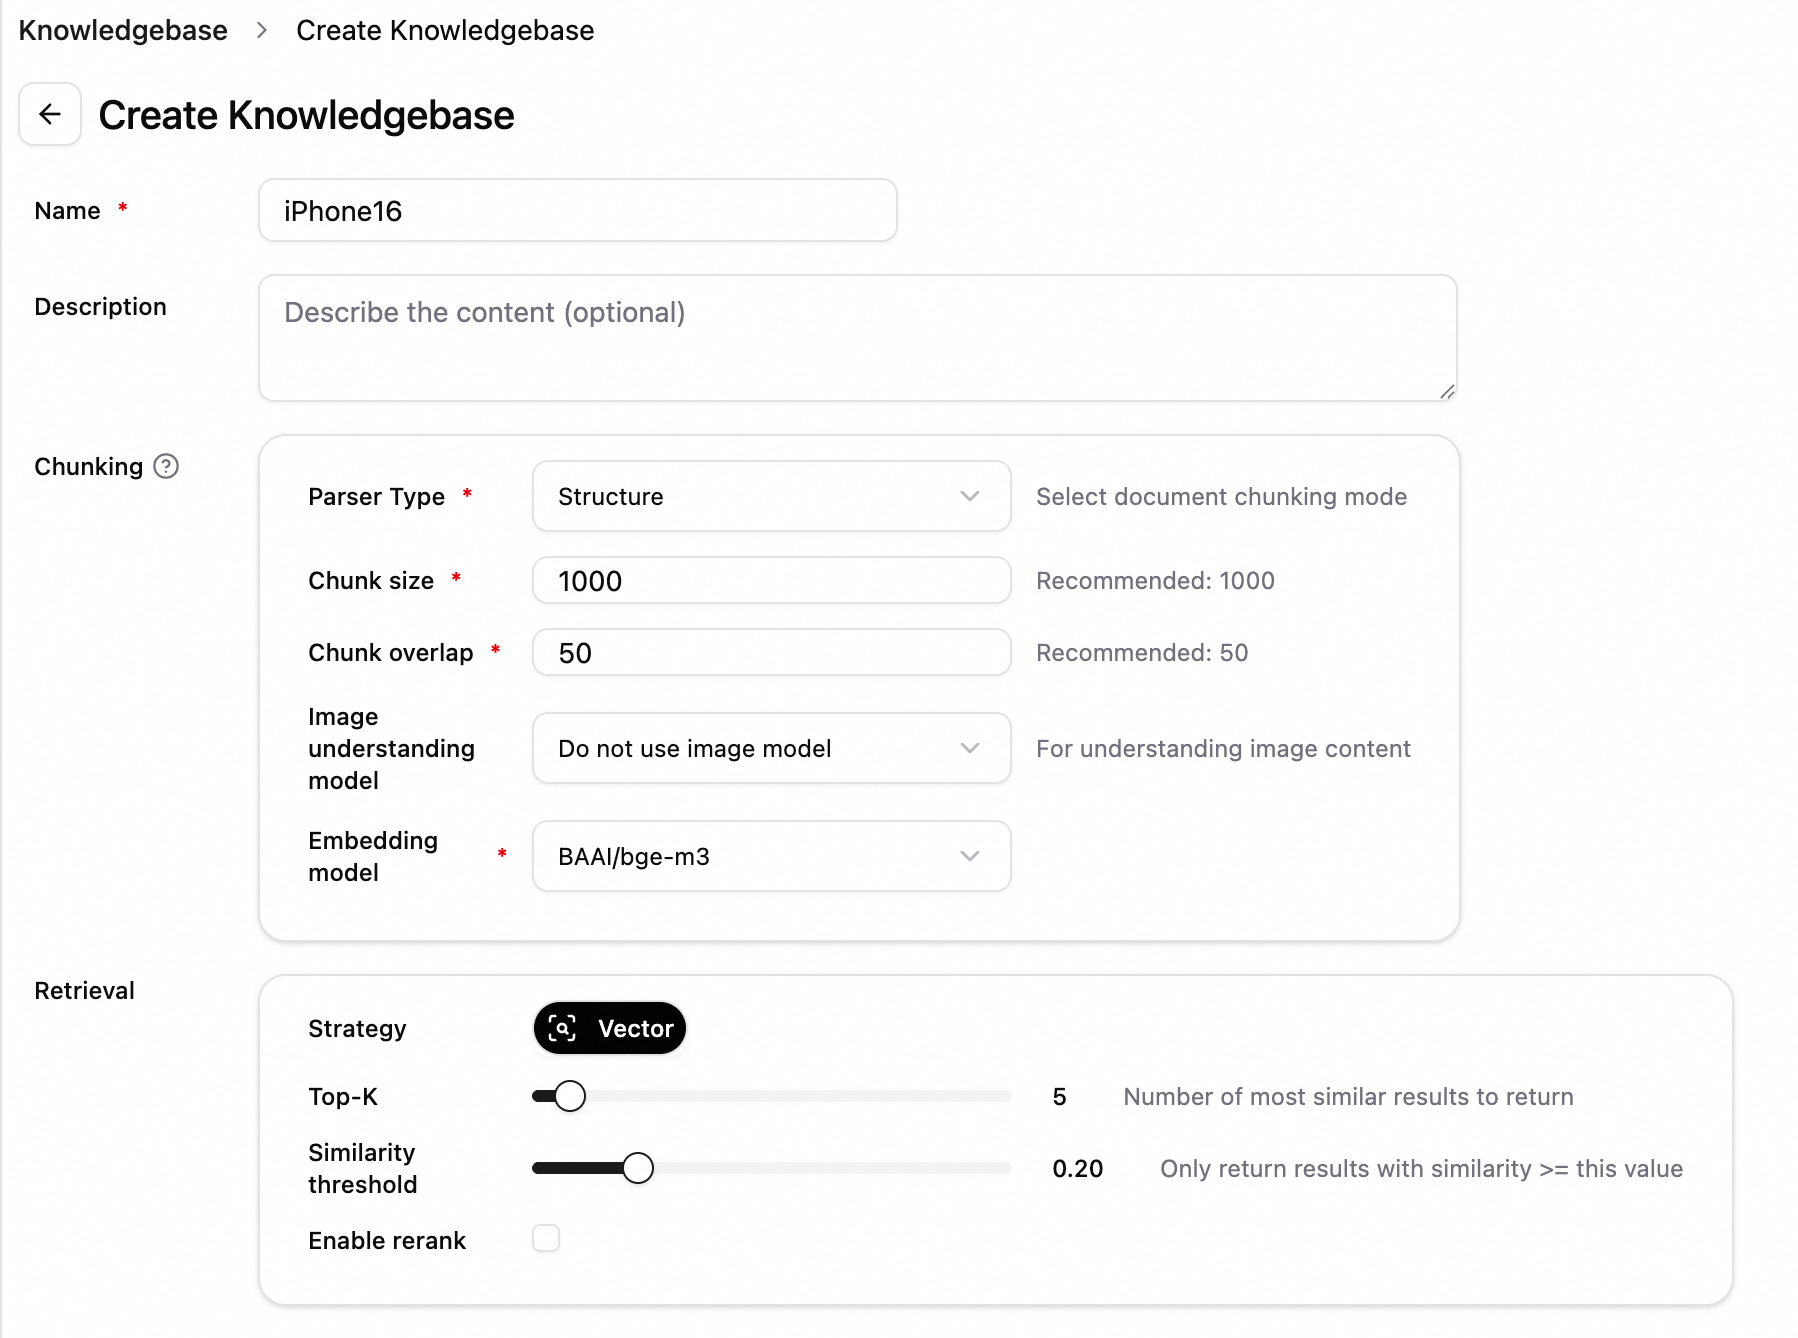
Upload a file. On the File Management tab, click Upload File. After the file is uploaded, click Start Parsing. Example: iPhone 16 and iPhone 16 Plus - Technical Specifications - Apple (CN).pdf.

View the knowledge base file. After the upload succeeds, click the filename to view document chunking.
Test retrieval. Switch to the Retrieval Test tab and enter a query such as
iPhone16to test knowledge base retrieval.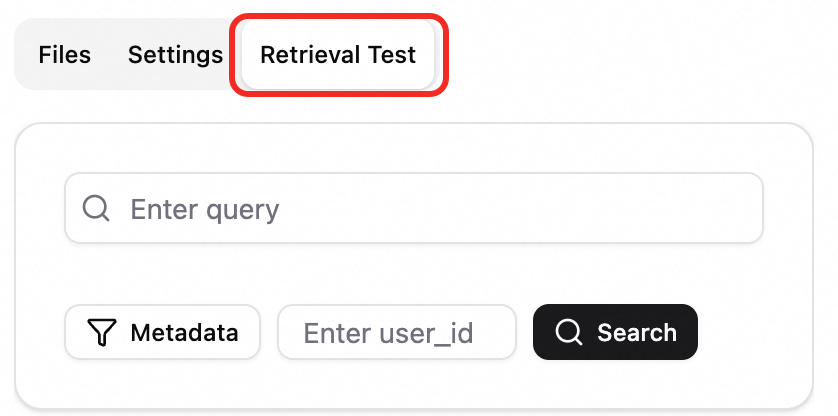
2.3 Knowledge base Q&A
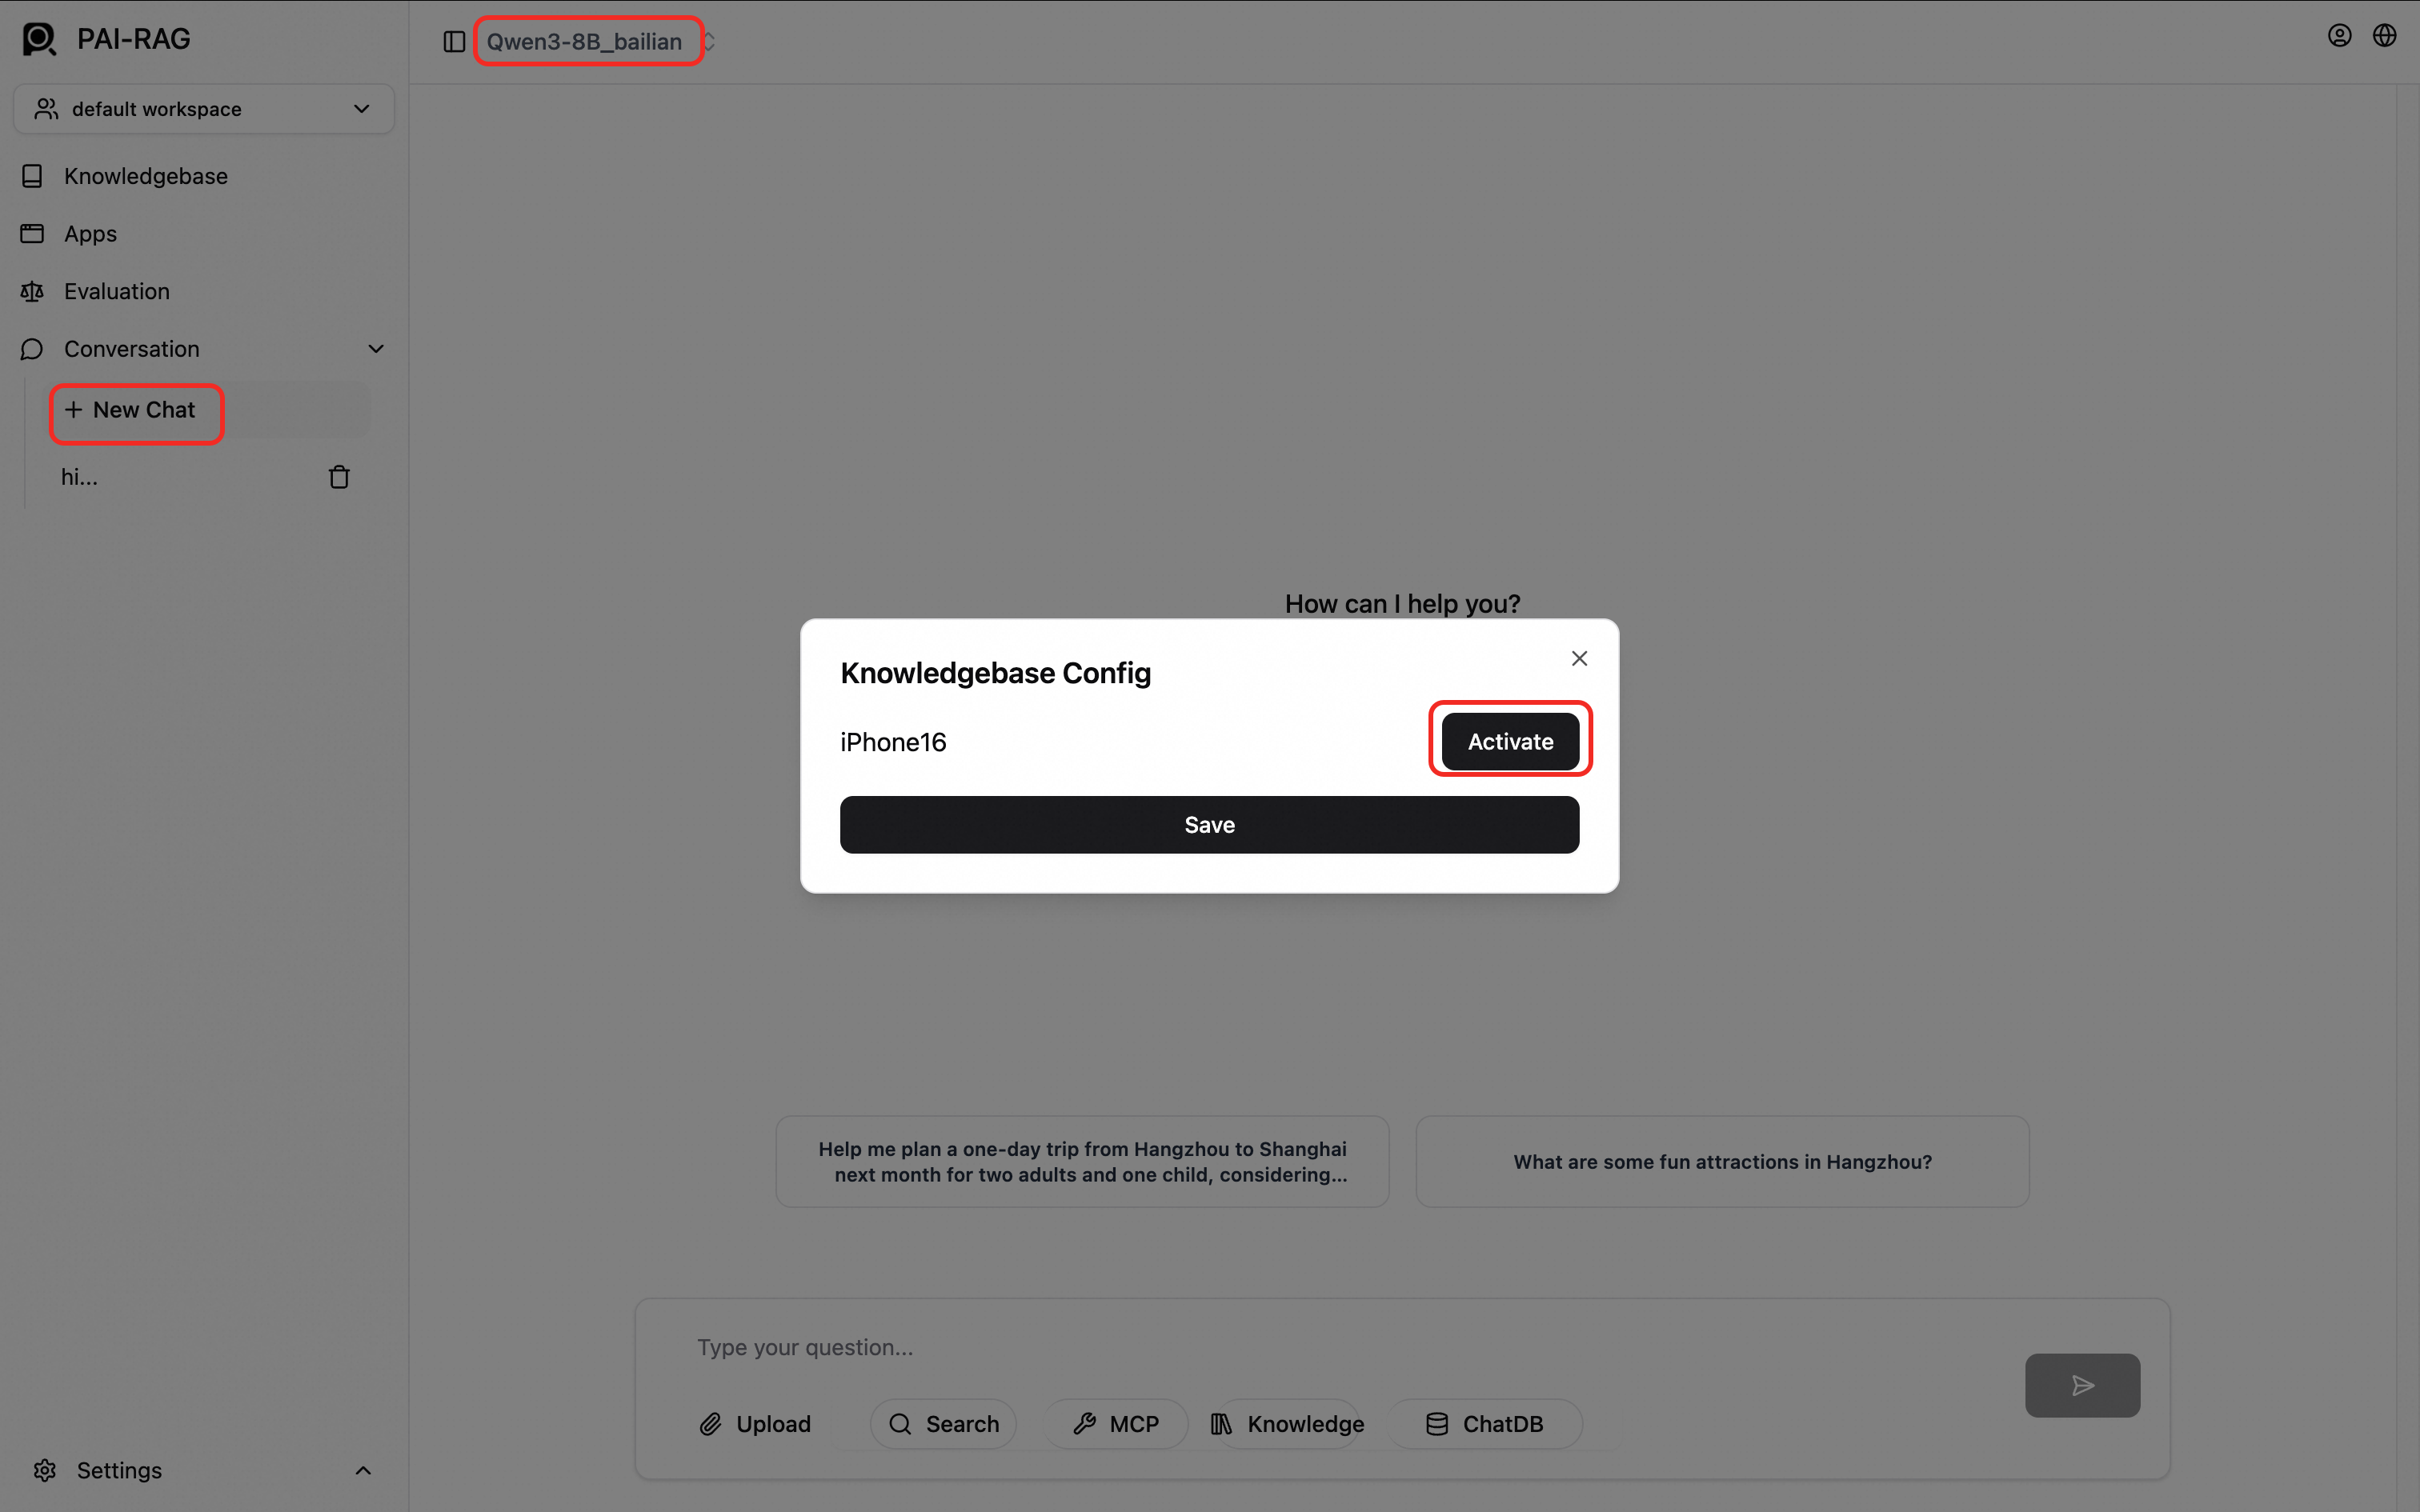
In the left-side navigation pane, click New Chat. At the top of the chat page, select a model. At the bottom, click Knowledge Base, select a knowledge base such as iPhone16, click Activate, and then click Save.
NoteTest the model configuration in a chat before activating a knowledge base.
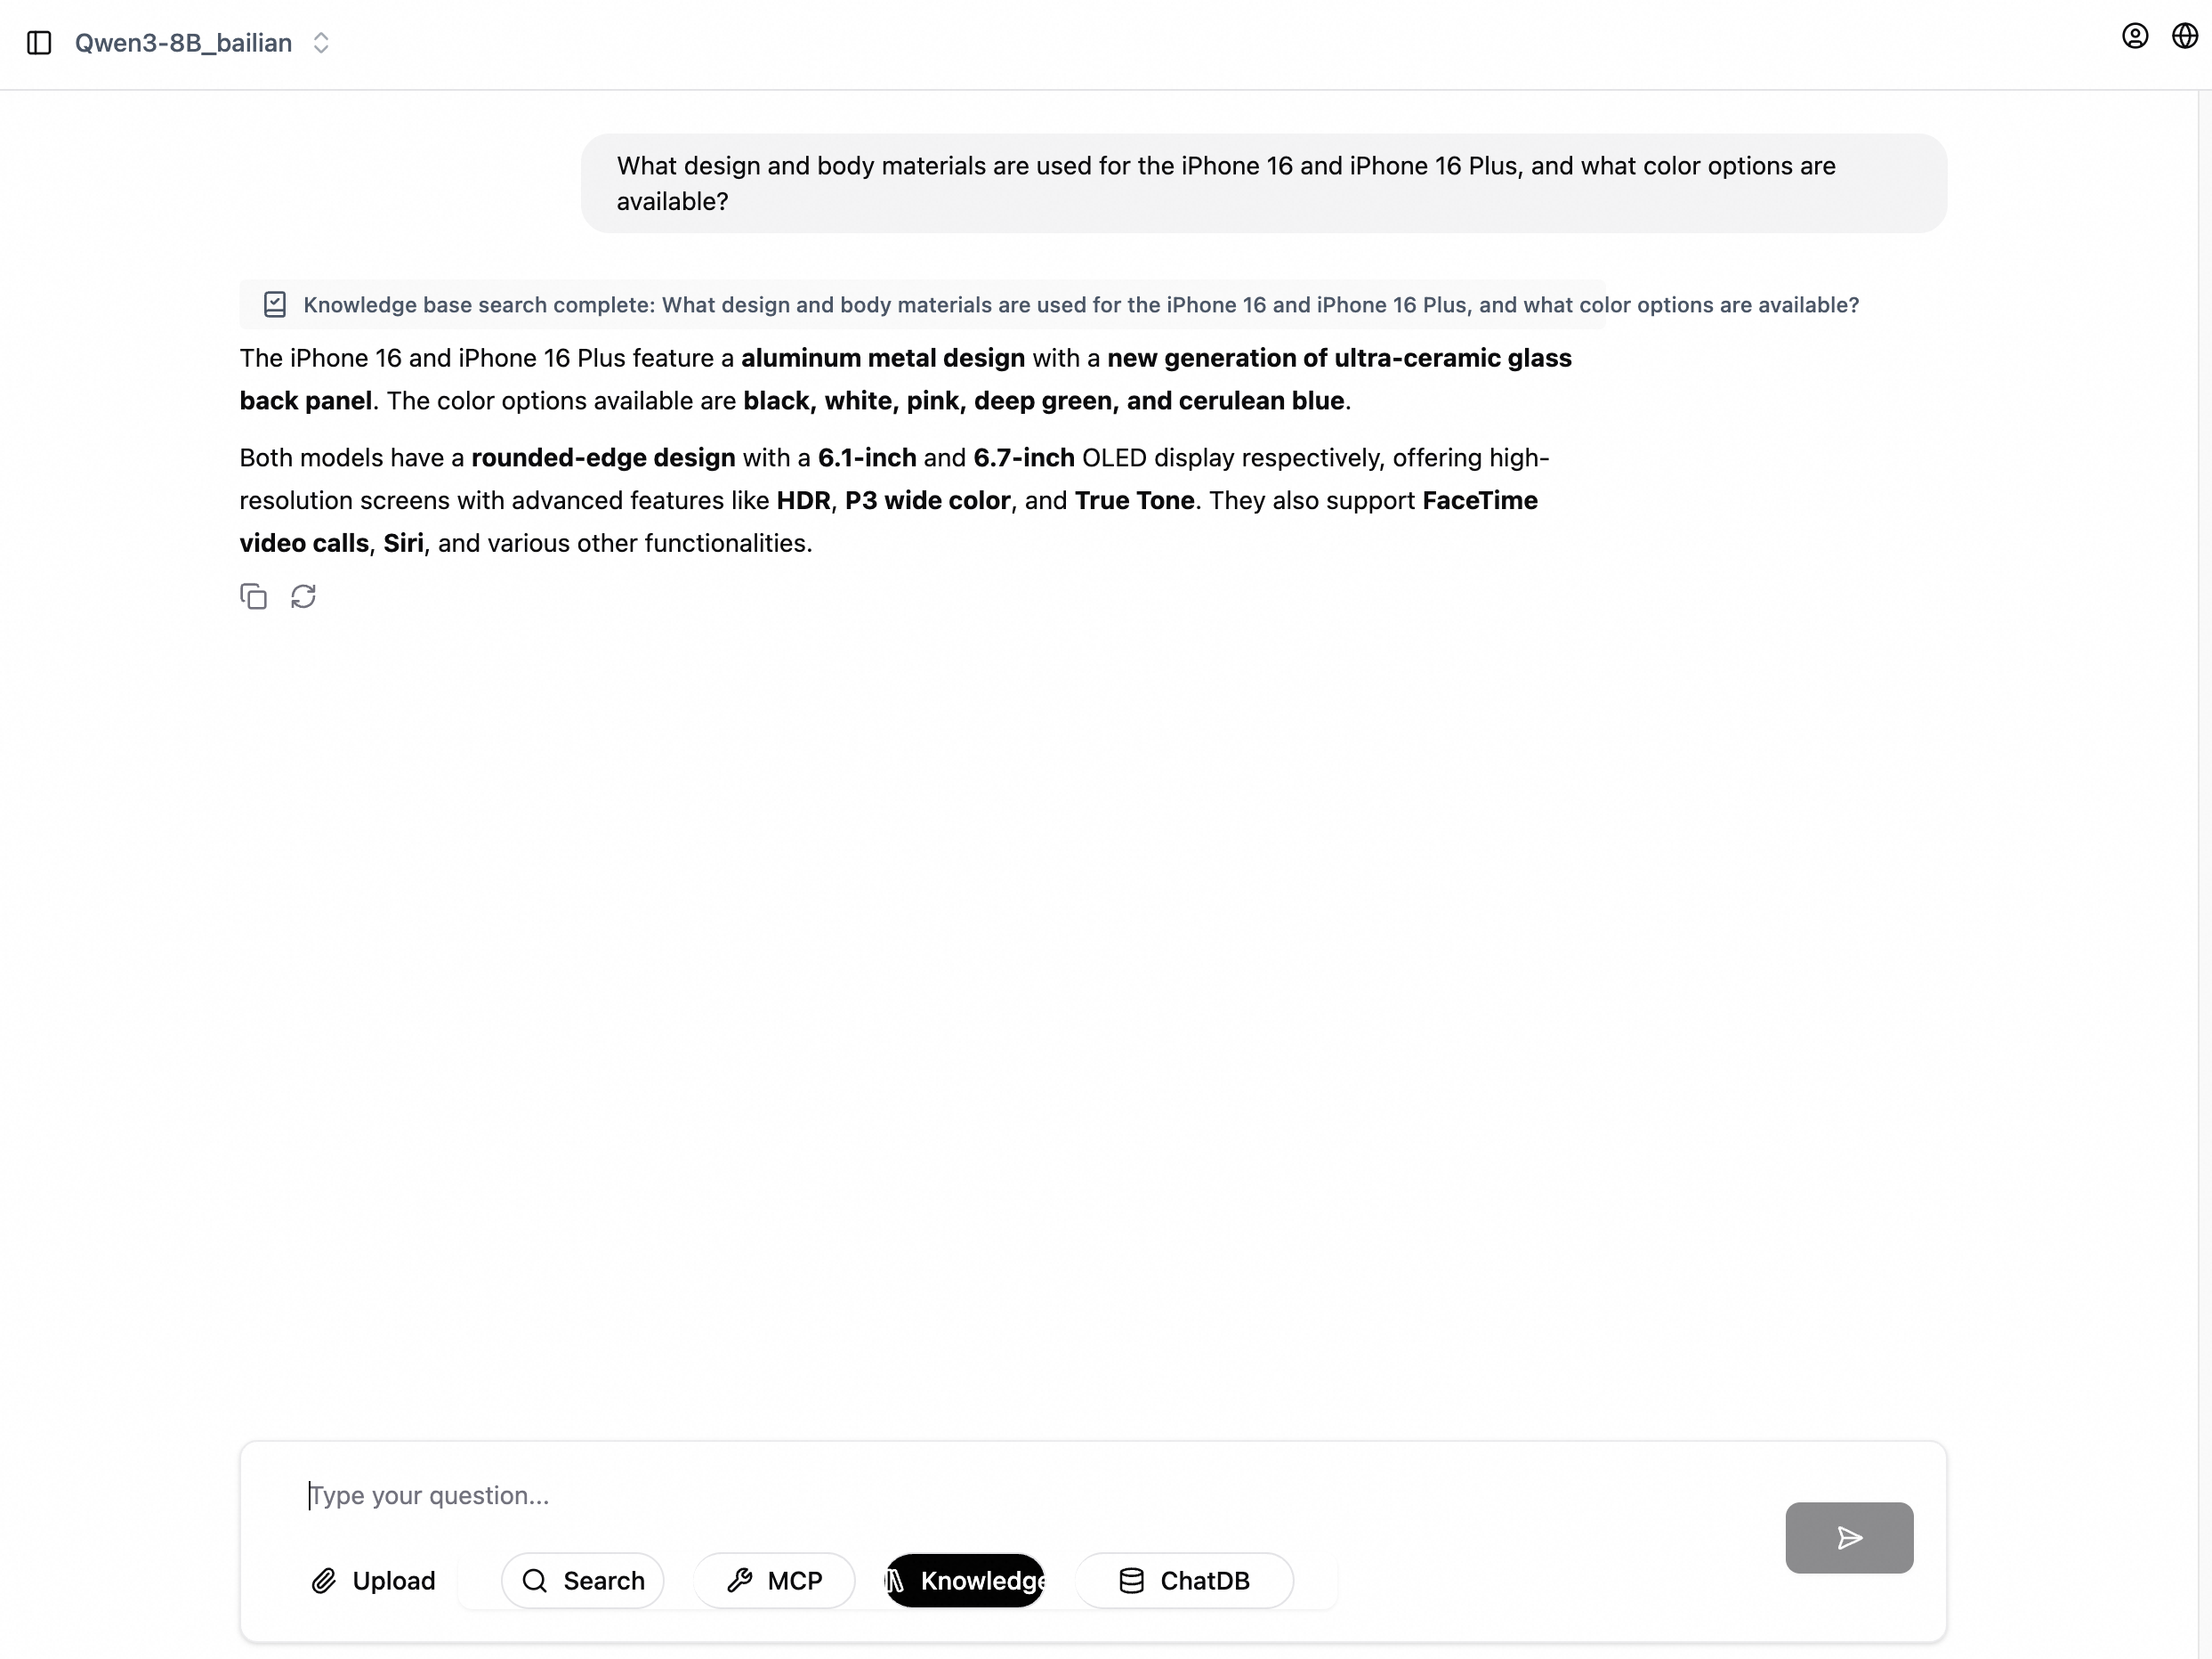
Enter your question in the chat box.
Step 3: Explore advanced Q&A modes
Multimodal Q&A
Multimodal Q&A requires OSS environment variables for file storage and a multimodal model.
Configure OSS storage environment variables for the RAG service. Scenario-based deployment does not support environment variables directly. On the service deployment page, click Convert to Custom Deployment in the upper-right corner. For an existing service, click Update to open the deployment page. In the Environment Information section, add the following environment variables:
FILE_STORE_TYPE: oss.
OSS_BUCKET: Your OSS bucket name.
NoteWhen FILE_STORE_TYPE is set to oss, a directory named
pairag_knowledgebasesis automatically created in the OSS_BUCKET to store uploaded knowledge base files and chat attachments. If FILE_STORE_TYPE is not set, files are stored in the mounted OSS directory.OSS_ENDPOINT: OSS endpoint. See OSS regions and endpoints. Example:
oss-cn-hangzhou.aliyuncs.com.OSS_ACCESS_KEY_ID and OSS_ACCESS_KEY_SECRET: AccessKey ID and AccessKey secret with the AliyunOSSFullAccess permission.
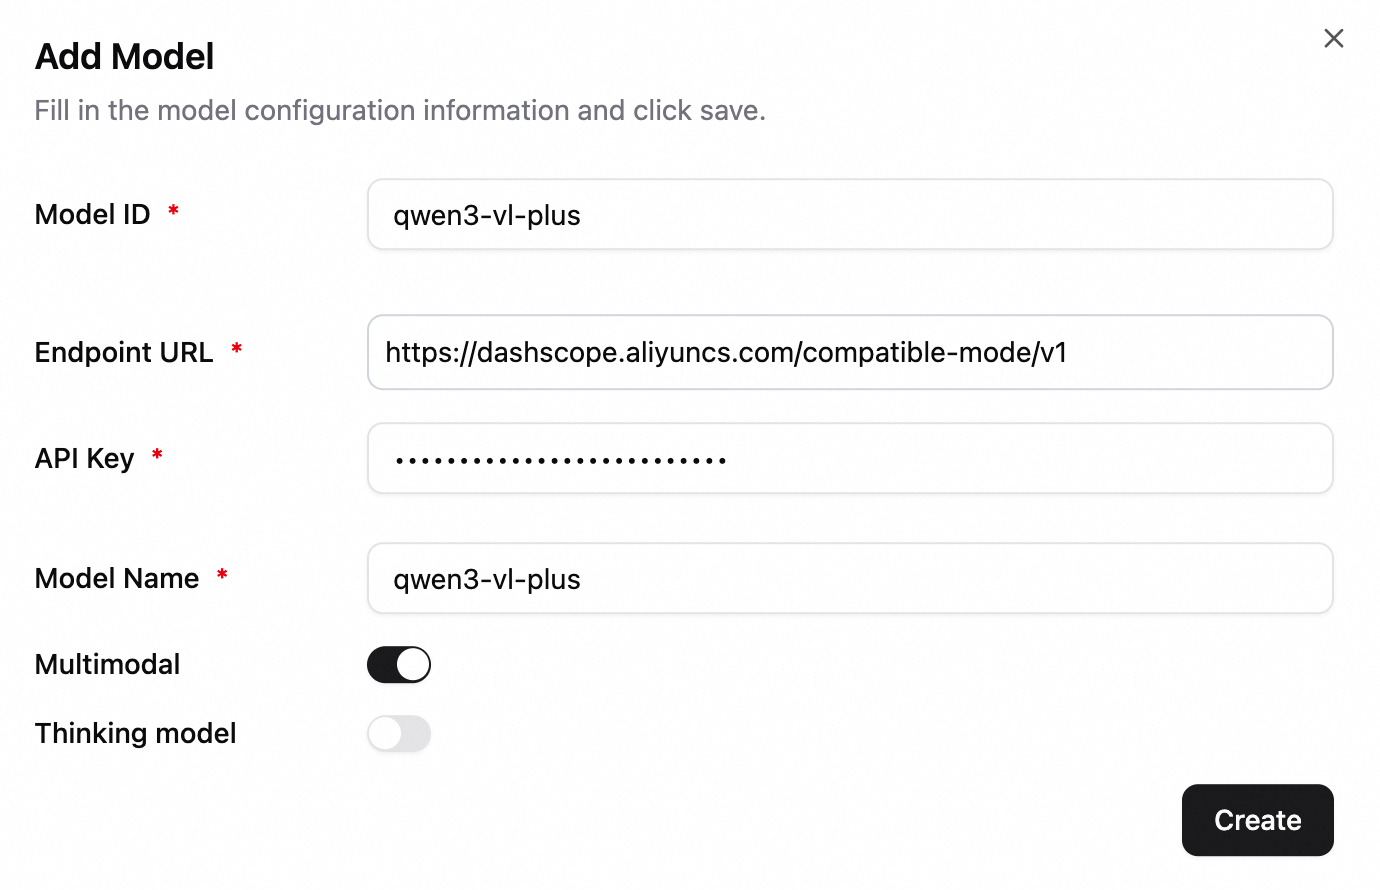
Configure a multimodal LLM (such as Qwen-VL series). The following example uses qwen3-vl-plus. Enable the multimodal model switch.
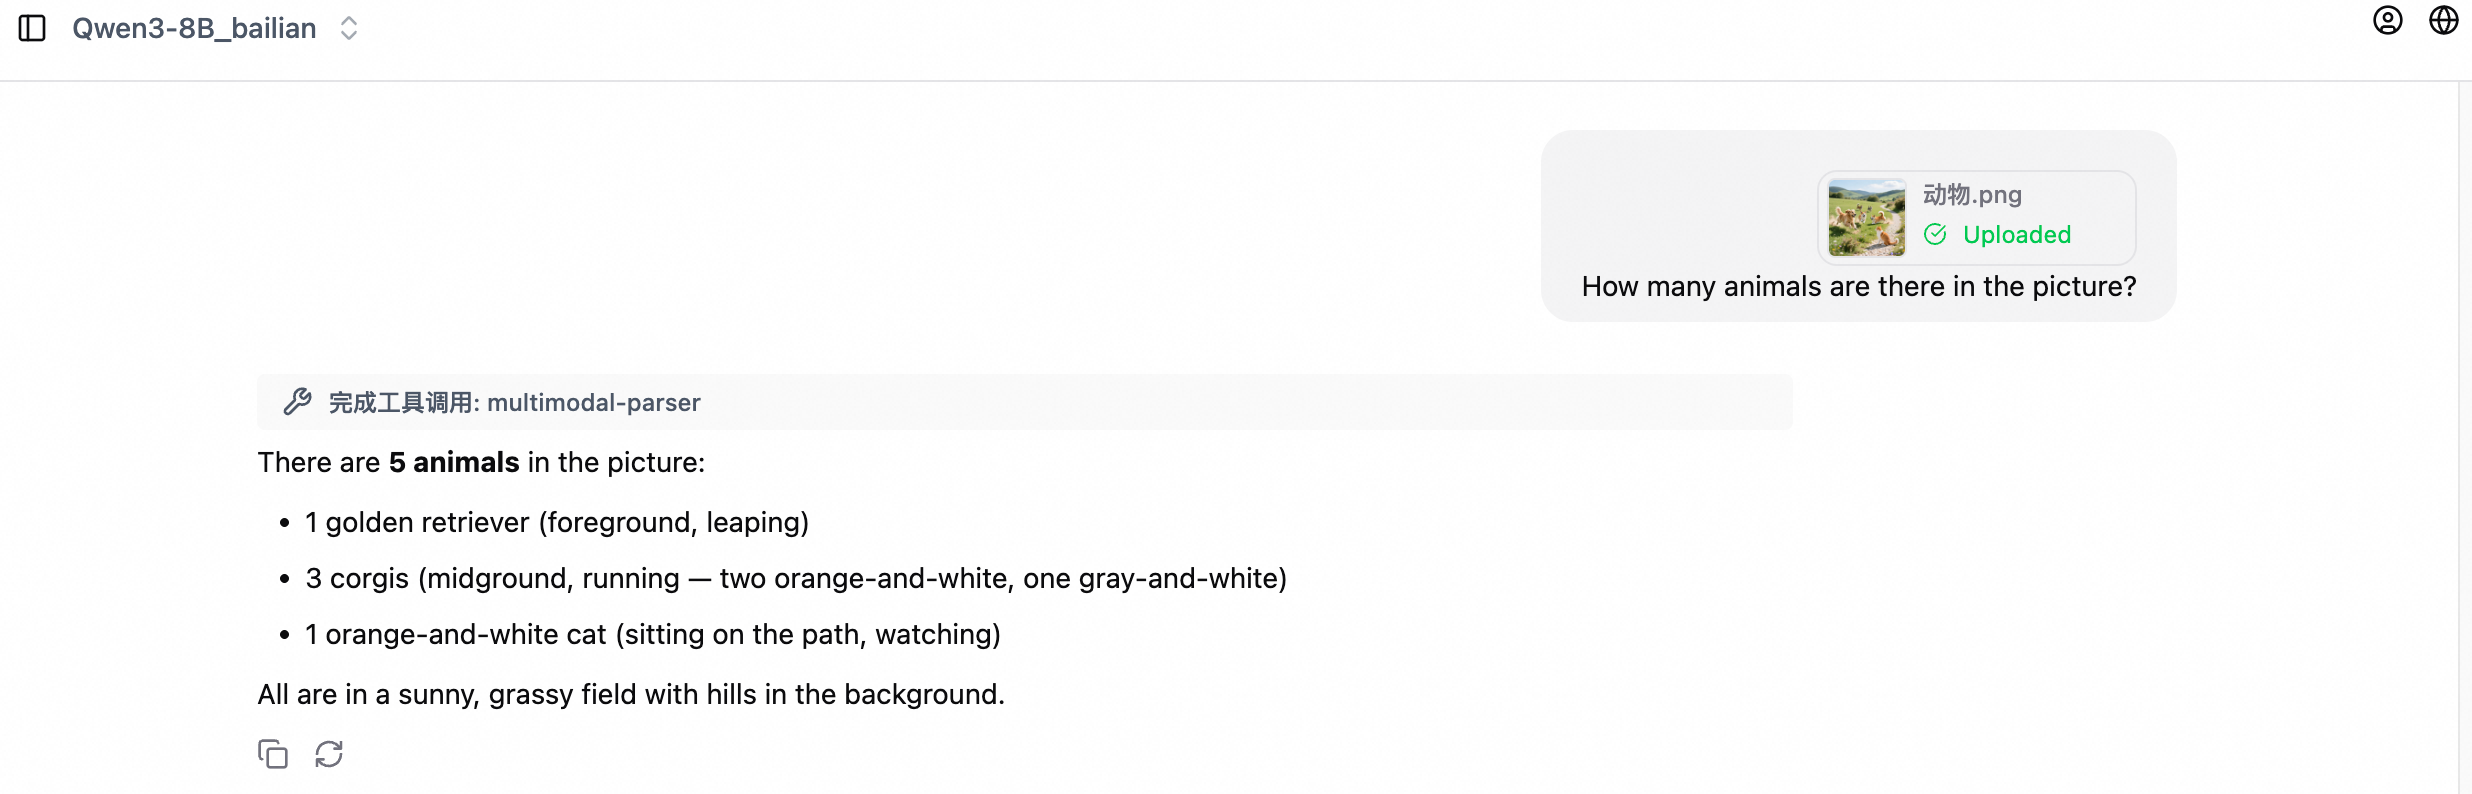
Chat example:
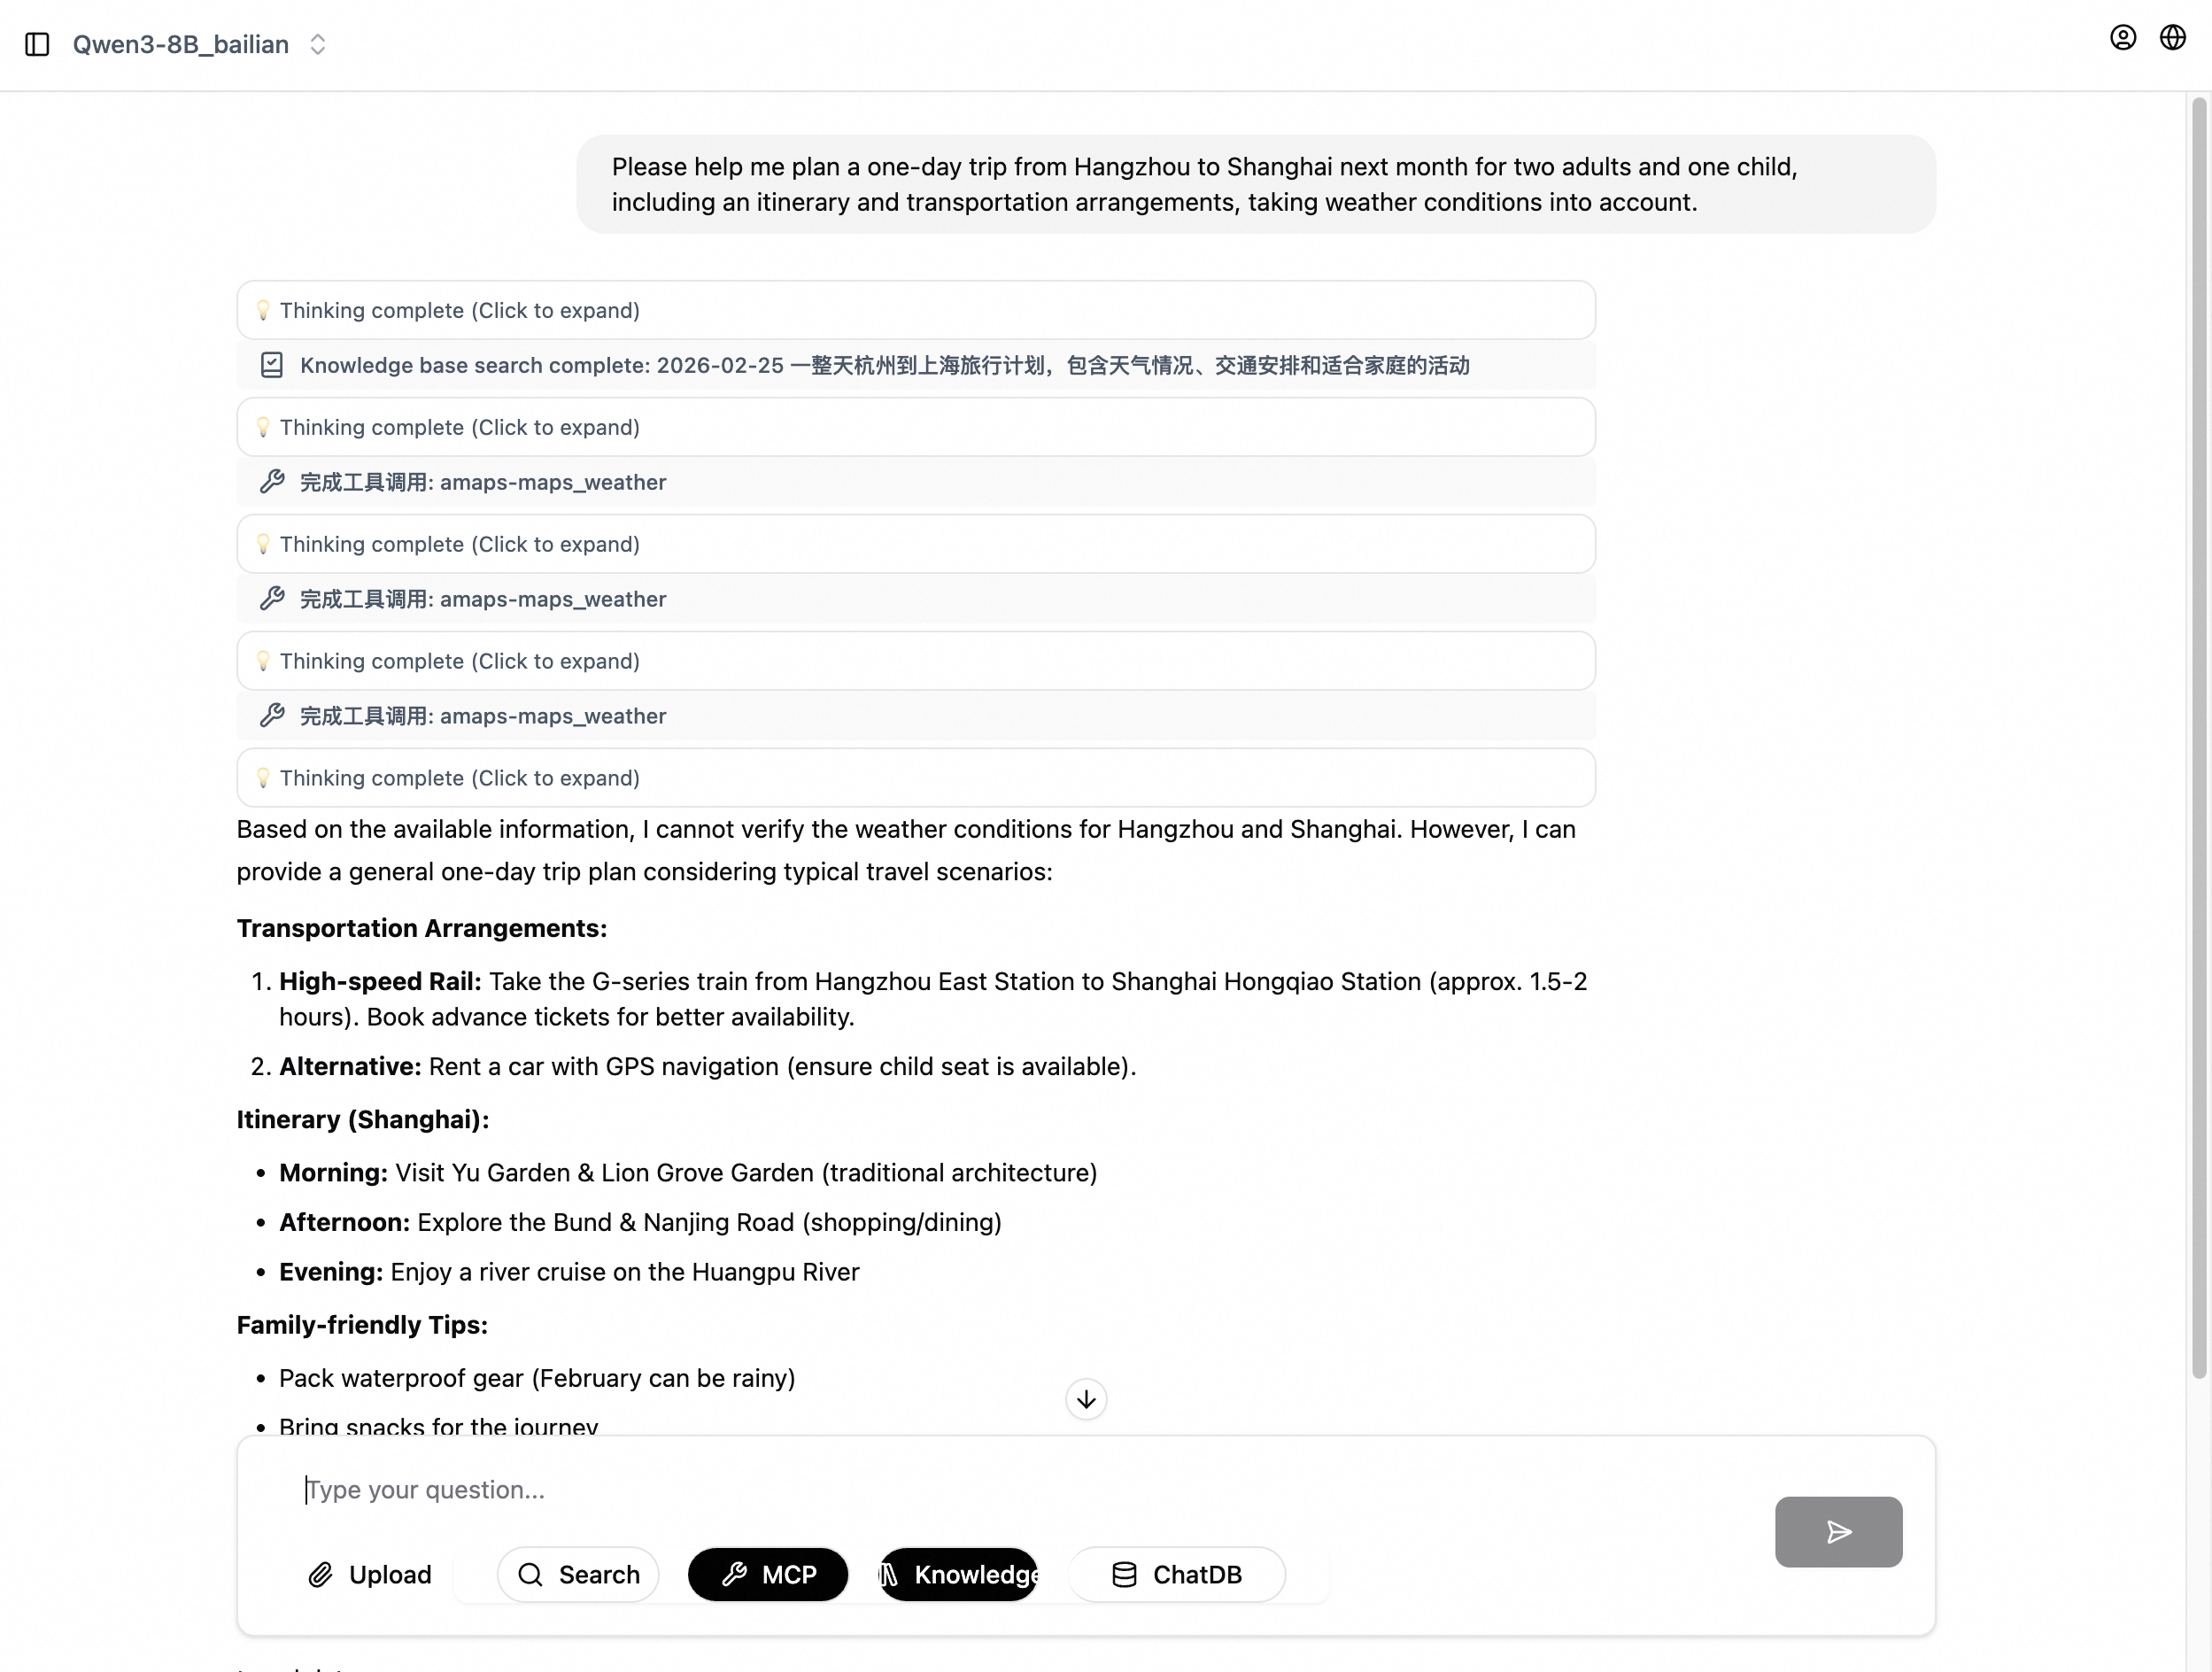
Agentic Q&A
This mode uses the model's reasoning to call external tools such as search and maps for answering complex questions.
Example workflow:
Configure a Deep Thinking model. In the model configuration, enable the Deep Thinking option.
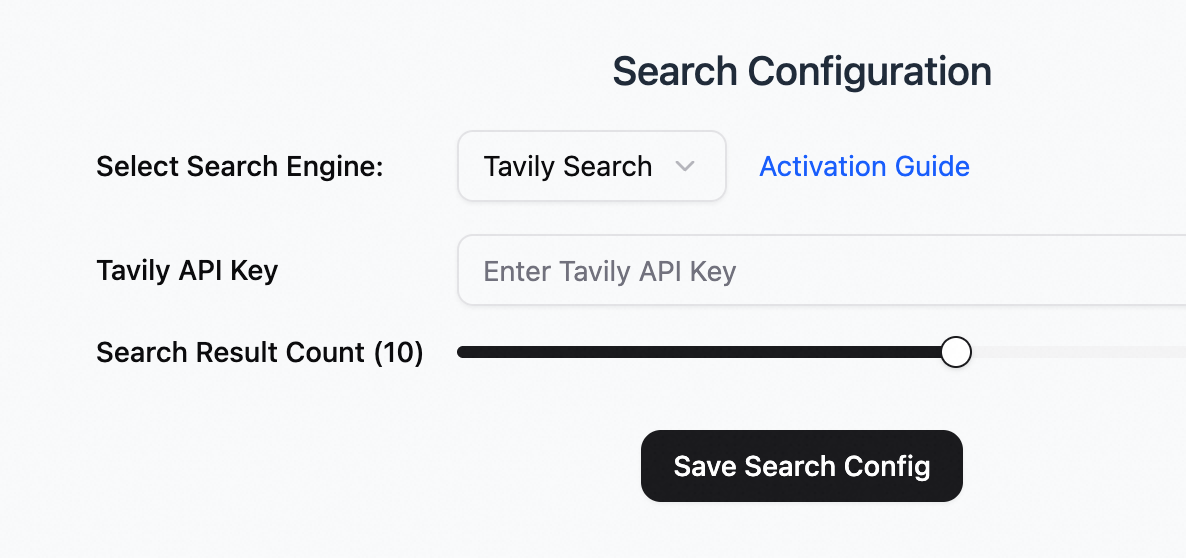
Configure search.
Select a search engine: Tavily Search.
For Chinese search, you can also configure Alibaba Cloud General Search.
Tavily API key: Register at the Tavily official website to obtain an API key.
Configure Amap MCP. In the lower-left corner, click Settings > MCP and configure the following parameters.
MCP name: amaps
MCP link: https://mcp-server-amap-jitptfyoyw.cn-hangzhou.fcapp.run/sse
MCP type: SSE
Test the conversation. In the left-side navigation pane, click New Chat. At the top, select the Qwen3-8B_bailian model. At the bottom, select Deep Thinking, Search, and MCP (activate amaps).
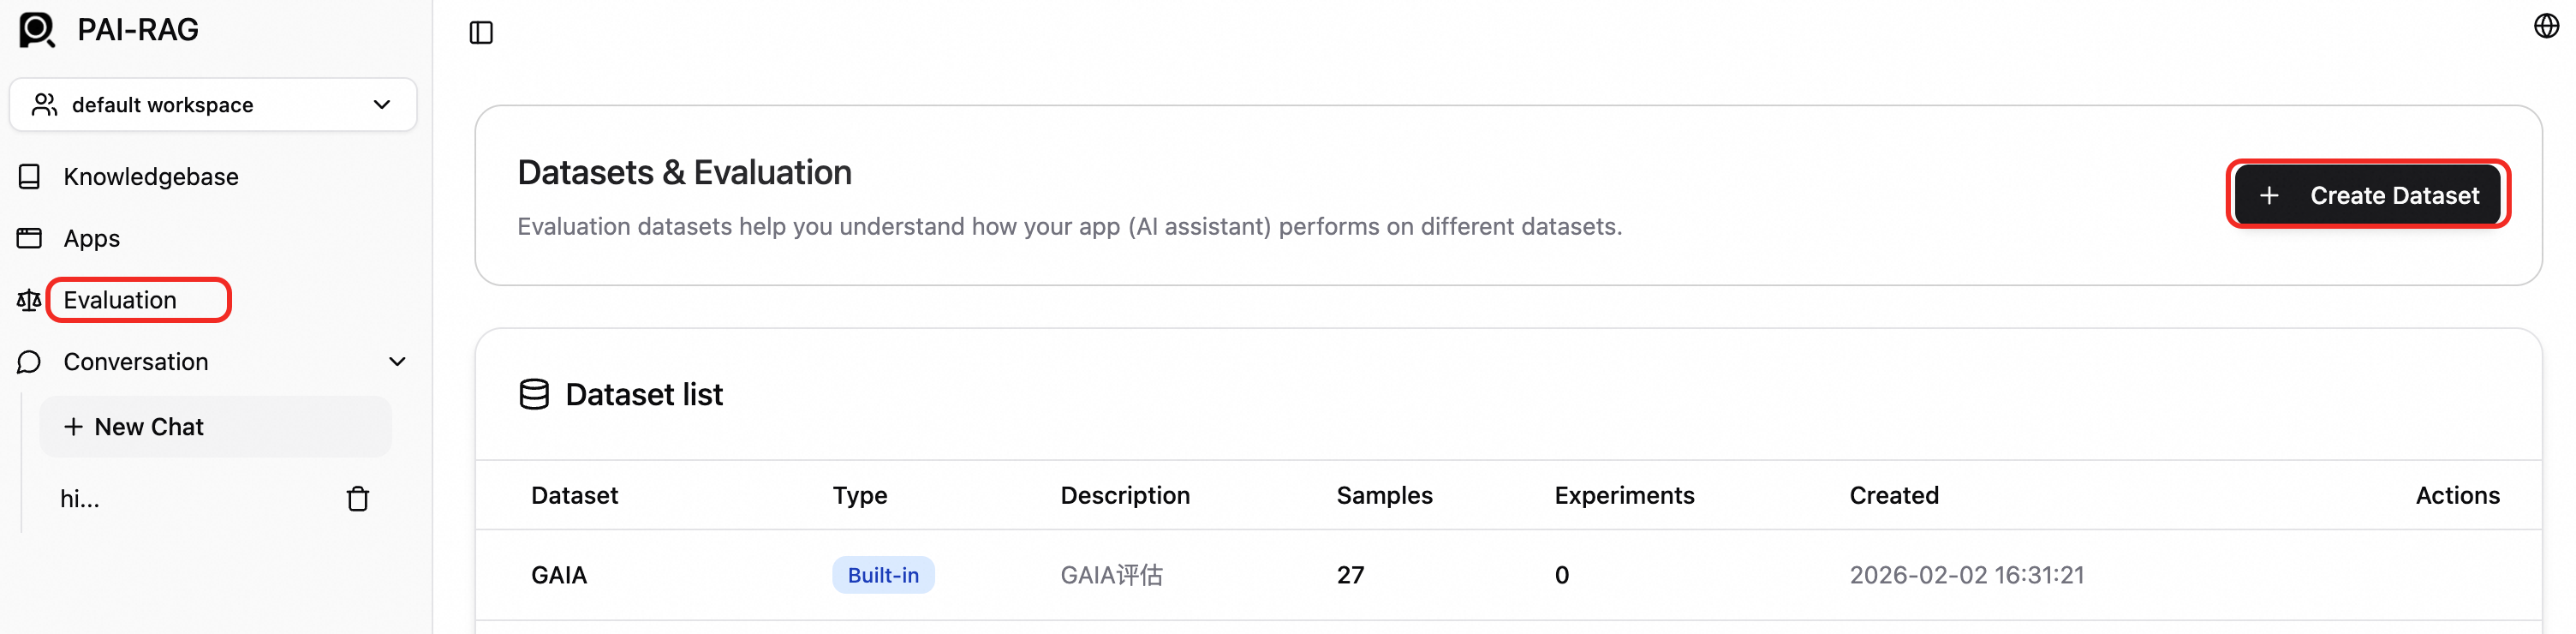
Step 4: Evaluate RAG performance
The RAG system includes a built-in evaluation module for quantitatively analyzing Q&A performance across configurations.
Create a dataset. In the left-side navigation pane, click Evaluation. On the Evaluation page, click Create Dataset.
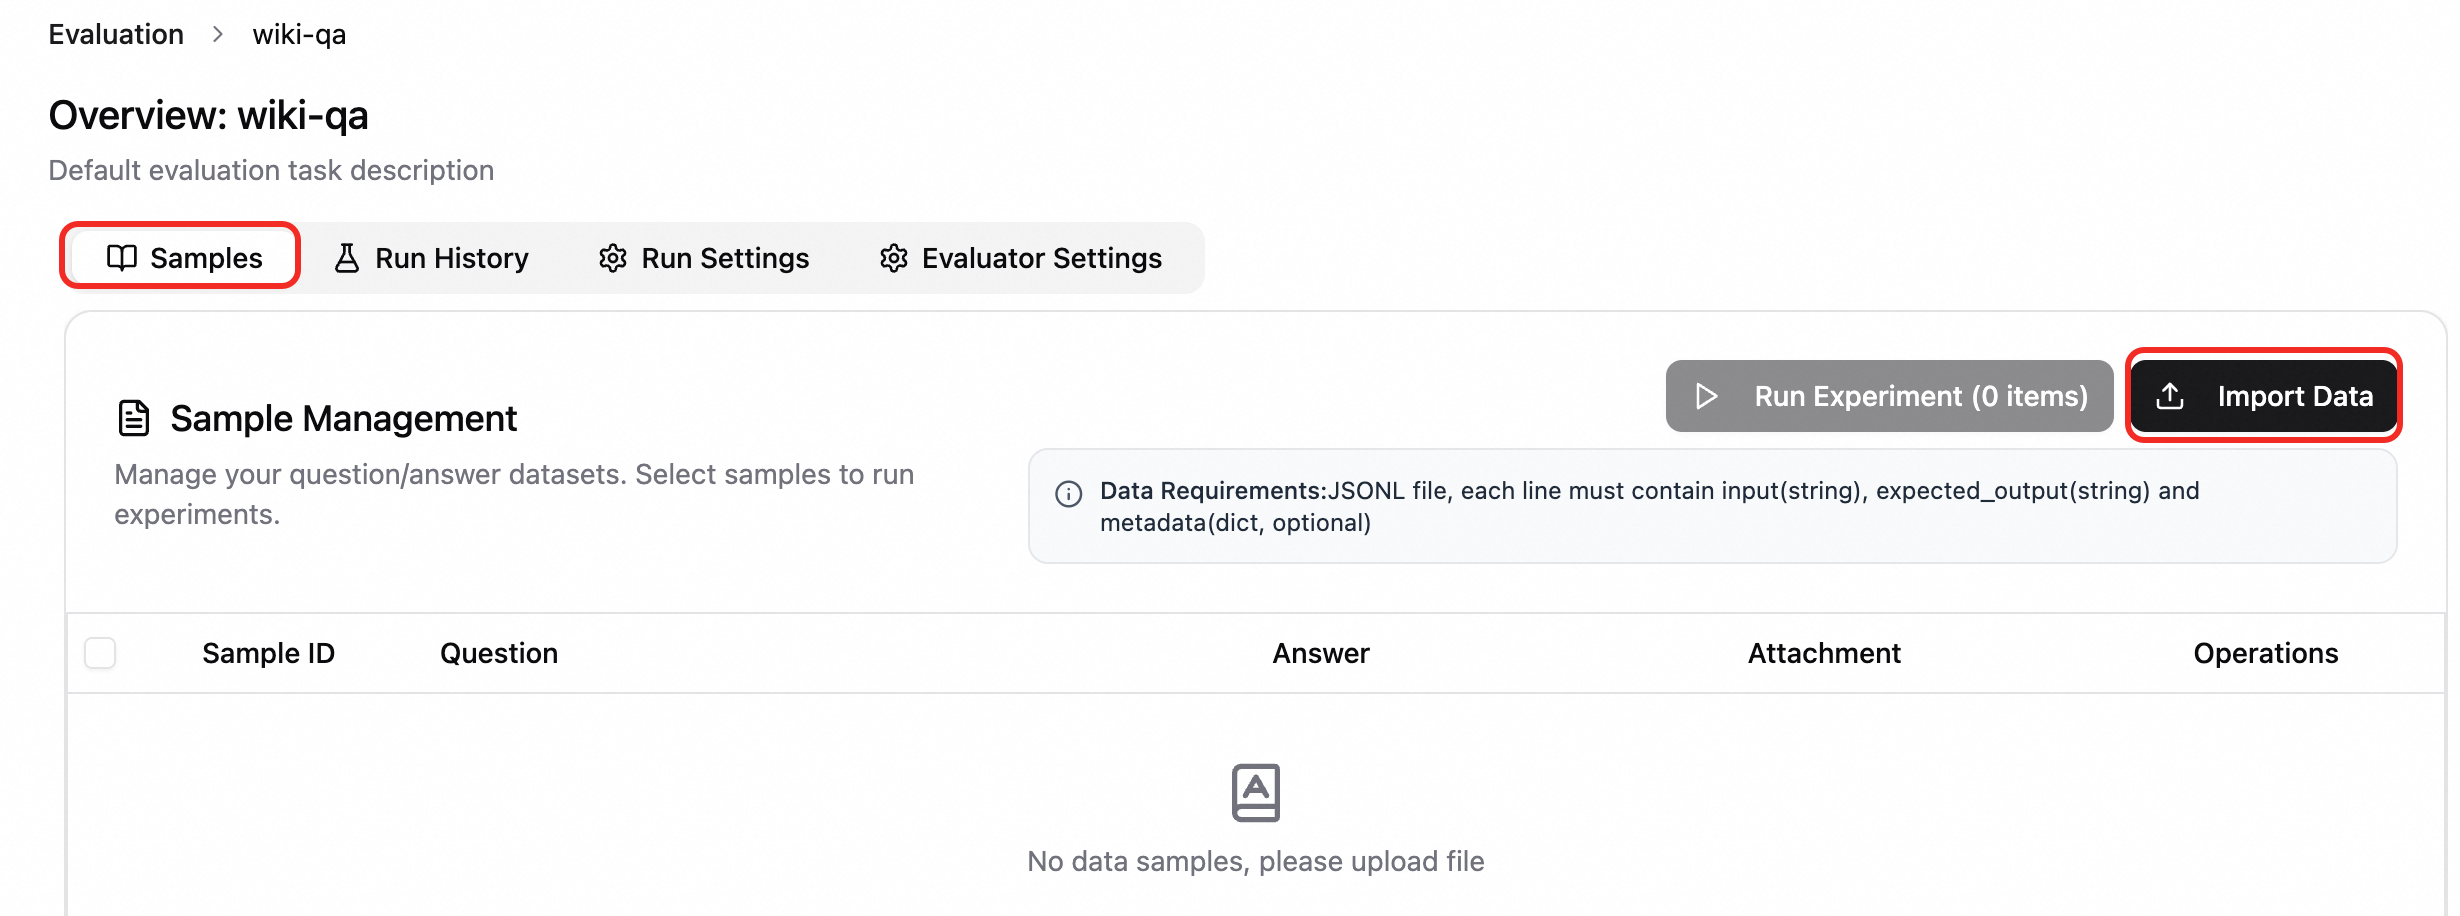
Import samples. Click the dataset to open the evaluation task. On the Samples tab, click Import Data.
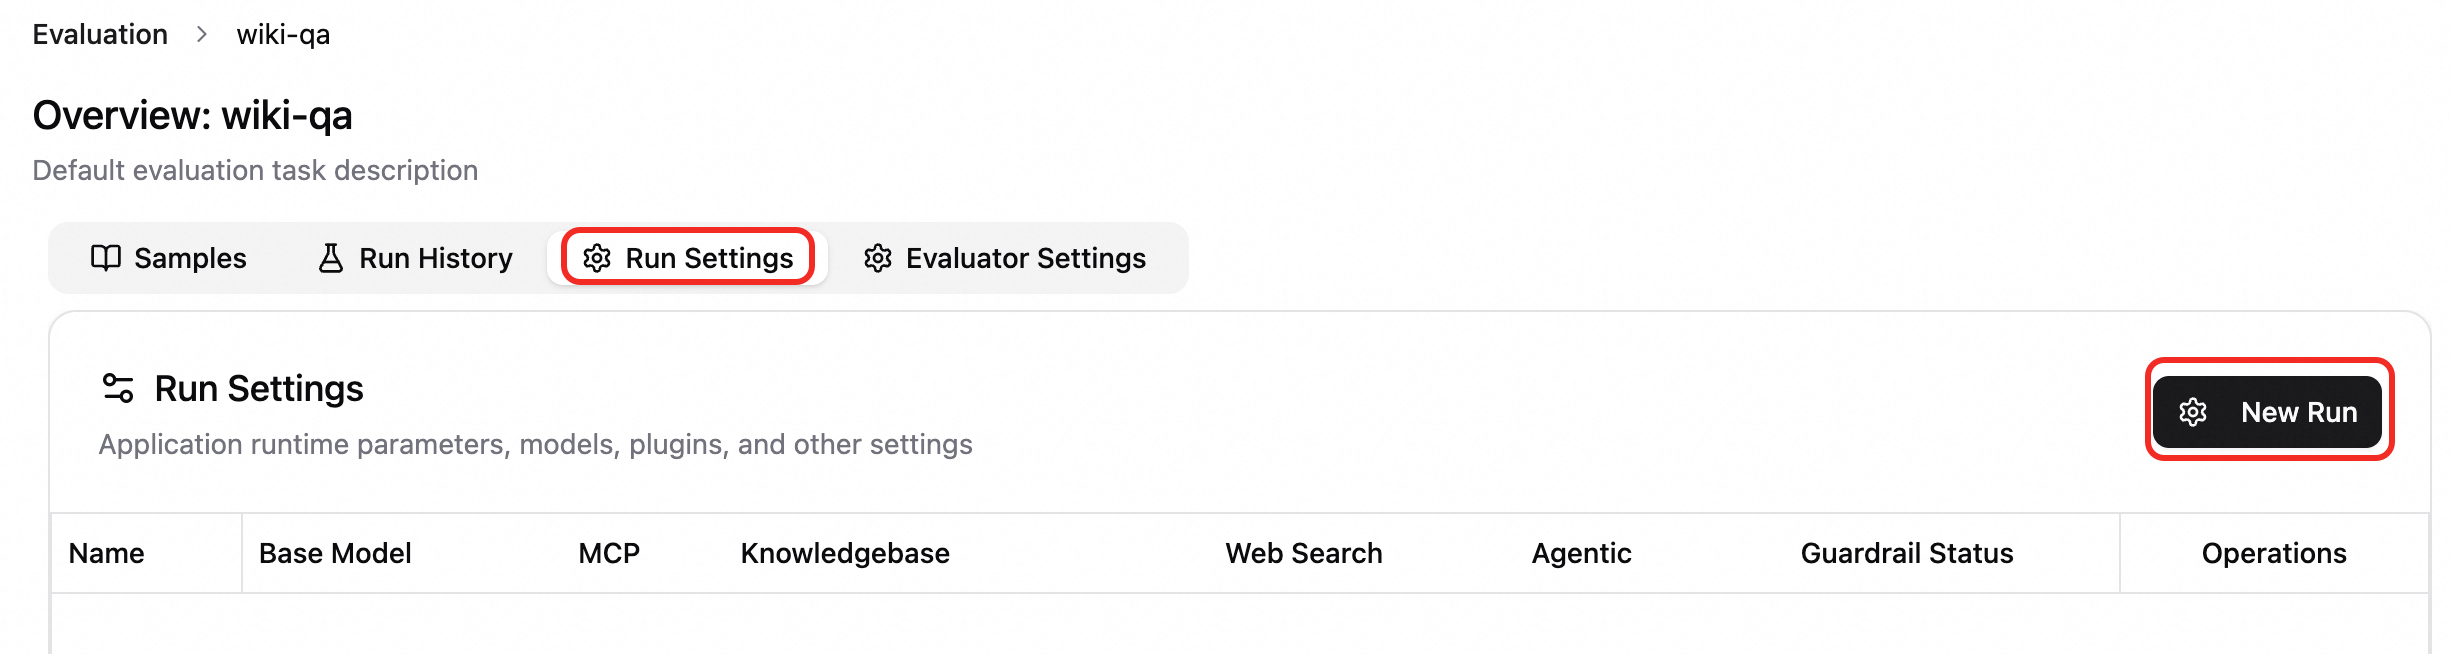
Create a run configuration. On the Run Settings tab, click Create Configuration and configure settings as needed.
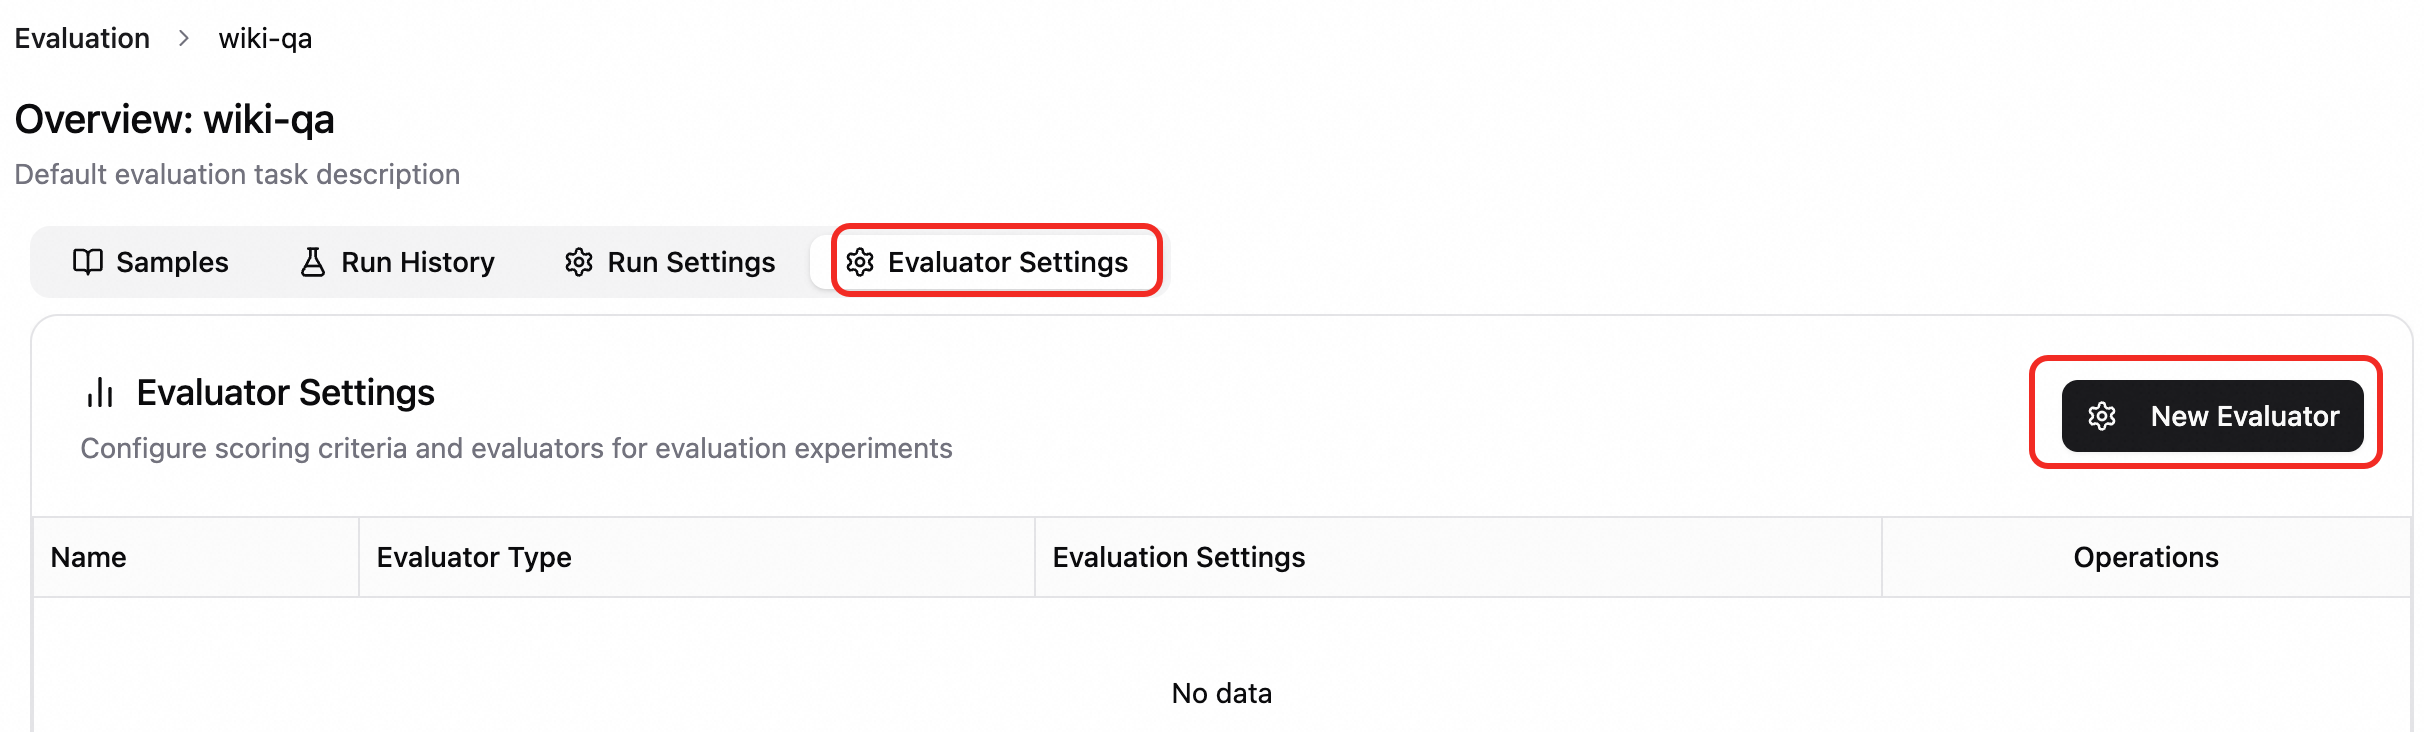
Create an evaluation configuration. On the Evaluator Settings tab, click Create Configuration and select the configuration and evaluator type as needed.
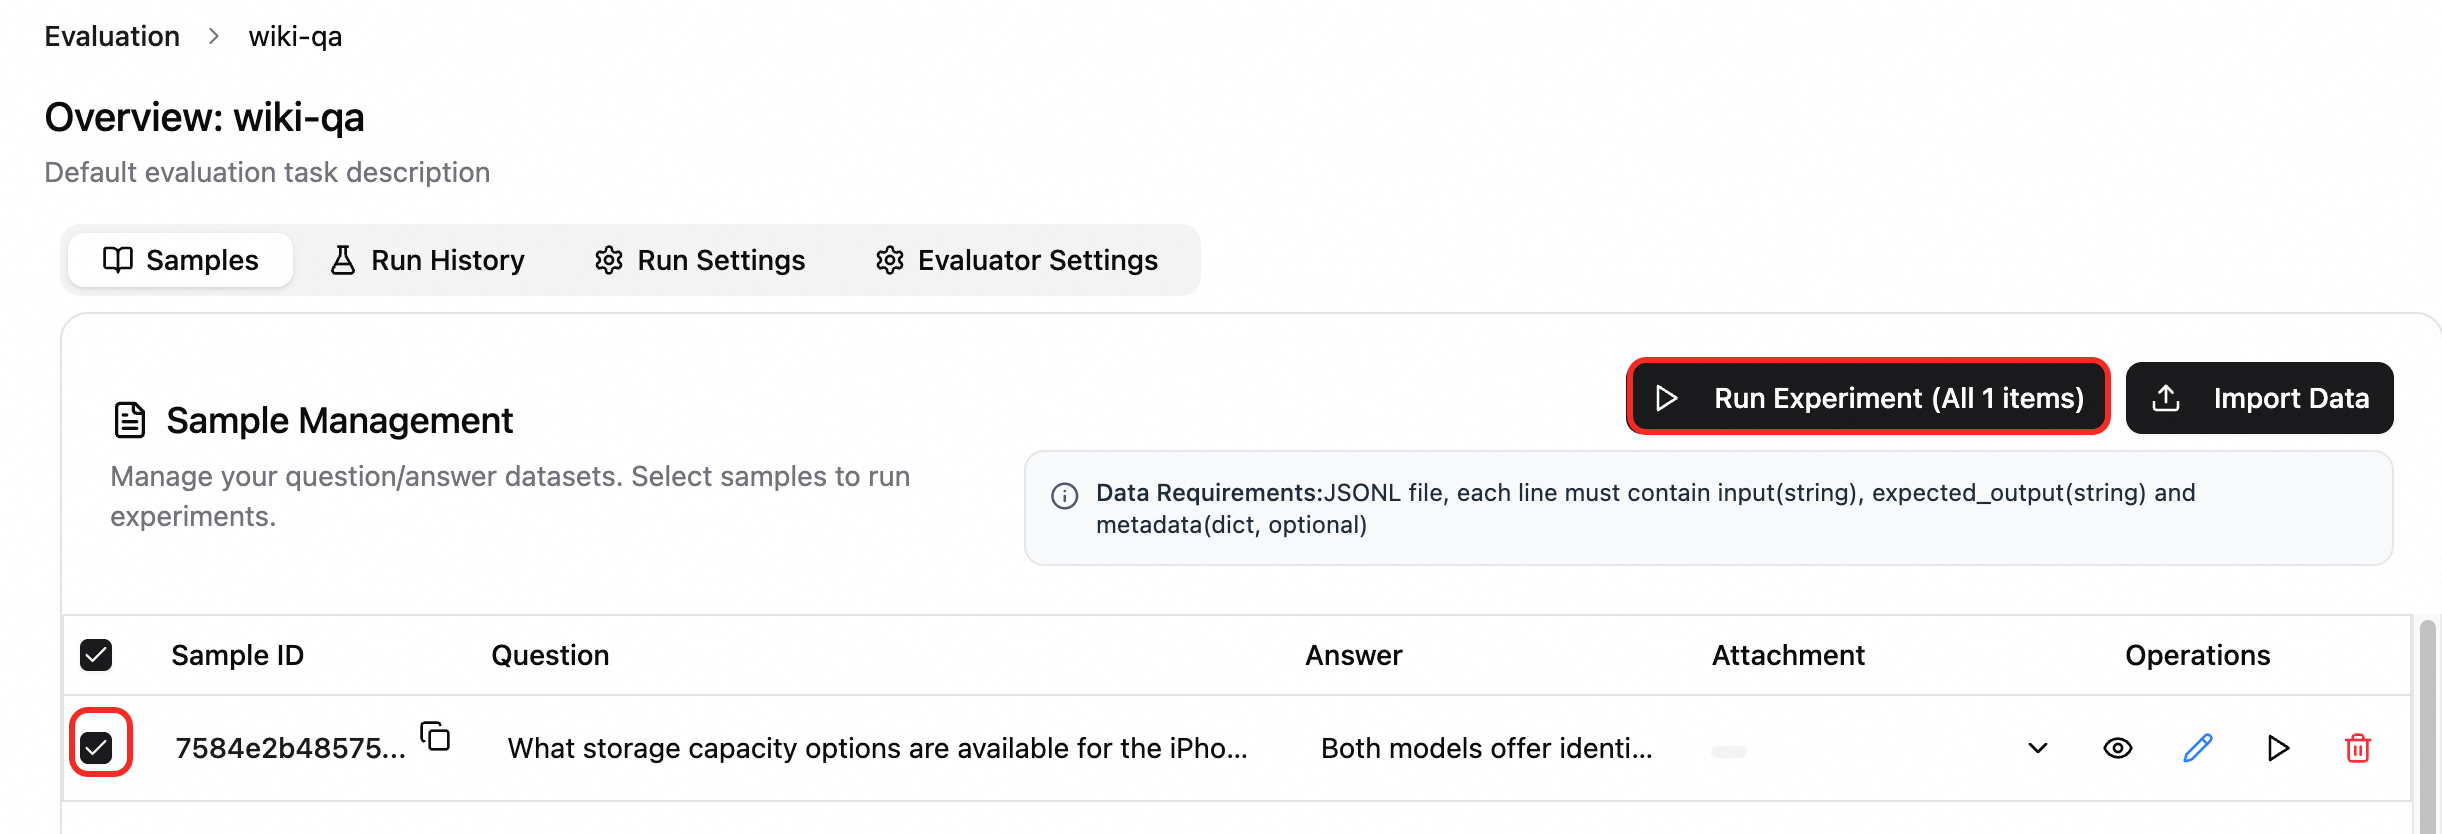
Run an evaluation. On the Samples tab, select the samples to evaluate and click Run Experiment. Enter a name and select a Run Configuration and Evaluation Configuration.
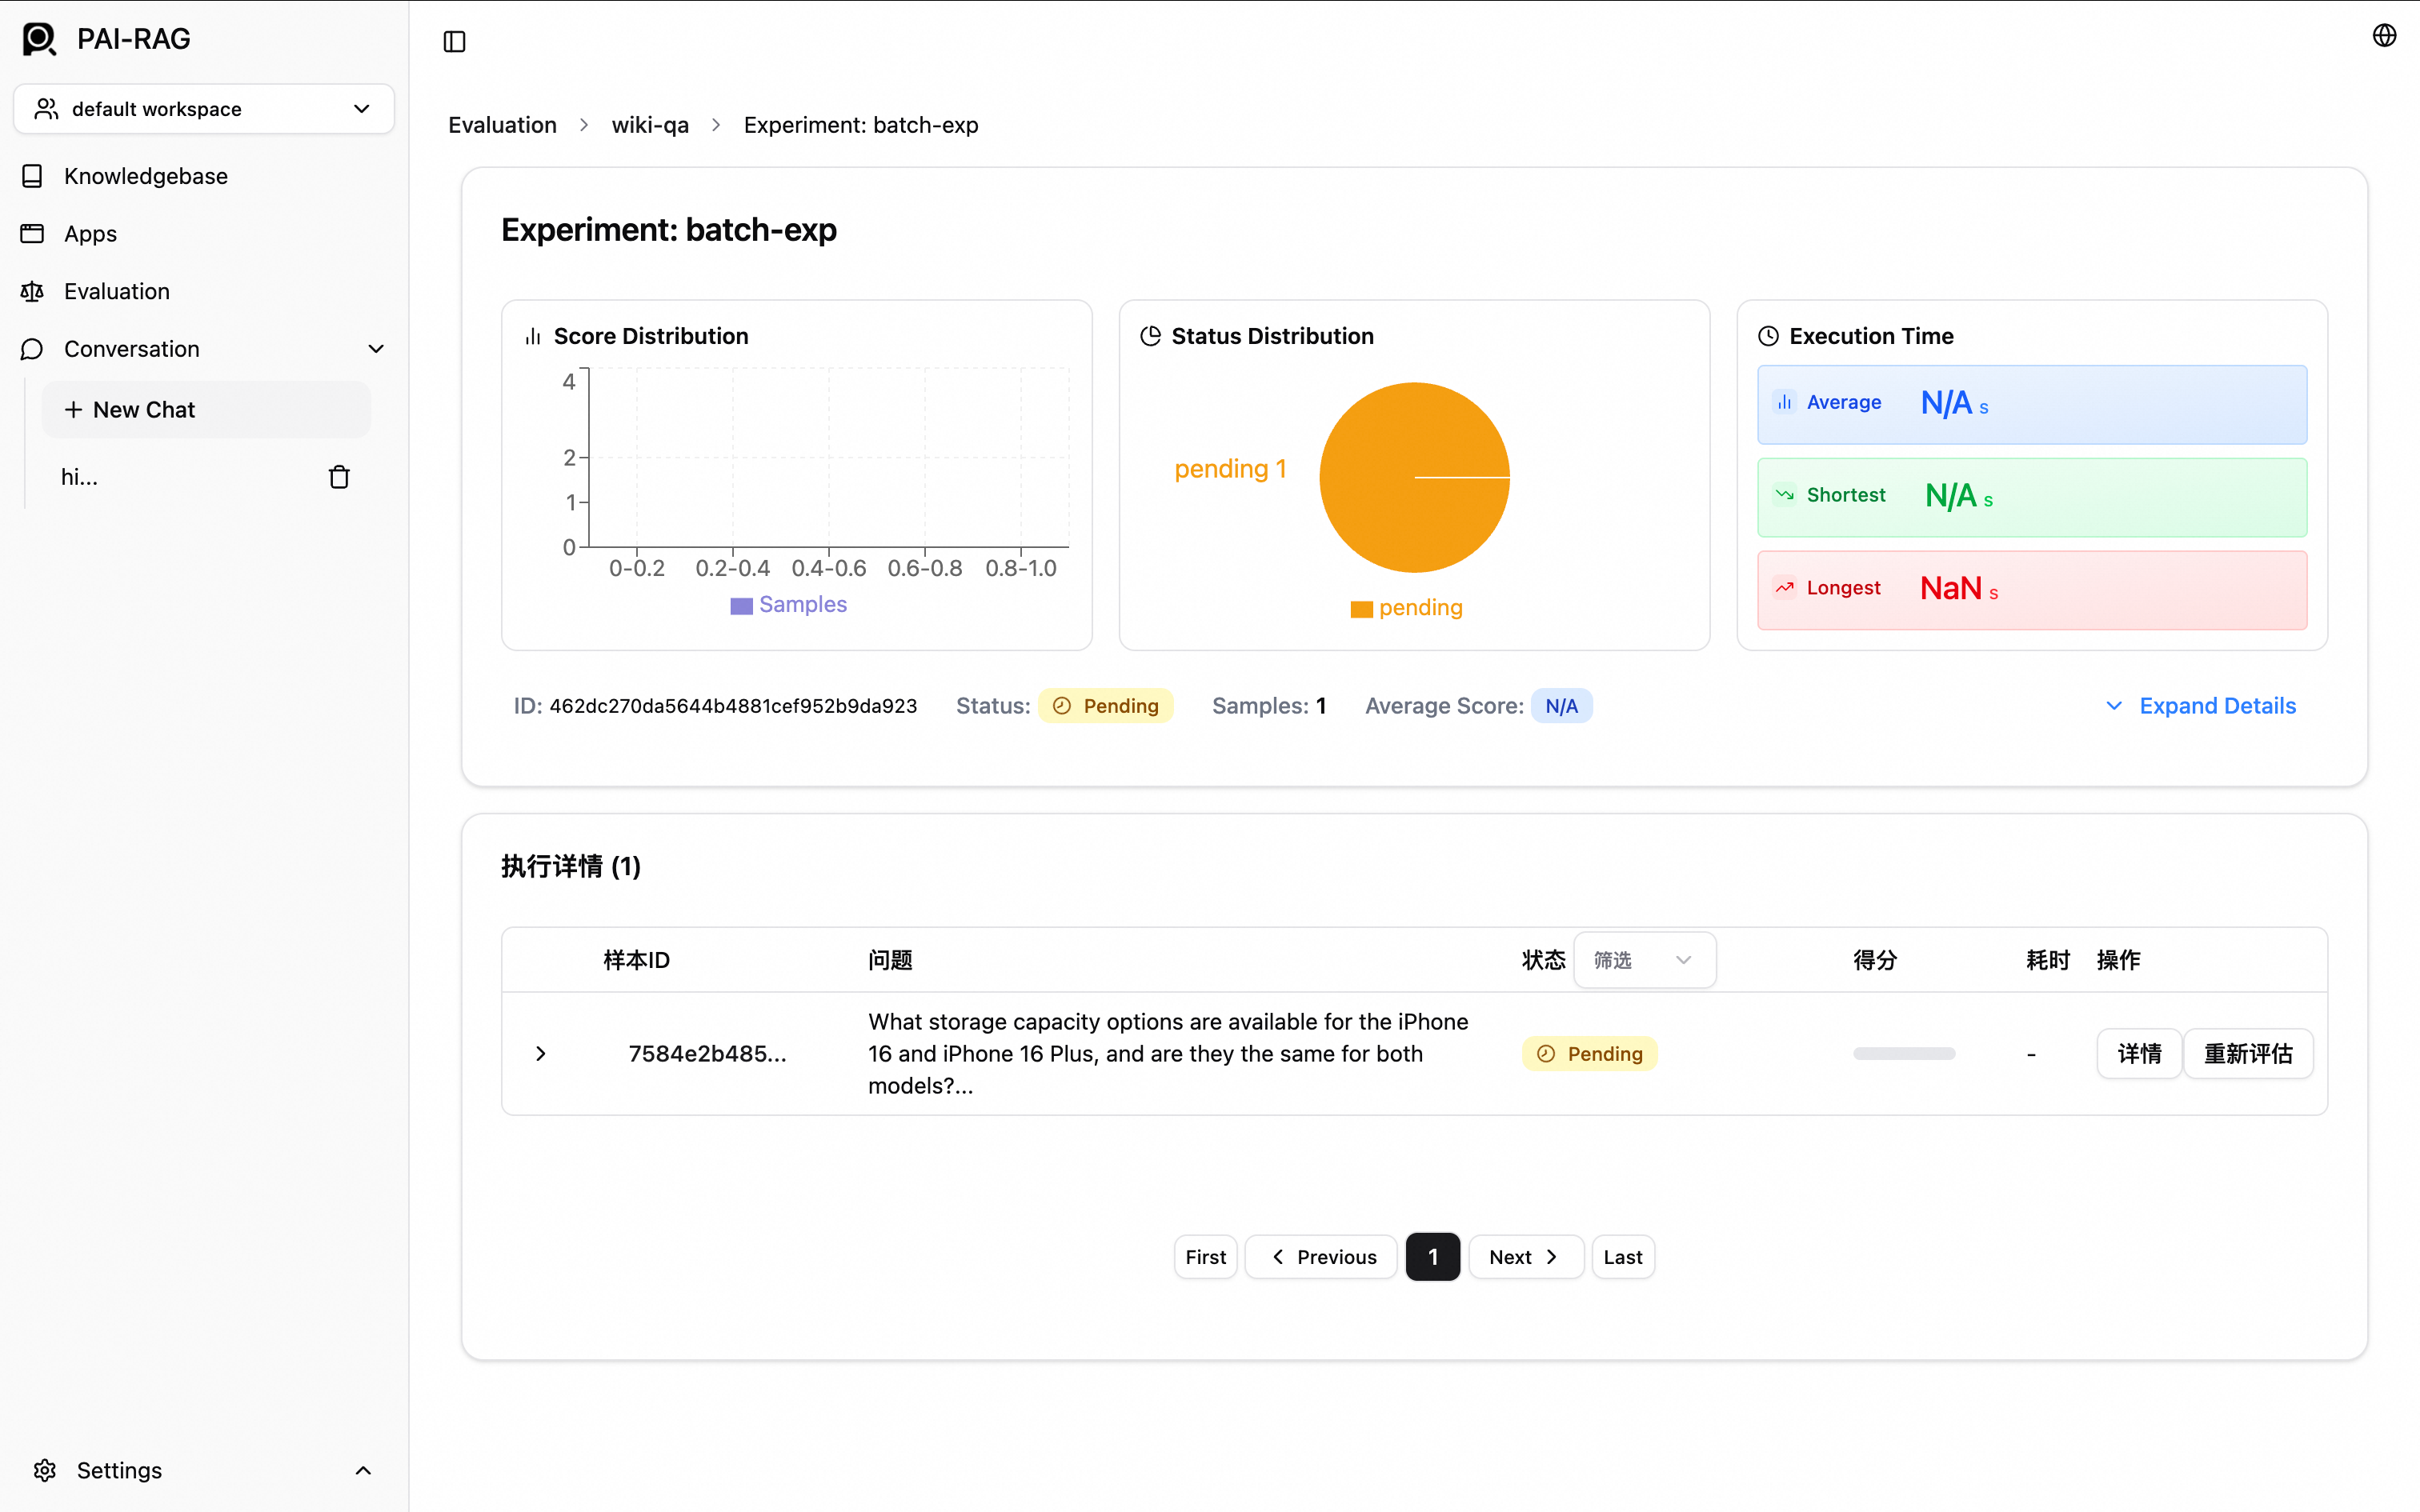
View results. After the experiment is created, the experiment details page opens automatically. Alternatively, switch to the Run History tab and select the target experiment.
Production deployment
Use an Alibaba Cloud vector database
PAI-RAG supports vector databases built with Elasticsearch, Hologres, OpenSearch, or RDS for PostgreSQL.
Hologres, Elasticsearch, and RDS for PostgreSQL support internal network and public internet access. Internal network access is recommended.
OpenSearch supports access only over the public internet.
Elasticsearch
Prepare an Elasticsearch instance
If no Elasticsearch instance is available, log on to the Alibaba Cloud Elasticsearch console and create one with the following settings. For details, see Create an Alibaba Cloud Elasticsearch instance.
Region and availability zone: Same region as your PAI-EAS service.
VPC: Same VPC as your PAI-EAS service for internal network access.
Instance type: Select Standard.
Scenario initialization configuration: Select General-purpose.
Service configuration
Enable automatic index creation for your Elasticsearch instance. On the page, click Modify Configurations and set Auto Index Creation to Allowed. For details, see Configure YML parameters.
Vector Database Type: Select Elasticsearch.
Private Endpoint and Port: Private endpoint and port from the Basic Information section of the instance details page. Format:
http://<private IP address>:<port>.Index Name: Behavior depends on the name you enter.
New name: PAI-EAS automatically creates a PAI-RAG-compatible index during deployment.
ImportantAlibaba Cloud Elasticsearch does not allow automatic index creation by default. On the page, click Modify Configurations, update the YML file, and set Auto Index Creation to Allowed. For details, see Configure YML parameters.
Existing name: PAI-EAS uses the existing index. Ensure that the index was created by a PAI-RAG service for structural compatibility.
Account and Password: Username and password configured when creating the Elasticsearch instance. Default username: elastic. To reset the password, see Reset the instance password.
OSS Path: Existing OSS storage directory in the current region for knowledge base file management.
Manage indexes with Kibana
For index management, see Connect to an Elasticsearch cluster by using a Kibana client.
Hologres
Before you begin, purchase a Hologres instance.
Vector Database Type: Select Hologres.
Invocation Information: VPC host information. In the Hologres console, go to the instance details page. In the Network Information section, click Copy next to Specified VPC. The host is the part of the endpoint before
:80.Database Name: Hologres instance database name. To create one, see Create a database.
Account: Custom user account. To create one, see Create a custom user. For Select Member Role, select SuperUser.
Password: Password for the custom user account.
Table Name: Behavior depends on the name you enter.
New name: PAI-EAS automatically creates a PAI-RAG-compatible table during deployment.
Existing name: PAI-EAS uses the existing table. Ensure that the table was created by a PAI-RAG service for structural compatibility.
OSS Path: Existing OSS storage directory in the current region for knowledge base file management.
OpenSearch
Prepare an OpenSearch Vector Search Edition instance
If no OpenSearch instance is available, log on to the OpenSearch console and create one with the following settings. For details, see Purchase an OpenSearch Vector Search Edition instance.
Product Version: Select Vector Search Edition.
Region and availability zone and VPC: OpenSearch supports only public internet access. These settings do not need to match your PAI-EAS service.
Service configuration
Vector Database Type: Select OpenSearch.
Endpoint: Public endpoint of your OpenSearch Vector Search Edition instance.
NoteEnable public access for the OpenSearch Vector Search Edition instance and add the EAS public IP address to the allowlist.
Instance ID: Instance ID from the OpenSearch Vector Search Edition instance list.
Username and Password: Username and password configured when creating the OpenSearch Vector Search Edition instance.
Table Name: Create a compatible index table first. See Configure an instance and use the following key parameters:
Select the general-purpose scenario template and import the following configuration file to define the fields.
In the Index Schema, ensure the vector dimension matches the embedding model dimension. For Distance Type, select InnerProduct.
Manage index tables and data
Log on to the Alibaba Cloud OpenSearch Vector Search Edition console and click the ID of your created instance to go to the Instance Details page.
Go to the table management page. For details, see Table management.

On the vector management page, run query tests and manage data. For details, see Vector management.
RDS for PostgreSQL
Prepare an RDS for PostgreSQL instance
If no RDS for PostgreSQL instance is available, go to the RDS instance creation page, configure the following key parameters, and follow the on-screen instructions. For details, see Create an ApsaraDB RDS for PostgreSQL instance.
Engine: Select PostgreSQL.
VPC: Same VPC as your PAI-EAS service for internal network access.
Privileged Account: In Advanced Settings, select Set Now and configure the database account and password.
Create a database.
Click the instance name. In the left-side navigation pane, click Database Management, and then click Create Database.
In the Create Database panel, configure Database (DB) Name. For Authorized Account, select the privileged account. For other parameters, see Create a database and an account.
Click Create.
Service configuration
Before you begin, create an RDS for PostgreSQL instance.
Vector Database Type: Select RDS PostgreSQL.
Host address: Internal endpoint of your RDS for PostgreSQL instance, available on the Database Connection page in the ApsaraDB RDS for PostgreSQL console.
Port: Default: 5432. Enter the actual port if different.
Database: The Authorized Account must be a Privileged Account. See Create a database and an account. Install the vector and jieba extensions for the database.
Table Name: Custom database table name.
Account and Password: Authorized username and password configured when creating the database. To create a privileged account, see Create a database and an account, and select Privileged Account for Account Type.
OSS Path: Existing OSS storage directory in the current region for knowledge base file management.
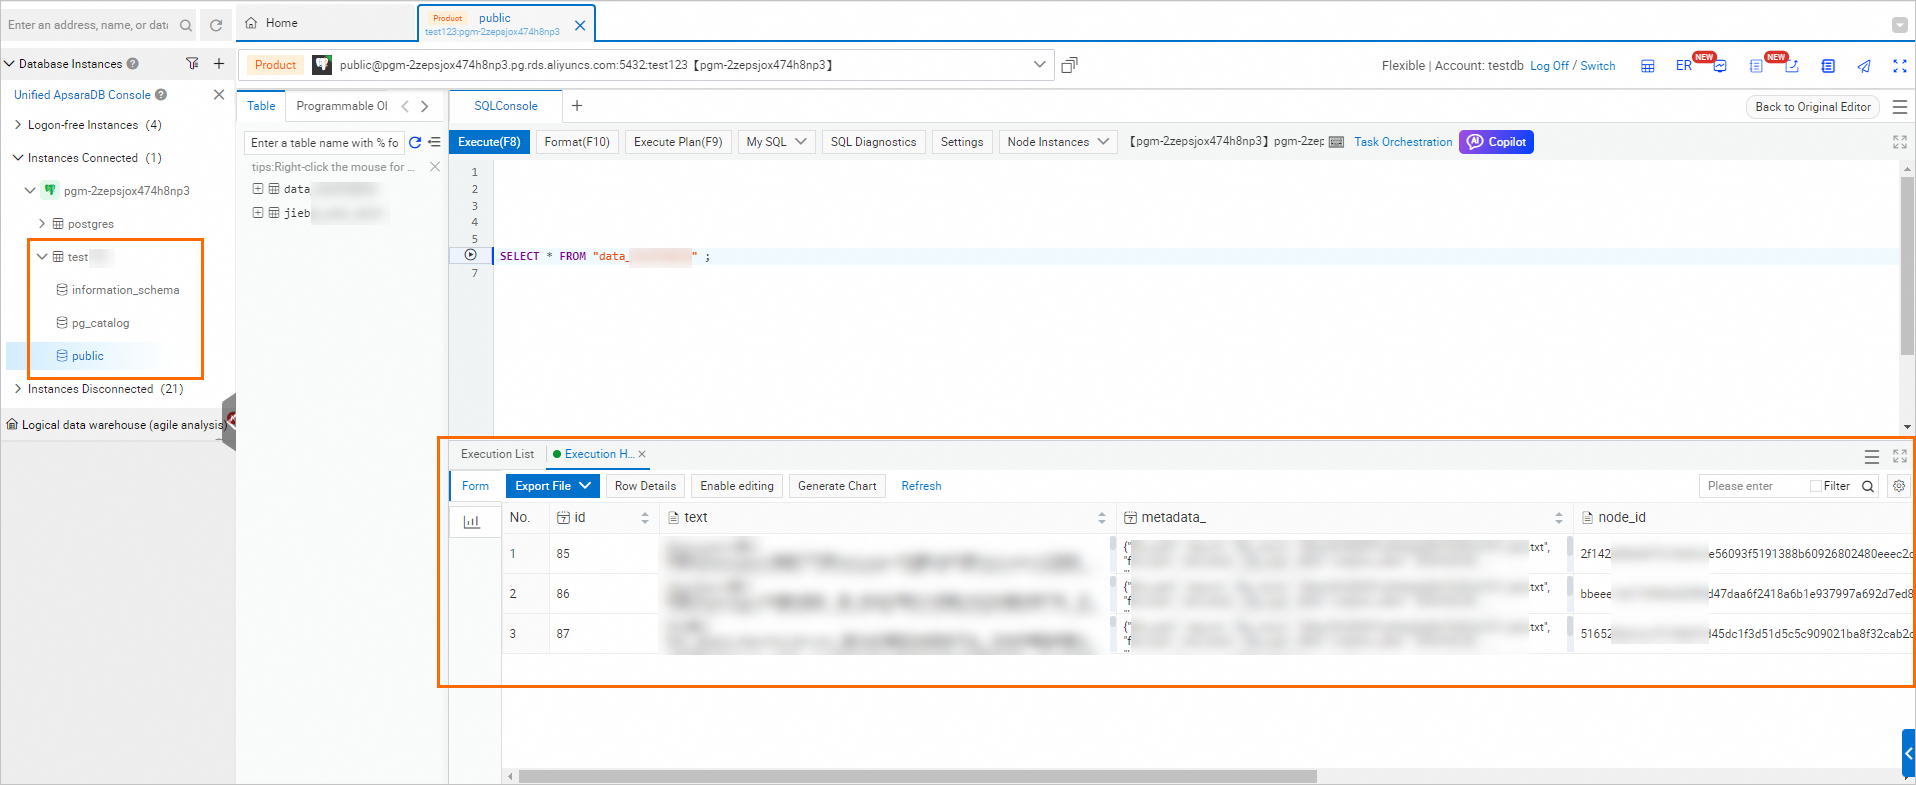
RDS for PostgreSQL database management
Go to the RDS instance list, switch to the region of your instance, and click the instance name.
In the left-side navigation pane, select Database Management. In the Actions column, click SQL Query.
Enter the Database Account and Database Password (privileged account credentials), and then click Sign in.
Query imported knowledge bases.