Use applications from the gallery, or create, customize, and share your own applications in PAI ArtLab.
Log on to the PAI ArtLab console.
Prerequisites
-
Complete PAI ArtLab activation and authorization.
-
(Optional) Claim a free trial, coupon, or purchase a resource plan. For more information, see PAI ArtLab billing.
Use applications from the gallery
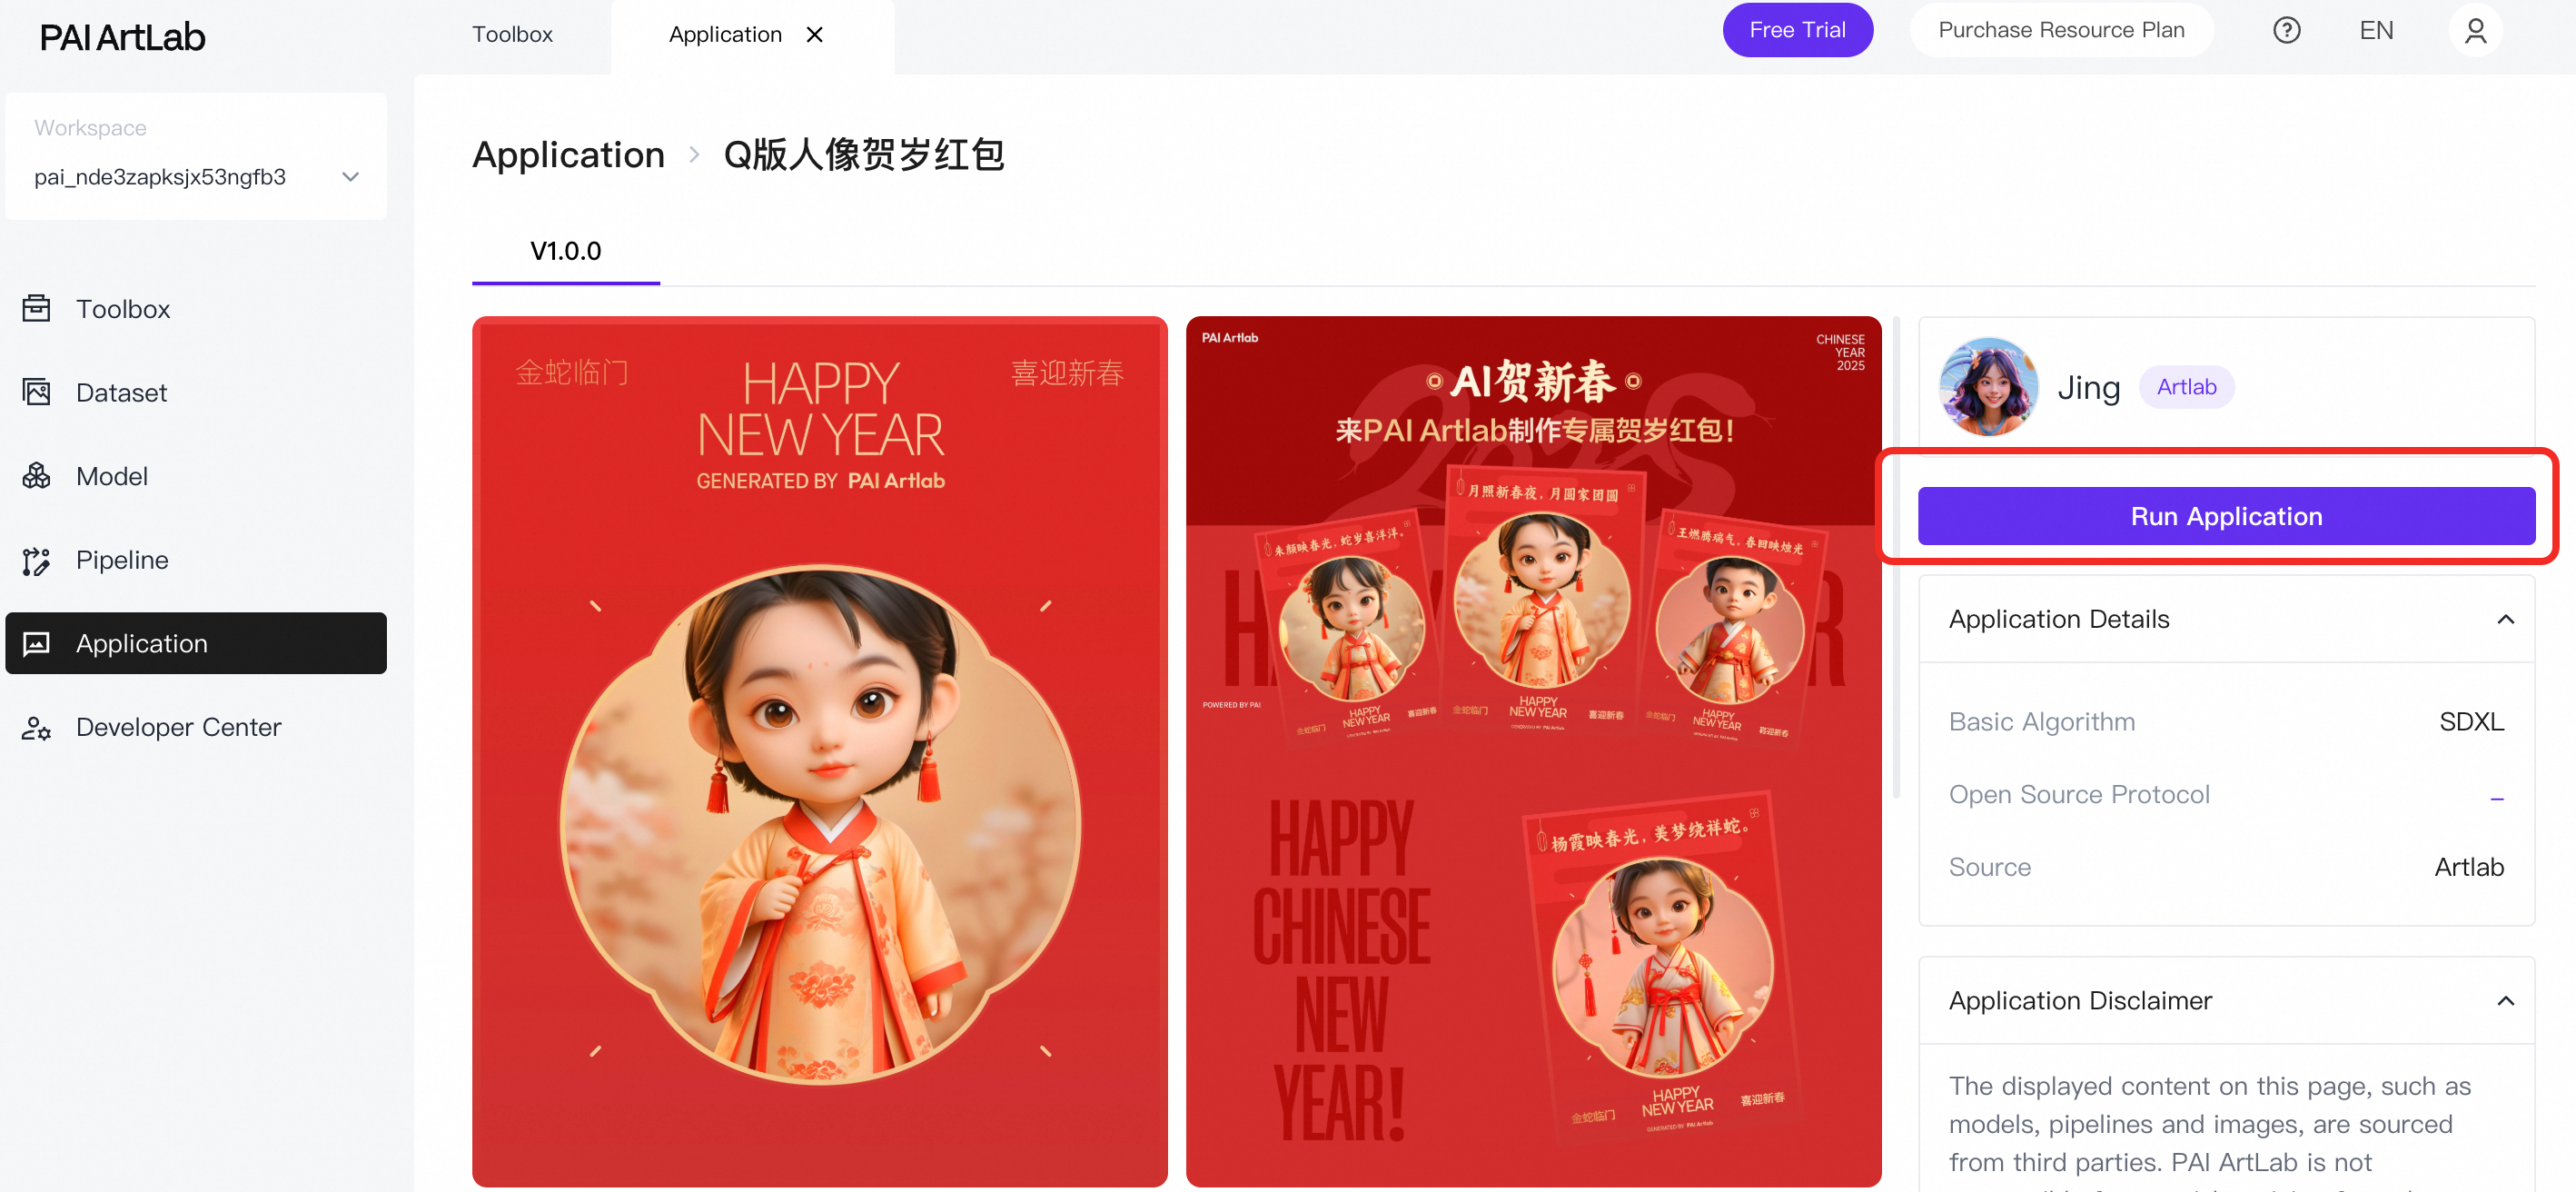
This example demonstrates how to generate an image using the New Year Red Packet With Q-style Portrait application.
-
Log on to the PAI ArtLab console. In the left-side navigation pane, click Application.
-
On the Application Gallery tab, click the New Year Red Packet With Q-style Portrait card. On the details page, click Run Application.
-
After the application starts, on the configuration page, upload a portrait photo, enter a keyword, and select a gender.
-
Click Start Generation to generate the image. Delete, download, or zoom in on the image as needed.
Create an application
Prerequisites
-
Ensure workflow runs in the corresponding ComfyUI edition
Applications are built on ComfyUI workflows. PAI ArtLab provides three ComfyUI editions: ComfyUI (Shared Edition), ComfyUI (Exclusive Edition), and ComfyUI (Exclusive Edition) GP7V Type. Determine which edition to use and ensure the workflow runs successfully in that edition before configuring the application.
-
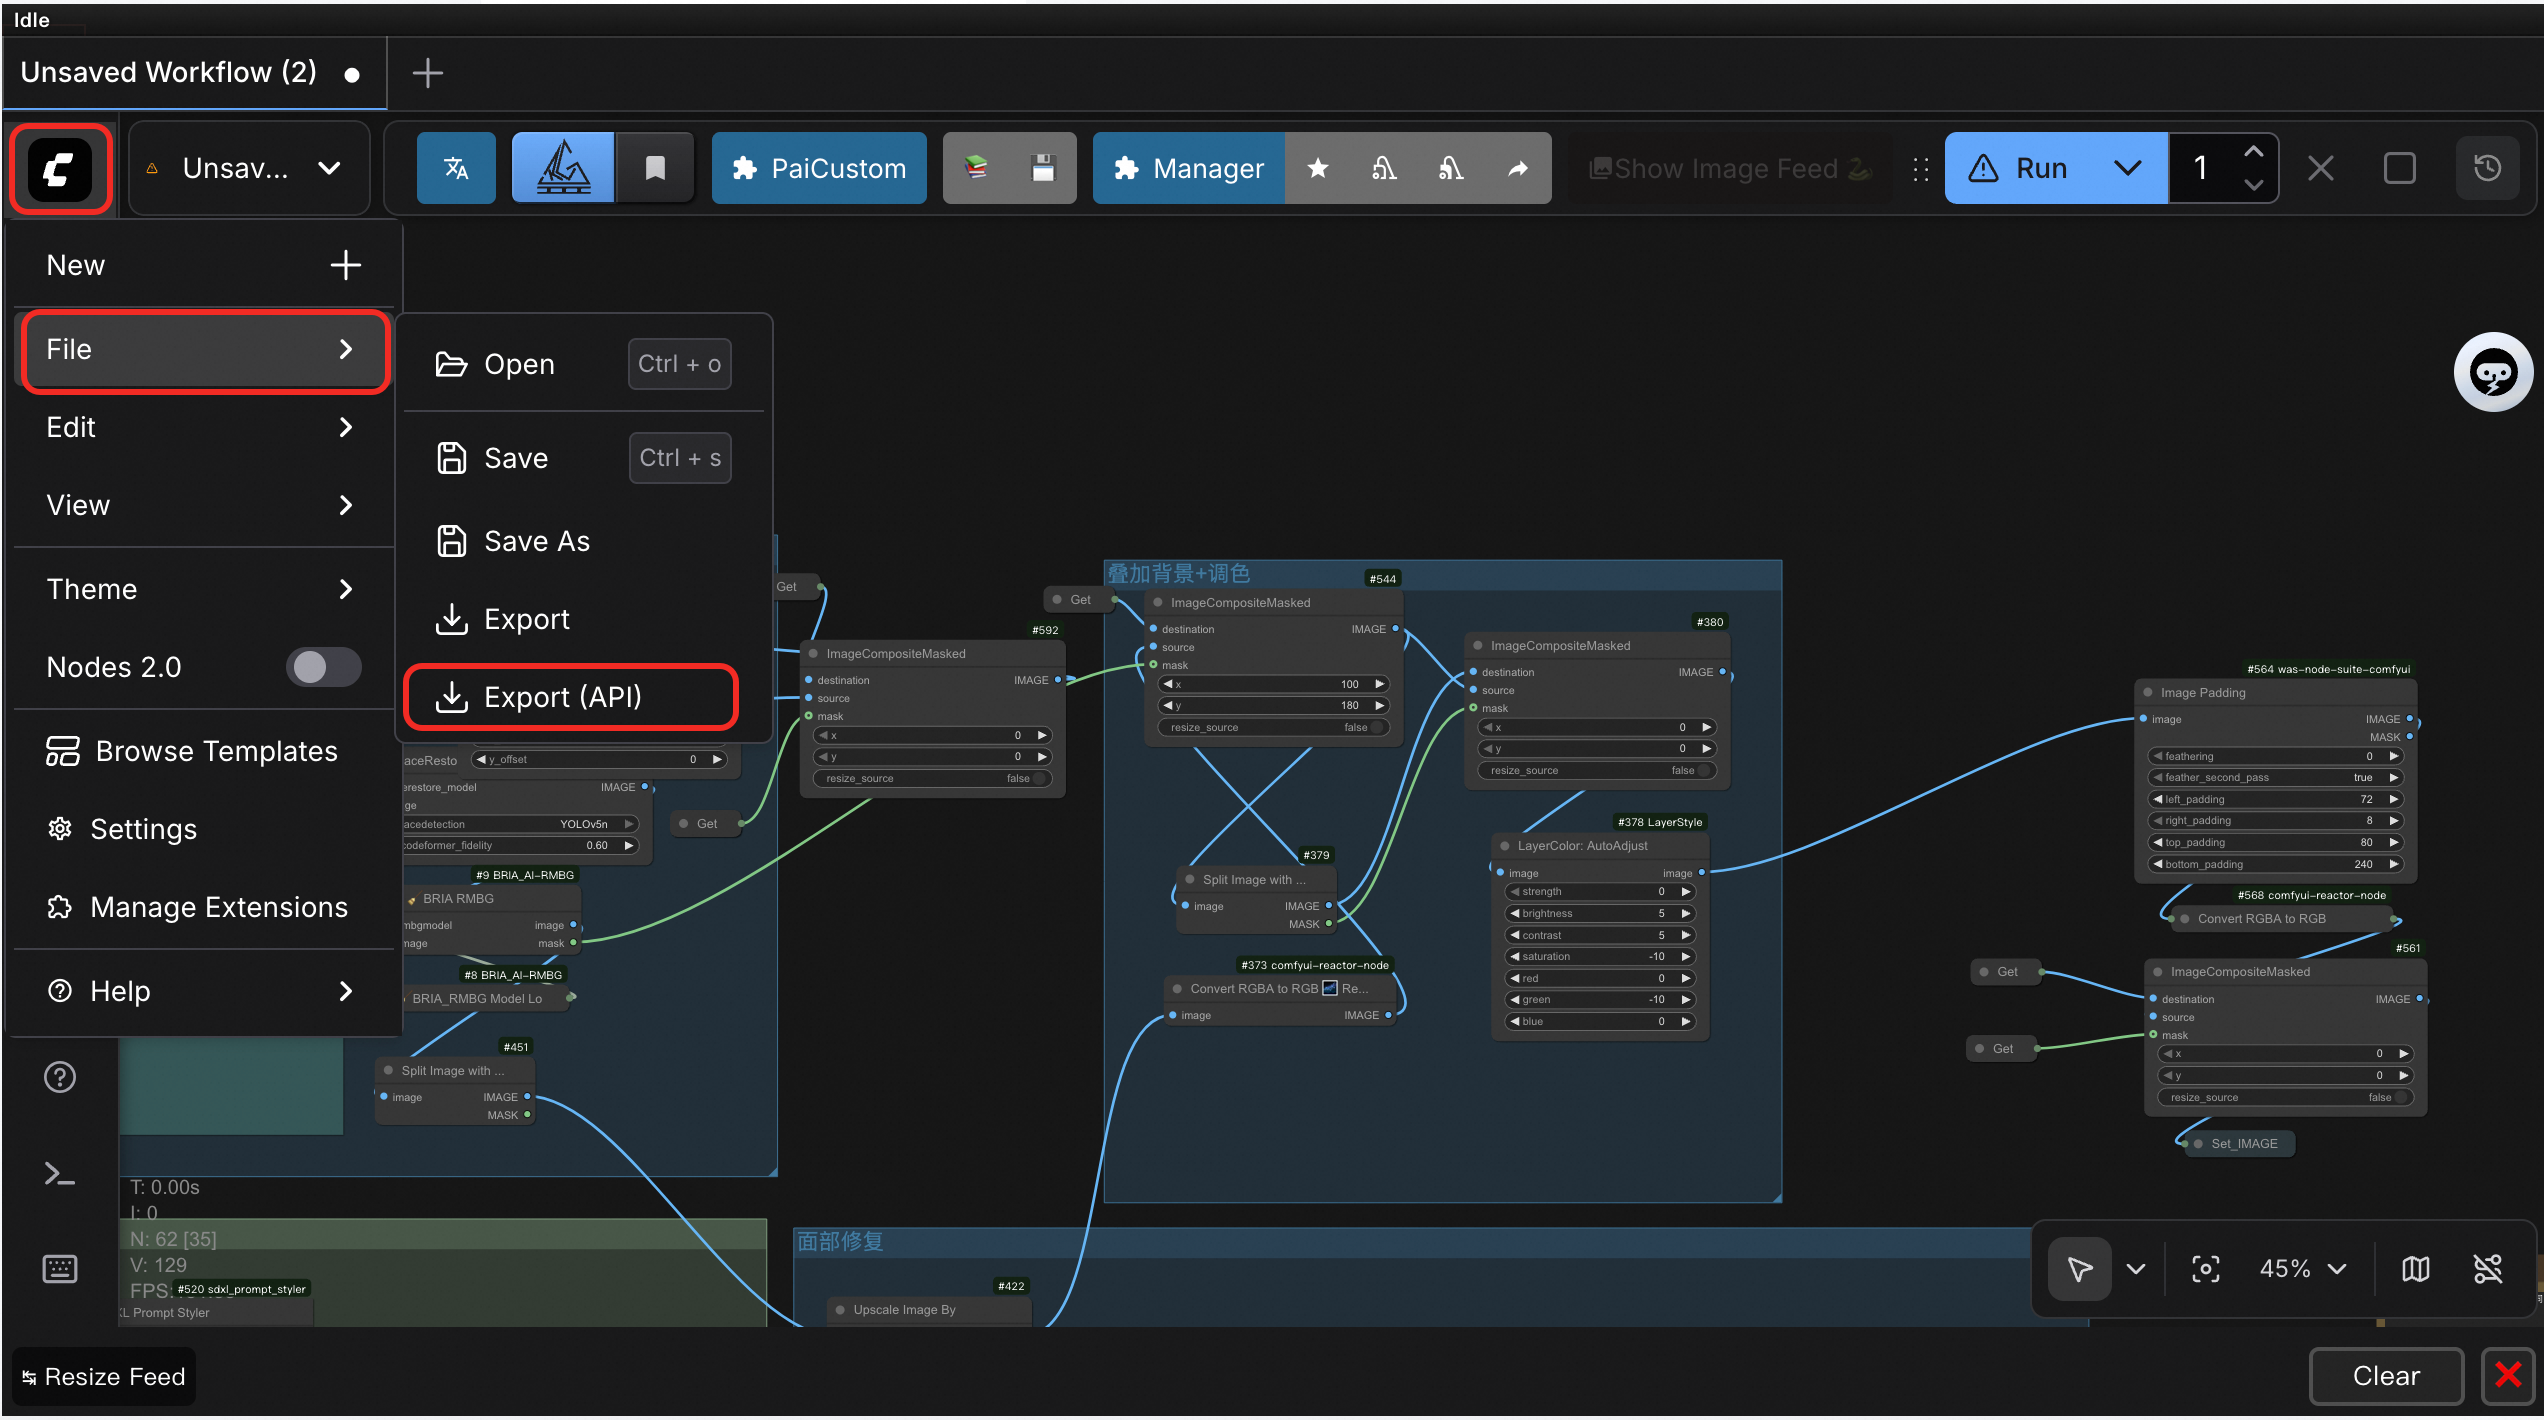
Export workflow file in API format
After the workflow runs successfully, export it in API format. For more information, see Export an API or original version of a workflow file.
Procedure
-
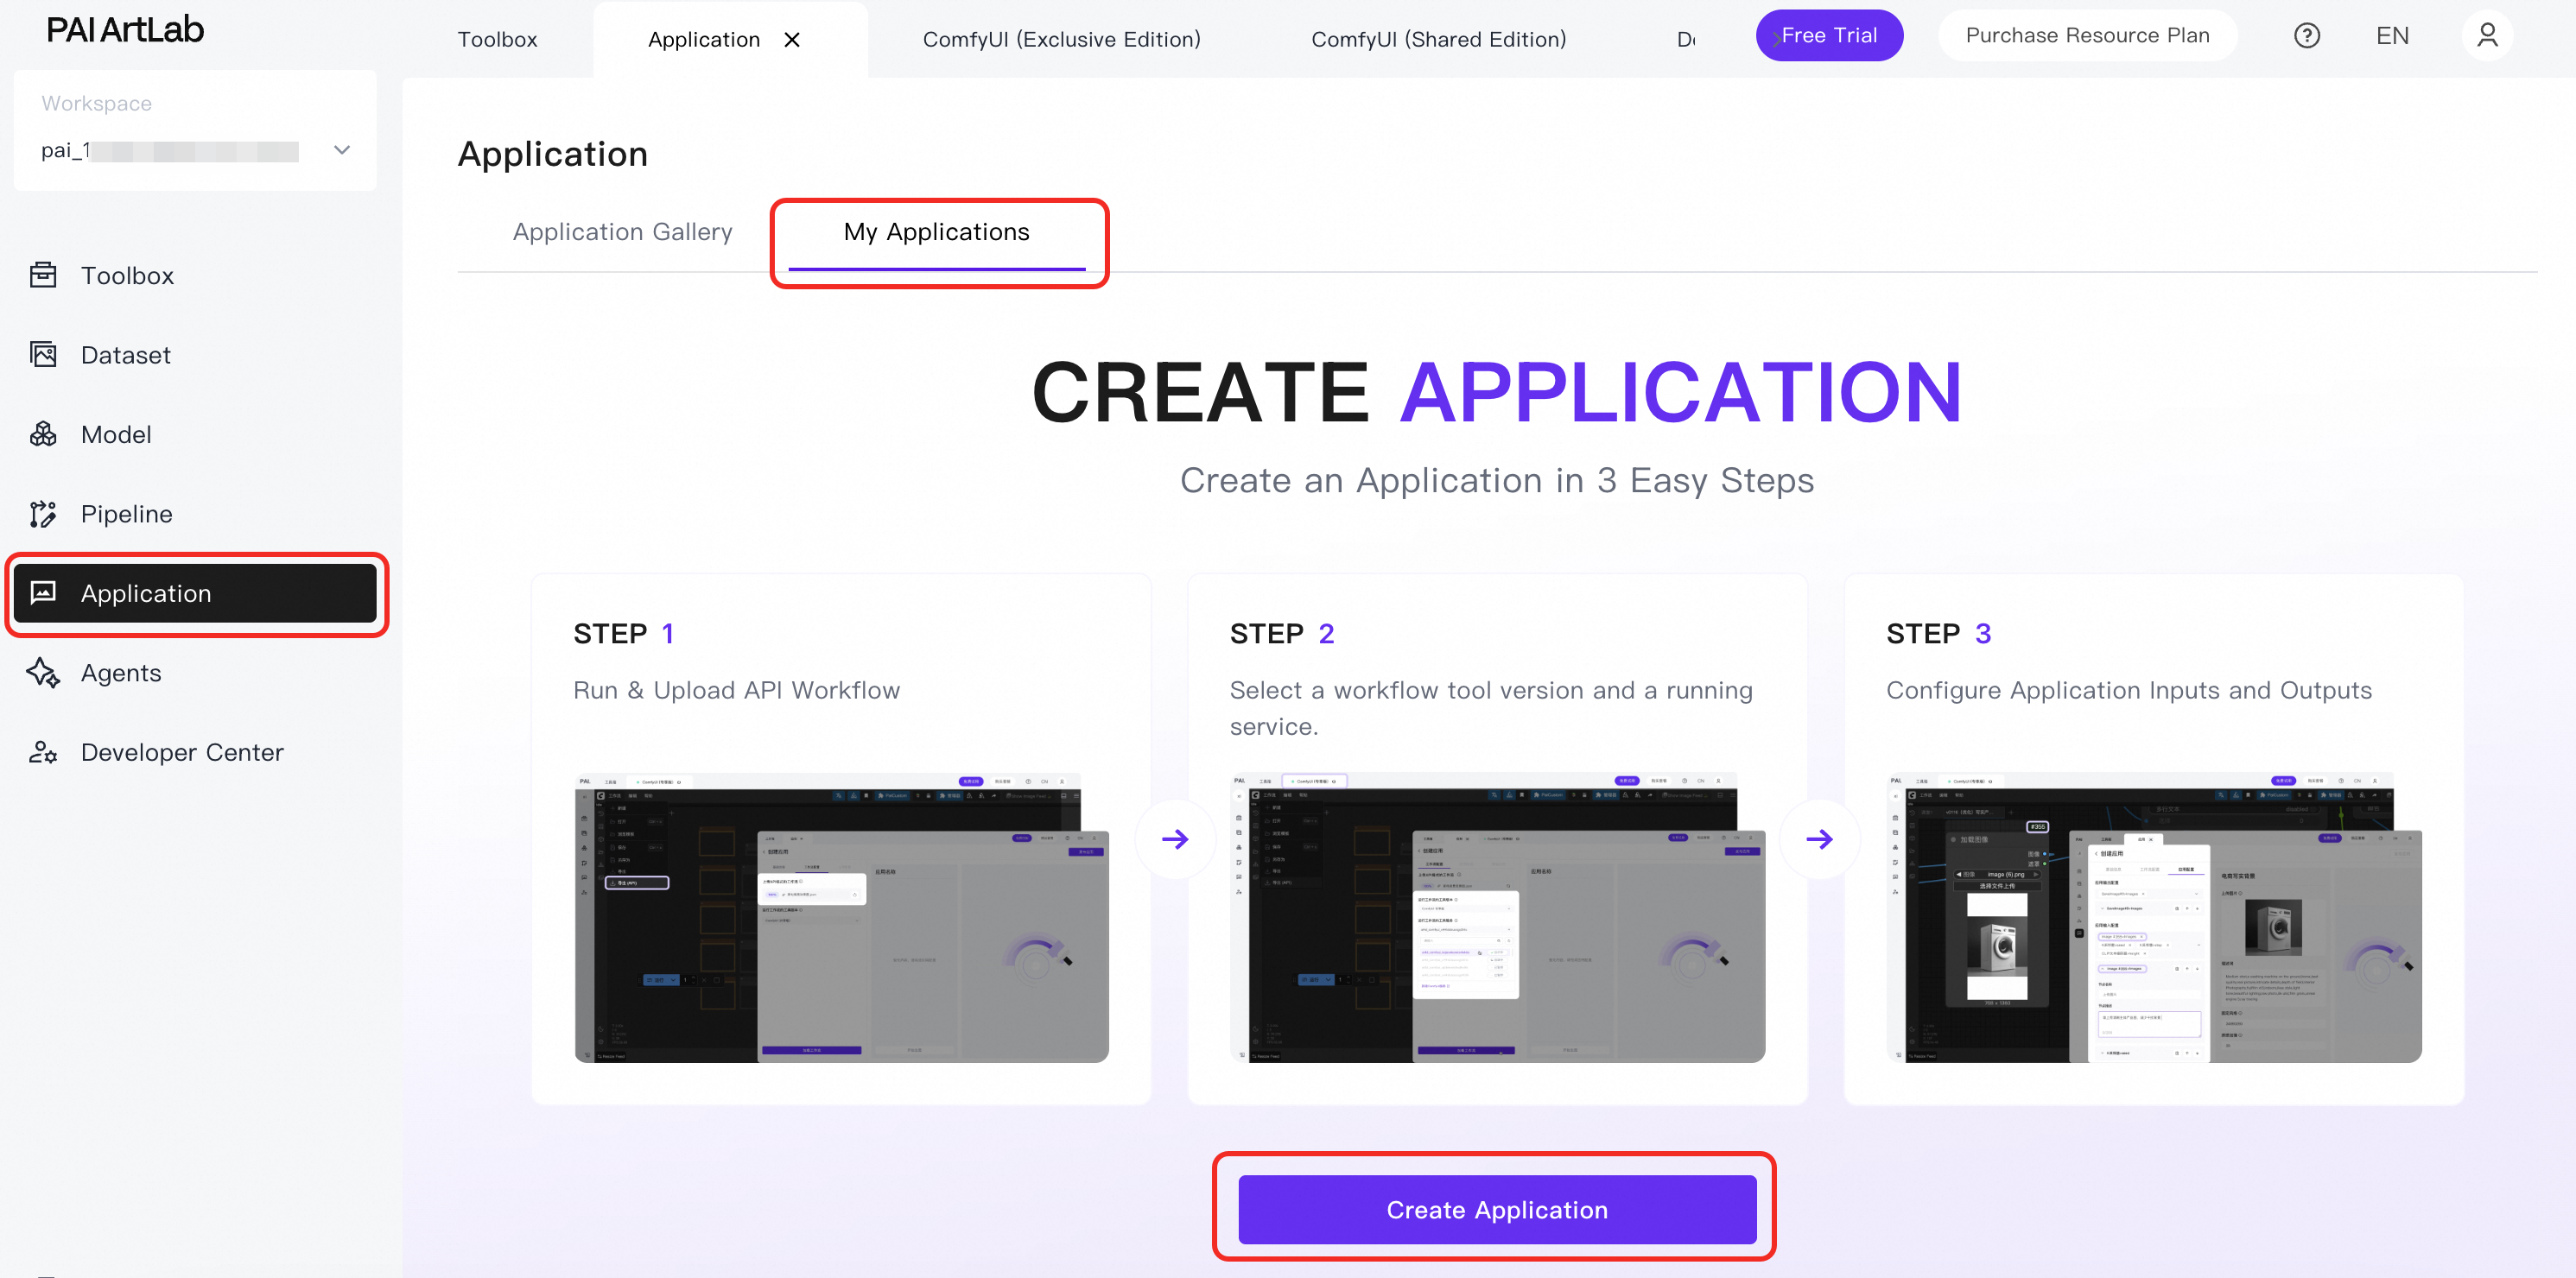
Log on to the PAI ArtLab console. In the left-side navigation pane, click Application > My Applications > Create Application, and configure the parameters.
-
In the Basic Information section, set the Application Name and upload an Application Thumbnail.
-
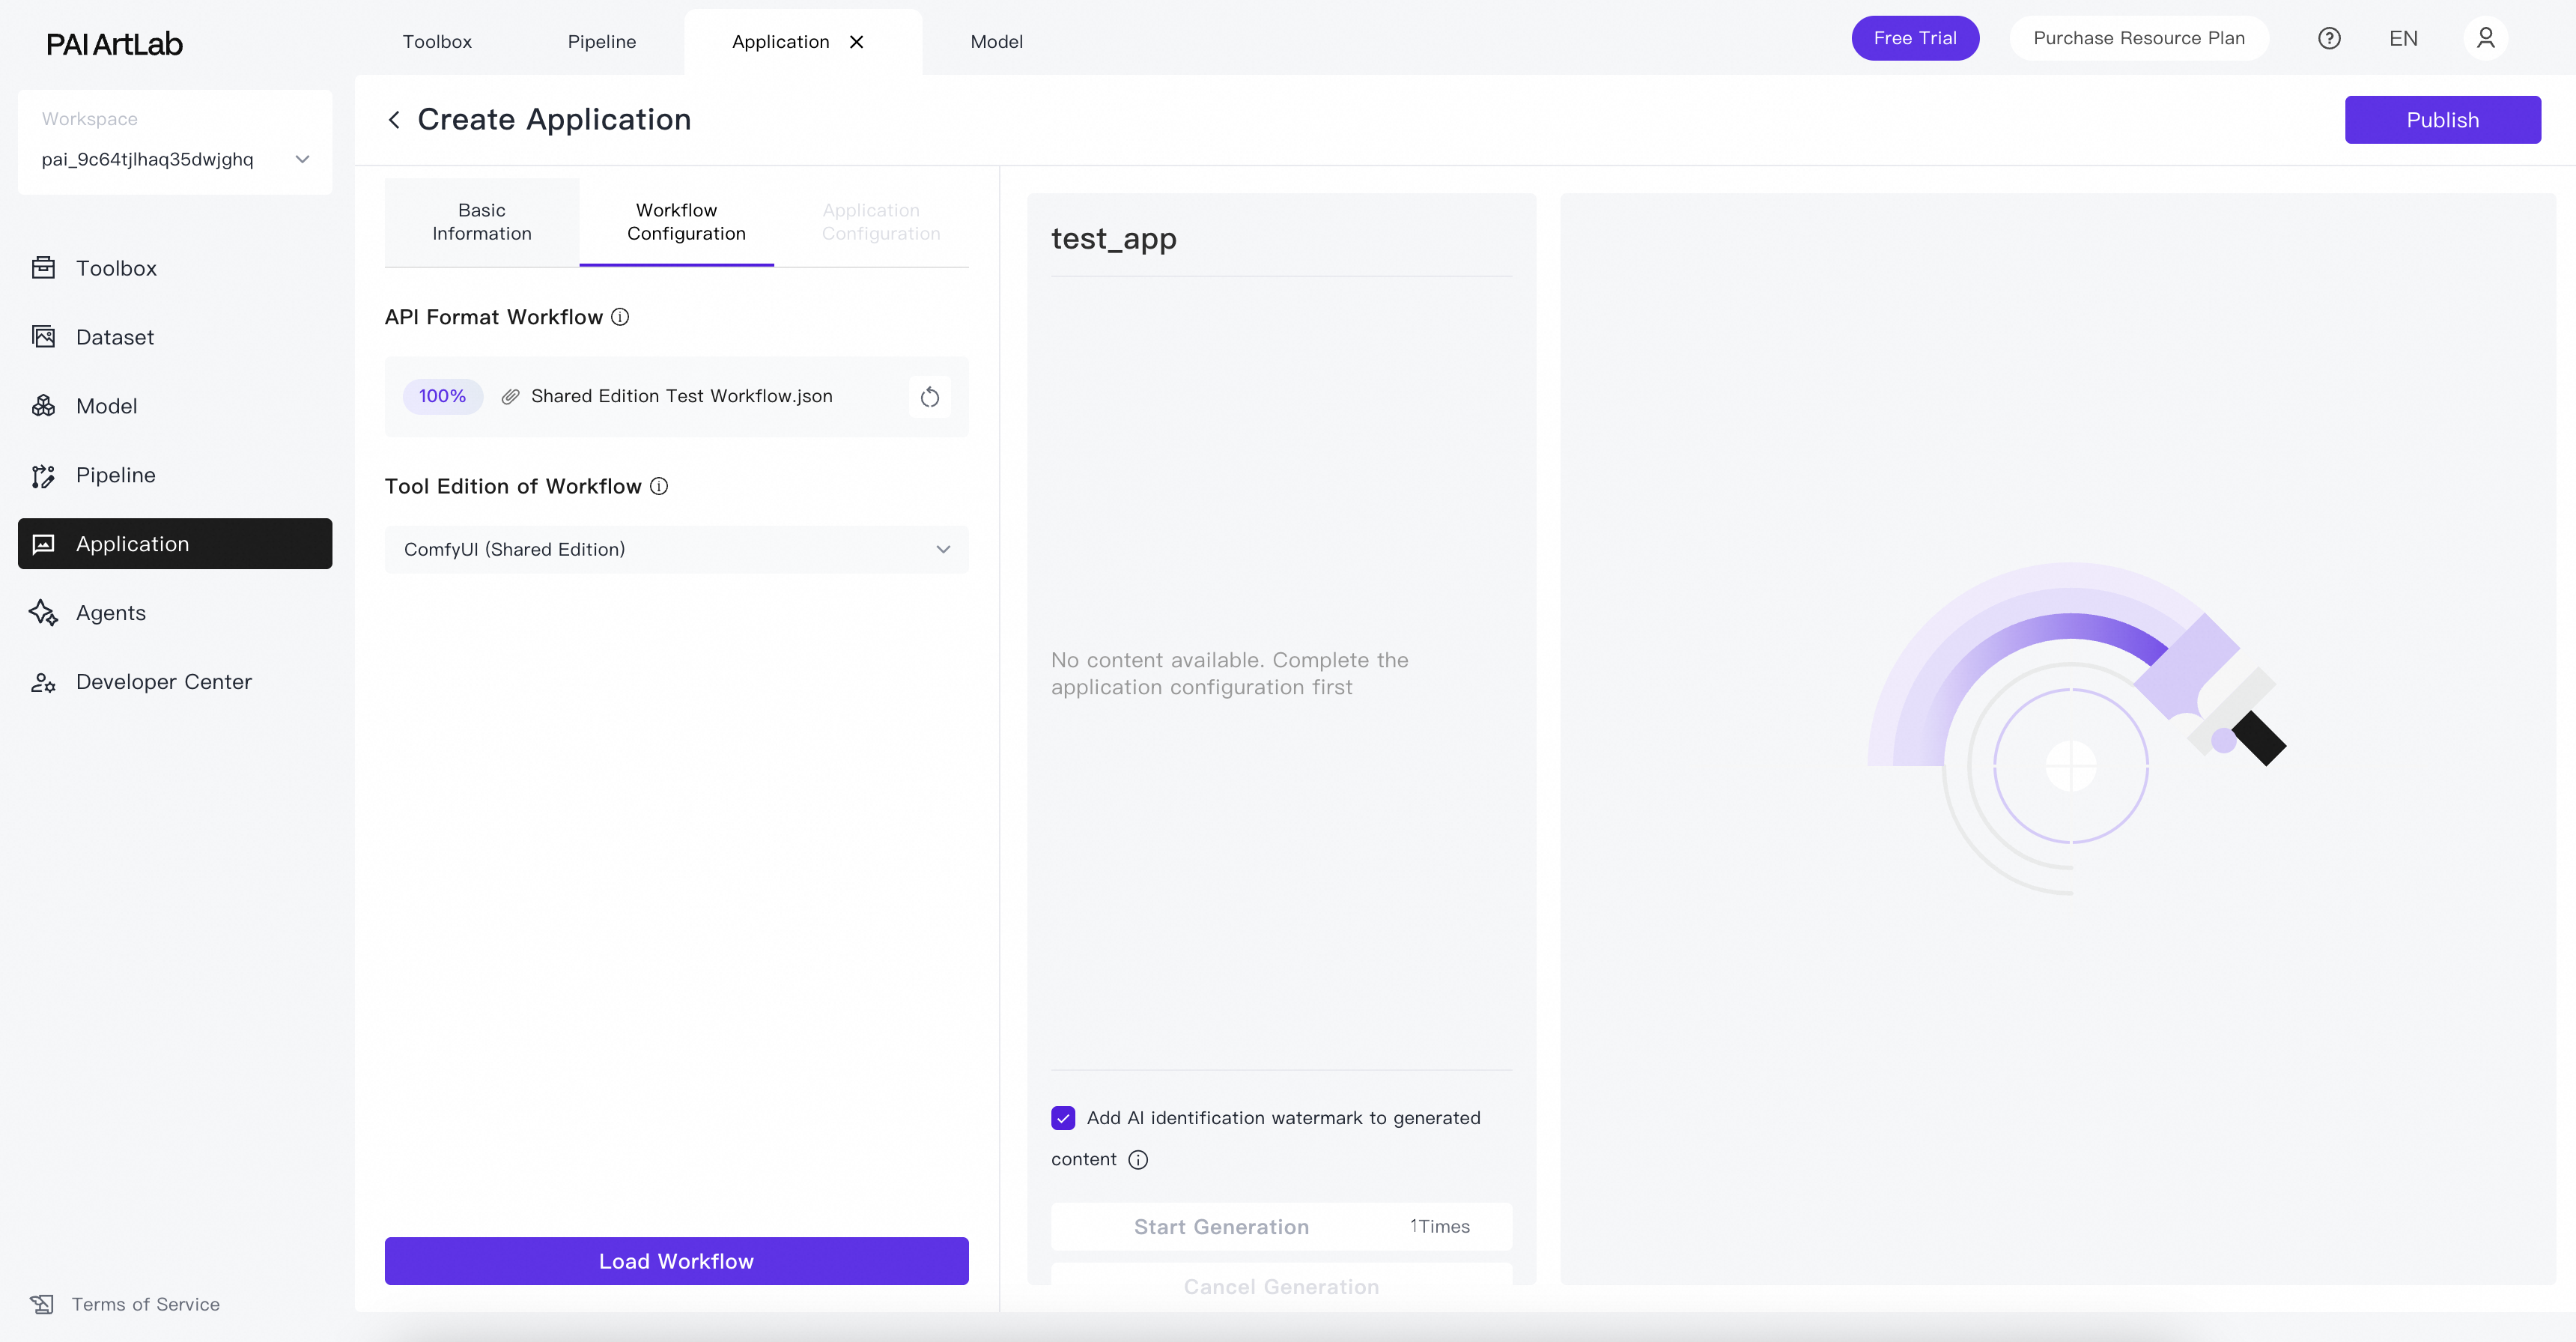
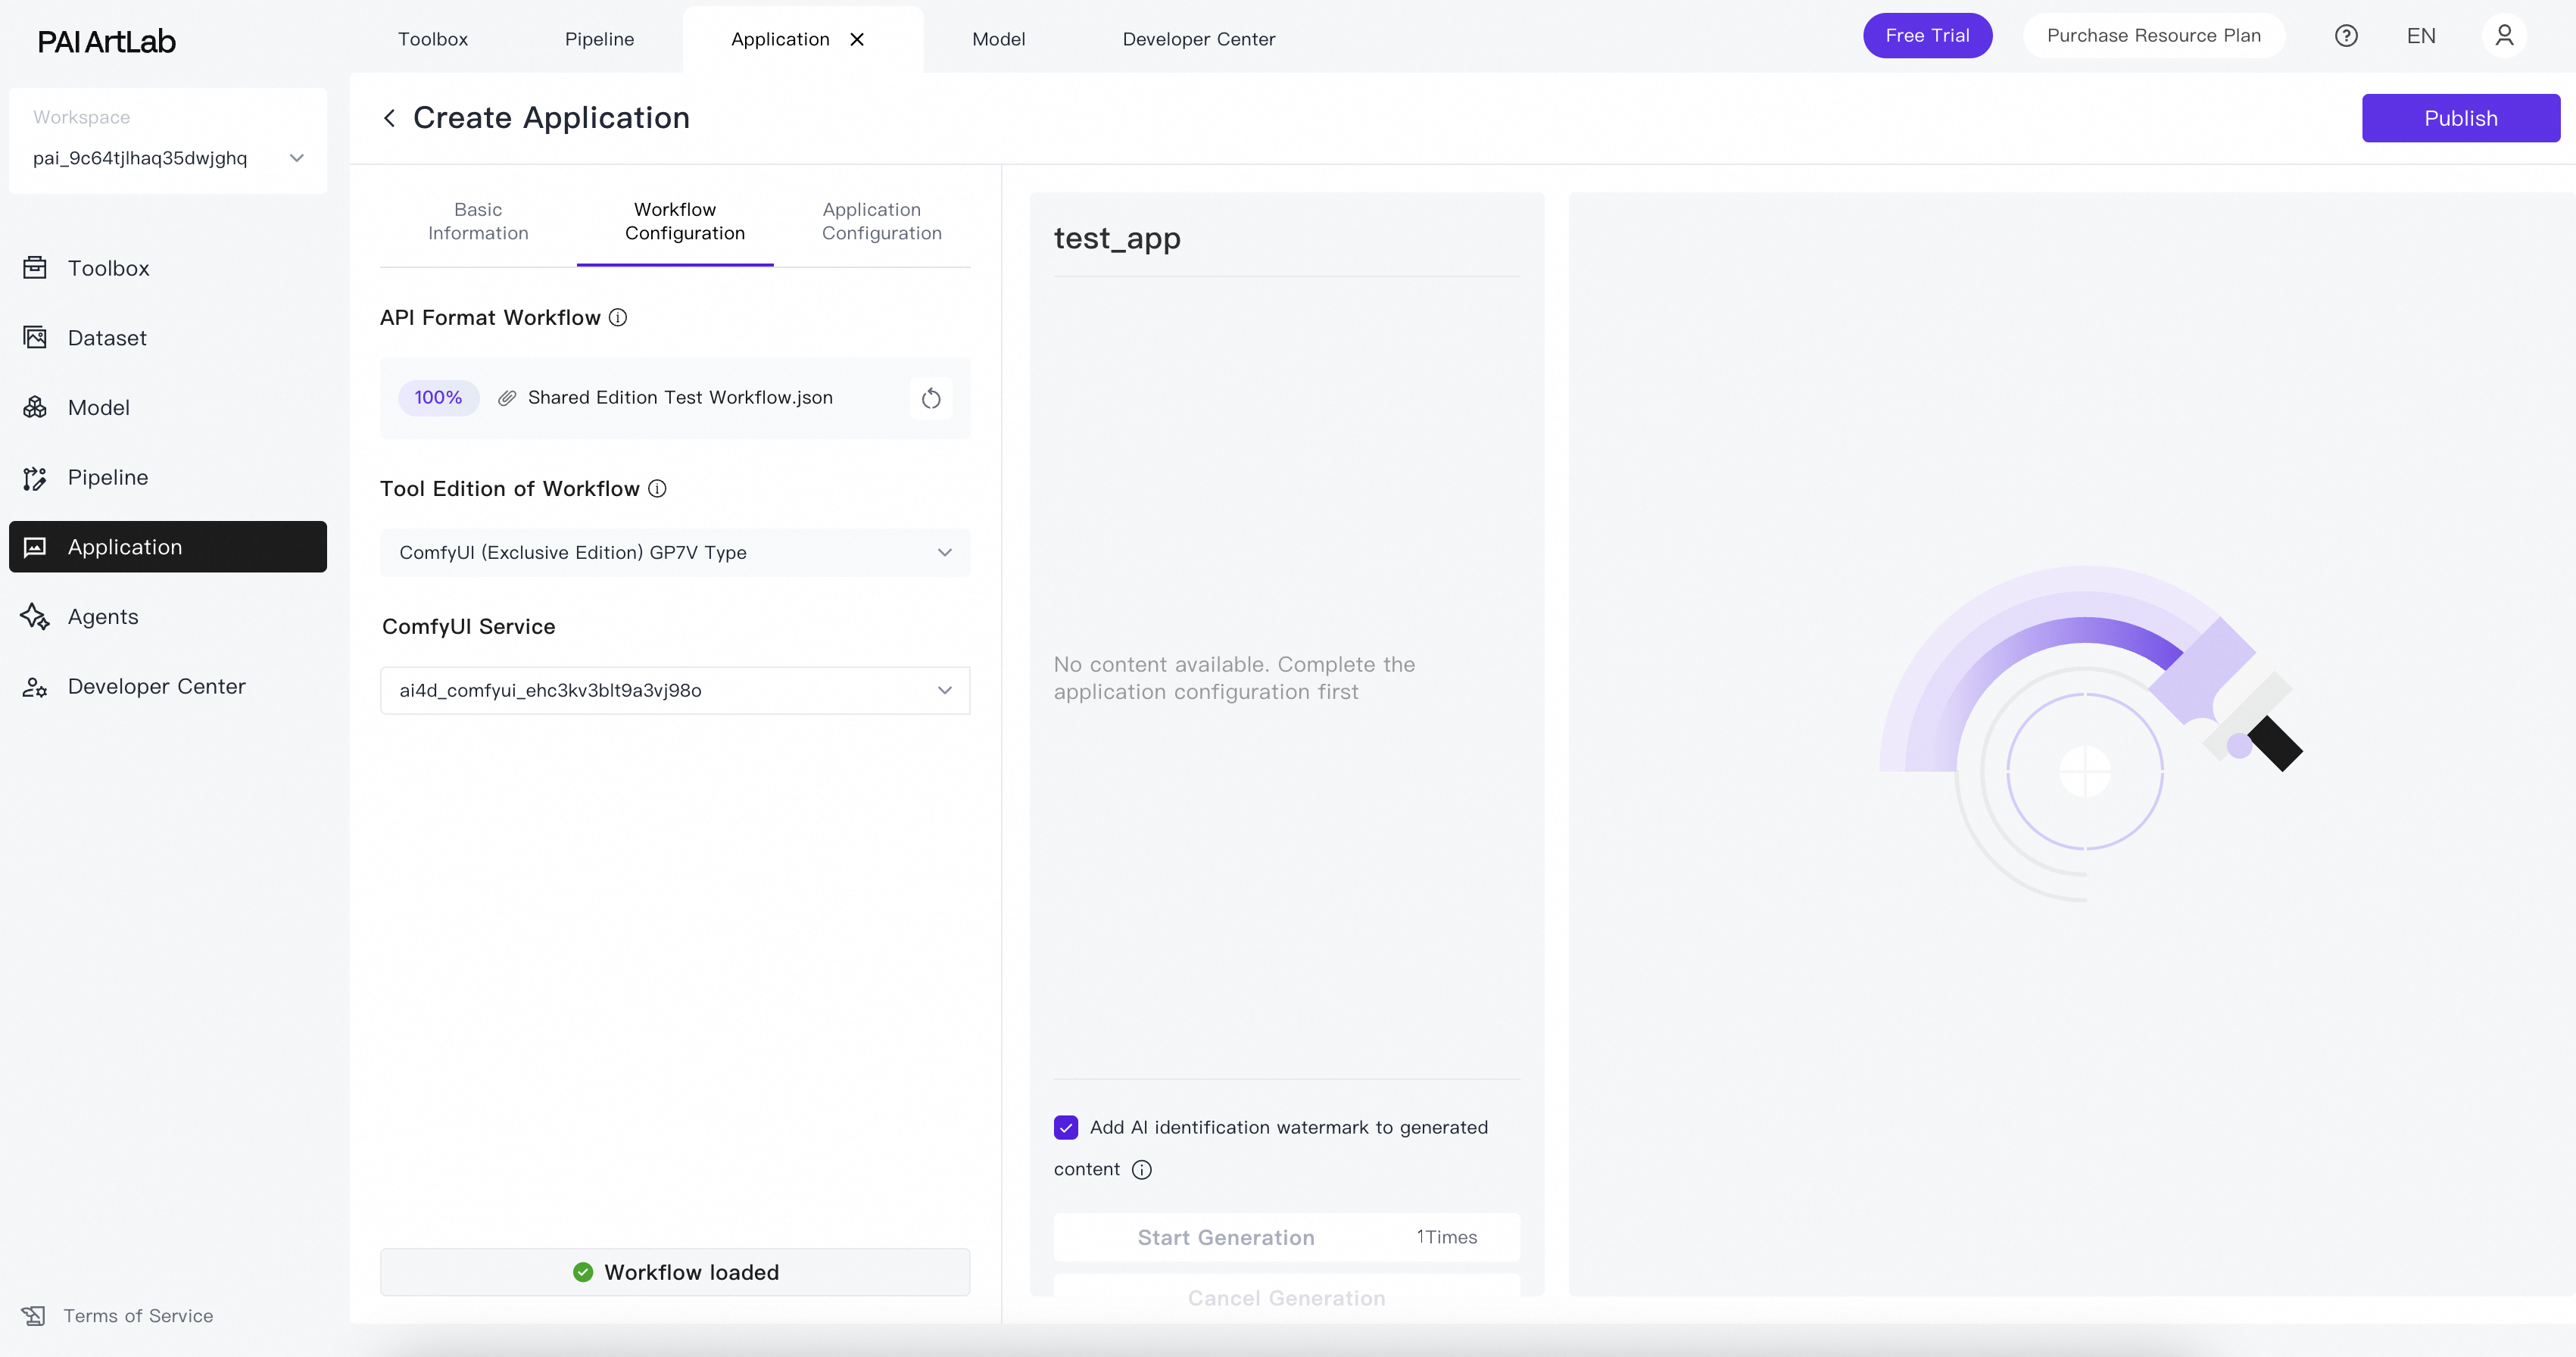
In the Workflow Configuration section, configure the parameters:
-
API-format workflow: Upload the exported API-format workflow file.
-
Tool Edition for Workflow: ComfyUI edition to use.
-
ComfyUI Service Selection: If you select ComfyUI (Exclusive Edition) or ComfyUI (Exclusive Edition) GP7V Type for Tool Edition for Workflow, select a running service of that edition.
For details on exporting an API-format workflow and selecting a tool edition, see the tabs:
ComfyUI (Shared Edition)
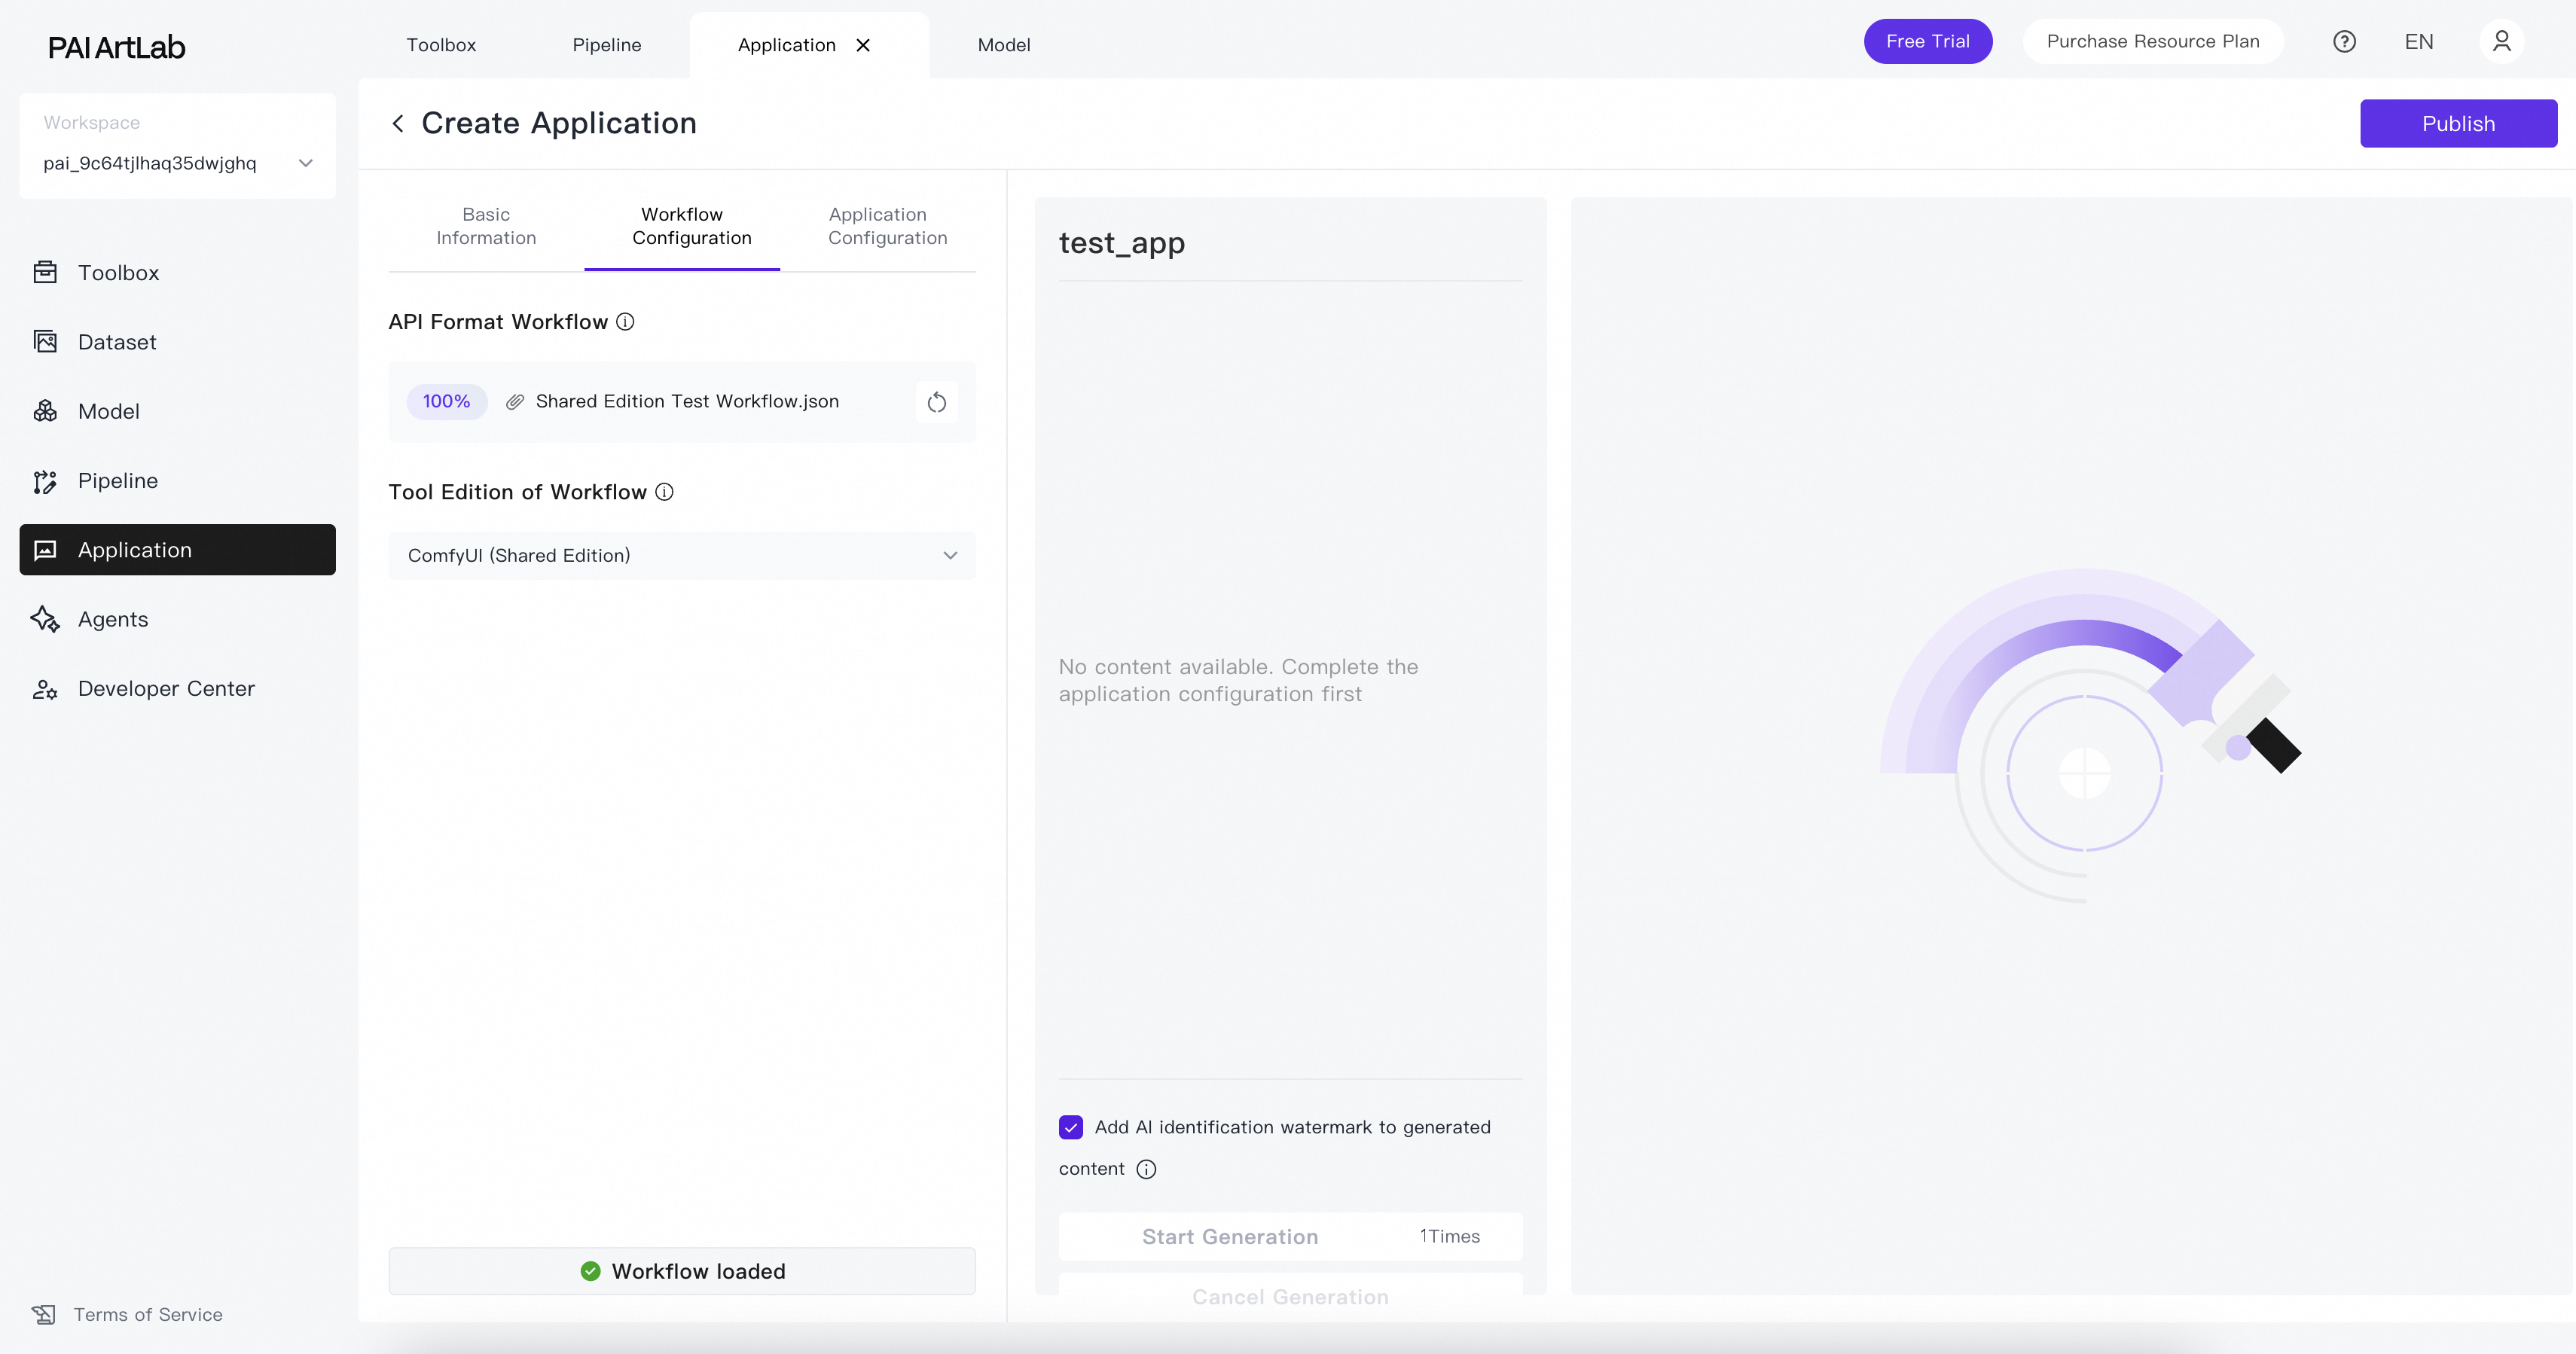
Ensure the workflow runs in ComfyUI (Shared Edition) in PAI ArtLab and export it as an API-format workflow.
Upload the exported workflow file. For Tool Edition for Workflow, select ComfyUI (Shared Edition) and click Load Workflow.
A Workflow loaded successfully message appears.
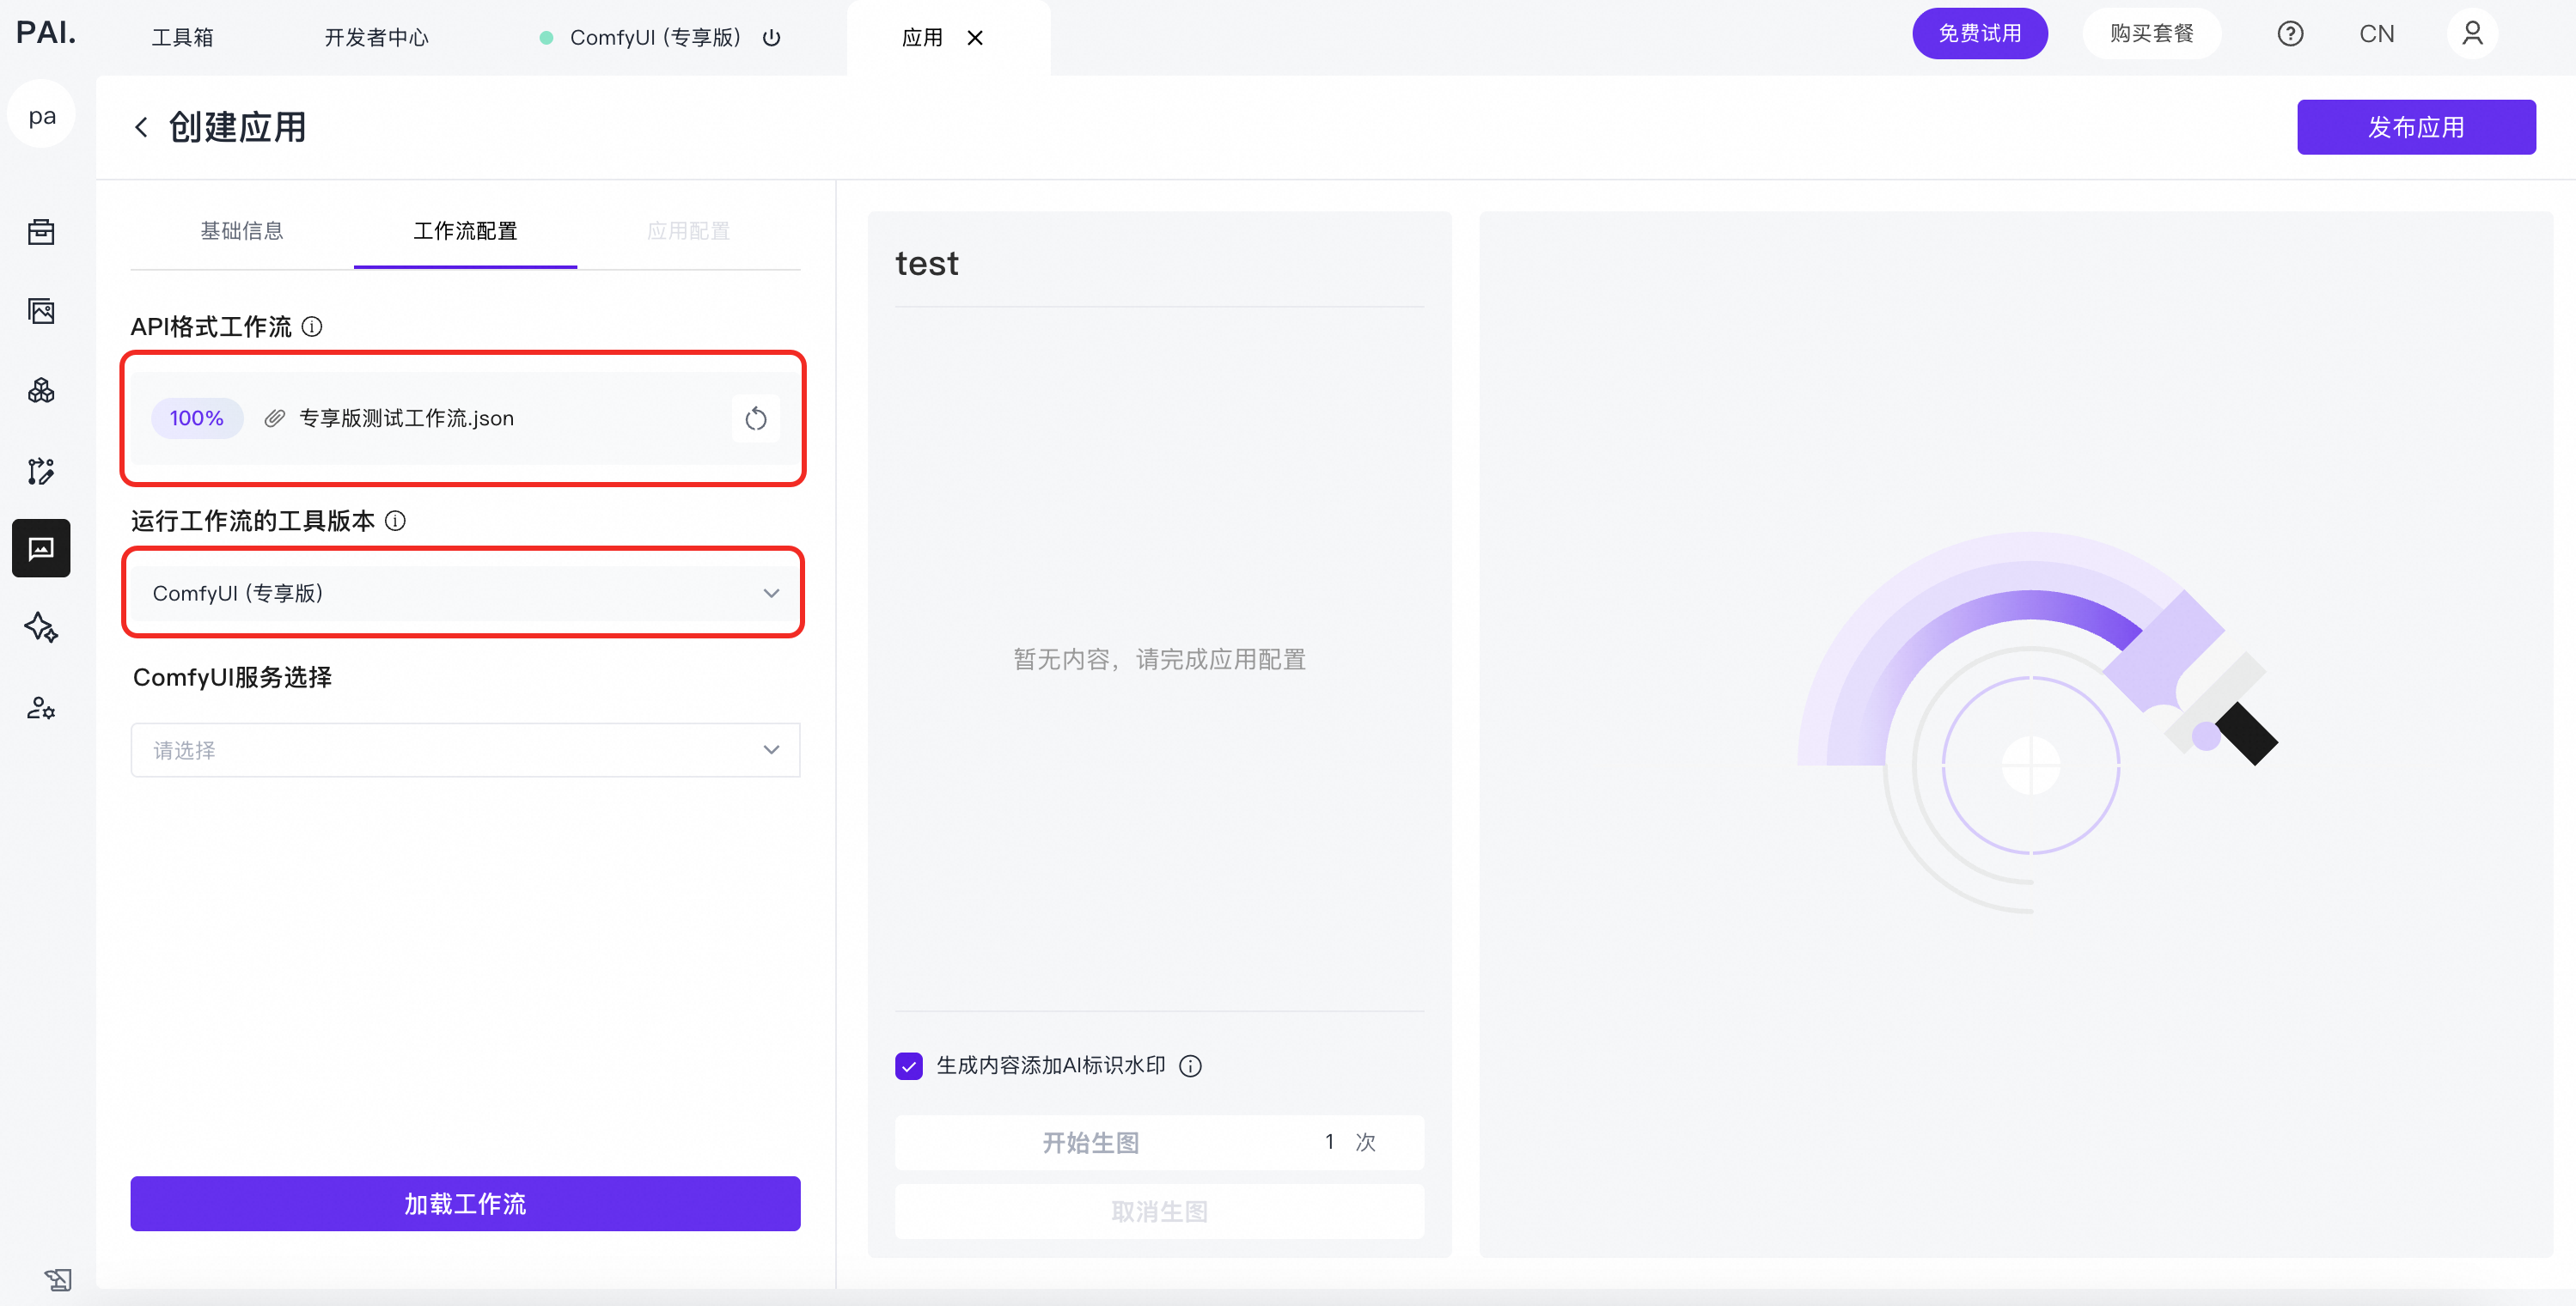
ComfyUI (Exclusive Edition)
Ensure the workflow runs in ComfyUI (Exclusive Edition) in PAI ArtLab and export it as an API-format workflow.

Upload the exported workflow file. For Tool Edition for Workflow, select ComfyUI (Exclusive Edition).
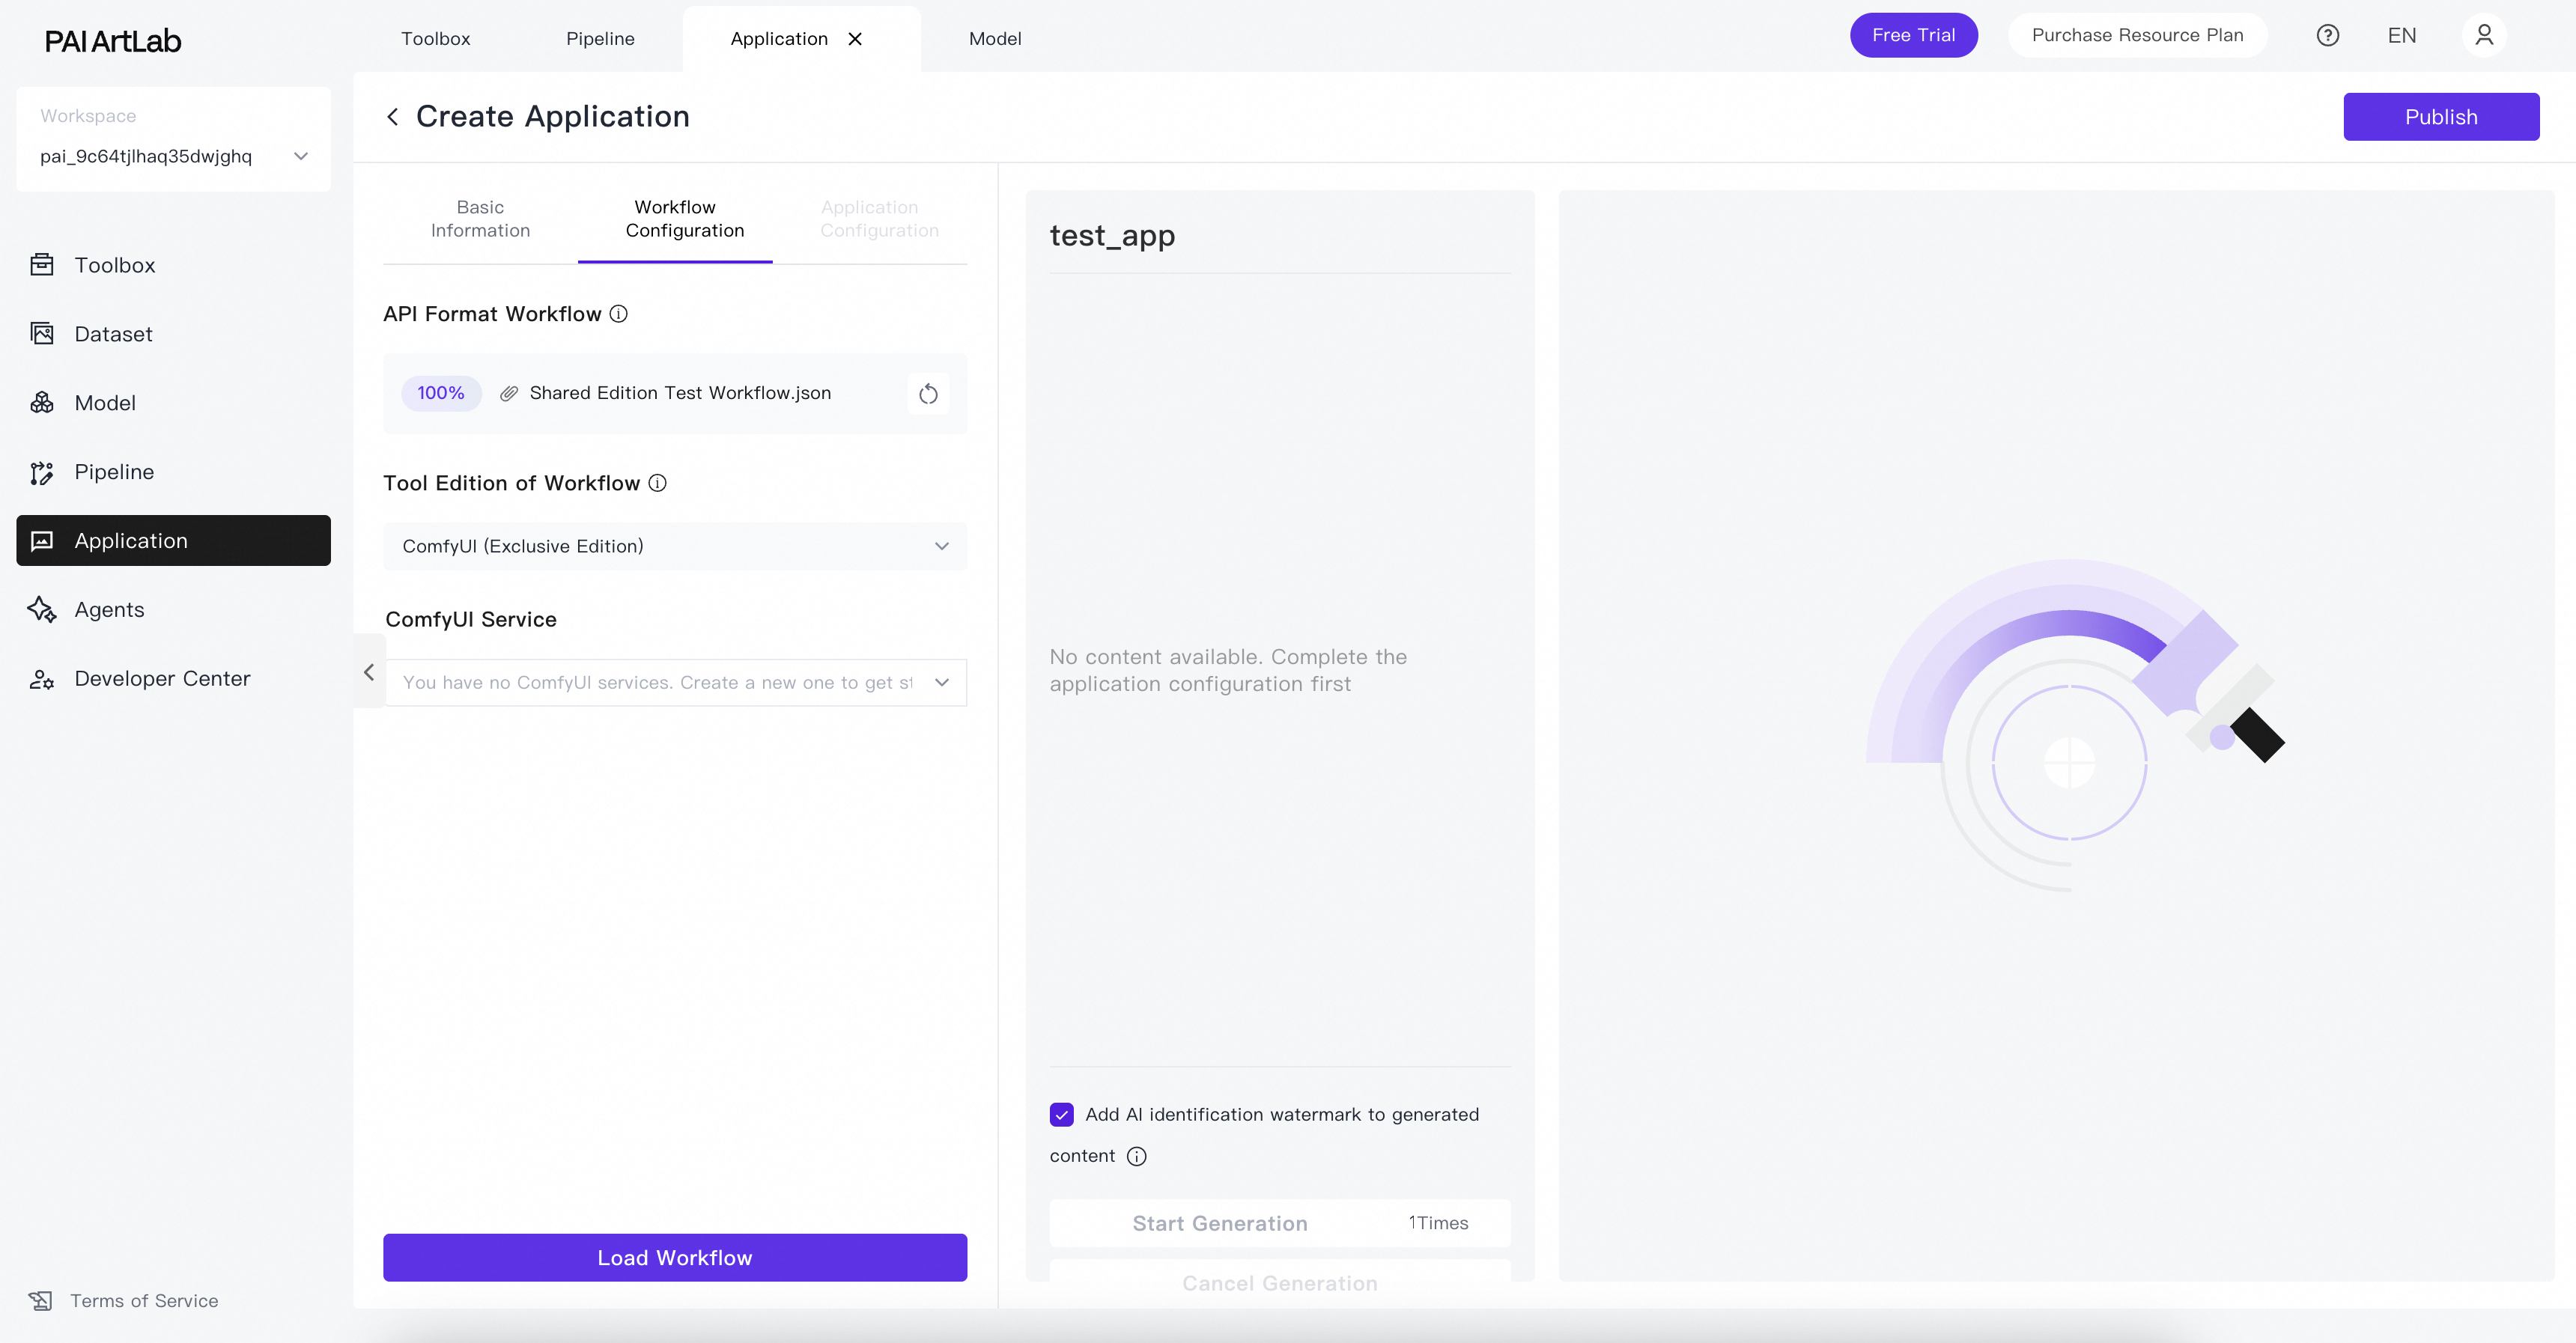
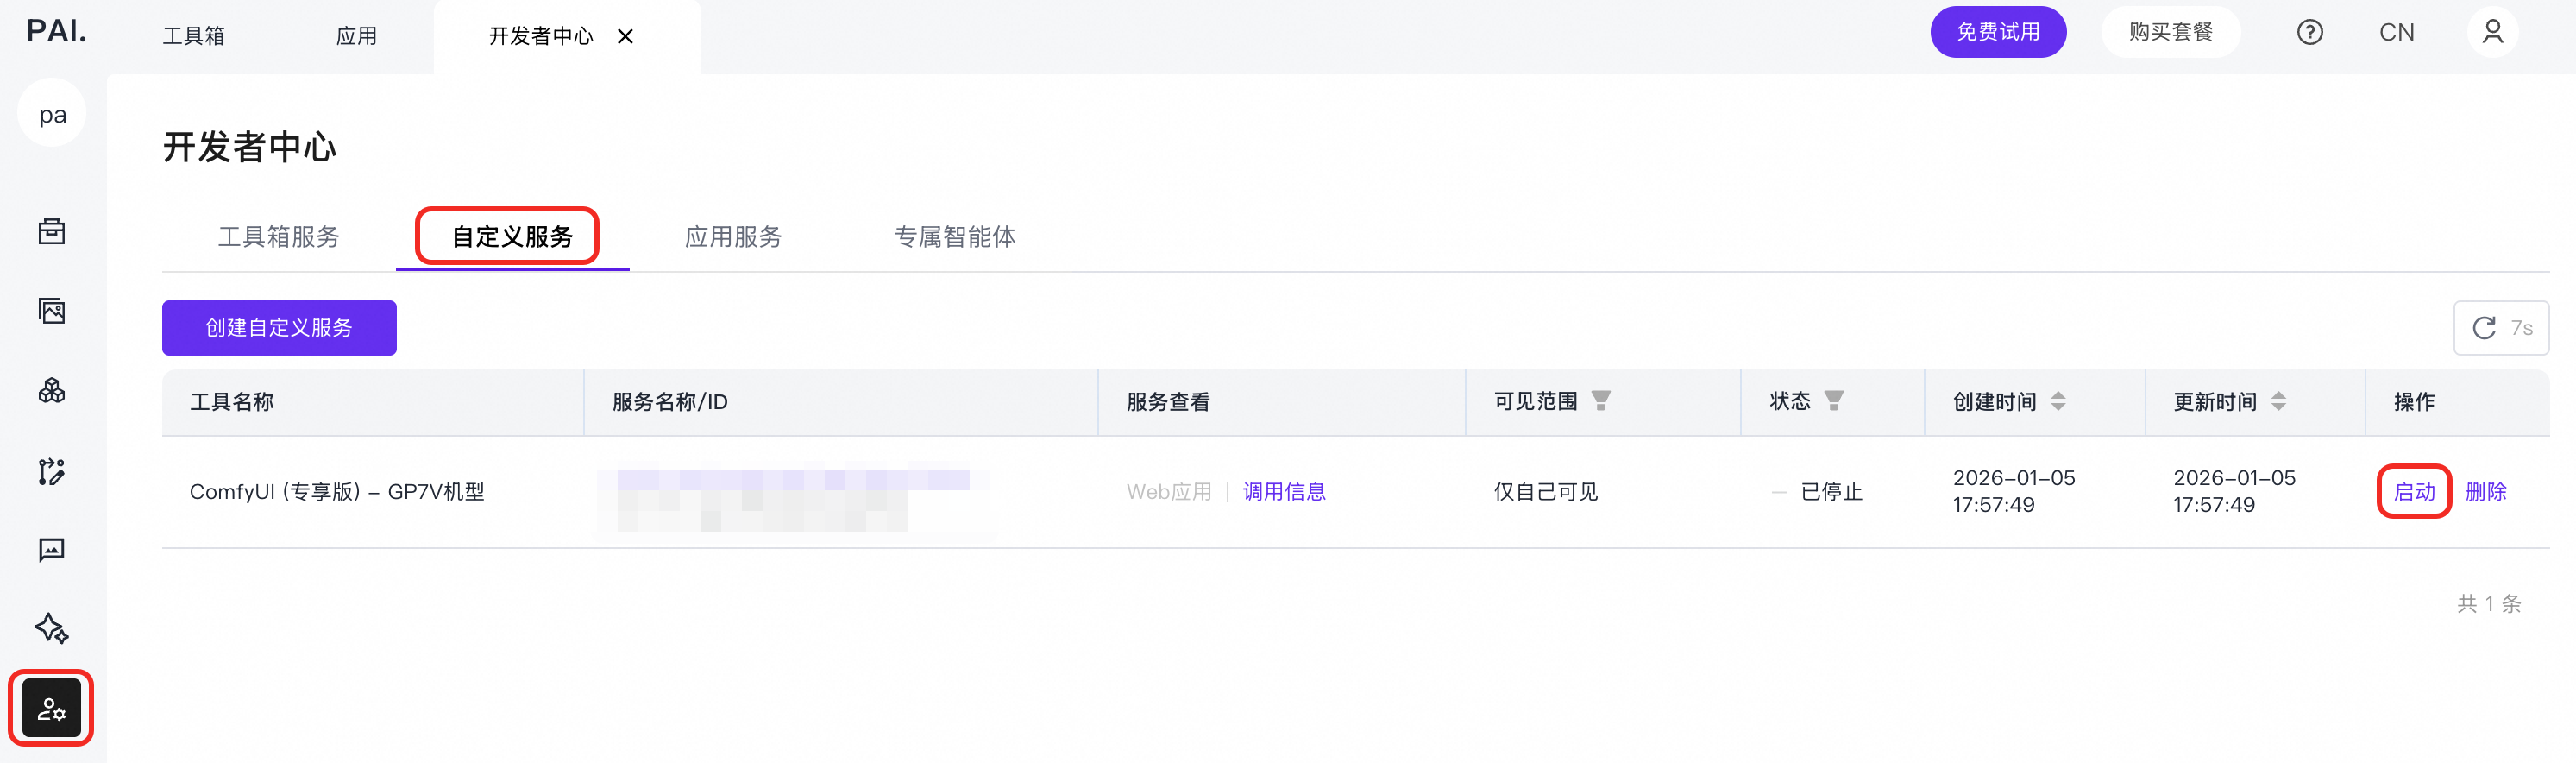
Select a running ComfyUI (Exclusive Edition) service and click Load Workflow.
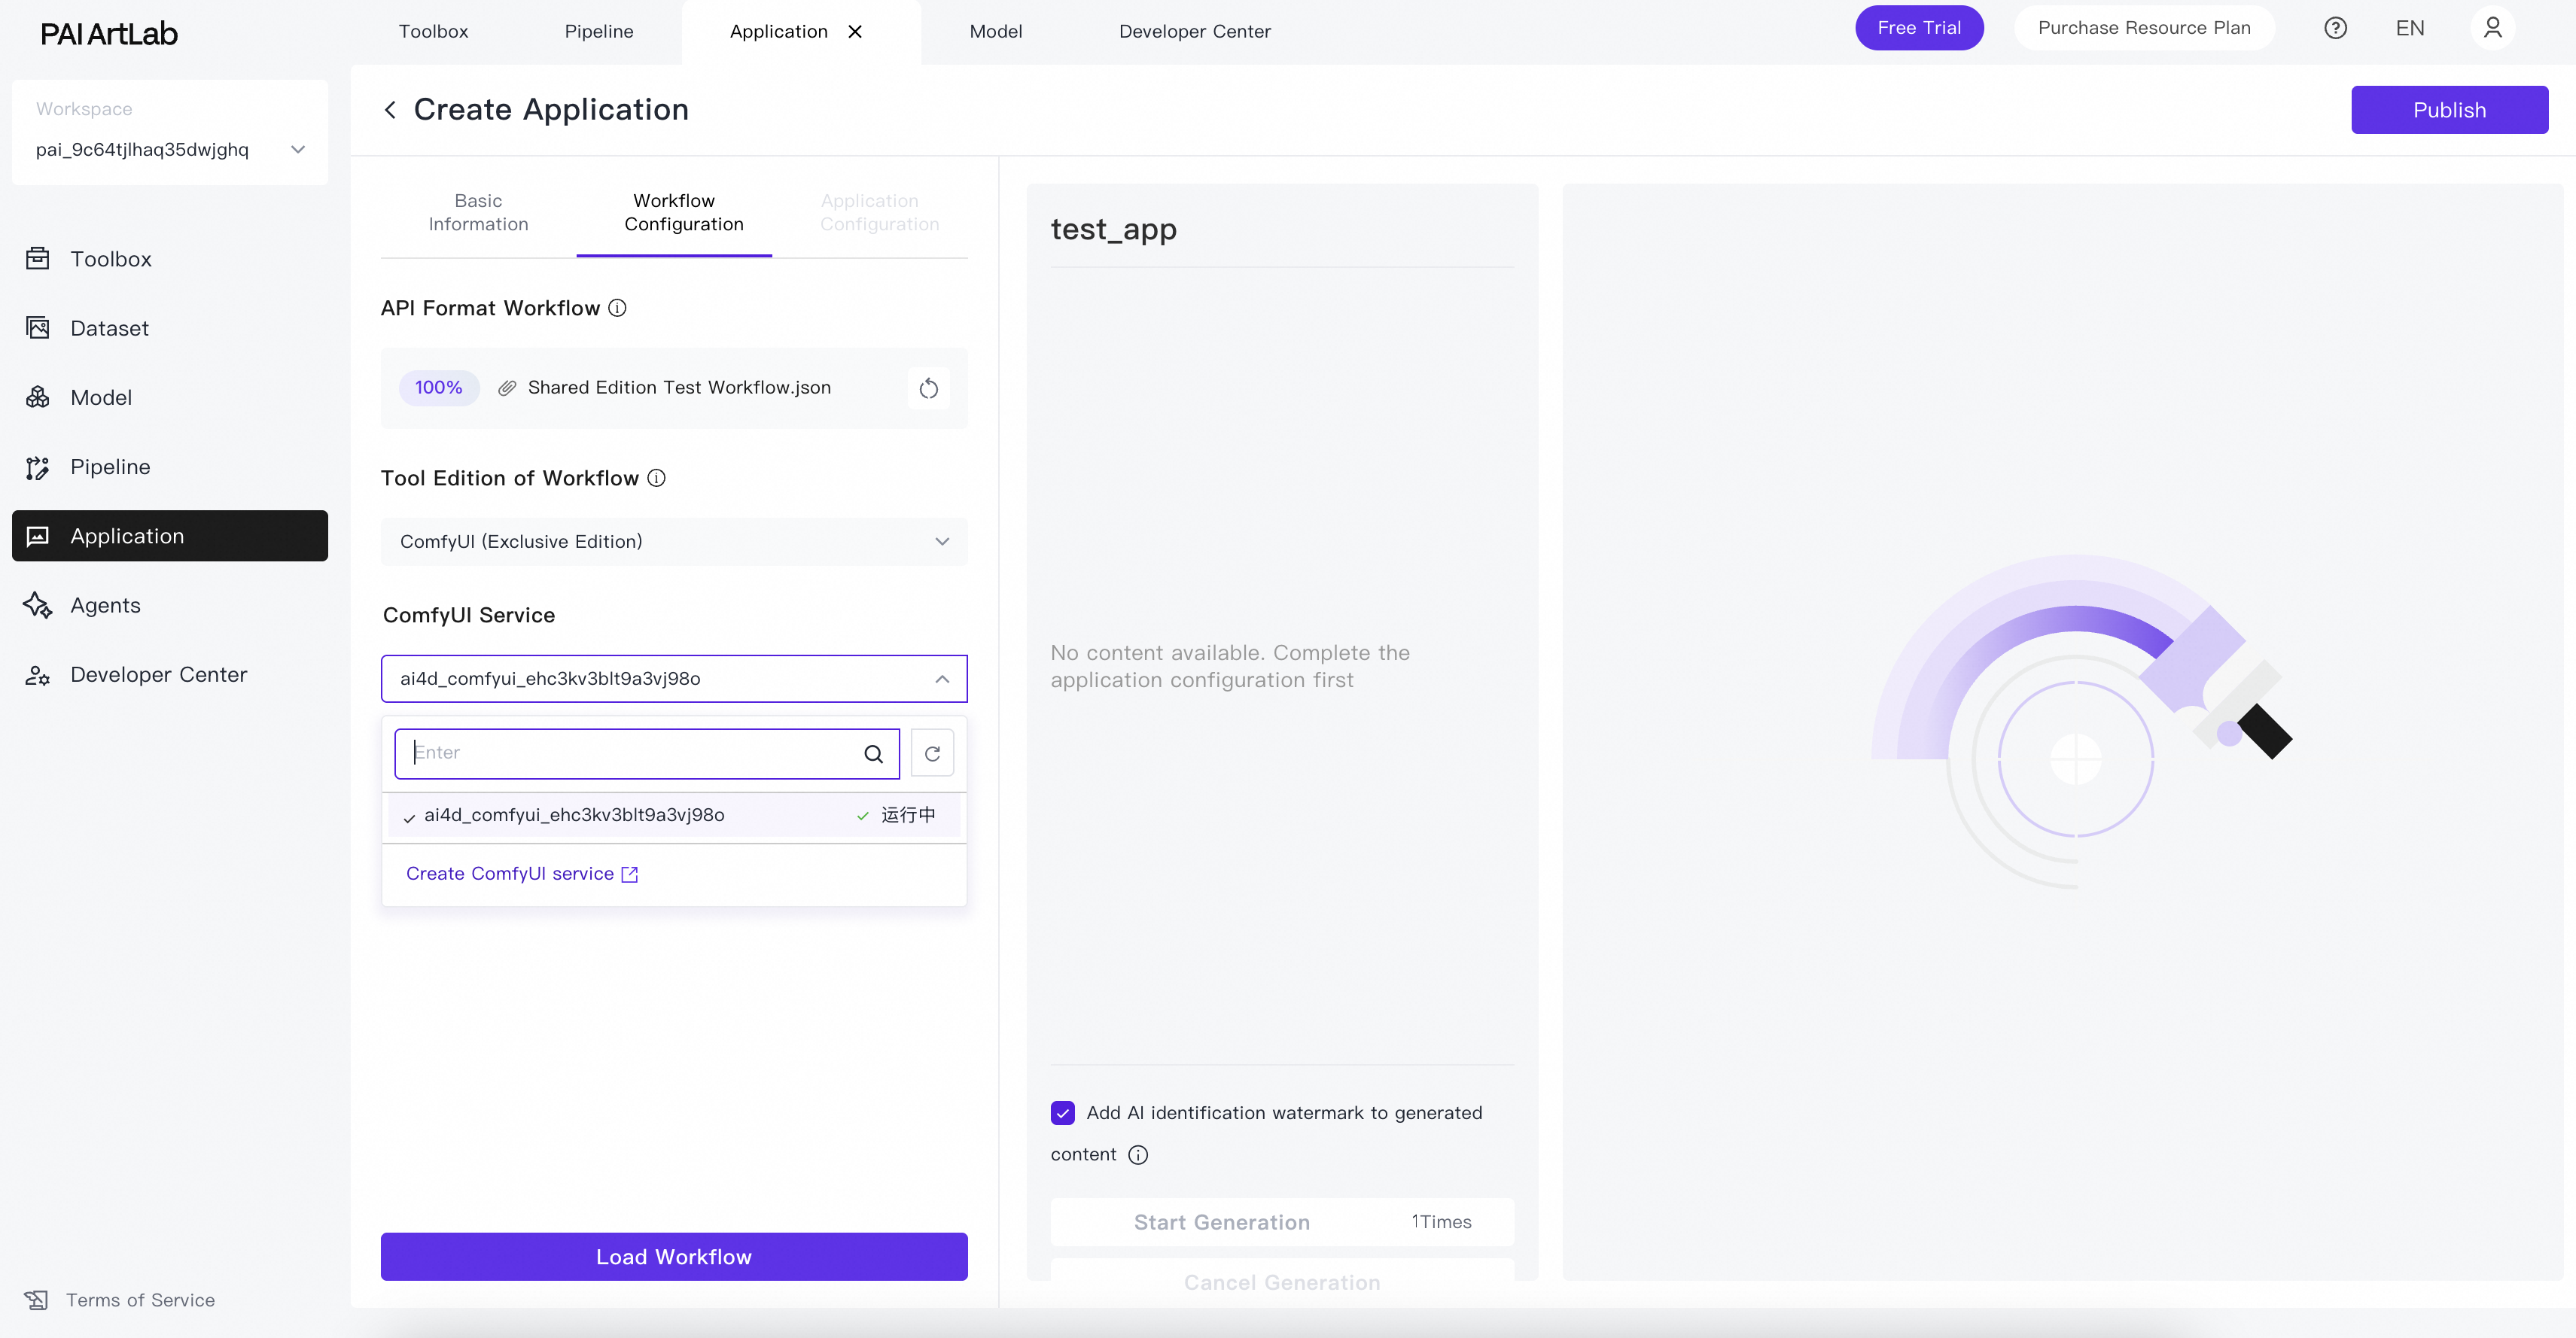
If no ComfyUI (Exclusive Edition) service is running, create one by clicking Create ComfyUI Service or start an existing service by clicking Start.
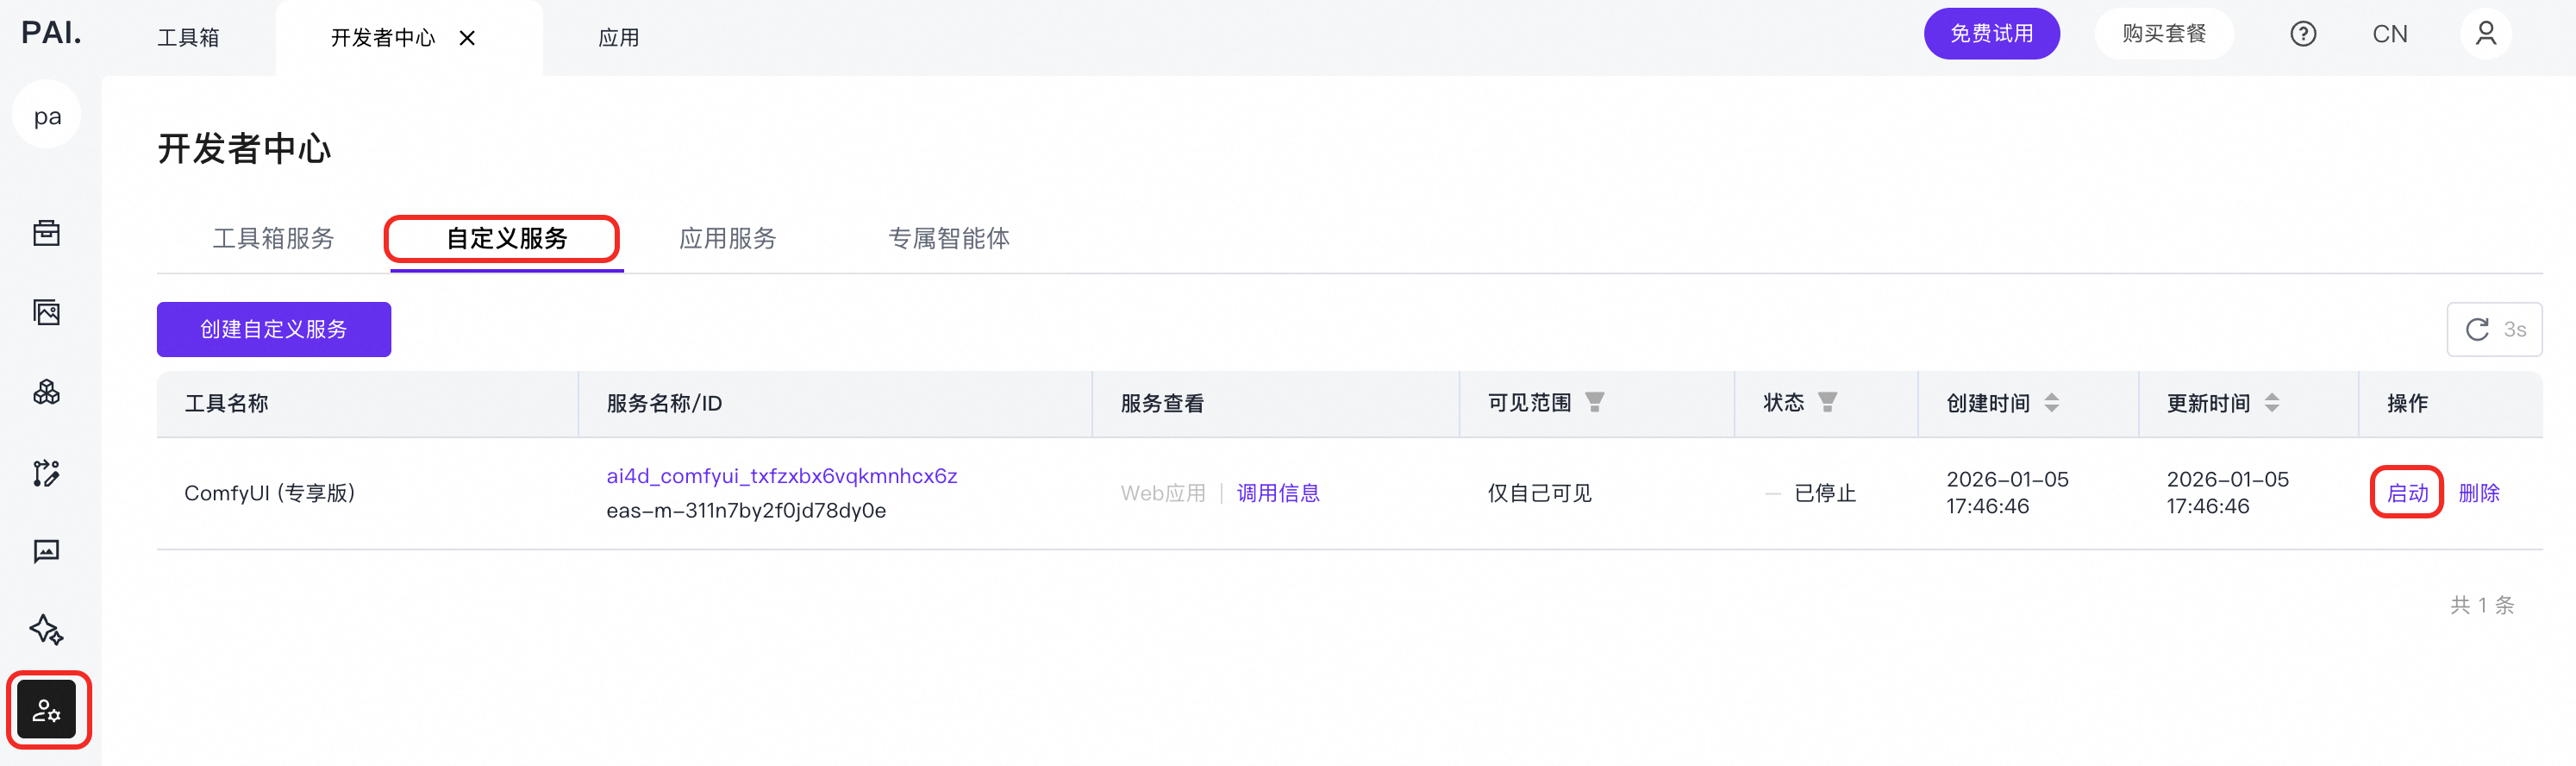
A Workflow loaded successfully message appears.
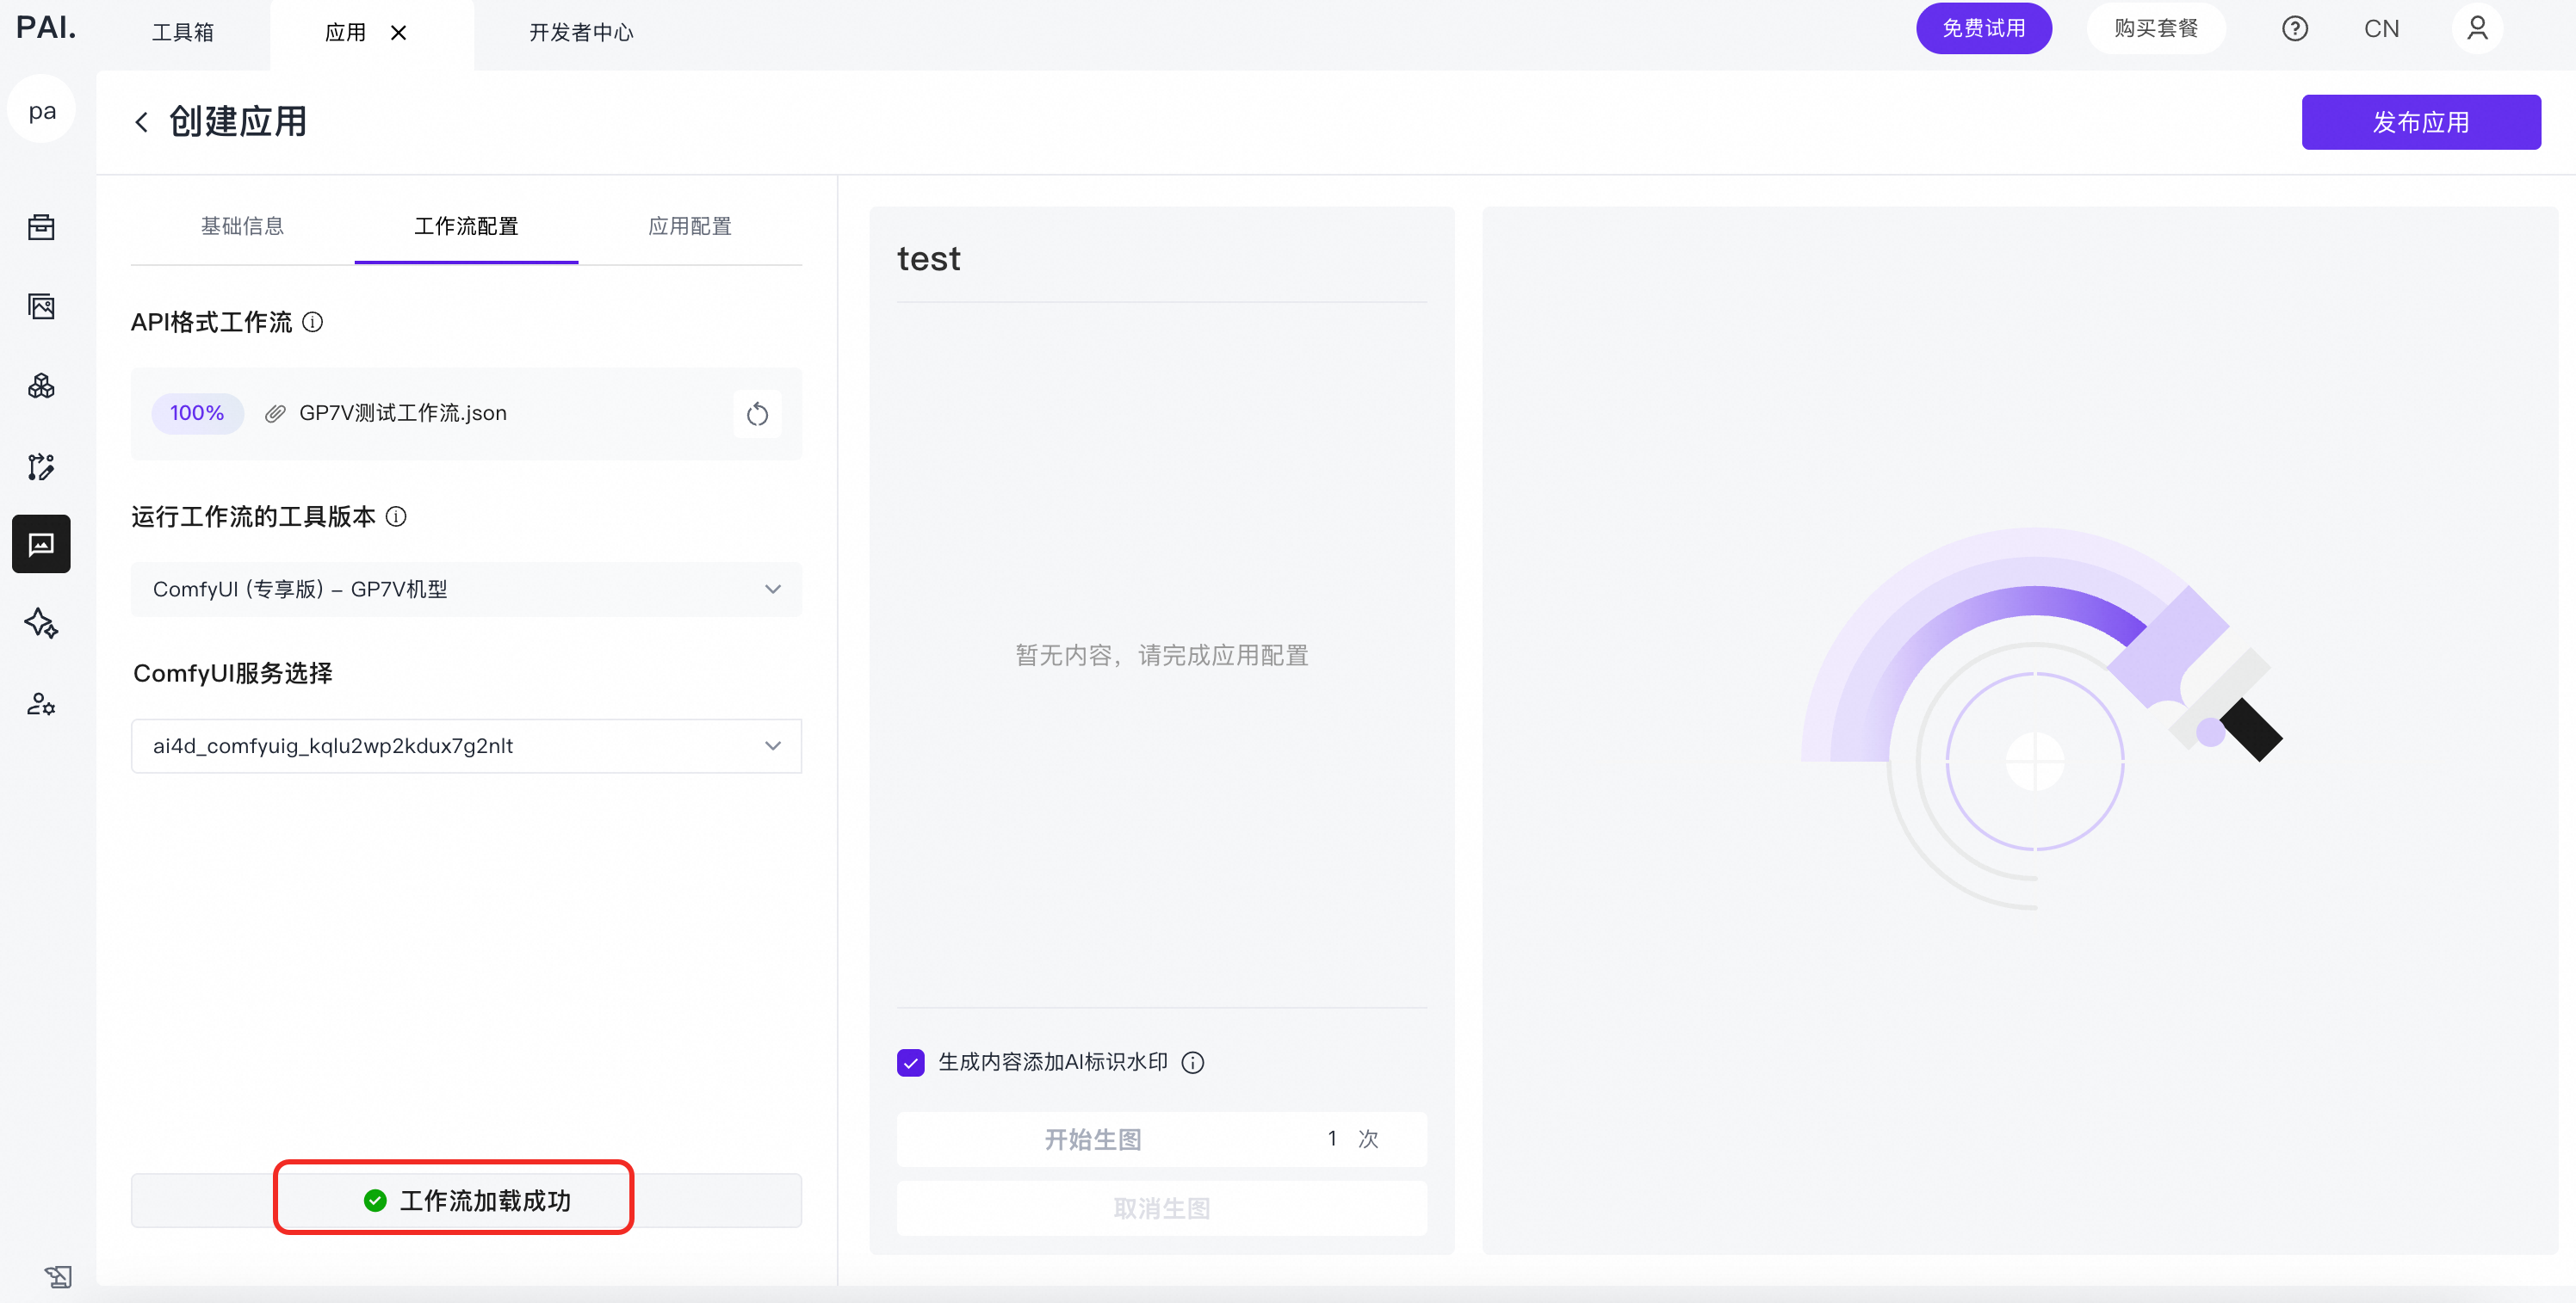
ComfyUI (Exclusive Edition) GP7V Type
Ensure the workflow runs in ComfyUI (Exclusive Edition) GP7V Type in PAI ArtLab and export it as an API-format workflow.

Upload the exported workflow file. For Tool Edition for Workflow, select ComfyUI (Exclusive Edition) GP7V Type.
Select a running ComfyUI (Exclusive Edition) GP7V Type service and click Load Workflow.
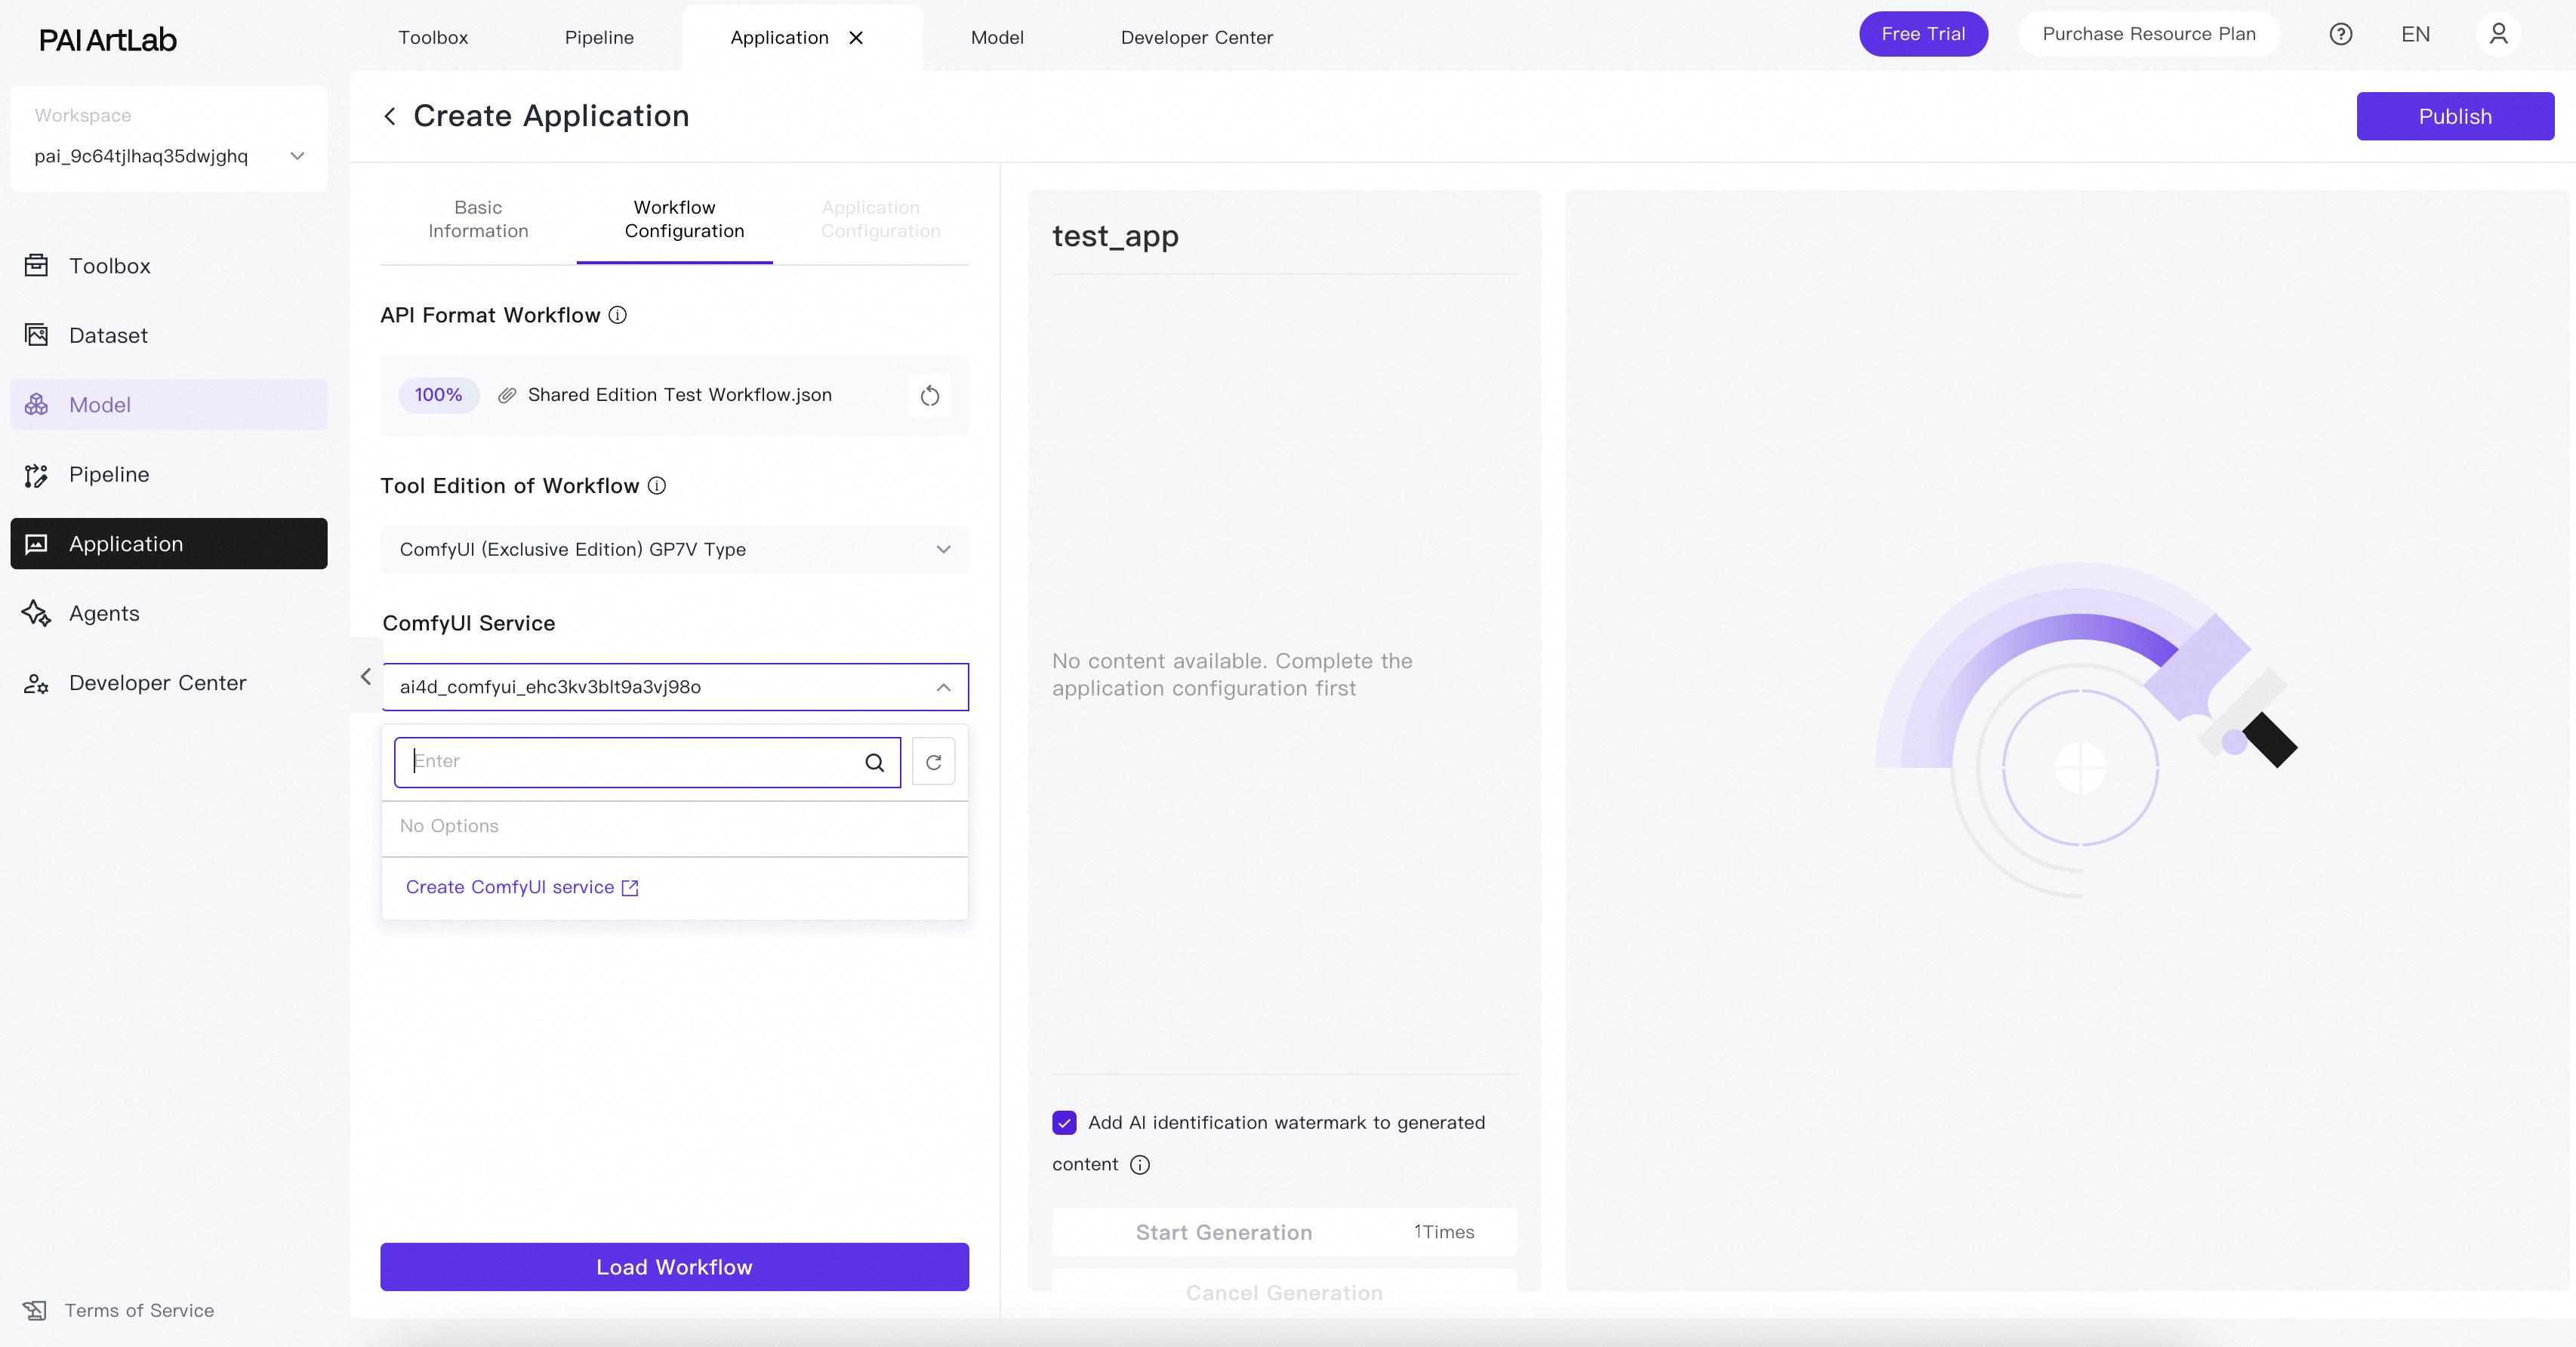
If no ComfyUI (Exclusive Edition) GP7V Type service is running, create one by clicking Create ComfyUI Service or start an existing service by clicking Start.
A Workflow loaded successfully message appears.
-
-
On the Application Configuration tab, configure the parameters after the workflow loads:
-
Application Output Type: Image or video.
-
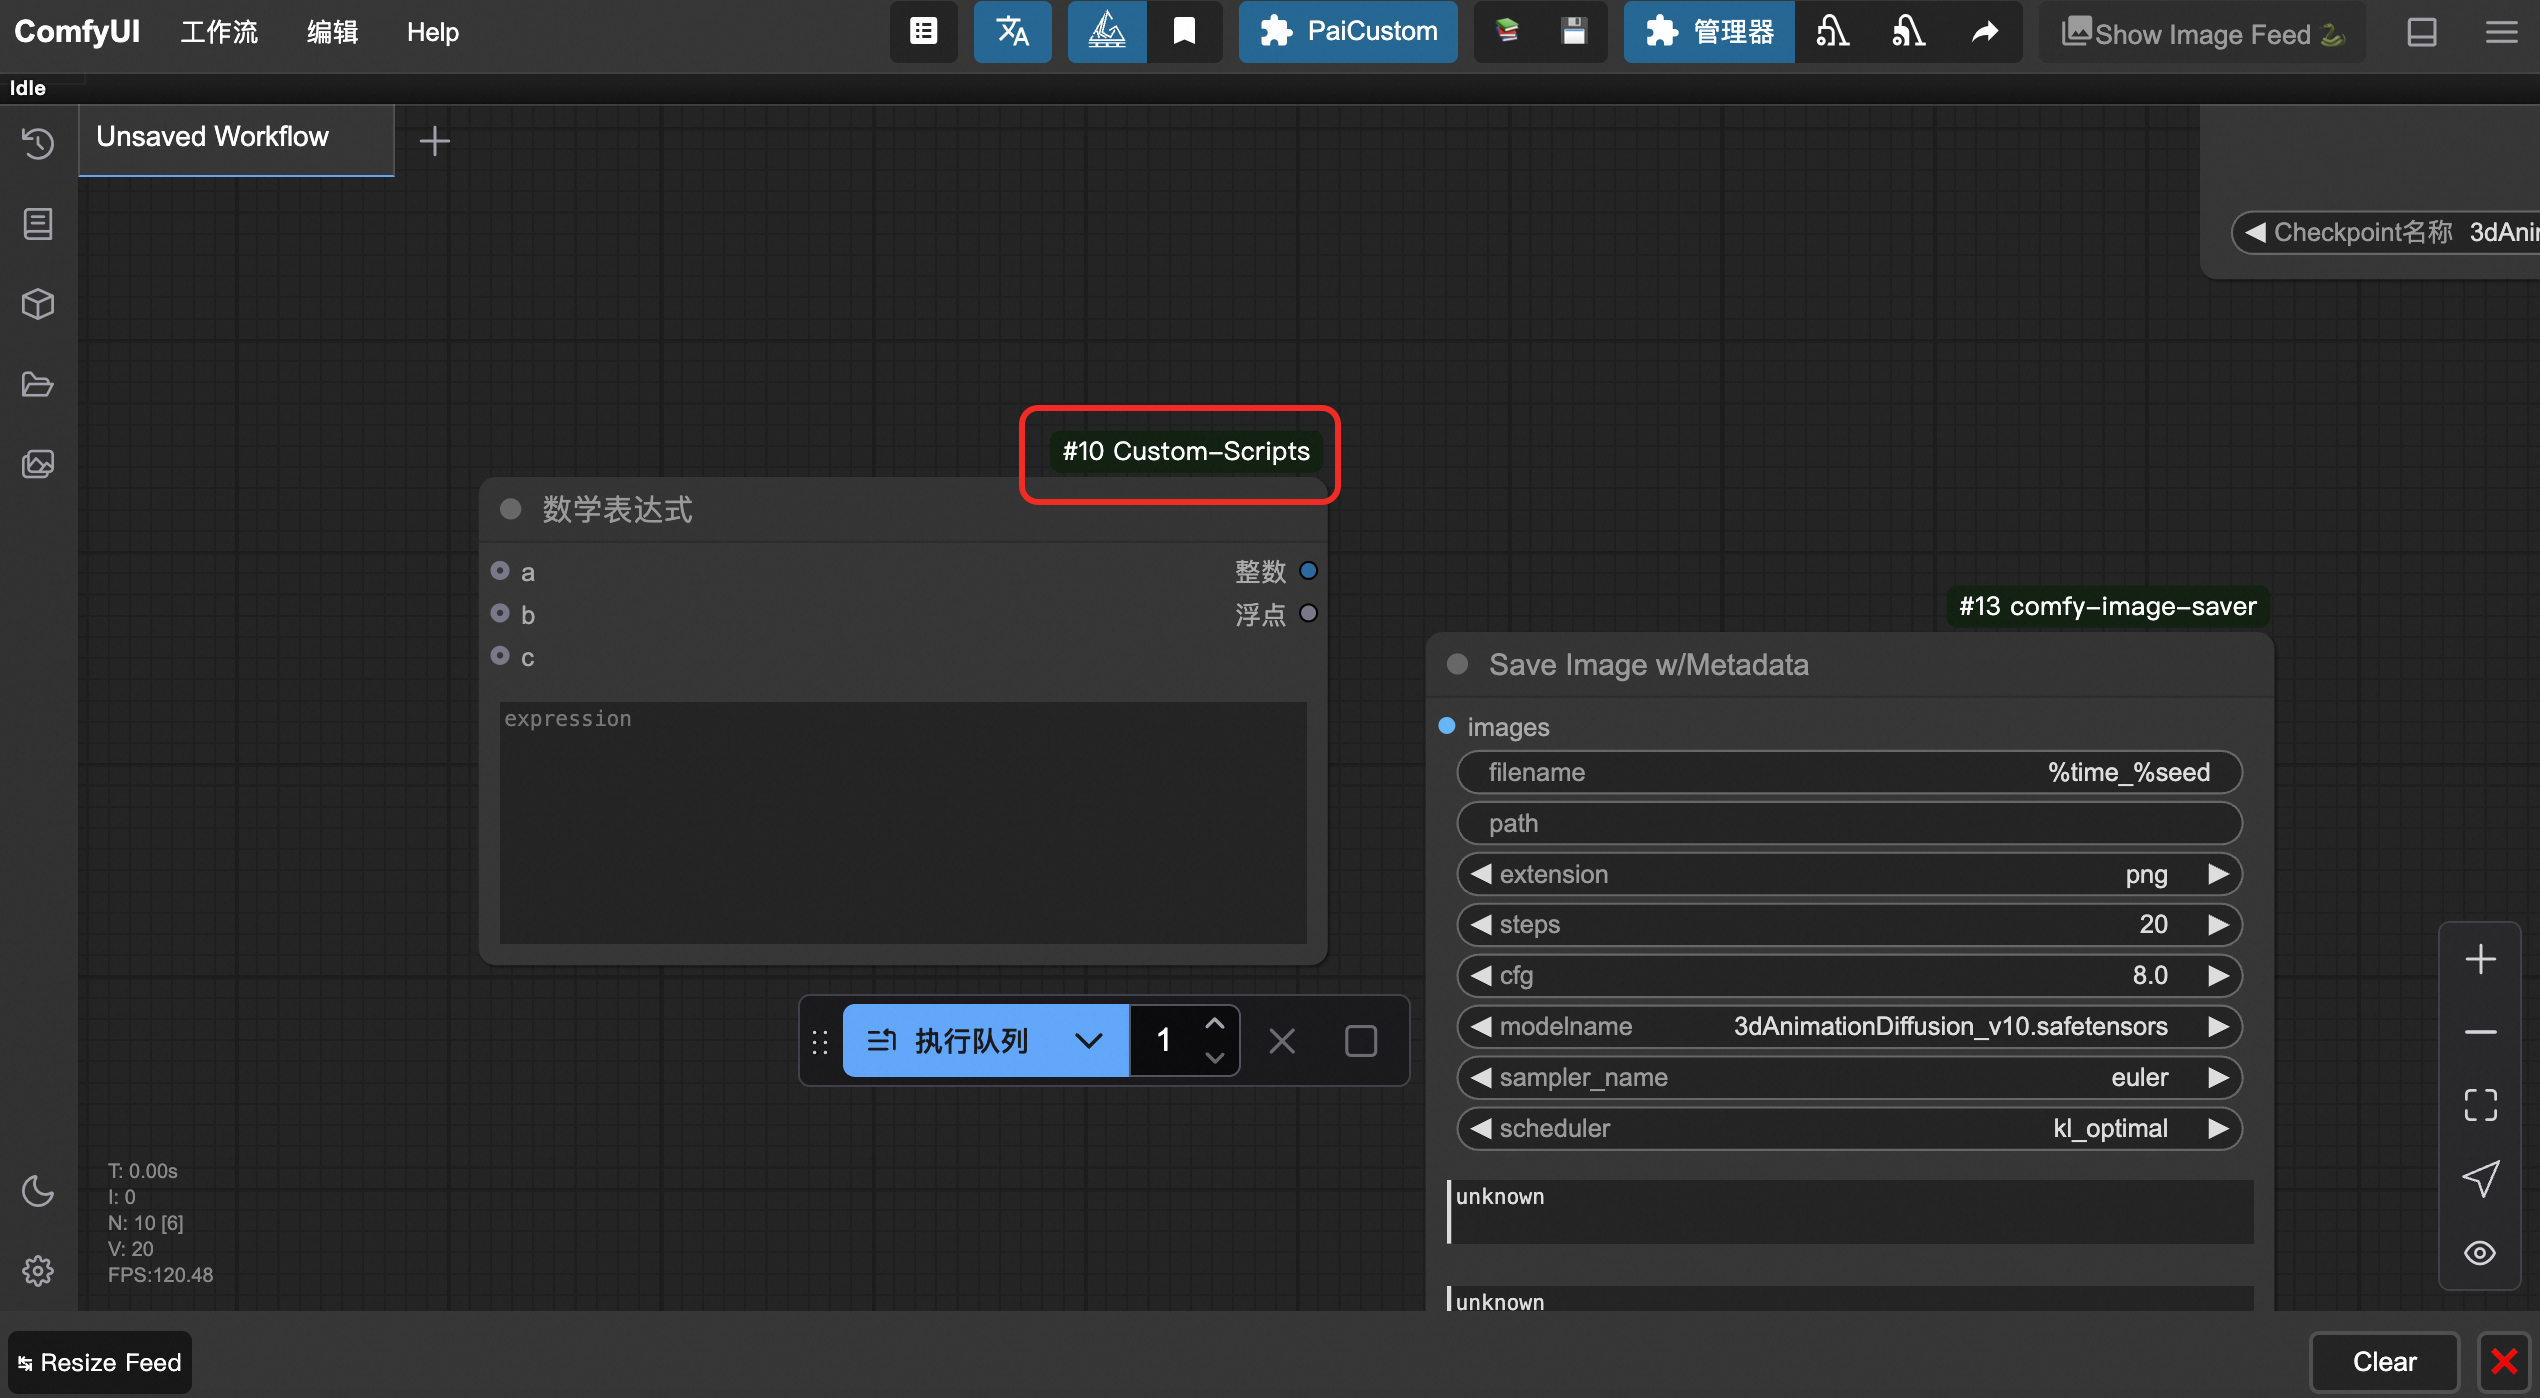
Application Output Configuration: Final output node in the workflow.
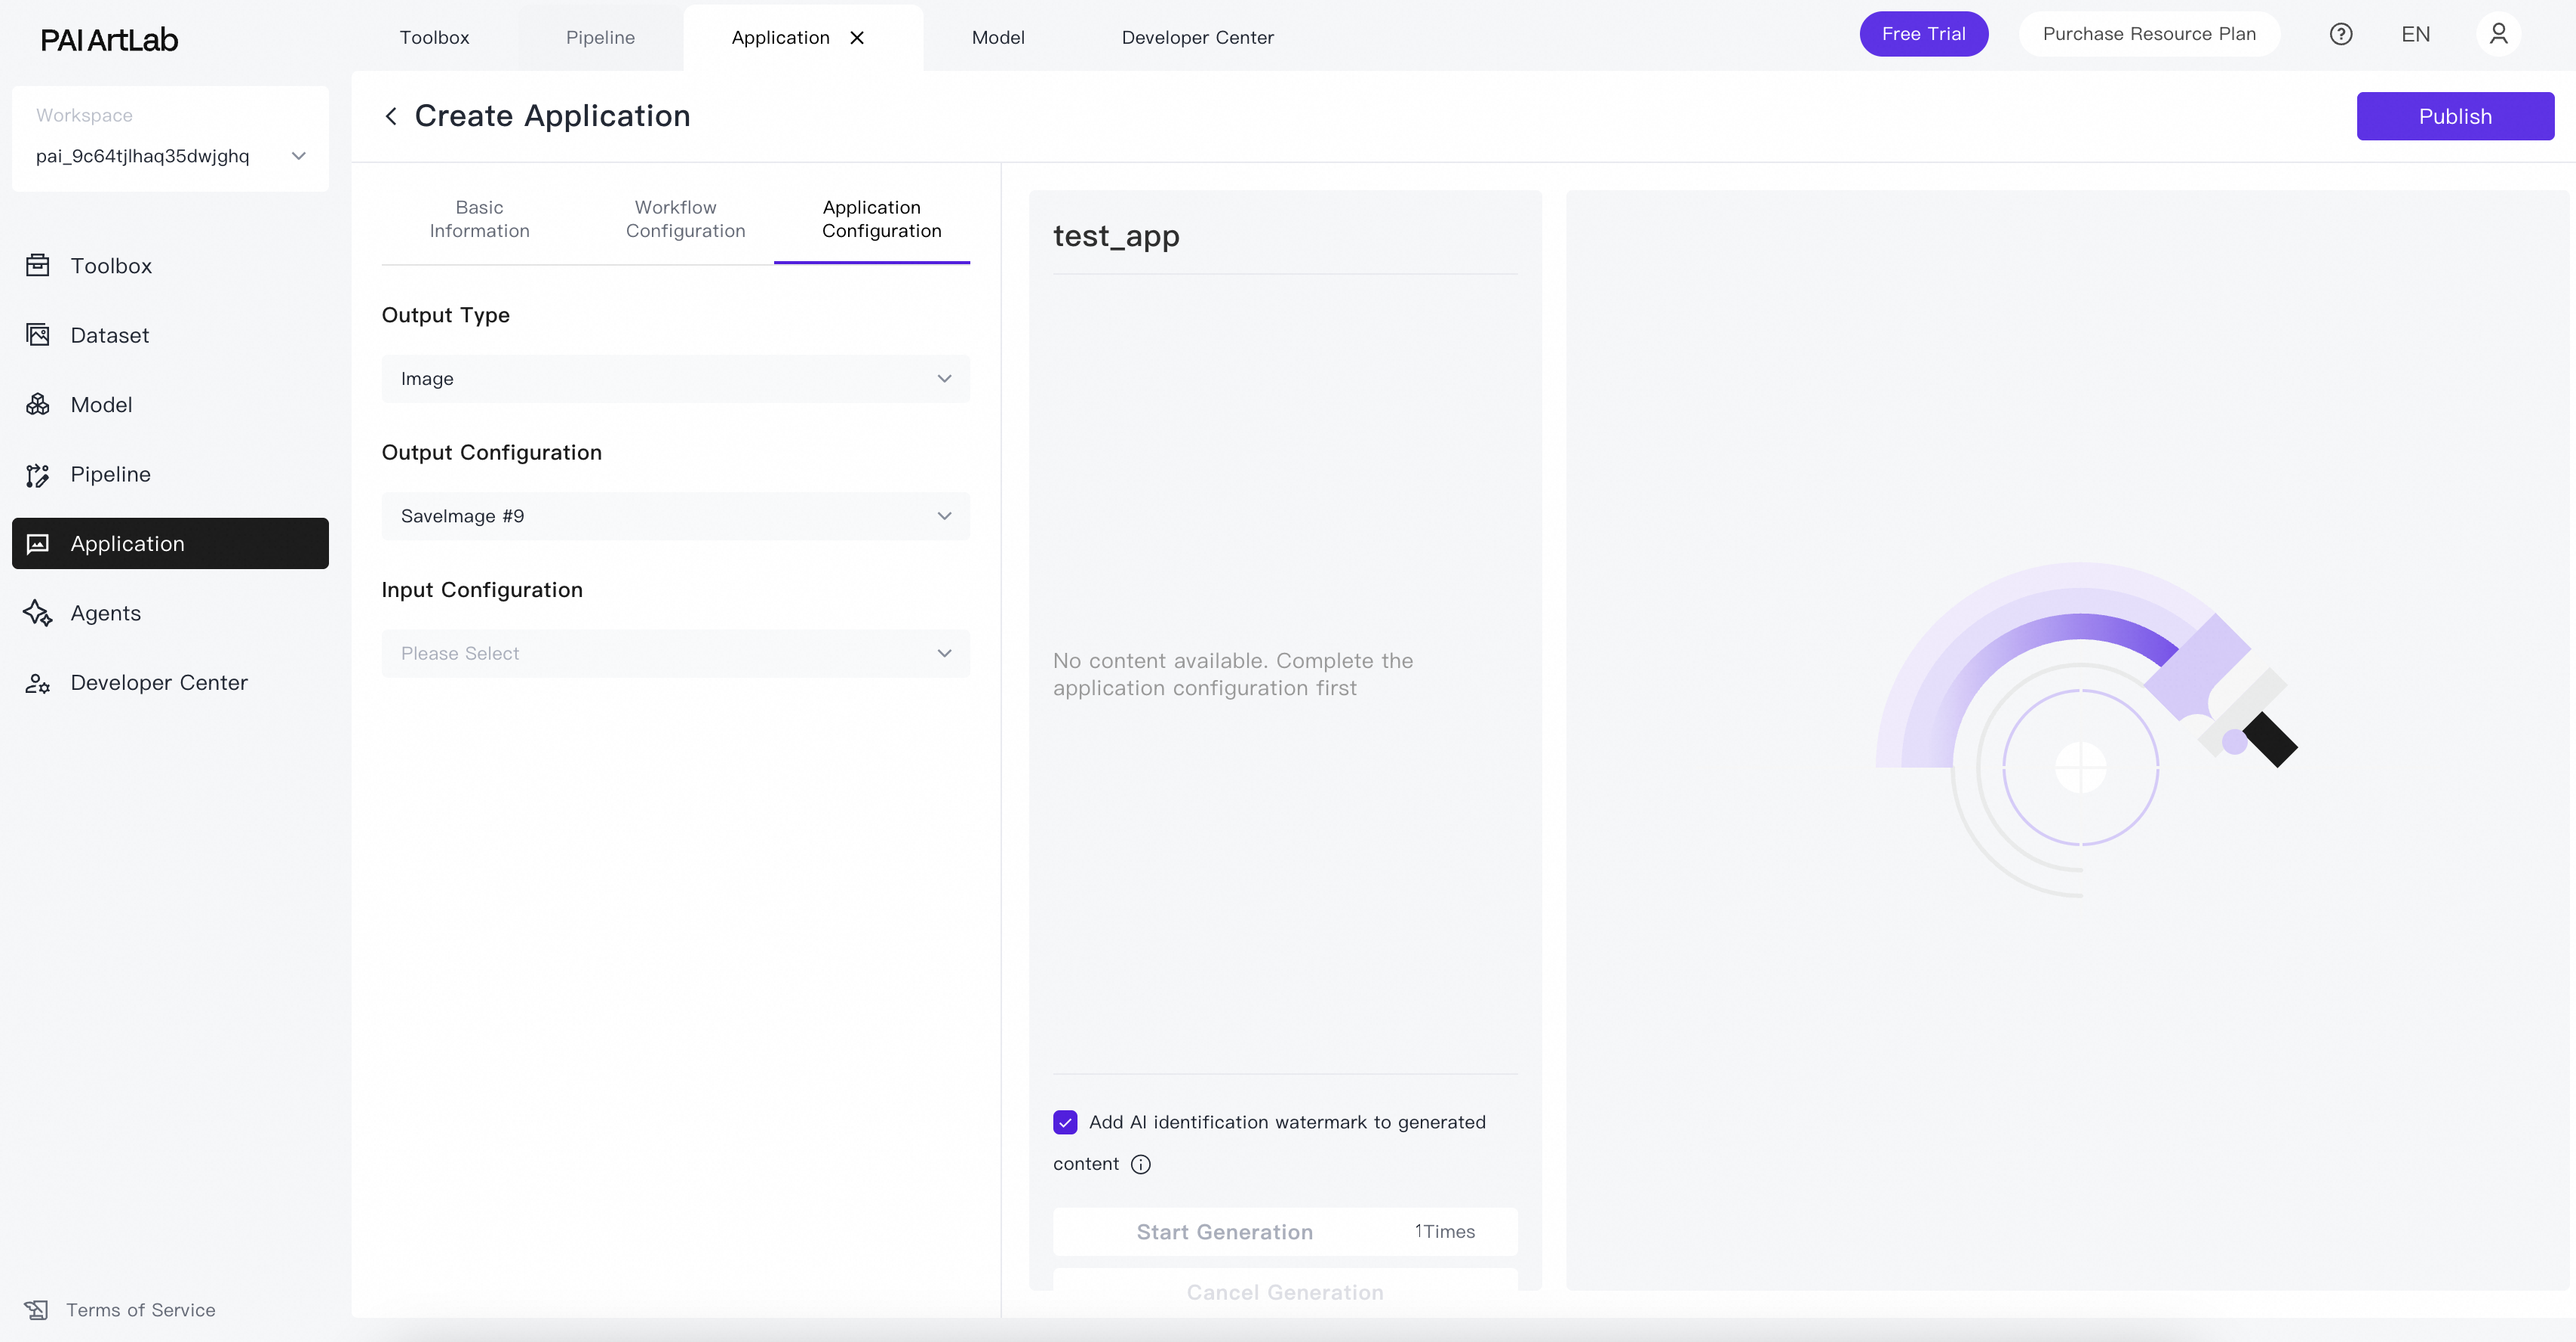
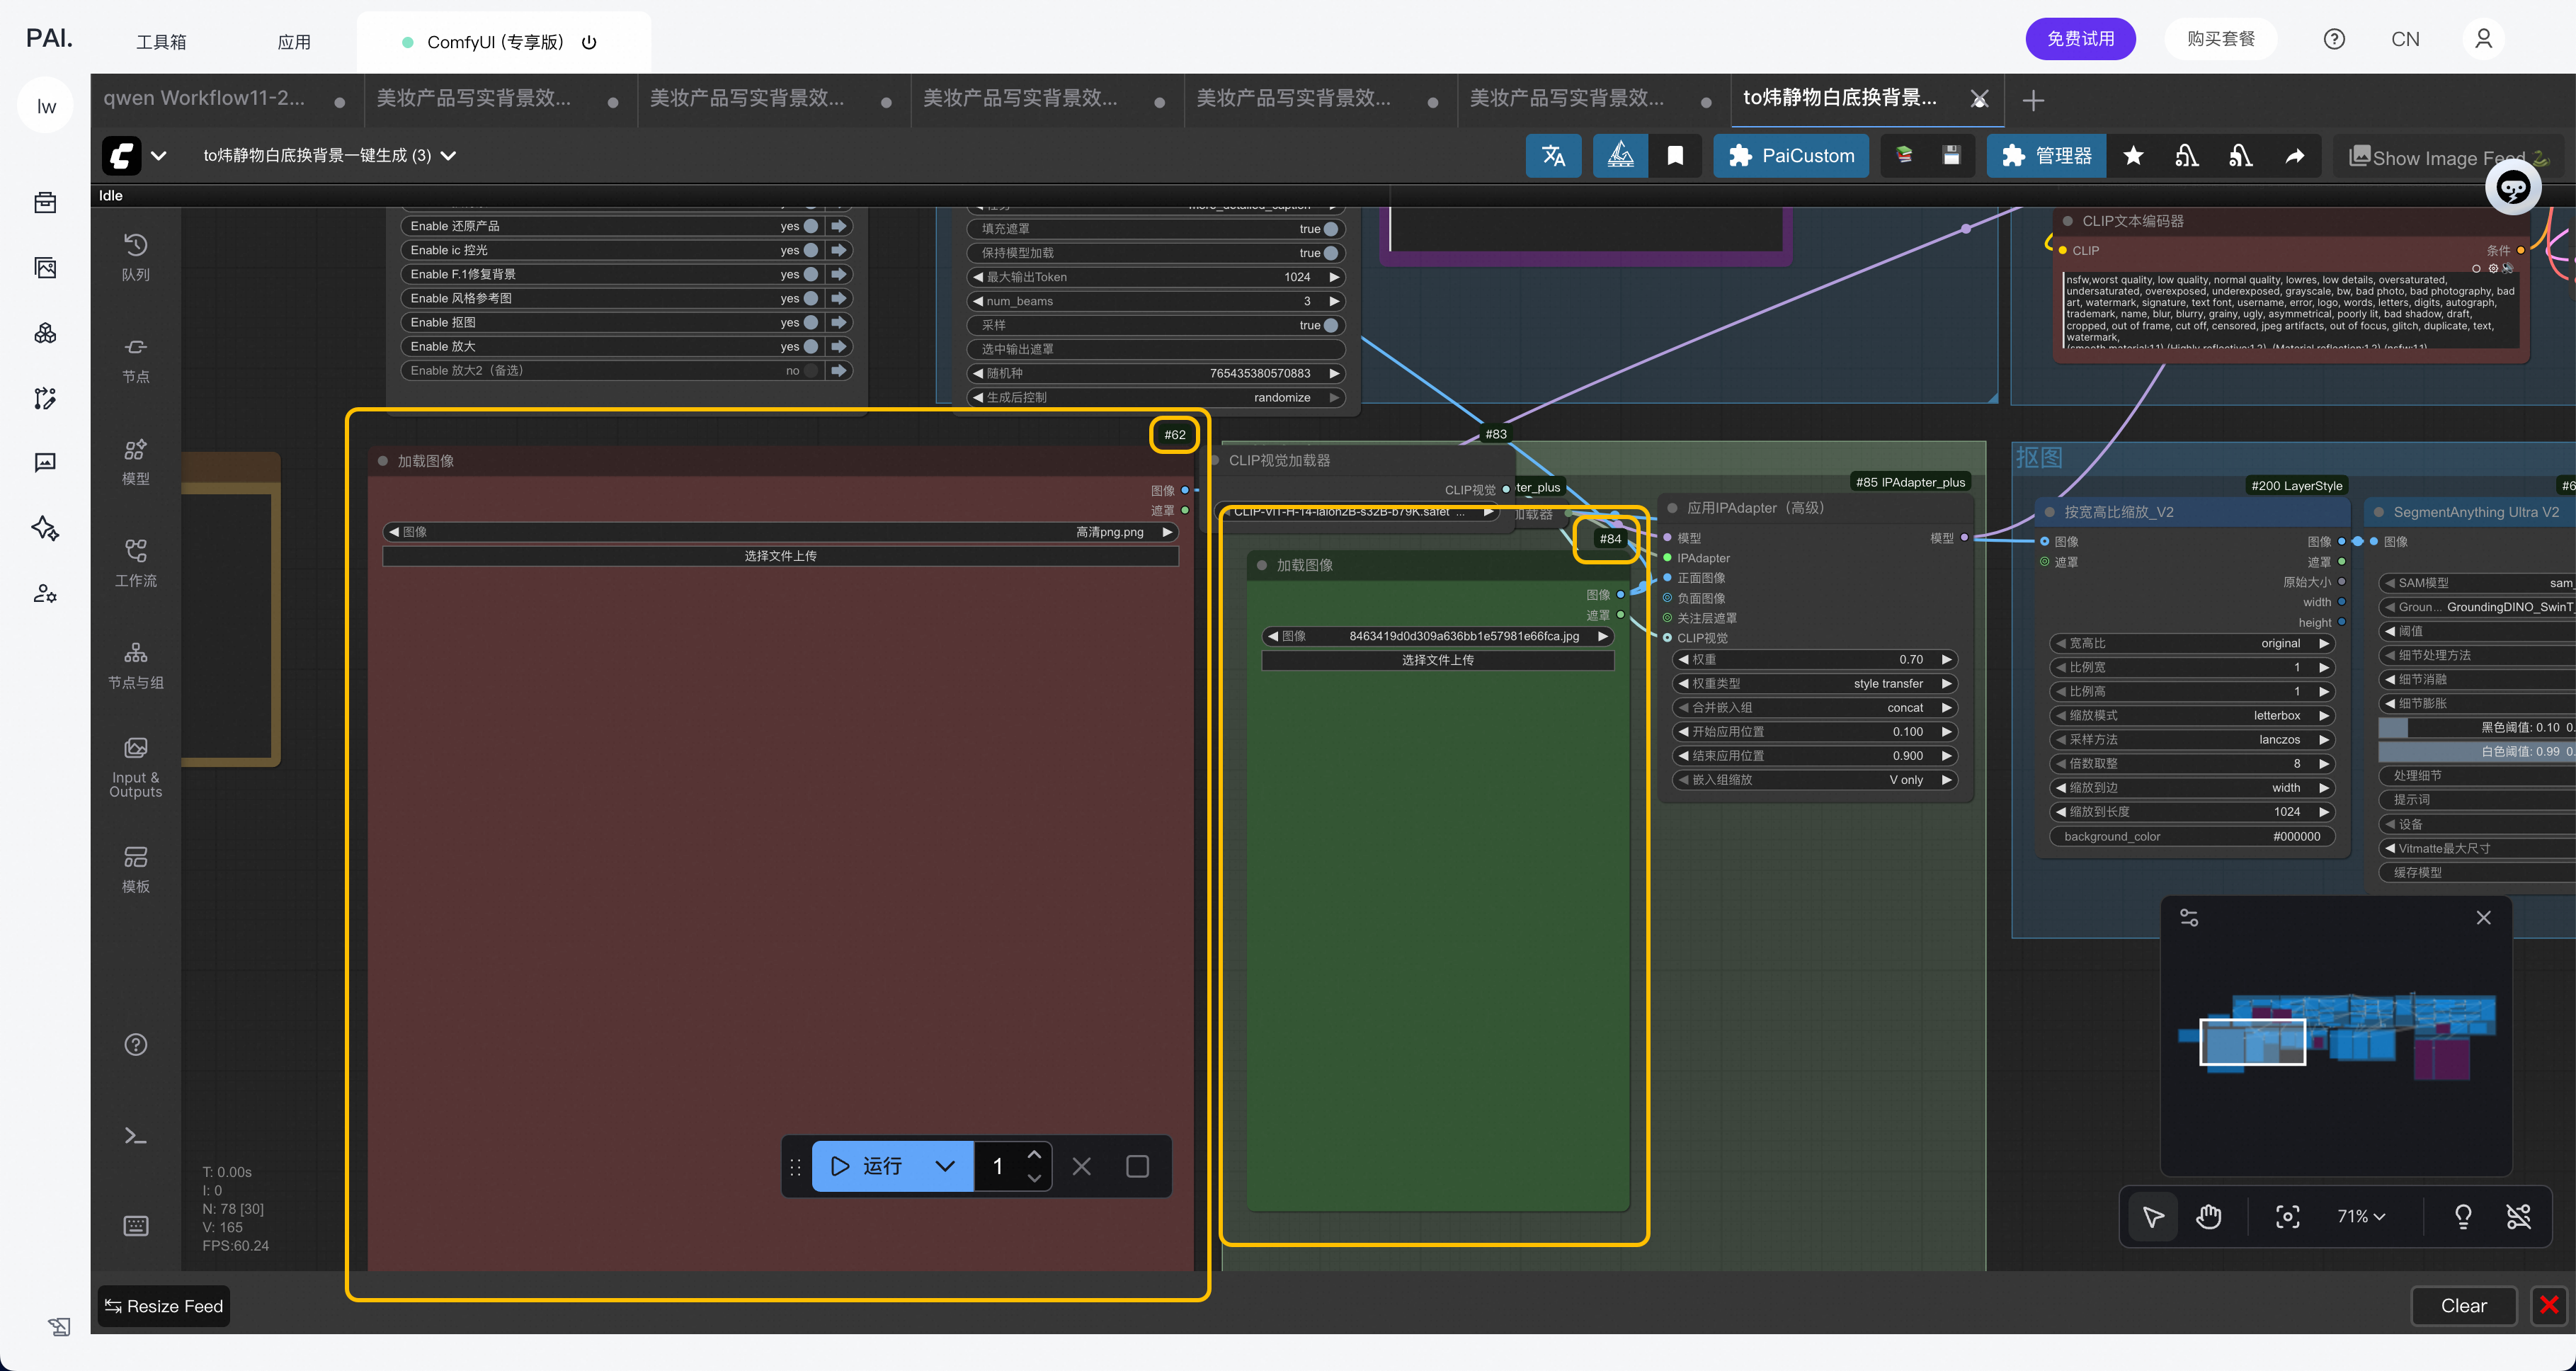
This is the output node of the workflow. To learn how to view node IDs, see How do I display and view node IDs?
-
Application Input Configuration: Input nodes from the workflow to display on the application user interface.

These are the input nodes of the workflow. To learn how to view node IDs, see How do I display and view node IDs?
-
-
Click Publish Application. After publishing, view and use the application on the My Applications tab.
Share an application
-
On the My Applications tab, click the
 (Share) icon on the application card to open the sharing configuration page.
 -
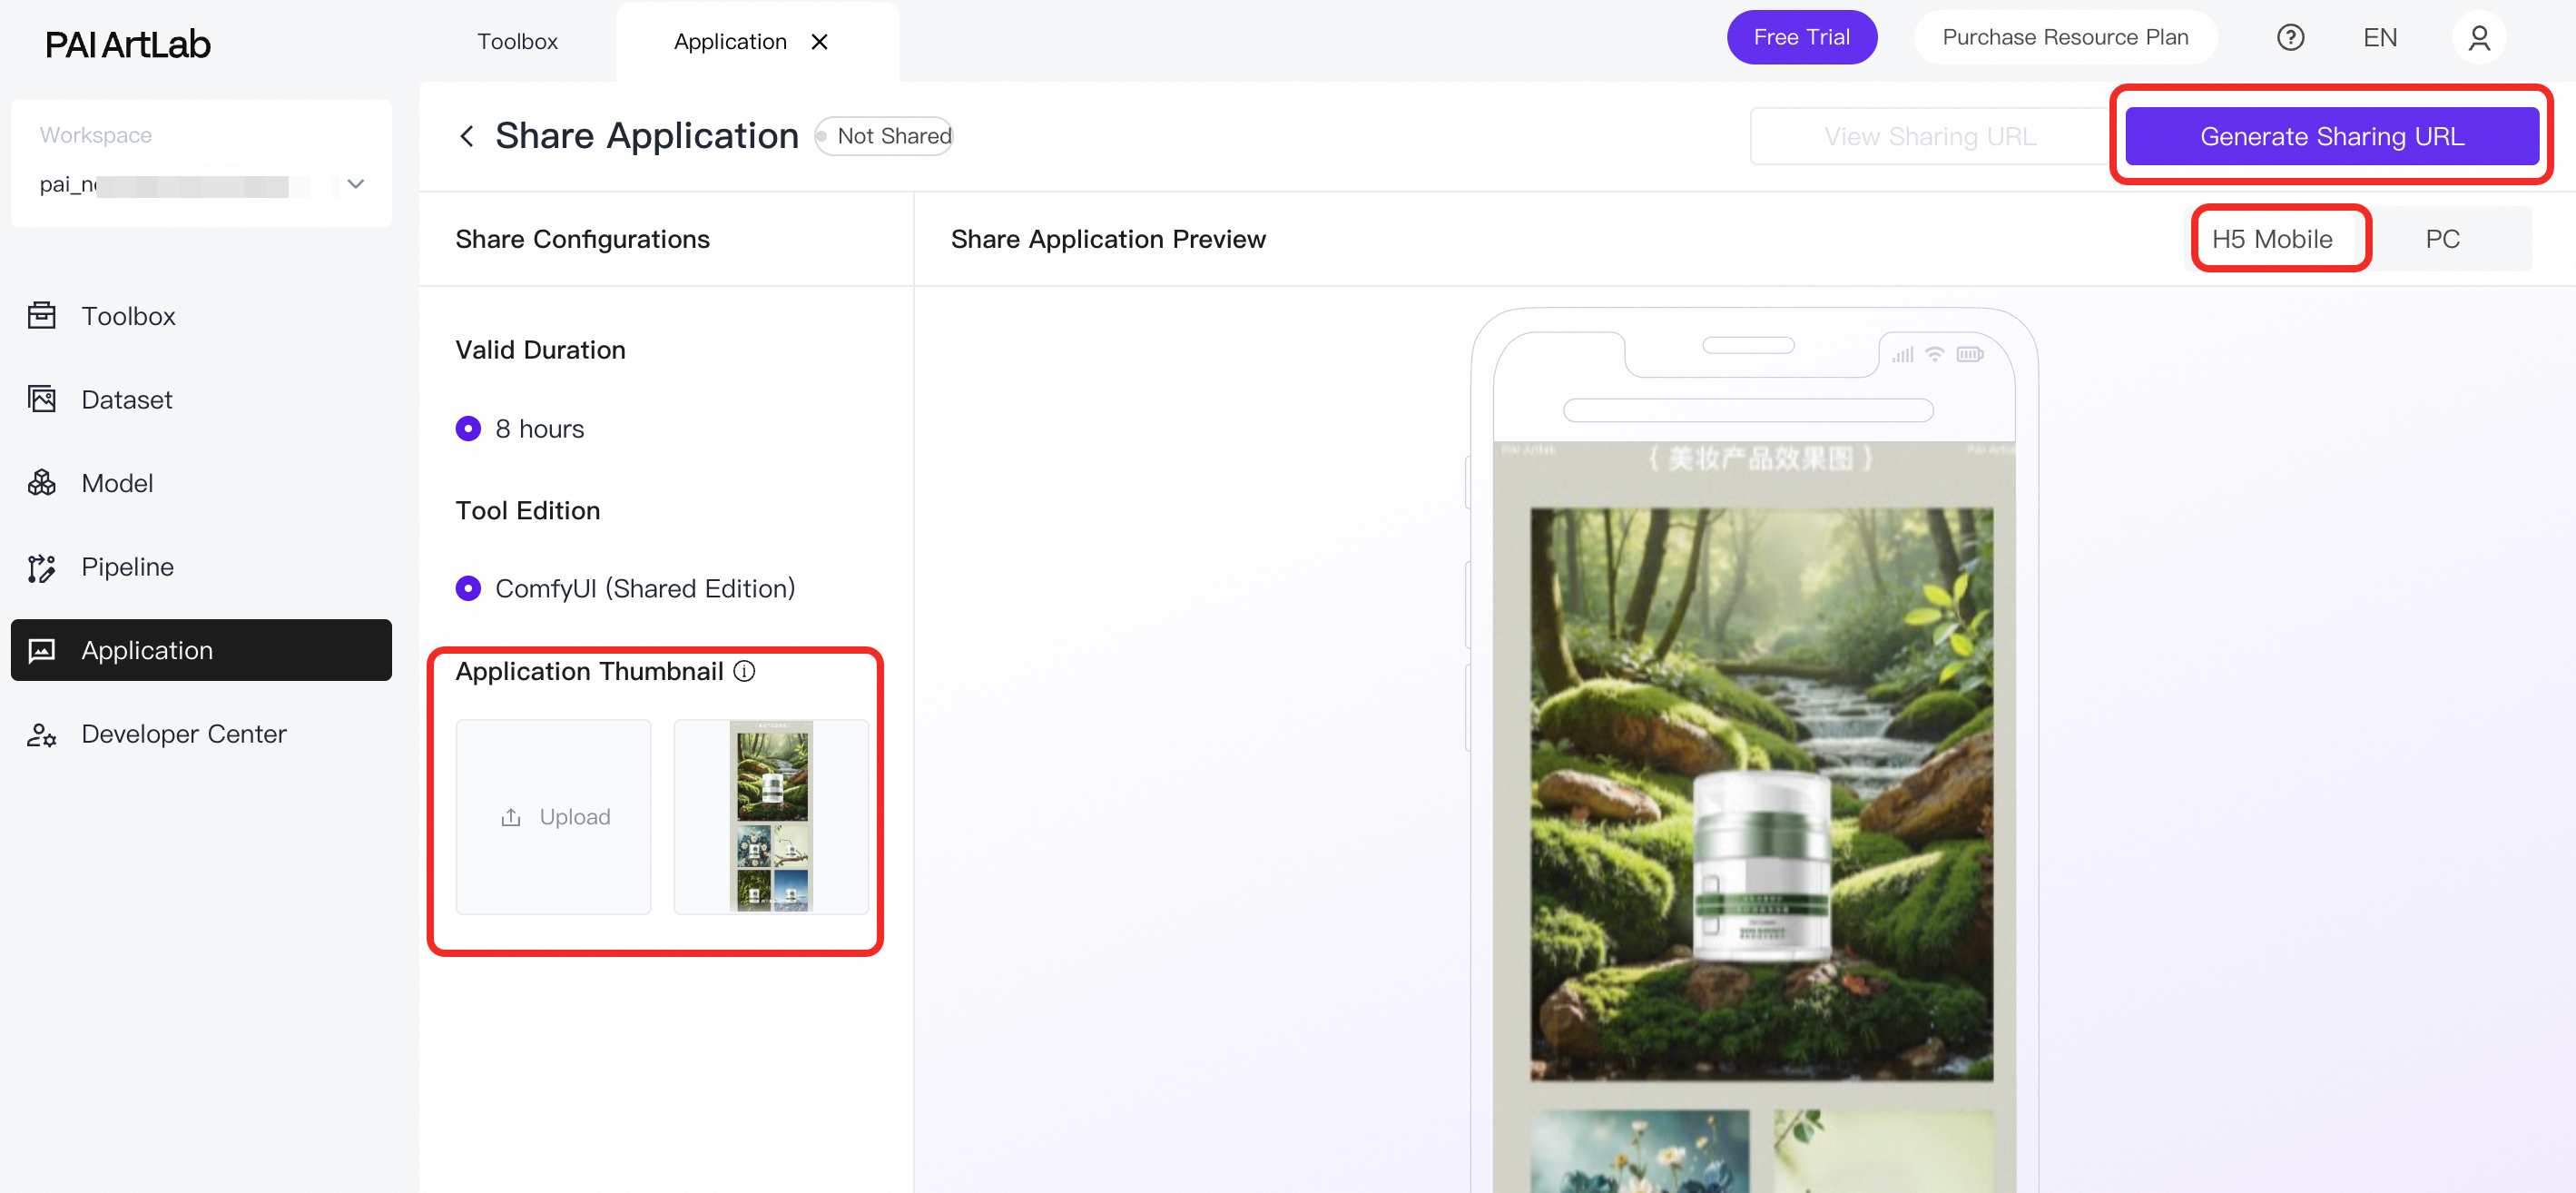
On the H5 Mobile tab, upload an Application Thumbnail and click Generate Share Link.
For optimal preview on mobile devices, use a 750 × 1624 pixel portrait image for the thumbnail.
-
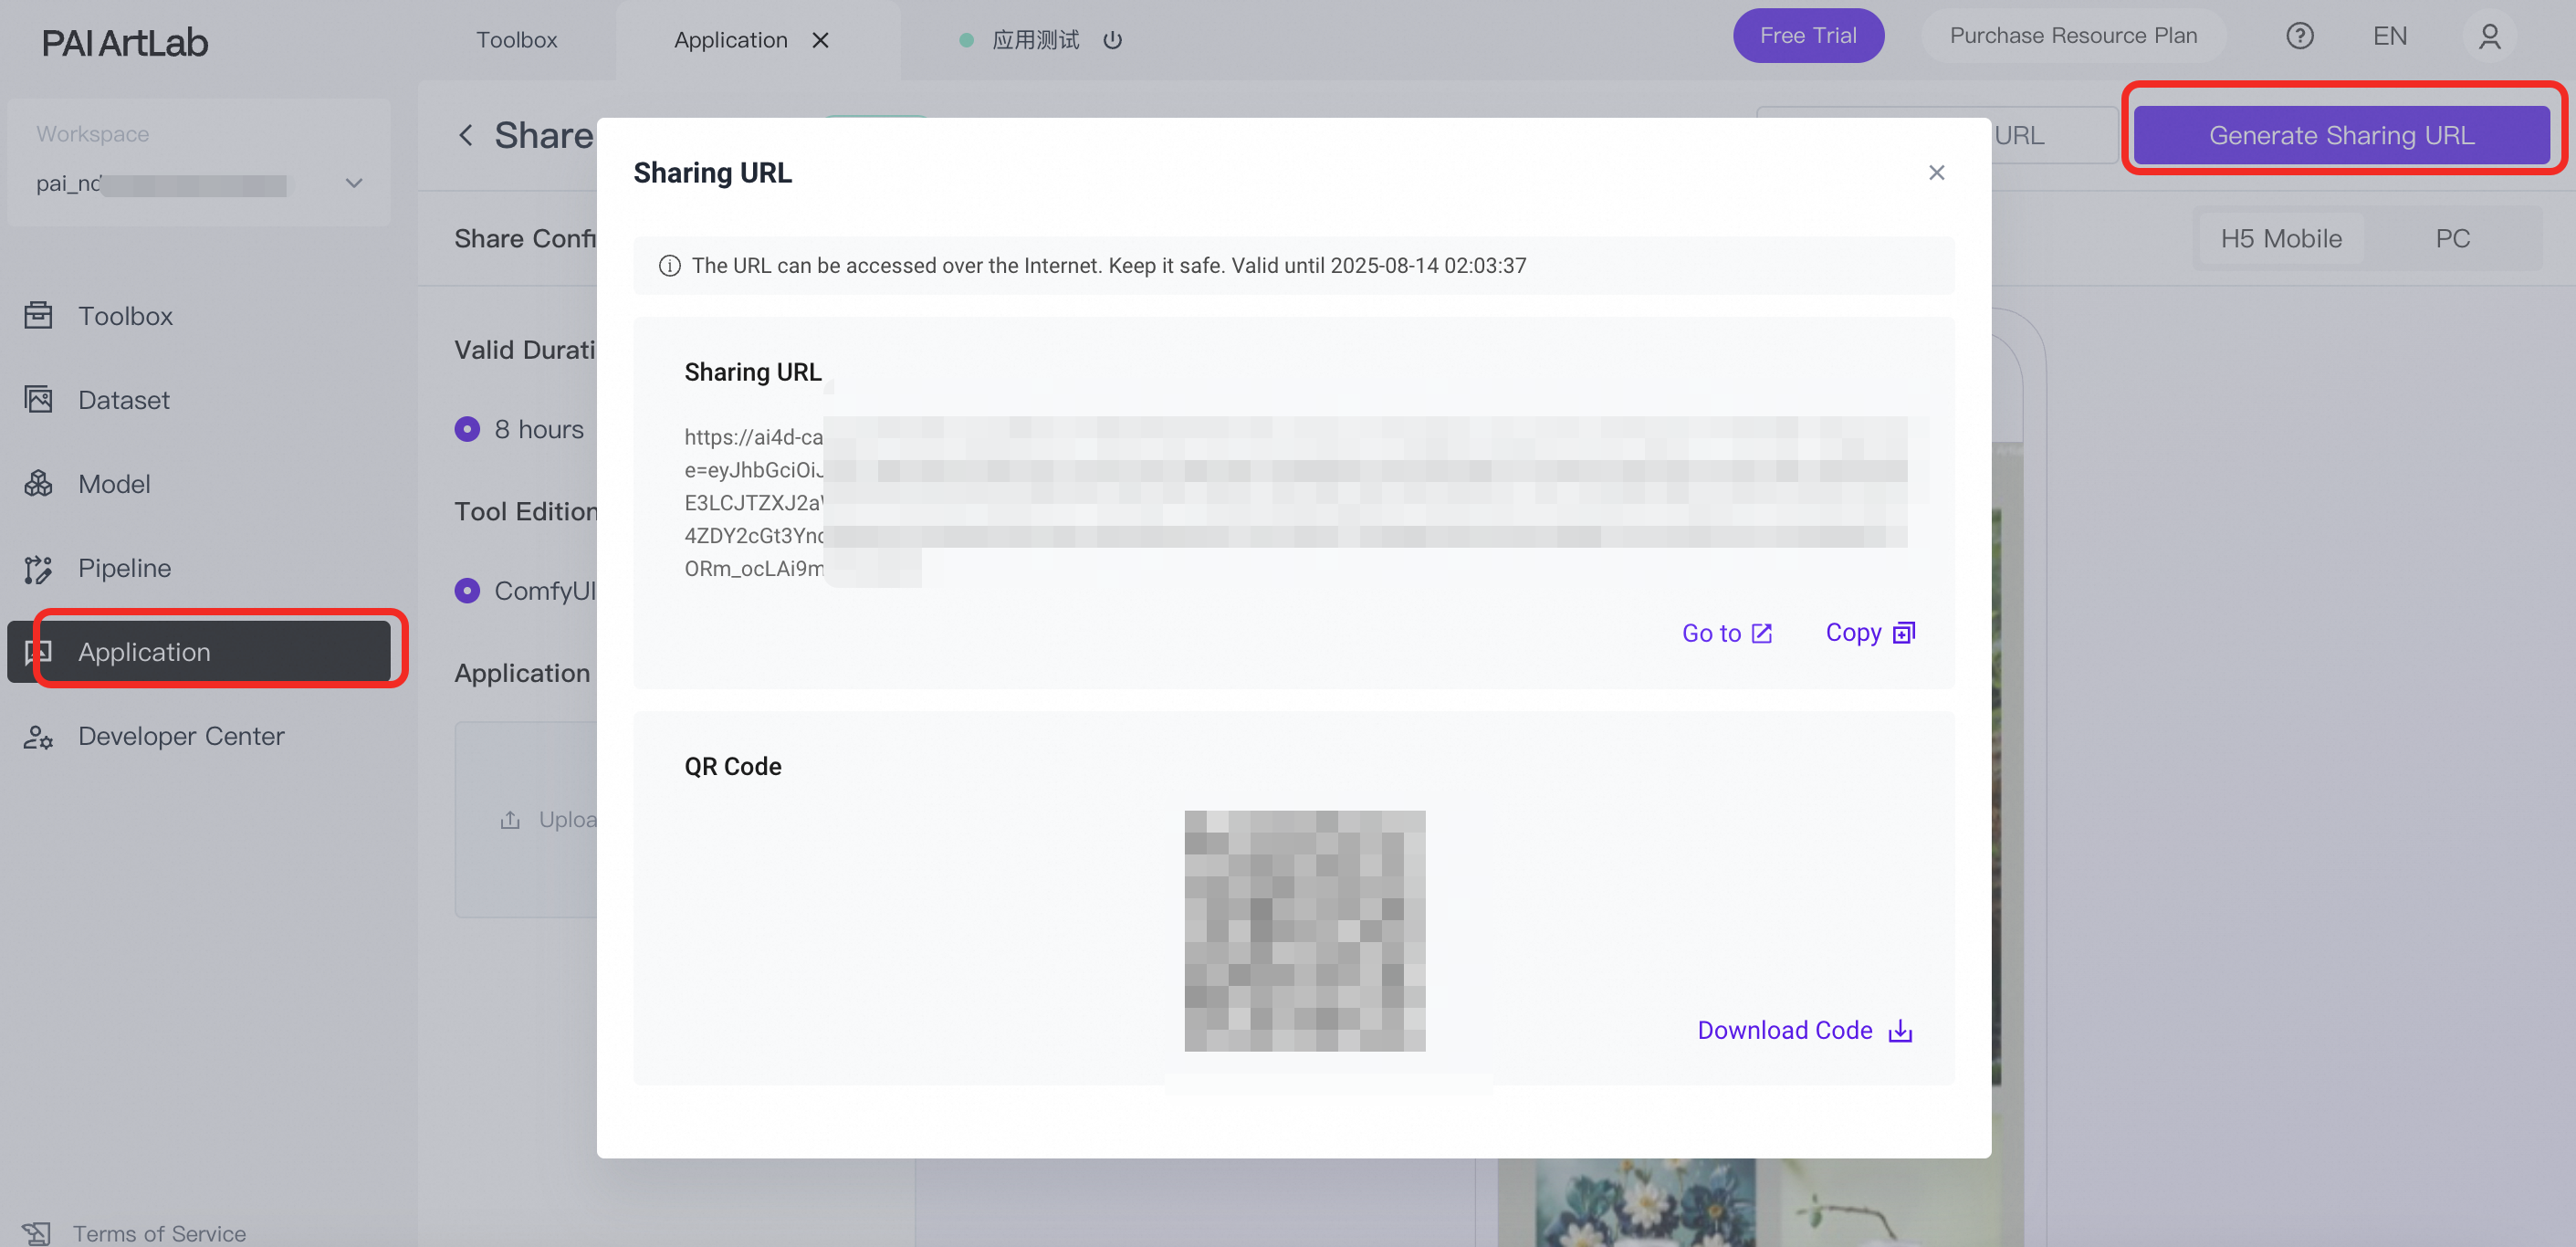
After the sharing service starts, go to the Application tab and click Generate Share Link to retrieve the share link and QR code. The link is valid for 8 hours.
Related operations
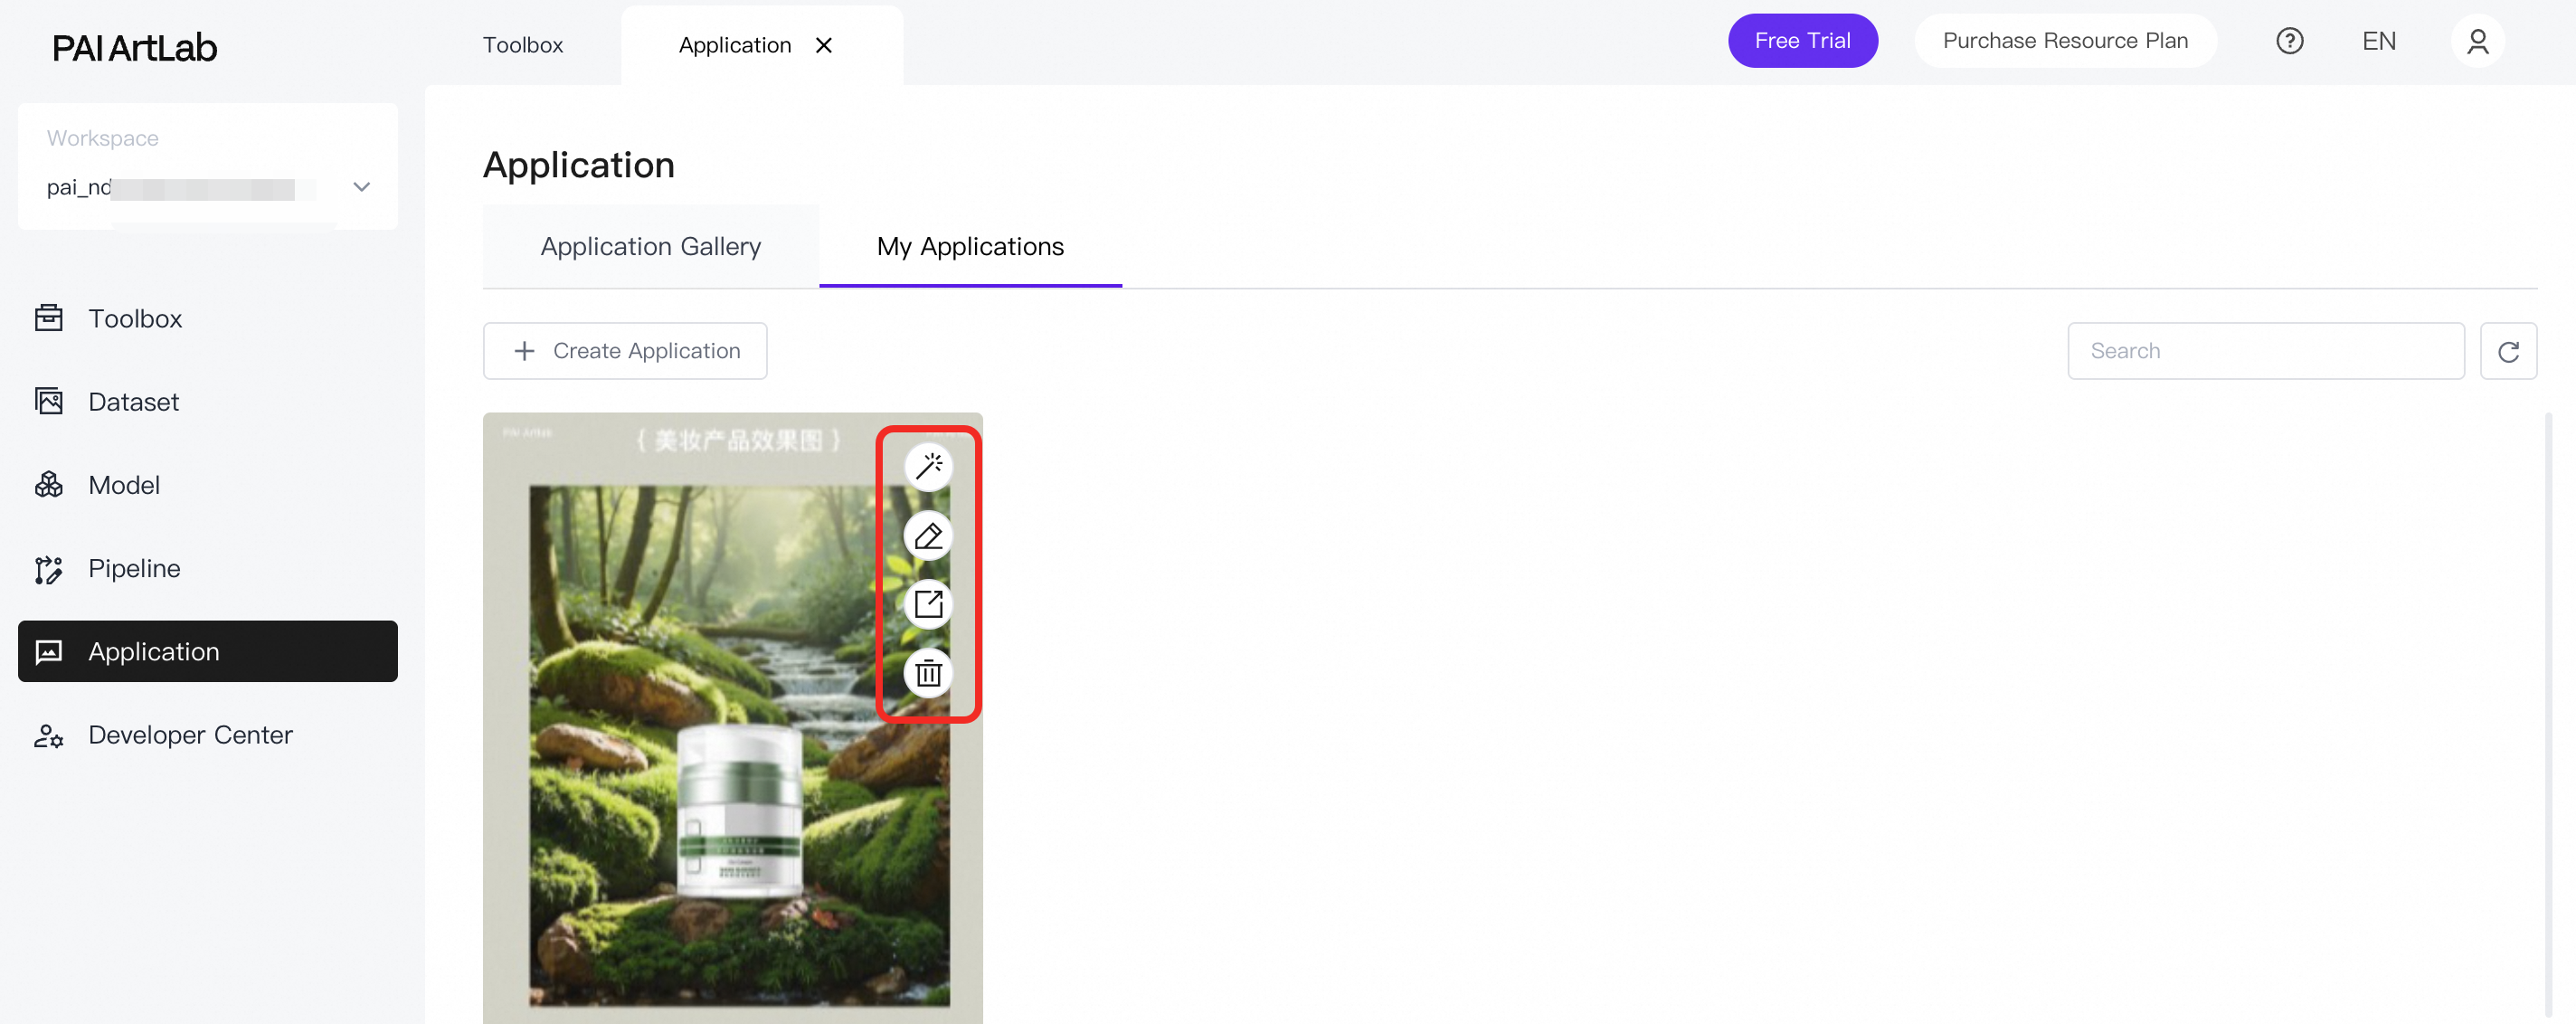
On the My Applications tab, run, edit, share, or delete applications.
FAQ
How do I export an API-format or original workflow file?
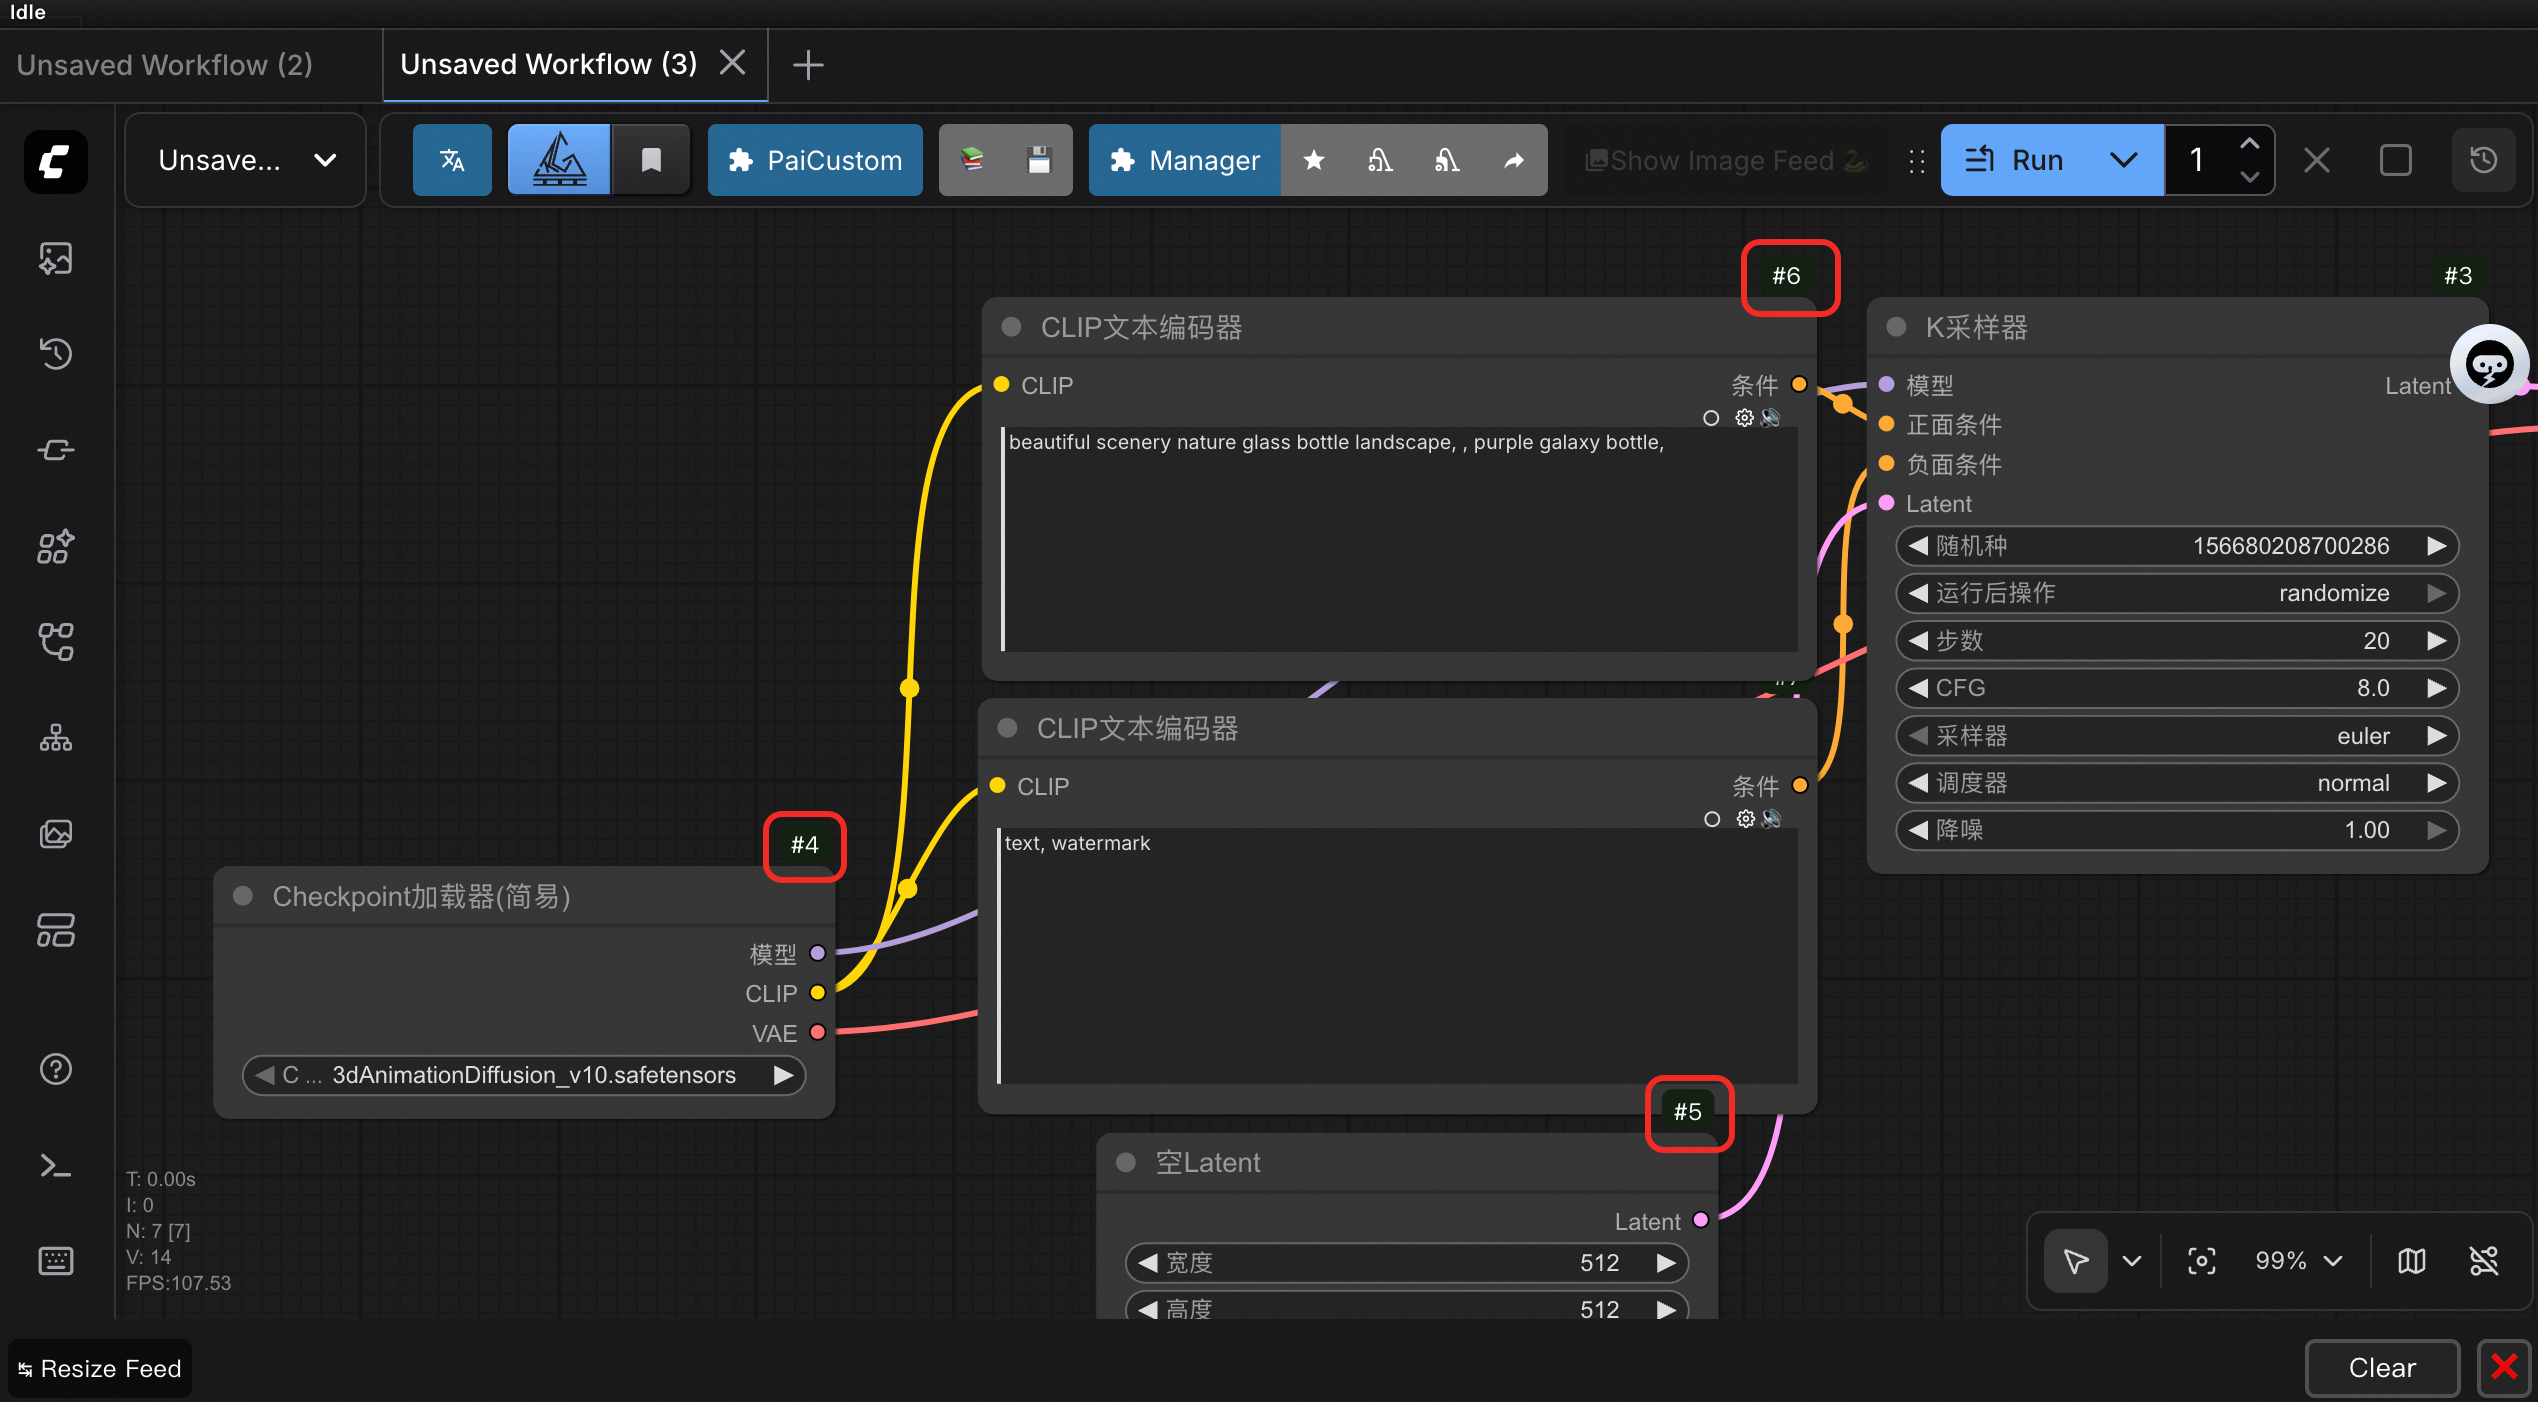
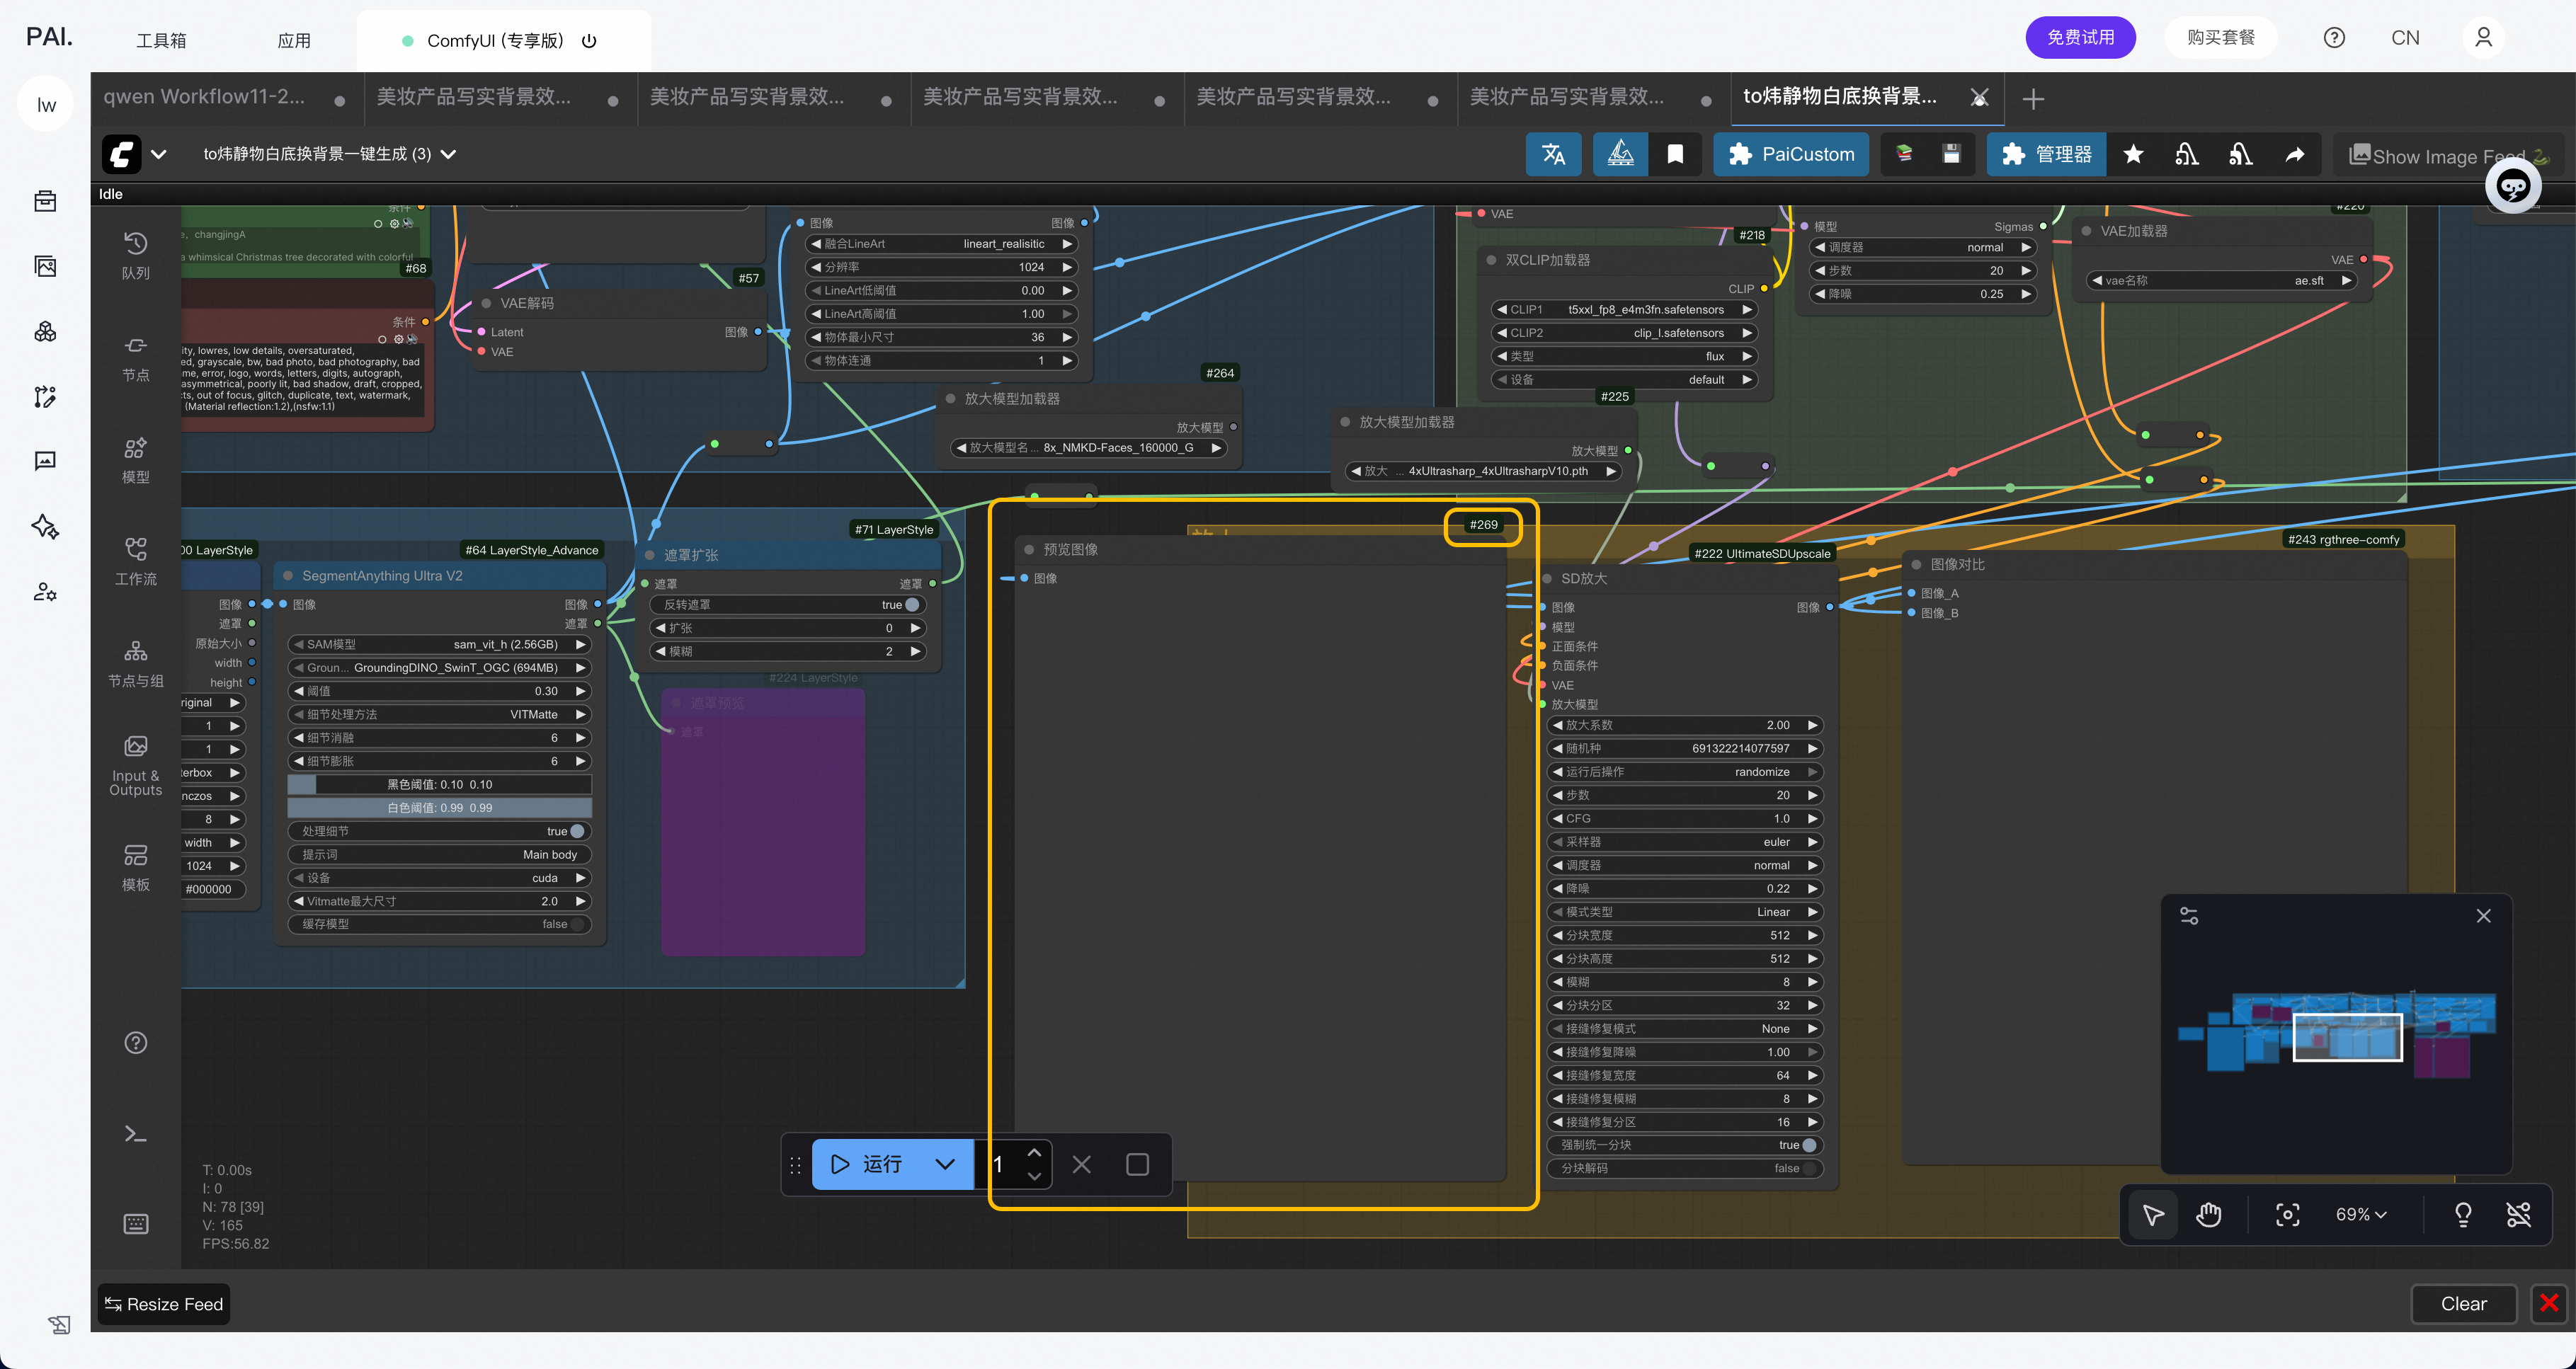
How do I display and view node IDs?
ComfyUI (Shared Edition)
Click the Settings icon ![]() in the lower-left corner. On the Lite Graph page, find Display Node ID and set it to Show All.
in the lower-left corner. On the Lite Graph page, find Display Node ID and set it to Show All.
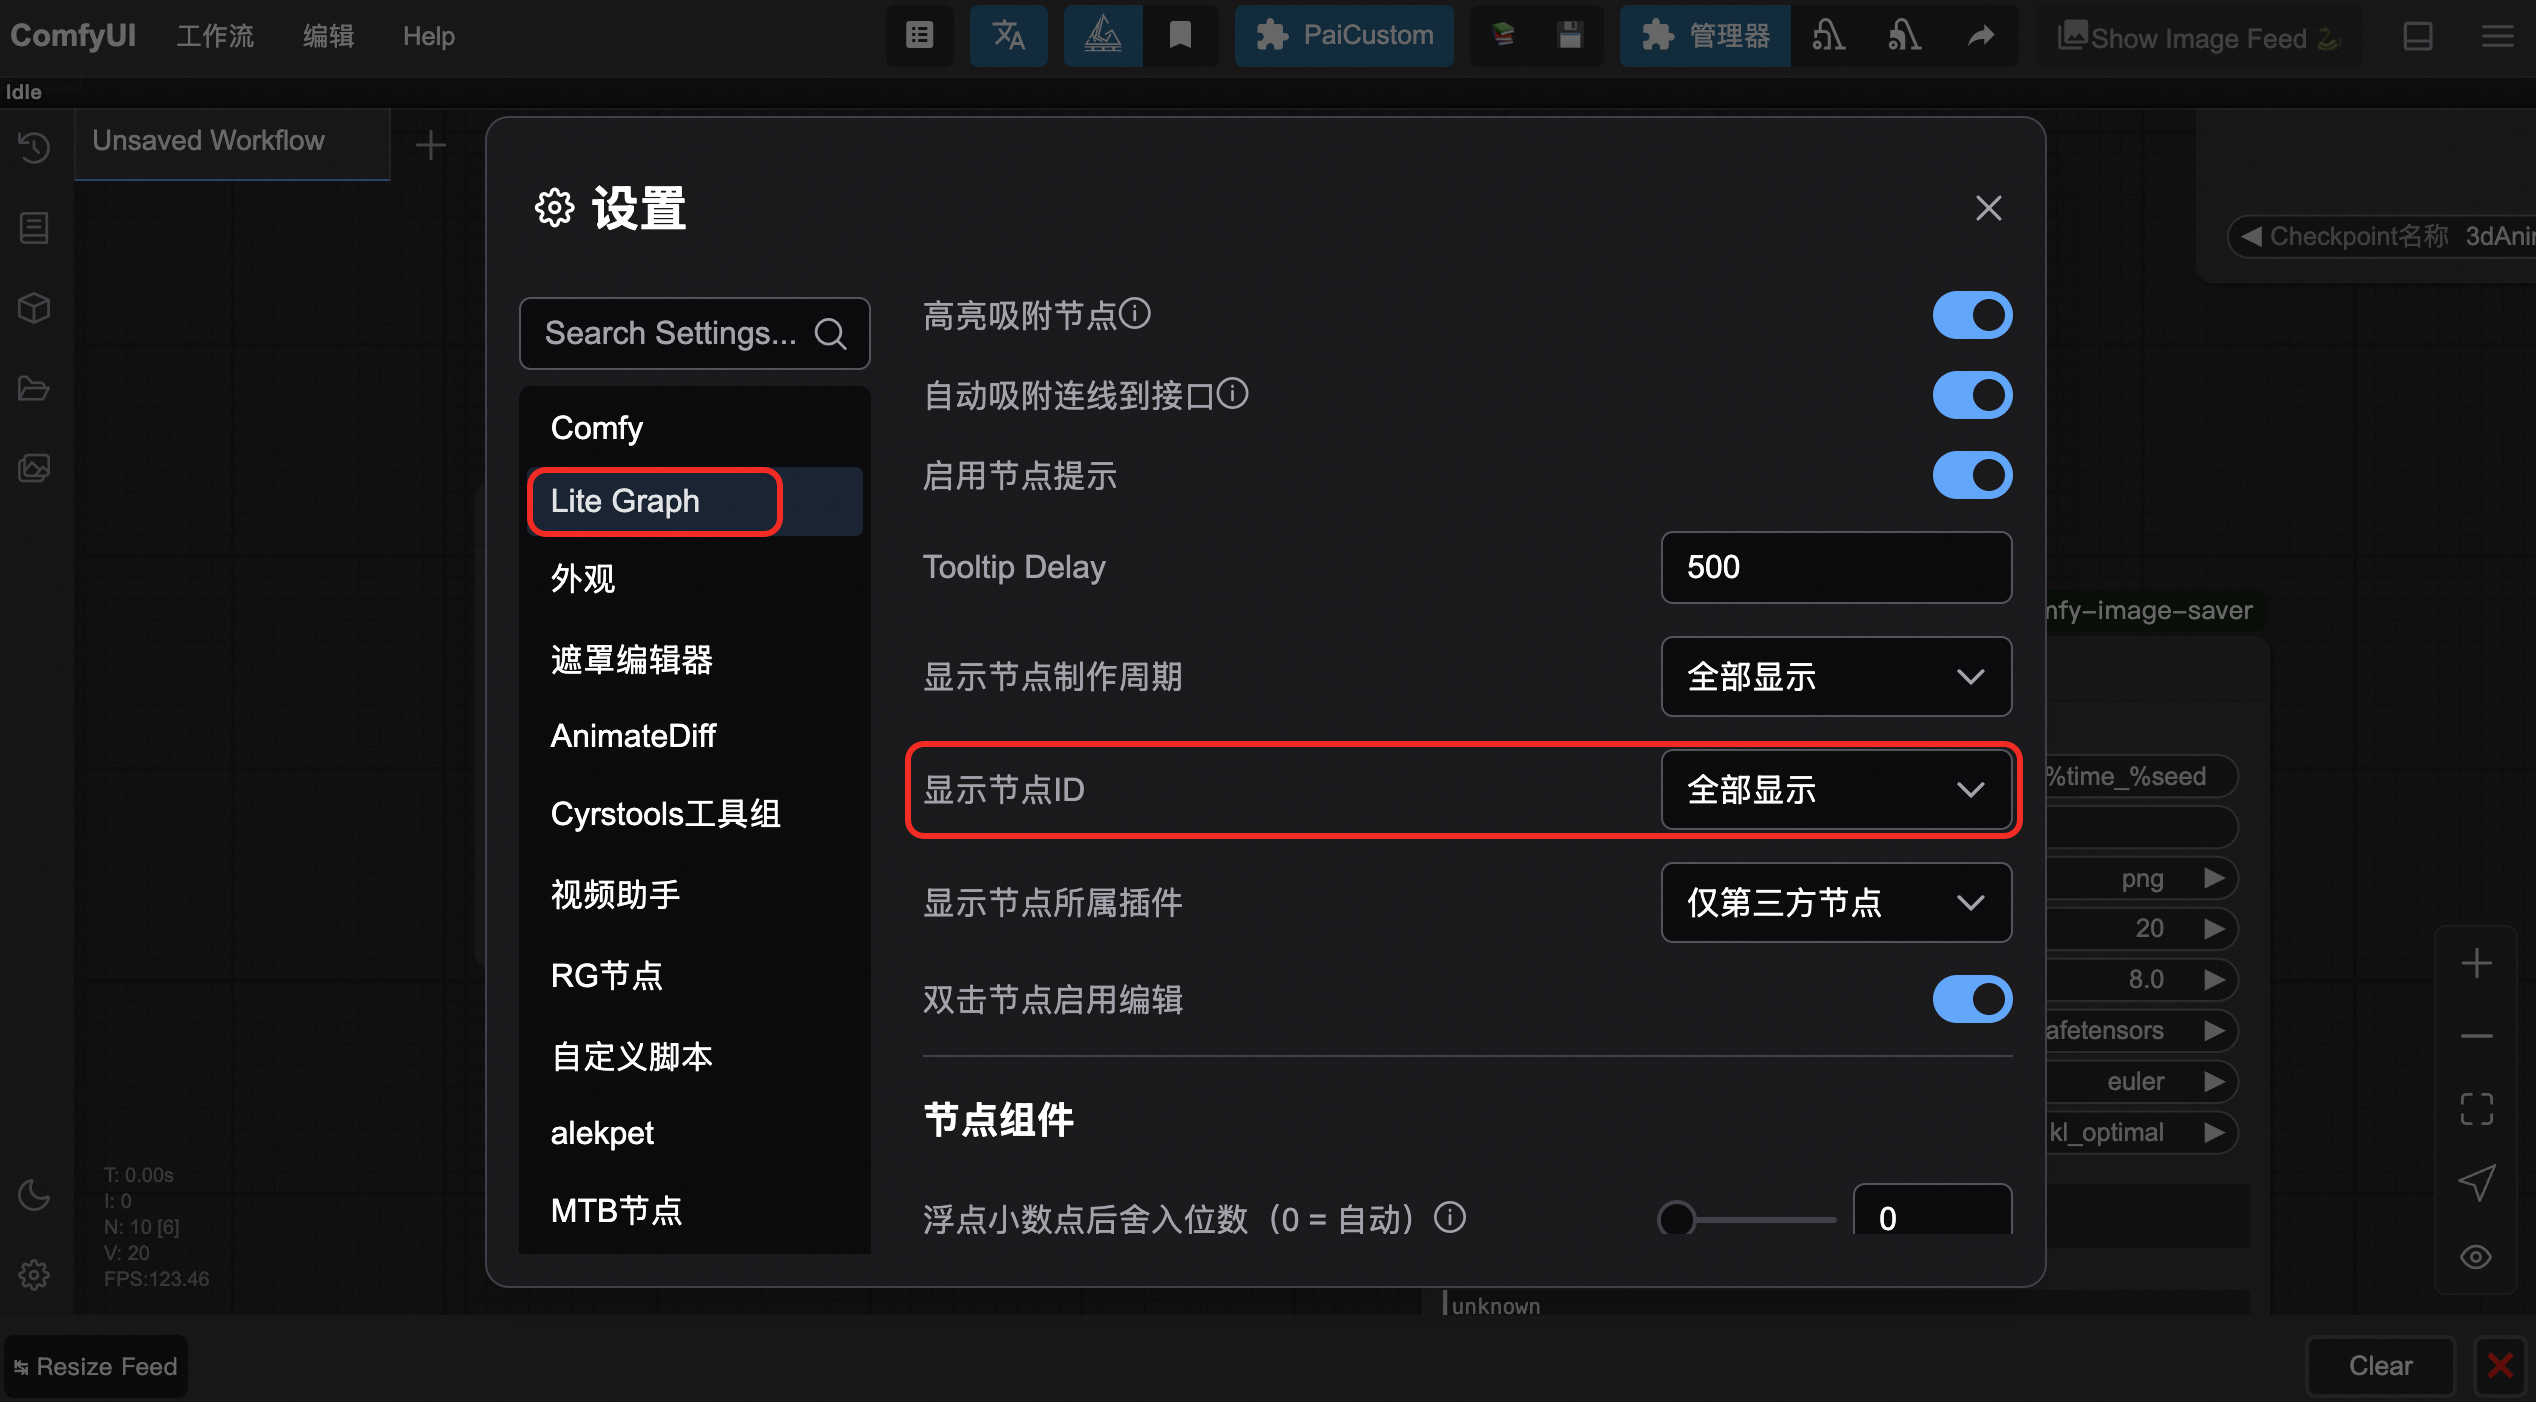
View the node ID on each node.
ComfyUI (Exclusive Edition)
Click the ![]() icon and select Settings.
icon and select Settings.
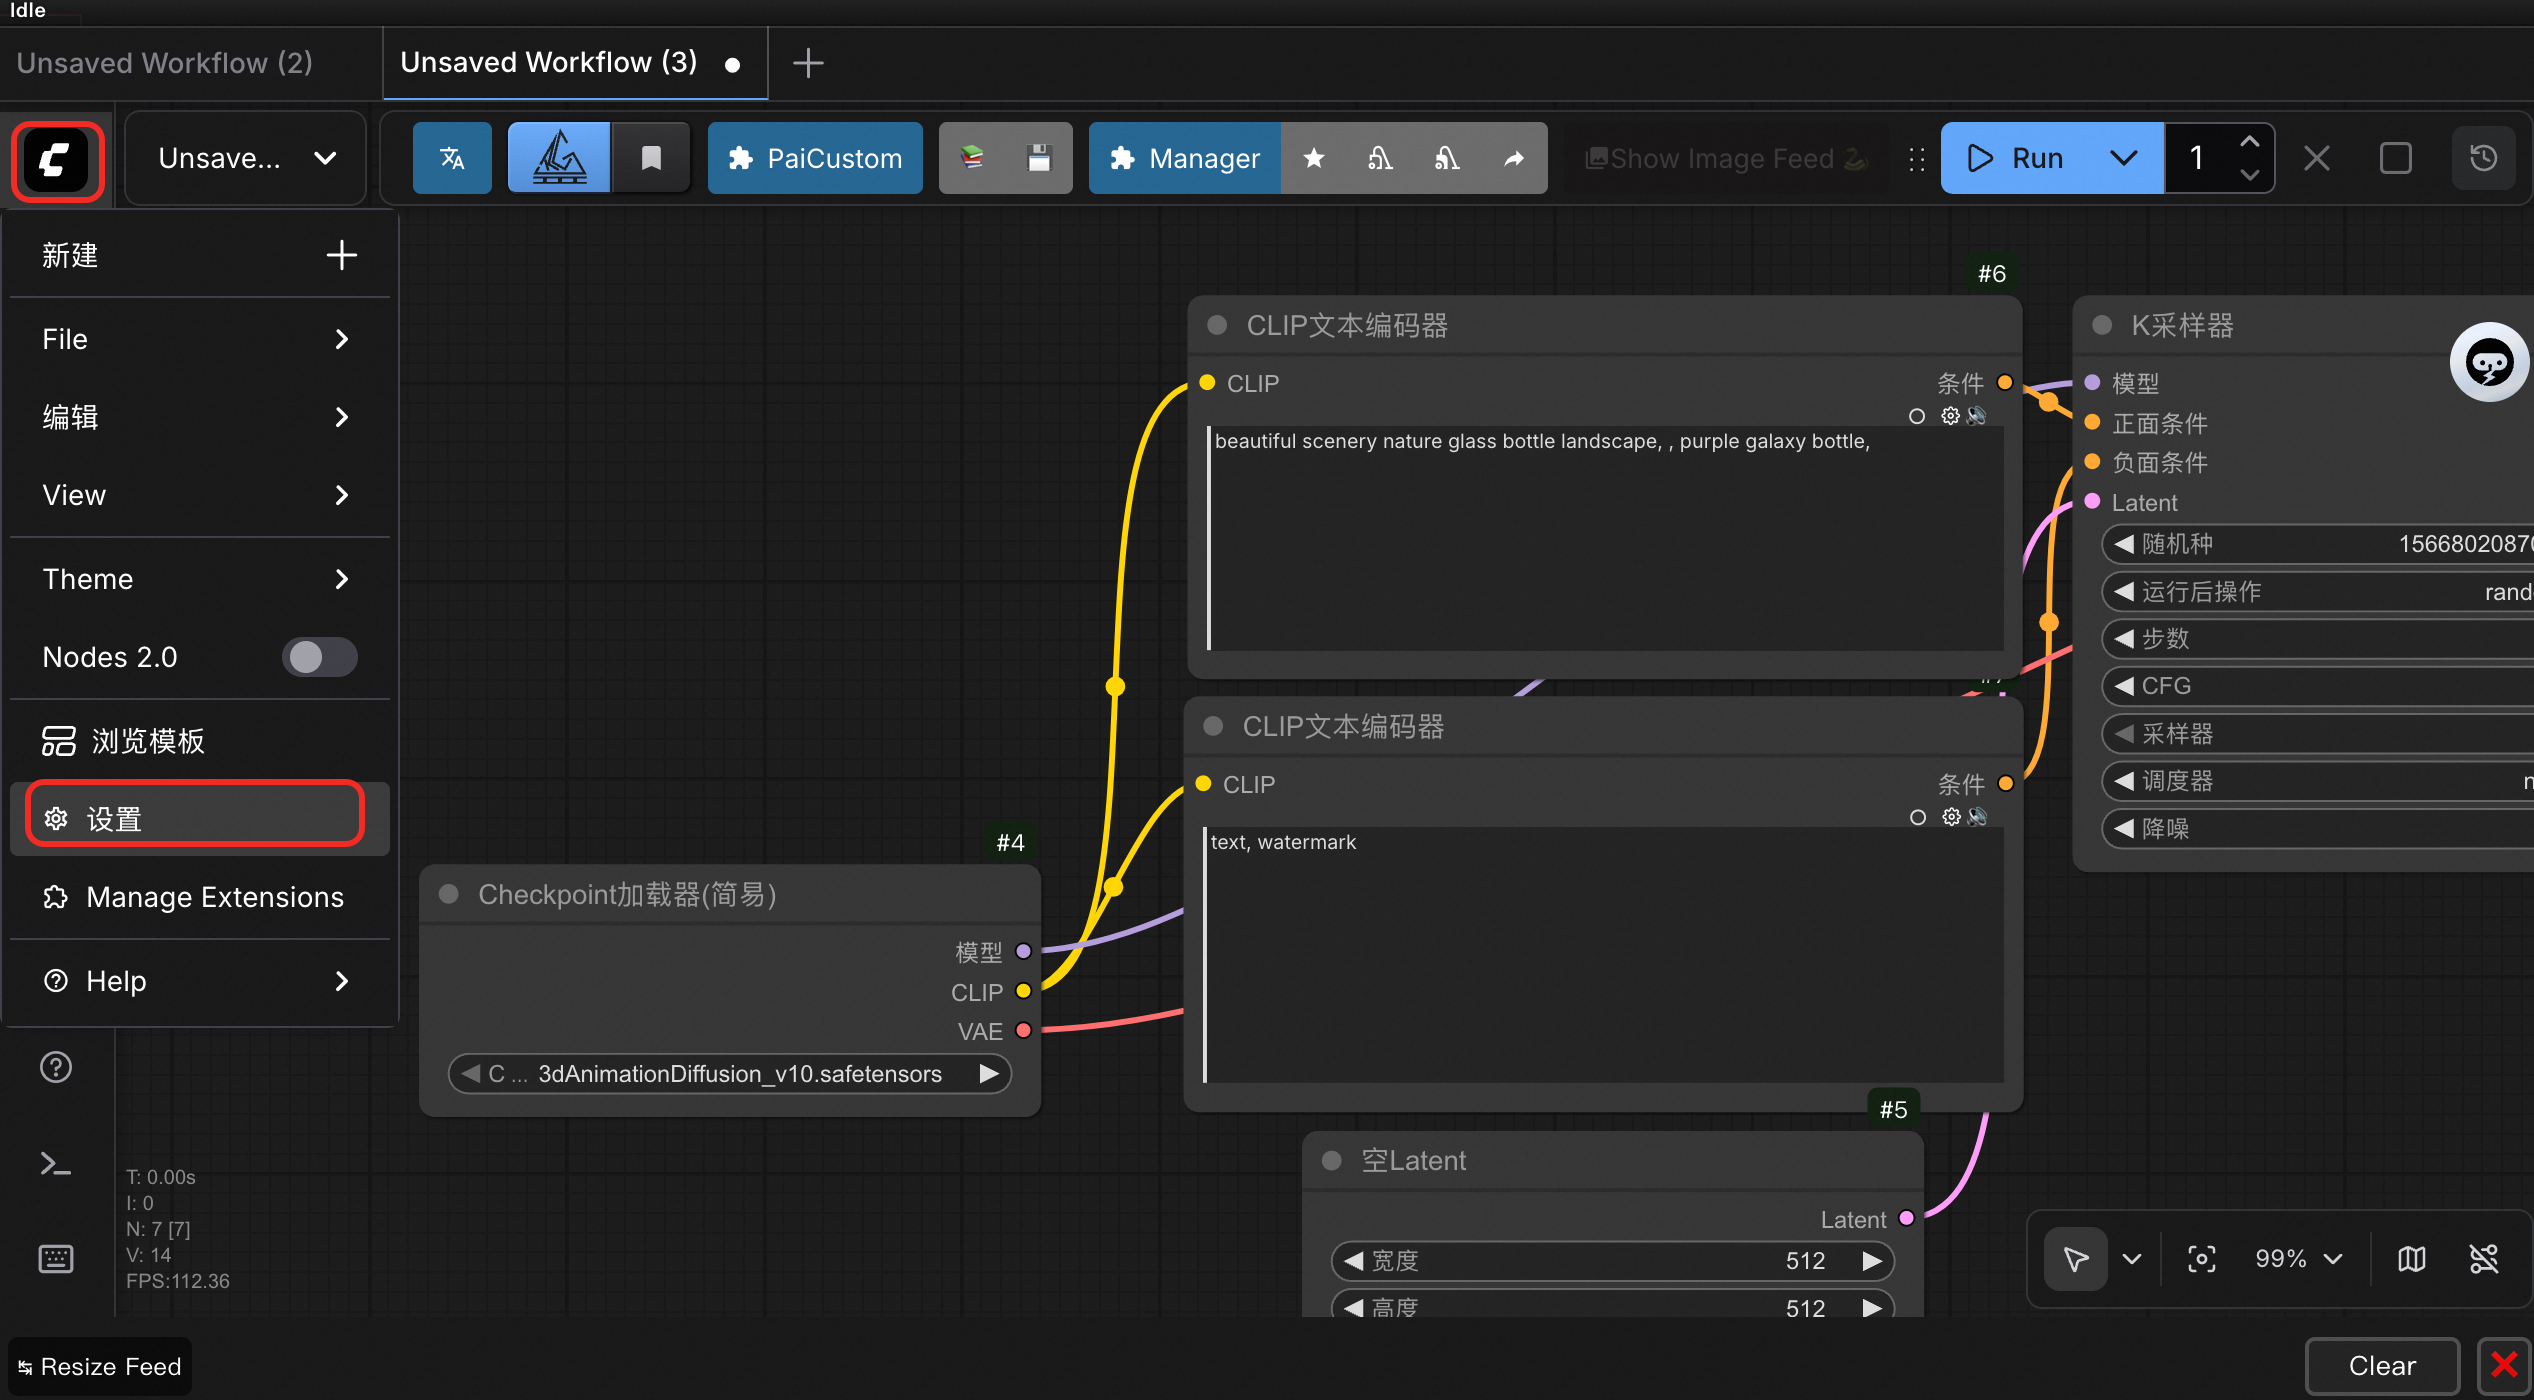
On the Lite Graph page, find Display Node ID and set it to Show All.
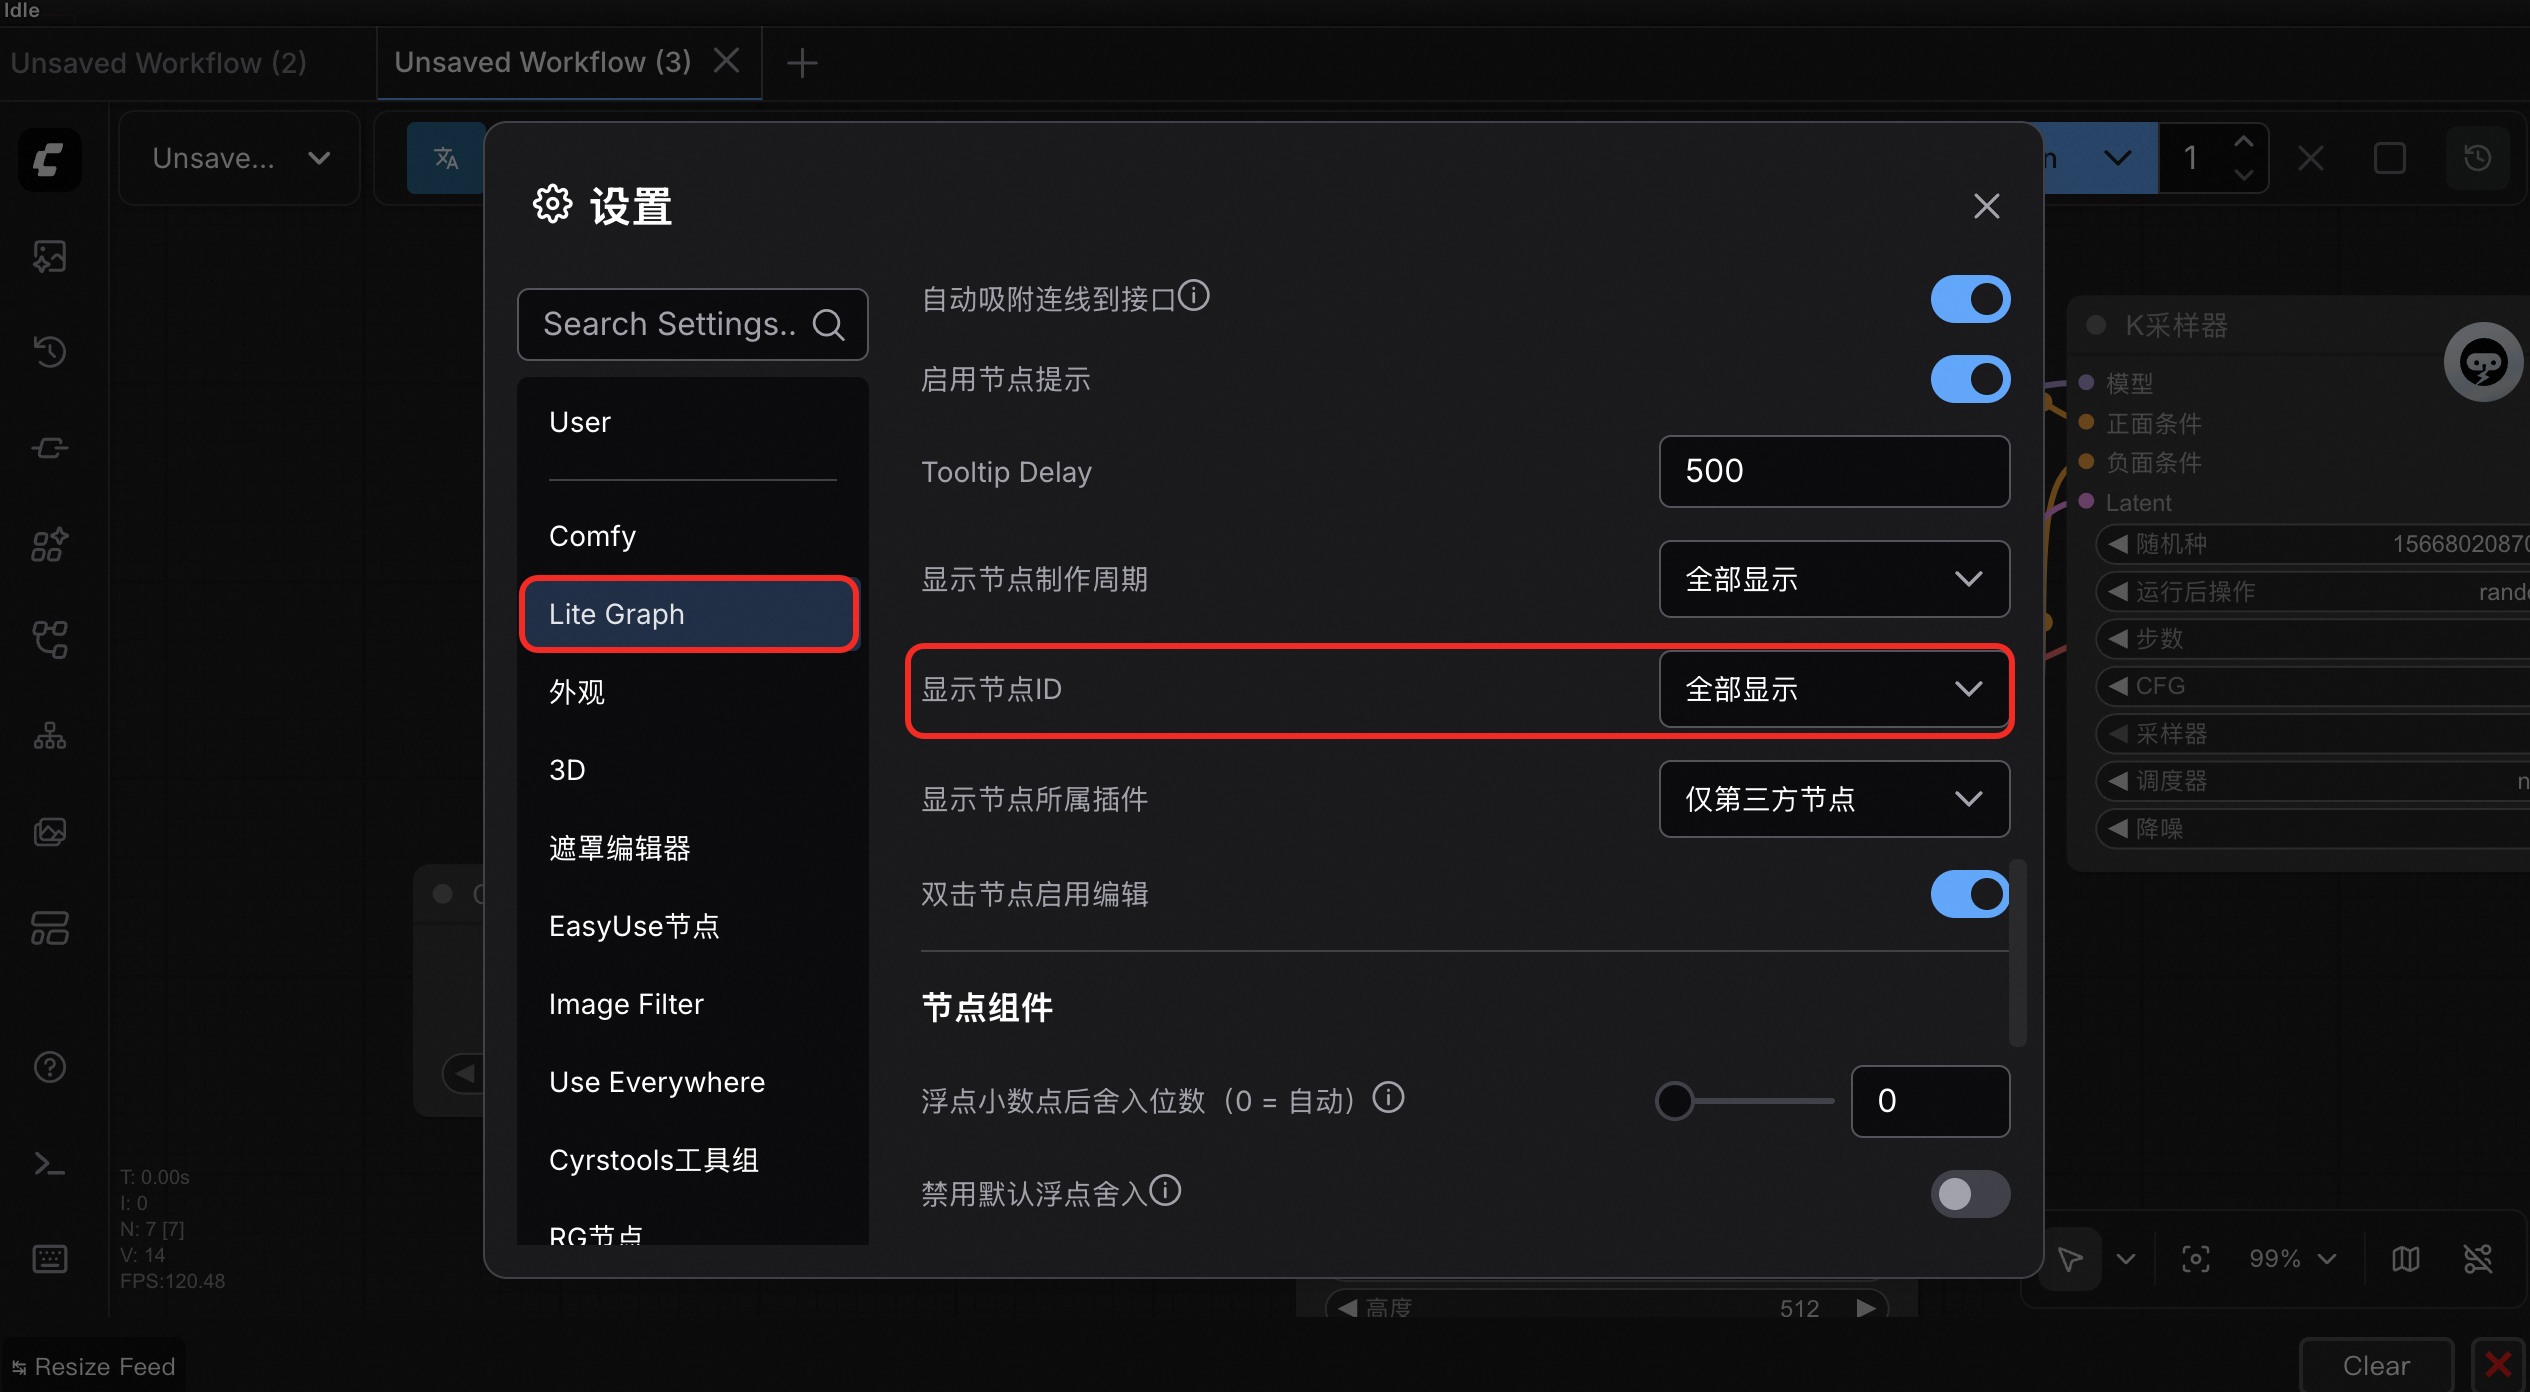
View the node ID on each node.