Use the built-in Notebook or VSCode in DSW (Data Science Workshop) to develop, train, and deploy deep learning models in the cloud. This topic uses MNIST handwritten digit recognition as an example to demonstrate the complete workflow.
MNIST handwritten digit recognition is a classic deep learning introductory task. The goal is to train a model to recognize 10 handwritten digits (0-9).
Prerequisites
An Alibaba Cloud account has activated PAI and created a workspace. If you have not activated PAI, visit PAI console, select the target region in the upper-left corner of the page, and complete one-click authorization and product activation.
Billing
This topic uses public resource groups to create a DSW instance and an EAS model service, which are billed on a pay-as-you-go basis. For billing details, see DSW billing and EAS billing.
Create a DSW instance
-
Go to the DSW page.
-
Visit PAI console.
-
Select the target region in the upper-left corner of the page.
-
In the left-side navigation pane, click Workspaces to go to the target workspace.
-
In the left-side navigation pane, choose .
-
-
On the Configure Instance wizard page, configure the following parameters and keep the default settings for other parameters.
-
Resource Type: Select Public Resources (pay-as-you-go).
-
Instance Type: Select
ecs.gn7i-c8g1.2xlarge.If this instance type is out of stock, you can select another GPU instance.
-
Image config: Select Alibaba Cloud Image and search for the image
modelscope:1.26.0-pytorch2.6.0-gpu-py311-cu124-ubuntu22.04.We recommend that you use the same image to avoid environment compatibility issues.
-
Mount storage: Persist model development files. This topic uses Object Storage Service (OSS). Click OSS, click the
 icon, select a Bucket, and create a directory (for example,
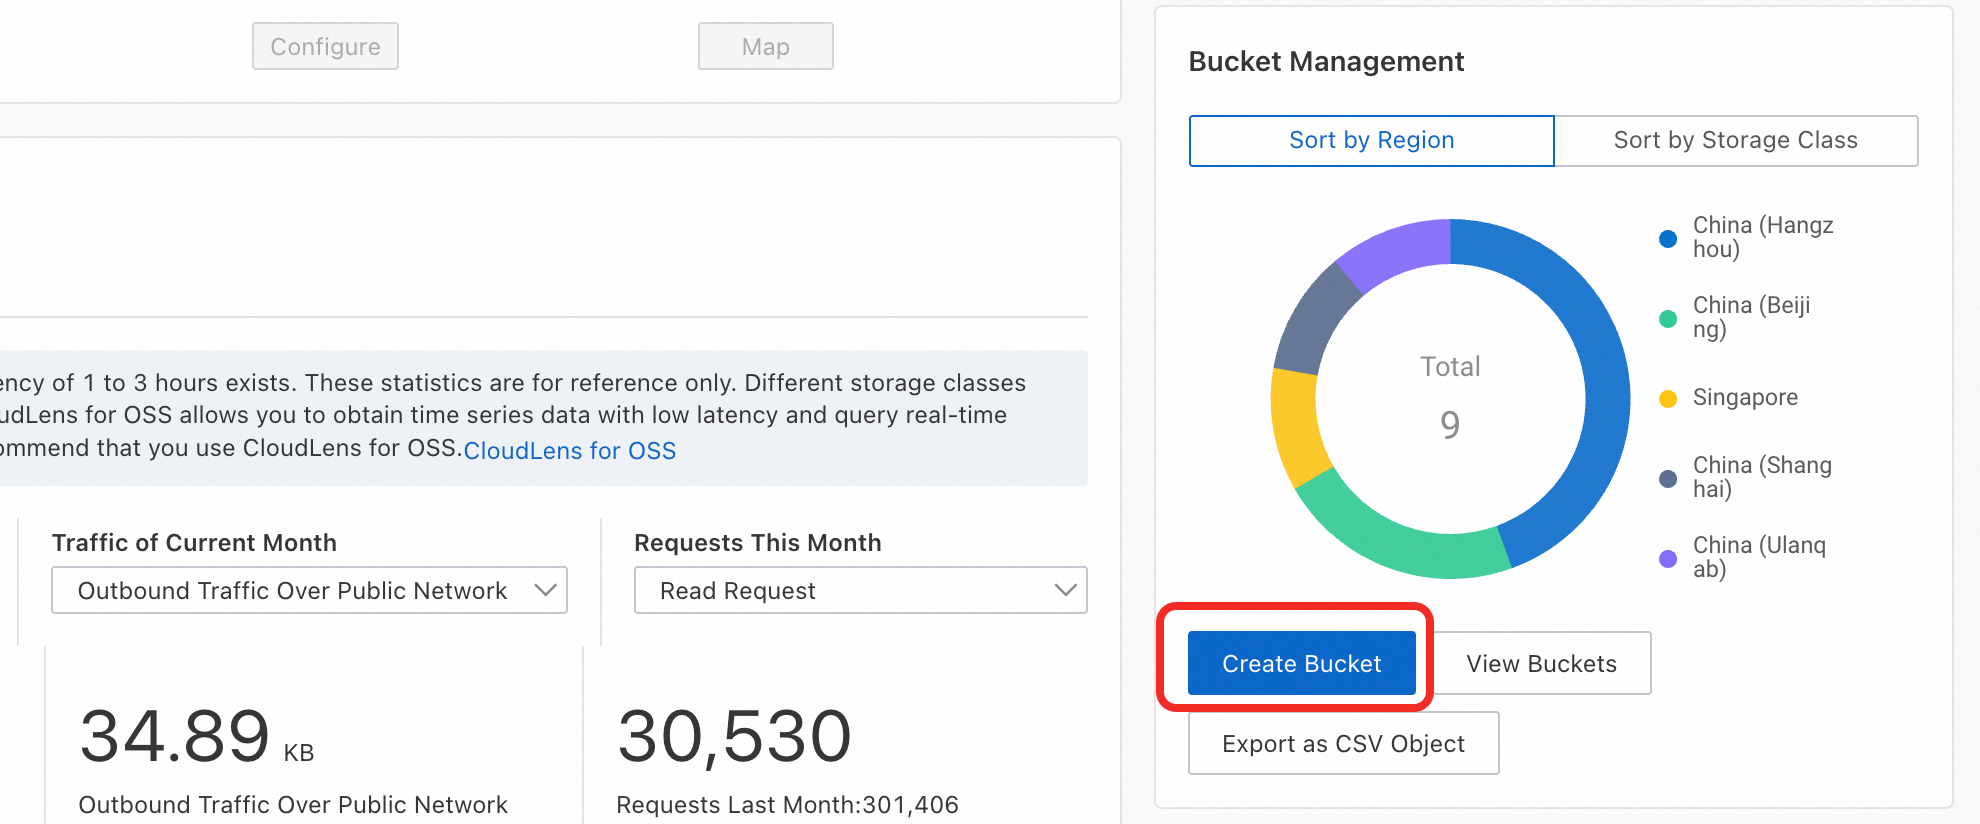
 pai_test).If no bucket is available in the current region, follow these steps to create one:
-
Visit the OSS console, click Create Bucket, enter a Bucket Name, set Region to the same region as PAI, keep the default settings for other parameters, and click Create.
-
Uri:
oss://**********oss-cn-hangzhou-internal.aliyuncs.com/pai_test/ -
Mount Path:
/mnt/data/
-
-
Click OK to create the instance.
If the instance fails to start, see Create a DSW instance for troubleshooting.
Develop a model in DSW
-
In the instance list, click Open to go to the DSW development environment. On the launcher page, click JupyterLab to create a Notebook development environment.
-
Write the model code. The MNIST training code is provided: download mnist.ipynb and then click the
 icon in the upper-left corner of the Notebook to upload the file.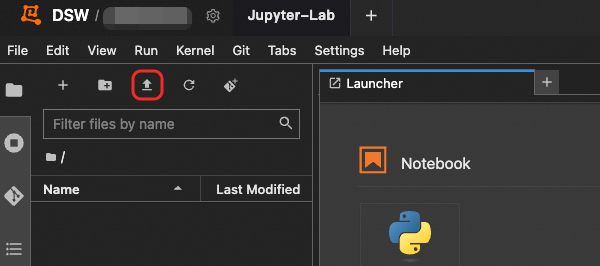
-
Train the model. Open
mnist.ipynb, find the training code cell, and click the icon to run it. The code automatically downloads the MNIST dataset to the
 dataSetdirectory and saves the trained model to theoutputdirectory. Training takes about 10 minutes.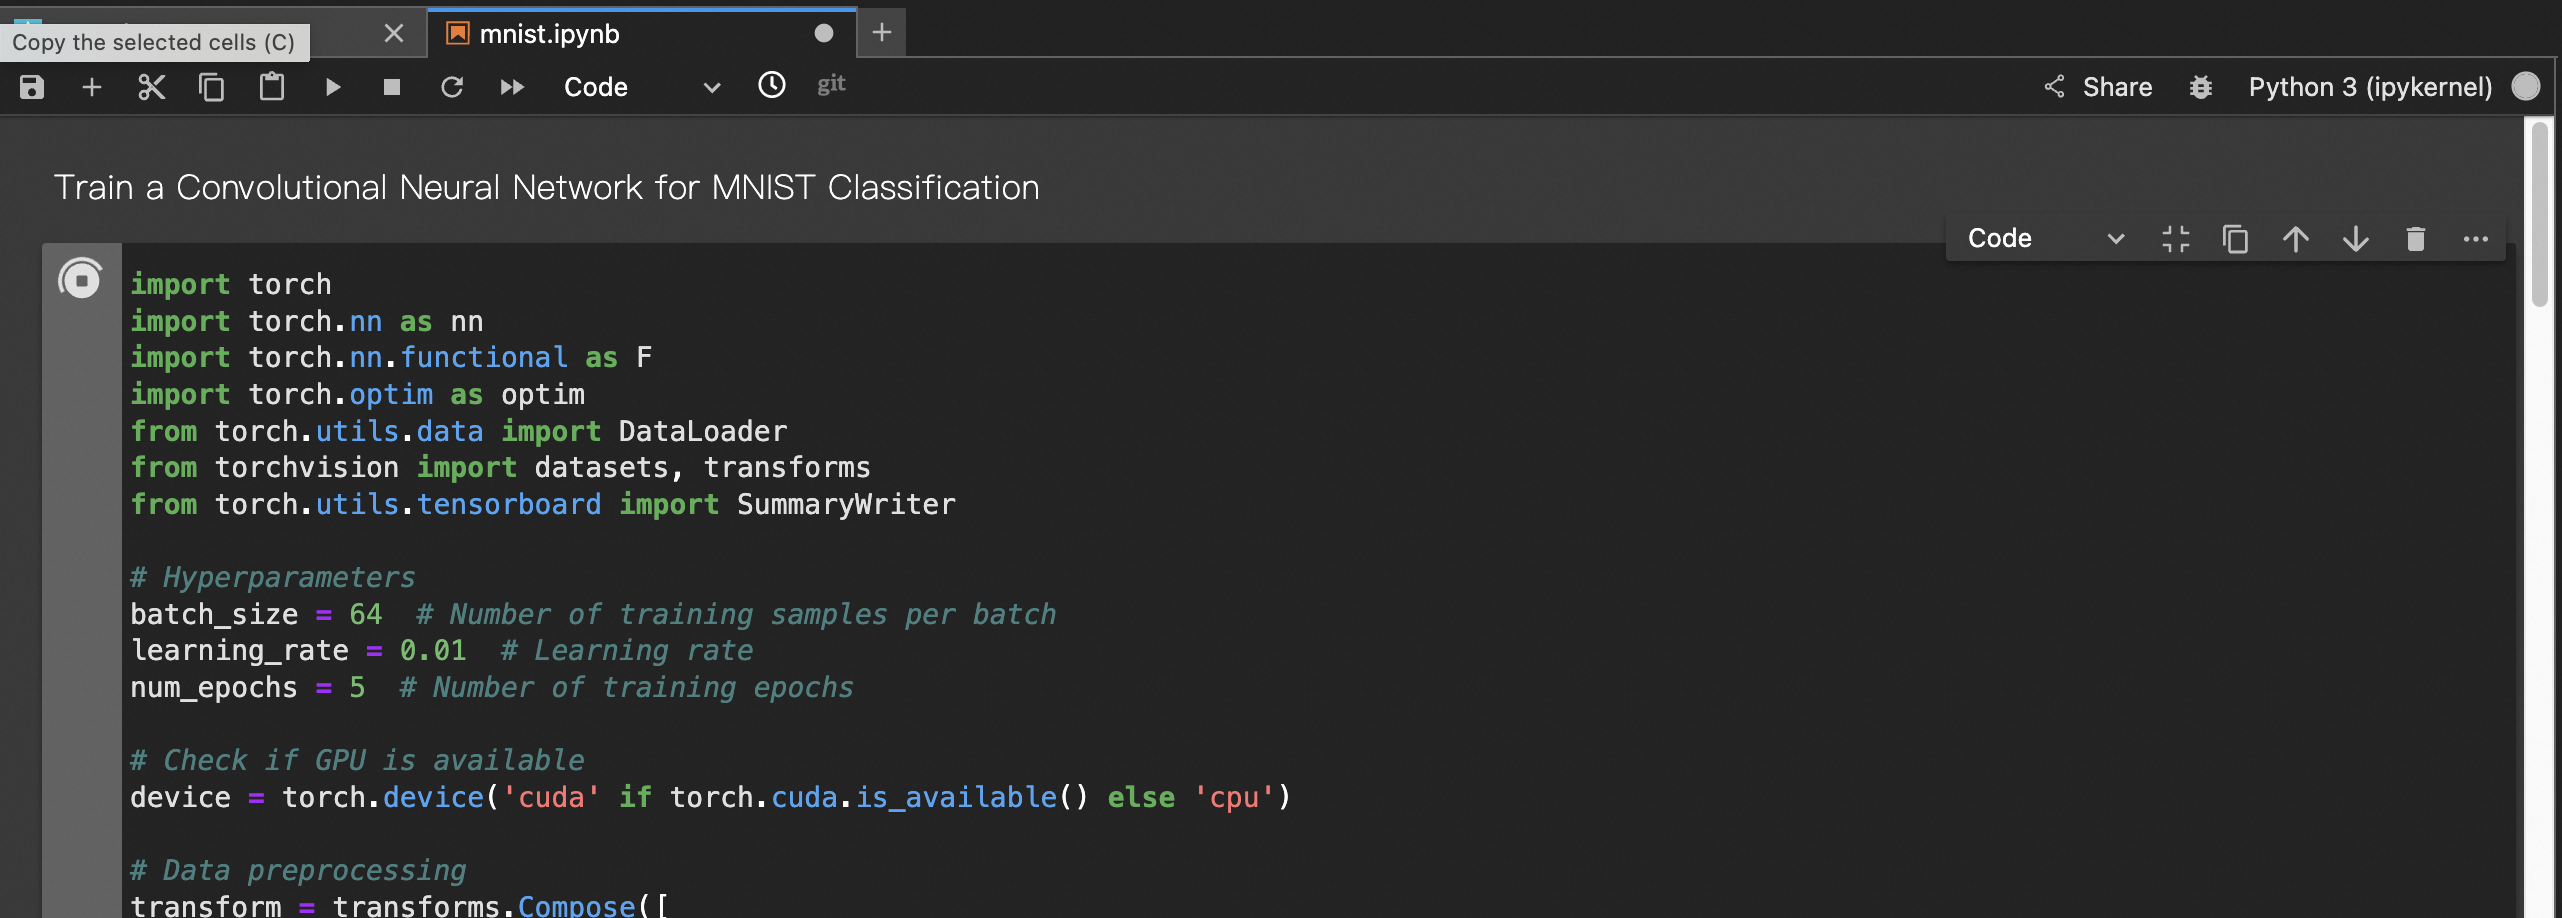
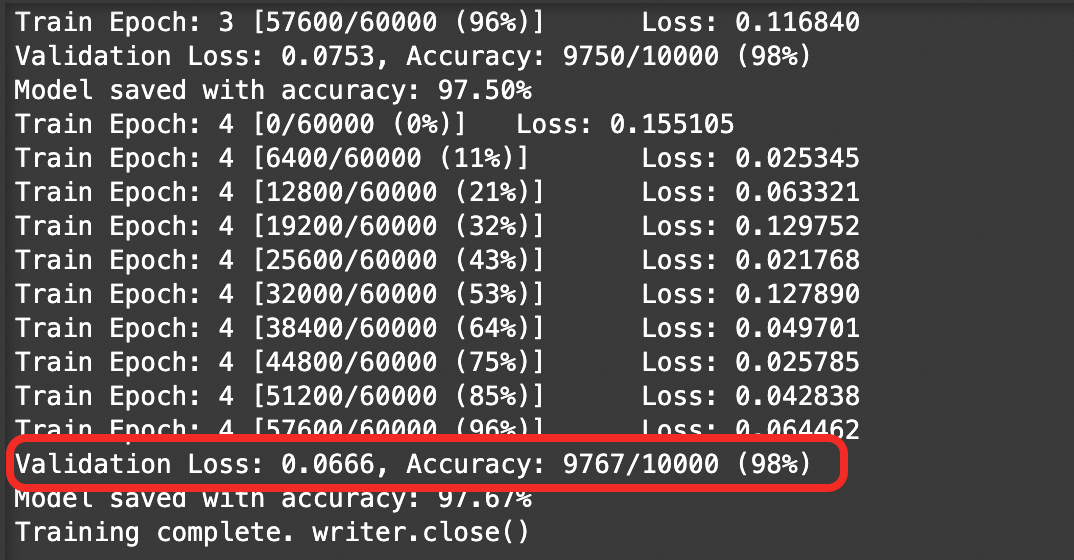
The training process outputs the accuracy on the validation set, which reflects the generalization capability. In this example, the validation set accuracy is 98%. You can proceed to the next steps.
-
View the training curves. Run the following cell and click the TensorBoard URL
http://localhost:6006/.
TensorBoard displays the train_loss (training loss) and validation_loss (validation loss) curves.
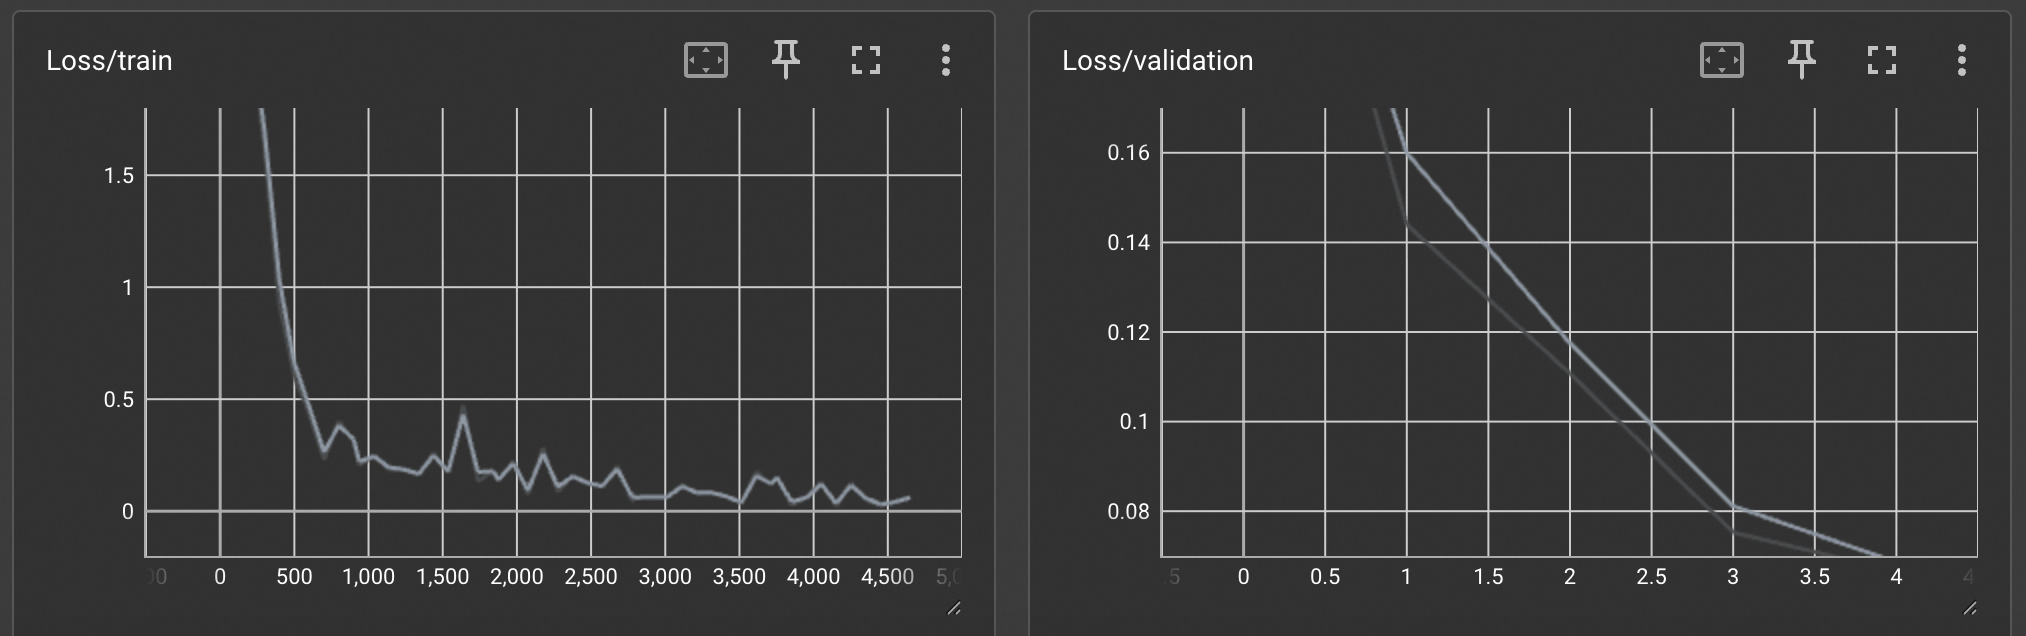
After viewing the curves, click the
 icon in the cell to stop TensorBoard. If TensorBoard is not stopped, subsequent cells cannot be executed.
 -
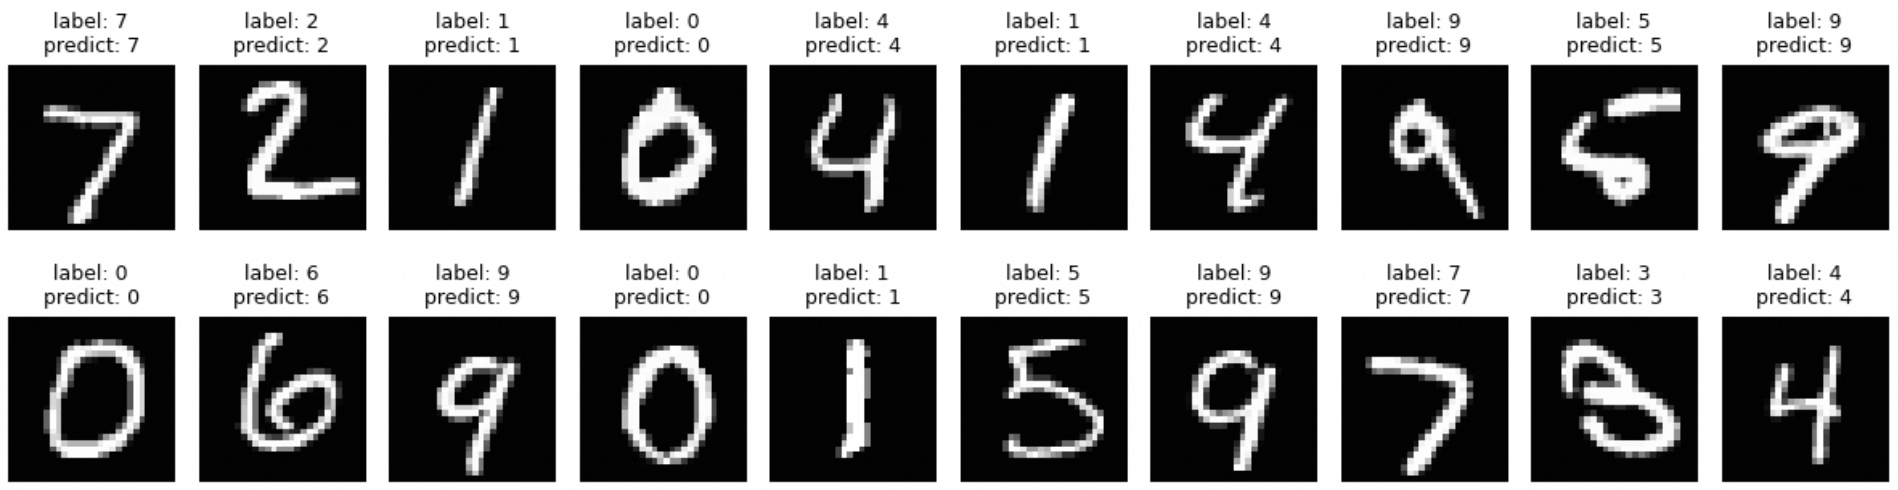
Test the model. Run the following cell to display 20 test images with their true labels and model predictions.
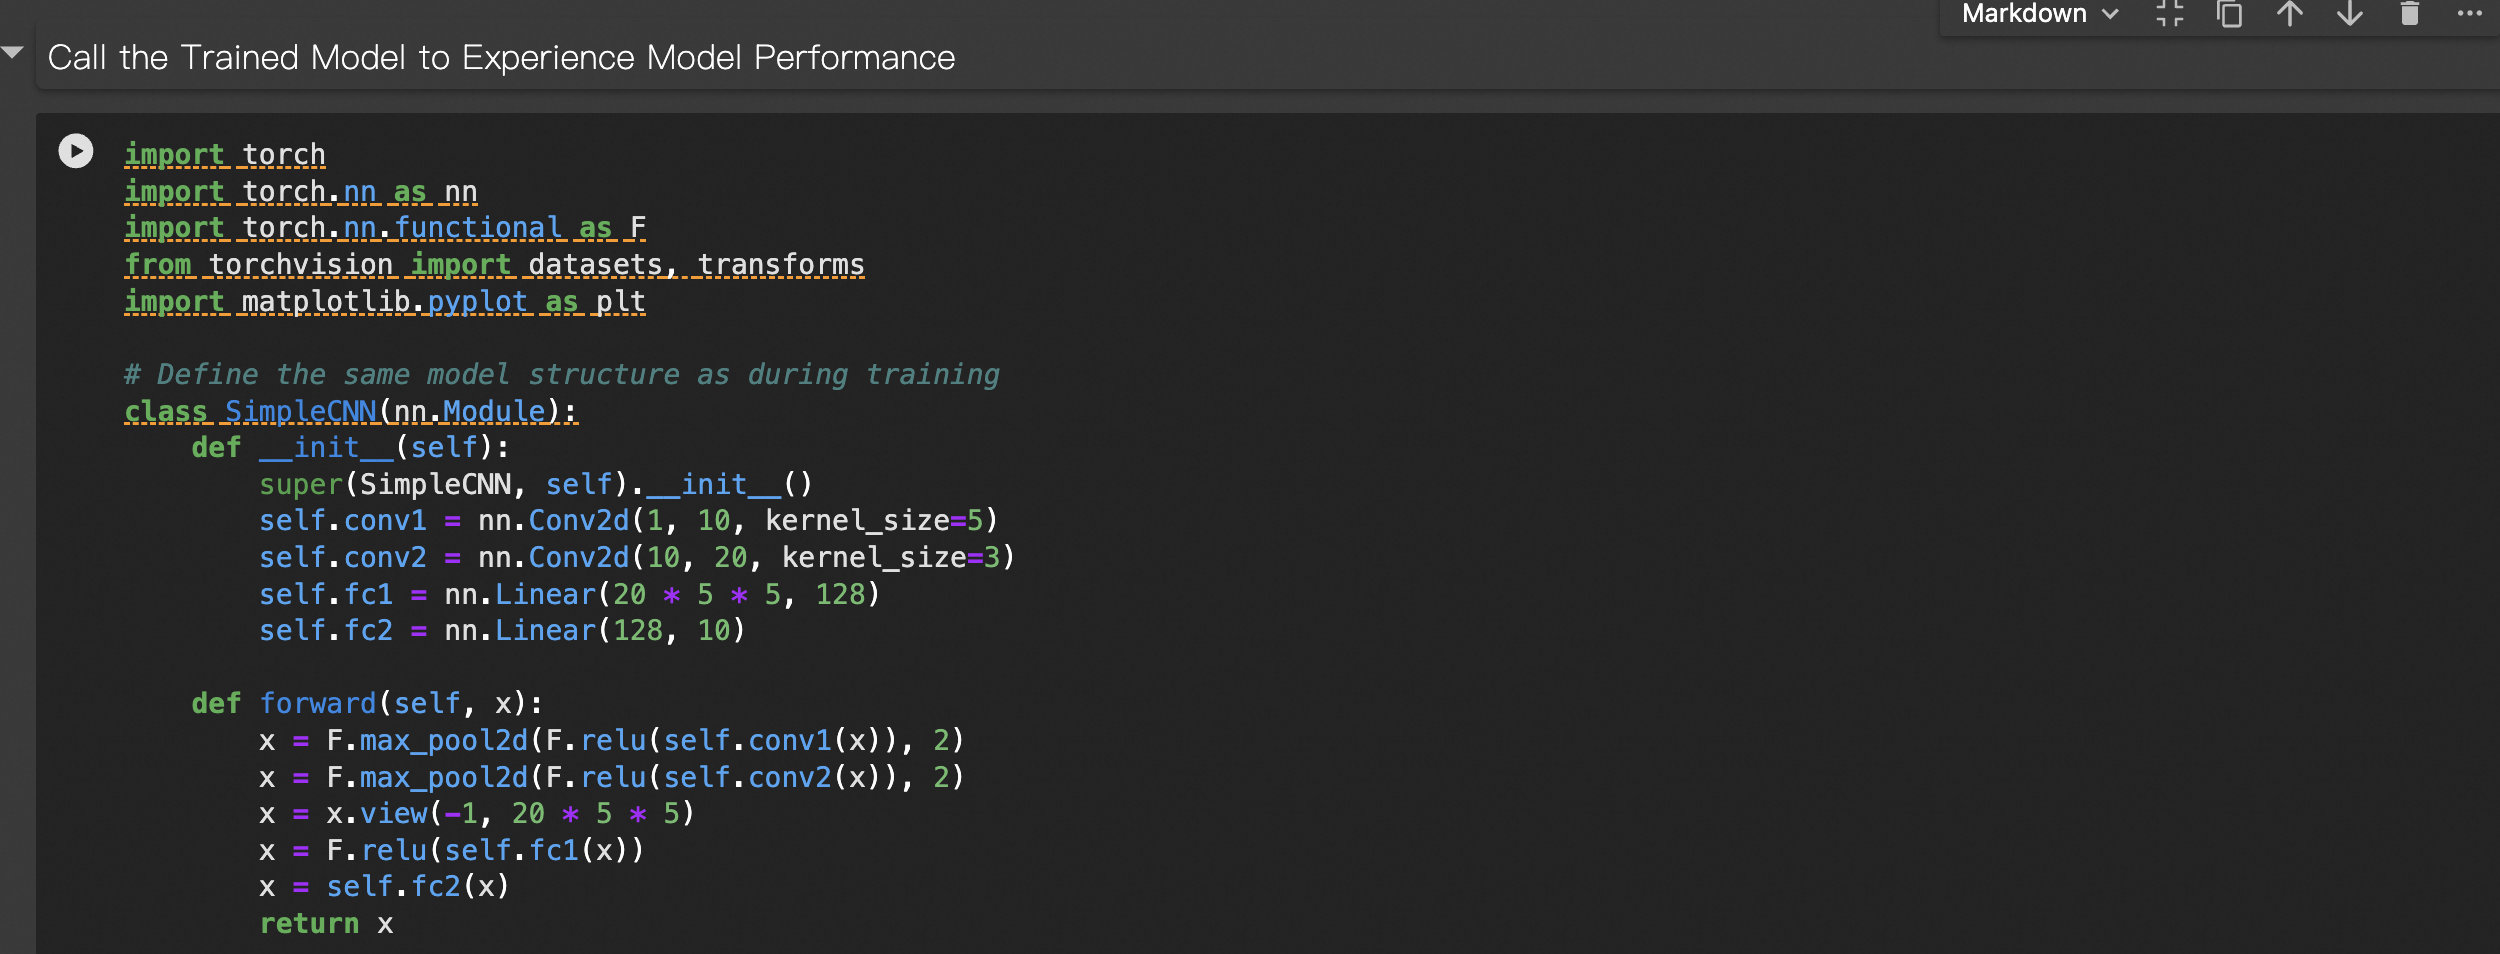
Example output:
-
Persist the model files. This topic uses public resource groups to create the DSW instance, and files are stored on the free cloud disk. If the instance is stopped for more than 15 days, the cloud disk content is automatically cleared. Copy the model files to OSS for subsequent use with PAI-EAS deployment.

Visit the OSS console to view the copied files:

After the model development is complete, you can deploy the model as an online service. See Deploy the model service with EAS.
This topic uses public resources to create the DSW instance, which is billed on a pay-as-you-go basis. When you do not use the instance, stop or delete the instance from the instance list page to avoid ongoing charges.
Deploy the model service with EAS
EAS (Elastic Algorithm Service) allows you to deploy trained models as an online inference service or an AI web application. EAS supports heterogeneous resources and combines features like auto scaling, one-click stress testing, canary release, and real-time monitoring to ensure service stability in high-concurrency scenarios at a lower cost.
-
Write the model web service code and copy it to OSS. The web service code and copy commands are provided. Run the following cells.

-
(Optional) Verify the web service in DSW. Run the following cells to install dependencies and start the service.
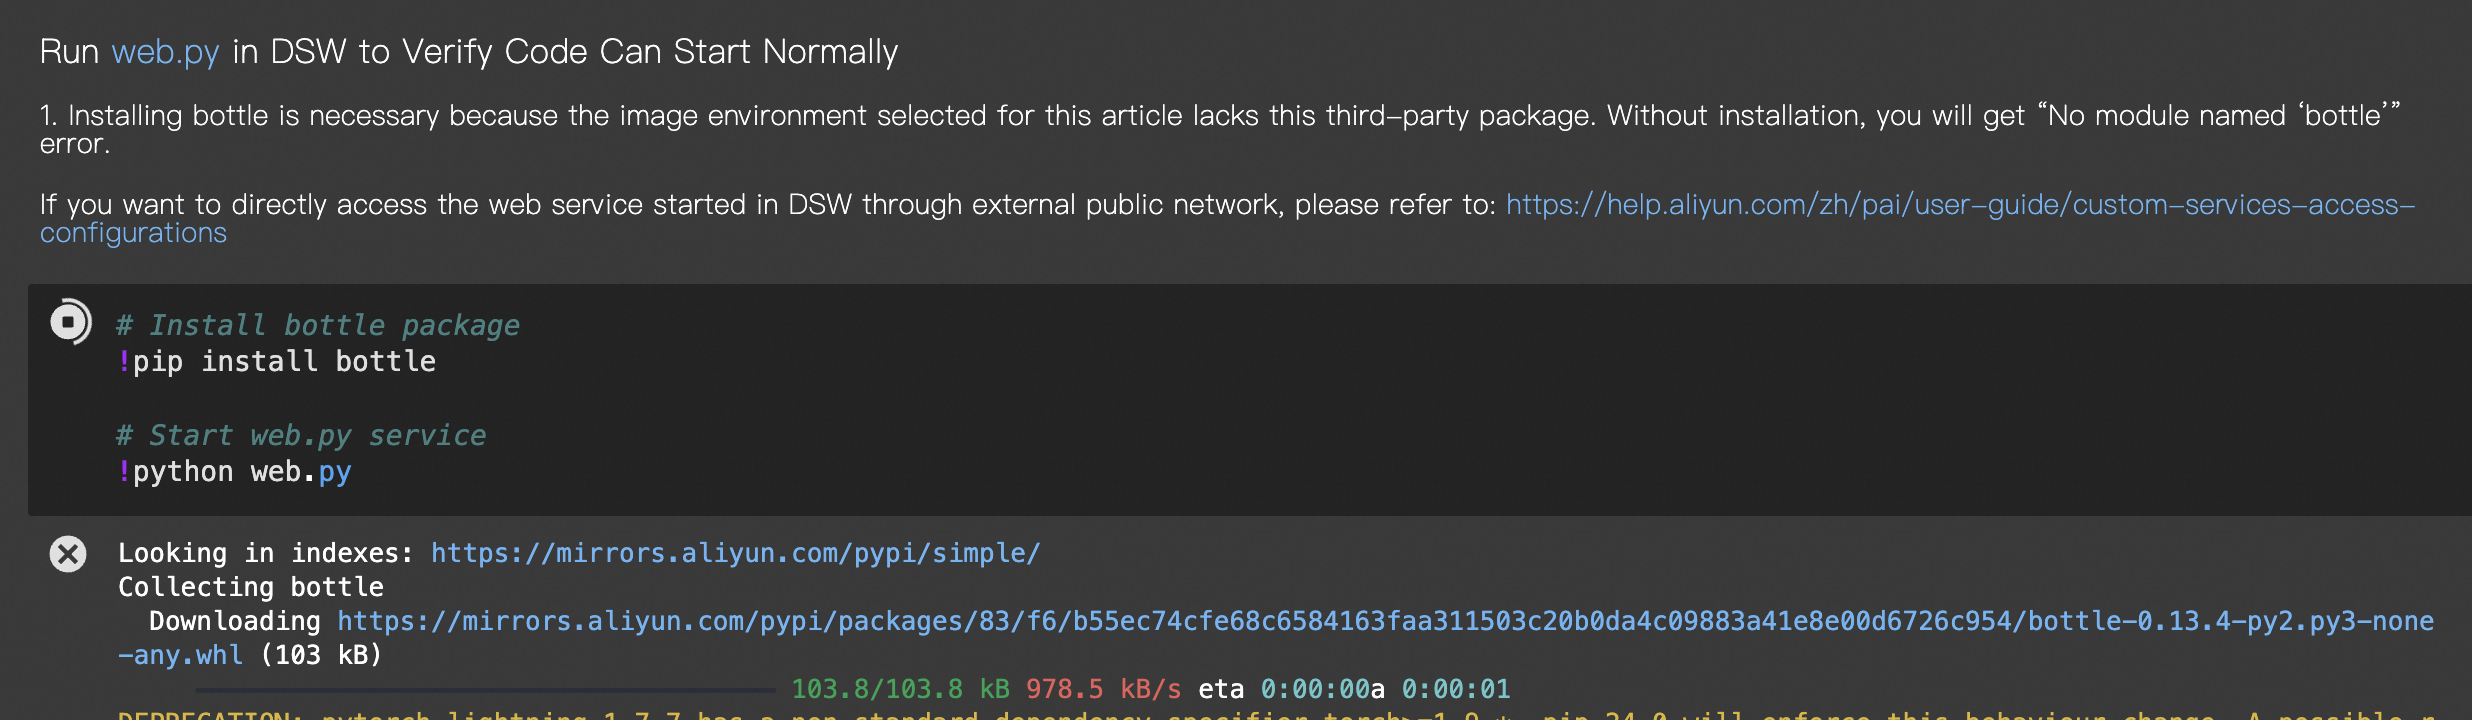
Test the service. On the launcher page, click VSCode to go to the development environment. Click
request_web.pyin the left-side pane, then right-click and choose Run Python > Run Python File in Terminal to execute the code. The following result is returned:{"prediction": 7}NoteTo access the web service in DSW over the Internet, you must configure VPC, NAT Gateway, and EIP. For details, see Access services in an instance over the public network.
-
Create an EAS service. In the left-side navigation pane of the PAI console, click Elastic Algorithm Service (EAS) > Deploy Service > Custom Deployment.
Configure the following parameters and keep the default settings for other parameters:
-
Deployment Method: Image-based Deployment
-
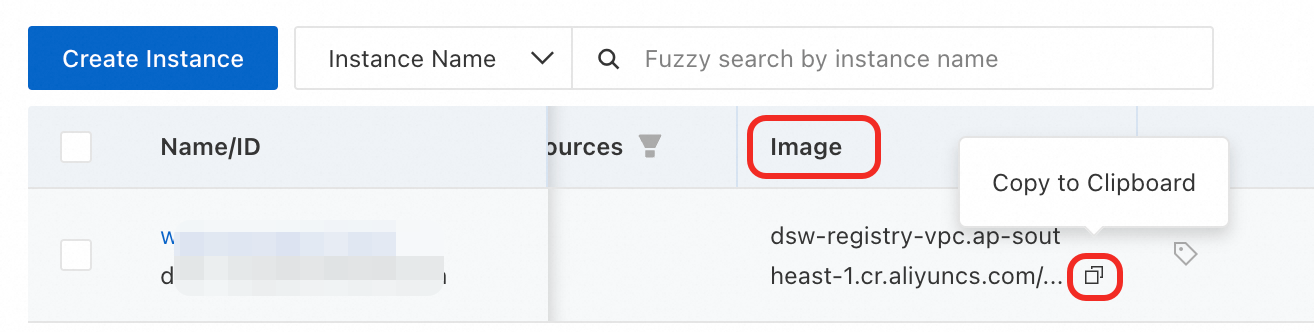
Image Configuration: Select Image Address and paste the image address used by DSW.
DSW has verified that this image can run the model code properly. Using the same image for deployment avoids environment issues.
-
Mount storage: The model files and web service code have been copied to OSS. Click OSS and select the corresponding path.
-
Uri: oss://*****/pai_test/
-
Mount Path: /mnt/data/
-
-
Command to Run:
web.pyhas been mounted to/mnt/data/. Adjust the path. The run command is:python /mnt/data/web.py -
Port Number: Enter the port number
9000used byweb.py. -
Third-party Library Settings: The selected image does not include the bottle library. Add
bottlehere. -
Resource Type: Select Public Resources. For Instance Type, select
ecs.gn7i-c8g1.2xlarge. -
Configure a system disk: Set to 20 GB.
The image is large. Insufficient system disk space causes instance startup failures. We recommend that you set it to 20 GB or more.
Click Deploy to create the service. It takes about 5 minutes to create the service. The service is deployed when the status changes to Running.
-
-
Obtain the call information. On the service details page, click View Endpoint Information to get the Internet Endpoint and Token.
-
Call the service. Replace the Internet Endpoint and Token in the following code with the actual values, and then run the code.
import requests

"""
Test image URLs:
label is 7
http://aliyun-document-review.oss-cn-beijing.aliyuncs.com/dsw_files/mnist_label_7_No_0.jpg
label is 2
http://aliyun-document-review.oss-cn-beijing.aliyuncs.com/dsw_files/mnist_label_2_No_1.jpg
label is 1
http://aliyun-document-review.oss-cn-beijing.aliyuncs.com/dsw_files/mnist_label_1_No_2.jpg
label is 0
http://aliyun-document-review.oss-cn-beijing.aliyuncs.com/dsw_files/mnist_label_0_No_3.jpg
label is 4
http://aliyun-document-review.oss-cn-beijing.aliyuncs.com/dsw_files/mnist_label_4_No_4.jpg
label is 5
http://aliyun-document-review.oss-cn-beijing.aliyuncs.com/dsw_files/mnist_label_9_No_5.jpg
"""

image_url = 'http://aliyun-document-review.oss-cn-beijing.aliyuncs.com/dsw_files/mnist_label_7_No_0.jpg'

# Download the image as binary data
img_response = requests.get(image_url, timeout=10)
# Automatically check whether the request succeeded based on the status code
img_response.raise_for_status()
img_bytes = img_response.content

# Replace <EAS_TOKEN> in the header with the actual token
# In production, we recommend that you set the token as an environment variable to prevent sensitive information leaks.
# For more information about how to configure environment variables, see: https://www.alibabacloud.com/help/zh/sdk/developer-reference/configure-the-alibaba-cloud-accesskey-environment-variable-on-linux-macos-and-windows-systems
headers = {"Authorization": "Token"}
# Send the binary data as the body of a POST request to the model service
resp = requests.post('Call URL/predict_image', data=img_bytes, headers=headers)
print(resp.json())
Result:
{"prediction": 7}
This topic uses public resources to create the EAS service, which is billed on a pay-as-you-go basis. When you do not use the service, stop or delete the service from the service list page to avoid ongoing charges.
References
-
For troubleshooting DSW startup failures, see Create a DSW instance.
-
For DSW billing, see DSW billing.
-
For DSW core features, see DSW overview.
-
For accessing DSW web services over the Internet, see Access services in an instance over the public network.
-
For EAS core features, see EAS overview.