Connect Quick BI to a MaxCompute project to query and visualize your data in real time without writing code. Use drag-and-drop operations and built-in chart types to explore data and build reports directly in the Quick BI console.
Prerequisites
Before you begin, make sure you have:
A MaxCompute project. See Create a project
An AccessKey ID and AccessKey Secret with access to the project. Get them from the AccessKey Pair page
The Quick BI service activated. This guide uses Quick BI Basic
Step 1: Connect Quick BI to MaxCompute
Log on to the Quick BI console.
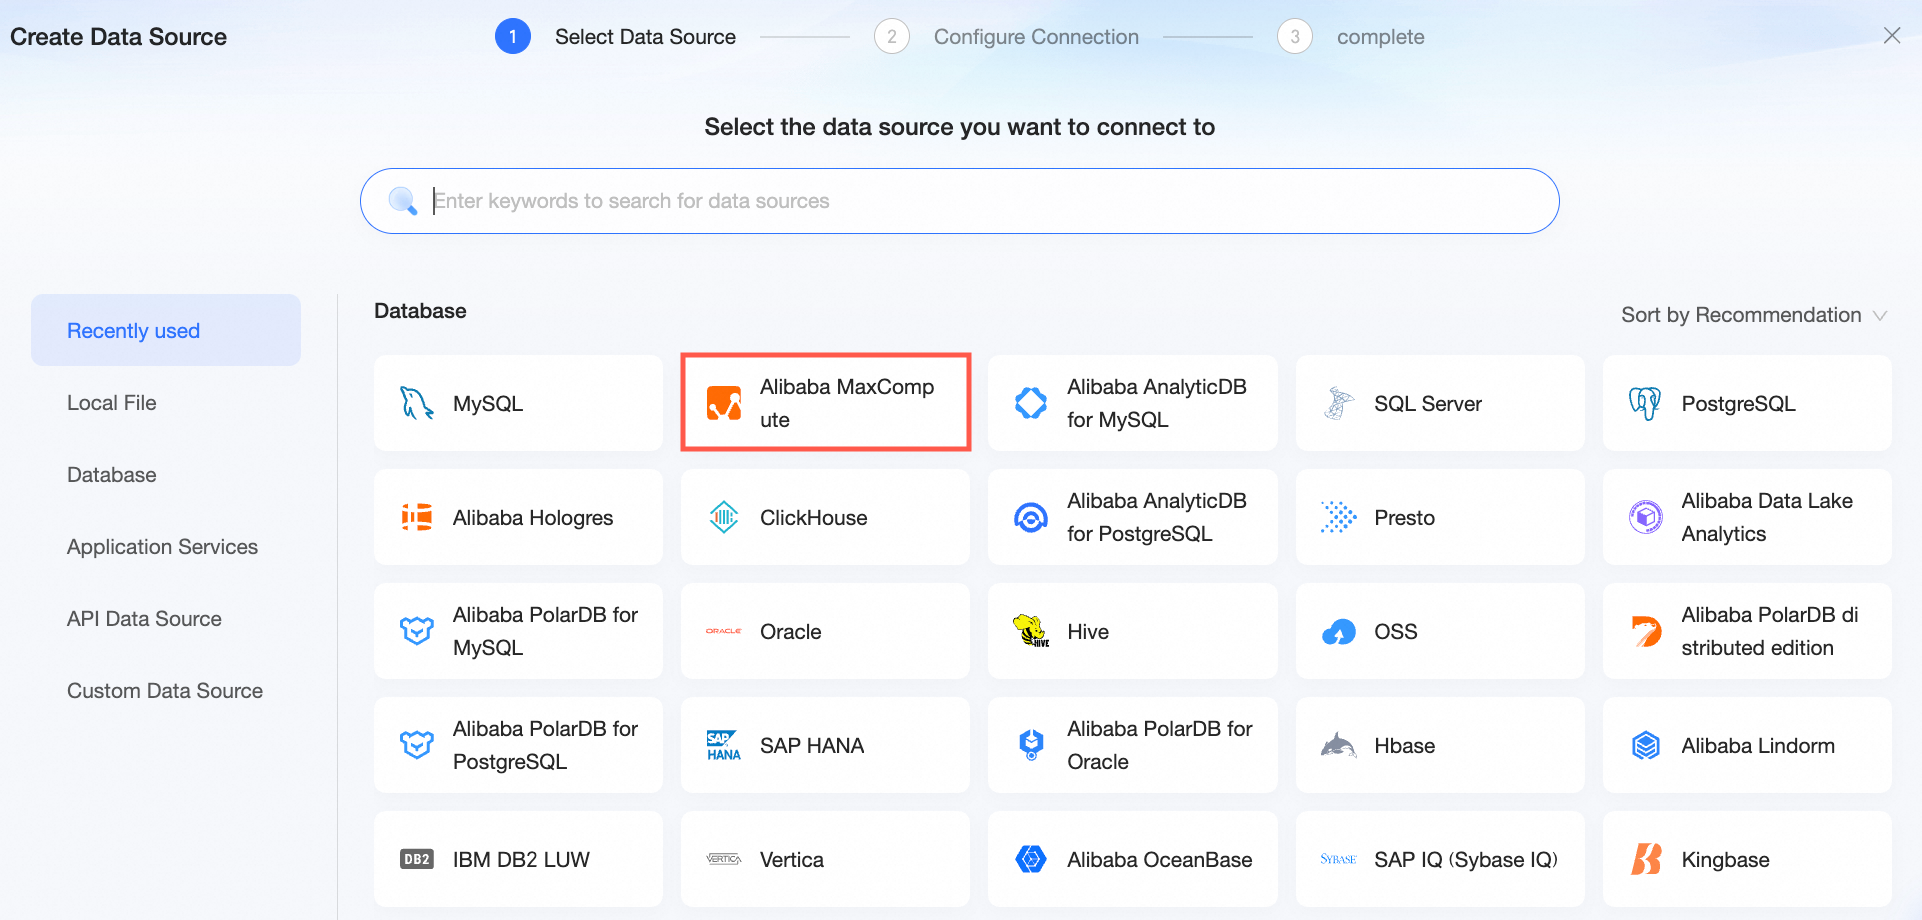
You can refer to the following figure to add a data source.
Navigate to the data source creation page from an entry point for creating a data source.
Select the Alibaba MaxCompute data source.
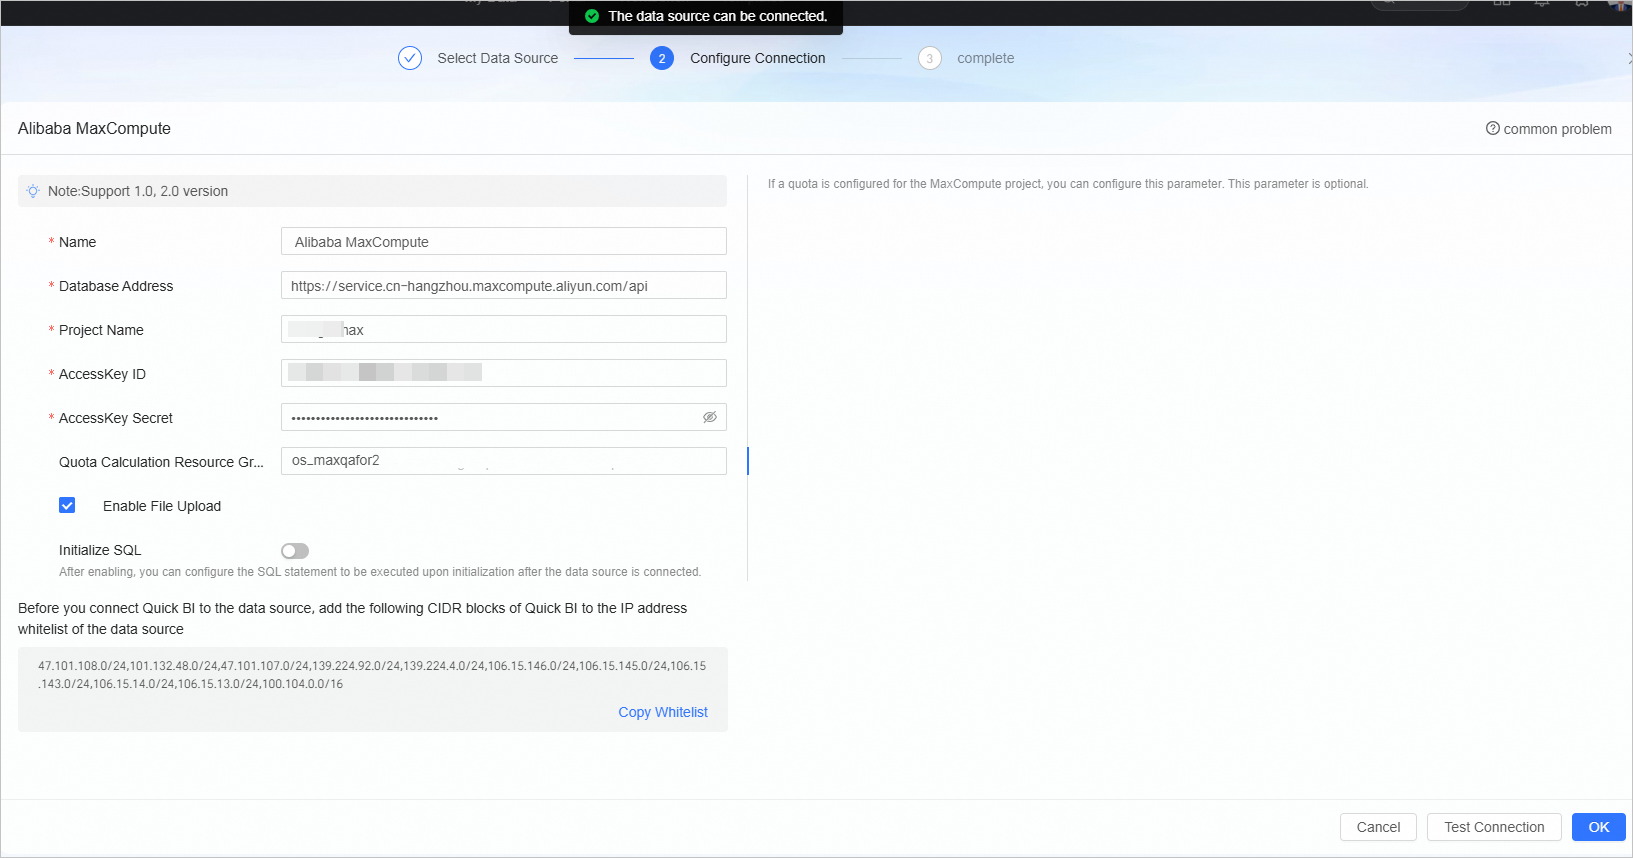
In the Configure Connection dialog box, set the following parameters.
Name
Description
Display Name
The display name in the data source list.
Enter a standard name. Do not use special characters. The name cannot contain leading or trailing spaces.
Database Address
The Endpoint to connect to the MaxCompute project. Quick BI can connect to the MaxCompute service over the Alibaba Cloud internal network through an Endpoint.
Project Name
The name of the destination MaxCompute project.
This is the name of the MaxCompute project, not the workspace. You can log on to the MaxCompute console. After you switch the region in the upper-left corner, you can find the name of the MaxCompute project on the Workspace > Project Management page.
AccessKey ID and AccessKey Secret
The AccessKey ID and AccessKey secret that have permissions to access the destination MaxCompute project.
Ensure that the account has the CreateInstance and List permissions on the project, and the Desc permission on the table. To upload files, the account also requires the CreateTable and Write permissions on the project. You can log on to the RAM console to grant these permissions.
Quota Compute Resource Group
If you use the MaxQA query acceleration feature of MaxCompute, enter the MaxQA Quota name.
If other MaxCompute projects have Quota compute resource groups, enter the names of the groups as needed.
If you leave this parameter empty, the MCQA 1.0 feature of MaxCompute is used for query acceleration by default.
This parameter is optional.
Enable File Upload Entry
If this option is enabled, you can upload files. This option is enabled by default.
Init SQL
If this option is enabled, you can configure the SQL statements that are executed for initialization after a data source is connected.
Only `SET` statements are allowed. Separate multiple statements with semicolons.
Click Test Connection to test the data source connection.
 Note
NoteFor more information about data source access control issues, see Solutions to access control issues and analysis of common errors for business analysts who connect to MaxCompute data sources in Quick BI.
After the test is successful, click OK to add the data source.
NoteQuick BI uses an asynchronous policy to load and update MaxCompute cloud data sources. If you are adding a data source for the first time, wait 1 to 5 minutes for the data synchronization to complete.
You can find the newly created data source in the data source list.
Step 1: Connect Quick BI to MaxCompute
Log on to the Quick BI console.
Go to the Create Data Source page using the entry point for adding a data source.
Select Alibaba MaxCompute.
In the Configure Connection step, fill in the following parameters.
Parameter Description Name A display name for this data source in the configuration list. No special characters or leading/trailing spaces. Database Address The MaxCompute endpoint. Quick BI can connect using the cloud product interconnection network endpoint. Project Name The name of your MaxCompute project — not the DataWorks workspace name. To find it: log on to the MaxCompute console, select a region in the top navigation bar, then go to Workspace > Projects. AccessKey ID and AccessKey Secret Credentials for accessing the MaxCompute project. The account must have CreateInstance and List permissions on the project, and Desc permission on tables. If you enable file upload, the account also needs CreateTable and Write permissions. Get the AccessKey ID from the RAM console. Quota Resource Group (Optional) The quota group to use for query acceleration. Enter a MaxQA quota name to use MaxQA, or specify another computing resource quota based on your needs. If left blank, the system uses MCQA 1.0 for query acceleration. Enable File Upload Selected by default. Enables file upload support. Initialize SQL (Optional) SQL statements to run each time the data source connection is initialized. Only SETstatements are supported, separated by semicolons (;).Click Test Connection to verify connectivity.
After the test passes, click OK.
When adding a MaxCompute data source for the first time, Quick BI uses an asynchronous loading strategy. Wait 1 to 5 minutes for the initial data synchronization to complete before the data source appears in the list.
Step 2: Query and analyze data
With the MaxCompute data source connected, query and visualize data directly in the Quick BI console:
To add tables from MaxCompute or write custom SQL queries, see Create and manage datasets.
To build charts and dashboards, see Create a dashboard and Overview of visualization charts.
To perform drill-down analysis, see Configure and display drill-down analysis.