To improve access speed and meet the high security and availability requirements for your web service, combine Global Accelerator (GA) and Web Application Firewall (WAF). GA uses Alibaba Cloud's premium Border Gateway Protocol (BGP) bandwidth and global network. When used with WAF, GA effectively defends against web attacks. The health check feature in GA prevents service disruptions caused by abnormal nodes. This combination provides a secure, highly available acceleration solution for web services.
Scenario
A web service is deployed on an ECS instance in the Germany (Frankfurt) region. The service uses a custom domain name and forwards traffic on HTTP port 80. Most clients are in the China (Hong Kong) region. The web service faces these challenges:
The web service is frequently targeted by various web attacks, which severely impact its security and availability.
The cross-border public network is unstable, often experiencing issues such as latency, jitter, and packet loss.
The backend servers are unstable, posing a risk of service interruptions.

The figure shows the architecture. This deployment solves the challenges faced by the cross-border web service.
WAF: After you add the custom domain name to WAF, all service traffic is directed to WAF for inspection. WAF filters out web attacks and forwards only normal traffic, ensuring the security of your web service and data.
GA: After WAF inspects and filters access requests from users in China (Hong Kong), the requests enter the Alibaba Cloud acceleration network through the acceleration area in China (Hong Kong). GA uses smart routing and automatic network scheduling to forward the requests to the web service in Germany (Frankfurt). This significantly improves access speed. In addition, enabling health checks improves service reliability and availability by preventing service disruptions caused by abnormal nodes.
Prerequisites
A web service is deployed on ECS instances ECS01 and ECS02 in the Germany (Frankfurt) region. This topic uses Alibaba Cloud Linux 3 as the operating system and Nginx to configure an HTTP service on port 80 as an example.
You have configured DNS records for your custom domain name by creating A records that point the domain name to the public IP addresses of the two backend servers.
If you use a DNS service other than Alibaba Cloud DNS, refer to the documentation provided by your DNS provider.
To provide services over HTTPS port 443, you must first create and request a certificate, or upload a third-party certificate to the SSL Certificate service and bind it to your custom domain name.
In this scenario, activate a WAF 3.0 instance that uses the Pay-as-you-go billing method in a region outside the Chinese mainland.
ImportantIf the GA acceleration area (client region) you configure includes a region in the Chinese mainland, you must also activate a WAF instance in a region in the Chinese mainland. Ensure that your custom domain name has completed its ICP filing and that the filing information is valid while WAF protection is active.
Procedure
Step 1: Configure Global Accelerator
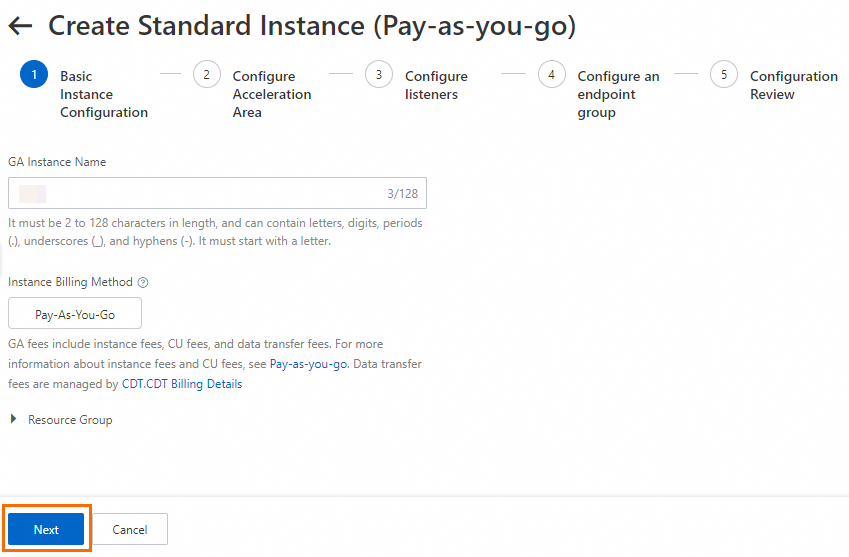
This topic uses a pay-as-you-go Standard GA instance as an example.
On the page of the GA console, click Create Standard Pay-as-you-go Instance.
In the Basic Instance Configuration step, configure the basic information and click Next.
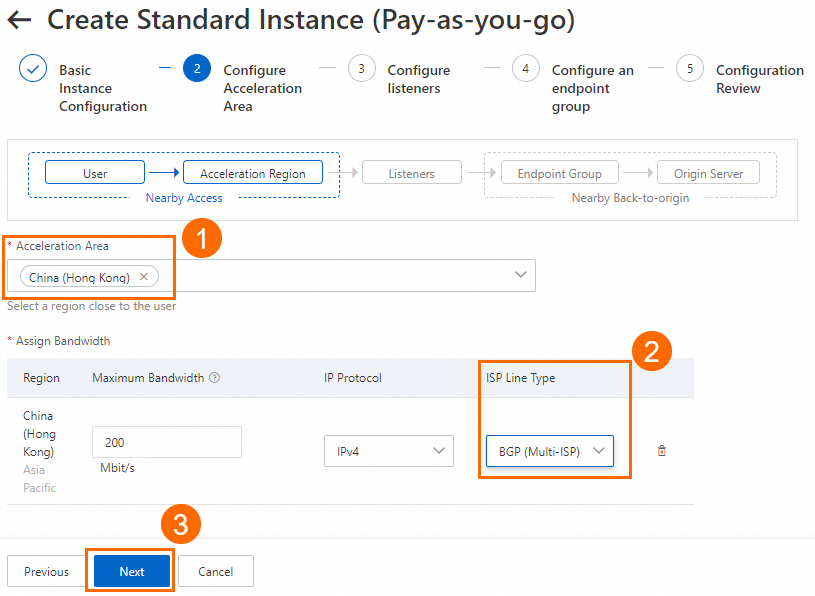
In the Configure Acceleration Area step, add an acceleration region, allocate bandwidth to the region, and then click Next.
In this example, the Acceleration Region parameter is set to China (Hong Kong), and the ISP Line Type parameter is set to BGP (Multi-ISP). You can use the default values for other parameters or modify the parameters based on your business requirements. For more information, see Add and manage acceleration areas.
ImportantIf the acceleration regions include regions in the Chinese mainland, you must apply for an ICP number for the domain name to provide services.
If you specify a small value for the maximum bandwidth, throttling may occur and packets may be dropped. Specify a maximum bandwidth based on your business requirements.
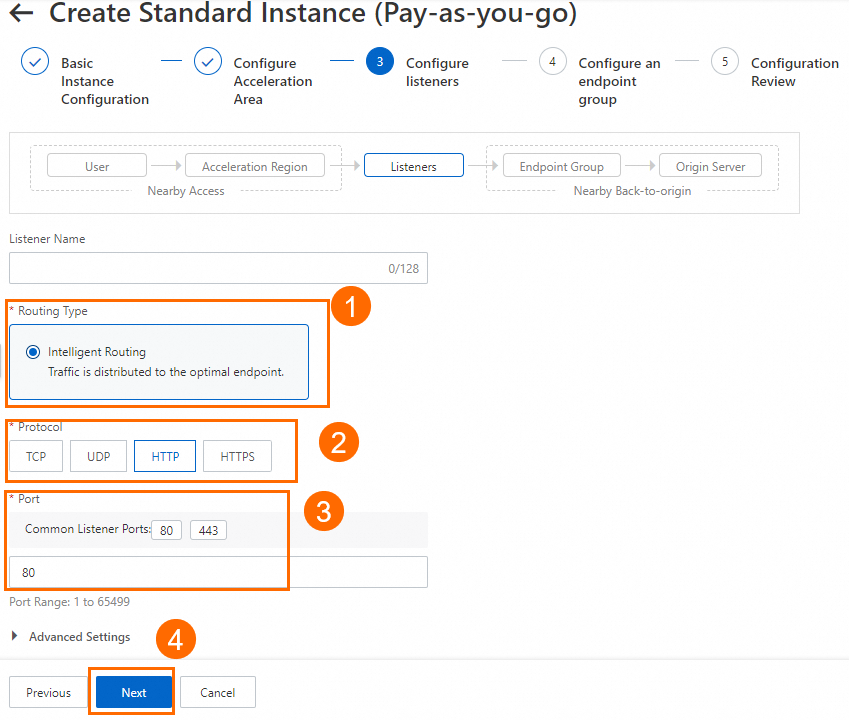
In the Configure listeners step, configure the forwarding protocol and port, and then click Next.
In this example, the Routing Type parameter is set to Intelligent Routing, the Protocol parameter is set to HTTP, and the Port parameter is set to 80. You can use the default values for other parameters or modify the parameters based on your business requirements. For more information, see Add and manage smart routing listeners.
NoteIf you want to use HTTPS 443 to provide external services, you can select HTTPS for Protocol and 443 for Port, associate the created certificate with the listener, and configure the mapping between listener port 443 and the backend service port 80 in the Port Mapping parameter of the endpoint group. This way, users can securely access the HTTP website over HTTPS.
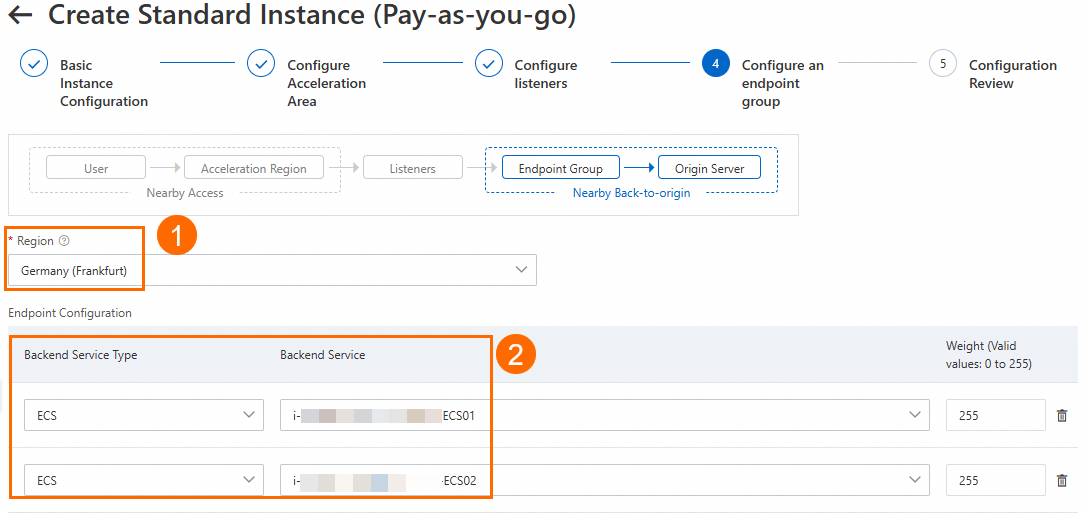
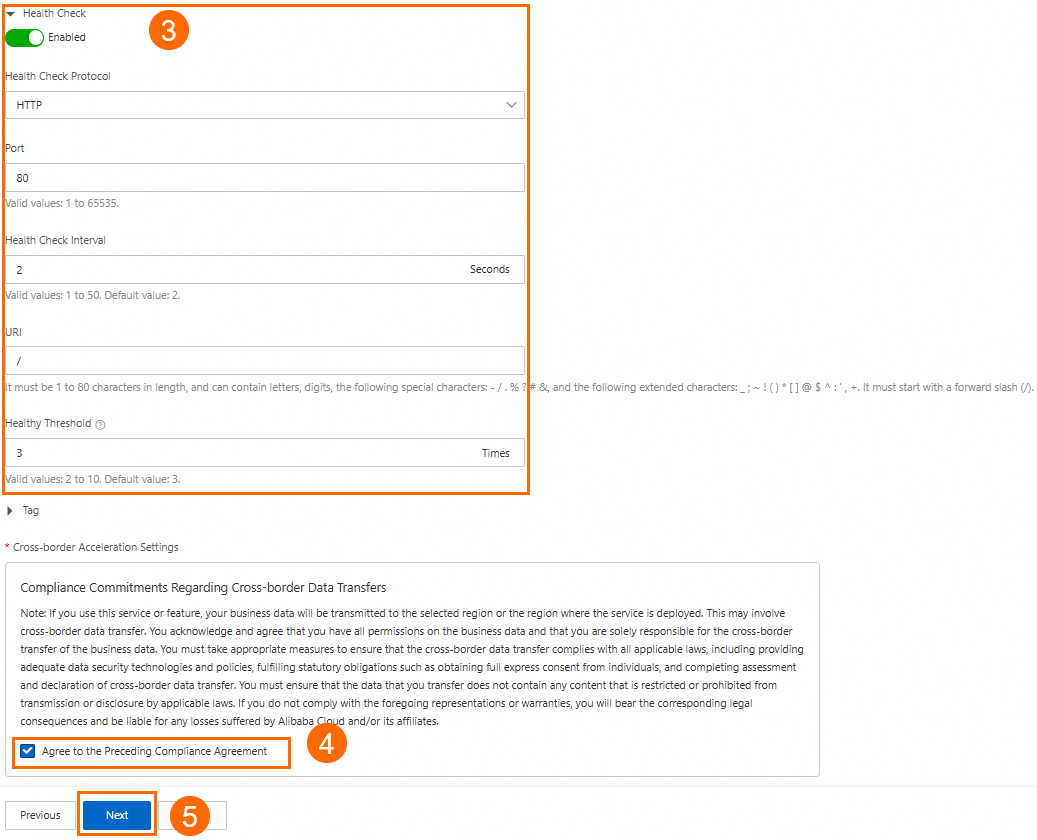
On the Configure an endpoint group page, configure the backend service for the endpoint, and then click Next.
In this scenario, set Region to Germany (Frankfurt). For Backend Service, configure ECS01 and ECS02. Turn on the Health Check switch. Then, read and select the Compliance Commitments Regarding Cross-border Data Transfers. For more information, see Configure other endpoint group parameters. You can keep the default values or modify them as needed.
In the Configuration Review step, confirm the GA configurations and click Submit.
On the Instances page, find the created GA instance and obtain the CNAME assigned to the GA instance in the CNAME column.
On the backend server, allow traffic from the CIDR block that GA uses to connect to the backend service.
In this scenario, GA connects to the backend ECS instances over a private network. You must add a rule to the ECS security group to allow traffic from the vSwitch CIDR block. Ensure that the vSwitch CIDR block has at least eight available private IP addresses.
Step 2: Configure Web Application Firewall
In the Web Application Firewall 3.0 console, go to the Onboarding page. Click the CNAME Record tab, and then click Add.
In the Add Domain Name panel, on the Configure Listener page, configure the domain name, protocol, port, and other settings. Then, click Next.
In this scenario, set Domain Name to
www.<YOURDOMAIN>.cloudand select HTTP for Protocol Type. For more information, see Configure other domain provisioning parameters. You can keep the default values or modify them as needed.
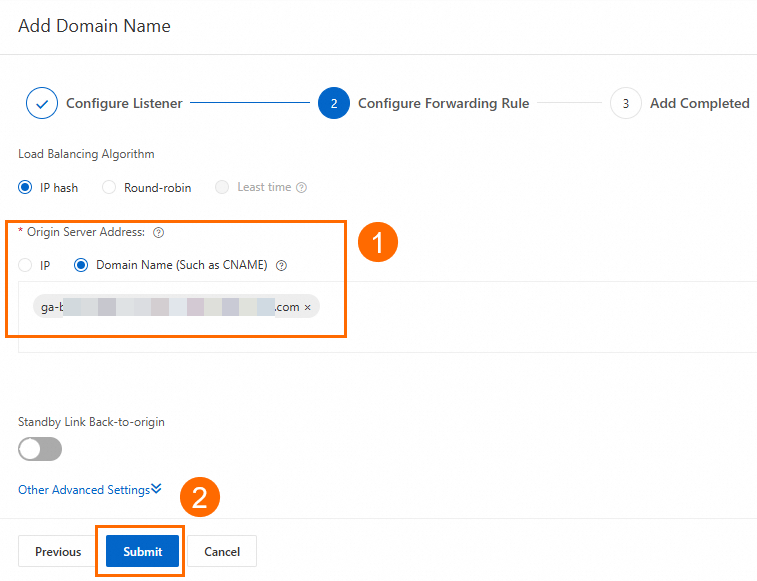
On the Configure Forwarding Rule page, configure the server address to which requests are forwarded, and then click Submit.
In this scenario, set Origin Server Address to the CNAME of the GA instance. Keep the default values for other parameters or modify them as needed.
On the Add Completed page, obtain the CNAME address of WAF, and then click Complete.

Step 3: Configure CNAME resolution
Update the DNS record by adding a CNAME record that points your custom domain name to the WAF CNAME.
In this scenario, if you already have an A record that points to the backend servers, you can first add a CNAME record that points to the WAF CNAME for the China (Hong Kong) region for testing. After the test is successful, you can gradually expand to other regions or keep only the CNAME record that points to WAF.
On the Public Zone page, find the target custom domain name and click Settings in the Actions column.
NoteFor domain names not registered with Alibaba Cloud, you must first add the domain name to the Alibaba Cloud DNS console before configurong DNS settings.
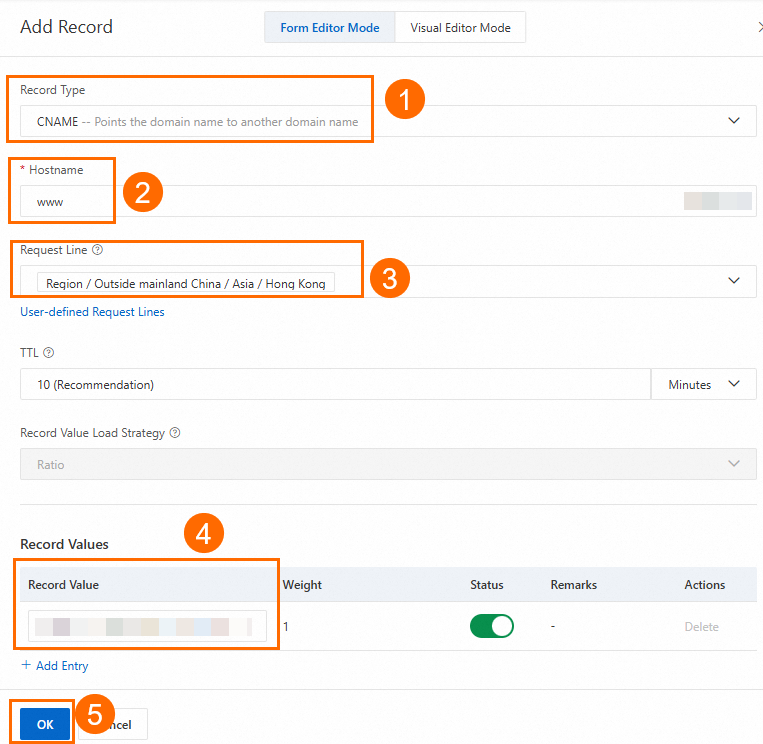
On the DNS settings page, click Add Record, configure the CNAME record, and click OK.
In this scenario, set Record Type to CNAME, Hostname to www, Query Source to China (Hong Kong), and Record Value to the CNAME address of WAF. For more information, see Configure other DNS record parameters. Keep the default values or modify them as needed.
Step 4: Verify the results
On a computer in the acceleration area, which is China (Hong Kong) in this scenario, open a browser. You can test the protection and acceleration effectiveness of the GA and WAF combination as follows.
Verify WAF protection
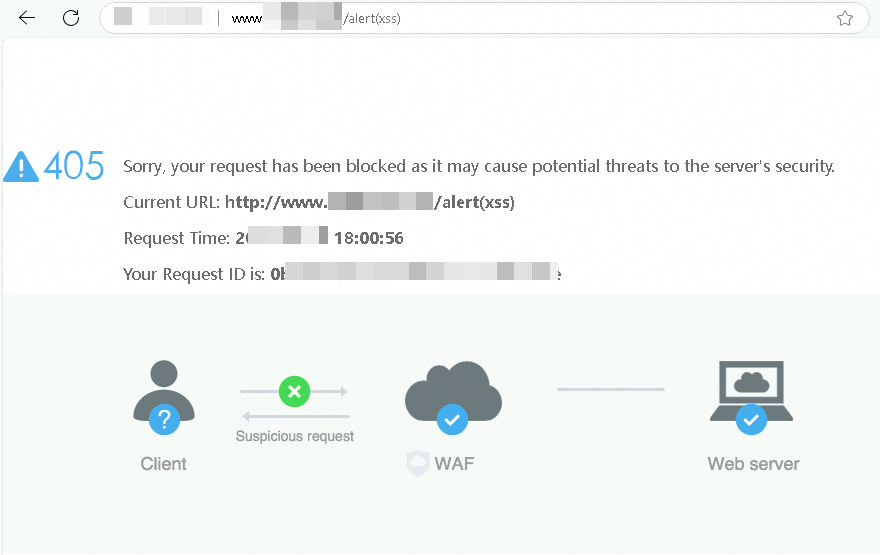
Simulate a simple web attack to verify that WAF protection is effective.
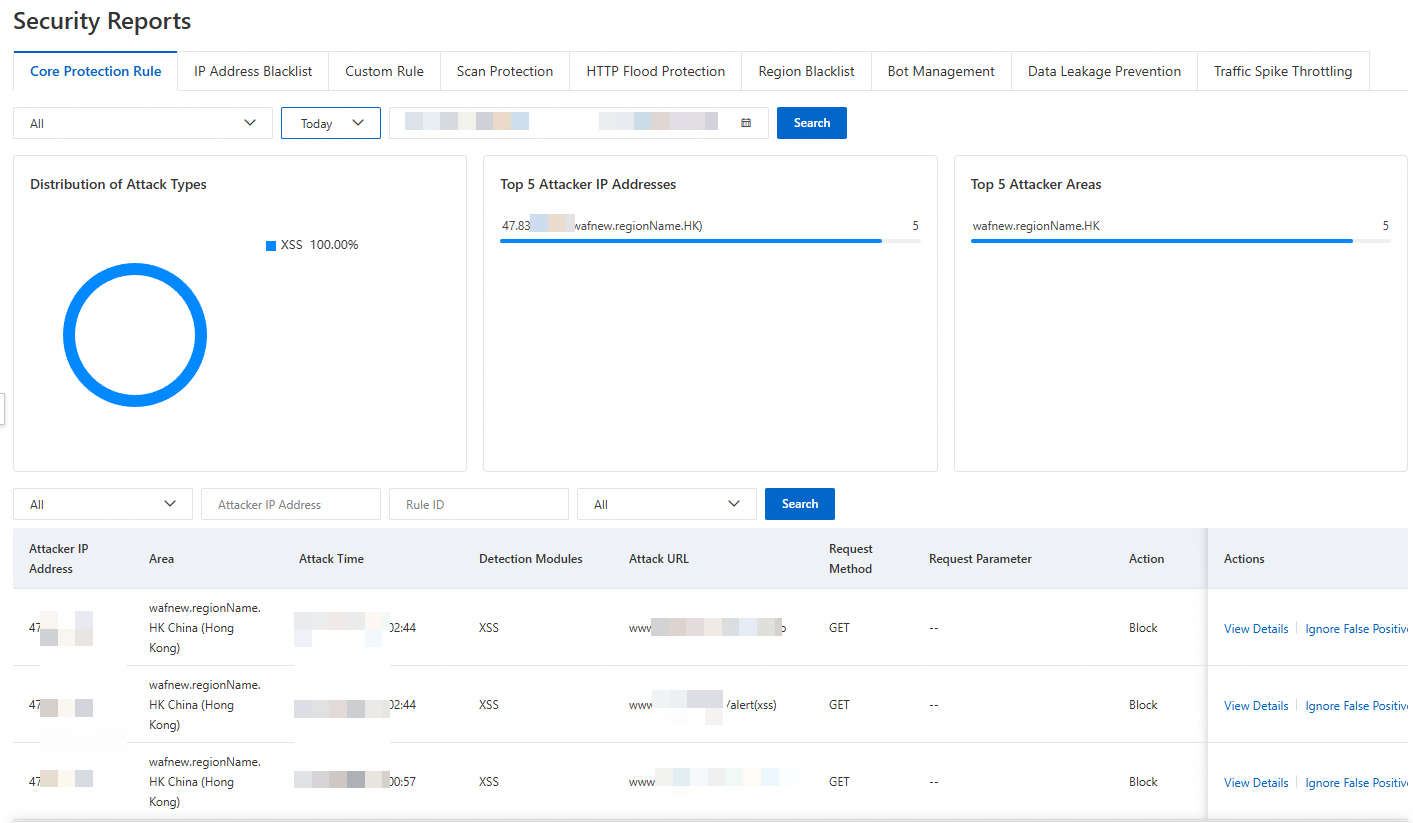
For example, you can test the web application attack protection by entering a sample attack request such as <protected domain name><span class="ph" data-tag="ph" id="fe8efd6abfz6y"><code class="code" code-type="xCode" data-spm-anchor-id="a2c4g.11186623.0.i54.60327209q28jCE" data-tag="code" id="da7f9ca0b8nu1">/alert(xss) in your browser's address bar. WAF will then return a block page.
On the Security Reports page of Web Application Firewall 3.0, you can view the protection records.
Verify GA health check effectiveness
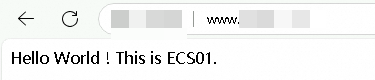
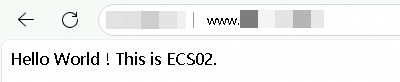
In a browser, enter the custom domain name of the website to access the website deployed in the Germany (Frankfurt) region.
The test shows that you can access the website in the Germany (Frankfurt) region using its custom domain name. If you refresh the browser multiple times, the responding server switches between ECS01 and ECS02.
Simulate a failure: Stop the ECS01 server.
After a while, on the Endpoint Group tab of the GA instance, check the Health Check Status.
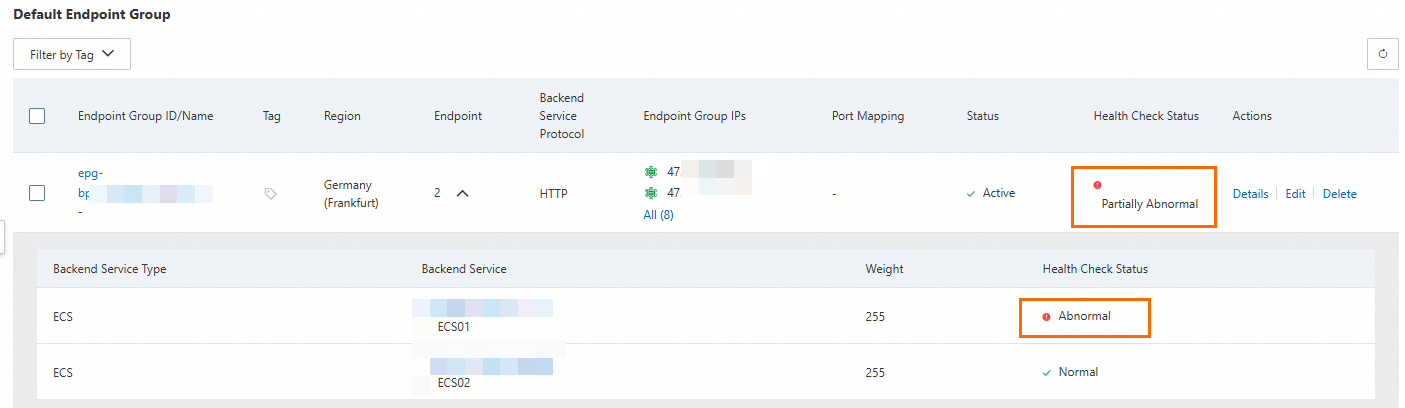
After refreshing the browser multiple times, you can still access the service normally, but the only responding server is ECS02.
Verify GA acceleration
This topic uses a detection point in China (Hong Kong) as an example. Before and after you configure GA, use a network probe tool to test the web service domain name. You can check the response time to measure data latency.
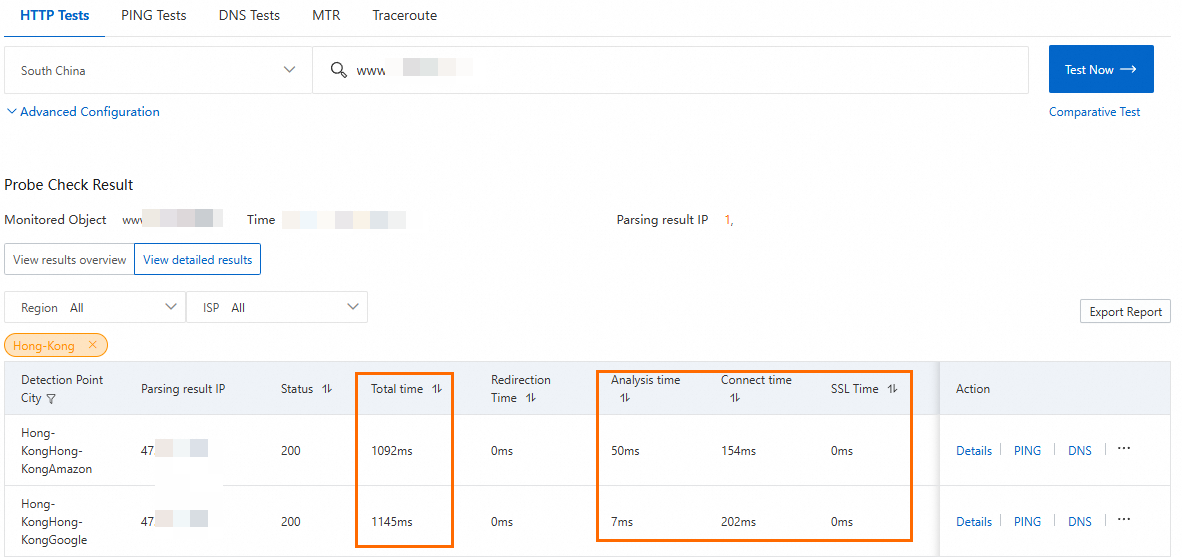
Test the network latency before you configure GA.
Before you perform this step, make sure that:
The server address in WAF is set to the public IP addresses of the two backend servers. Client requests are forwarded directly to the backend service after being processed by WAF.
You need to configure the security software or access control policy on the backend servers to allow inbound traffic from the WAF back-to-origin IP address ranges.
Test the network latency after you configure GA.
Before you perform this step, make sure that the server address in WAF is set to the CNAME of GA.
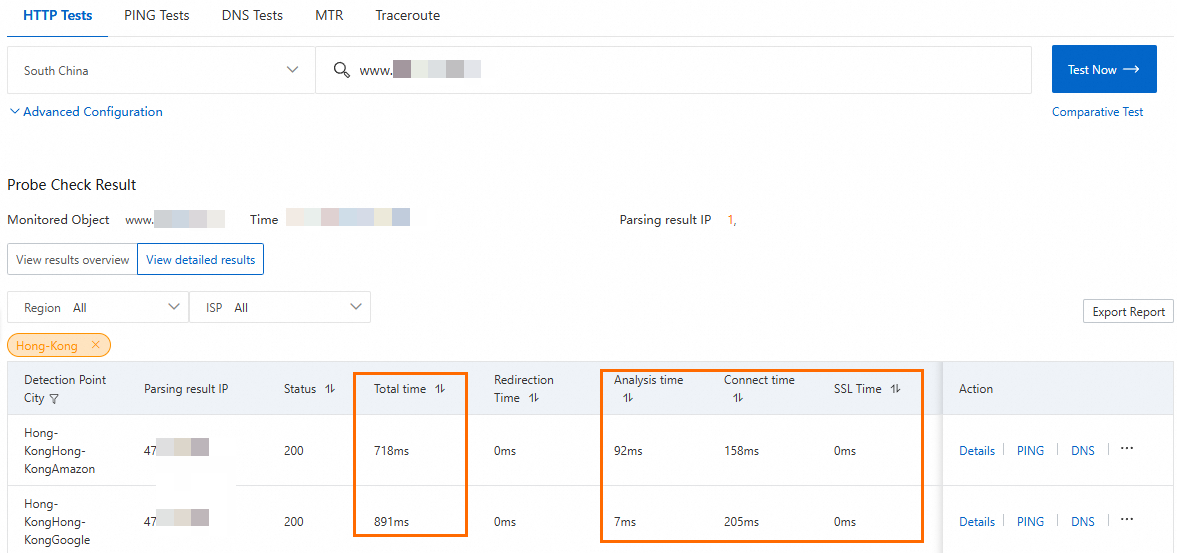
The verification shows that using GA reduces the latency for clients in China (Hong Kong) when they access the web service in Germany (Frankfurt).
The actual protection and acceleration performance of GA and WAF depends on your specific service tests.
References
GA costs include the following: billing for pay-as-you-go GA instances, CU fees, and data transfer fees.
In cross-border scenarios, premium bandwidth cross-border acceleration is used by default. If you require higher network quality, leased line cross-border acceleration. For more information, see Acceleration Configuration Selection.
For more information about WAF, see the following: