Schedule a Function Compute (FC) function from DataWorks to automatically add watermarks to incremental PDF files stored in Object Storage Service (OSS). This tutorial walks you through building the end-to-end pipeline: create an FC application from a template, configure a Function Compute node in DataWorks with a date variable, then commit and publish the node for daily scheduling.
How it works
The pipeline connects three services:
-
DataWorks triggers the Function Compute node on a daily schedule and passes the current date as a variable.
-
Function Compute reads the PDF from OSS, overlays the watermark, and writes the watermarked file back to the same path.
-
OSS stores both the source PDF and the output file.
Prerequisites
Before you begin, ensure that you have:
-
DataWorks activated. See Purchase guide.
-
Function Compute activated. See Quickly create a function.
-
OSS activated, with a bucket created and a PDF file uploaded. See Activate OSS. In this tutorial,
example.pdfis uploaded to the2023-08-15/directory in thebucket-test222bucket. You can use this sample PDF.
Limitations
-
Function type: DataWorks supports invoking only event functions. HTTP functions are not supported. Create an event function before proceeding. See Function types.
-
Region availability: Function Compute nodes are available in the following regions: China (Hangzhou), China (Shanghai), China (Beijing), China (Shenzhen), China (Chengdu), China (Hong Kong), Singapore, Malaysia (Kuala Lumpur), Indonesia (Jakarta), Germany (Frankfurt), UK (London), US (Silicon Valley), and US (Virginia).
Step 1: Create a Function Compute application
-
Log on to the Function Compute console. In the left-side navigation pane, click Applications.
-
Click Create Application. On the Create Application page, select Use a Template to Create an Application. Search for
start-pdf-watermark, hover over the result, and click Create Now.The
start-pdf-watermarktemplate reads a PDF from an OSS path, adds the specified watermark text, and writes the output back to the same path. Source code is available on GitHub.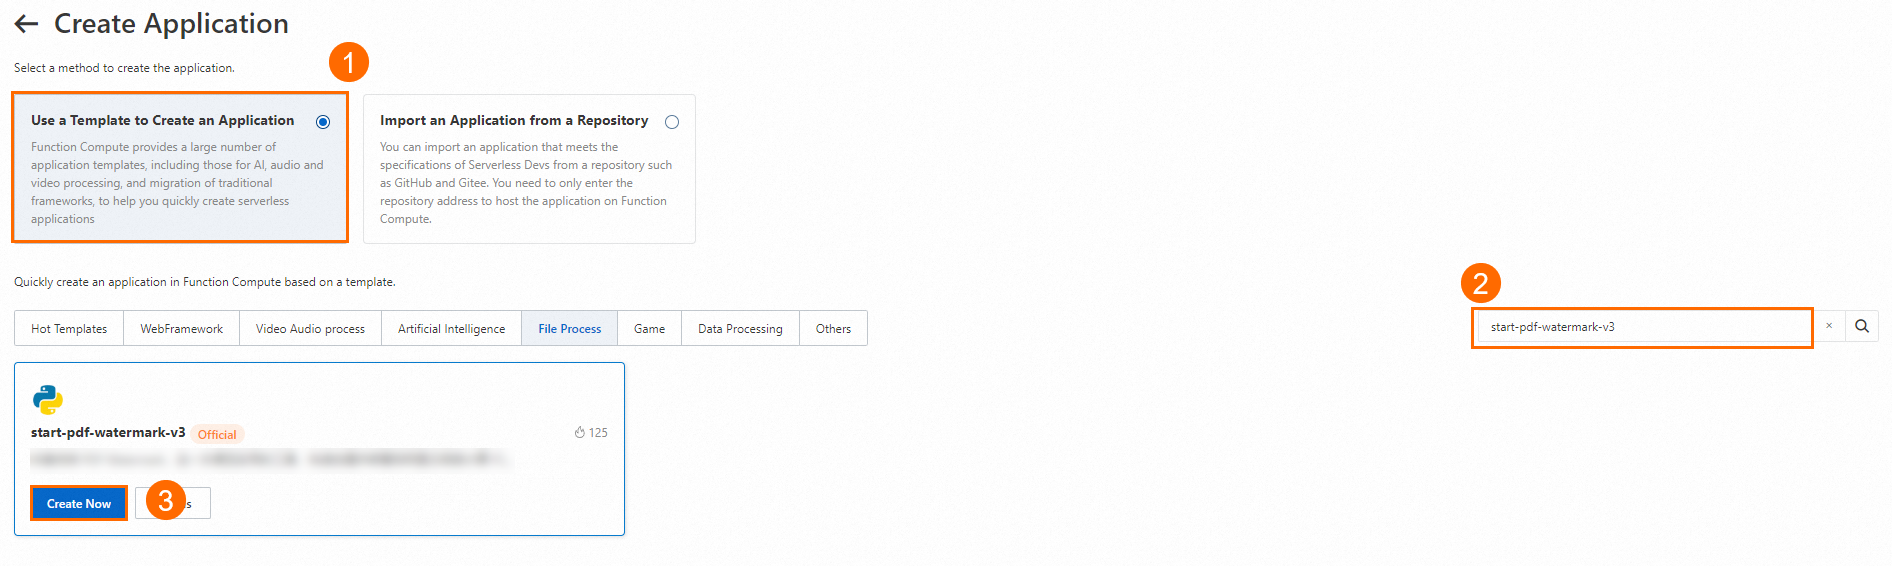
-
Configure the application parameters:
If the console prompts that additional permissions are required, click Authorize to grant them.
Parameter Description Deployment type Select Directly Deploy. Application name Auto-generated. Change it to match your naming convention if needed. Role name AliyunFCServerlessDevsRole is selected by default. This role grants Serverless Application Center the permissions required to deploy resources and access services such as Virtual Private Cloud (VPC), Apsara File Storage NAS, and Simple Log Service (SLS). To view or modify the role's permissions, go to the Resource Access Management (RAM) console. Region The region where the application is created. Only OSS buckets in this region are available for OSS bucket name. Function name Auto-generated. Change it if needed. Time zone Auto-selected based on the region. Change it if needed. OSS bucket name The OSS bucket to use. Must be in the same region as Region. RAM's ARN AliyunFCDefaultRole is selected by default. This role grants Function Compute access to the Alibaba Cloud resources it needs. See Step 1: Activate Function Compute for setup instructions. -
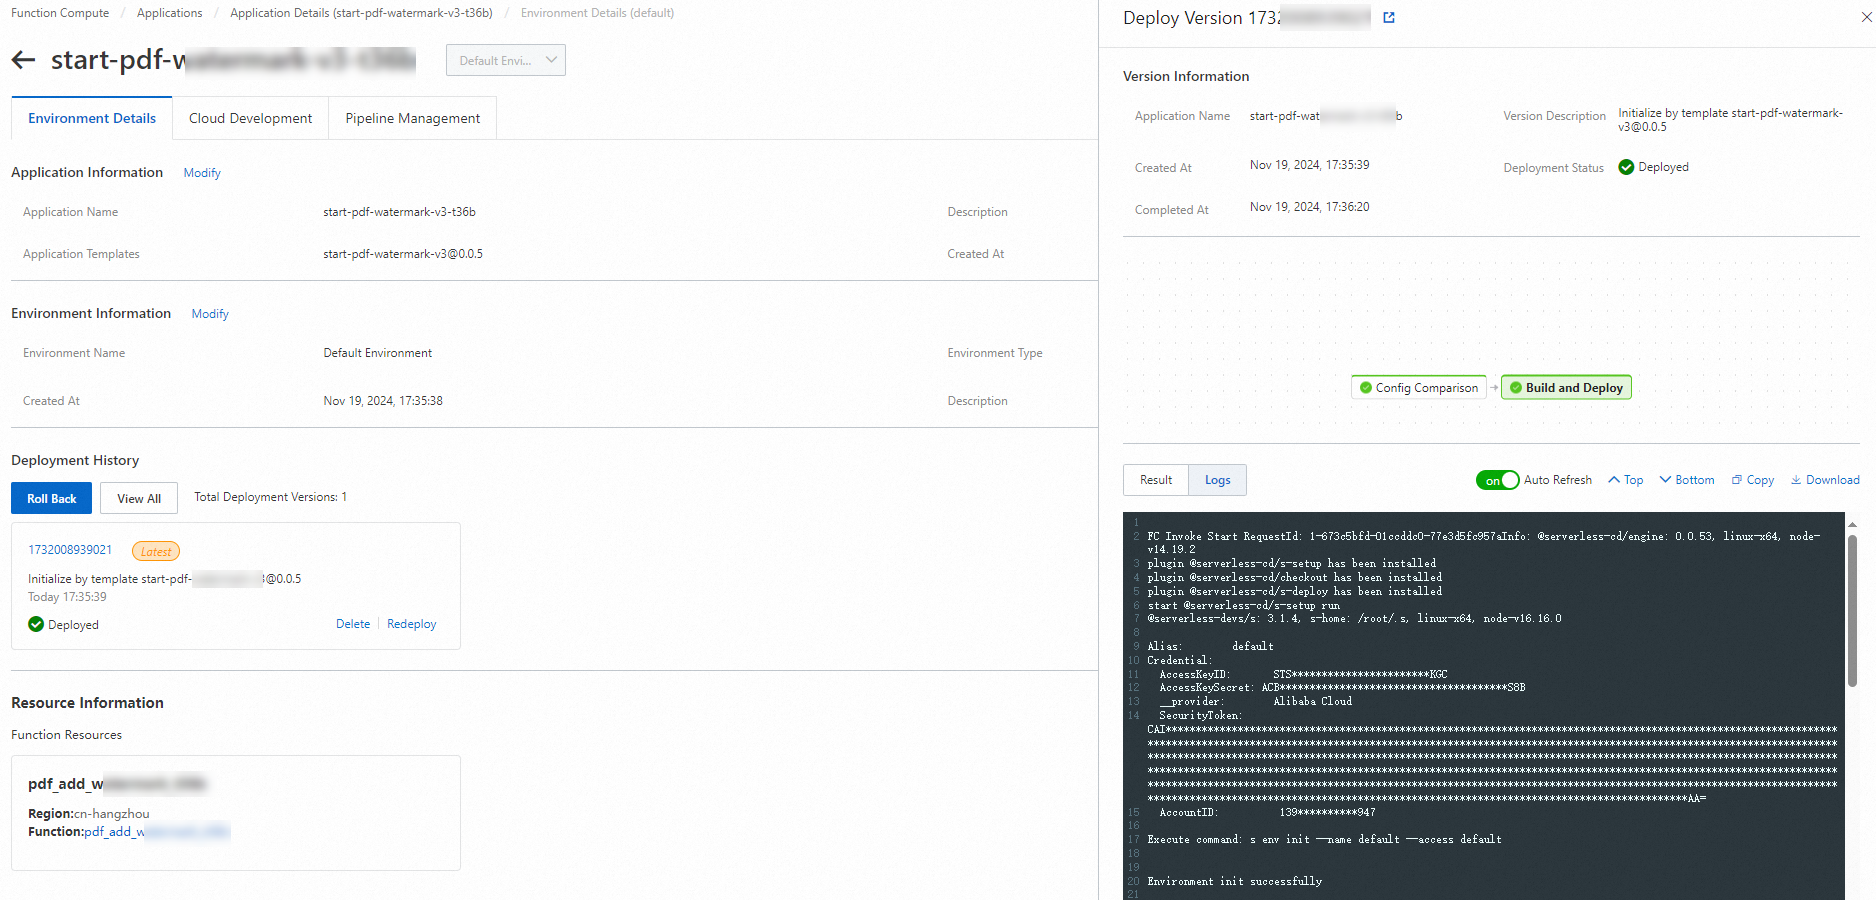
Click Create and Deploy Default Environment. The application is ready when Deployed appears next to Deployment Status.
-
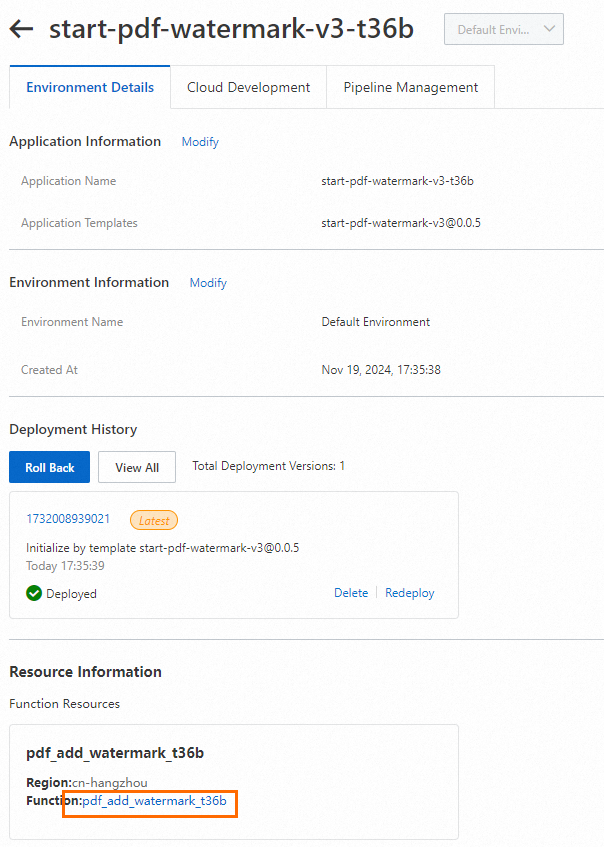
On the Applications page, click the application name to open the Environment Details tab.

-
In the Resource Information section, click the value of Function to open the function details page.
-
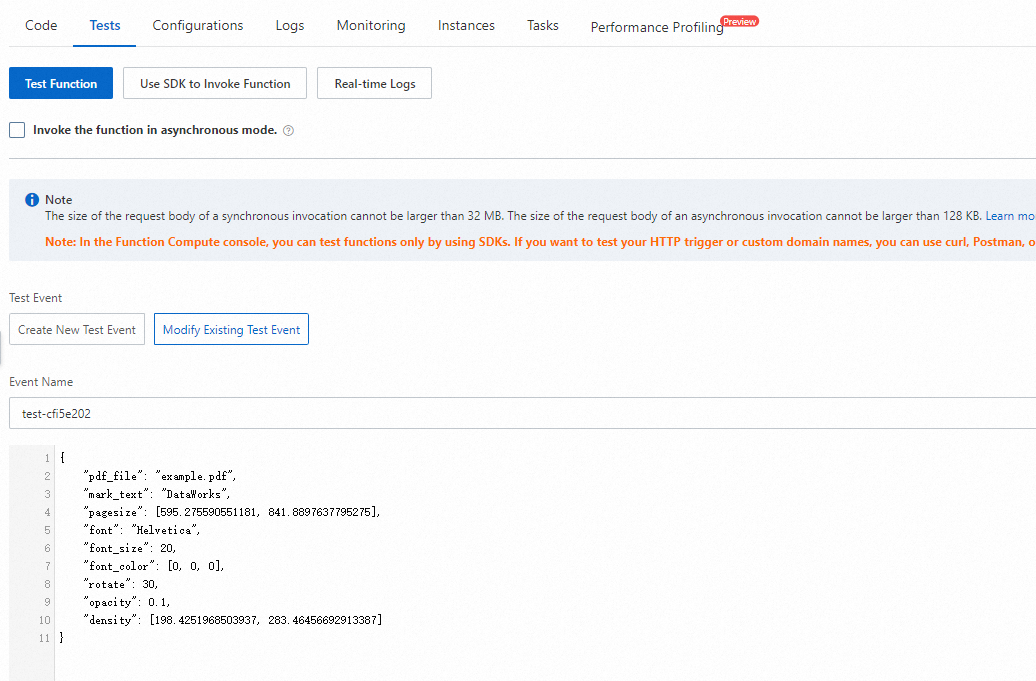
Click the Test Function tab. Expand Configure test events and configure the following:
-
Event name: Enter a name for this test event.
-
Event content: Paste the following JSON. This example adds a
DataWorkswatermark in Helvetica toexample.pdfin the2023-08-15/path.ImportantRemove the
//comments before pasting — inline comments are not valid JSON and will fail format validation.{ "pdf_file": "2023-08-15/example.pdf", "mark_text": "DataWorks", "pagesize": [595.275590551181, 841.8897637795275], "font": "Helvetica", "font_size": 20, "font_color": [0, 0, 0], "rotate": 30, "opacity": 0.1, "density": [198.4251968503937, 283.46456692913387] }Parameter Required Default Description pdf_fileYes — Path to the PDF in the OSS bucket. mark_textYes — Watermark text. pagesizeNo A4 [595.28, 841.89]Page dimensions in points. 1 cm = 28.346 points. fontNo HelveticaWatermark font. For Chinese text, use zenheiormicrohei.font_sizeNo 30Font size in points. font_colorNo [0, 0, 0]RGB color. Default is black. rotateNo 0Rotation angle in degrees. opacityNo 0.1Opacity from 0 (transparent) to 1 (opaque). densityNo [141.73, 141.73] Spacing between watermark tiles: X-axis (7 cm) and Y-axis (10 cm).
-
-
Click Test Function. If the run succeeds, OSS generates
example-out.pdfat2023-08-15/example-out.pdf. Verify by checking the bucket in OSS — you should see both the originalexample.pdfand the newexample-out.pdf.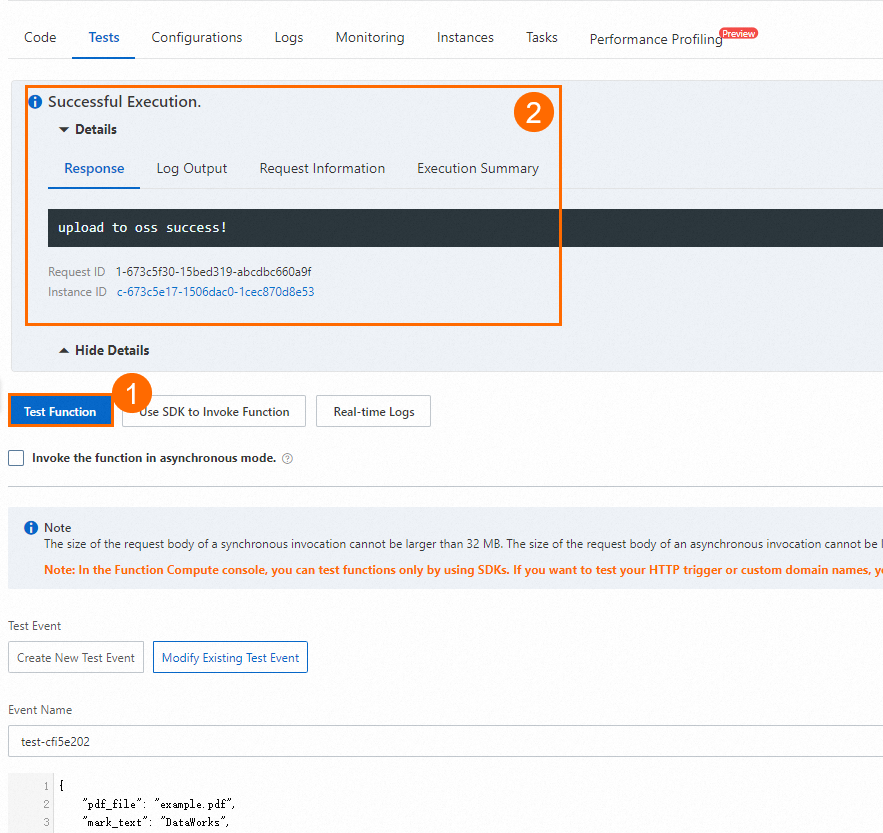

Step 2: Create and configure a Function Compute node
-
Log on to the DataWorks console.
-
In the top navigation bar, select the same region you chose in Step 1.
-
In the left-side navigation pane, choose Data Development and O&M > Data Development. Select your workspace and click Go to Data Development.
-
In the Scheduled Workflow pane of DataStudio, find your workflow, right-click General, and choose Create Node > Function Compute. Enter a name and click Confirm.
-
On the node configuration tab, configure the following parameters:
Parameter Description Select function Select the function you created in Step 1. DataWorks supports event functions only. HTTP functions are not supported. See Function types. Select version or alias Select the version or alias to invoke. Select Default Version to always invoke the latest version ( LATEST). Alternatively, select a pinned version for stable invocations, or an alias to support canary releases and rollbacks.Invocation method Select Synchronous Invocation for this tutorial. Use Asynchronous Invocation for functions that run longer than 1 hour, consume large amounts of resources, or have error-prone logic. Variable The JSON payload passed to the function on each run. 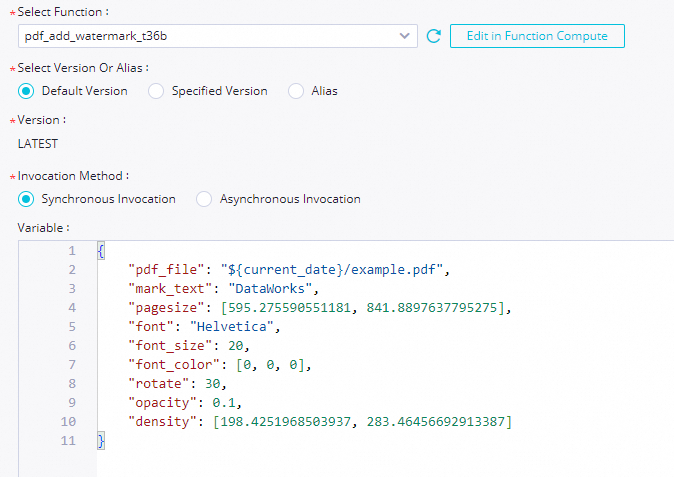
-
In the Variable field, enter the following JSON. The
${current_date}placeholder is replaced at runtime with the actual run date, so the node processes a different PDF path each day.ImportantRemove the
//comments before saving — inline comments are not valid JSON.The daily watermarking only works if your upstream system uploads a PDF to the corresponding date-based path in OSS before the node's scheduled run time.
{
    "pdf_file": "${current_date}/example.pdf",
    "mark_text": "DataWorks",
    "pagesize": [595.275590551181, 841.8897637795275],
    "font": "Helvetica",
    "font_size": 20,
    "font_color": [0, 0, 0],
    "rotate": 30,
    "opacity": 0.1,
    "density": [198.4251968503937, 283.46456692913387]
}
For example, if the node runs on August 15, 2023,
pdf_fileresolves to2023-08-15/example.pdf. If it runs on August 16, it resolves to2023-08-16/example.pdf. -
(Optional) Debug the node. Click the run icon in the toolbar. In the Runtime Parameters dialog box, select a resource group, assign a constant to
${current_date}(for example,2023-08-15), and click Confirmation. DataWorks invokes the function immediately and processes2023-08-15/example.pdf. After the run completes, go to OSS and confirm that2023-08-15/example-out.pdfexists in the bucket. -
Configure scheduling parameters so DataWorks automatically passes the correct date at runtime. In the right-side navigation pane, click Properties. In the Scheduling Parameter section, add a parameter named
current_datewith the value$[yyyy-mm-dd]. DataWorks replaces$[yyyy-mm-dd]with the run date each time the node executes. For more details, see Supported formats for scheduling parameters and Overview.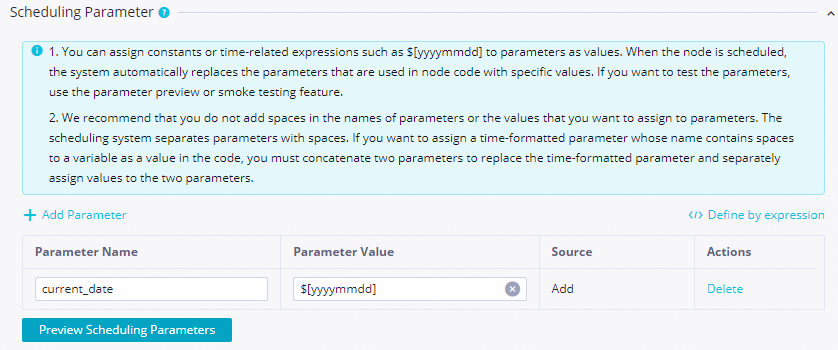
Step 3: Commit and publish the node
A Function Compute node must be committed and published to the production environment before it runs on schedule.
-
Save and commit the node. Click the save icon, then the commit icon in the toolbar. Enter a change description when prompted. During commit, you can optionally:
-
Enable code review to require reviewer approval before publishing. See Code review.
-
Run a smoke test to verify the node runs as expected before it goes live. See Smoke testing.
Before committing, set Rerun Property and Upstream Dependencies in the scheduling configuration.
-
-
(Optional) Publish the node. For standard mode workspaces, click Publish in the upper-right corner after committing. See Workspaces in standard mode and Publish a task.
What's next
-
Monitor and manage scheduled runs in the DataWorks Operation Center. See Operation Center.
-
After you learn how to create and use a Function Compute node, you can explore best practices to learn about more advanced scenarios. See Dynamically add watermarks to PDFs using a Function Compute node in DataWorks.